
ARROZ e GALINHA no FORNO

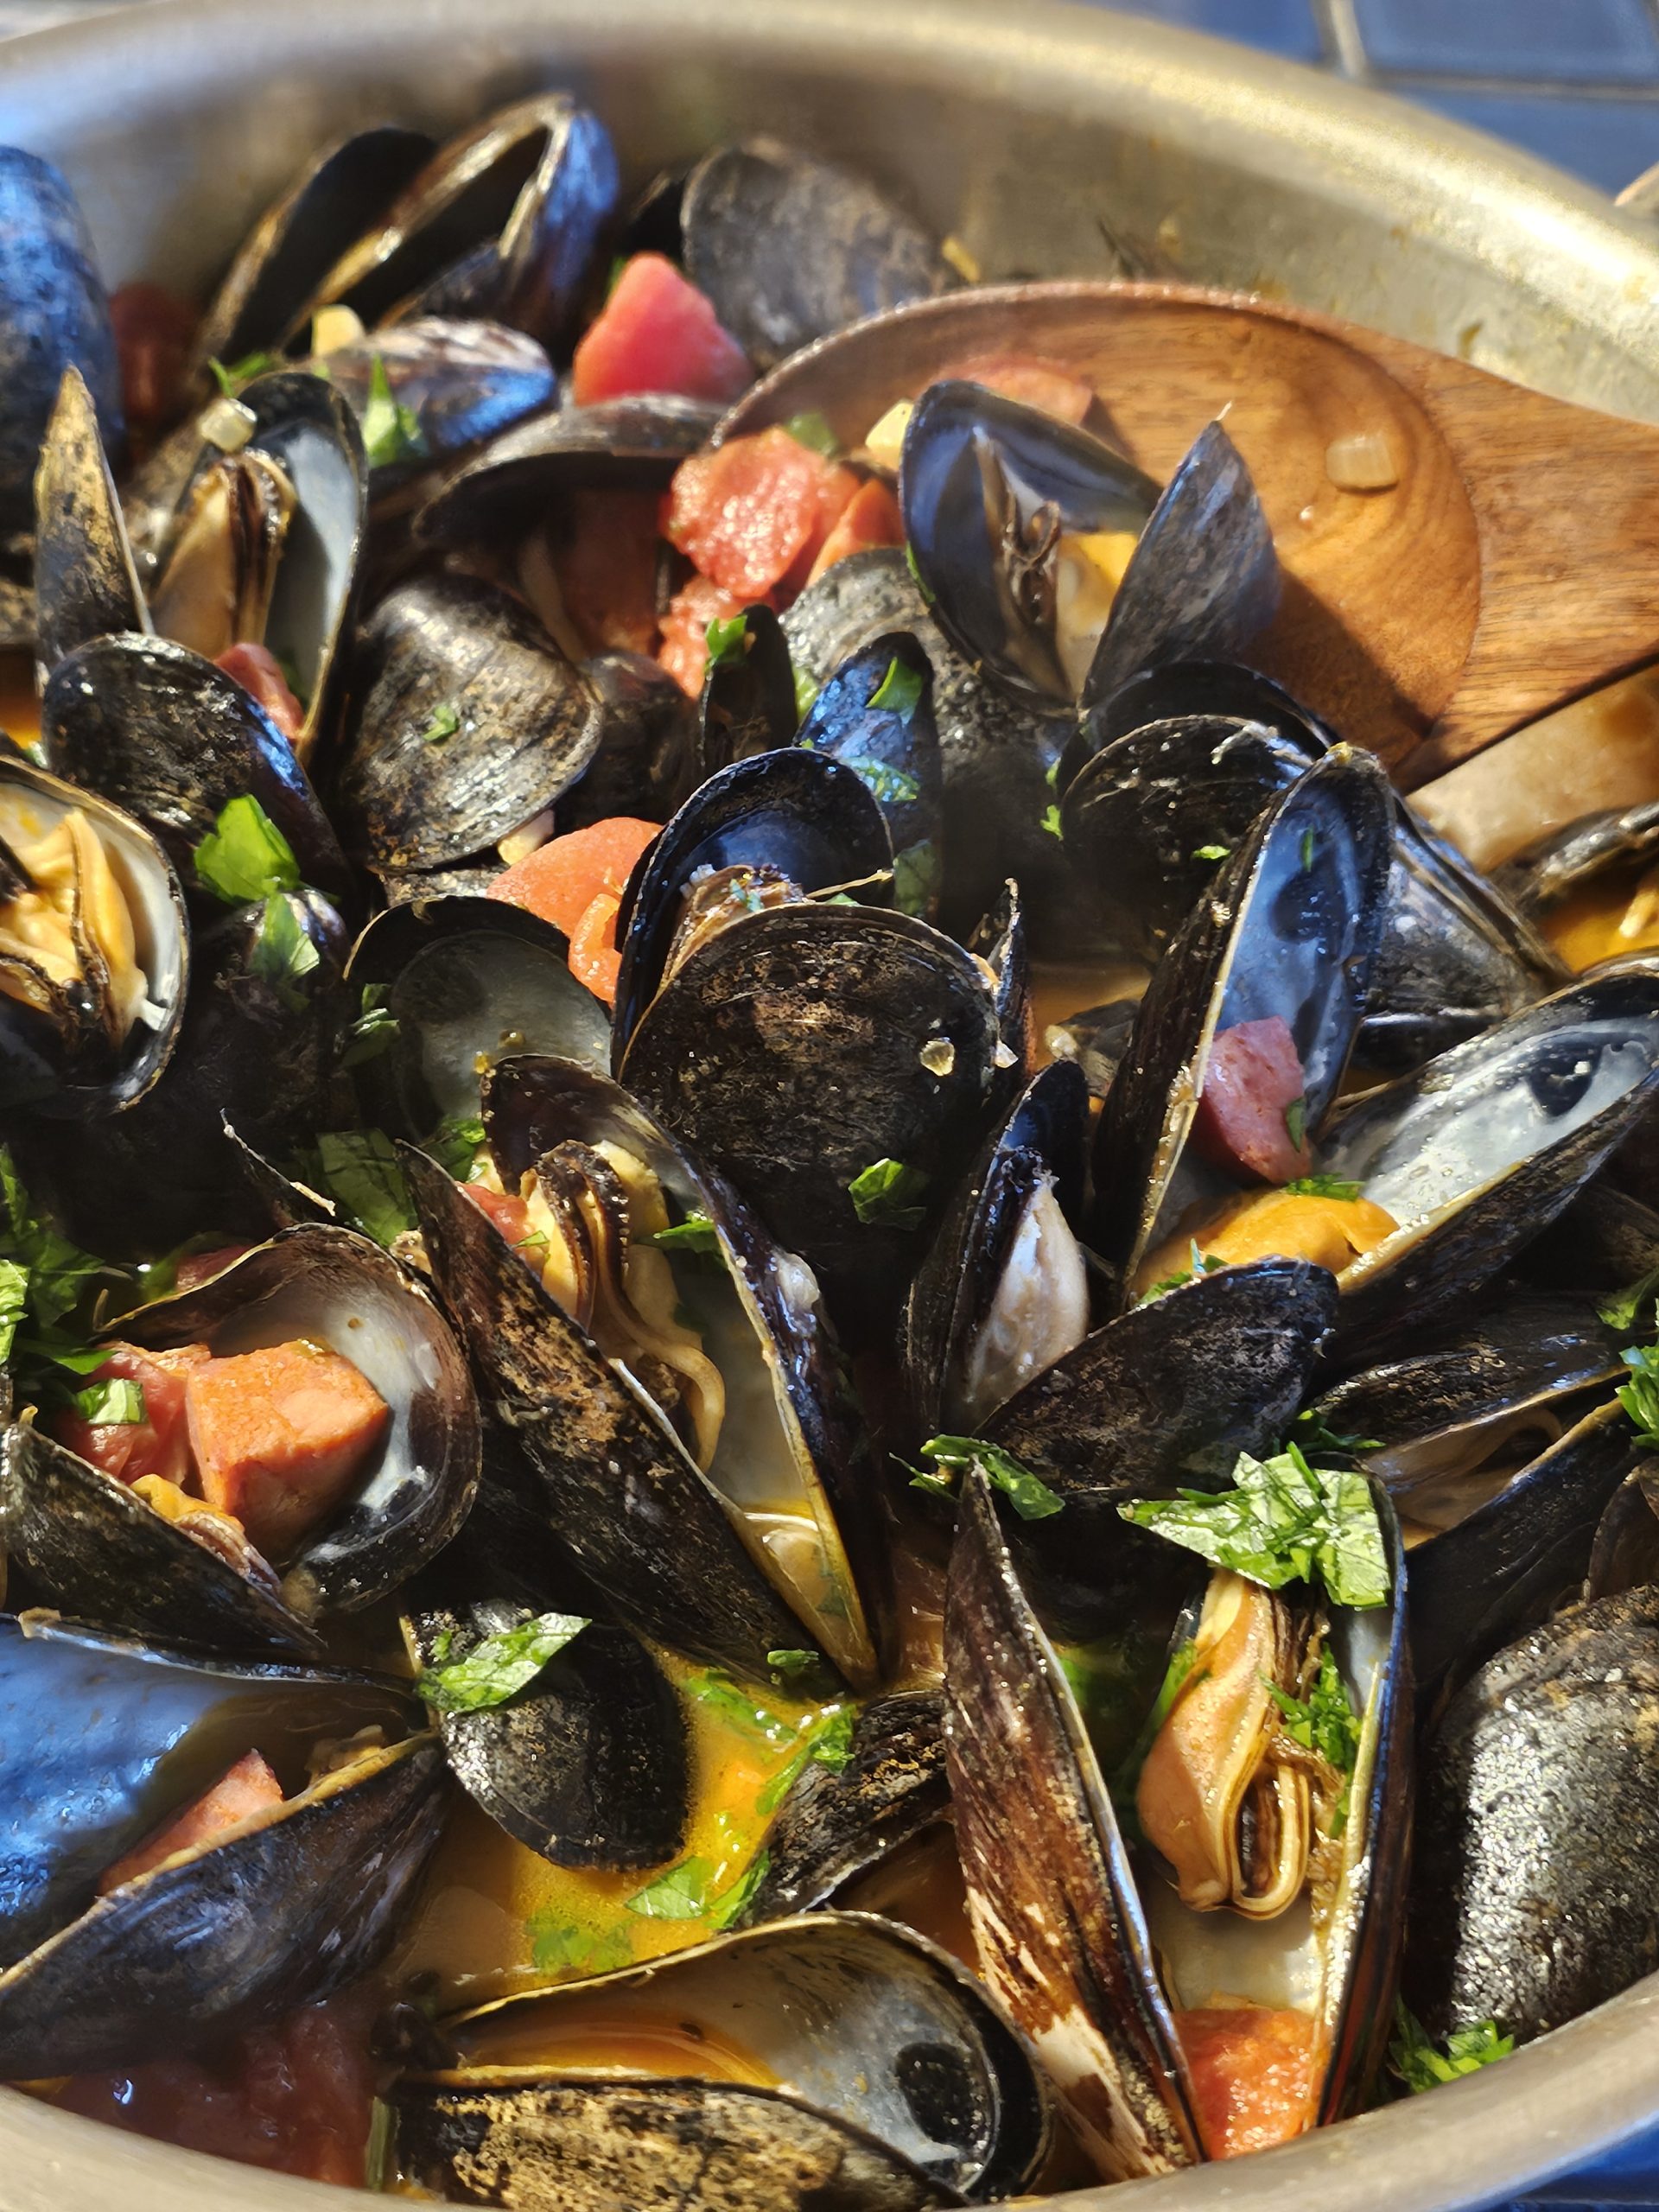
These mussels are so easy and delicious! You can also make this same recipe using little neck clams. Enjoy! INGREDIENTS: 3-4 lbs mussels (cleaned)8 oz...
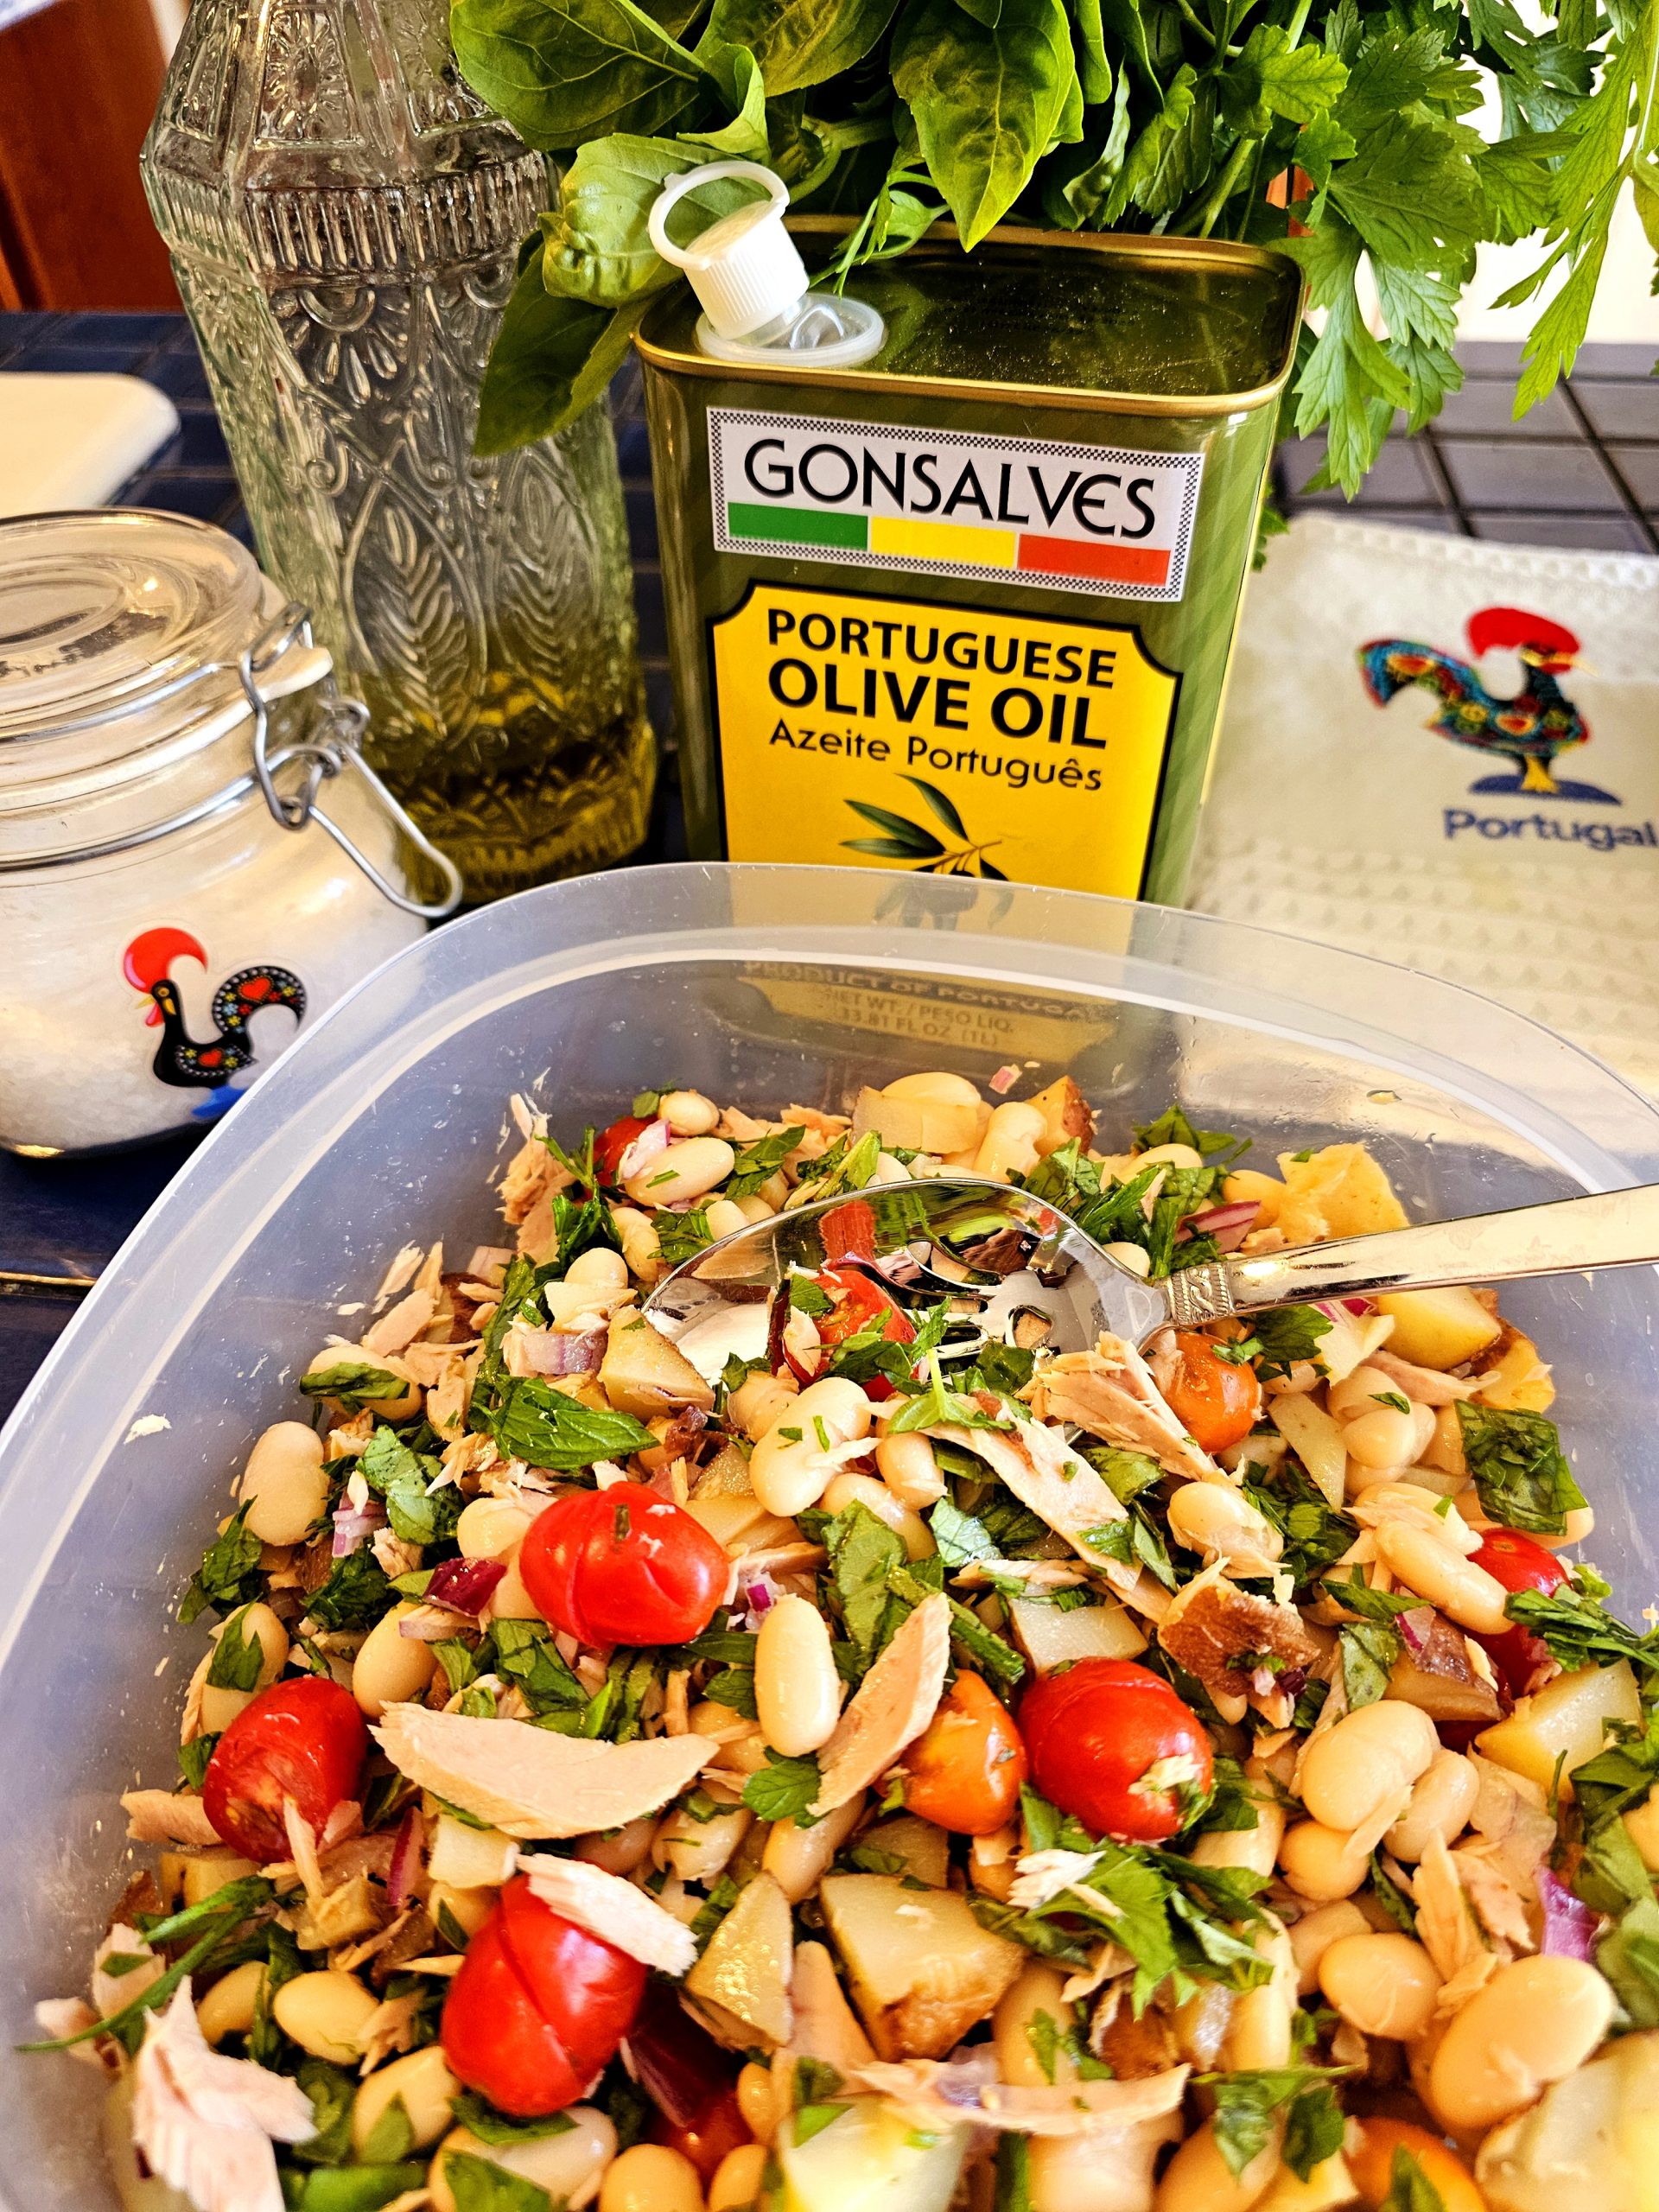
Make this TUNA & WHITE BEAN SALAD for a protein packed lunch or dinner. INGREDIENTS 1 can tuna 1 can white beans 1 cup cubed...
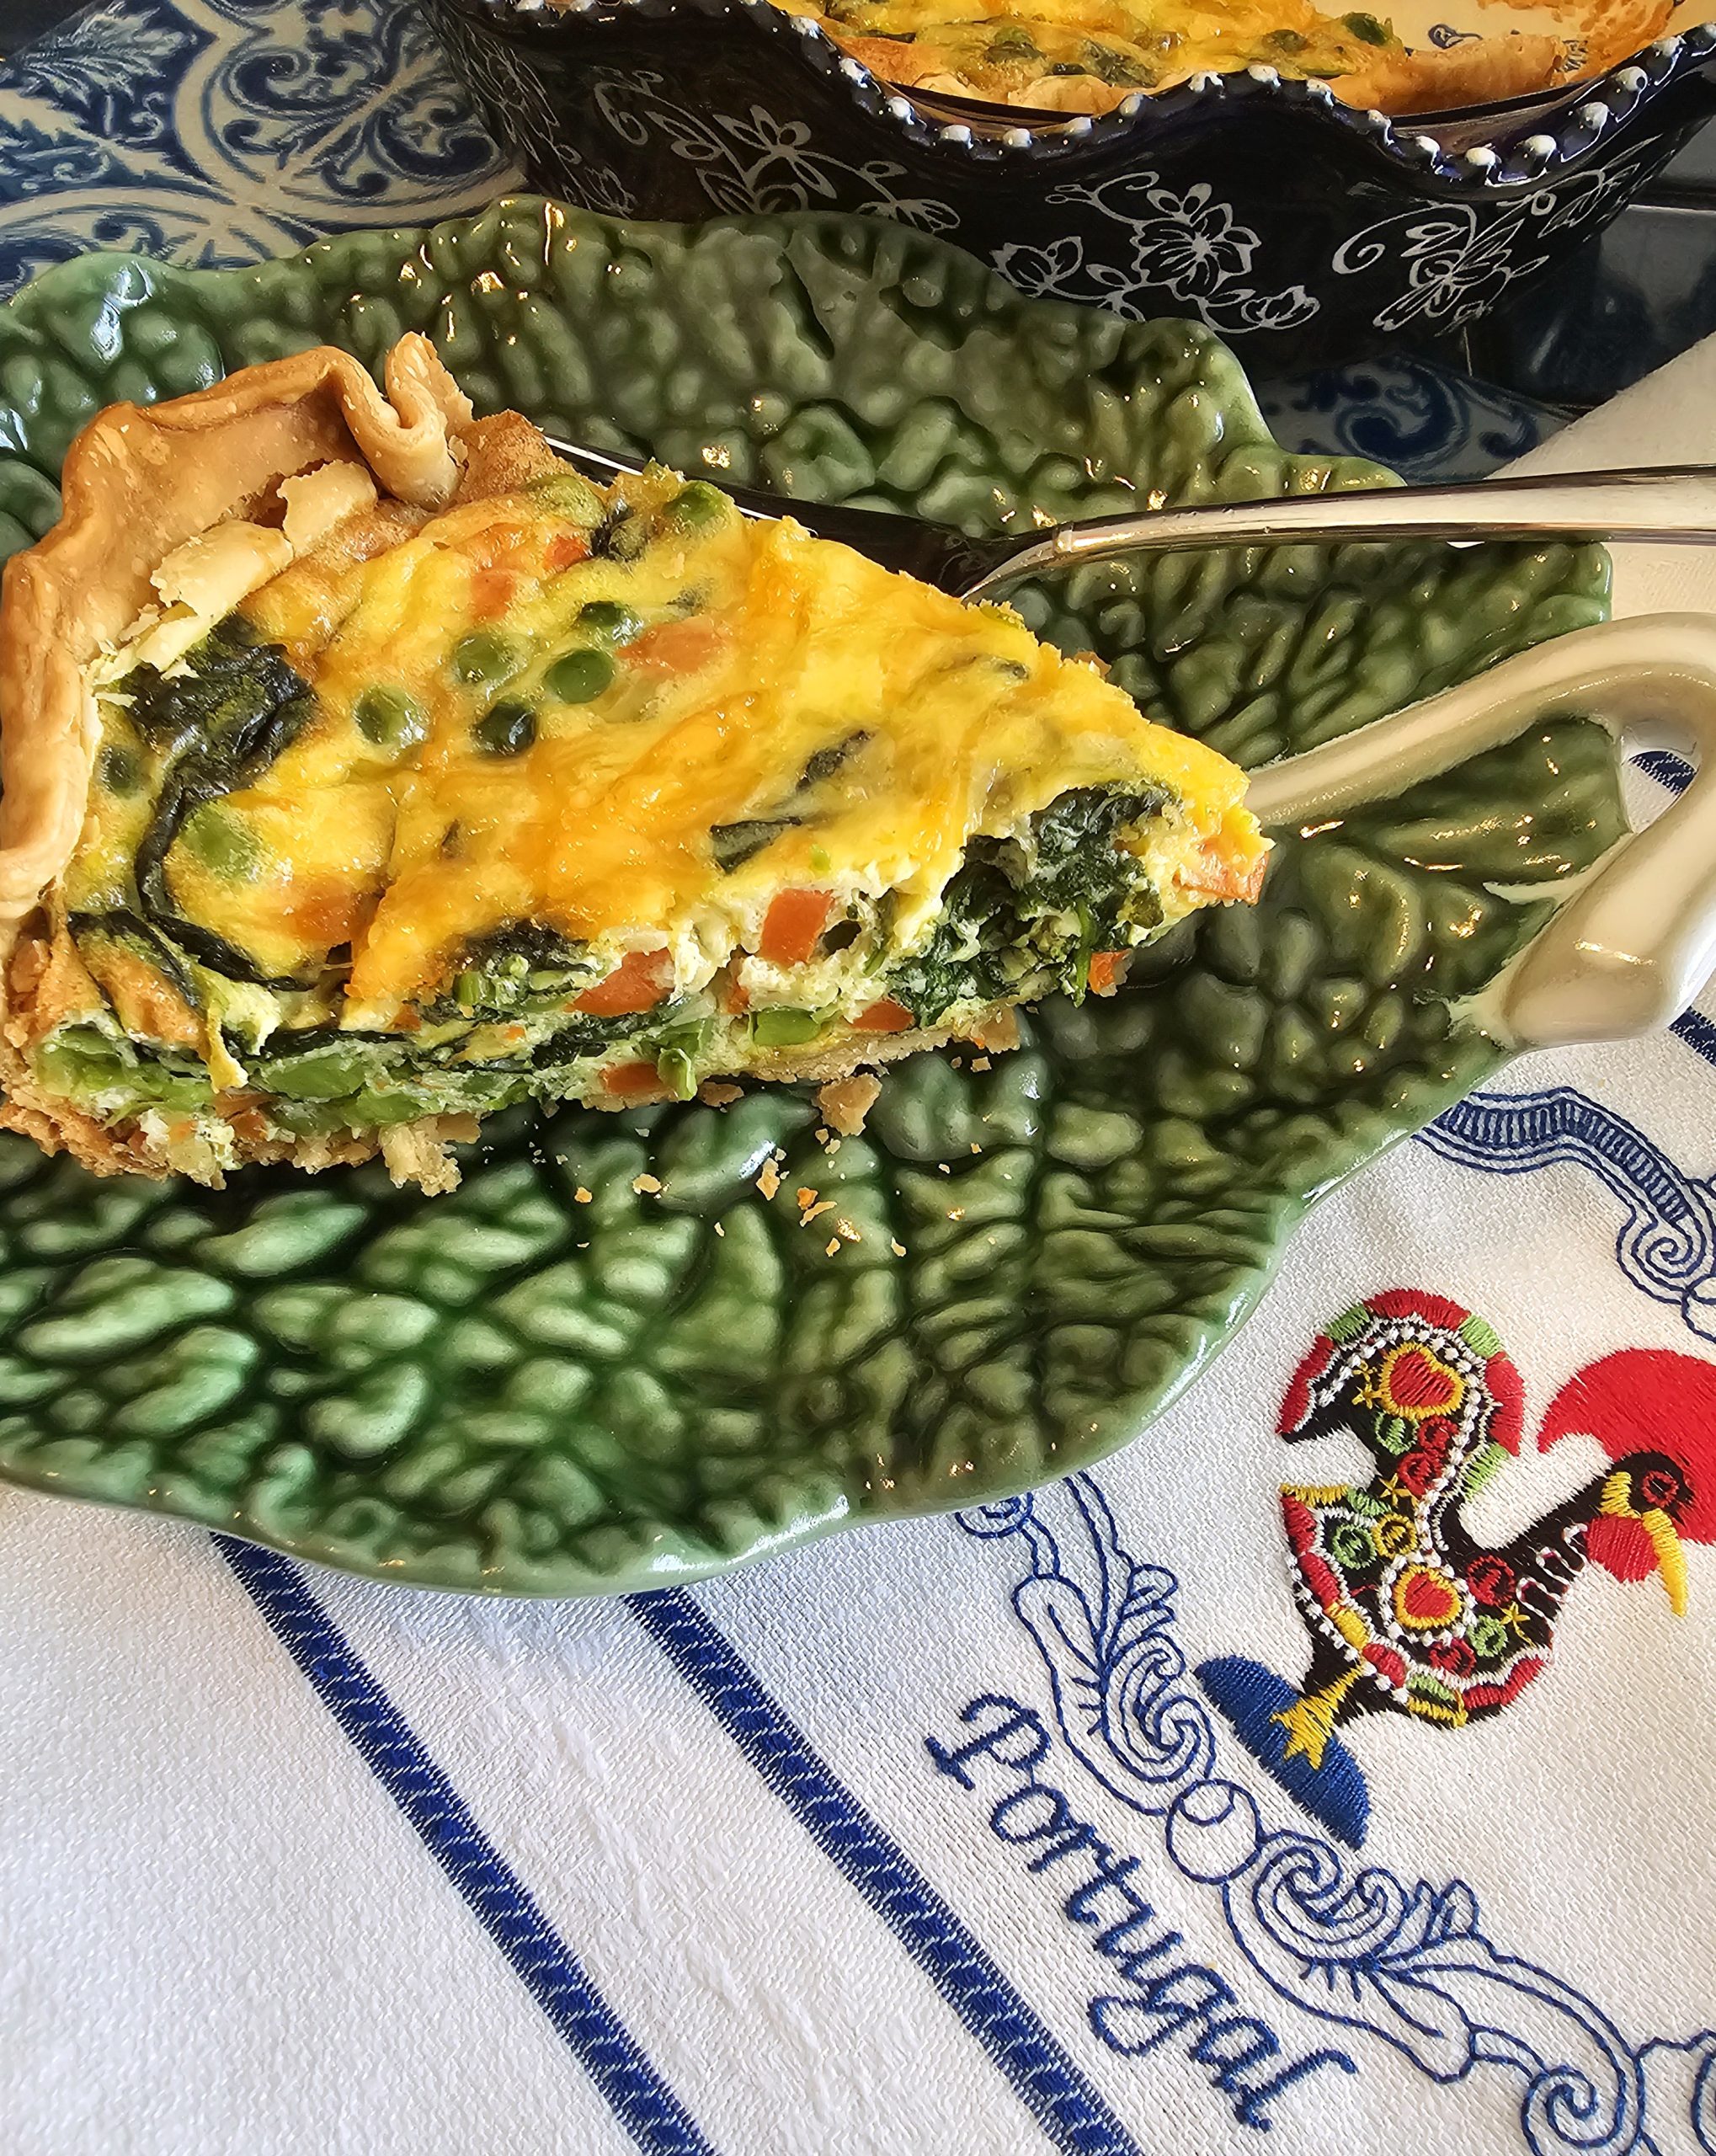
Let’s go meatless and healthy this week. I make 2 quiches and eat them all week. It’s a perfect breakfast. takeaway lunch, snack or dinner....

Easy Chicken Parmesan recipe. This is so easy that you’ll make it every weekend RECIPE: 2 lbs chicken breast sliced thin 1 cup flavored bread...

These little pork bites are garlicky and deliciously savory! So easy to make. 1 lb pork but cut into 1/2 inch pieces. (No need to...

Let’s make BEER CAN CHICKEN INGREDIENTS: 1 whole chicken 1 can beer (opened) 2 to 3 tbsp TASTE PORTUGAL SEASONING 2 tbsp olive oil 2...
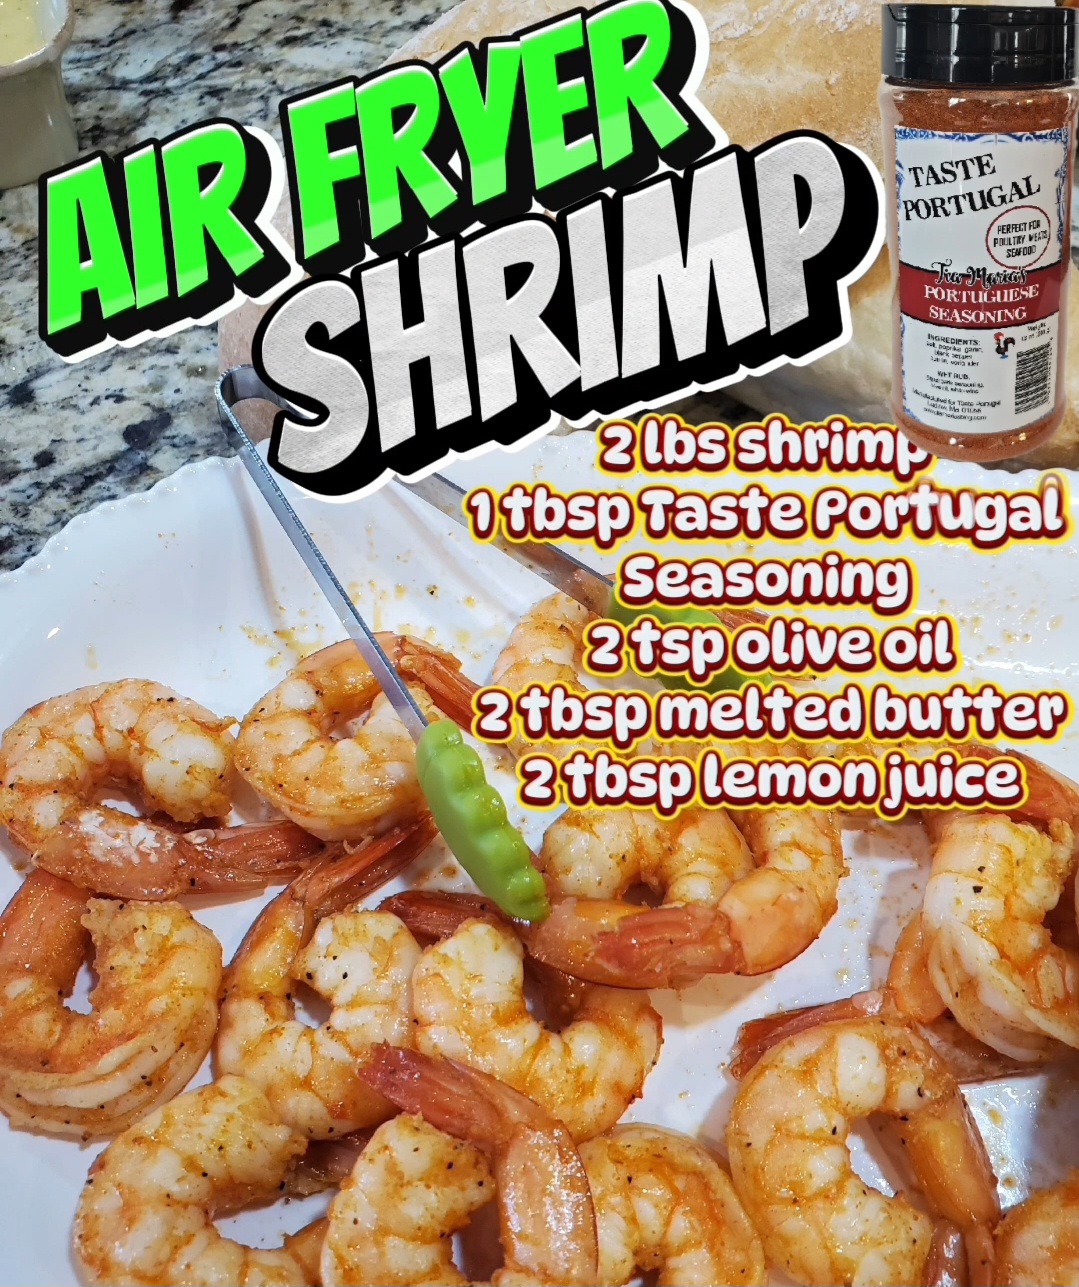
Easy Air Fryer Shrimp takes only minutes to prepare. It’s savory and garlicky. Serve as an appetizer, over pasta, salad or as a main dish....

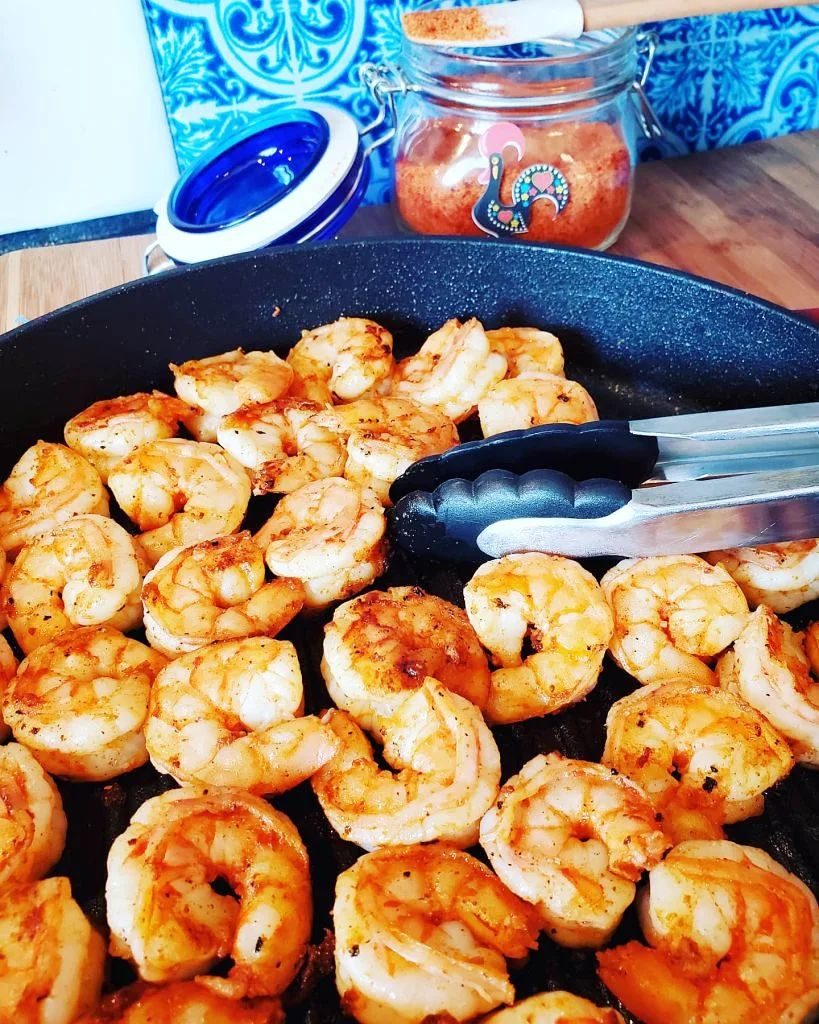
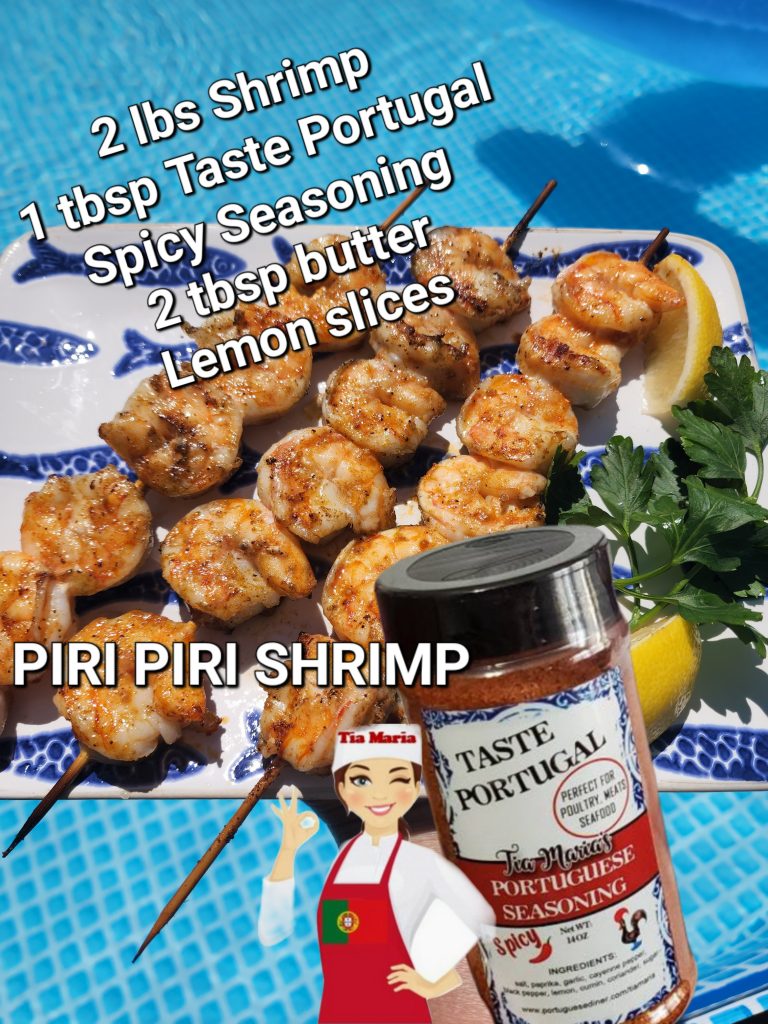
This Spicy Shrimp will set your mouth on fire but you’ll love it! Serve as an appetizer or as a main dish over fettuccine pasta...

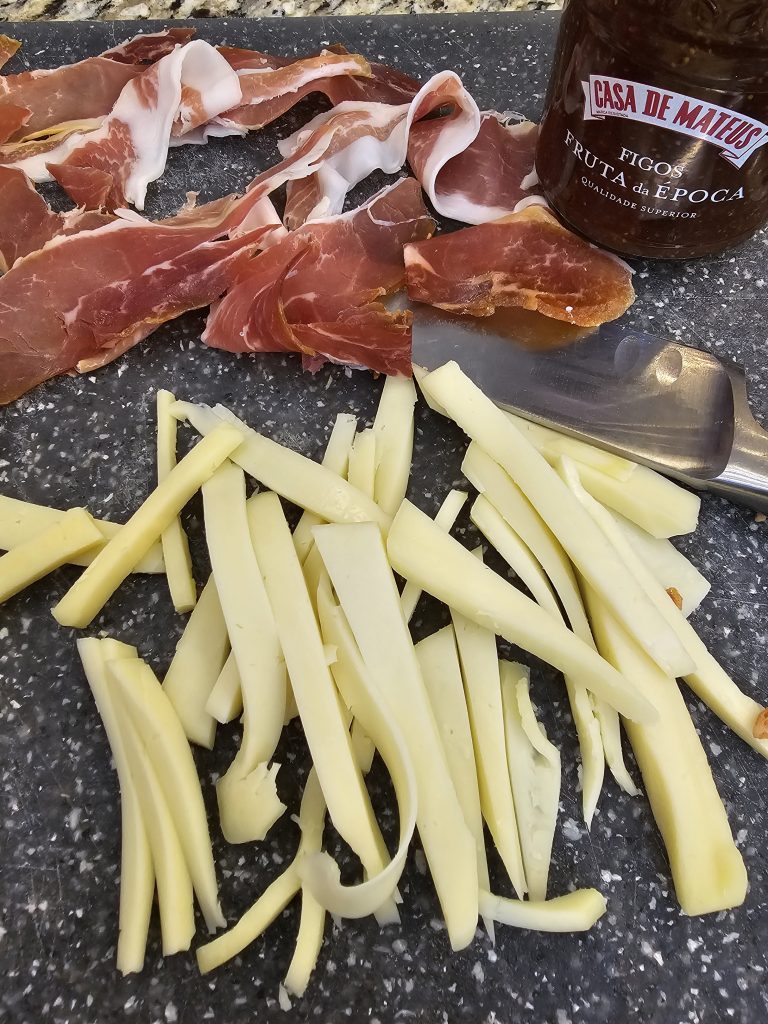
This is a delicious savory pizza. I use Fig jam as a base. The combination of the sweet jam and salty presunto is mouthwatering. INGREDIENTS:...
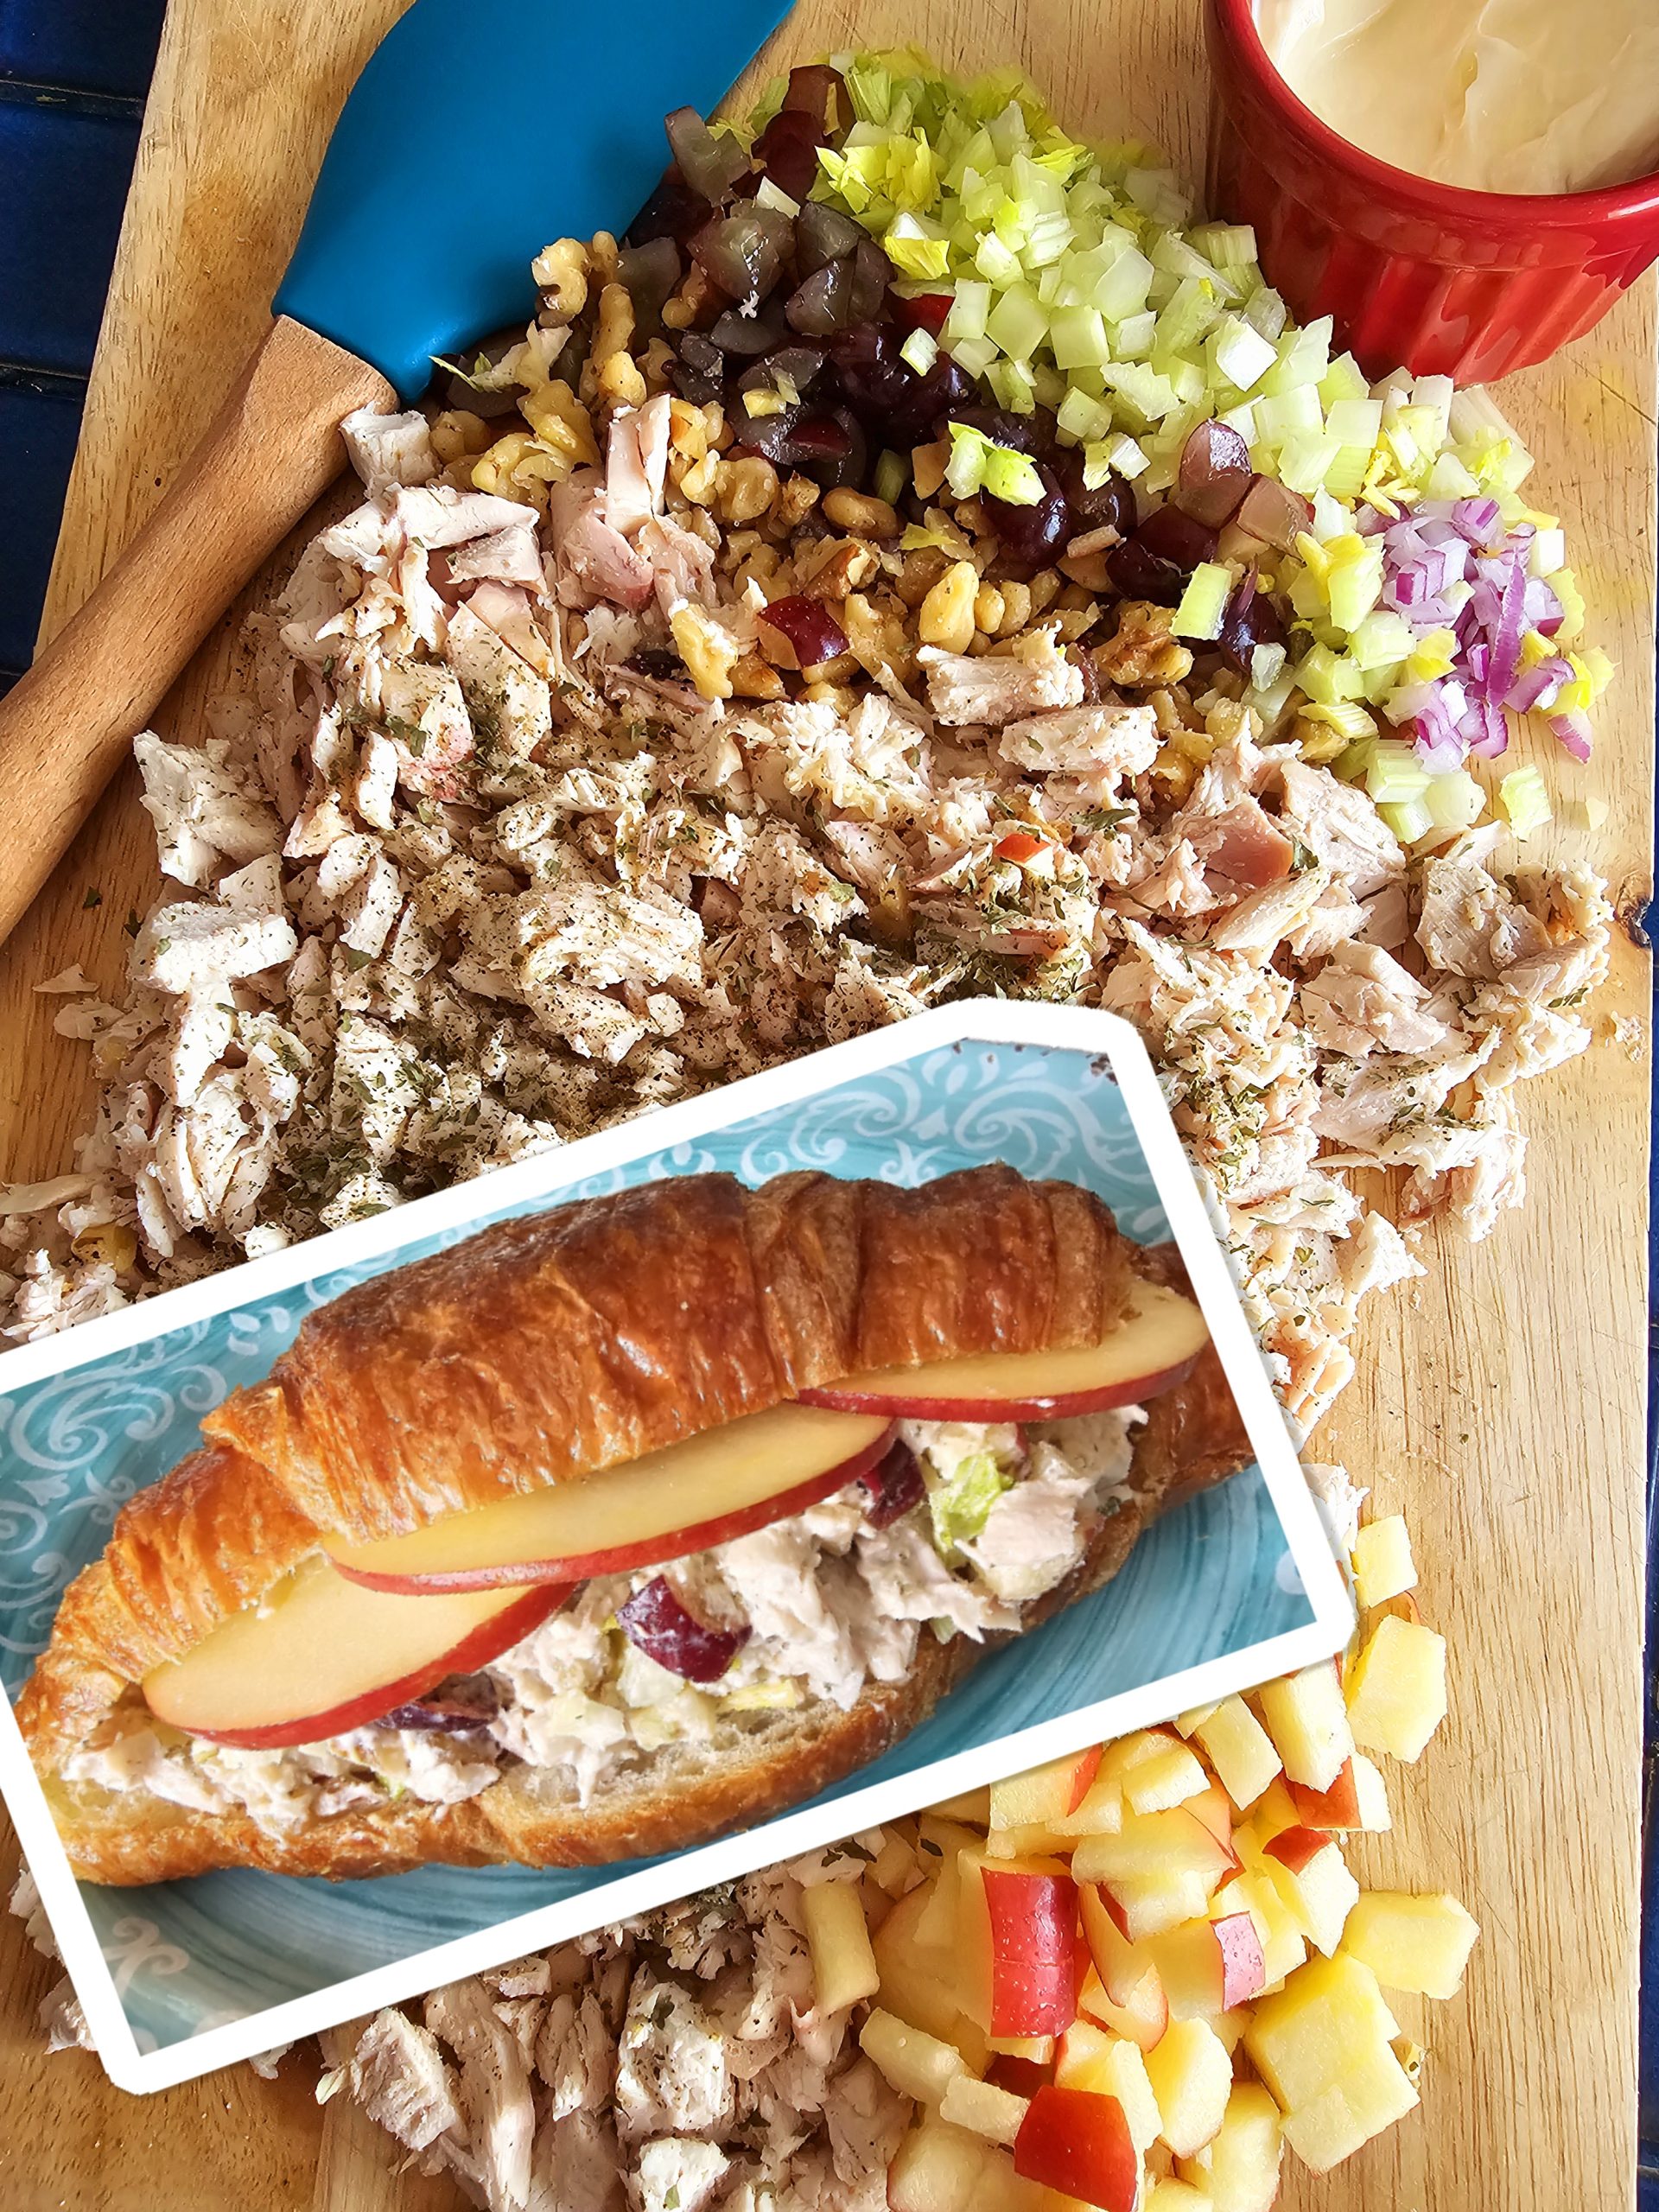
This chicken salad will be your go to for easy lunches all week. I buy the rotiserrie chicken and at croissants at Costco which makes...

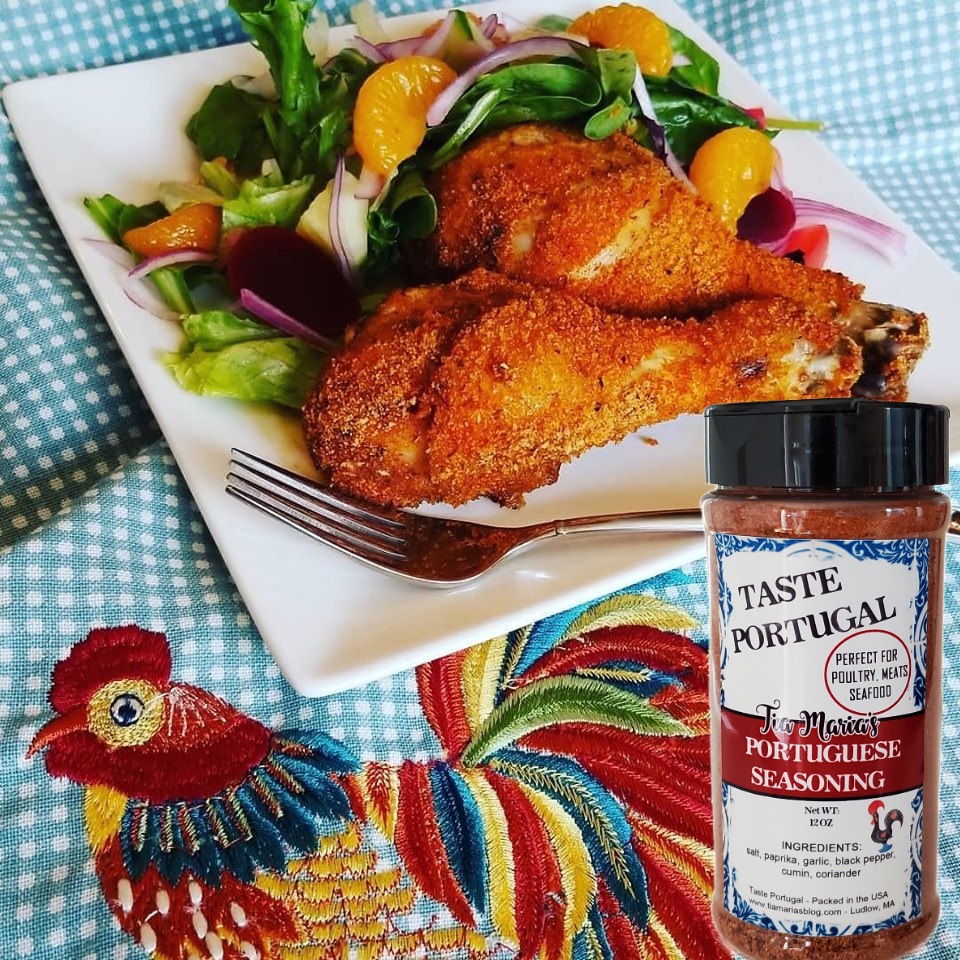
ORDER ON AMAZON: CLICK ON PICTURES My Oven Fried Chicken 🍗 is savory, easy, and delicious! You’ll never fry chicken again. Trust me. 😋Chicken Prep;10...

GET IT ON AMAZON: CLICK PICTURE This easy 5 minute shrimp is so simple. It’s so savory and tender. You won’t believe how tender, savory...

Lulas Reciadas are a classic recipe that you’ll love. This recipe is my TASTE PORTUGAL MORE EASY PORTUGUESE RECIPES. I learned this recipe from my...

ORDER SET OF SEASONING HERE: SCAN QR CODE: My Taste Portugal Seasonings will make all of your Portuguese recipes delicious. Just shake, marinate and season....
Cooking Portuguese is easy! Watch my videos for Piri Piri Frango Churrasco and Baked Piri Piri Chicken! ORDER SET OF SPICES 1 REGULAR AND 1...

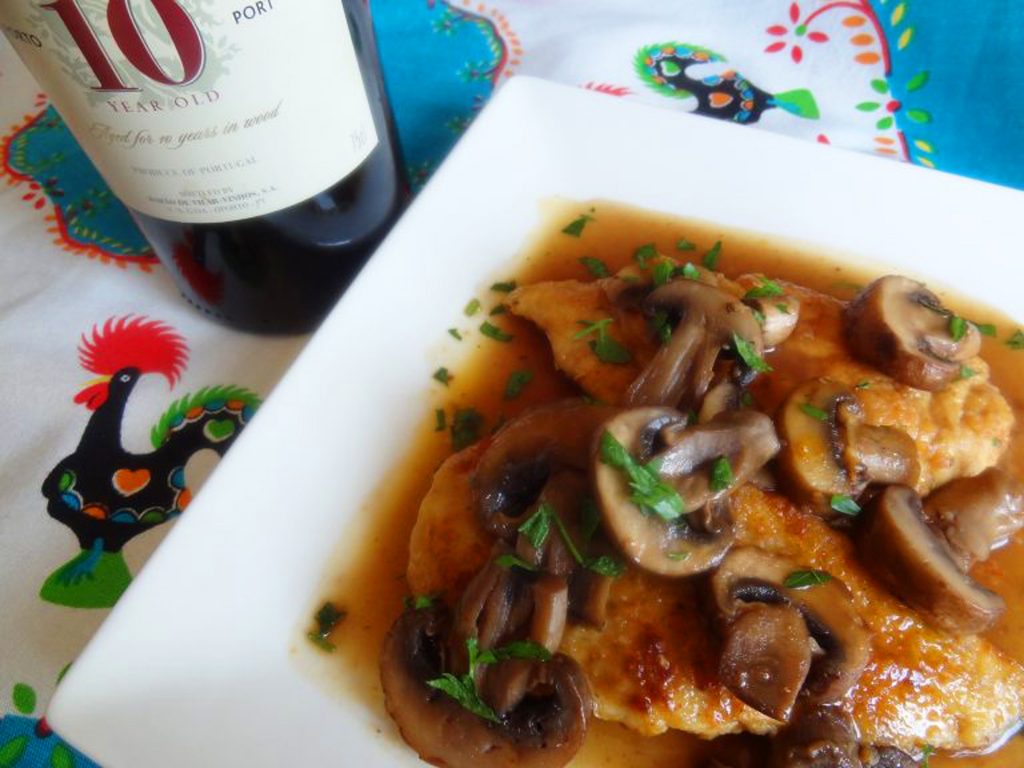
This savory roast beef will be your go to recipe. I make this dish a lot since it’s a family favorite and the best part...

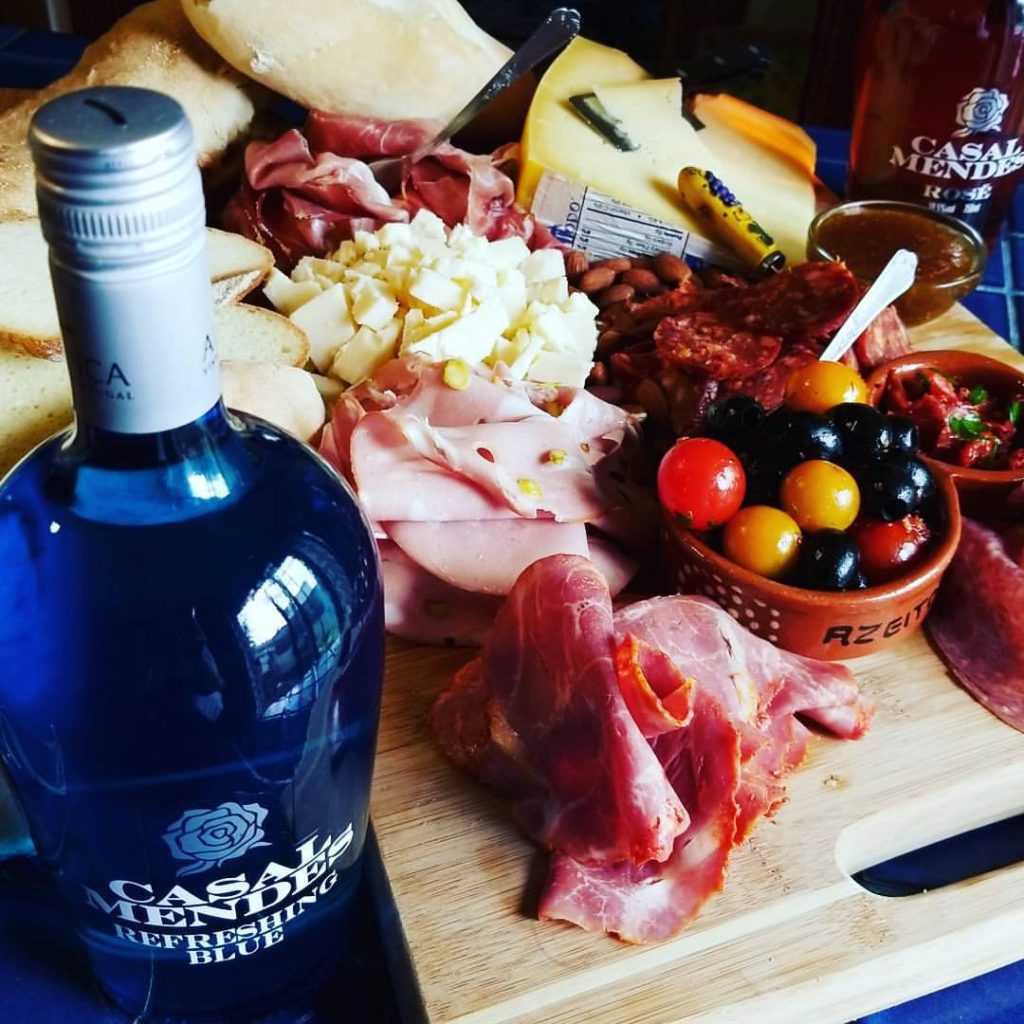
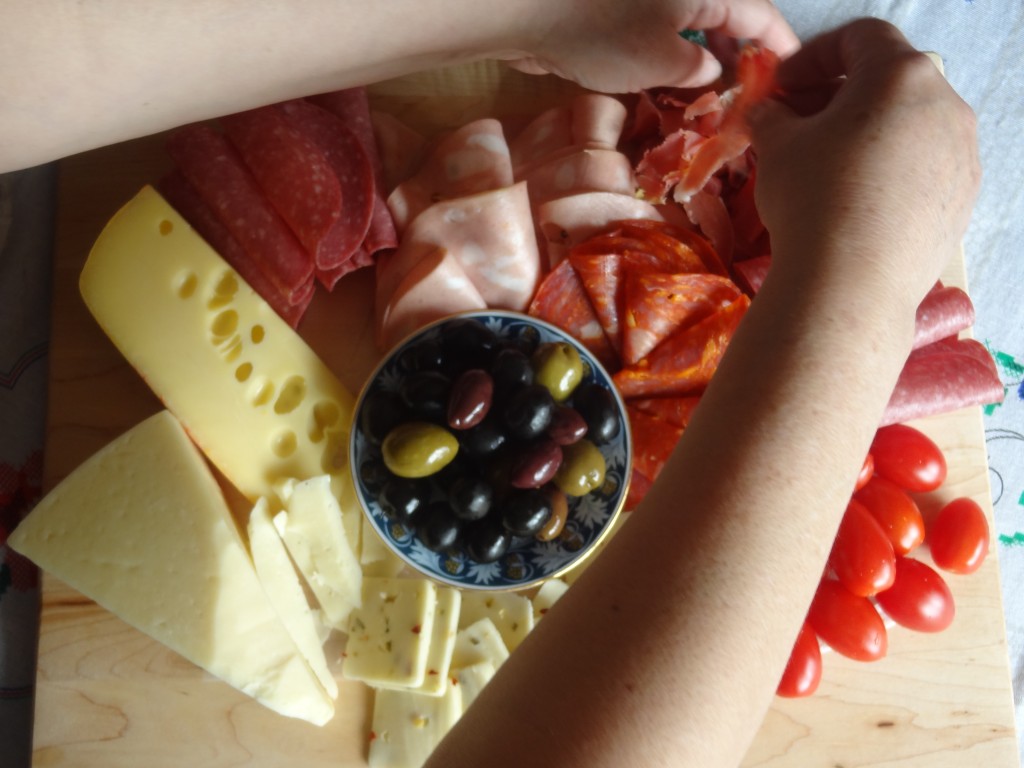
Here are five delicious sandwiches made with my favorite 3 Meal Muffins/Portuguese muffins/Bolos Levedos! Visit their website at 3mealmuffin.com to order and to find out...
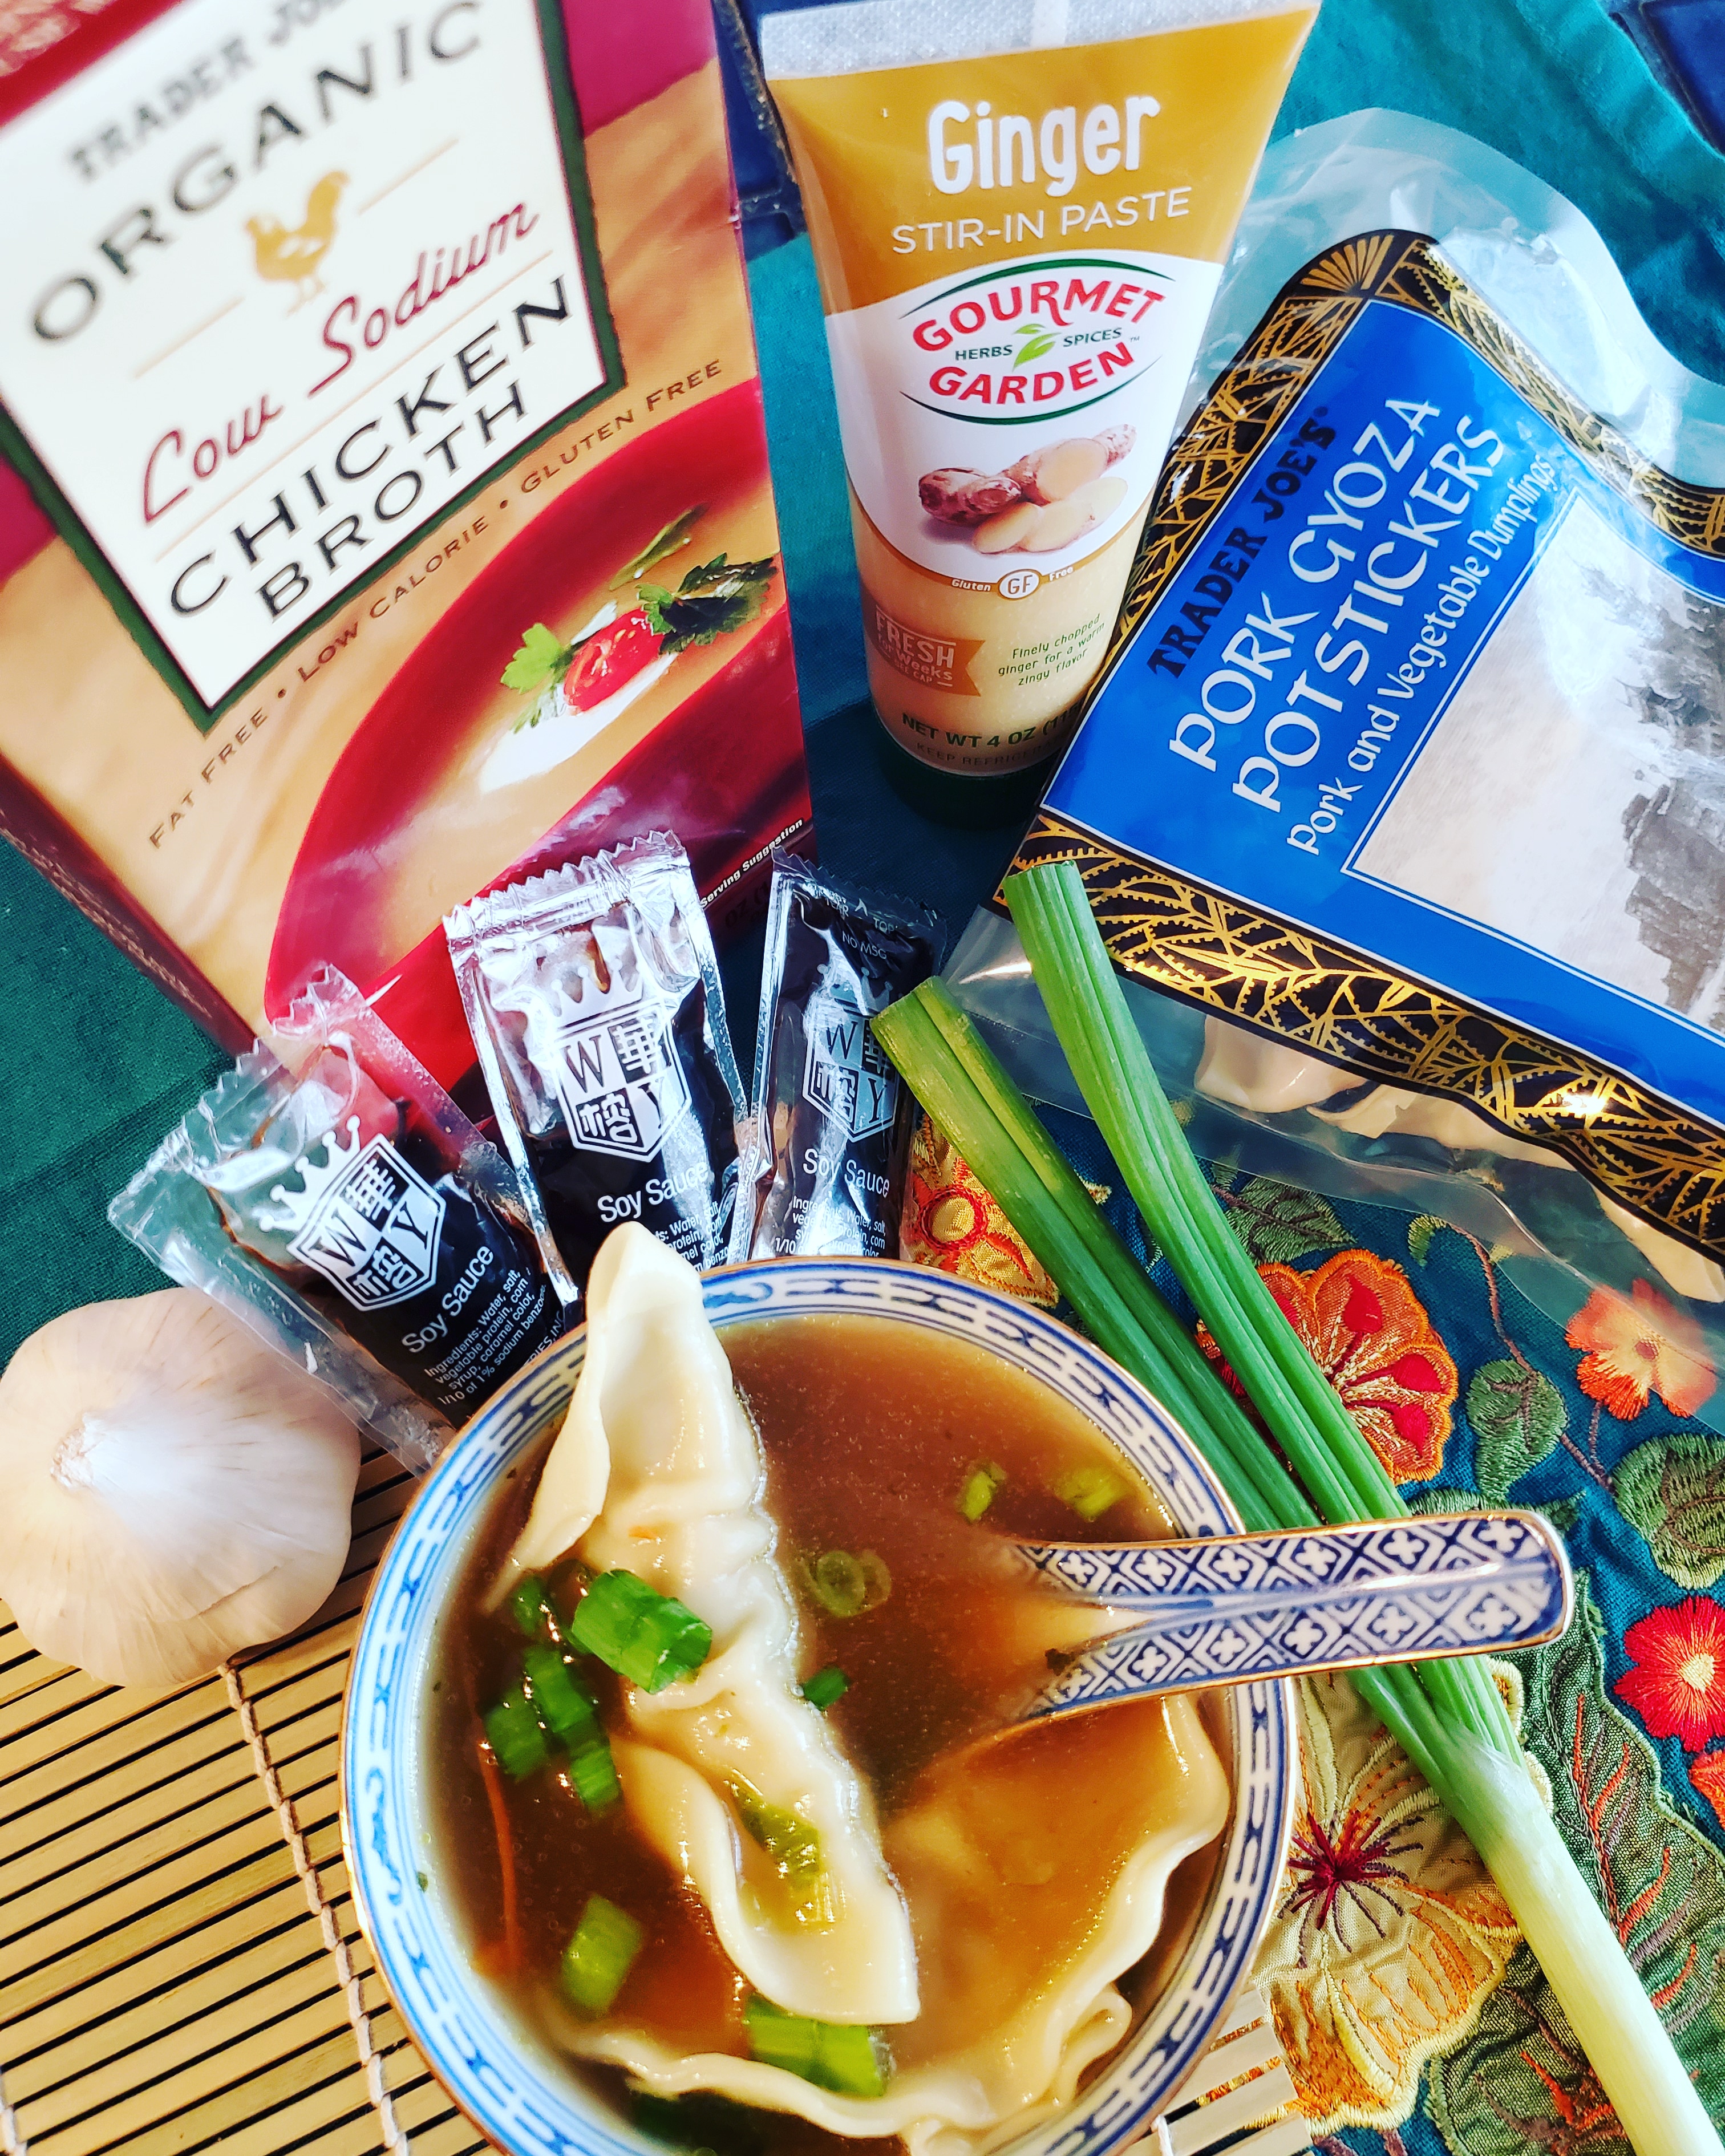
Easy Won Ton Soup This will be your go to easy recipe any day of the week! I’ve made many variations on this soup in...
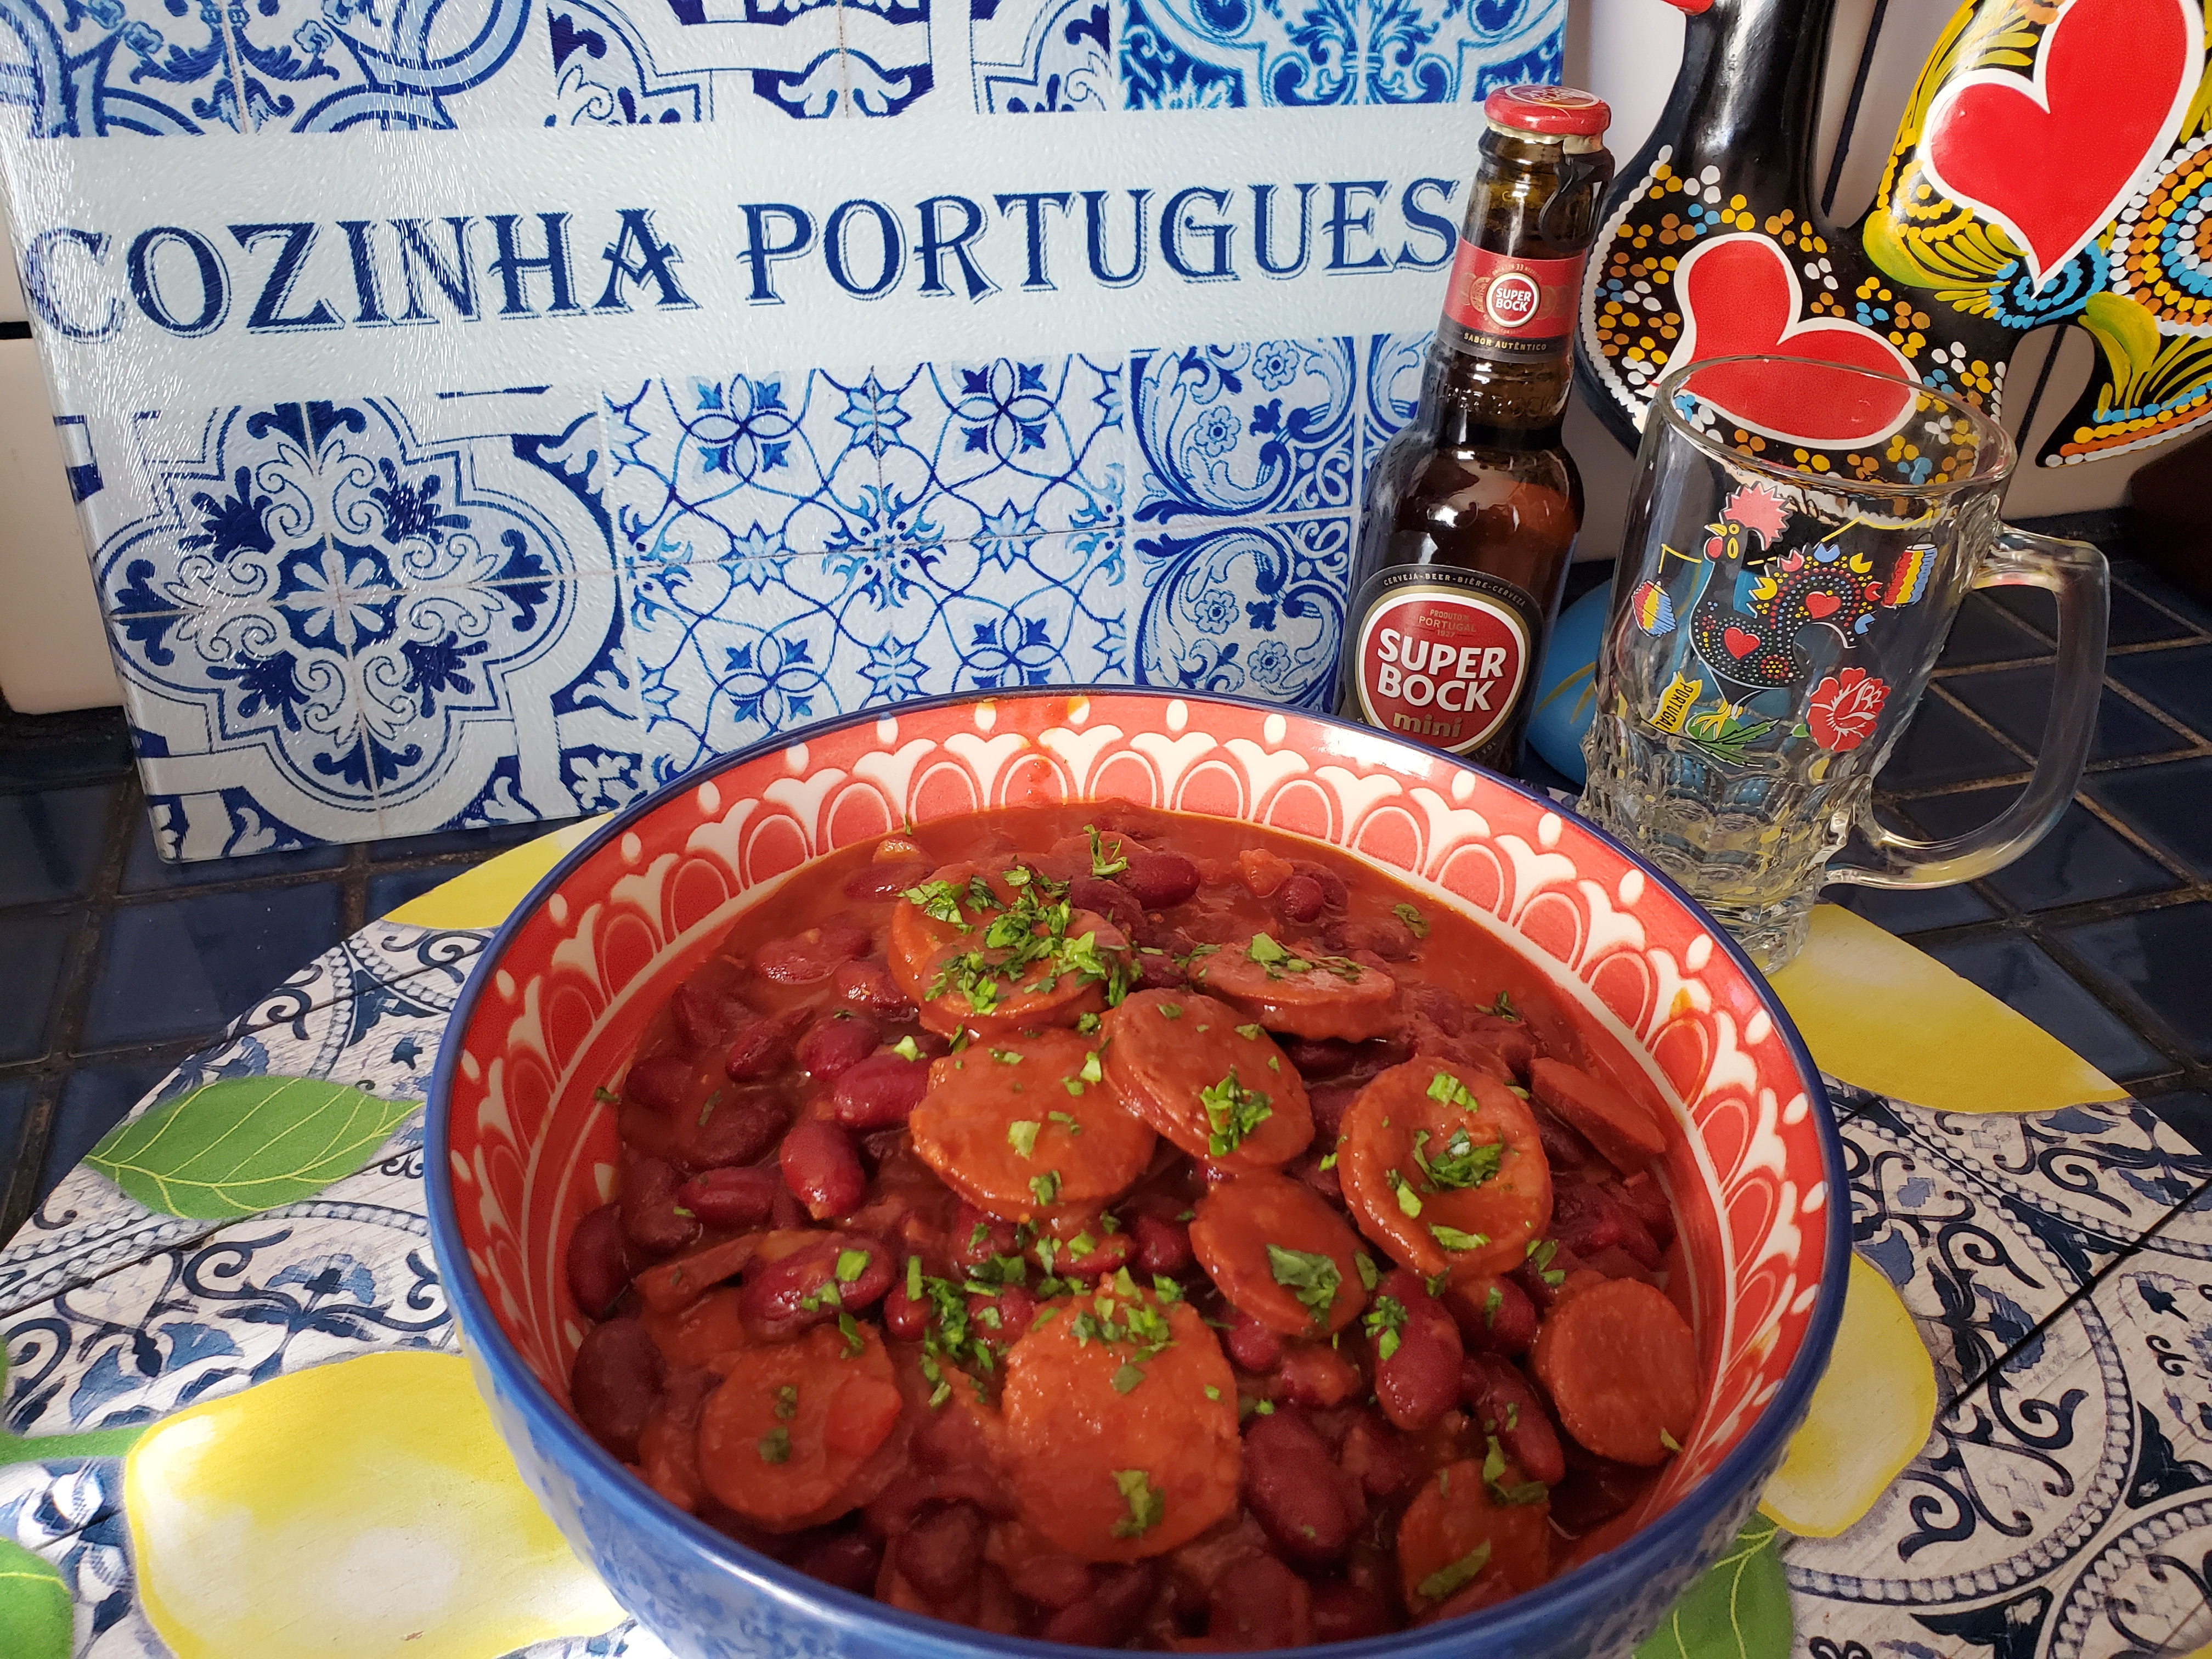
Order this beautiful Glass cutting board on Lisbon Blue shop Watch video recipe here: My family calls this dish Portuguese Chili. It’s easily made with...

I always add sweet potatoes to my beef stew since it adds great flavor and the texture thickens the broth. Make a big pot to...

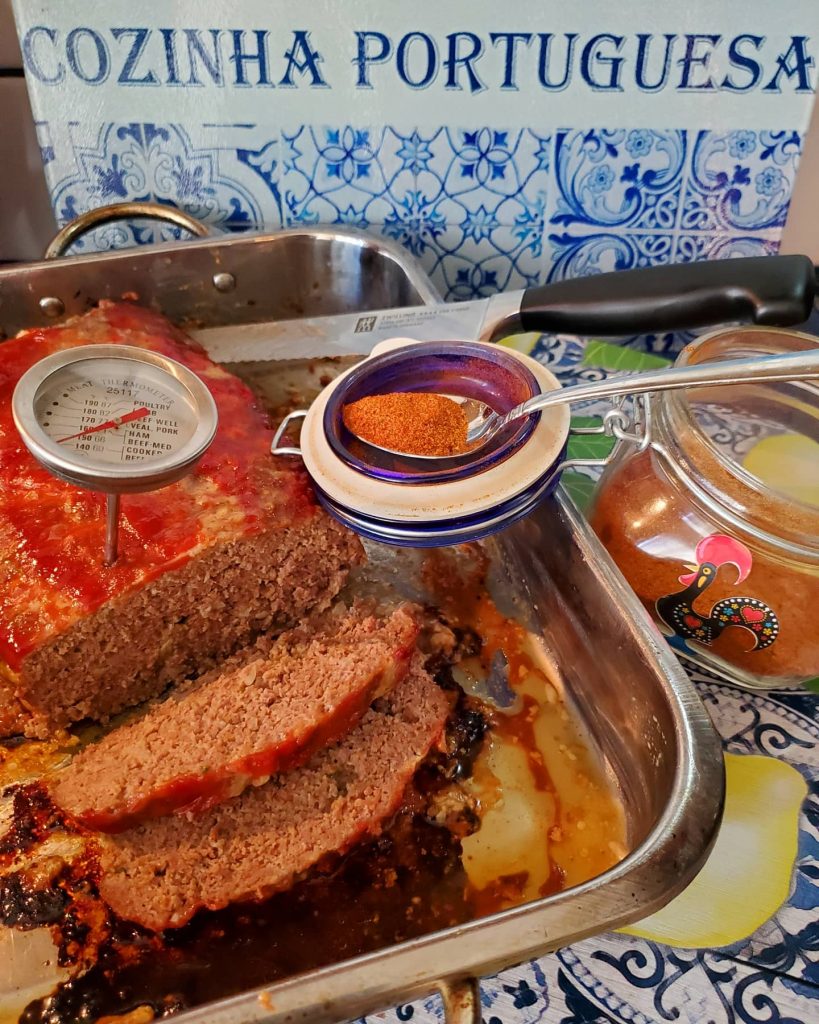
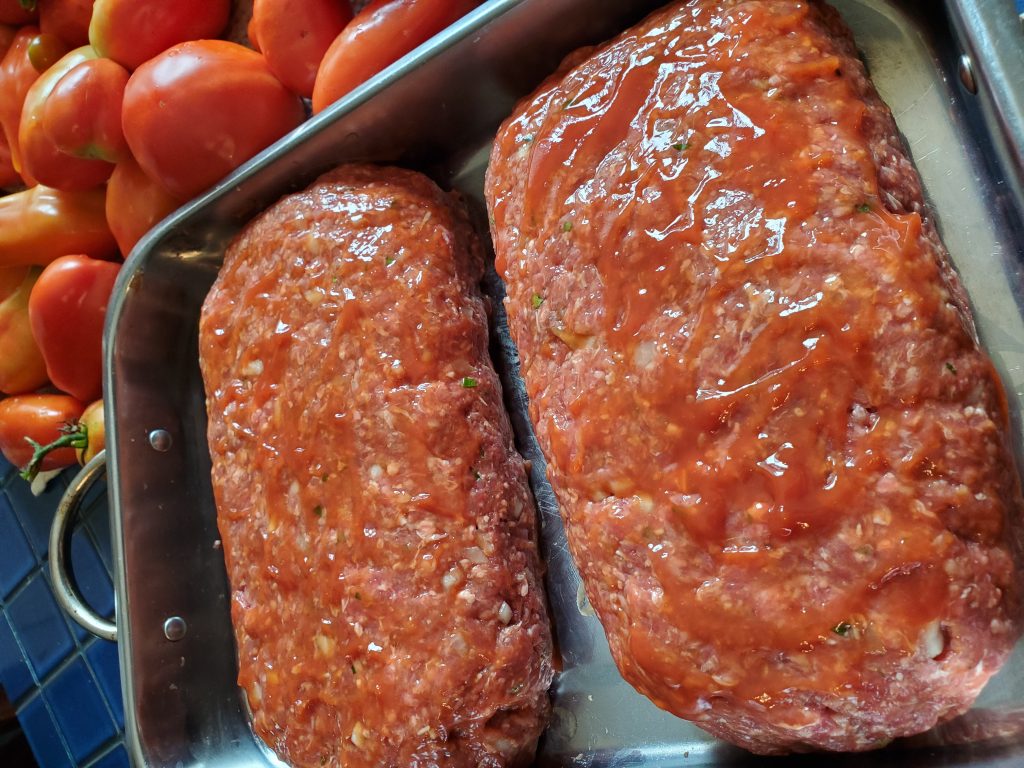
Ingredients: 2 pounds ground beef or ground turkey 2 eggs 1 cup dried seasoned breadcrumbs 1 slice of fresh bread (crumbled, I use a grater)...

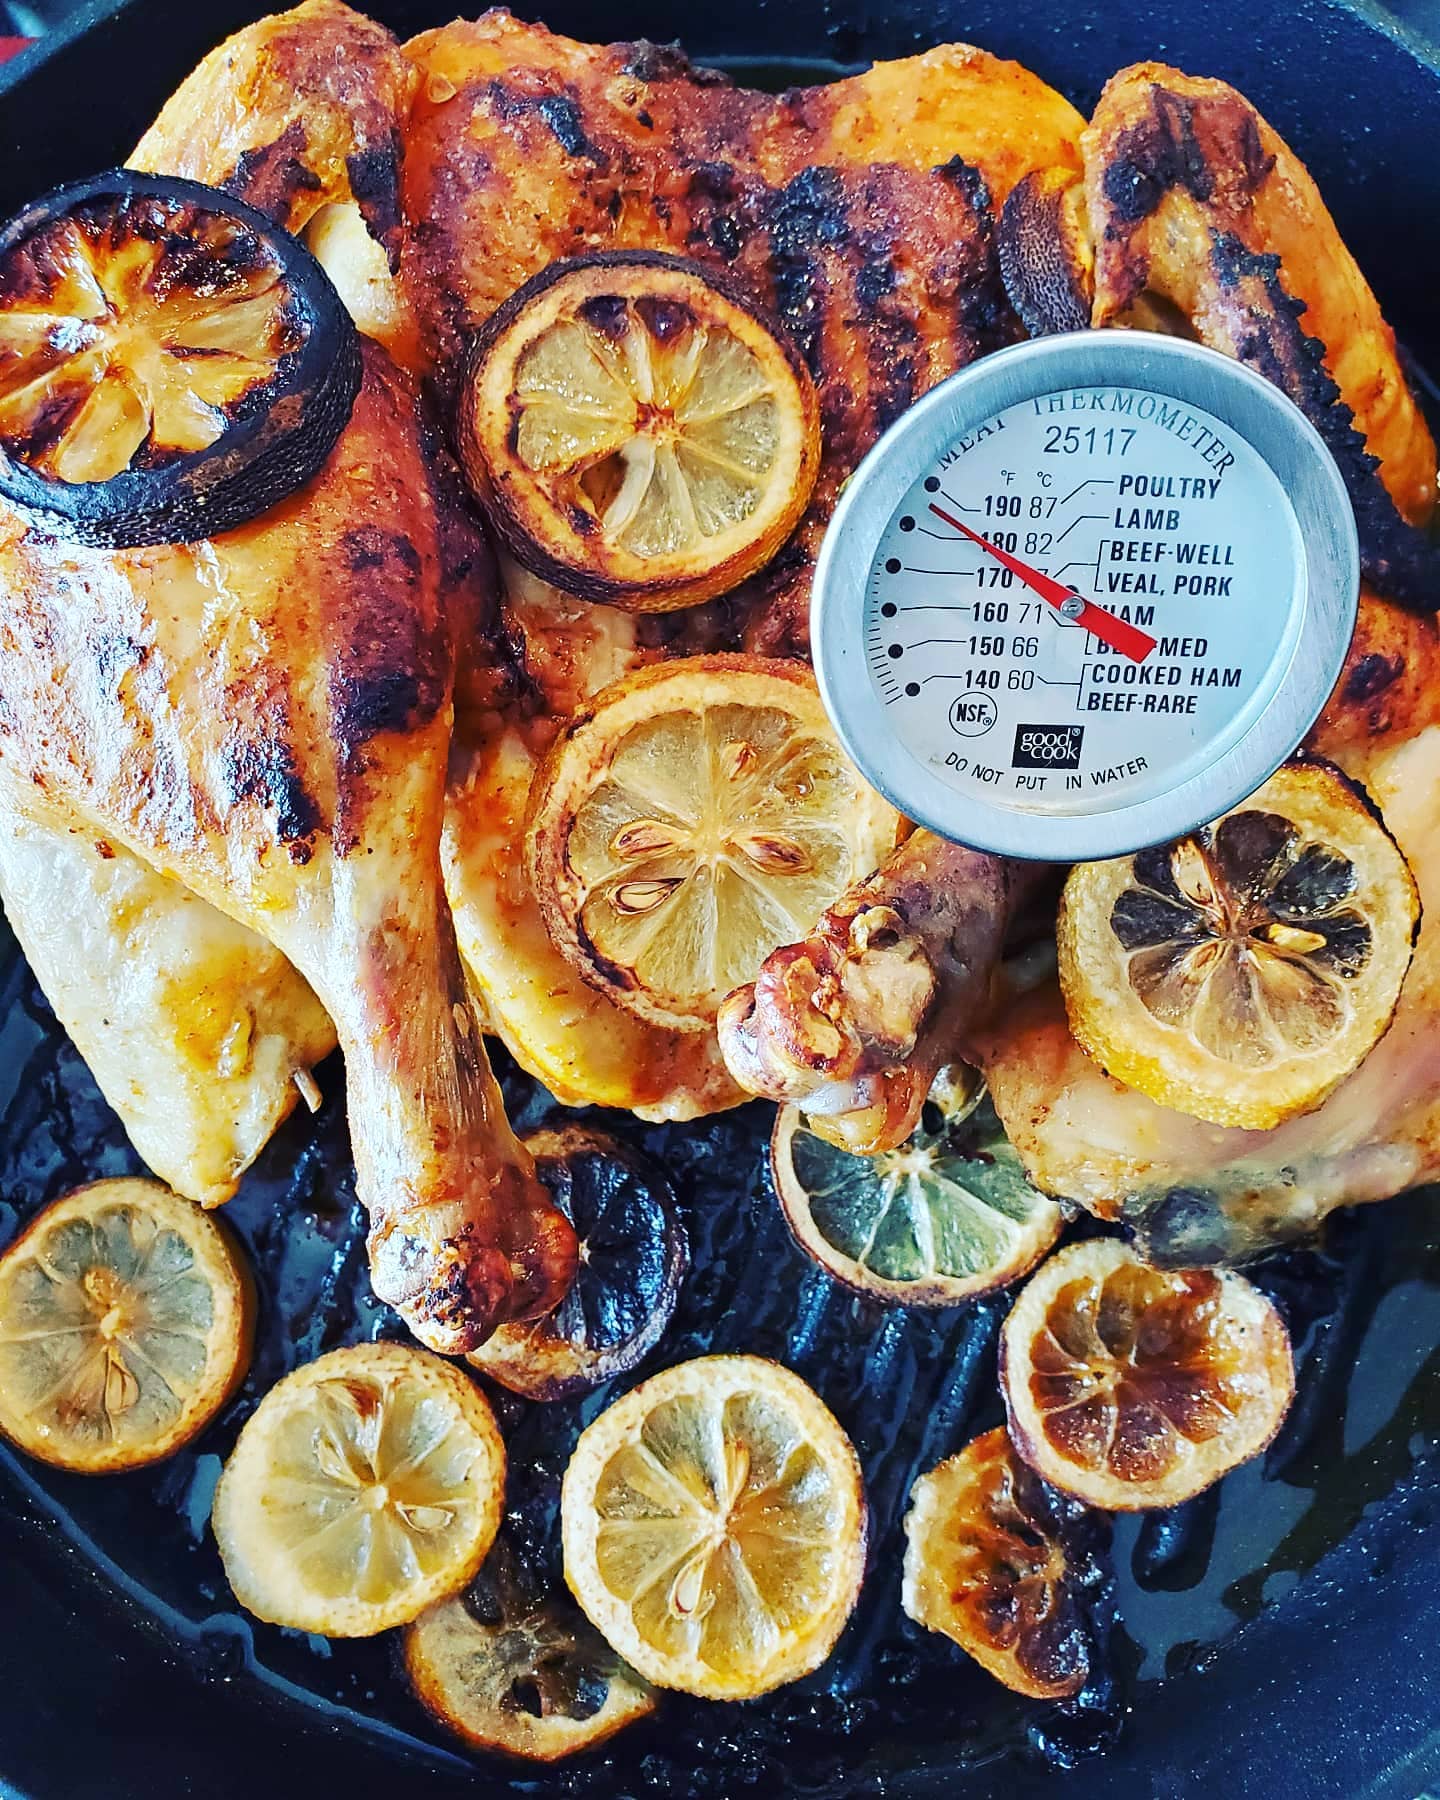
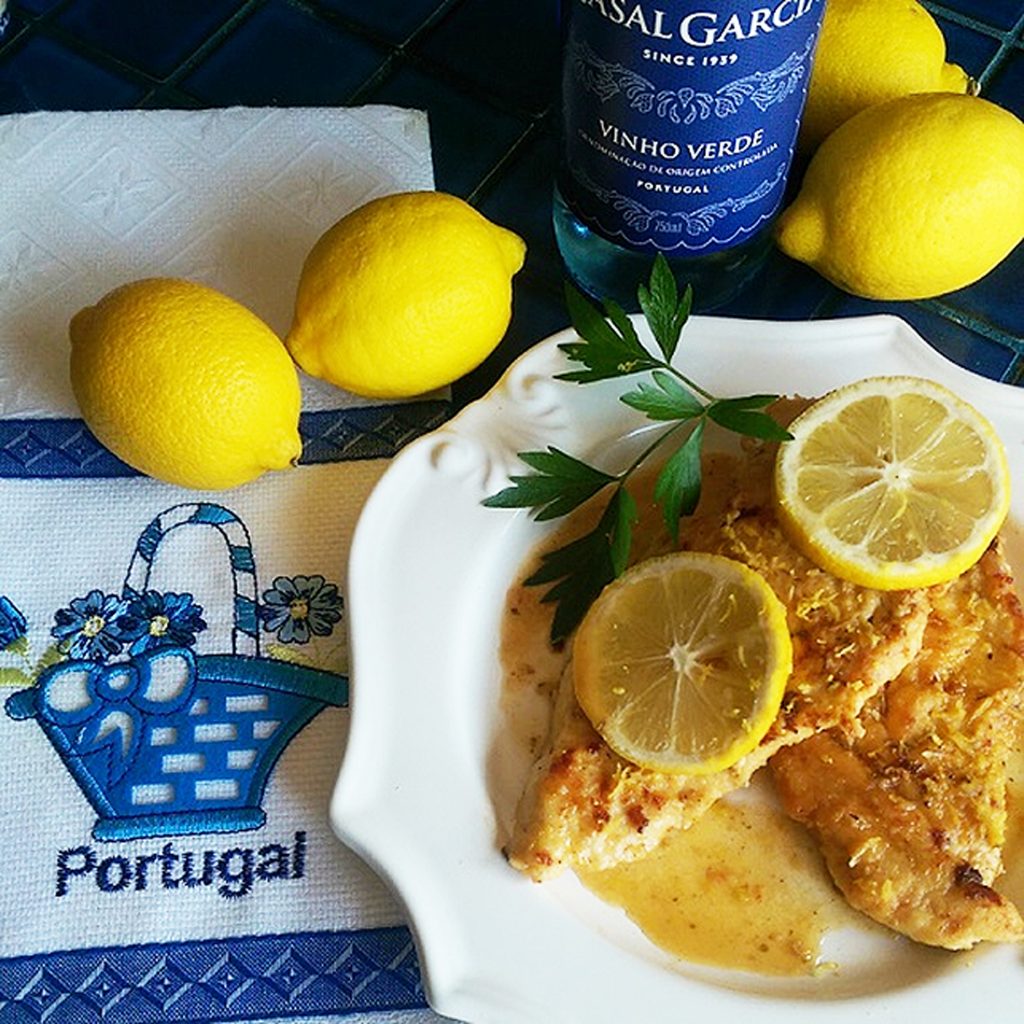
This classic Lemon Rosemary Chicken is moist, juicy and full of lemony flavor. I always make 2 chickens so we can enjoy the chicken the...
Ingredients: 1 (3 to 4) pound roasting chicken (butterflied) 2 lemons (sliced) 1 large onion (chopped) (optional) ¼ cup olive oil 1 tablespoon butter 1...

This savory quiche will be your favorite way to use all that summer zucchini that’s in season right now. I bet you have all the...

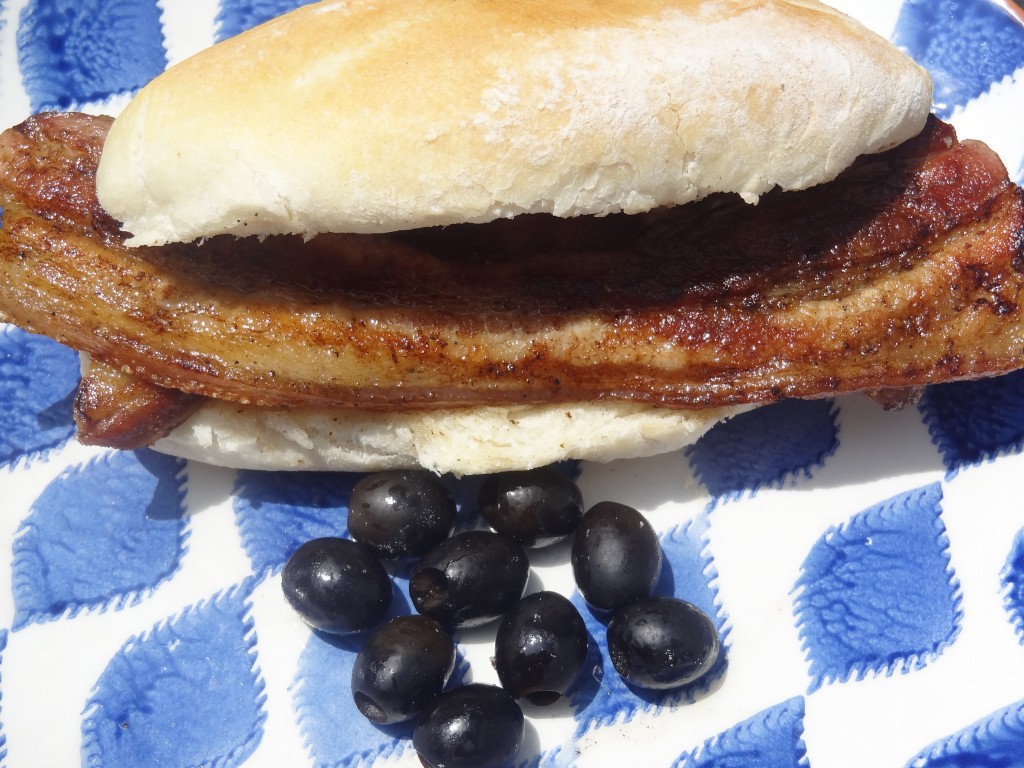
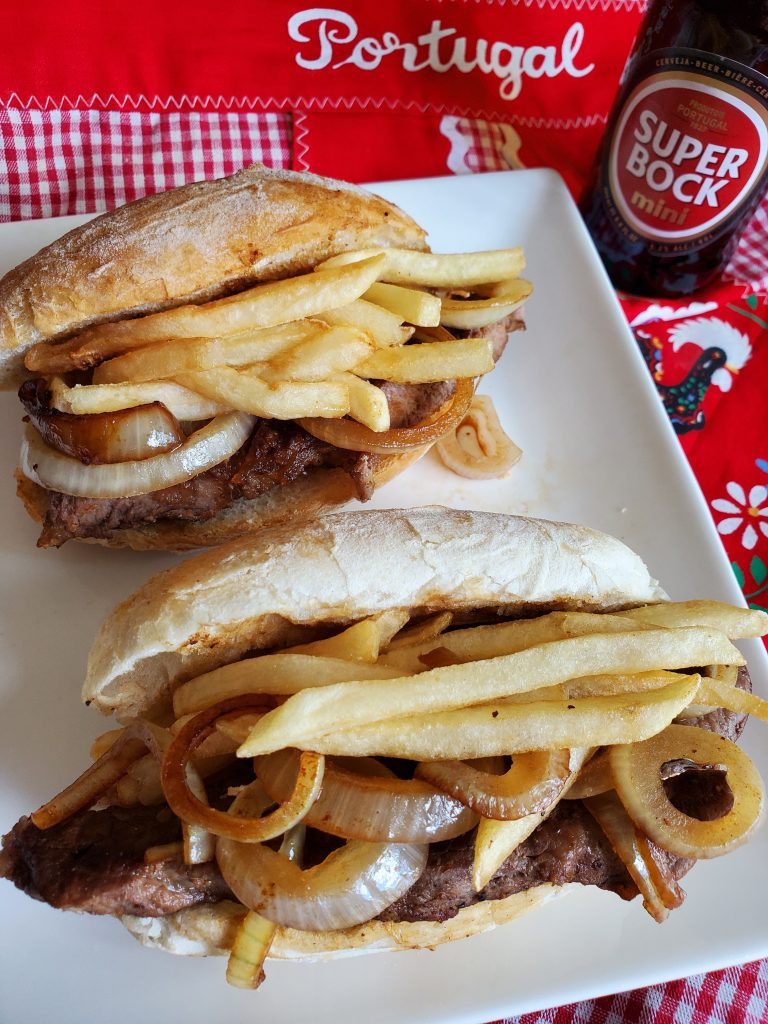
Bifanas are a must have at any Portuguese Festa but you can have them any day of the year. The savory pork with sauteed onions...
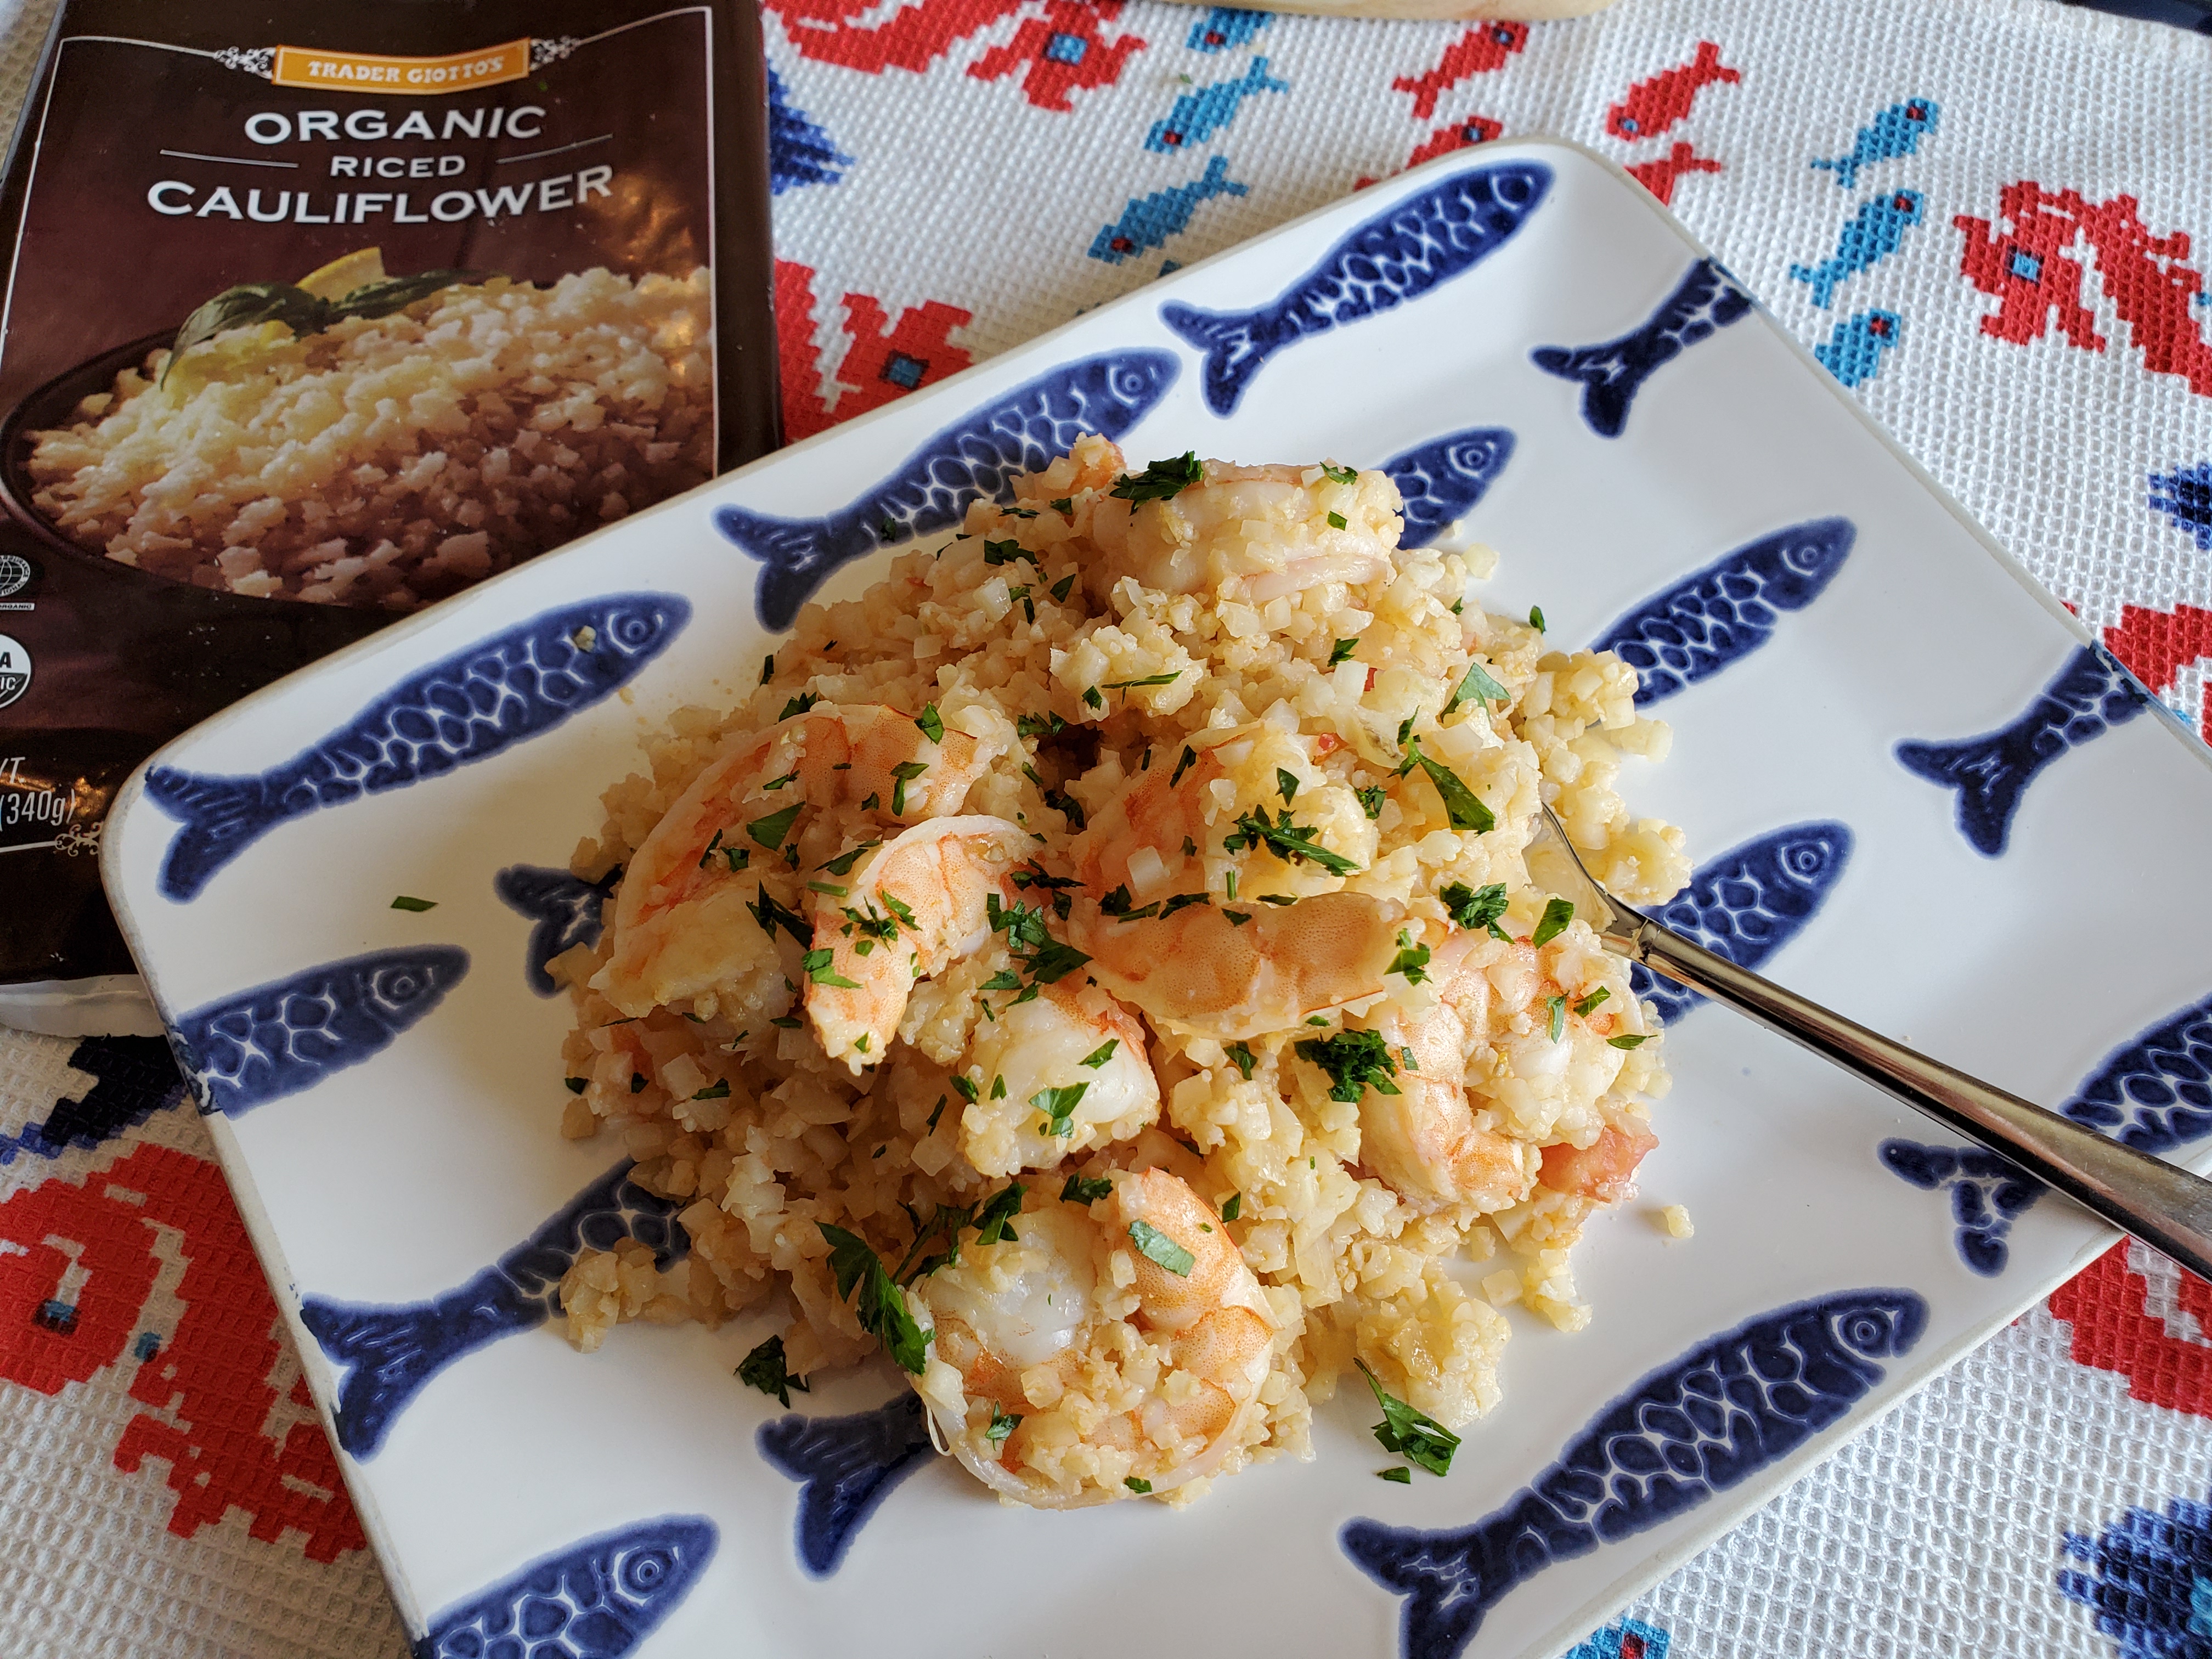
You’ll love this easy, low carb, low calorie version of the classic Portuguese Shrimp and Rice dish that’s one my favorite recipes on this blog....

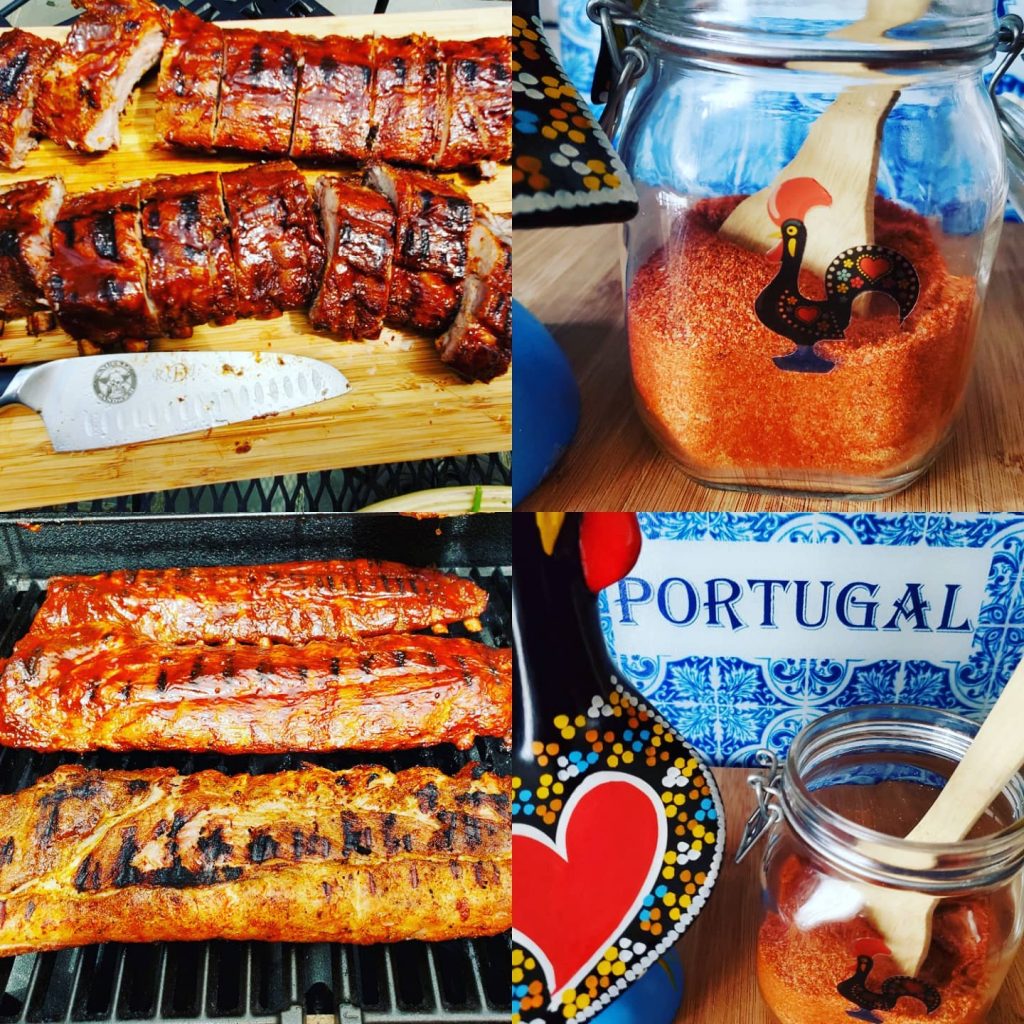
You can’t get the Portuguese Festa experience without enjoying some authentic barbecue chicken while you’re there. The chickens are deliciously flavored with Portuguese spices and...

This Pizza Dough can be used to make any kind of your favorite pizza, flatbread or even foccacia breads. Ingredients: 4 cups flour (more as...
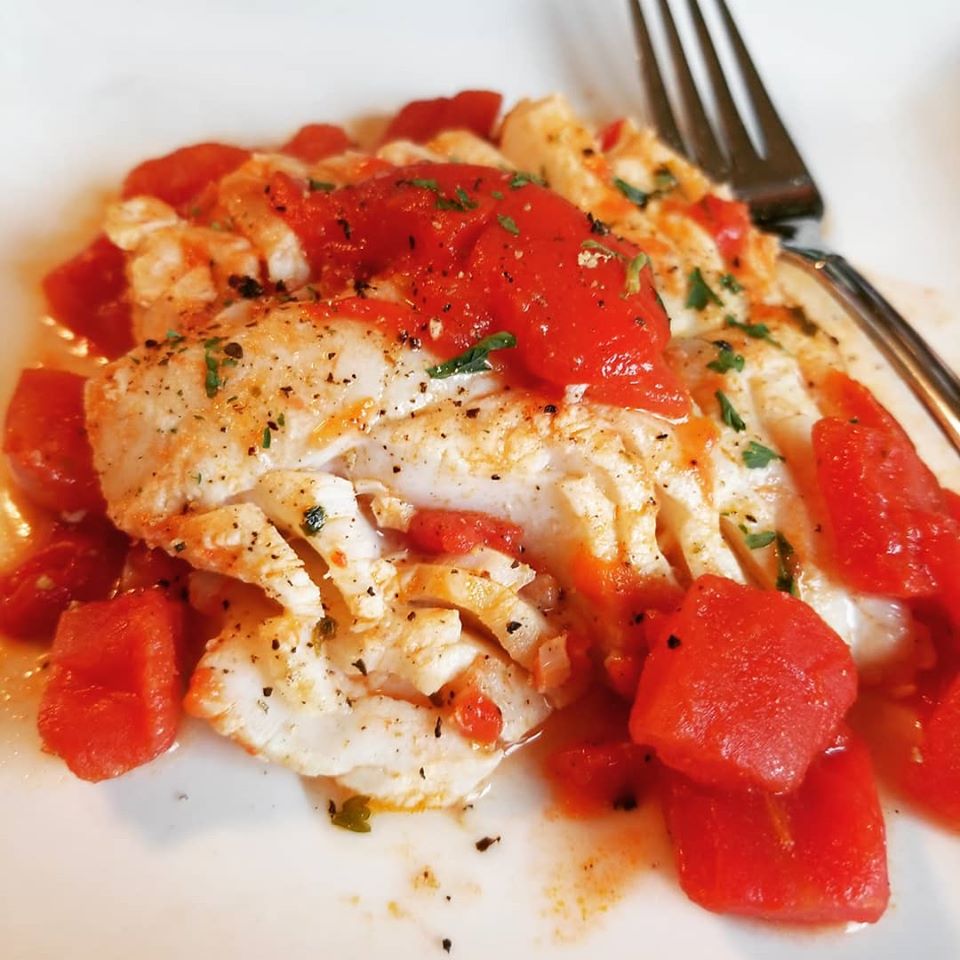
This fresh codfish recipe is simple and delicious! Perfect for lent, meatless Mondays or any day of the week. Feel free to use salt cod...


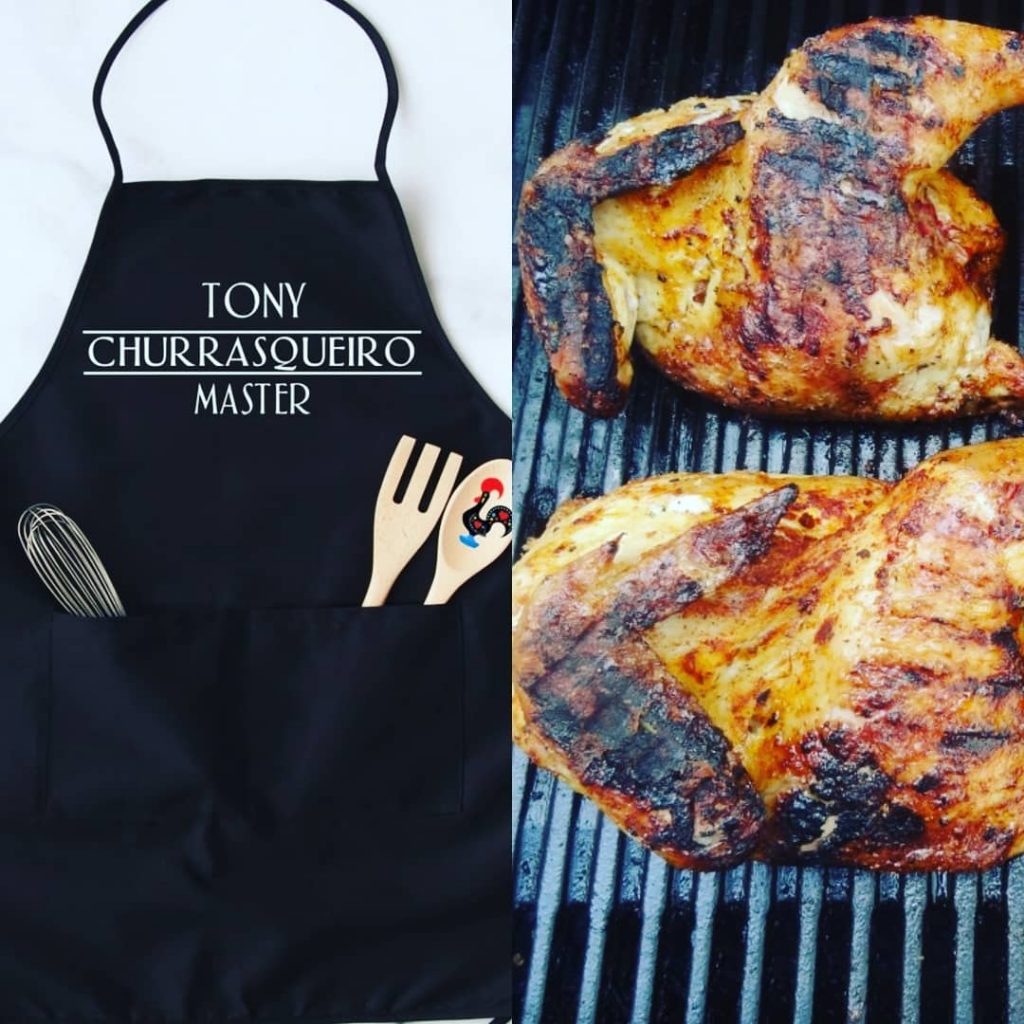
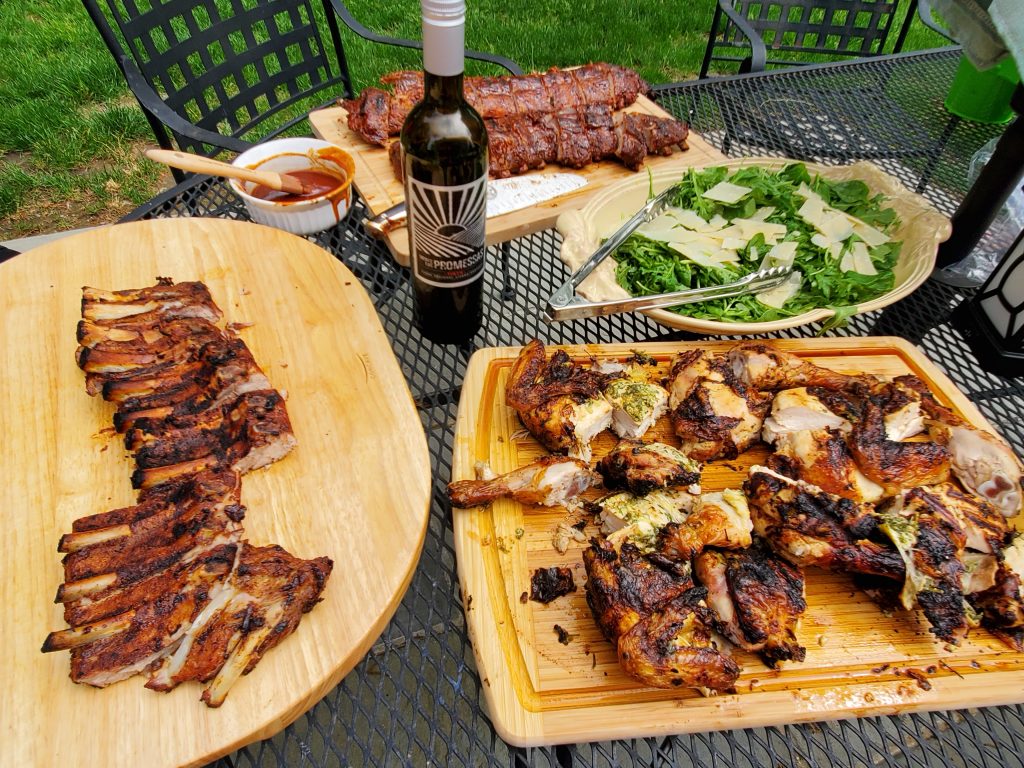

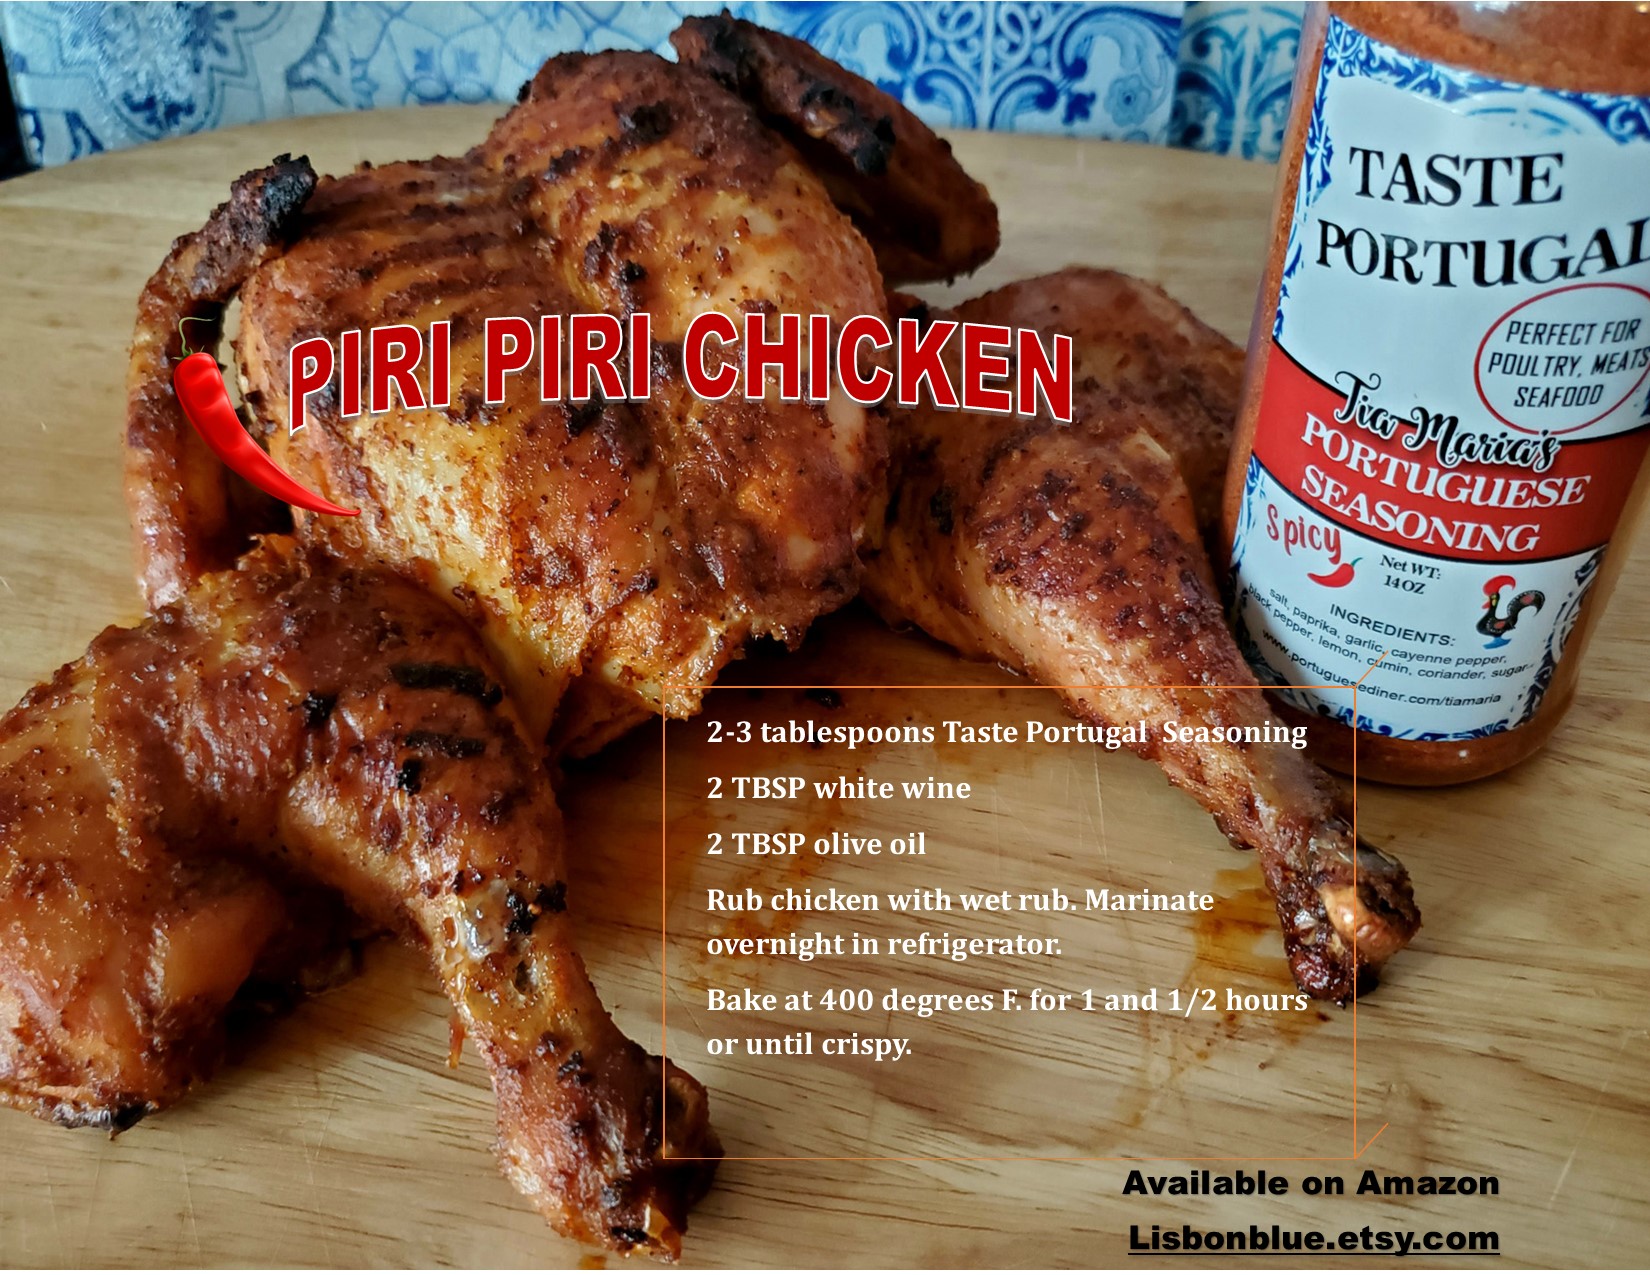
You can’t get the Portuguese Festa experience without enjoying some authentic barbecue chicken while you’re there. The chickens are deliciously flavored with Portuguese spices and are sold whole for the family to enjoy along with some fresh Portuguese rolls. No utensils required because you eat with your hands of course.
Ingredients:
2 whole fryer chickens (butterflied, washed and pat dry)
4 tablespoons my spice mix (REGULAR OR SPICY FOR PIRI PIRI CHICKEN)
2 tablespoons olive oil
1/4 cup white wine

Preparation:
Mix spices with oil and wine to make a “wet rub”. Marinate chickens with wet spice rub one day before or for at least 2 hours before cooking. Store overnight in refrigerator, or let sit at room temperature the same day.
Remove from refrigerator and let come to room temperature before cooking.Set grill to high heat. Place chickens skin side up on grill and cook for about 15 minutes. Turn skin side down and let cook another 10-15 minutes. Move chicken away from flames as it cooks. Lower heat if needed and keep cooking turning on each side as needed. Cook until well done for a charred skin.
Serve chicken cut up with crusty bread, or with any side dish you prefer.
Cooking Portuguese is easy! Watch my videos for Piri Piri Frango Churrasco and Baked Piri Piri Chicken!

ORDER SET OF SPICES 1 REGULAR AND 1 SPICY ON PAYPAL OR SCAN QR CODE
FREE SHIPPING IN USA!


ORDER A SET OF 2 SPICES REGULAR AND SPICY ON PAYPAL – FREE SHIPPING IN USA
OR SCAN QR CODE

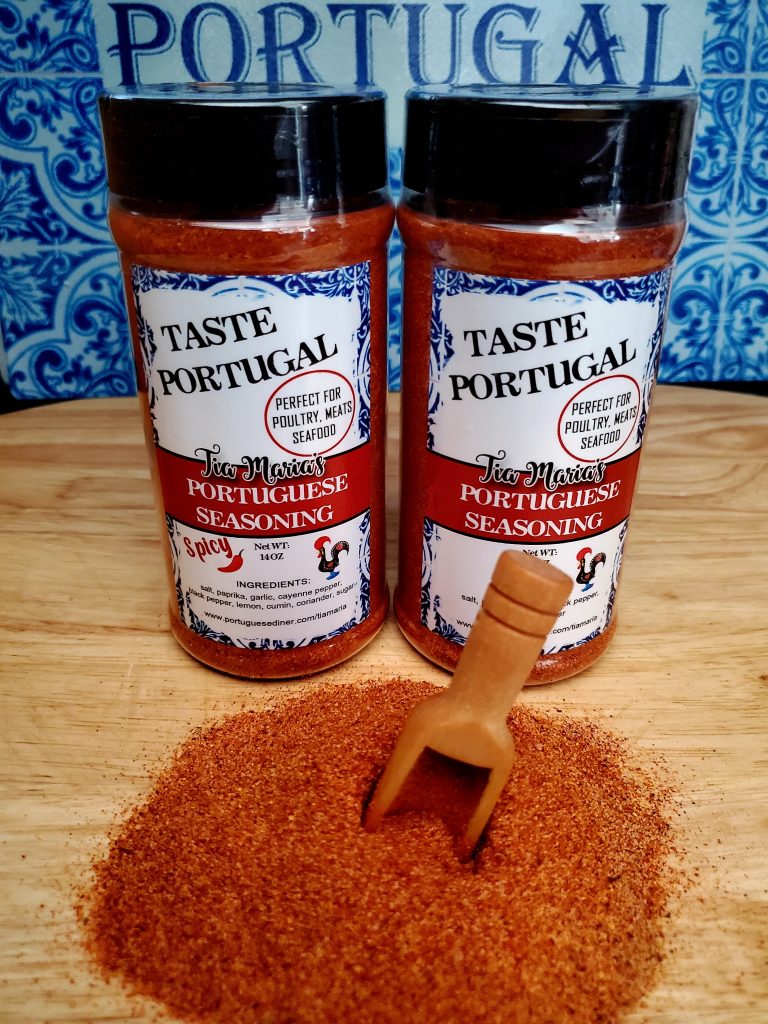
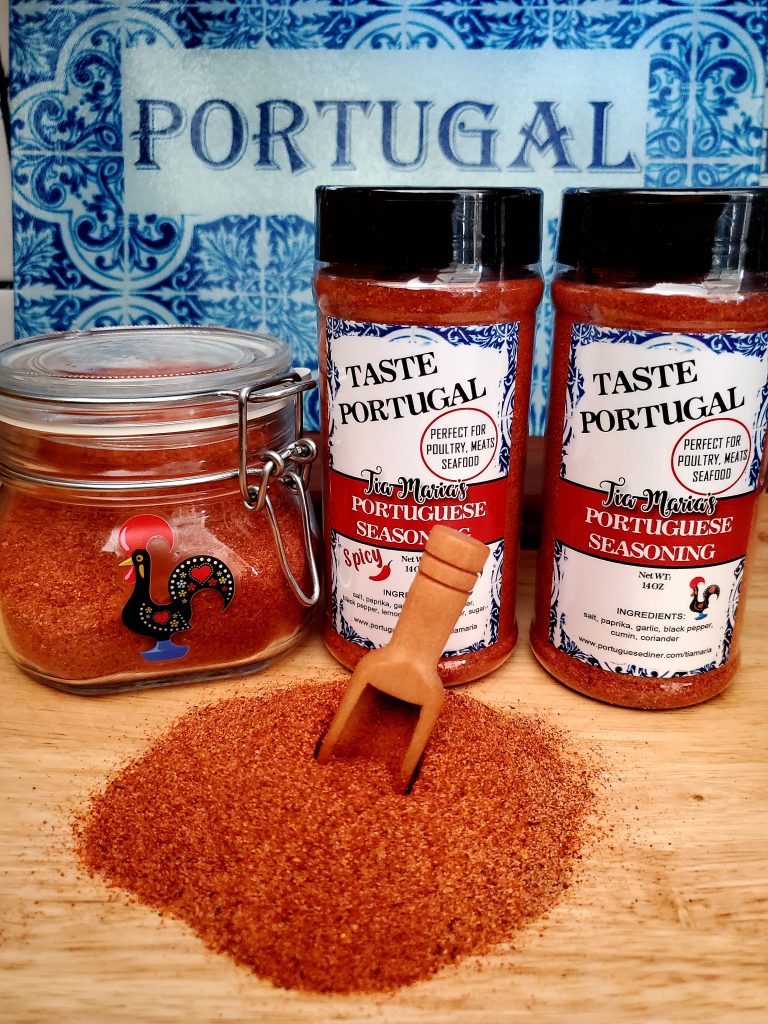
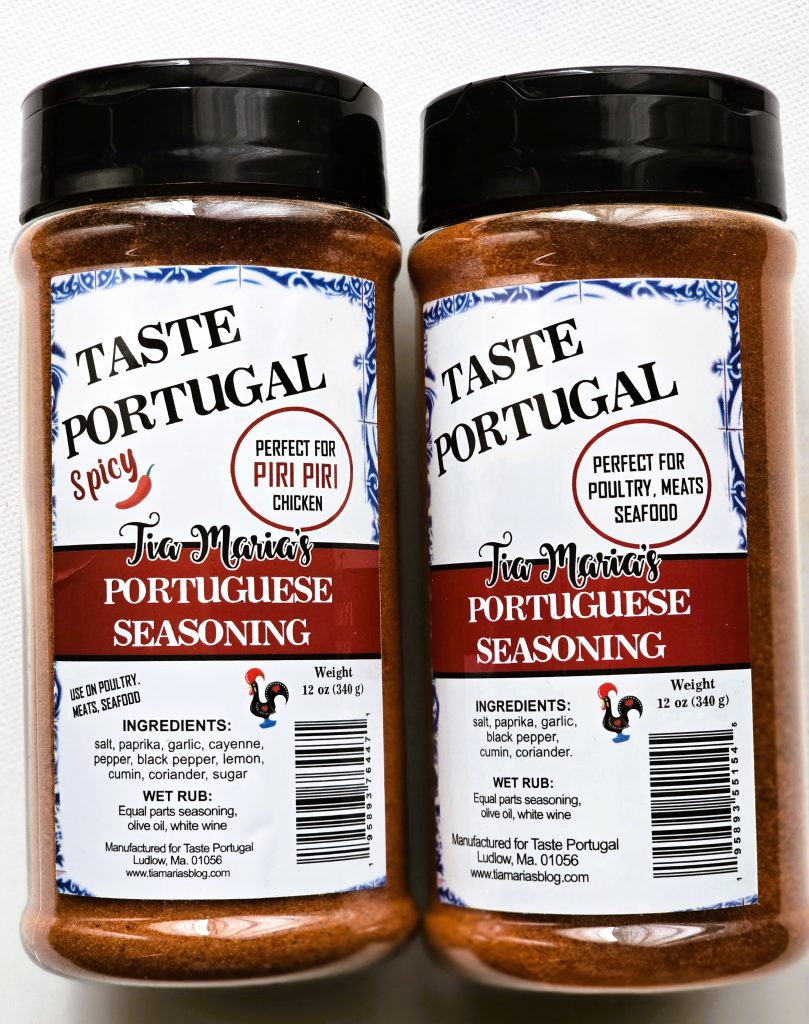
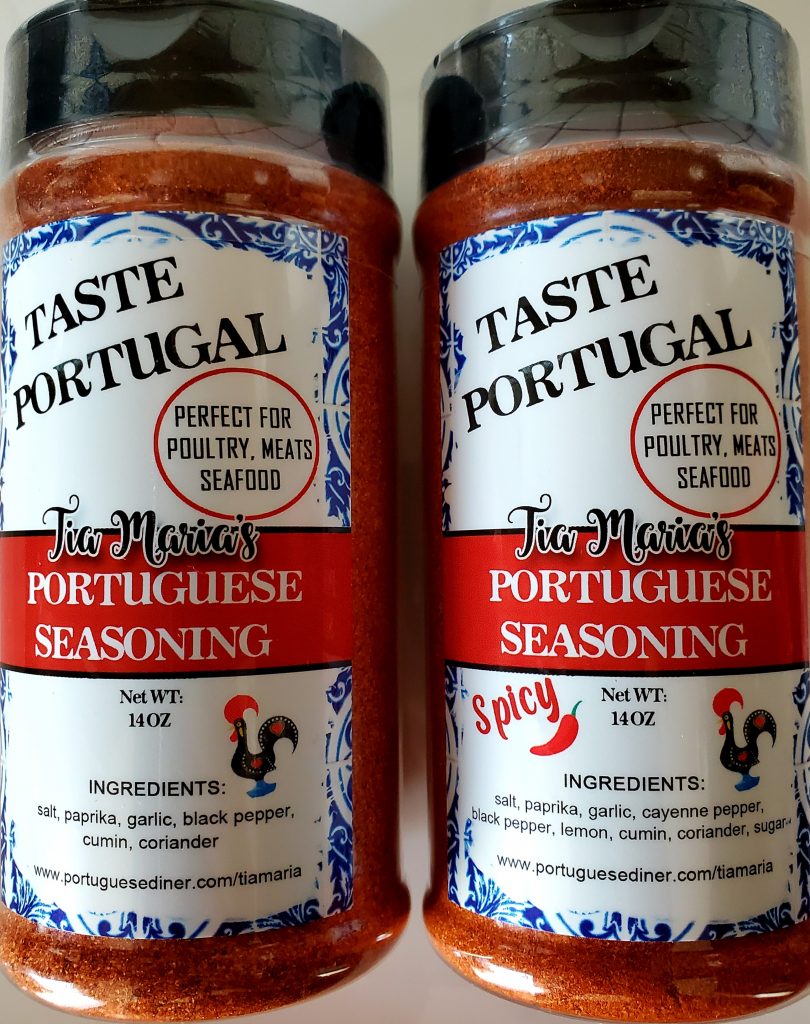
I’m so happy to bring you these 2 custom blend of seasonings that will bring the flavors of Portugal to all of your recipes. Use on poultry, meats, seafood and even vegetables.
Add a “spicy” kick with the red chili pepper spicy blend. So convenient to use because you no longer have to measure your spice ingredients.
Now you can make that hot and spicy Piri Piri Chicken on your grill. Just marinate and cook!
ORDER ON LISBON BLUE ETSY SHOP
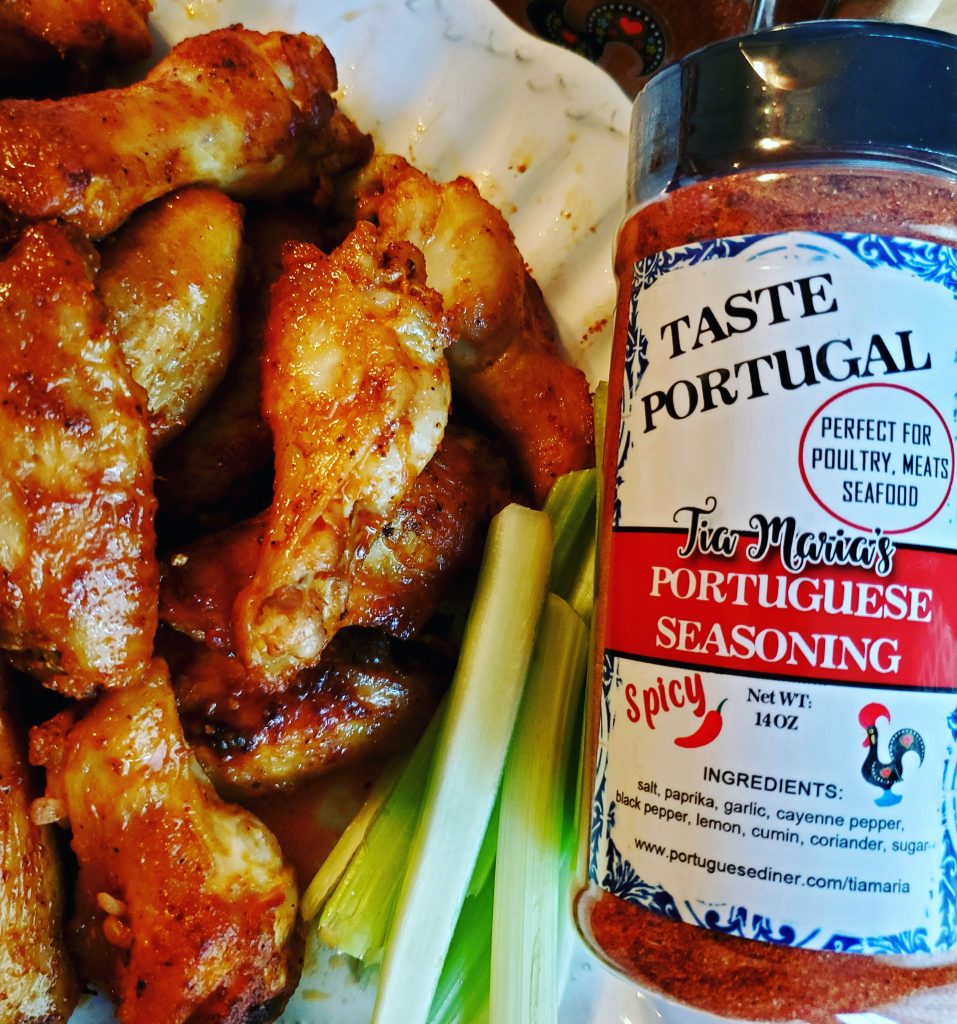
Taste Portugal – Tia Maria’s Portuguese Seasoning – Regular and Spicy blends
MADE IN USA – CUSTOM PACKED AND SAFETY SEALED FOR FRESHNESS – 14 OZ JARS
Taste Portugal -Tia Maria’s Spice mixes – Regular and Spicy blends
ORDER ON LISBON BLUE ETSY SHOP:
Ships FREE in USA – Ships internationally *SET OF 1 EACH REGULAR AND 1 SPICY JAR – 1 213 892 9311 OZ – ONLY $30
Look at the wonderful recipes you can make with these delicious seasonings!


Easy Air Fryer Shrimp takes only minutes to prepare. It’s savory and garlicky. Serve as an appetizer, over pasta, salad or as a main dish.
Ingredients:
2 lbs medium shrimp (peeled and devained)
1 tbsp TASTE PORTUGAL SEASONING
2 tsp olive oil
2 tbsp melted butter
2 tbsp lemon juice
cooking spray
parsely for garnish
Preparation:
Marinate shrimp in seasonings, lemon juice and olive oil for about 3 minutes. Place evenly in Air Fryer. Spray with a lite coating of cooking spray and toss.
Cook at 400 F. for about 5 to 6 minutes or until pink. Place in a bowl and add the butter and mix well. Serve.
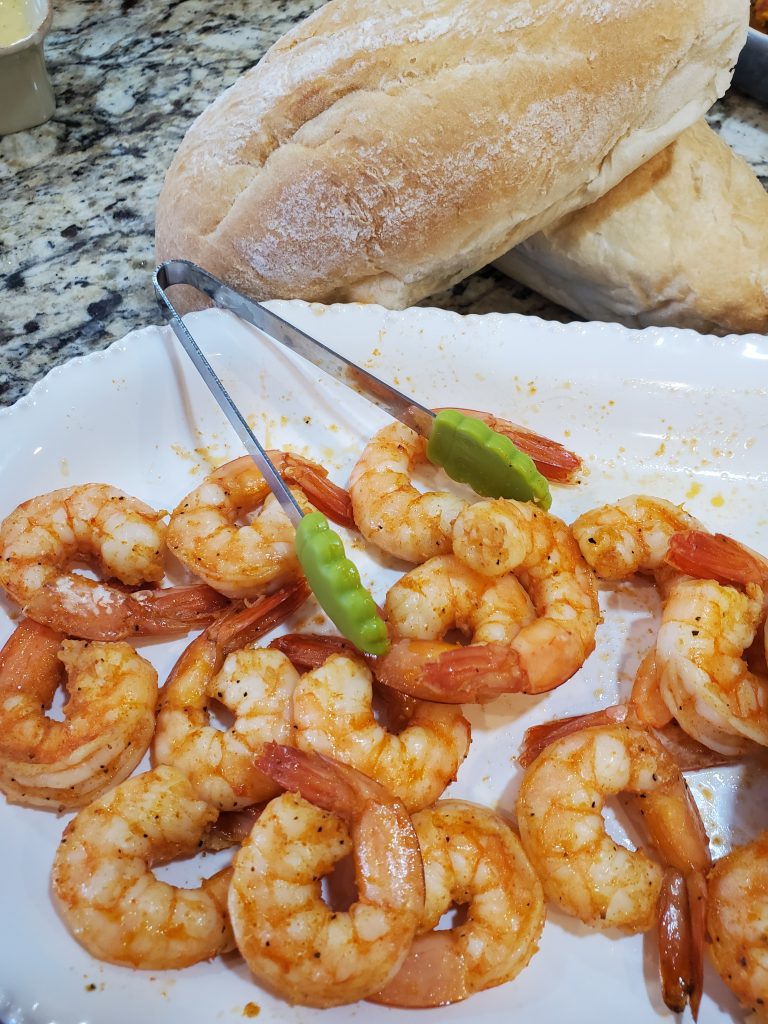


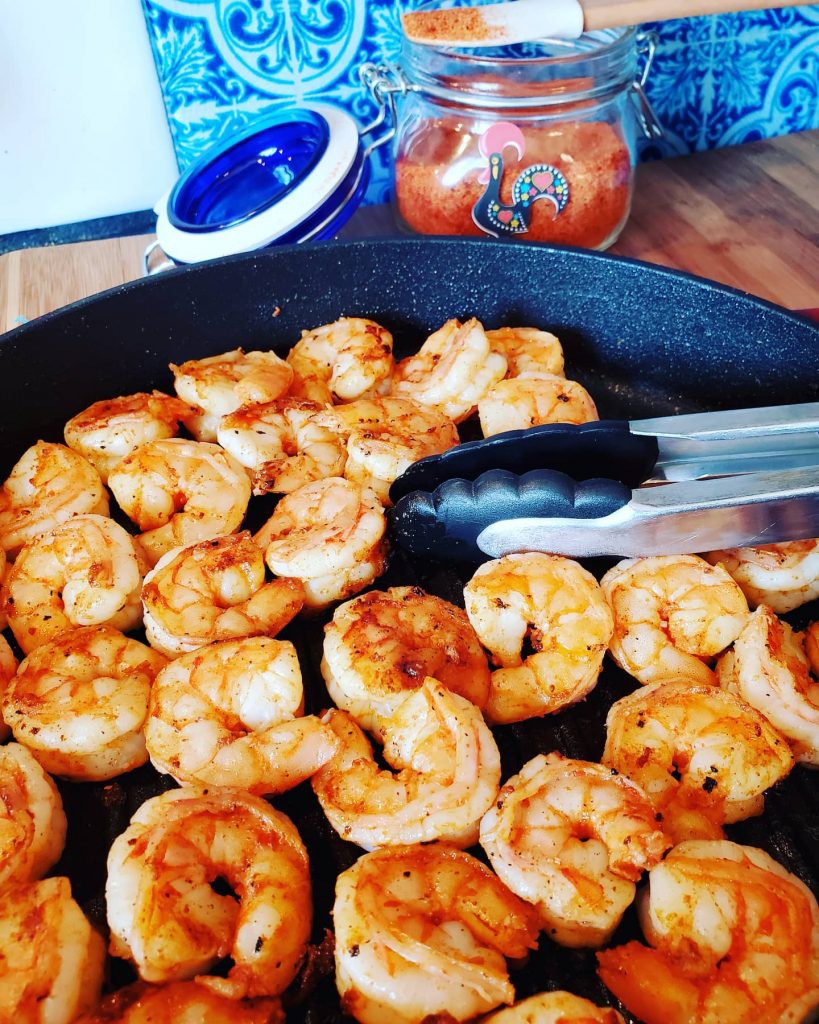
This Spicy Shrimp will set your mouth on fire but you’ll love it! Serve as an appetizer or as a main dish over fettuccine pasta or any other favorite pasta.

INGREDIENTS:
2 lbs medium shelled shrimp
2 tbsp butter
1 tbsp white wine
1 tbsp olive oil
2 cloves minced garlic
1/4 tsp salt
1 tsp crushed red pepper flakes
PREPARATION:
Marinate shrimp in wine, salt, and pepper flakes for 3 minutes.
Heat oil and butter until hot. Add garlic and cook until translucent. Add shrimp and stir. Cook for 3 to 5 minutes until fully cooked.


Let’s make delicious SPICY PIRI PIRI CHICKEN DRUMSTICKS
12 to 14 drumsticks
2 tbsp TASTE PORTUGAL SEASONING
2 tbsp olive oil
2 tbsp white wine
Marinate chicken 2 hours or overnight in fridge.
Lay out on a foil lined sheet pan coated with cooking spray. Top with more cooking spray.
Bake at 375 f. Fir about 50 min. until crispy.
This is a delicious savory pizza. I use Fig jam as a base. The combination of the sweet jam and salty presunto is mouthwatering.

INGREDIENTS:
1 pizza dough
1/2 cup fig jam
1 cup chopped or sliced chouriço
4 slices presunto
1 cup mozzarella or your favorite cheese
1/4 cup pecorino cheese
PIZZA DOUGH
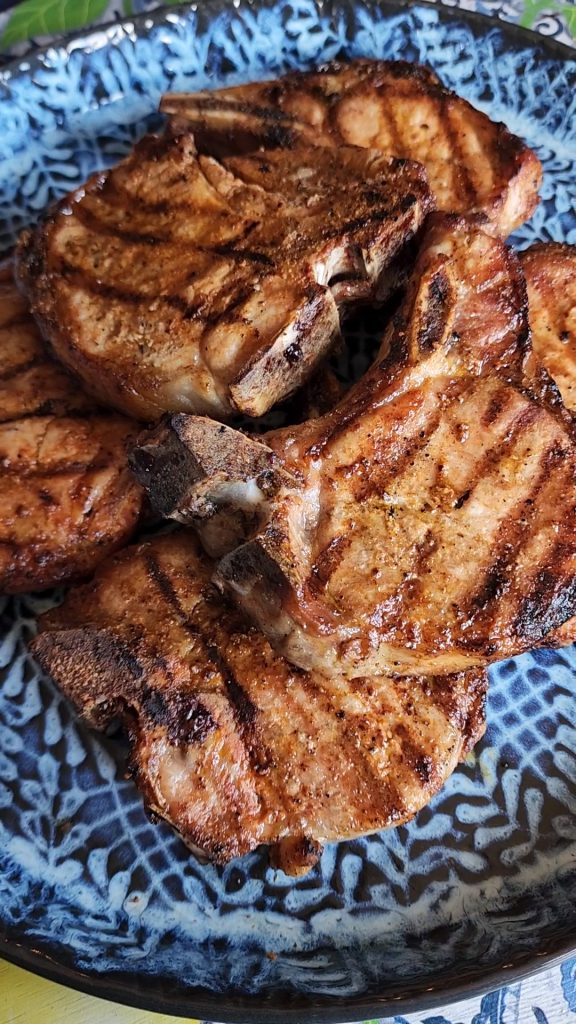
This is your weekend recipe. Light up the grill. These pork chops are moist, savory and delicious.
INGREDIENTS:
6 pork chops
1.5 tbsp Taste Portugal Seasoning
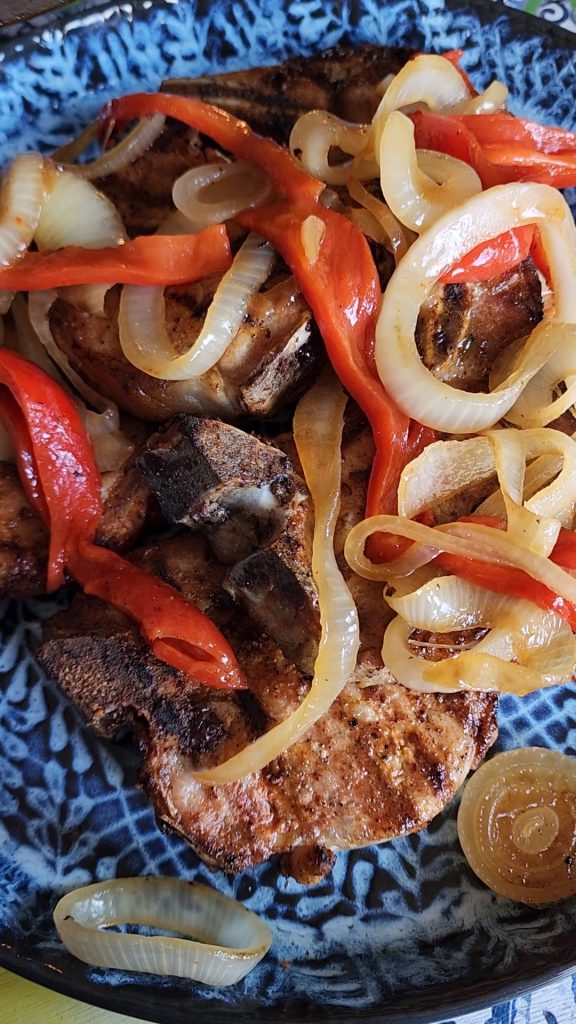
Onions:
1 large sliced onion
1 large roasted red pepper
2 tbsp olive oil
Pinch of salt
1/2 tsp white vinegar
1 bay leaf
Season pork. Grill.
Saute onions, peppers, and bay leaf in oil until tender. Add vinegar and cook a few minutes.

ORDER ON AMAZON: CLICK ON PICTURES
My Oven Fried Chicken 🍗 is savory, easy, and delicious! You’ll never fry chicken again. Trust me. 😋
Chicken Prep;
10 pieces of chicken
2 tbsp Taste Portugal Seasoning
2 beaten eggs
1 tbsp water
Bread Coating
1 cup bread crumbs
1 cup panko
1/4 cup flour
1 tbsp Taste Portugal Seasoning
Cooking spray
Sheet Pan
Foil
Beat eggs with water. Place chicken, seasoning, and eggs into a large plastic bag and let marinate for a few hours.
Mix coating ingredients in a large plastic bag. Coat chicken 3 at a time by shaking bag.
Line sheet pan with foil, then coat with spray.
Place chicken evenly on the pan. Coat heavily with cooking spray.
Bake at 375 f. for 1 hour or longer until browned. Turn over chicken to crisp both sides.
ORDER ON LISBON BLUE SHOP


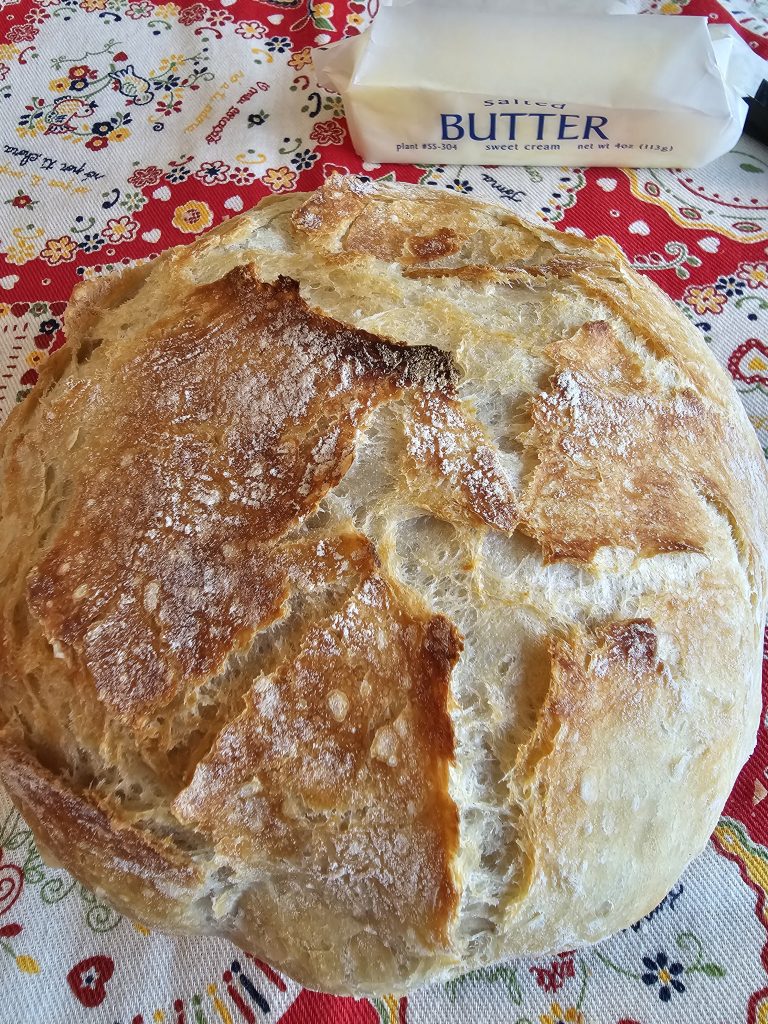
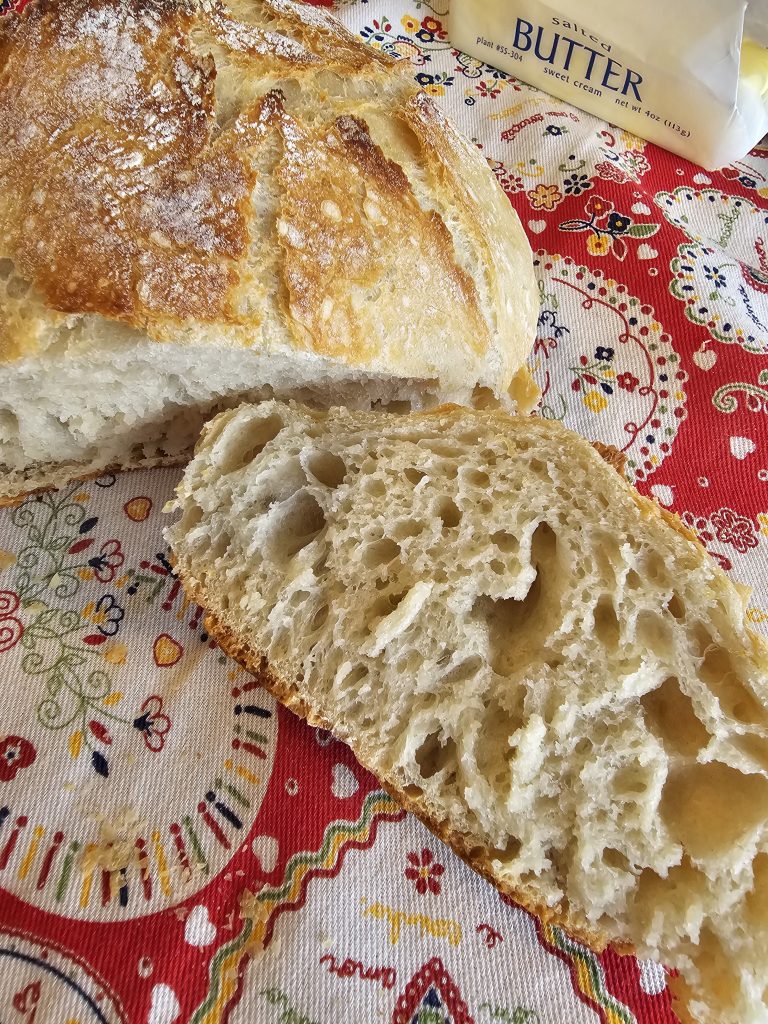
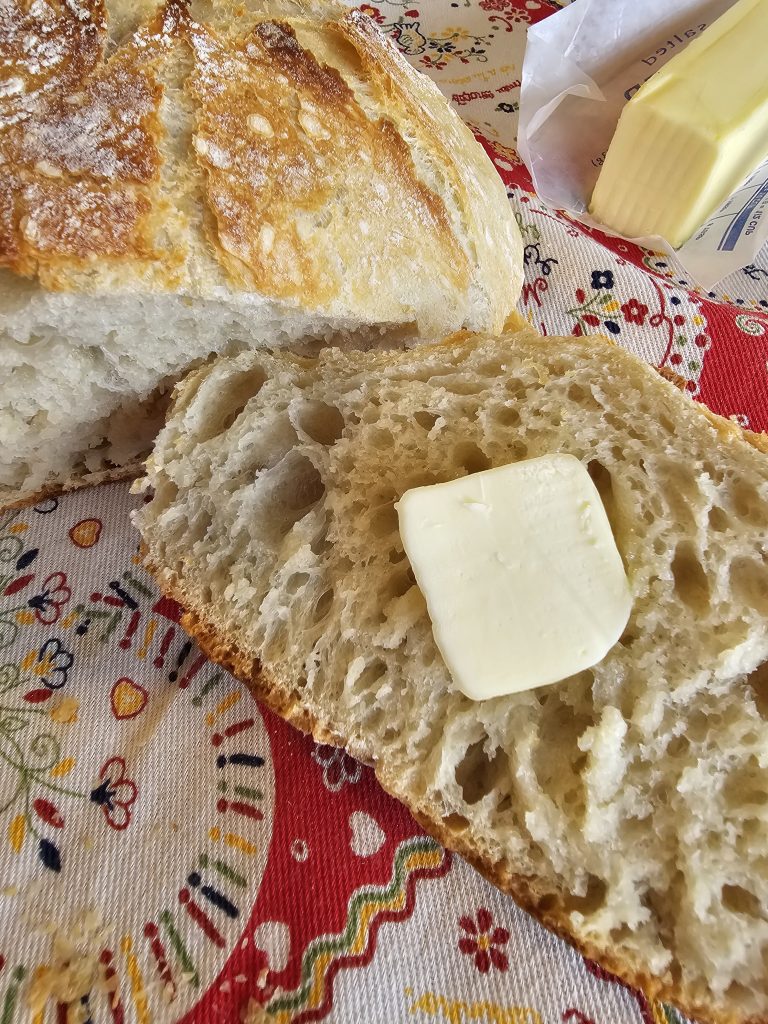
Never buy bread again with this easy recipe. Trust me. It’s so crusty, moist and delicious.
Just mix, let it rise, and bake to golden perfection. 🥖👩🍳
Ingredients
3 cups flour
2 tsp salt
2 tsp instant yeast
1.5 cups warm water
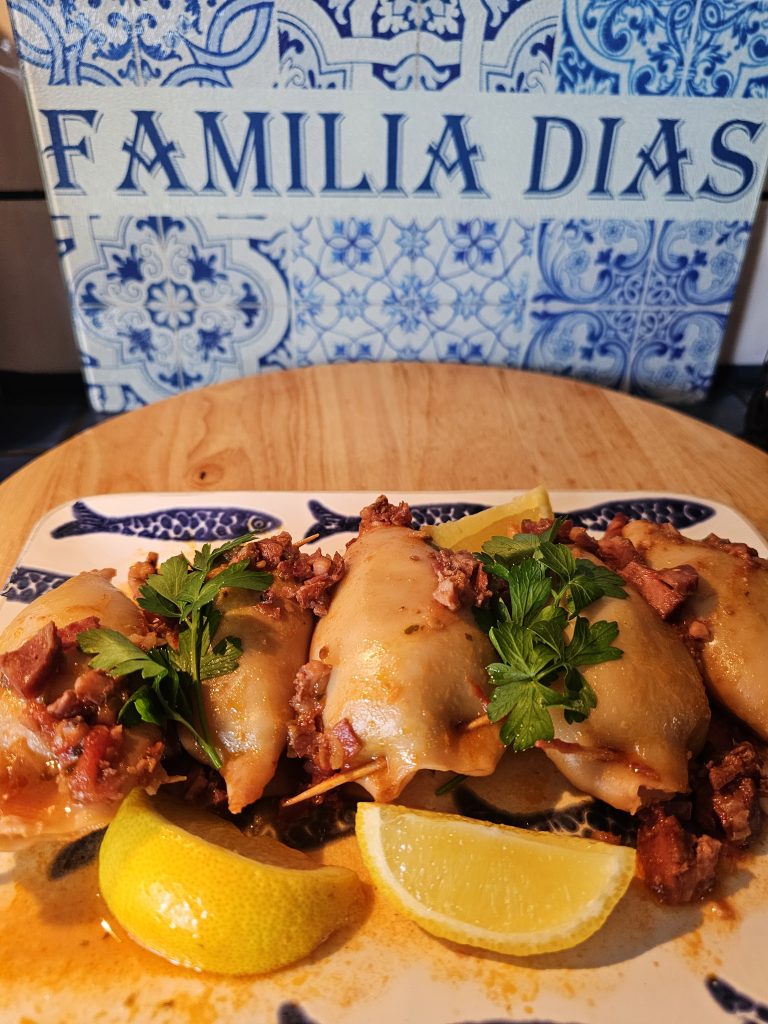
Lulas Reciadas are a classic recipe that you’ll love. This recipe is my TASTE PORTUGAL MORE EASY PORTUGUESE RECIPES.
I learned this recipe from my Mother in Law who passed many years ago. I’ve improvised it a bit. It’s my husband’s favorite which I make for him often.
INGREDIENTS:
2 to 2 lbs cleaned whole squid (cut tentacles into small pieces)
1 medium chouriço sausage (cut into small pieces)
2 to 3 slices of presunto (prosciutto cut into small pieces)
1/4 cup olive oil
1 large onion (chopped)
1 small red pepper diced (optional)
1 bay leaf
4 garlic cloves (minced)
1 to 2 cups very ripe tomatoes (chopped)
1/2 cup white wine
1 teaspoon salt
lemon slices
fresh parsley (chopped)
Preparation:
Saute onion, garlic and pepper in olive oil until golden. Add the chopped tentacles, chouriço, and presunto. Cook for a few minutes and add tomatoes, wine and parsley. Cover and cook for about 10 to 15 minutes until the sauce thickens. Let cool slightly.
Fill each whole squid with the mixture and seal with a toothpick. Place into pan with the remaining sauce and cook on medium for about 20 minutes until tender. Place on serving dish and top with more parsley, and squeeze of lemon juice
Serve over boiled potatoes, fries or rice.
Watch my YOUTUBE CHANNEL FOR THE VIDEO RECIPE.
BOM APETITE!

ORDER SET OF SEASONING HERE: SCAN QR CODE:
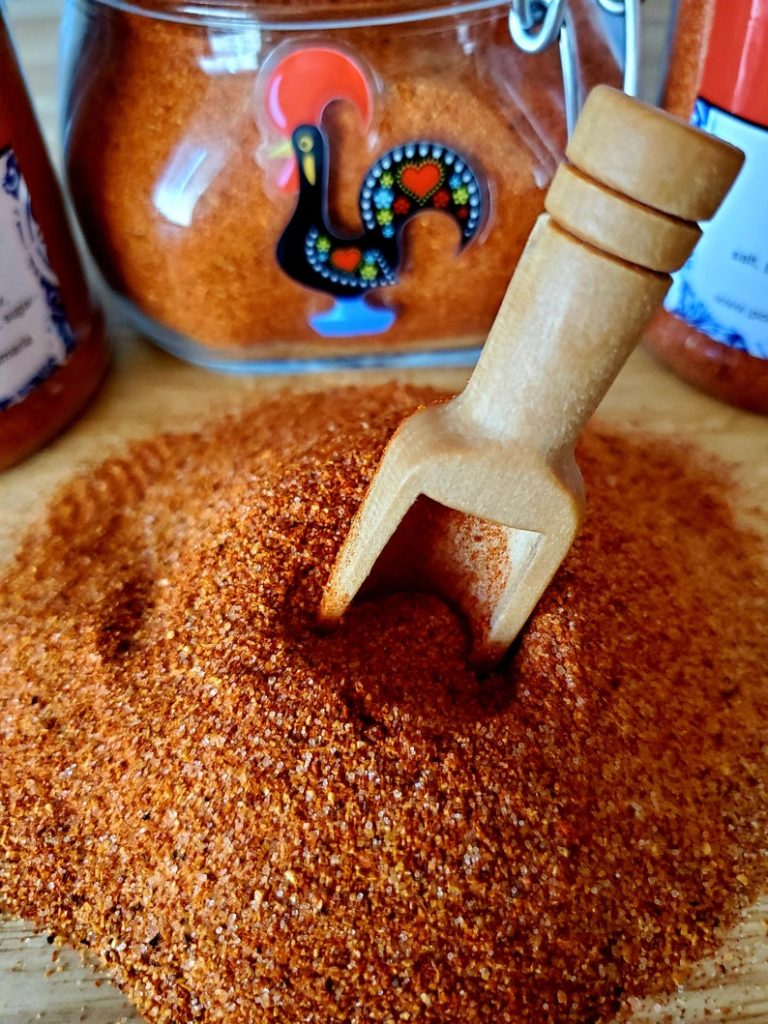
My Taste Portugal Seasonings will make all of your Portuguese recipes delicious. Just shake, marinate and season. No mixing of other spices required because I’ve done all the work for you. The classic tastes of Portugal are now here in a convenient and easy to use shaker jar. These seasonings are made with the flavoring spices brought back with the Portuguese explorers from around the world.
Today’s consumers are always looking for convenient, easy to use products with new and unique flavors from around the world. Portugal has been voted the number one vacation destination in the word and the foods of Portugal are loved by everyone. Now they can enjoy the tastes and flavors of Portugal in their own kitchen with these two blends of savory and spicy seasonings.
USE OF PRODUCT
2 tablespoons of spice, oil and white wine.
Make the famous “piri piri spicy chicken” or spicy shrimp with the “spicy” blend.
Perfect for your summer barbeques, ribs, chicken seafood and clambakes!
NOW AVAILABLE AT HOMEGOODS ACCROSS THE USA!


Sprinkle on your eggs and even your French fries for a burst of flavor. Perfect for seafood, vegetables and even soups and stews for a delicious savory flavor.
CONTACT GONSALVES FOODS.COM TO GET IT AT YOUR LOCAL MARKETS

ORDER ONLINE AT LISBONBLUE.ETSY.COM or Amazon

This is how you do it! Find all these recipes on this blog. Bom Apetite!


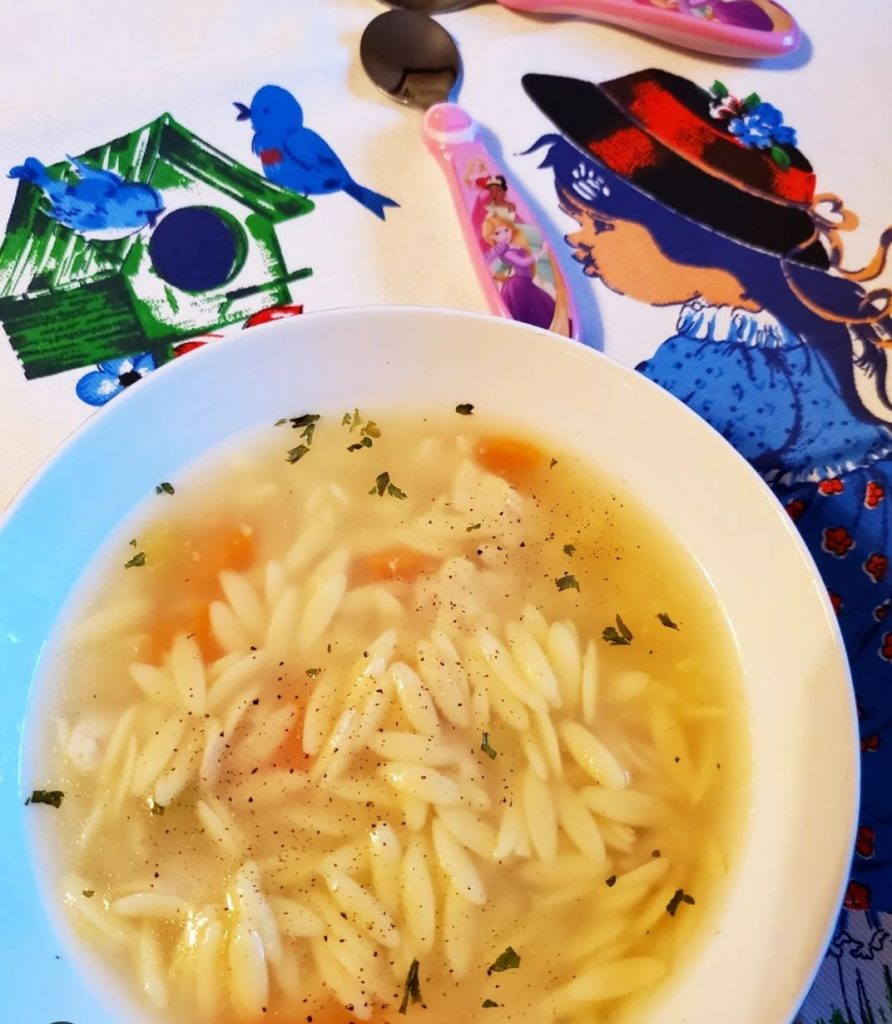
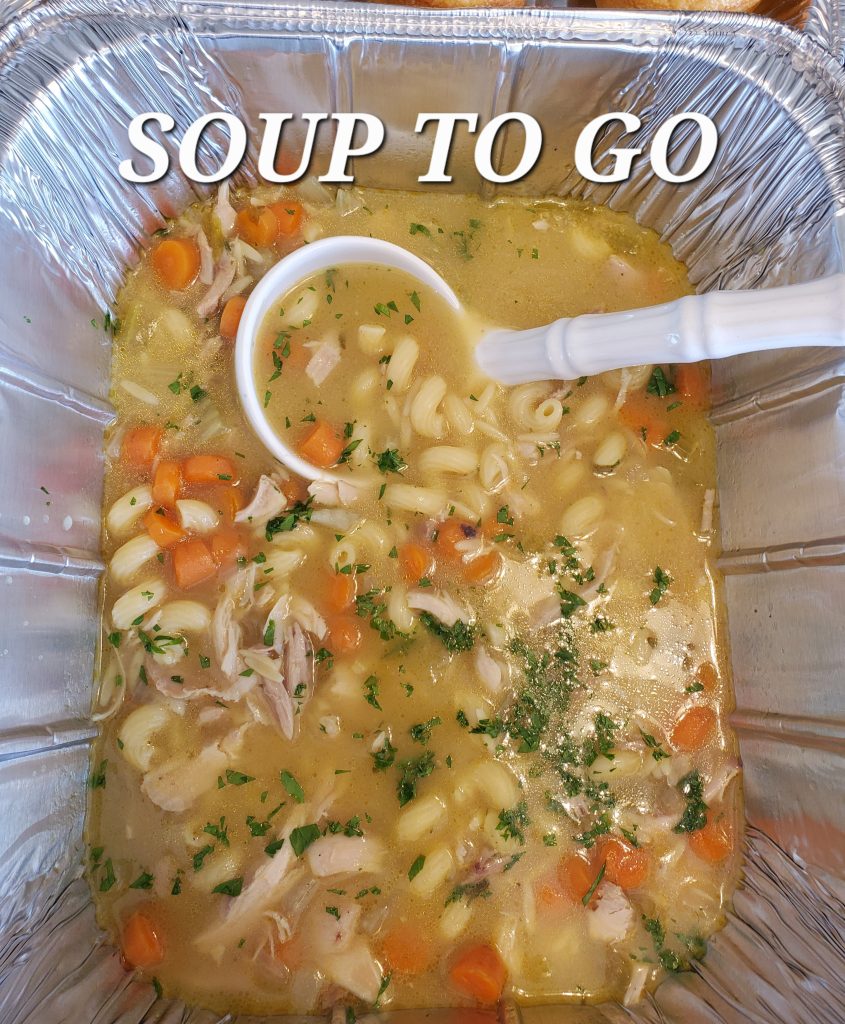
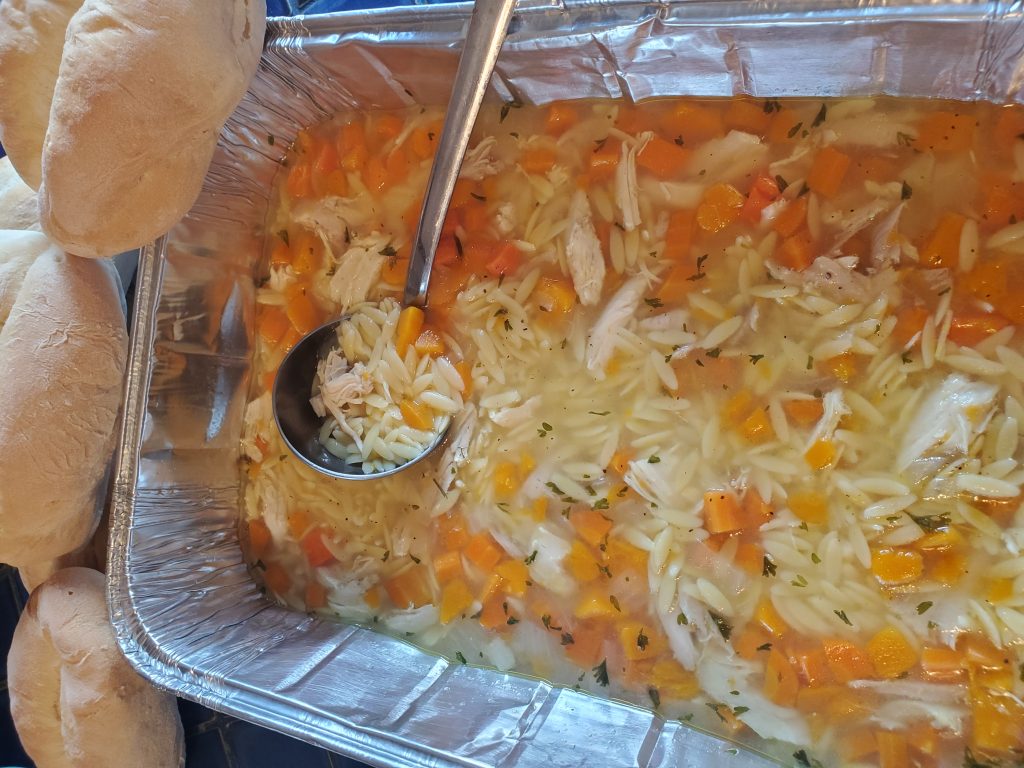
Your family will love this Chicken Orzo Soup because it’s so simple to make and delicious. I make this soup every time my family has a cold or feeling under the weather. I always have the basic staples for chicken soup on hand so I can make it anytime. My kids loved this soup when they were in school and love it now too. Double the recipe and enjoy this soup all week. Sometimes I add a few red pepper flakes for a spicy kick. It will clear up your sinuses. Trust me.
Ingredients:
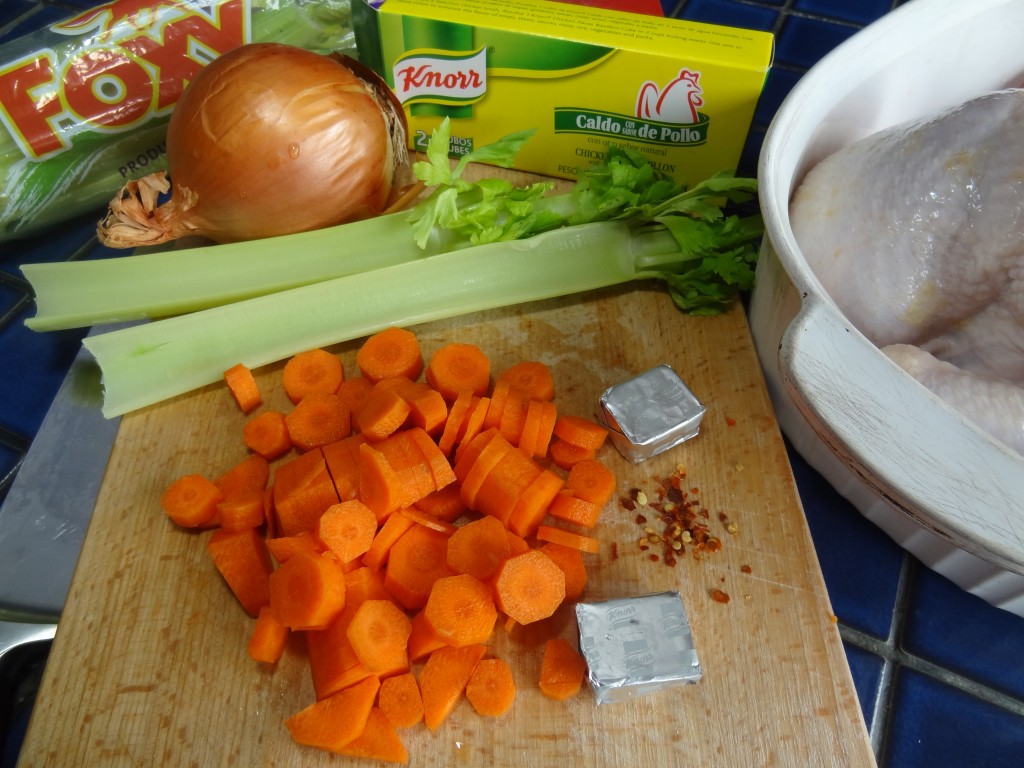
6 to 8 cups water (or half chicken broth and half water)
1 chicken leg quarter or breast
1 cup orzo pasta or (any small pasta)
1/2 small onion (diced)
1 garlic clove (diced)
1 or 2 large carrots (sliced)
1 or 2 stalks celery (diced)
2 chicken boullion cubes
2 tsp salt
1/2 tsp pepper
parsley and red pepper flakes for garnish
Preparation:
Bring water or broth to a boil in a large pan. Add the chicken, onion, garlic, celery, salt, and bouillon cubes. Let come back to a boil, cover and let cook for 45 minutes on medium heat.
After the 45 minutes remover the chicken from pan. When cool, remove the meat from the bone and chop into small pieces.
Add the chicken back into the soup along with the orzo pasta, and black pepper. Cook on medium uncovered for about 10 minutes or until paste is aldente.
If you want a thinner soup, add more water and let it come to a boil. Taste and add seasonings to your taste.
Serve with parsley flakes and red pepper for spicy kick if desired.

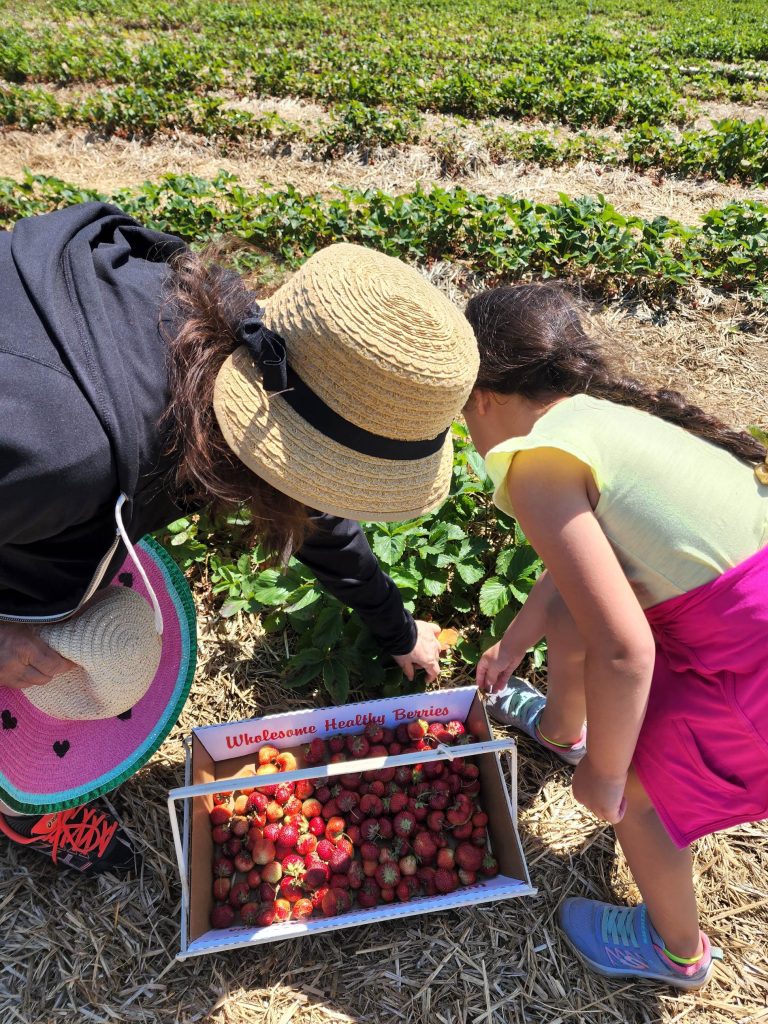
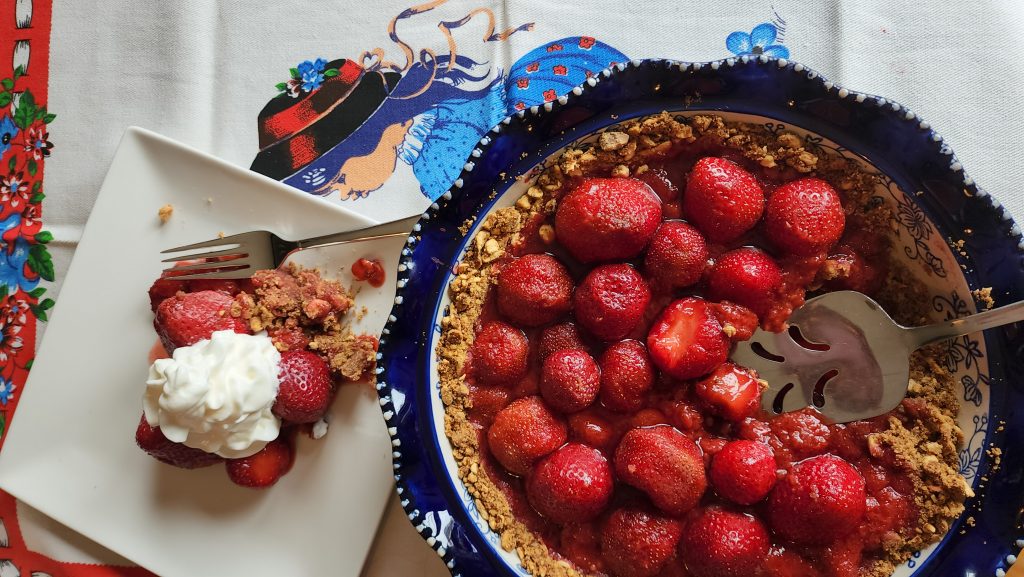
I went strawberry picking last week with my granddaughter. We made a delicious strawberry pie. This version is SUGAR FREE but visit this link for a regular STRAWBERRY PIE sweet version. I used pretzels and and almonds for the crust since they both have no sugar.


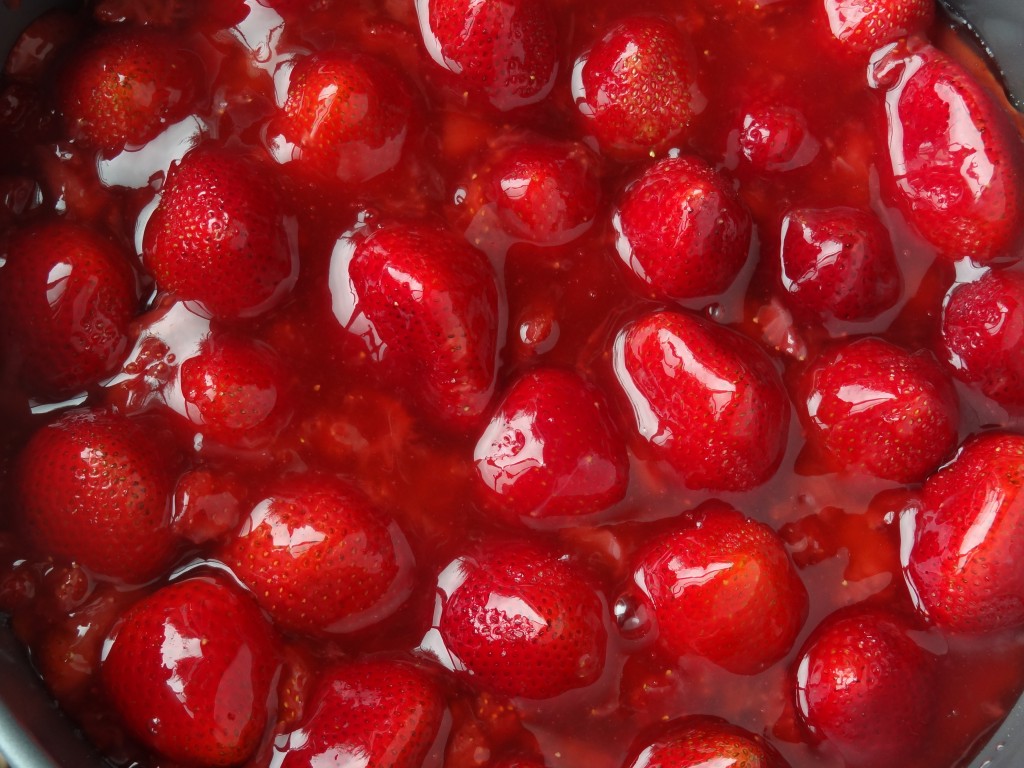
Strawberry Filling
2 and 1/2 quarts fresh strawberries (1/2 of them cut into quarters, leave the bigger ones for the top later)
1 cup monkfruit sweetener
3 tablespoons corn starch
1/2 cup water
1/4 teaspoon vanilla (optional)
Place strawberries, sweetener, vanilla and water in a saucepan. Cook until thickened for about 2 minutes. Mix cornstarch with a little cold water and dissolve. Add cornstarch to strawberries. Cook until you can see a line in the bottom of the pan when you form a line with a spoon. You may need to cook for about 3-5 minutes.
Poor the mixture in cooled crust leaving 1/4 for topping fresh strawberries. Arrange fresh berries on top of mixture and drizzle with the remaining cooked berries. Let cool for a few hours in refrigerator. Serve with fresh whipped cream. *Fresh whipped cream has 0 to only 1% added sugar*. This is optional of course.
Pretzel crust
1 and 1/2 cups mini pretzels

1/2 cup chopped almonds
1/4 cup monkfruit sweetener
1/2 stick butter softened
1 teaspoon cinnamon
Place pretzels, almonds, cinnamon and monkfruit in a processor and pulse until until crumbs form. Add butter and pulse until blended.
Form the mixture onto a pie plate and cook at 350 F. for 8 minutes. Let cool.
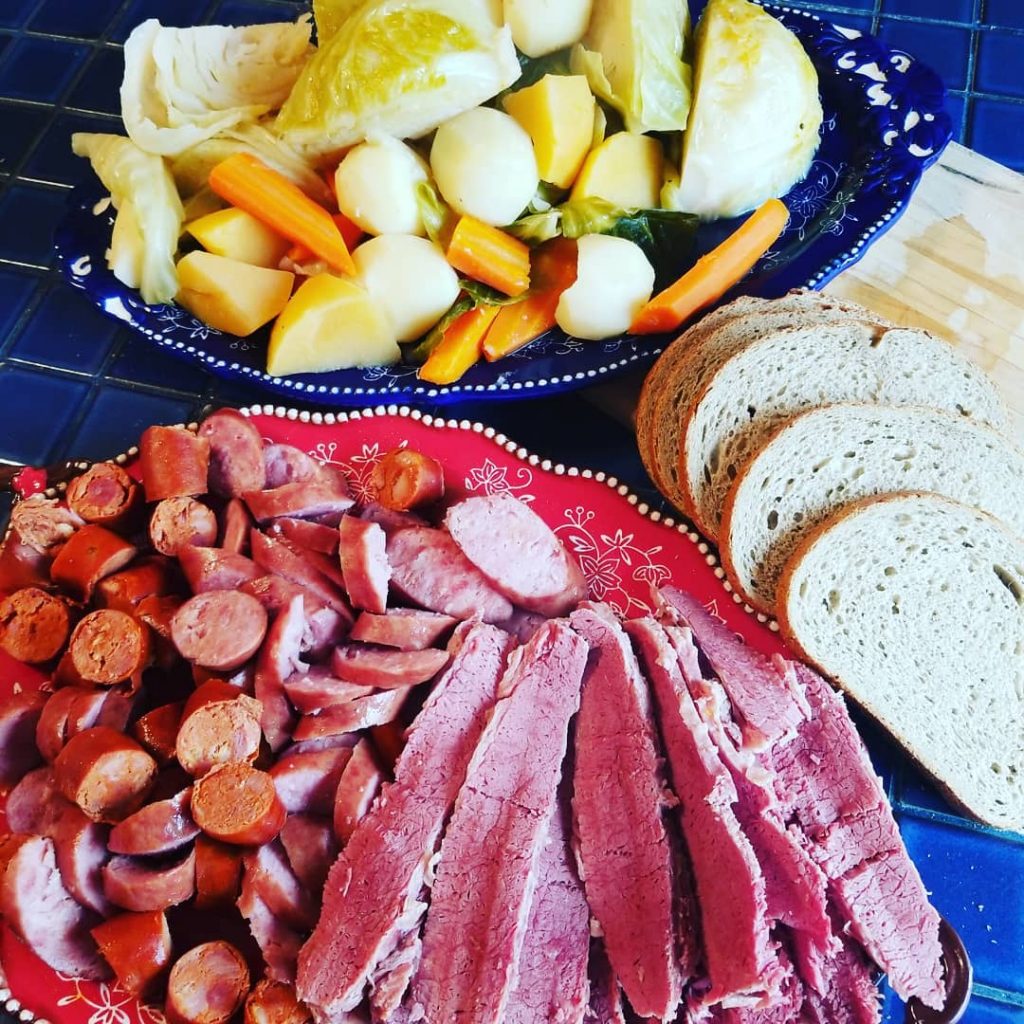
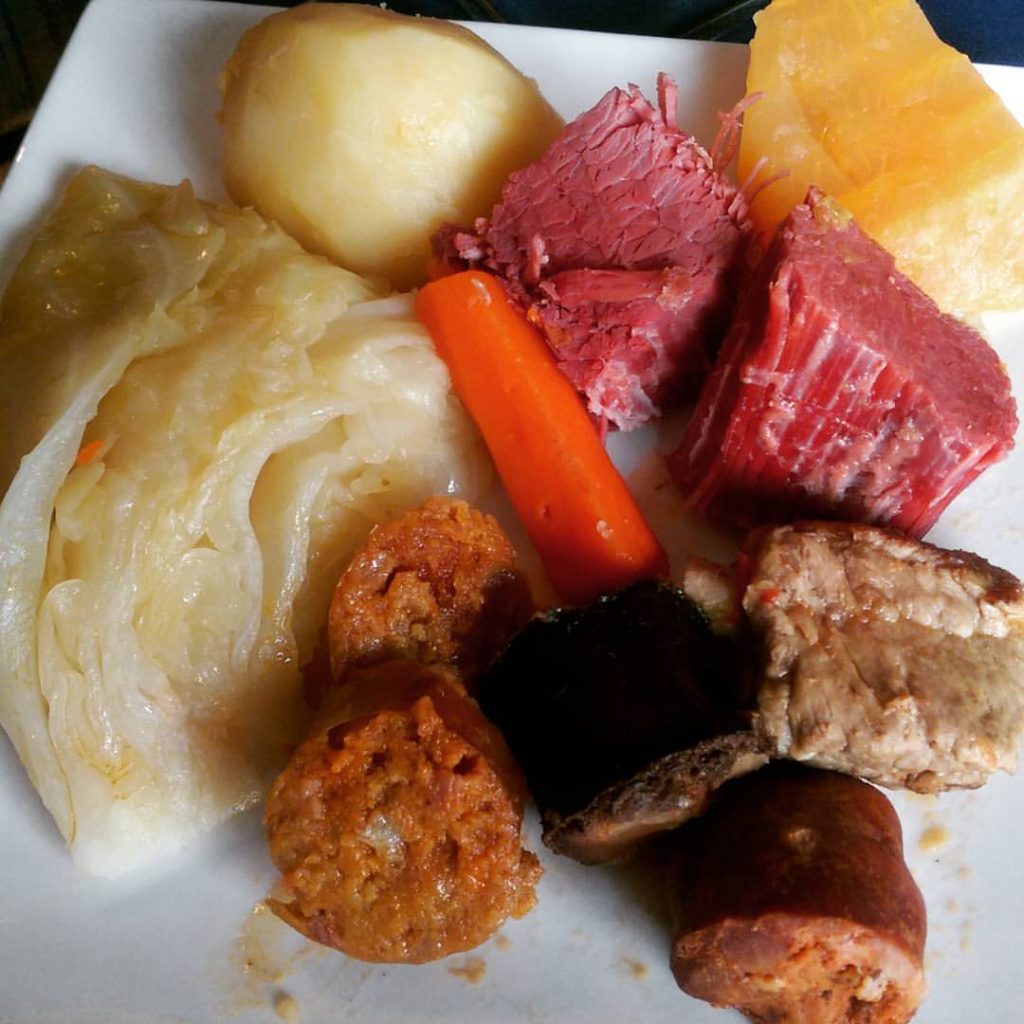
Happy Saint Patrick’s Day. I love cuisines of all nations. Every year I make my Corned Beef and Cabbage dinner with a Portuguese twist. My family loves it and they’re looking forward to me making it this month. Serve with delicious Irish soda bread, rye or any hearty bread.

Ingredients:
3 – 4 lbs corned beef brisket (with corned beef seasoning)
1 lb small pork ribs or beef ribs (optional) (cut in half if desired)
1 chourico sausage
1 farinheira sausage
1 morcella (blood sausage)
3 large carrots (cut into large slices0
10 medium potatoes (sliced into 1 inch slices)
1 large cabbage (cut into quarters)
1 onion (chopped into large pieces)
1 large rutabaga (cut into large pieces)
Preparation:
Cook corned beef as per directions (about 30 minutes per pound or until tender). Remove any scum that forms on the sides of pan as it cooks. When the corned beef is almost done about 1.5 hours add the ribs and let cook 30 minutes. Add potatoes, carrots, cabbage and remaining ingredients with the sausages on top. Remove the corned beef, and taste a potato. Add salt if needed and cook for a few minutes. Cover and let cook until potatoes and cabbage are tender.


Roasted Vegetables are so delicious and so easy to make. I like to make a large sheet pan so I can have leftover veggies all the next day. You can use any combination of chopped carrots, onions, squash, potatoes, cauliflower, brussel sprouts etc.
Toss in a large bowl with a olive oil salt, pepper, paprika and a little garlic powder or use my Taste Portugal Seasoning. Cook at 400 degrees F for about 20 minutes or until they are tender. Toss once in while as they bake.
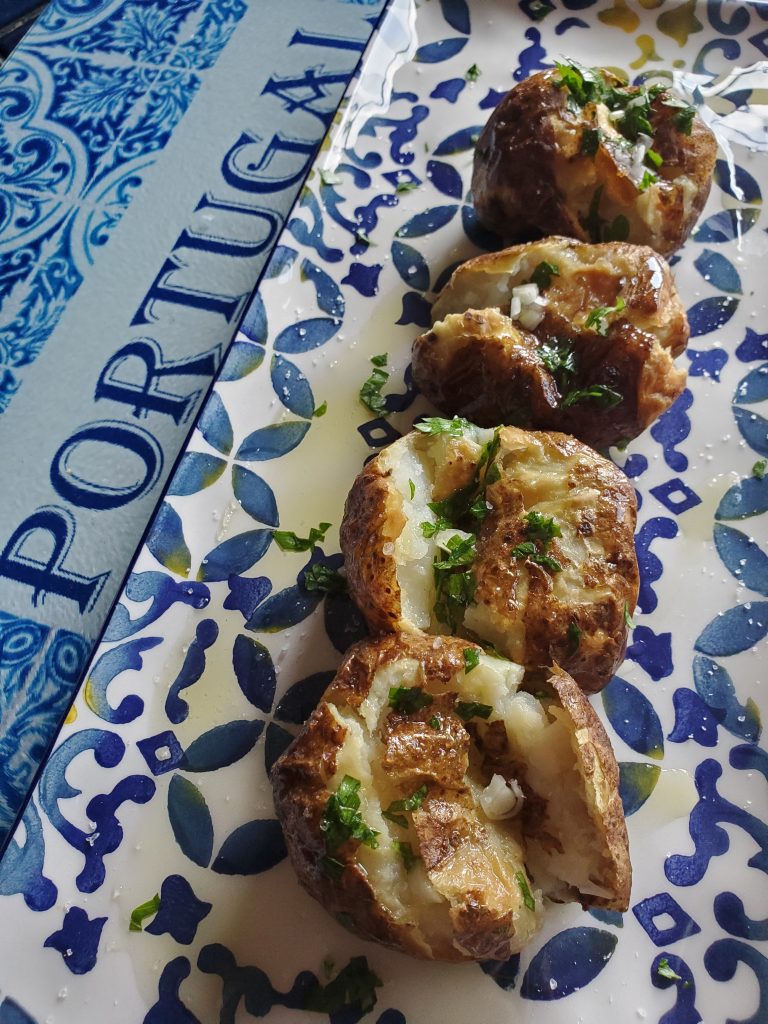
You can also bake the potatoes as in this video below. Follow same ingredients but bake for about 1 hour or until done.
Ingredients:
2 pounds any small or medium potatoes (washed and pat dry)
1/2 cup olive oil
3 to 4 cloves garlic (minced)
sea salt
parsley (minced)
more olive oil as needed
Preparation:
Place potatoes in a bowl and rub with about 1 tablespoon olive oil. Sprinkle with about 1 tablespoon sea salt.
Cook in air fryer at 400 F. for about 15-20 minutes. Shake pan once in while and pierce with a fork for doneness.
Meanwhile heat remaining olive oil with garlic for about 1 minute.
When potatoes are done, pour olive oil and garlic over them.
When ready to serve top with parsley and more salt as needed.

Ingredients:
1/2 pizza dough recipe
4 – 6 oz. (goat cheese or fresh farmers cheese )
2 cups fresh baby spinach
1/2 cup Portuguese fig jam (or any fig jam)
1/2 small red onion (very thin sliced)
2 tablespoons olive oil
1/2 teaspoon garlic powder
1/2 teaspoon dried oregano
2 oz Pecorino or Parmesan cheese (shredded)
Drizzle of olive oil
Dusting of flour Dusting of corn meal
Preparation:
Preheat oven to 425 degrees F.
Heat pizza pan in oven. Sprinkle pizza pan with a dusting of flour and corn meal. Roll out dough and put in sheet pan. Brush with 1 tablespoon olive oil and garlic powder. Spread fig jam evenly leaving 1 inch of edges without jam. Top with pieces of cheese, spinach and onions. Top with remaining olive oil, pecorino, and oregano.
Cook for about 15 minutes or until the crust is crispy.
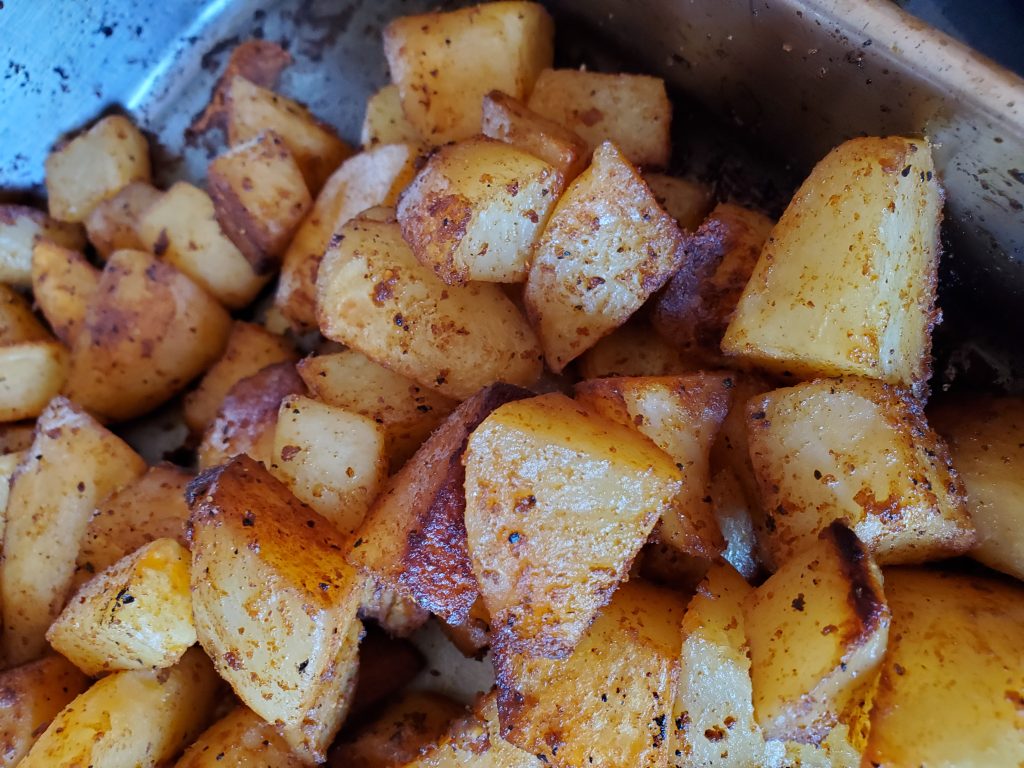
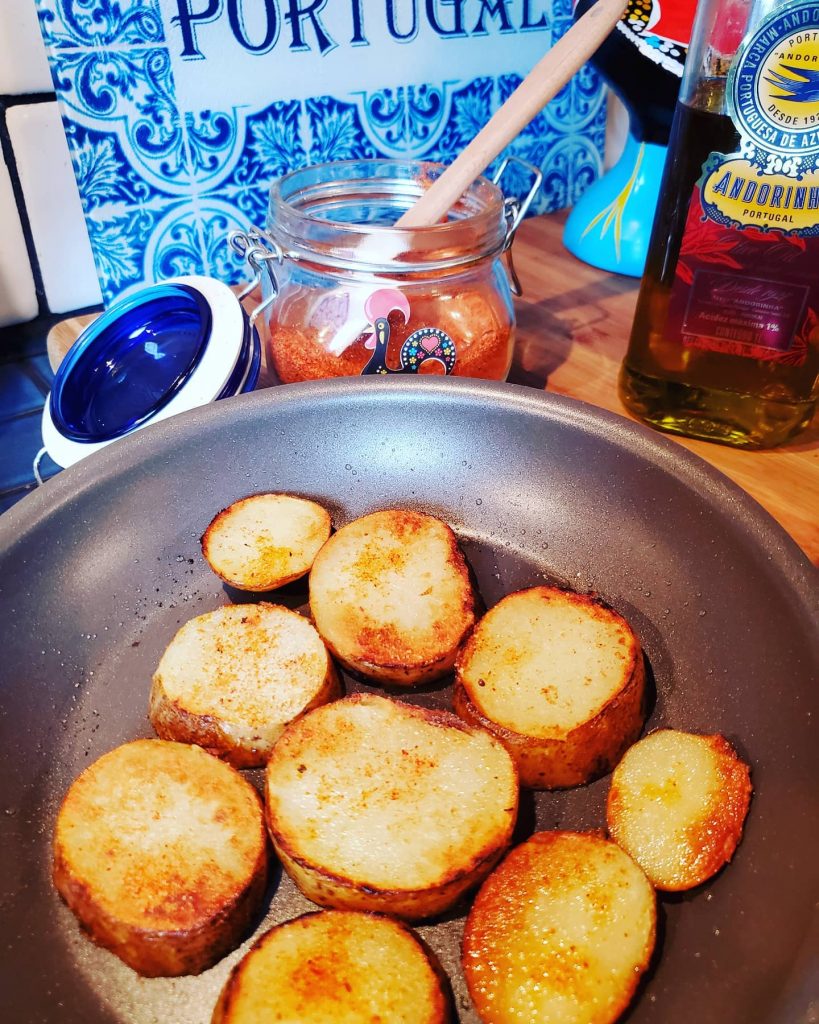
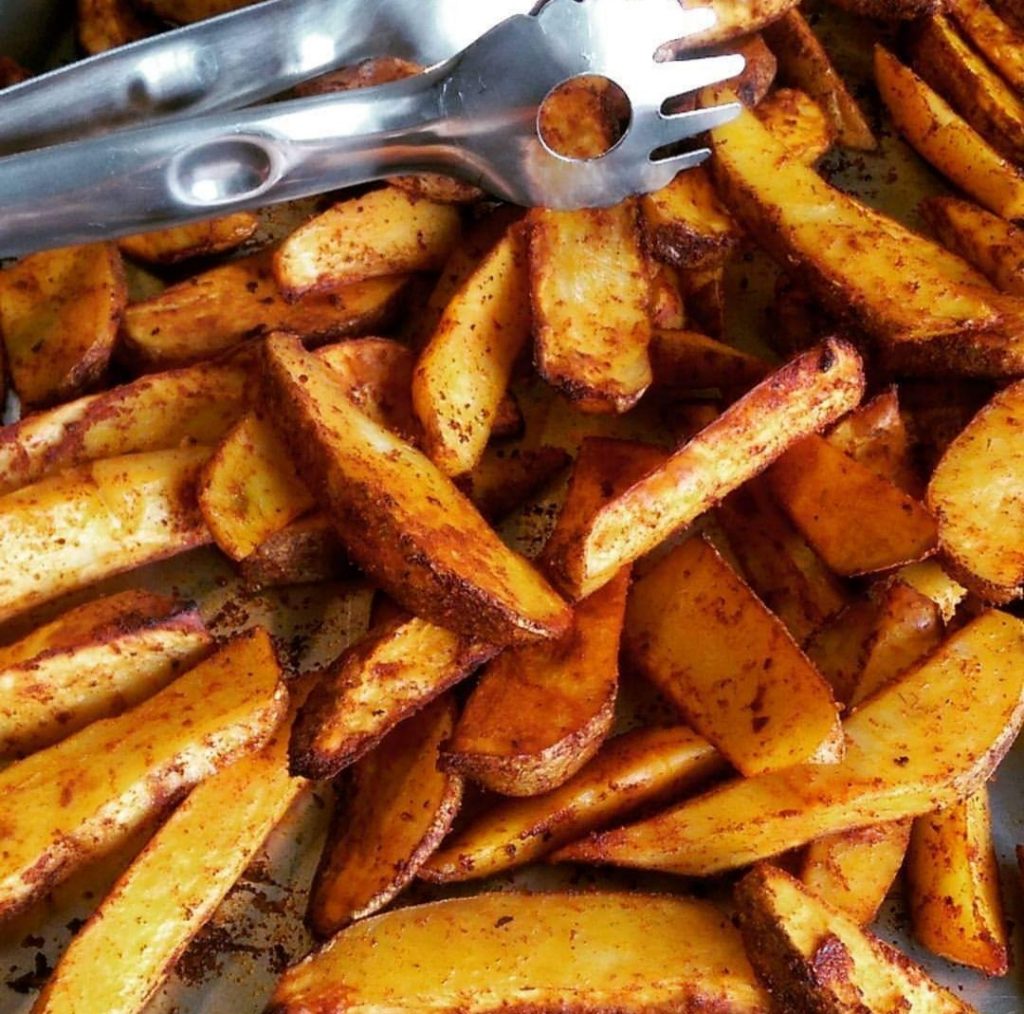
These crispy potatoes are easy to make. I make them along with my roast chicken, pork or roast beef. They cook in an hour and come out perfect every time.
Ingredients:
2-3 pounds cubed potatoes (about 1-2 inches)
1/4 cup olive oil
2 to 3 tablespoons my Taste Portugal Seasoning (I use 1 tablespoon per pound)
Preparation:
Find my Taste Portugal – Tia Maria’s Portuguese Seasonings at:


Ingredients:
Dough Makes 1 large or 2 small breads
3 1/2 cups of flour
1 teaspoon sugar
1 envelope instant dry yeast
2 teaspoons salt
1 and 1/2 cups warm water
2 tablespoons olive oil
Preparing dough:
In a medium bowl mix the dry ingredients. Add the water and oil and mix until a ball forms. It you find the dough too sticky add more flour. Grease a large bowl with olive oil and add the dough rolling it to coat with the oil. Cover with plastic wrap, cover with a warm towel, and place in a warm place for about 1 hour or until the dough doubles in size.
Filling:
8 – 12 oz Spinach dip
8 – 12 oz marinated artichokes (chopped)
1 and 1/2 to 2 cups mozzarella cheese (shredded)
1/4 cup pecorino or Parmesan cheese (grated)
1 teaspoon dried oregano
olive oil
flour and corn meal for coating
Preparation:
When dough has risen spread into a rectangle on a sheet pan that has been lightly floured and dusted with corn meal. Brush with a little olive oil. Mix spinach dip, artichokes, and half of mozzarella in bowl and spread evenly on dough leaving 1 inch with dough only on each side. Top with oregano, remaining mozzarella and pecorino cheese.
Gently roll up the dough and pinch sides and edges. Brush with a little olive oil and a dusting of flour. Make a few slits with a knife on bread. Let sit until oven is preheated to 425 degrees F. Cook for about 20-30 minutes or until golden brown.


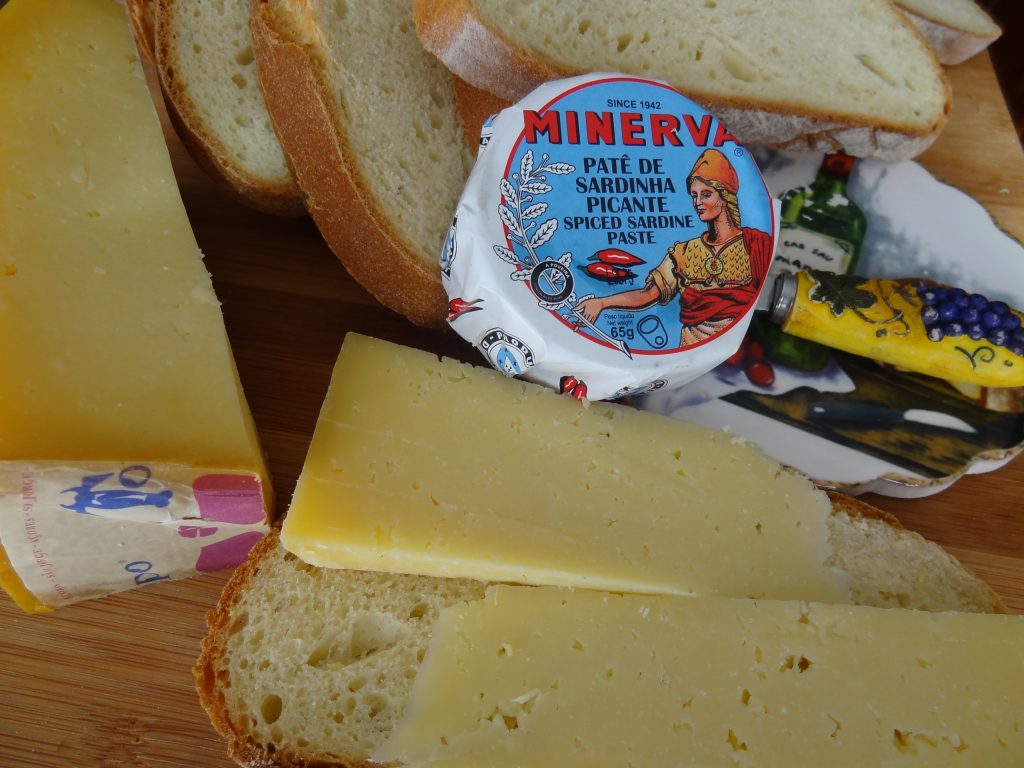
I love anything with lemon and one of my favorite cheeses is São Jorge making this dish one of my all time favorite’s. “Queijo São Jorge” is made with raw cow milk on the Azorean island of São Jorge where the lush pastures for grazing allows for a vast production of cow milk. An easy main or side dish for any occasion. If you can’t find Sao Jorge Cheese try Spanish Manchego cheese as a substitute.

Ingredients:
1 pound pappardelle pasta
1/2 cup Sao Jorge cheese (grated)
2 lemons (zested and juiced)
1/2 stick of butter (melted)
1 tablespoon olive oil
salt
4 tablespoons fresh parsley (finely minced)
Preparation:
Cook pasta in salted water, and drain. Place back into pan on low heat. Mix the lemon zest and juice with the butter and add to pasta. Mix gently. When ready to serve add parsley.
Cooking Portuguese is easy! Watch my videos for Piri Piri Frango Churrasco and Baked Piri Piri Chicken!
ORDER SET OF SPICES 1 REGULAR AND 1 SPICY ON PAYPAL OR SCAN QR CODE
FREE SHIPPING IN USA!
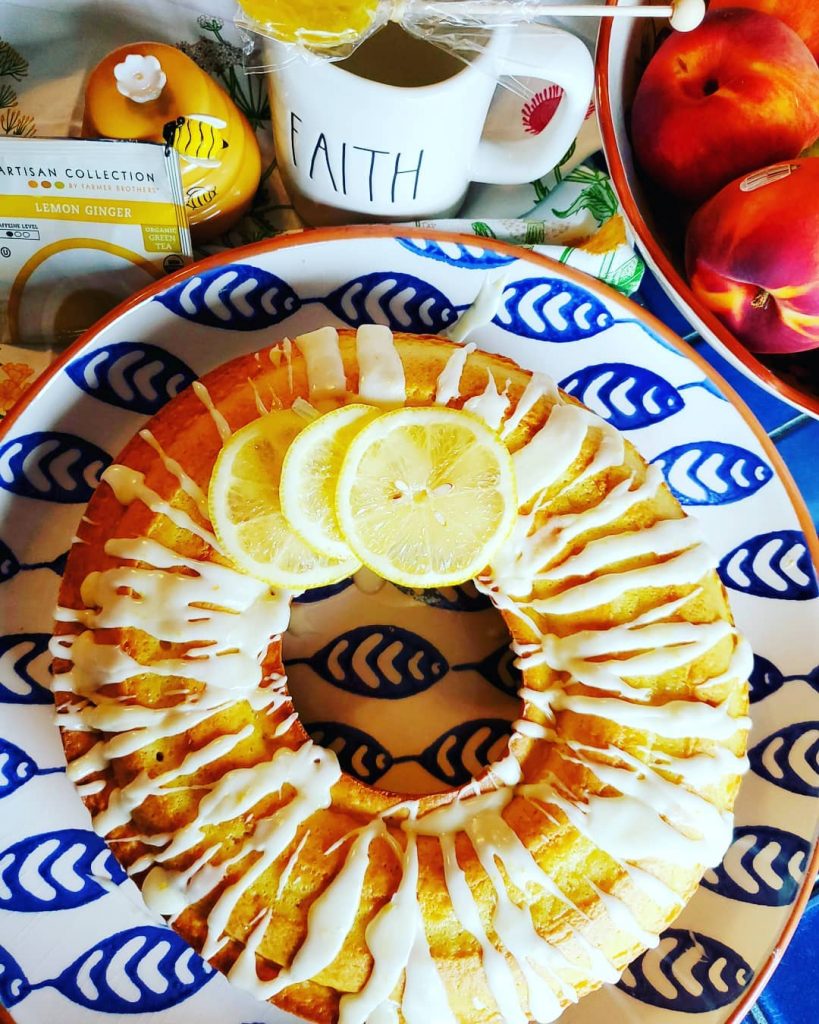
Ingredients:
2 and 1/2 cups flour
3 eggs
1 and 1/2 teaspoon baking powder
1/2 teaspoon salt
1 and 1/4 sticks softened butter
3/4 cups milk
1 and 1/2 cups sugar
1 lemon (zested and juiced)
1 cup confectioners sugar
2 teaspoons milk
Preparation:
Preheat oven to 350 degrees F.
Beat eggs with sugar until lemony. Beat in milk.
Mix flour, salt, baking powder, lemon zest and butter. Add into egg mix and beat until smooth.
Grease a bundt pan or loaf pan. Pour in batter. Cook for 1 hour or until toothpick comes out clean.
Mix confectioners’ sugar with 2 teaspoons of milk and lemon juice. Mix until smooth and creamy.
Add more milk or sugar if needed. Spoon glaze over cooled cake.
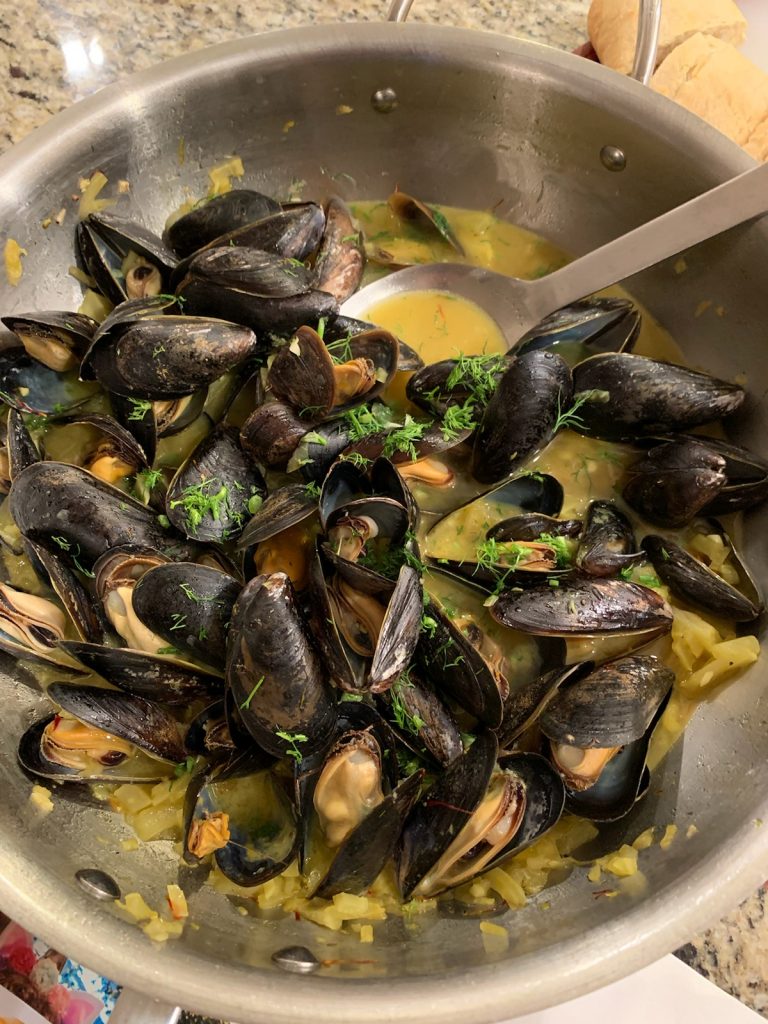
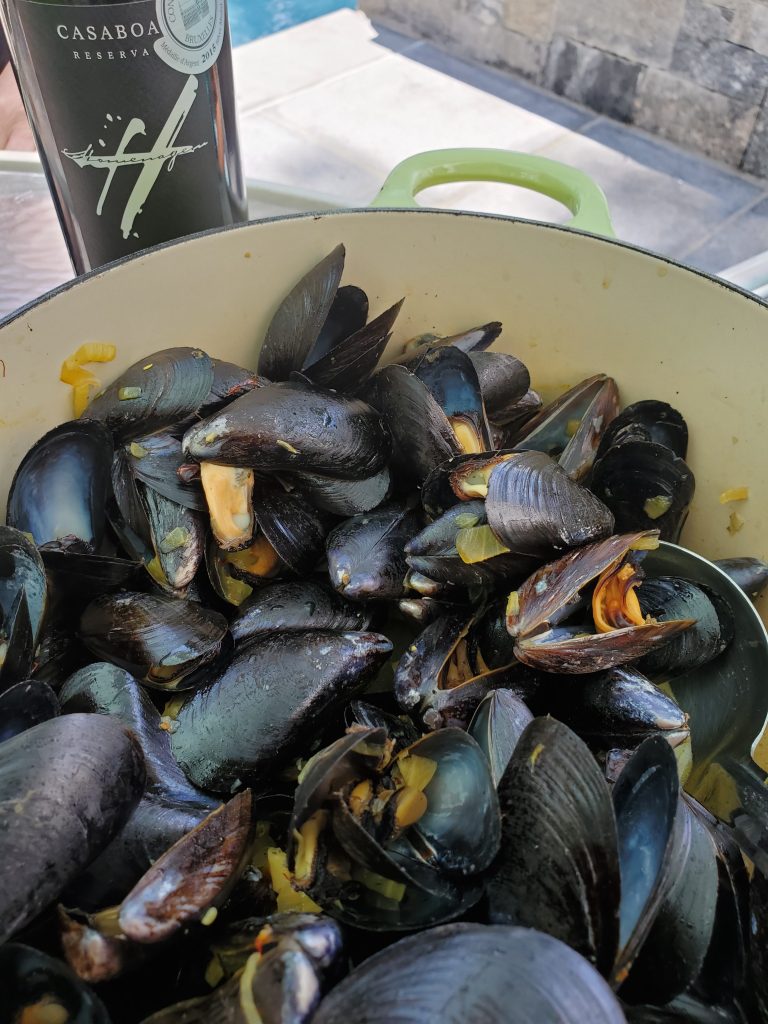
Ingredients:
3-4 pounds mussels (cleaned)
1 large onion (minced)
3 cloves garlic (minced)
1/4 cup fennel (minced)
1/4 cup olive oil
1 teaspoon salt
1 teaspoon black pepper
pinch of saffron
1 cup white wine
1 cup chicken broth
1 cube (Knorr Garlic Cilantro cubes)

parsley, or fennel leaves for garnish (finely minced)
Preparation:
Saute the onion, garlic, and fennel in olive oil with the salt and pepper for 10-15 minutes until tender. Add wine, chicken broth, saffron and cilantro cube. Cook and reduce by 1/2.
Add the mussels, cover and cook for about 10 minutes or until the mussels open.
Top with the fennel leaves or parsley as garnish before serving.


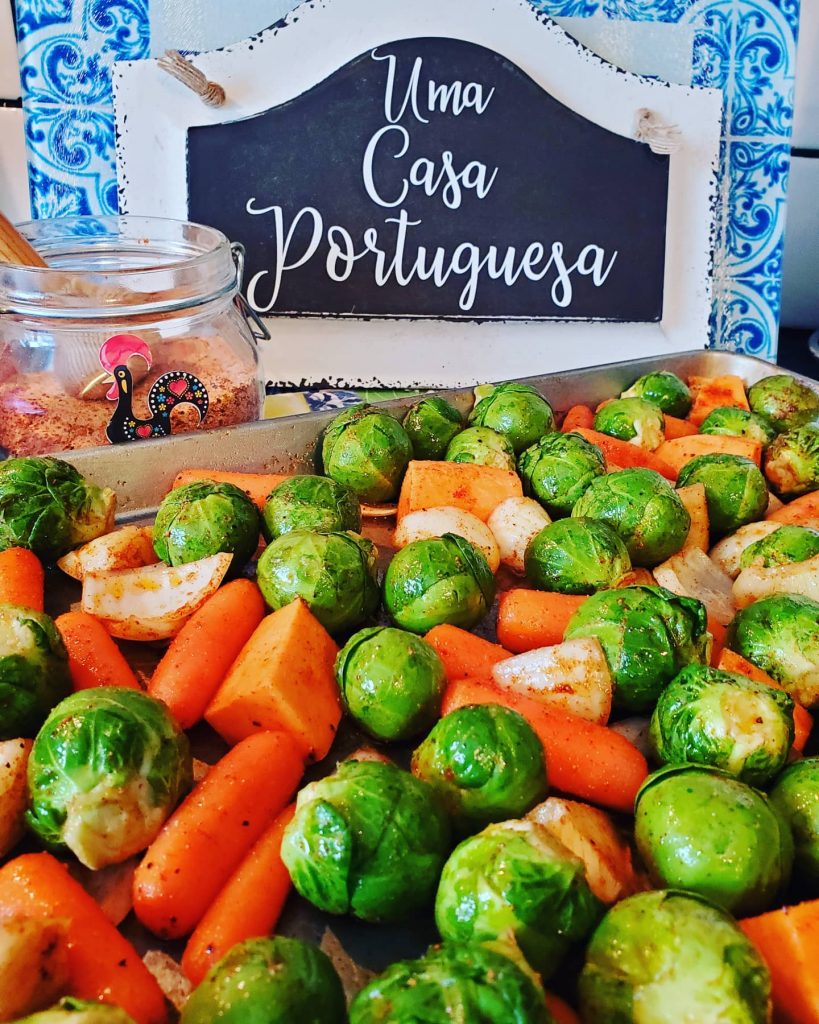
Sheet Pan Sausage Bake is an everyday go-to dish. One pan is all you need to bake and serve! It’s a side dish or main dish.

You can mix up the ingredients by using sweet potatoes or other vegetables like using broccoli in the image below.

Ingredients:
2 pounds Italian sausage or (**chourico/linguica – Portuguese sausage – see instructions for cooking**)
1 pound white or sweet potatoes (skin on, cut into cubes or wedges)
1 pound fresh or frozen brussel sprouts
1 pound baby carrots
2 tablespoons olive oil
1 large onion (chopped)
1 large red bell pepper (chopped optional)
1 1/2 or 2 tablespoons my Taste Portugal Seasoning mix order here on Lisbon Blue Esty shop
Preparation:
Place all ingredients in a large bowl. Mix well to coat. Place in a large slightly greased sheet pan.
Cook at 400 degrees F. for about 1 hour or longer until sausage is crispy. Note: Add chourico during last 30 minutes of cooking if you use chouriço. Shake pan once in a while to stir. Use a spatula to turn over. I like a crispier bake so cook longer if needed.
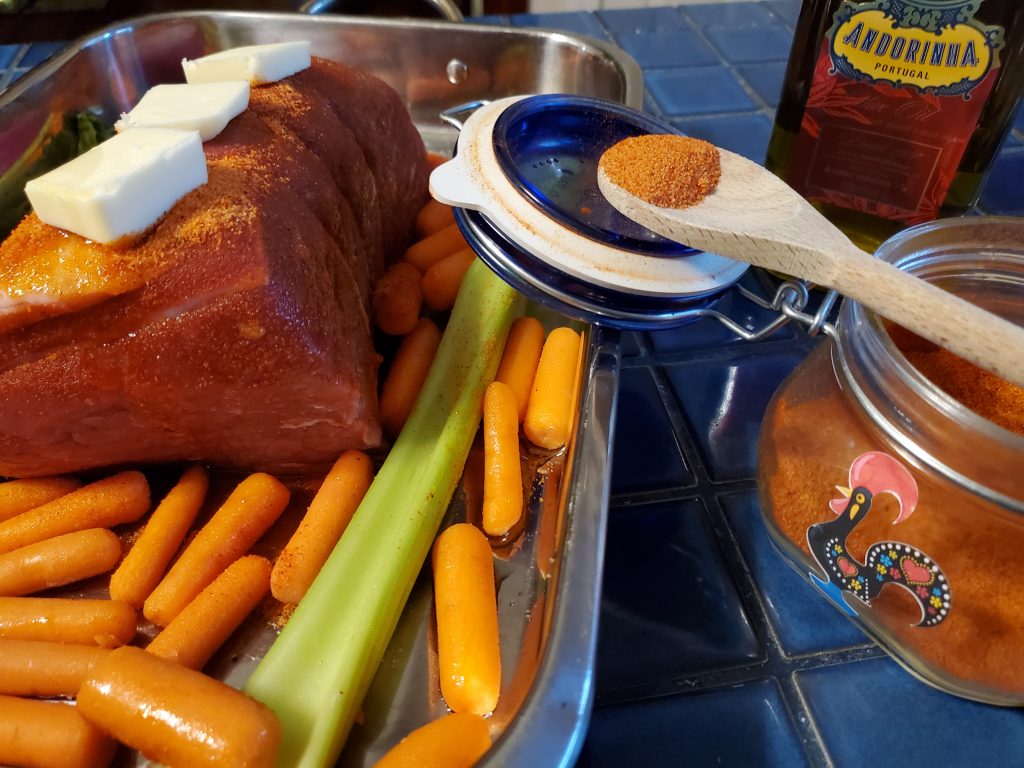
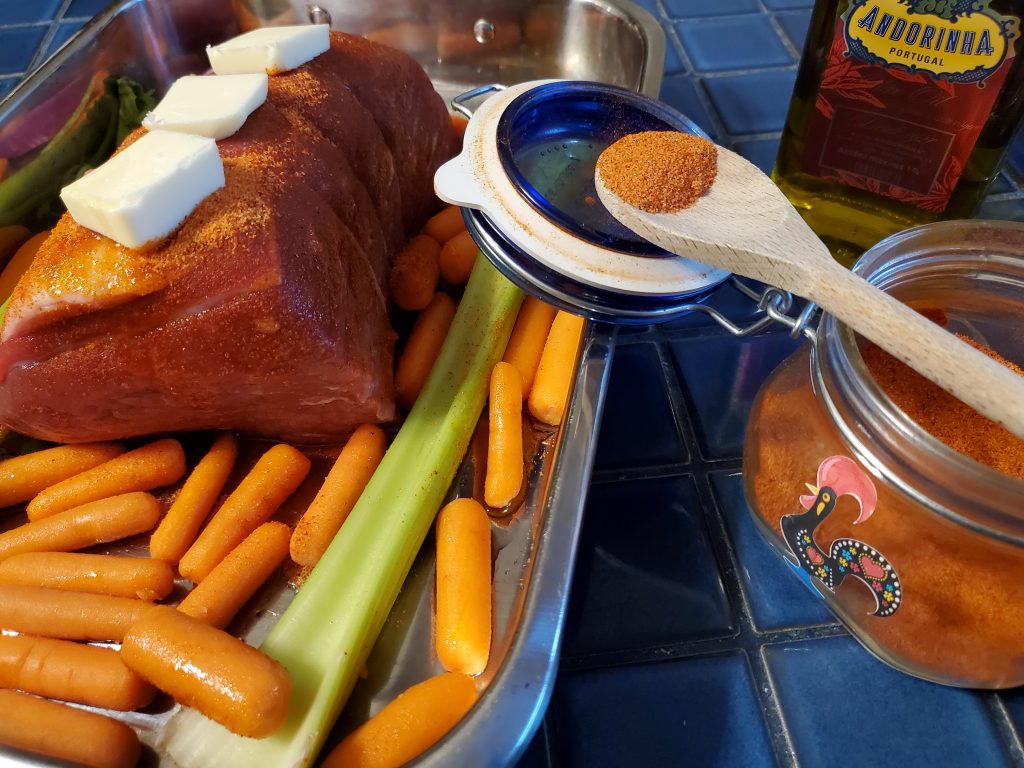
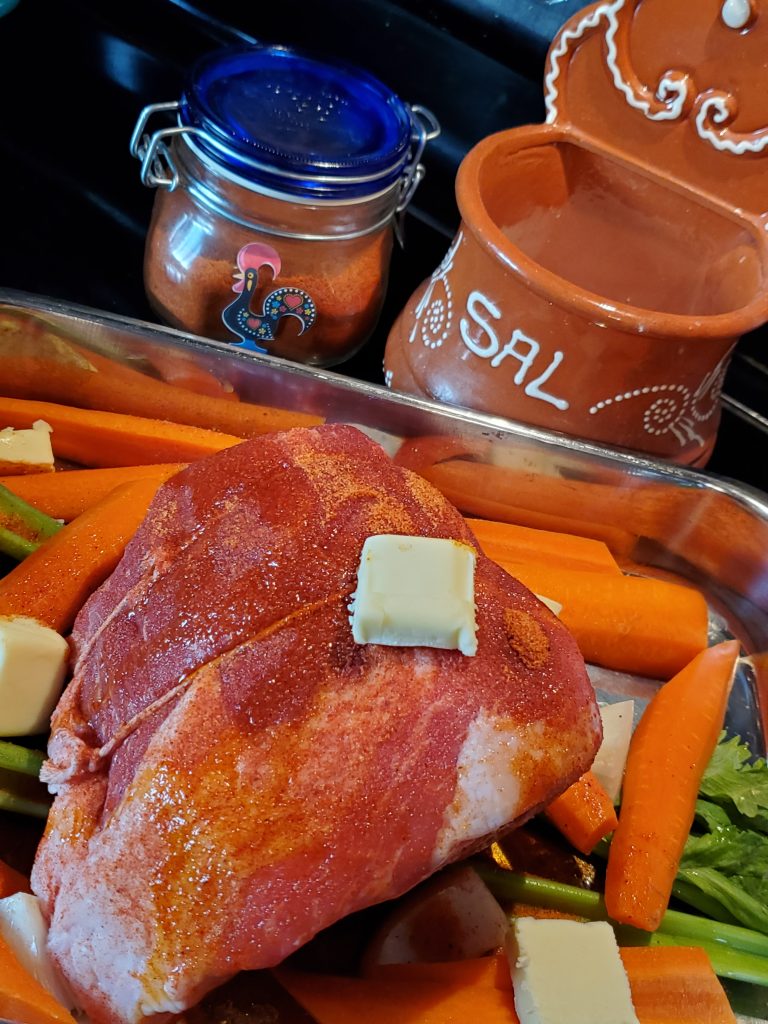
This savory roast beef will be your go to recipe. I make this dish a lot since it’s a family favorite and the best part is that leftovers all week are delicious. I make steak sandwiches, serve it with some gravy and potatoes and also beef quesadillas.

Ingredients:
1 (3 to 4 pound roast beef) (top round or bottom round is best but you can use all types of roasts)
2 to 3 tablespoons my spice mix (order here) Lisbon Blue Etsy Shop or Amazon
1 tsp coarse salt
1 large onion (chopped)
2 large carrots (chopped)
2 stalks celery (cut in half)
1/4 cup olive oil
3 tbsp butter
Preparation:
Let roast come to room temperature (about 30 to 45 minutes out of refrigerator). Place roast in a large sheet pan. Season beef and vegetables with spices and top with olive oil and butter. Stir vegetables to coat with olive oil and spices.
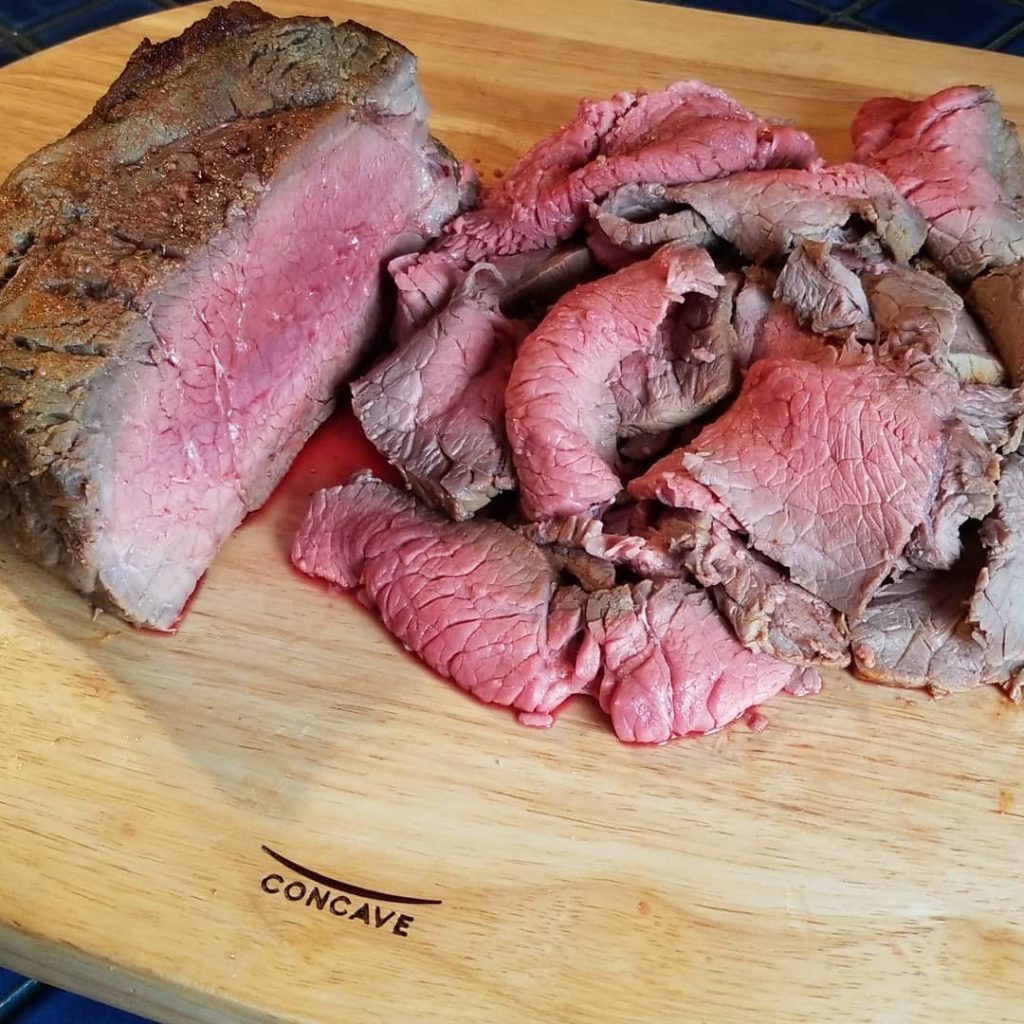
Heat oven to 450. Place roast in oven for 10 minutes. Reduce heat to 425 degrees F. Cook for 50 min. Shake pan half way into cooking. Let rest 30 minutes before slicing very thin.
Make a gravy by straining the pan juice into a saucepan. I take a short cut by adding a jar of beef gravy to pan. Stir and serve over the roast beef. Serve with vegetables if desired.
Note* I like my roast medium rare. Cook longer if you prefer.
Enjoy!

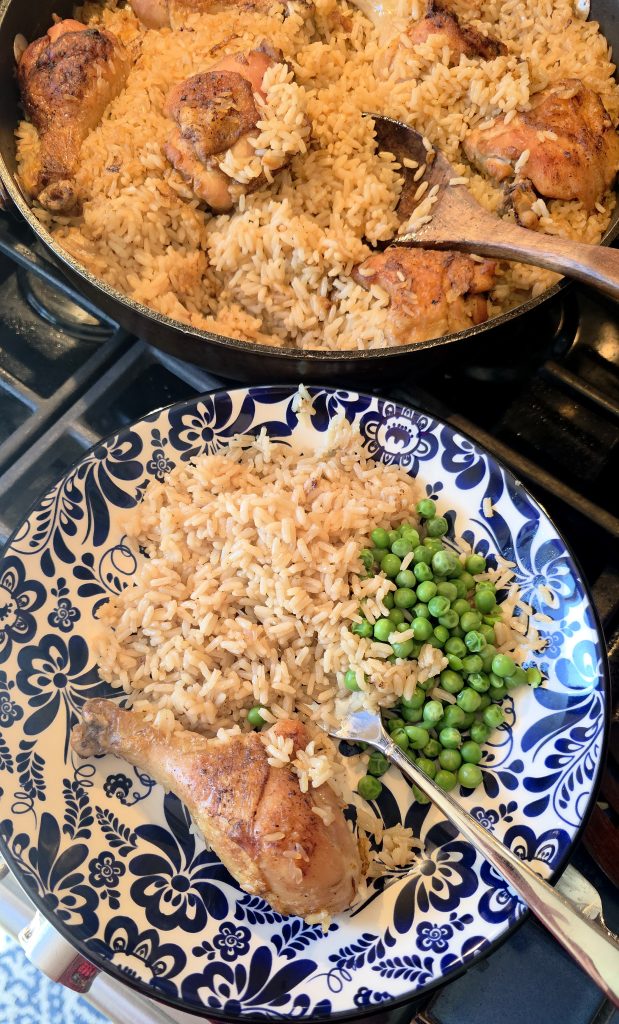
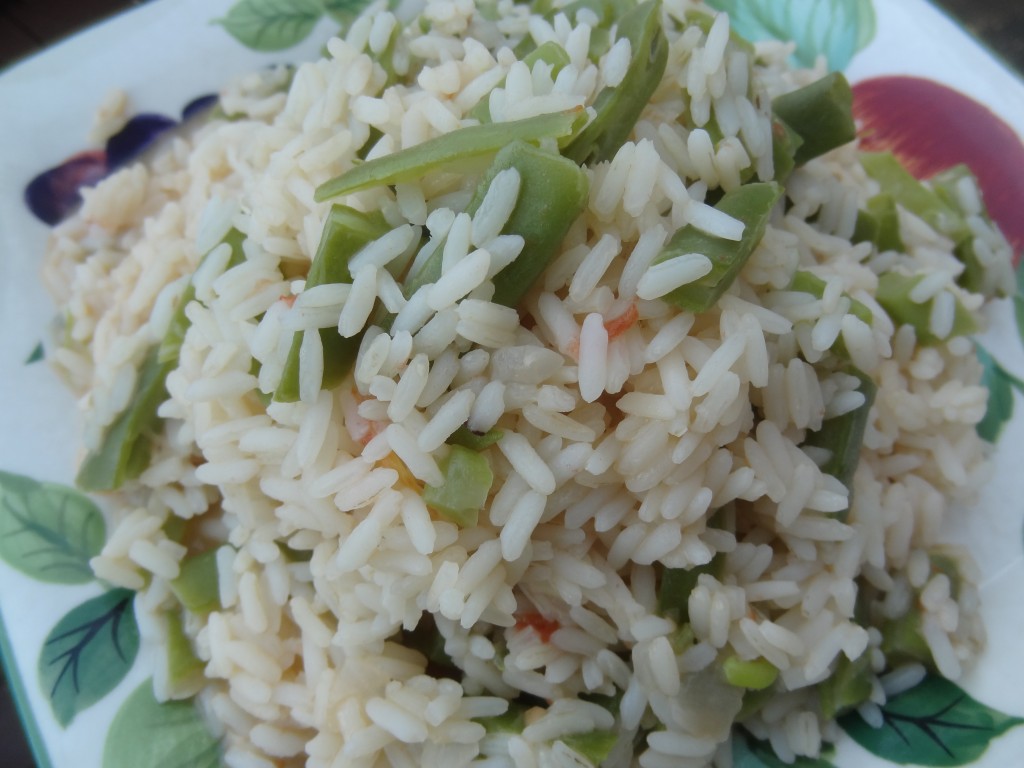
Summer vegetables from my garden make this Chicken and Veggie Rice. I also make this Rice and Green Bean version without chicken. It’s delicious as a mean dish or serve as a side dish.


8 to 10 pieces of chicken (I used drumsticks and thighs) (remove skin if desired)
2 cups long grain rice
1 medium onion (finely chopped)
2 large carrots or 8 oz baby carrots (chopped)
1 pound fresh green beans (chopped)
2 tablespoons olive oil
2 tablespoons salt
1 teaspoon pepper
1 teaspoon garlic powder
1/4 teaspoon paprika
1 bay leaf
5 cups boiling water
1 chicken bouillon cube or 1 cup chicken broth
chopped parsley for garnish
Preparation:
Season the chicken with the spices and let marinade for a few hours or overnight in the refrigerator.
Brown the chicken on both sides in the olive oil in a very large deep skillet. Add the onion and bay leaf and saute for about 5 minutes.
Add water, bouillon, cover and let simmer for about 30 minutes.
Add the vegetables and rice. Stir let come to a boil and cover. Let cook for about 15 minutes longer. Taste the rice for doneness.
I like a firm rice, but if you prefer a more well done rice cook longer. Add more boiling water if you find the rice has dried out.
When ready to serve top with chopped parsley.


Ingredients:
1 package of egg rolls wrappers (about 25)
1 pound of chourico or breakfast sausage (chopped finely)
1 dozen eggs (beaten)
1 small onion (minced)
1/2 cup shredded cheese
1 egg (beaten with 1 teaspoon water)
1 tablespoon olive oil
2 tablespoons parsley (minced)
salt and pepper to taste
hot sauce or piri sauce for garnish (optional)
cooking spray (for baking or air frying)
vegetable oil for frying
Preparation:
Heat the olive oil in large saute pan. When the oil is hot add the onion and chourico and cook for a few minutes until slightly crispy. Add the eggs and mix. Let cook while mixing to make a scramble. Add desired salt and pepper. Add piri piri if you want it spicy.
When cooked add parsley and mix in. Set mixture aside to cool.
Baking:
Preheat oven at 350 degrees F. Place 2 – 3 tablespoons of the filing in center of the wrapper and fold in the ends toward the center. Brush edges with egg wash. Fold in sides and roll like a jelly roll. Repeat.
Coat a baking pan with cooking spray and place the rolls evenly in pan. Brush tops of the egg rolls with cooking spray. Cook for about 12-15 minutes or until golden brown.
You may need to turn the egg rolls over to get all side crispy but this is optional.
Note: You can also fry them in hot oil until golden.
Frying:
Fry in oil for about 5-8 minutes until very golden crispy. Place on paper towels to absorb any grease.
Air Frying:
Spray prepared egg rolls with cooking spray on both sides. Cook at 400 degrees for about 8-10 minutes turning them over half way into cooking process.
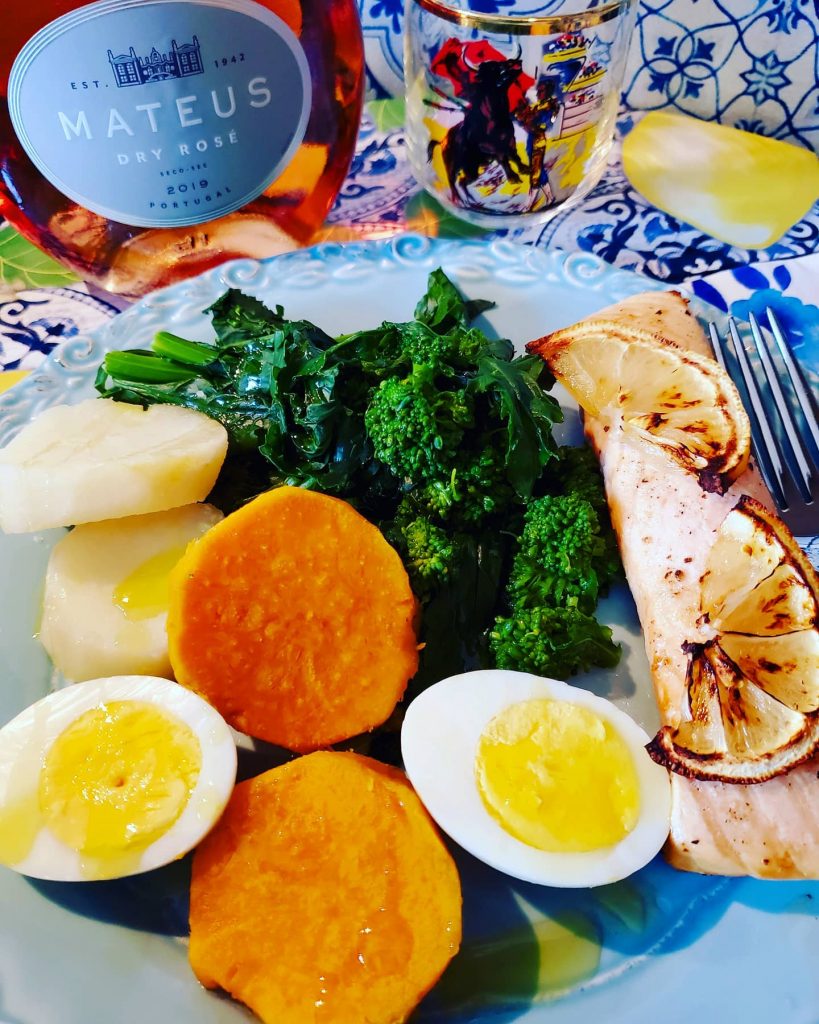
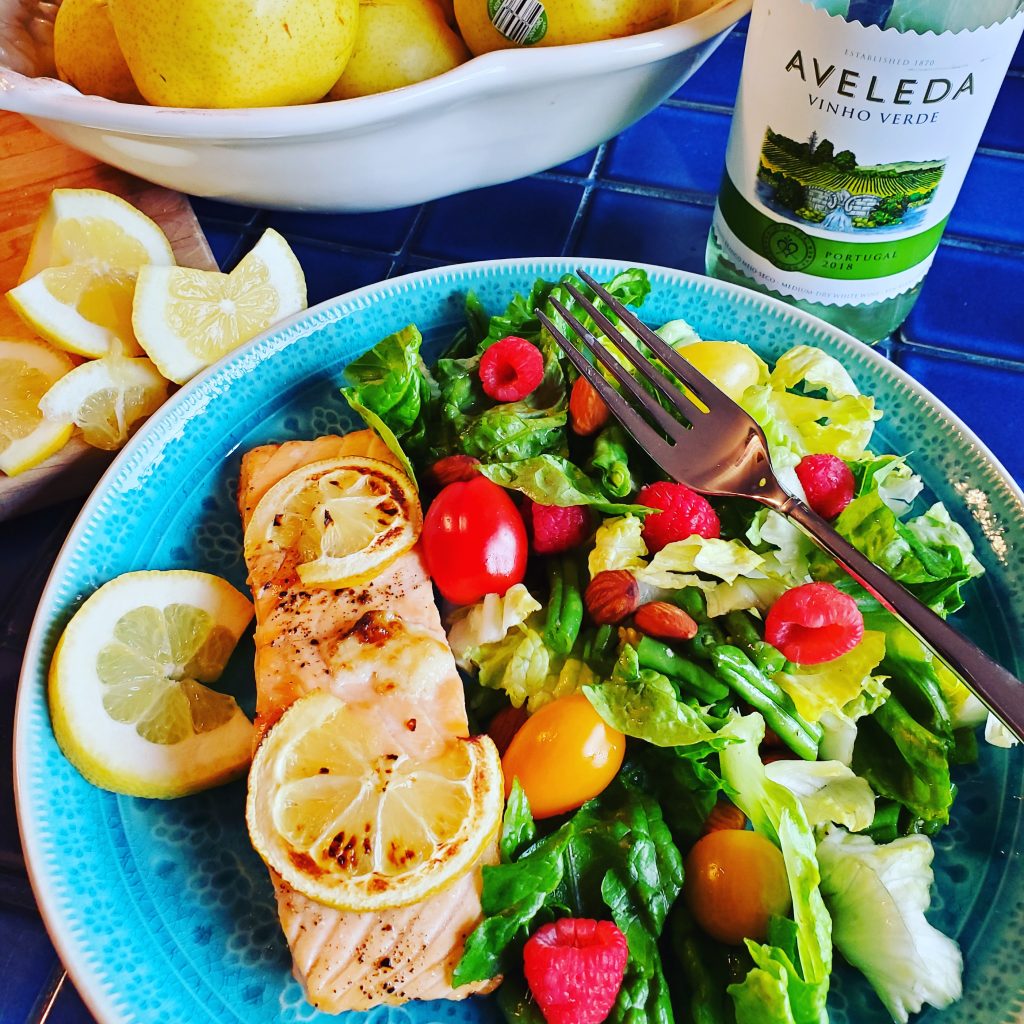
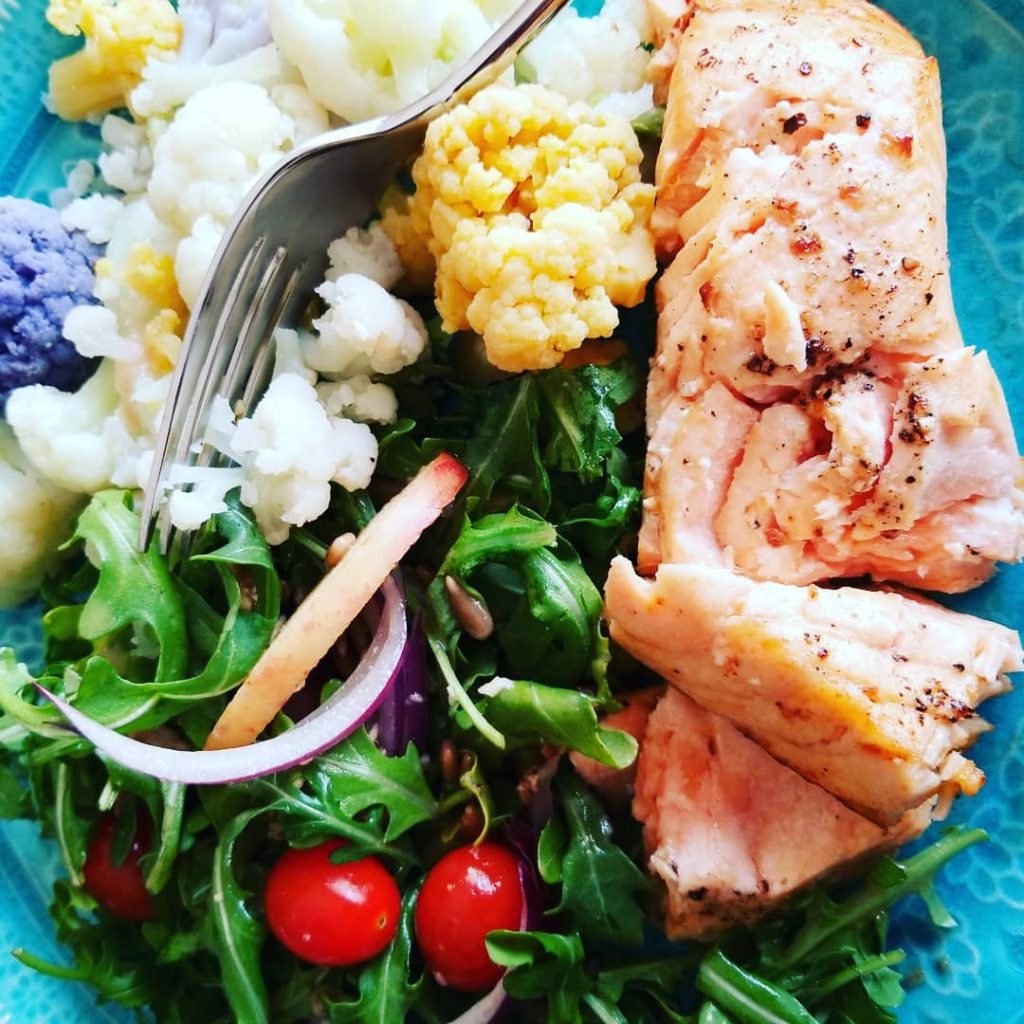
I love the beautiful colors and simple flavors of one of my favorite dishes. So healthy, delicious and easy to make. You can make this with or without the potatoes. I often serve the salmon with a fresh salad for a lite lunch. One of my favorite Portuguese wines; Mateus Rose or Vinho Verde or white wine pairs perfectly with this dish.
Ingredients:
2 (6-8 oz) portion salmon
2 white potatoes
2 sweet potatoes
2 hard boiled eggs (optional)
1 lb fresh broccoli rabe
olive oil
red or white wine vinegar
salt
pepper
Preparation:
Peel and slice potatoes into 1/2 rounds and cook in salted water for about 15 minutes or until cooked. Drain and set aside.
Wash broccoli rabe and cut the bunch in half or thirds. Cook in salted boiling water for about 15 minutes or until tender. Drain and set aside.
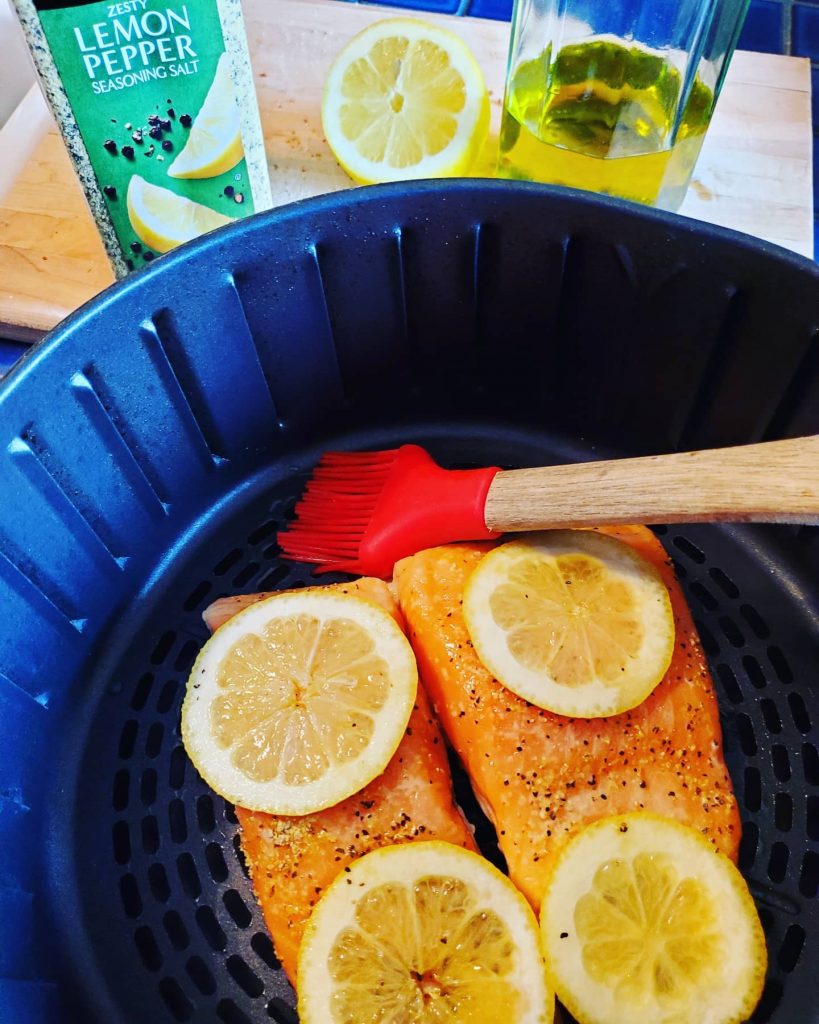
Meanwhile, brush salmon with a little olive oil, and season with salt, pepper and and lemon juice. Place in air fryer with thin lemon slices on top. Cook at 400 degrees F for about 8 minutes.
Serve salmon with a few slices of potatoes, brocolli rabe and egg.
Drizzle with olive oil and a little vinegar.
Don’t forget the wine of course!

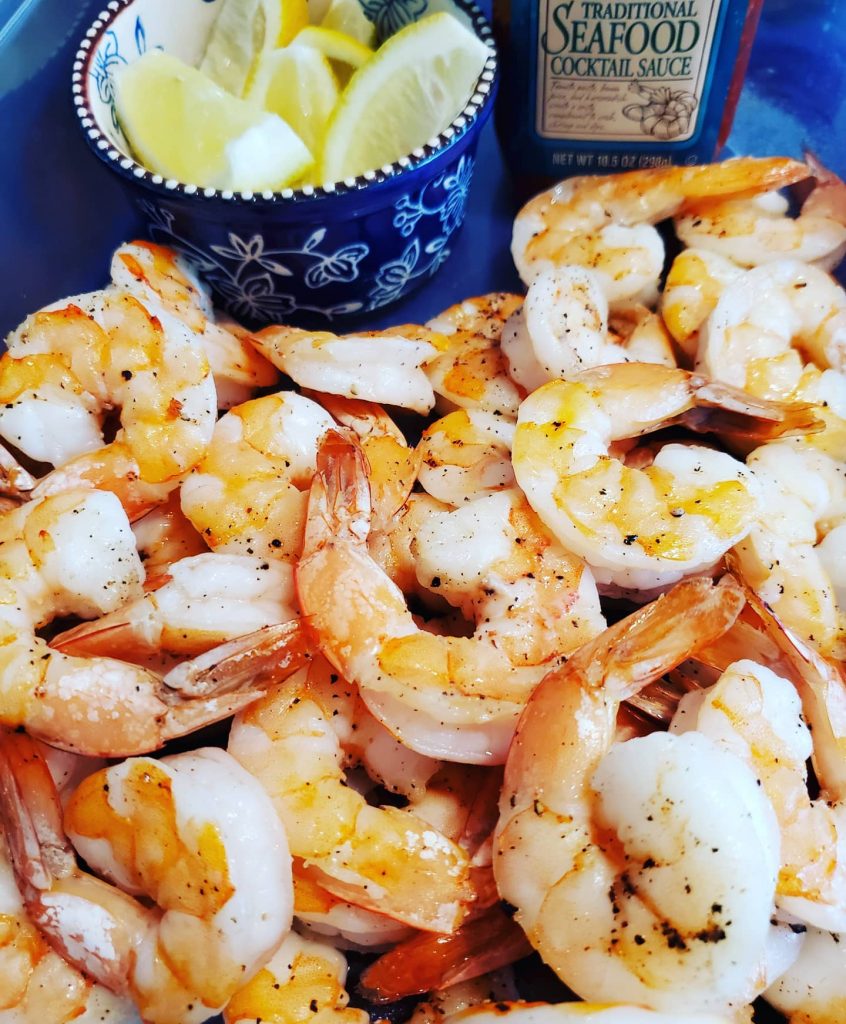
You’ll love this easy way to prepare shrimp cocktail. It’s delicious and it cooks in only about 10 minutes. No need to buy those expensive cocktail shrimp you’ll find in your supermarket.
Ingredients:
2 pounds medium raw shrimp (shelled with tail on, and de veined)
sea salt
crushed black pepper
1/2 tablespoon olive oil
lemon wedges for garnish
cocktail sauce for dipping
Preparation:
Heat oven to 400 degrees F. Grease a large sheet pan with oil or spray. Place shrimp in a bowl and season with salt, pepper and oil. Place raw shrimp on pan in single layer. Cook for about 8-10 minutes until cooked. Let cool and serve with lemon wedges and cocktail sauce.S
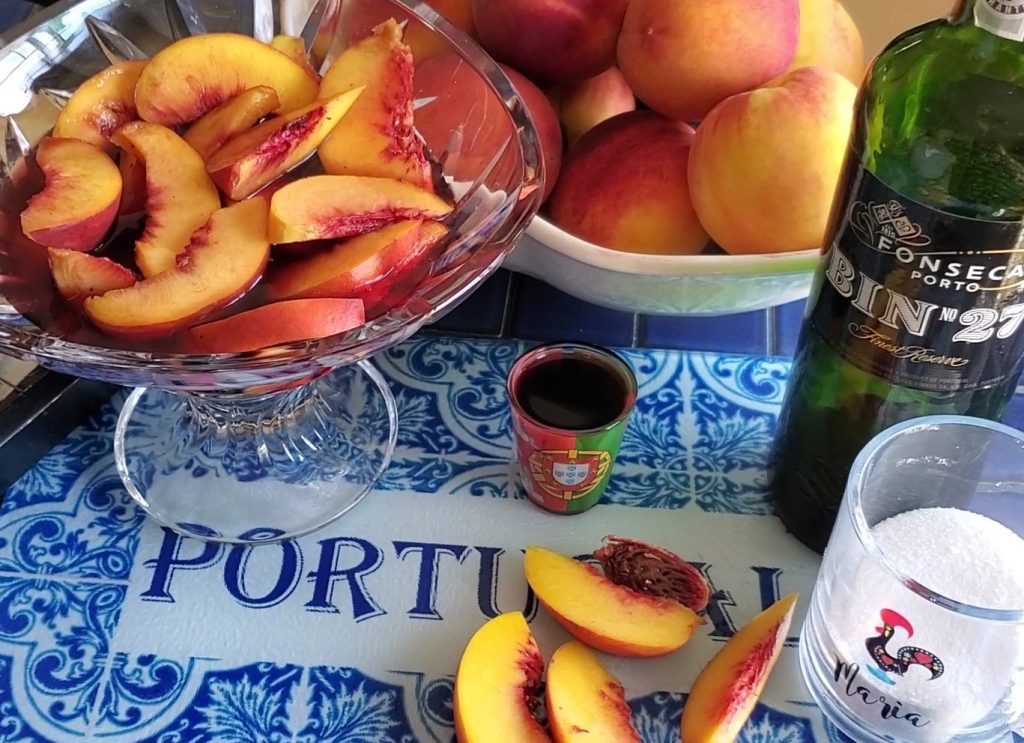
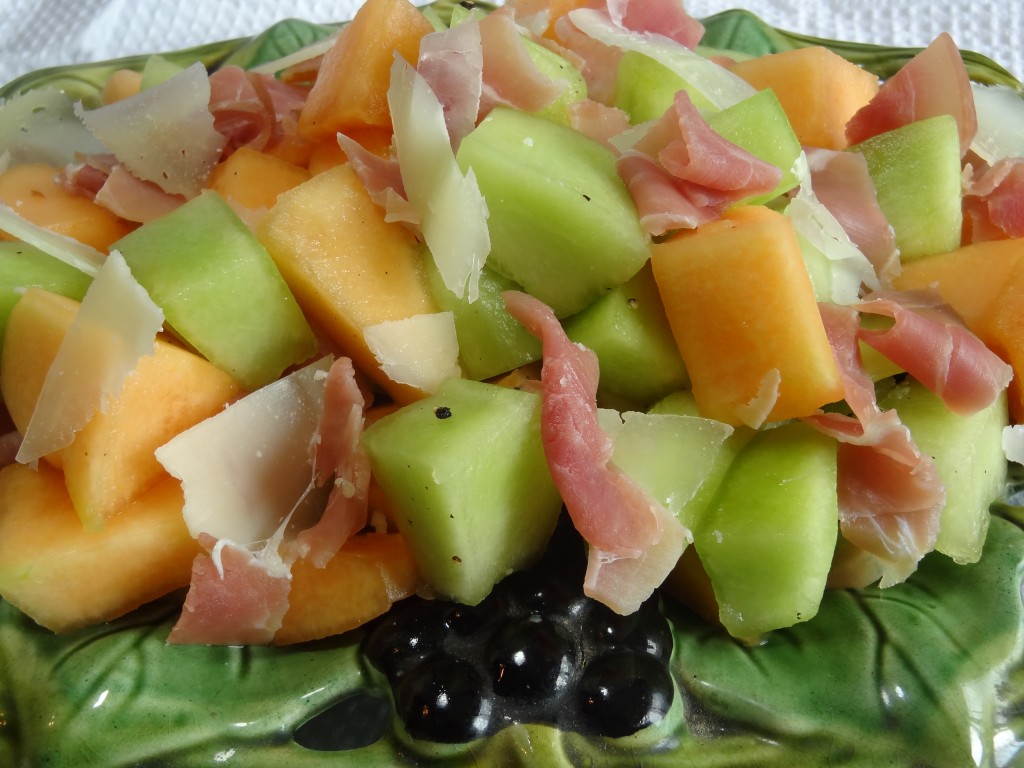
This beautiful dessert is a must have during peach season!

Order these beautiful Glass cutting board and mugs here at Lisbon Blue Shop
I had a great time answering all your questions while making this video. It’s wonderful to receive so much support from all of my followers on Facebook, Instagram, and Youtube channel. Click on the links on this homepage to follow me.
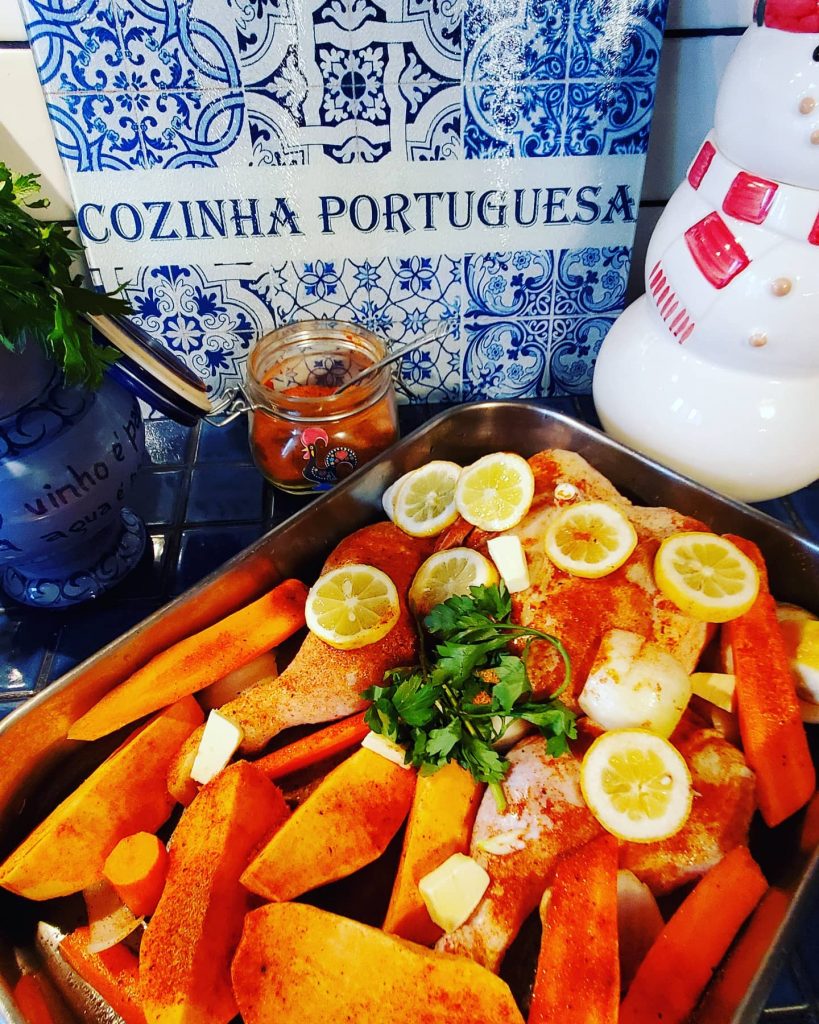
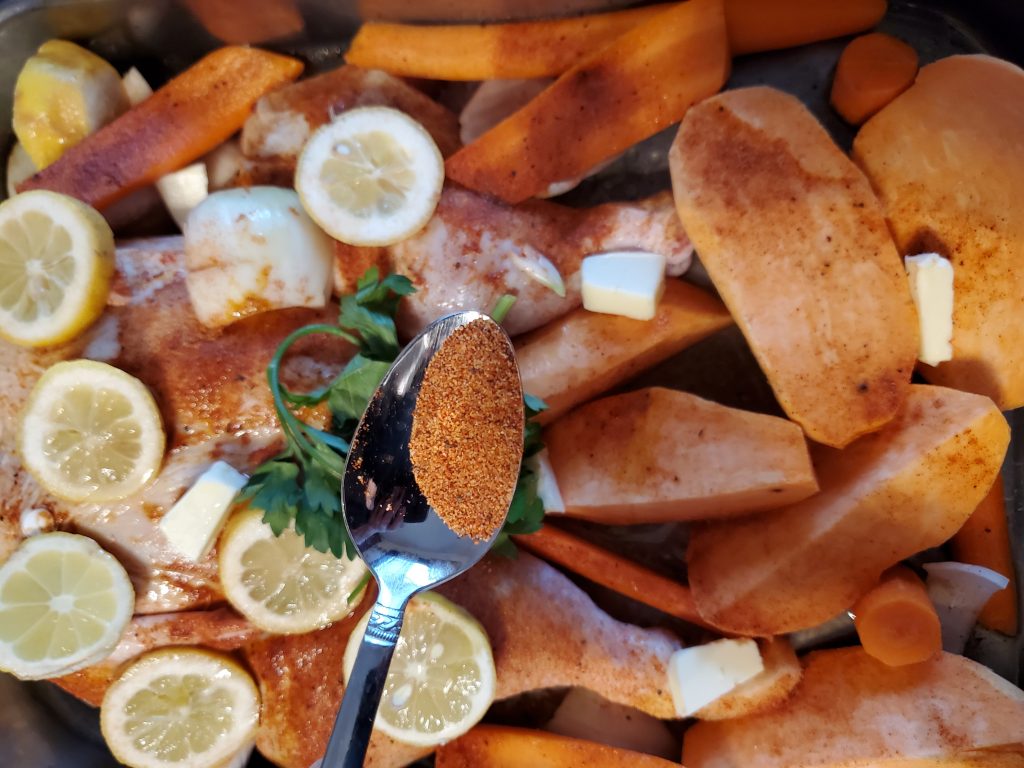
This Chicken is tender, juicy and full of flavor from the roasted onions and sweet potatoes. All you need is my spice mix, olive oil and white wine to marinate the chicken and vegetables.

Ingredients:
1 large roasting chicken
2 tablespoons my seasoning mix
1 large onion (chopped)
3 to 4 large sweet potatoes (sliced in half or quartered)
3 large carrots (chopped)
1/4 cup olive oil
1/4 cup white wine
1 teaspoon rosemary (optional)
1 large lemon (sliced)
1/2 stick butter (cut into pieces)
Preparation:
Marinate chicken with 1 tablespoon seasoning, half of oil and half of wine. Let marinade for about 1 hour or overnight in refrigerator.
When ready to cook set oven at 400 degrees F.
Remove chicken from refrigerator and let sit for 20 minutes to reach room temperature.
Mix onions, carrots and sweet potatoes with the remaining seasoning in a bowl. Toss well to coat.
Place chicken in a large baking sheet. Surround with vegetables.
Top chicken with lemon slices and rosemary if desired.
Cook for 1 and 1/2 hours or longer until chicken is crispy


Pizza Dough Ingredients:
4 cups flour (more as needed)
2 tablespoons olive oil
1 package dry yeast (1/4 ounce or 2 1/4 tsp)
1 teaspoon of sugar
2 teaspoons of salt
1 1/2 cups of warm water
cast iron pan
Toppings:
1 small onion (minced)
1/4 cup raw red or green pepper (finely chopped)
1 cup fresh or canned chopped tomatoes
1 teaspoon oregano or Italian seasoning mix
1/2 teaspoon garlic powder or minced garlic
8 oz. sliced pepperoni
8 oz cooked sausage or Portuguese chourico sausage or any sausage (sliced)
2 tablespoons olive oil
8 oz shredded mozzarella
4 oz pecorino cheese
Preparation:
Place flour, sugar and dry yeast into mixer. Mix ingredients together. Slowly add water and olive oil. Knead for around 1 minute and add salt.
Continue kneading dough until a soft dough/ball forms. Add additional 1 tbsp of flour at a time if dough is too wet/sticky. Cover with plastic wrap and towel and let rise for about 1 hour.
When dough has doubled in size, divide in half. Stretch out pizza dough, and place onto deep dish cast iron pan that has been dusted with a little flour and cornmeal.
Brush dough with olive oil. Top with tomatoes, peppers, onions, garlic followed by 1/2 of the cheese. Add the meats and top with oregano and remaining cheeses.
Bake at 425 F for around 15-20 minutes, depending on your oven.


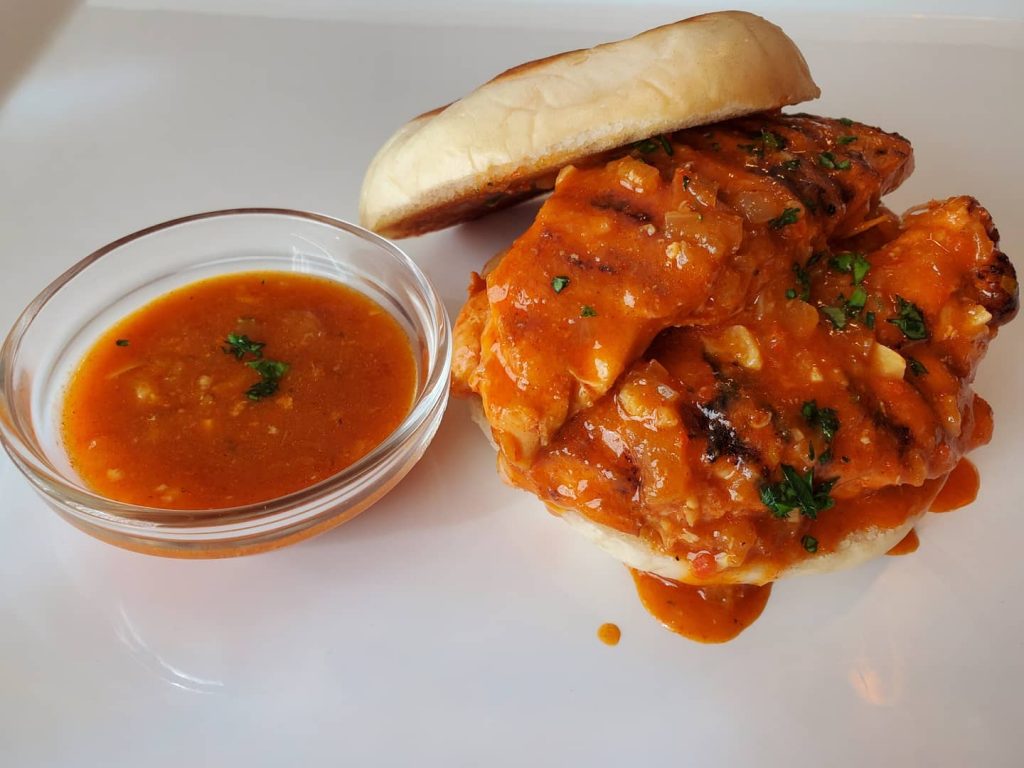
This delicious recipe is one of my family’s favorite chicken recipes. The chicken is moist, flavorful and it has a spicy kick! Perfect over rice, pasta, or even french fries. It makes a great sandwich to serve on a bun, a Portuguese roll, Portuguese muffin, and it even makes a zesty quesadilla or panini. There are endless ways to serve it. Enjoy the recipe!
Visit my Youtube channel for the complete recipe. Please like and subscribe to the channel to get notifications of when I post new videos. Be a supporter to get exclusive access to videos, recipes and savings on Lisbon Blue Shop.

Vinho Verde Sangria is so delicious and refreshing! This is a perfect summer drink. “Cheers – Saude”!
Order these beautiful custom glass cutting boards on Lisbon Blue Shop.


Ingredients:
1 bottle Vinho Verde
1 liter bottle lemon seltzer
2 to 3 oz lemon vodka
1 orange sliced
1 lime sliced
1 lemon sliced
1 cup frozen white grapes
mint leaves
Ice as desired
Preparation:
Mix all ingredients in jar and add ice. Stir well before serving.

Here are five delicious sandwiches made with my favorite 3 Meal Muffins/Portuguese muffins/Bolos Levedos!
Visit their website at 3mealmuffin.com to order and to find out where you can find them at your local store.
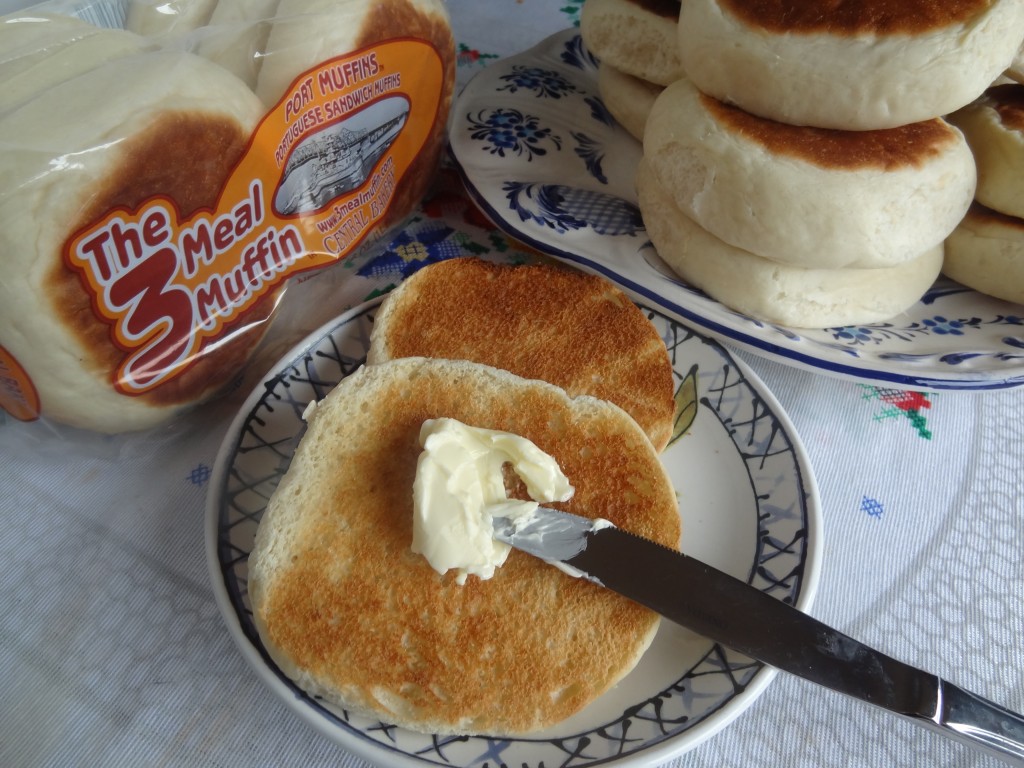
Chicken Mozambique, Bacon Burger with Egg and Cheese, Avacado Toast with Bacon and Egg, Chourico and Egg omelet with Cheese and a Goat Cheese, Fig Jam and Walnut Panini! They’re all delicious any time of day!
Watch the video below for how to make them!
Chicken Mozambique Sandwich

Chourico and Egg with Cheese
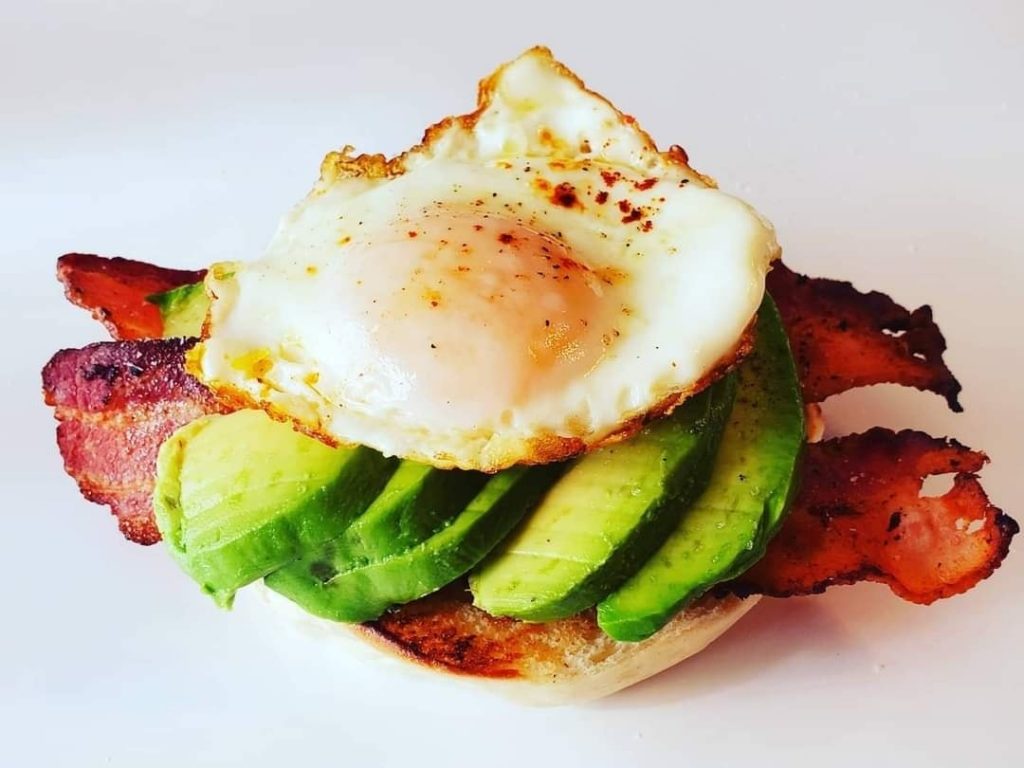
Avacado with Bacon and Egg Toast

Bacon Cheeseburger with Egg and Cheese


Easy Won Ton Soup
This will be your go to easy recipe any day of the week! I’ve made many variations on this soup in the photos below. You can add your own favorites such as; pea pods, mushrooms, fine noodles, or even some shrimp or cooked chicken for a variation. Just add the proteins to the broth and cook for an additional 10 minutes. I also made egg rolls to go along with the soup which were a big hit. My recipe for egg rolls can be baked, fried or air fried.


Ingredients:
2 to 3 quarts chicken stock
1 package of frozen pot stickers. I used trader Joe’s but you can also make my recipe for shrimp and pork dumplings here.
3 scallions (finely diced)
salt to taste
3 cloves garlic (finely minced)
1 and 1/2 teaspoons ginger paste
1 small carrot finely cut into strips (optional)
1/4 cup soy sauce
1 teaspoon sesame oil
1/2 teaspoon chili sauce (optional for spice)
1/2 pound shelled shrimp (optional)
4 oz thin egg noodles (optional)
Preparation:
Place all ingredients in a soup pan except the pot stickers/shrimp/egg noodles and scallions. Let come to a boil and simmer for 15 minutes. Taste and add more salt or soy sauce if needed. Add desired amount of pot stickers per person and cook for 5 minutes. Save the broth for later and store in refrigerator up to 2 days. Heat broth and add more pot stickers as desired for each serving.
I only cook the pot stickers per portions needed since overcooking makes the dumplings mushy.
Order this beautiful Glass cutting board on Lisbon Blue shop 
Watch video recipe here:
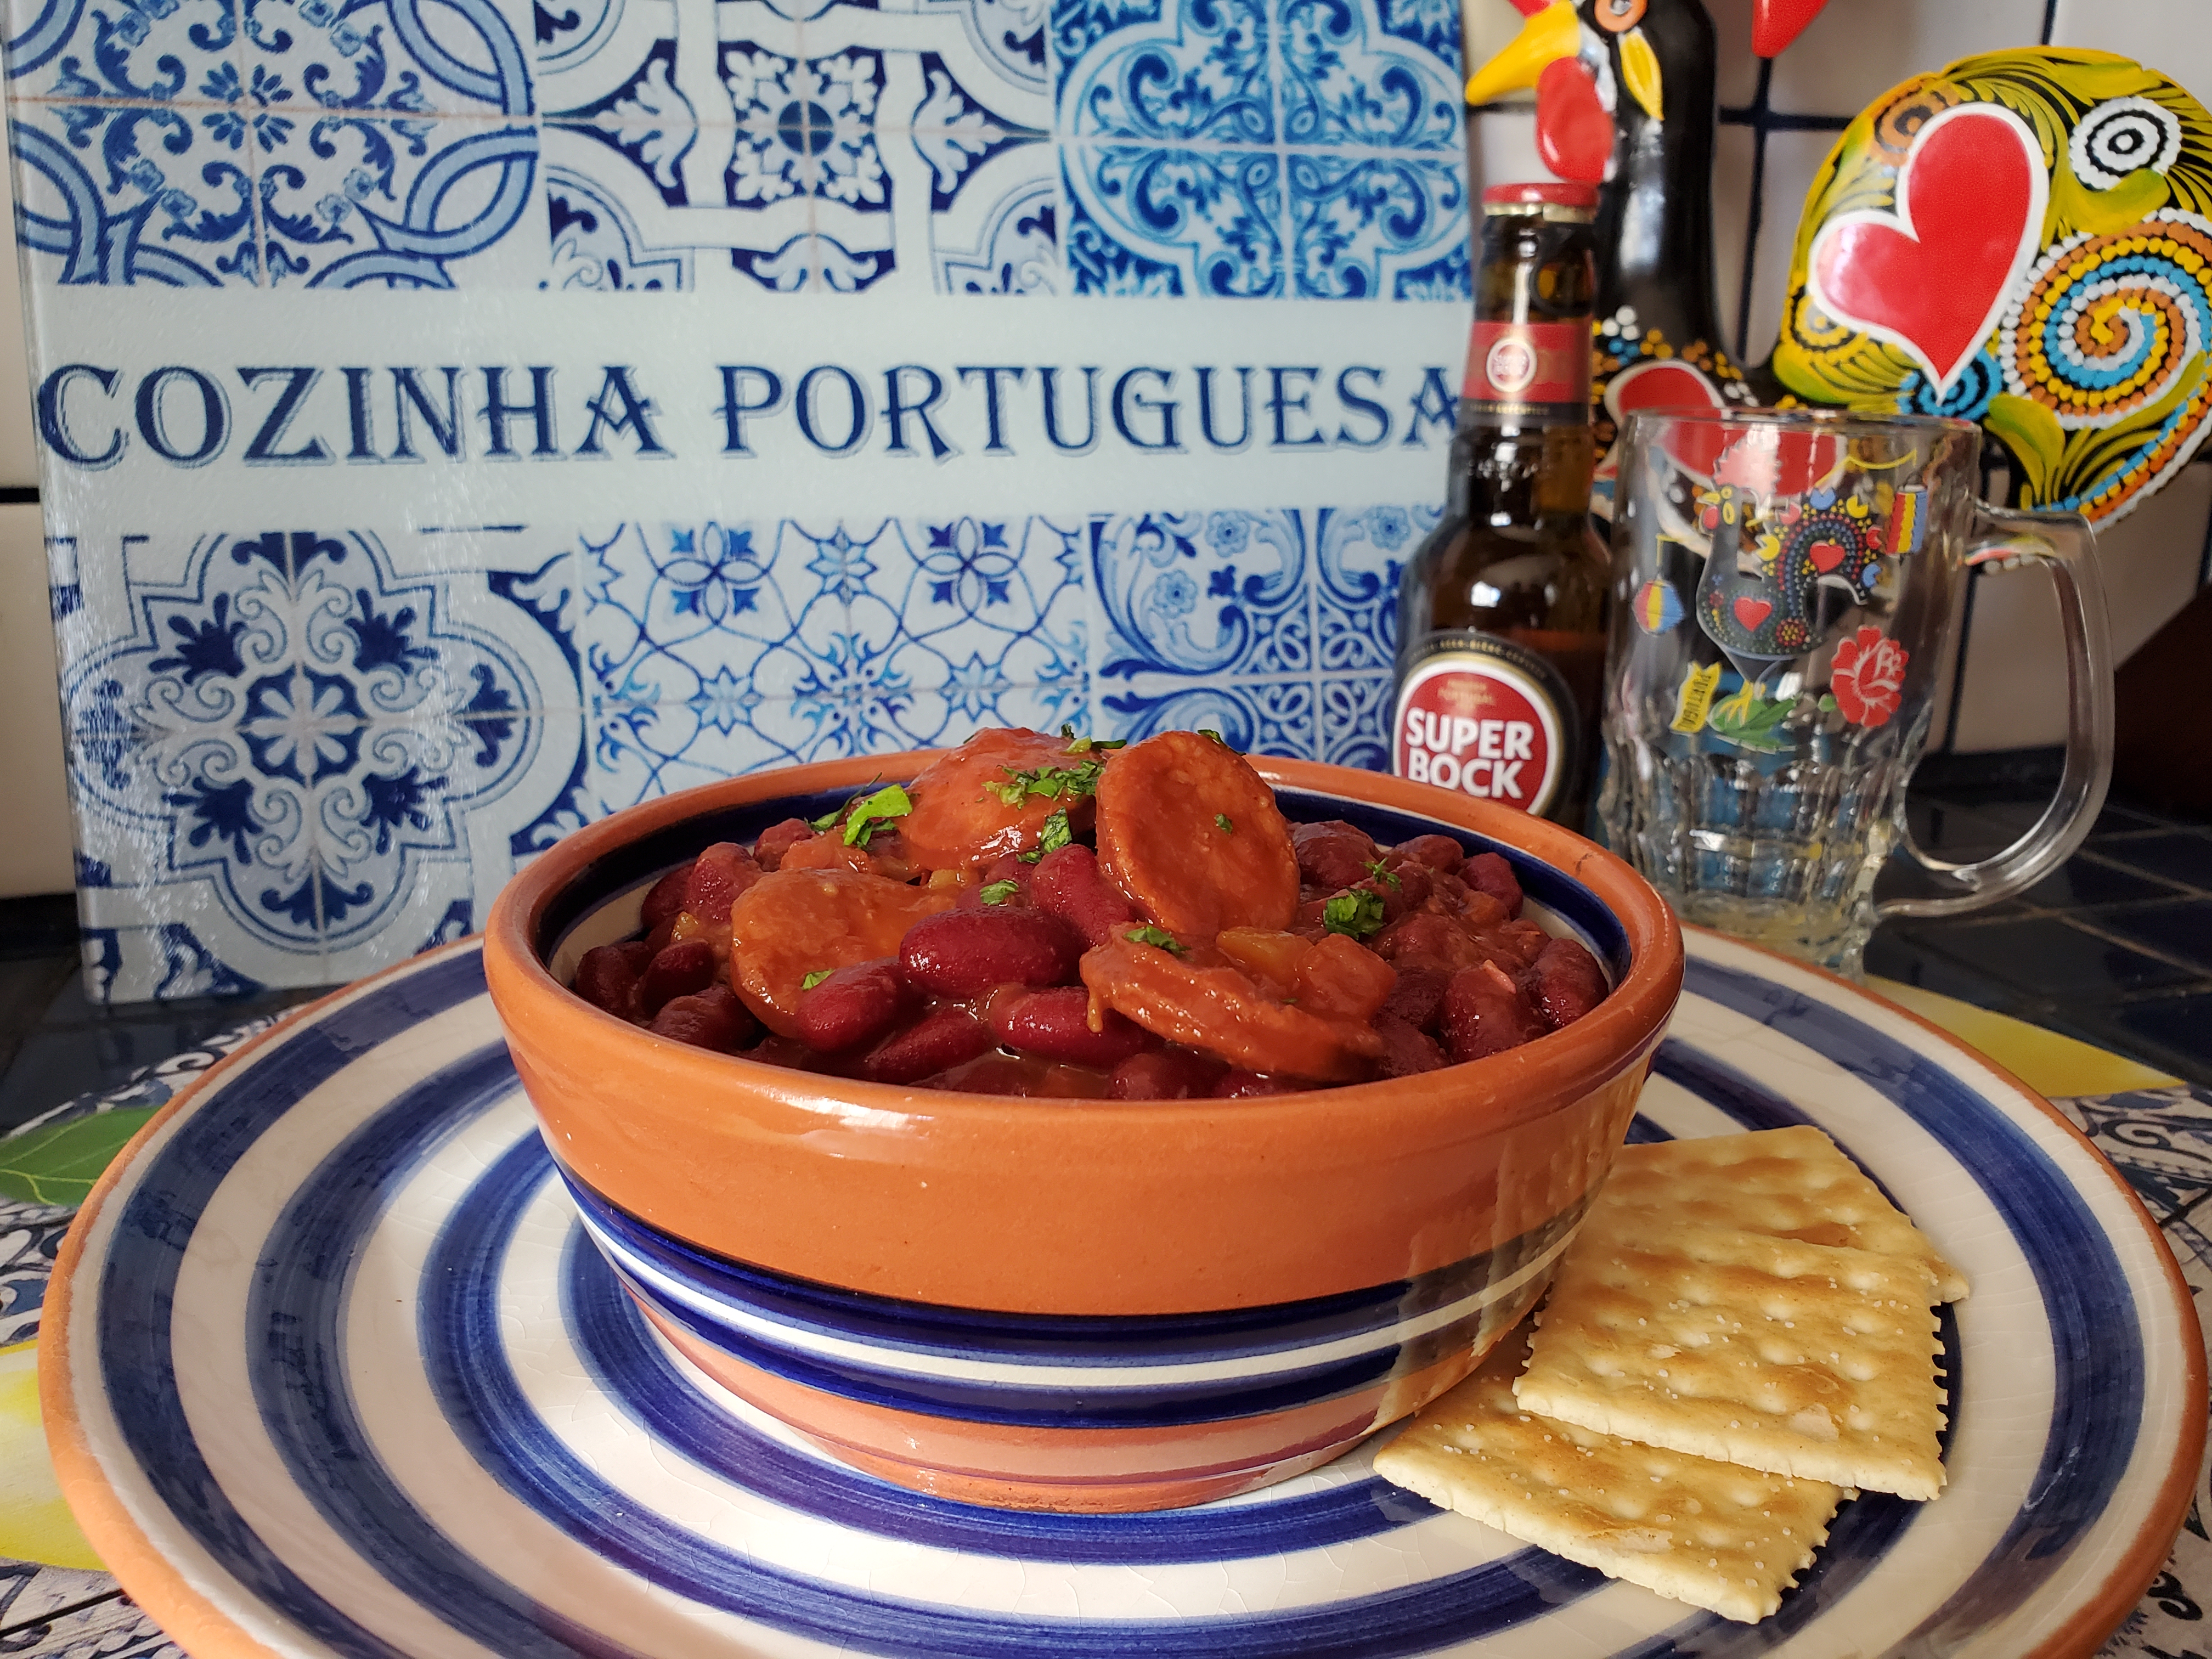
It’s classic comfort food that’s hearty, full of protein, and perfect for cool weather days. Try it as a new twist for those Sunday game day snacks. I serve this Chili with Portuguese Rice but you can serve it with any crusty bread, or Portuguese rolls.
By the way did you ever hear about a “Portuguese Chili” dog? My family loves them!

Portuguese Chili – Serves 4-6
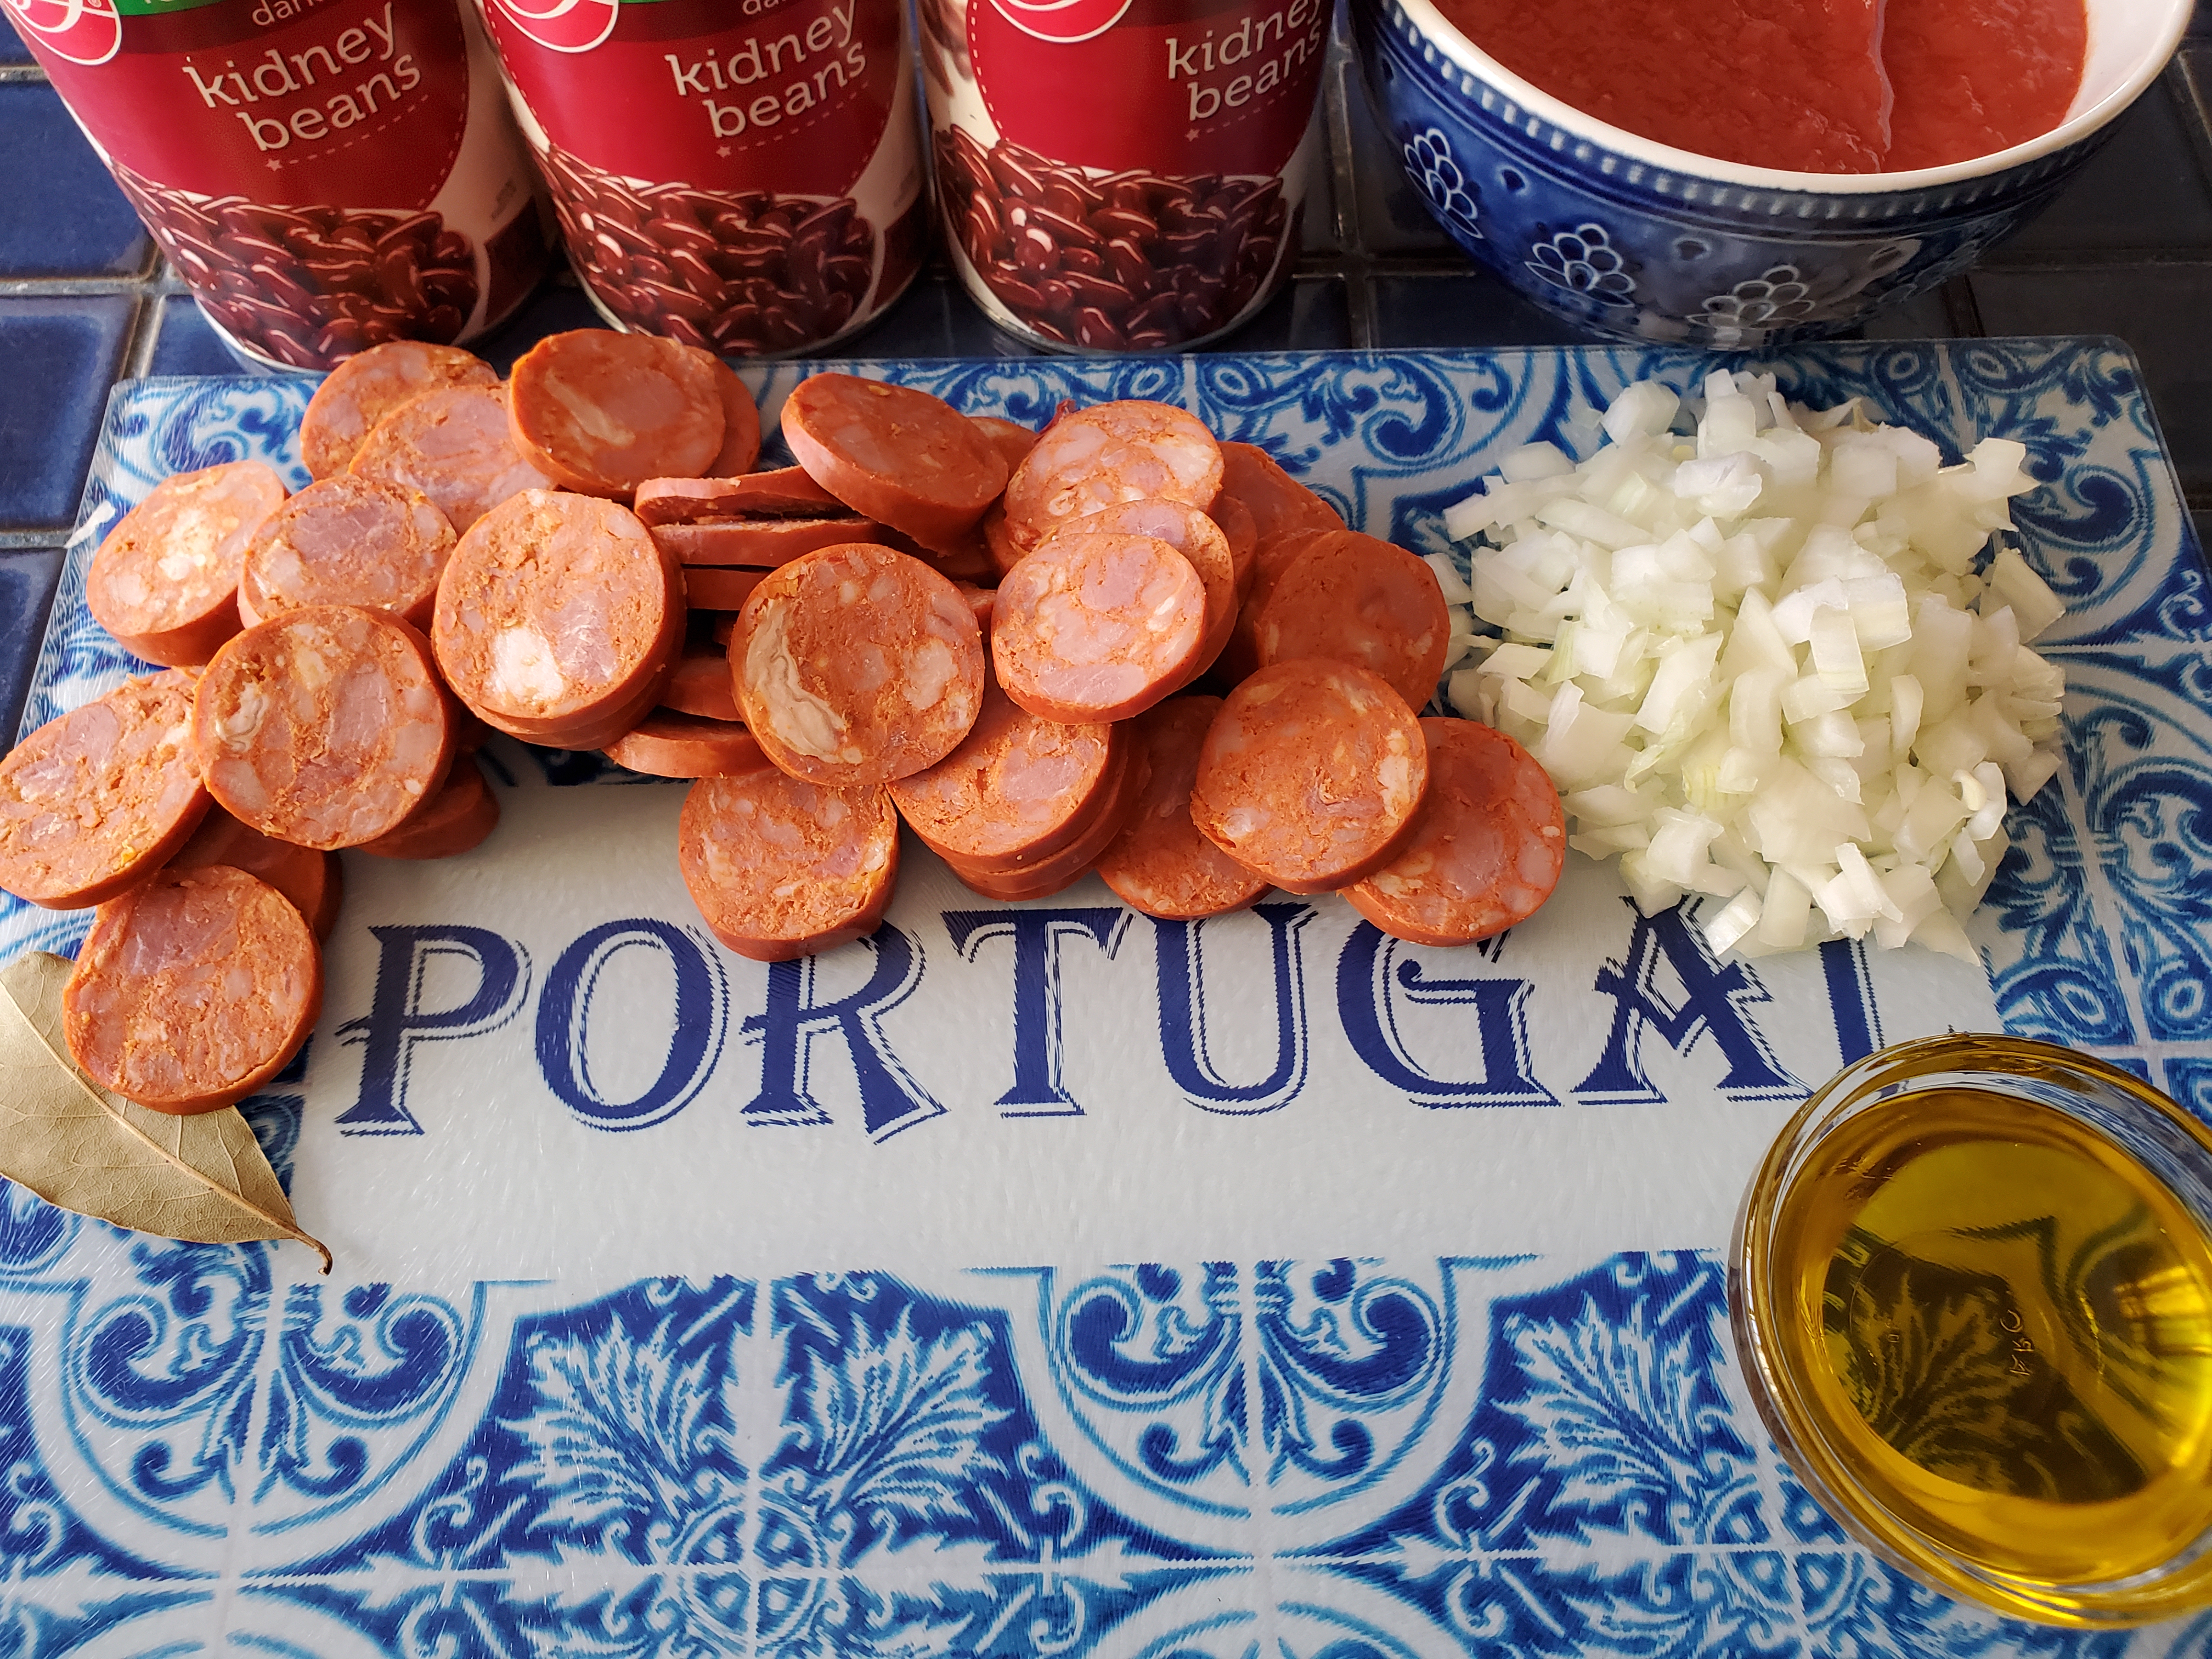
Ingredients:
1 large Portuguese chourico or linguica sausage (cut into 1/4 inch slices )
2 to 3 large cans of cooked red kidney beans
1 small onion (diced)
2 garlic cloves (diced)
1 bay leaf
1 teaspoon paprika
1 to 2 teaspoons Piri Piri sauce or hot Sauce (optional for added spice)
1/4 cup water
1/2 cup red wine
1 cup crushed red tomatoes
2 teaspoons olive oil
2 teaspoons parsley flakes (for garnish)
Instructions:
In a large deep saucepan on medium heat, saute the onions, garlic and bay in the olive oil for 1-2 minutes until translucent. Add chourico and let it cook for about 2 minutes until slightly browned. Add the remaining ingredients except the parsley flakes. Let it come to a boil. Reduce heat and simmer on low for 15-20 minutes stirring on occasion.
I wish you could smell the aroma right now! It’s amazing!
To thicken, simply mash about 1 cup of the beans with a fork, stir back into the chili and let it cook until it reaches your desired consistency. Cover and set aside. The chili will thicken as it cools.
Remove Bay Leaf before serving. Store in the refrigerator.

Easter Sour Cream Birds Nest Coffee Cake is a perfect cake for your Easter dessert table.
Look at those beautiful candy coated almonds that look just like bird eggs. The crumbly, nutty topping pairs perfectly with your afternoon coffee or tea break. You can also serve the cake year round without the almonds of course.
Enjoy and Happy Easter!

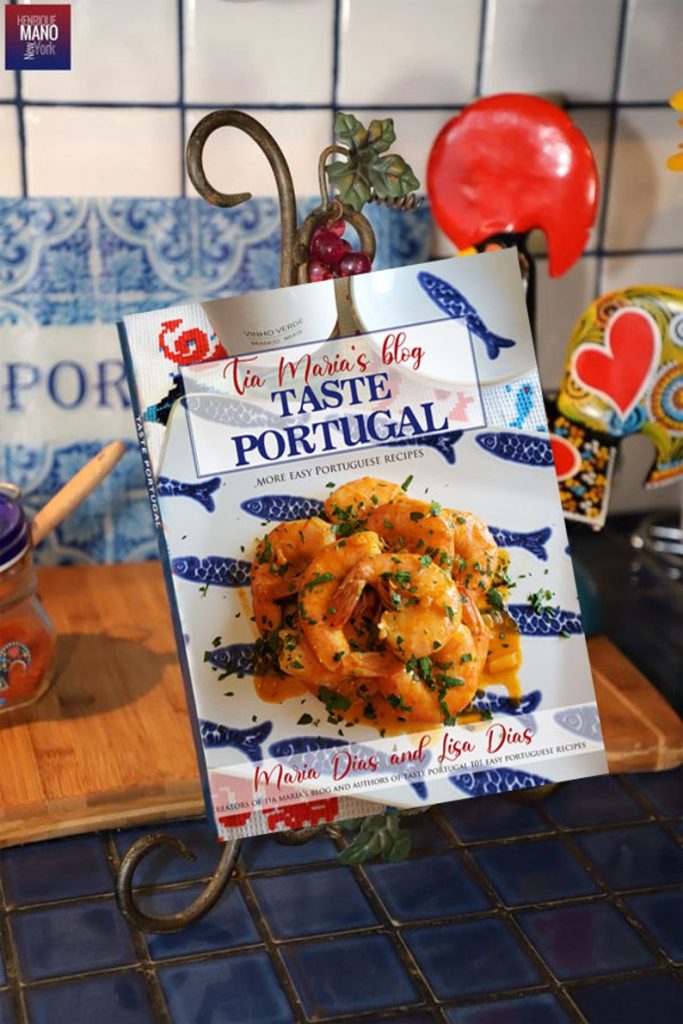
Find this delicious recipe in my Taste Portugal More Easy Portuguese recipes cookbook;

Ingredients:
1 stick butter
1 cup sour cream
2 eggs
2 cups flour
1 tsp baking powder
1 tsp baking soda
1 tsp vanilla extract
1 cup sugar
Crumb Topping
1 tablespoon cinnamon
2 tablespoons brown sugar
2 tablespoon sugar
2 tablespoons melted margarine
1 tablespoon flour
1 cup chopped nuts (pecans or walnuts)
Instructions
Make crumb topping by mixing all ingredients in a small bowl. Set aside until you make the cake batter.
Note: The mix will be dry and crumbly. If you find it too wet, add more sugars.
In a large mixing bowl, beat the sugar and margarine until smooth and creamy. Add the remaining ingredients and mix until smooth.
Pour 1/2 of the batter into a greased tube or bundt pan. Sprinkle 1/2 of the crumb topping evenly over batter.
Add the remaining batter and top with the rest of the crumb topping. Cut through the batter with a knife once around to form a circle pattern.
Cook at 350 for about 40-50 minutes or until a toothpick comes out clean.
Cool in pan for a few minutes. Serve with crumb side up.
Add candy almonds in a small bowl that fill center of cake. I used a ramekin.
TAKE MY SHORTCUT AND USE MY TASTE PORTUGAL SPICY PIRI PIRI SEASONING

Piri Piri Chicken wings are so delicious that you’ll keep making them again and again at every party! I used an air fryer to bake these wings but you can also bake them in the oven at 400 degrees F for about 30 minutes or longer until crispy. Use this sauce to make piri piri chicken too. Enjoy!
Order this beautiful Glass Cutting Board on Lisbon Blue shop.
Ingredients:
2 pounds uncooked chicken wings
piri piri sauce
cooking spray
Preparation:
Piri Piri Sauce recipe:
20 fresh birds eye whole peppers (use 2 large red peppers if unavailable)
6 red jalapeno peppers (seed and chop)
6 cloves garlic
juice of 1 lemon
2 tablespoons white vinegar
2 tablespoons paprika
1 tablespoon salt
½ cup olive oil
Preparation:
Place all ingredients into a blender and pulse to a smooth consistency. Place in jars and store in refrigerator until ready to use.
NOTE: I cook down the sauce for about 5 minutes and serve along with the wings for dipping.
Chicken Wings:
Marinate room temperature wings for at least 2 hours or overnight in refrigerator.
Lightly coat air fryer with cooking spray. Place half of wings (shake off marinade) in fryer and lightly spray with cooking spray. Cook at 400 degrees F. for 12-15 minutes until crispy. Cook remaining wings.
You can also bake at 400 degrees F. for about 30 minutes until crispy depending on your oven.
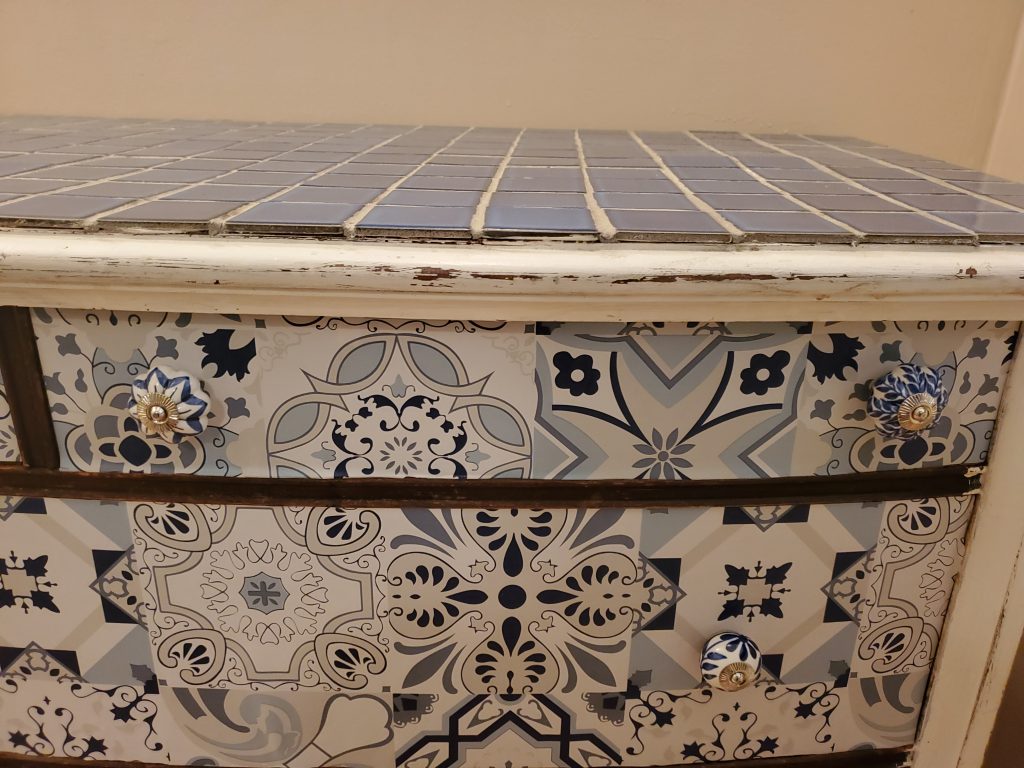
This easy makeover was easy with sticky tile paper, and porcelain drawer handles from Amazon. 1 roll of paper covered both my chest and my office bureau. I had a drawer missing in my office bureau so I added a white basket which adds a rustic look. I posted the links below for you. I love the look of the Portuguese blue tiles which I adore! I hope you try this easy makeover. I suggest you get an old piece of furniture, give it a coat of white primer, sand it and then give it a coat of white paint. I also sanded the edges to give both pieces a vintage weathered look. A clear coat of poly is optional. Enjoy!


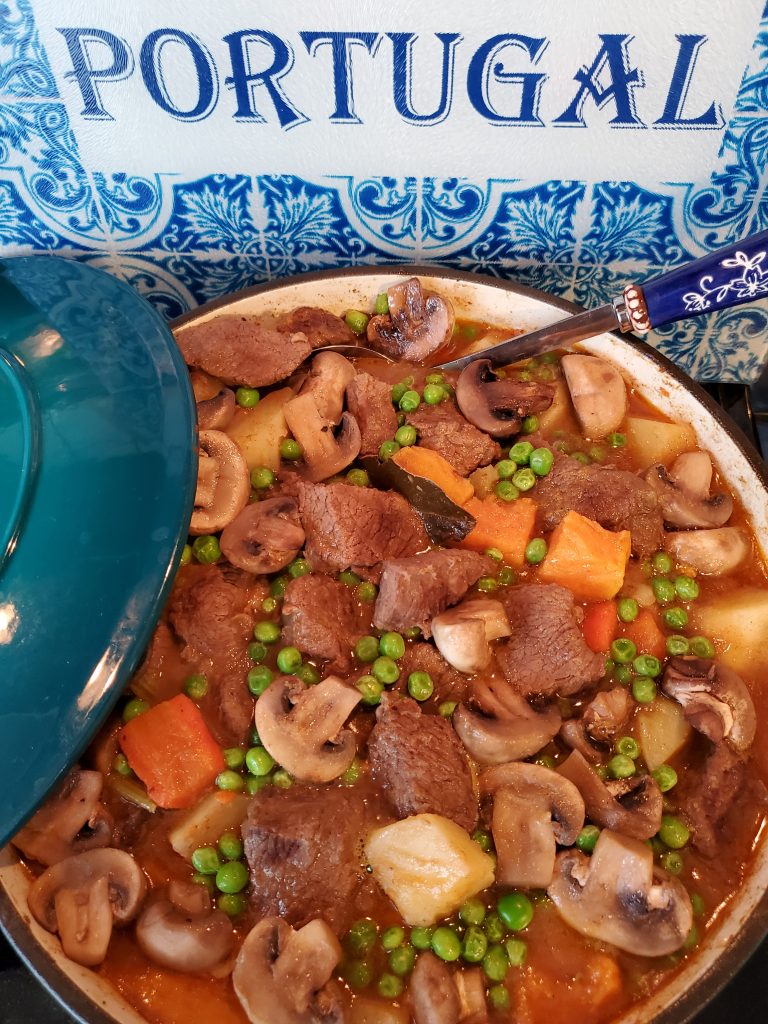
I always add sweet potatoes to my beef stew since it adds great flavor and the texture thickens the broth. Make a big pot to enjoy the next day. I add mushrooms and peas, but of course this is optional to your taste.
Ingredients:
2 to 3 pounds beef stew meat (cut into 2 inch pieces)
2 large onions (chopped)
2 large stalks celery (chopped)
4 cloves garlic (finely minced)
2 tablespoons olive oil
2 tablespoons flour
1 tablespoon paprika
1 tablespoon salt
1 teaspoon black pepper
1 beef bouillon cube or 1 cup beef broth
1 and 1/2 cups water
1/2 cup red wine
1/2 cup port wine
1 bay leaf
4 large potatoes (cut into 1 to 2 inch cubes)
2 large sweet potatoes (cut into 2 inch cubes)
1 to 2 pounds mushrooms (optional)
1 cup frozen sweet peas (optional)
parsley for garnish
Preparation:
Marinate meat in salt, garlic, pepper, paprika and red wine for a few hours or overnight in refrigerator in a bowl. When ready to cook take meat out of refrigerator and let sit for 20 minutes at room temperature. Reserve liquid and place meat in clean bowl and add the flour. Shake meat to coat with flour.
Heat the oil in large heavy dutch oven or pan and brown meat on all sides. Add onion, celery, carrots, bay leaf, beef bouillon, water, reserved marinade and port wine. Stir evenly and let cook on medium for about 1 hour. Stir often so the stew does not stick and burn. Add both potatoes and cook for another 30-45 minutes until cooked. Cook mushrooms in a small pan with 1 tablespoon butter for about 5 minutes. (I like to add the mushrooms on top of stew but this is optional you can also add the mushrooms into the stew to cook.) Add peas during the last few minutes.
Top with parsley for garnish. Serve with Portuguese red wine or any good red wine.

Serve with Portuguese red wine of course.
Ingredients:
2 pounds ground beef or ground turkey
2 eggs
1 cup dried seasoned breadcrumbs
1 slice of fresh bread (crumbled, I use a grater)
1 medium onion (finely minced)
3/4 cup milk
2 tablespoons of my spice mix (order here on Lisbon Blue Etsy shop)
2 to 3 tablespoons minced parsley
1 cup ketchup
Preparation:
Mix all ingredients in a bowl. Shape into loaf and place in a baking dish. Top with ketchup. Cook at 350 degrees F for about 1 hour or longer until it reaches 170 degrees on a meat thermometer.
I like a well done crispy edge on my meatloaf but this is optional.
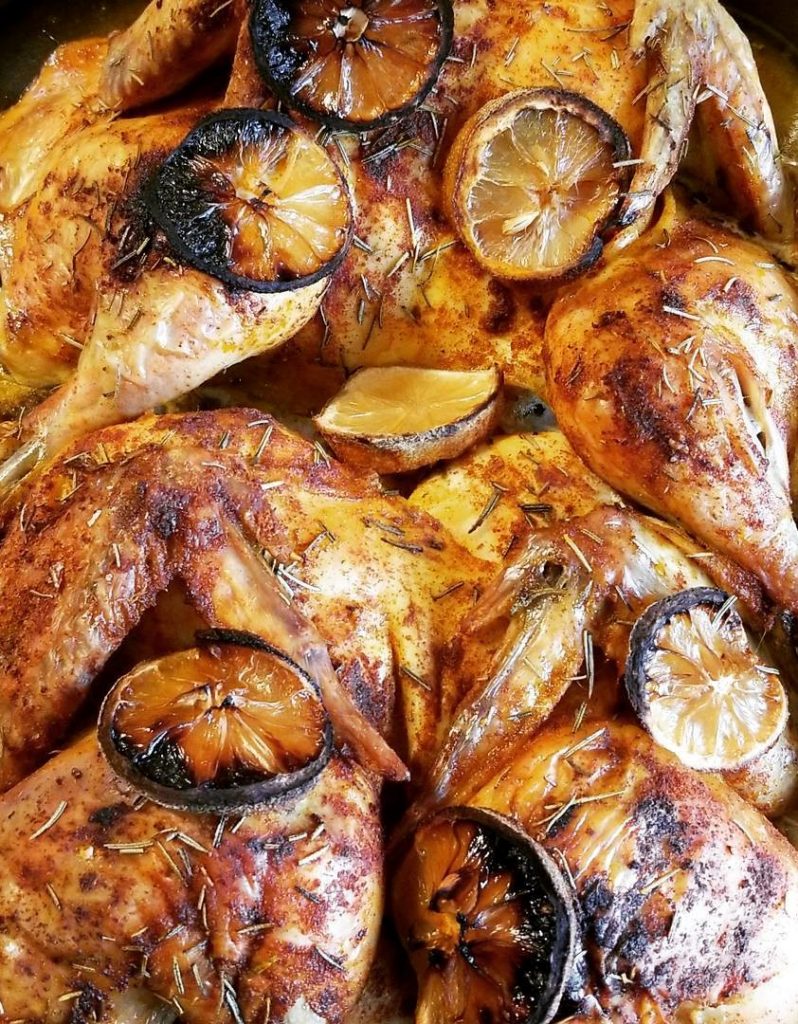
This classic Lemon Rosemary Chicken is moist, juicy and full of lemony flavor. I always make 2 chickens so we can enjoy the chicken the next day to make sandwiches, quesadillas and chicken salad. I love a crispy skin chicken so I always let the chicken bake at 400 degrees for at least 1 and 1/2 hours.
Ingredients:
2 roasting chickens (butterflied)
1/4 cup Portuguese olive oil
2 tablespoons butter (cut into pieces)
2 tablespoons salt
1 tablespoon paprika
2 teaspoons garlic powder
1 teaspoon black pepper
1 to 2 tablespoons dried rosemary flakes
2 lemons (sliced)
Preparation:
Place salt, paprika, garlic powder and pepper in a mortar and pestle and crush.
Marinate chicken with seasonings for at least 30 minutes or overnight in refrigerator. Coat chicken with olive oil and butter. Top with lemon slices and sprinkle on rosemary.
Bake at 400 degrees F. for 1 and 1/2 hours until golden and crispy. Chicken should reach 190 degrees F on a thermometer.

Ingredients:
6 pork chops
2 tablespoons olive oil
1/4 cup white wine
1 tablespoon salt
1 teaspoon garlic powder
1 teaspoon paprika
1/2 teaspoon crushed black pepper
3 to 4 cups of Cebolada sauce recipe
Preparation:
Marinate pork chops with all seasonings and wine. Let sit for a few hours or overnight in refrigerator.
When ready to cook take pork chops out of refrigerator and let come to room temperature. Brown on both sides in skillet or grill pan with the olive oil. Add the tomato sauce and cook on simmer for about 30 minutes or until pork is cooked.
Perfect over rice, mashed potatoes or fries.
Don’t be intimidated by cooking octopus. It’s relatively easy to do. I learned this method from my mother of boiling the octopus in water with only 1 onion and no salt required since the octopus is salty already. After boiling I like to bake the octopus with some onions and peppers and olive oil. If you have any leftovers simply make octopus salad, add it to omelets, stews and rice dishes.
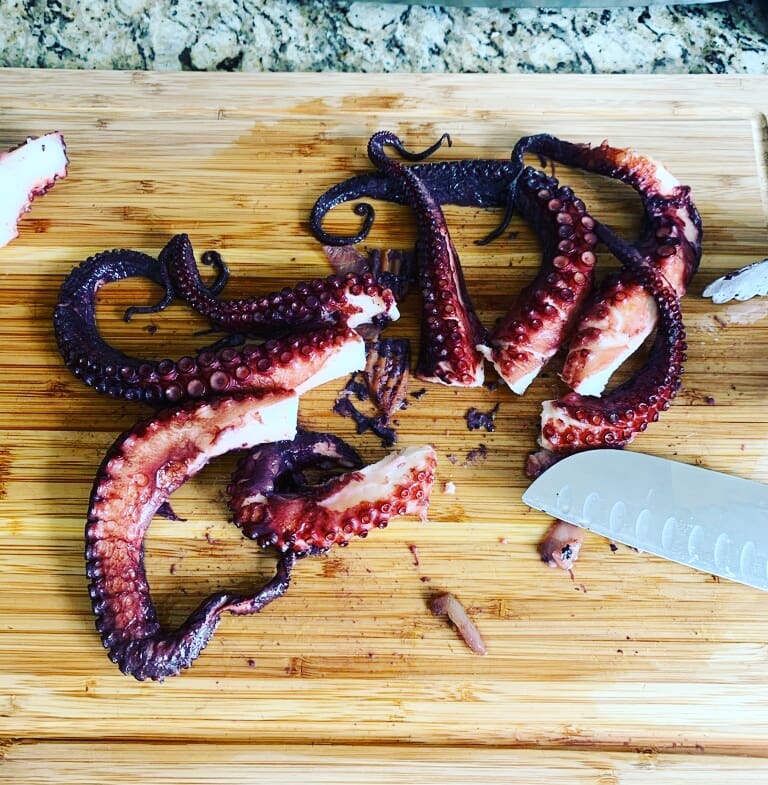

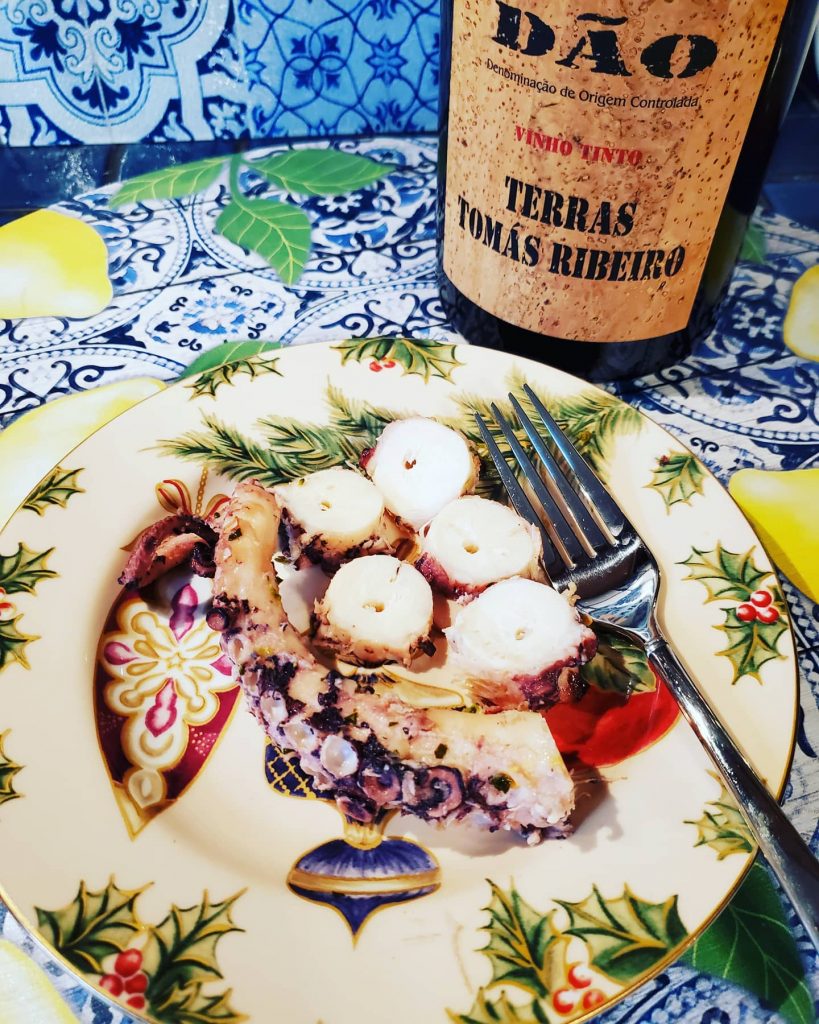
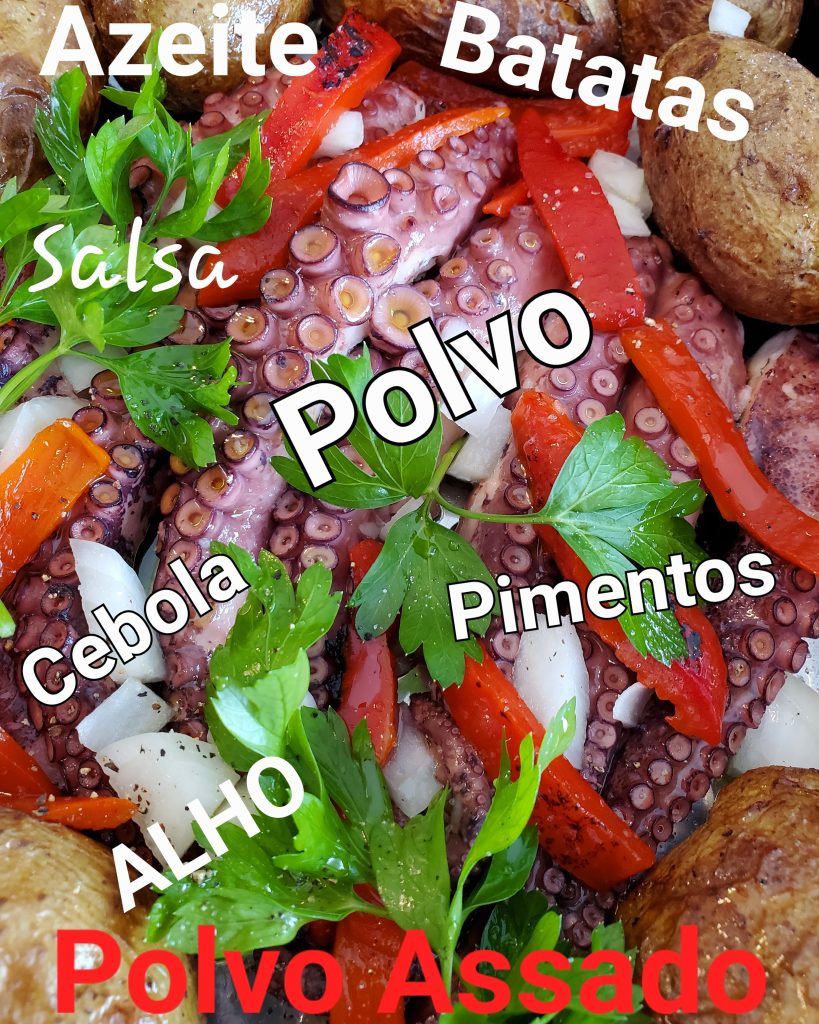

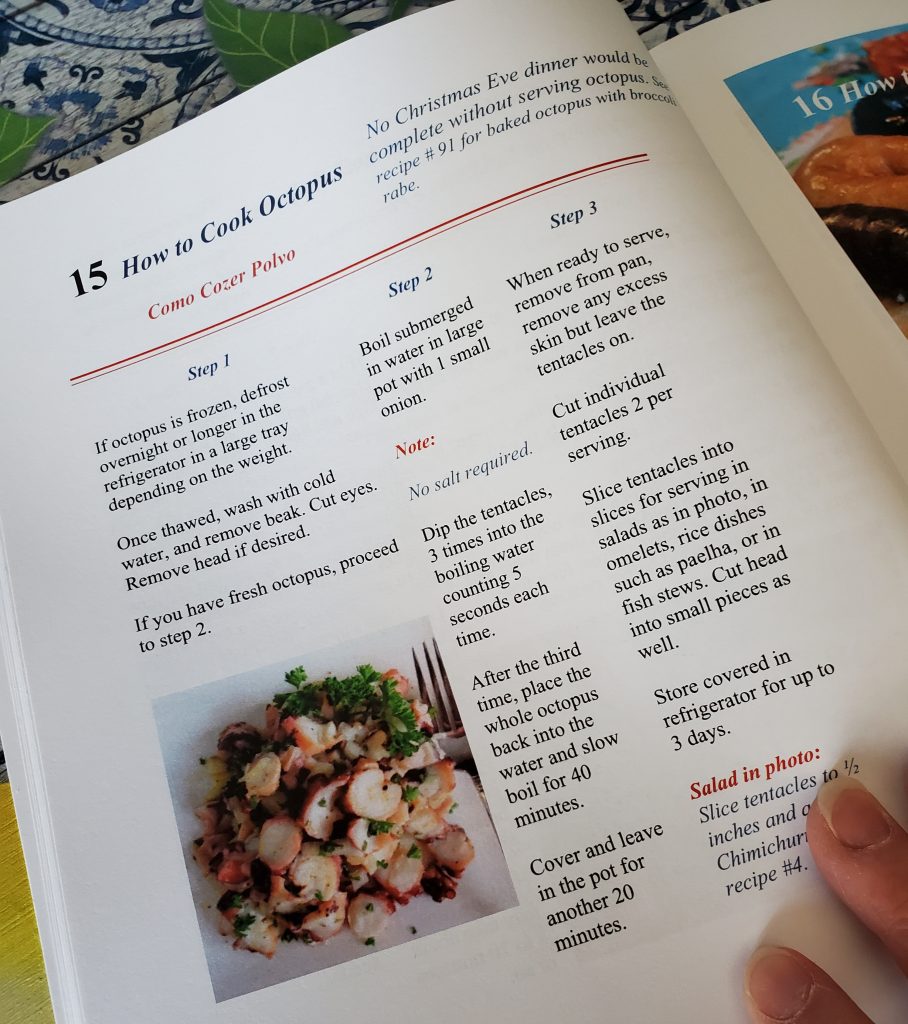
Recipe # 15 HOW TO COOK OCTOPUS – TASTE PORTUGAL MORE EASY PORTUGUESE RECIPES
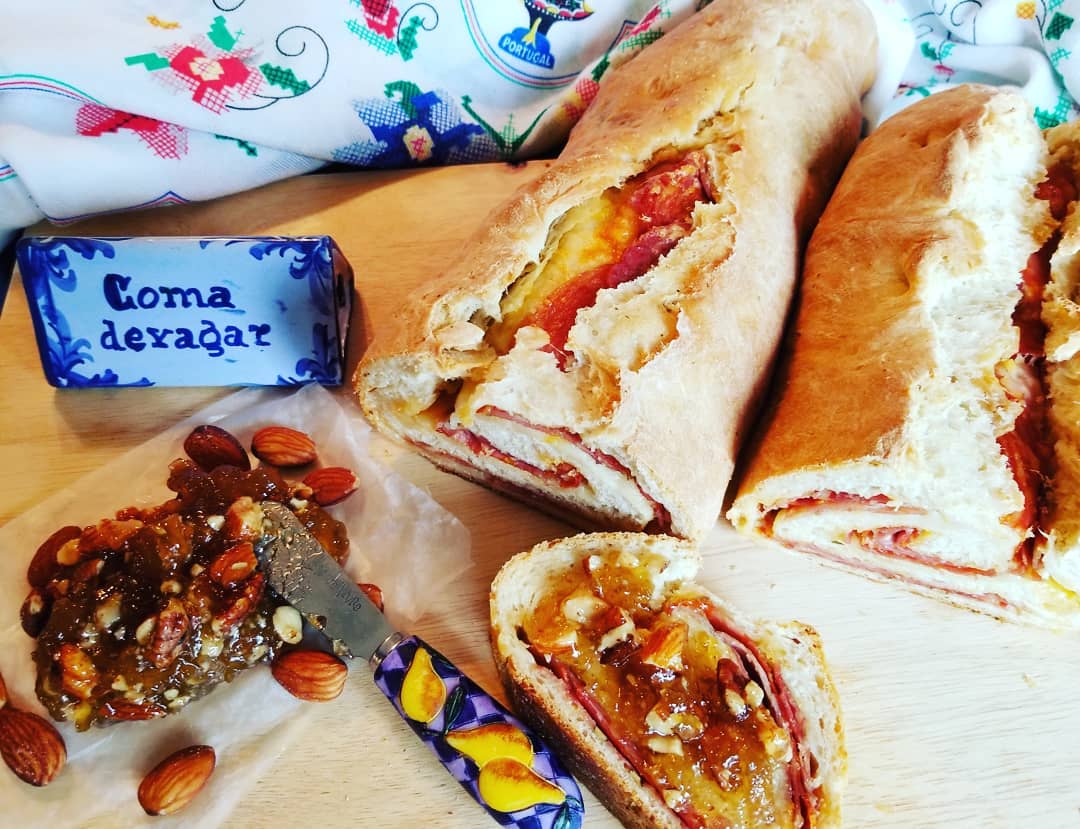


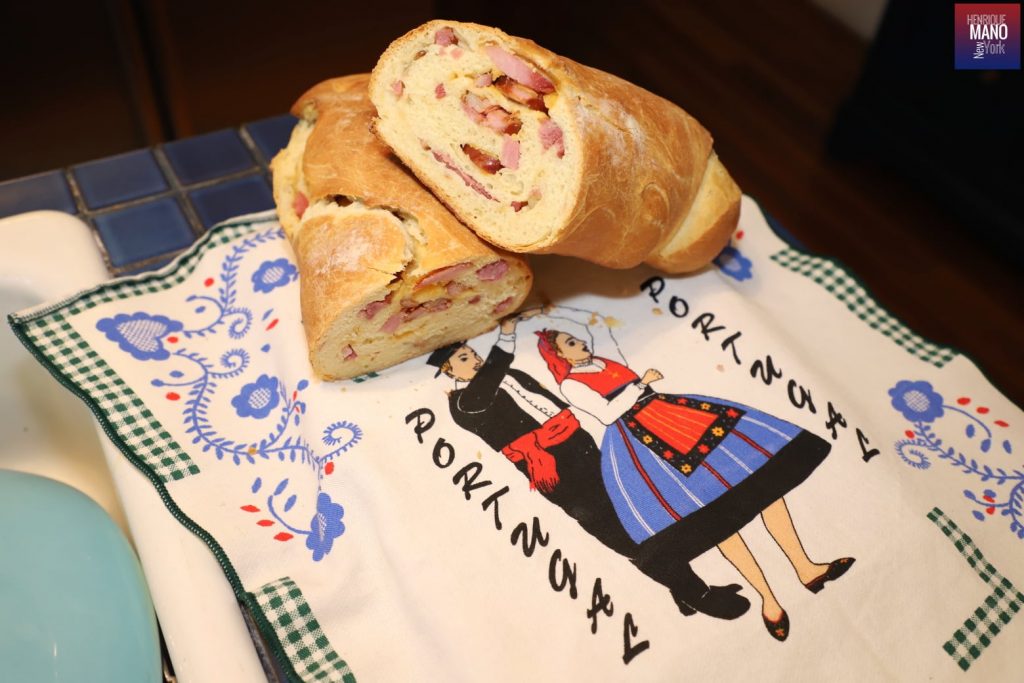
This bread is savory, salty and sweet all in the same bite. Make 2 because this will be the first appetizer to go. It a great bread to freeze and enjoy the next time. The fig spread is optional but it adds a sweet and nutty texture. Enjoy!
Find this delicious recipe in my Taste Portugal More Easy Recipes Cookbook
Ingredients:
Makes 1 large or 2 smaller loaves
1 flat bread recipe # 19
1 small chouriço or linguica sausage (cut into thin slices)
3 or 4 slices of presunto, or ham (cut into strips)
3 slices of salami (optional, cut into strips)
1 medium onion (sliced)
1 medium red pepper (sliced)
1 cup of shredded cheese
1 tablespoon plus 1 teaspoon olive oil
1 tablespoon of coarse corn meal
flour for dusting
Fig Spread:
1 cup fig jam (or any brand)
¼ cup mixed chopped almonds and walnuts.
Preparation:
Preheat oven to 375 degrees F.
Sauté the onions and peppers for a few minutes in 1 tablespoon olive oil until translucent. Let cool.
Sprinkle a dusting of flour and corn meal on a large sheet pan or pizza pan.
Roll out each half of dough into a rectangle. Add a layer of onions followed by a layer of meats. Top with cheese.
Begin gently rolling the dough evenly into a log shape. Seal the edges tightly with your fingers.
Place on pan and brush with olive oil. Let rise for about 20 minutes.
Cook for 15 to 20 minutes at 375 degrees F. or until the bread is golden and crispy.
Let cool slightly before slicing into ½
to 1- inch slices.
Mix fig jam with nuts and place in a small ramekin. Serve bread with fig spread.

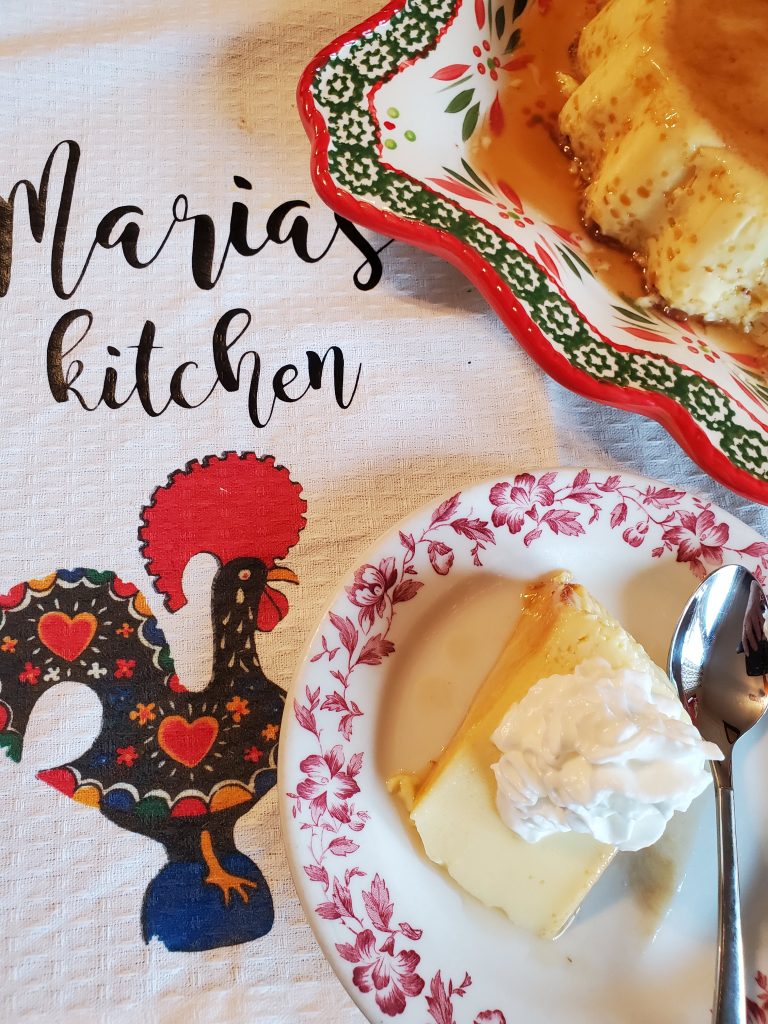
This Caramel Flan is delicious, so creamy, and you can’t tell it from the original flan recipe. Watch my original Caramel Flan video recipe below from Tia Maria’s Blog Youtube Channel.
It’s a wonderful sugar free dessert. I used Crystallized Monk Fruit, a natural sweetener in place of granulated sugar. You can find the sweetener at most grocery and specialty stores and also online.
I also made the caramel sauce using the Monk Fruit, but for a short cut you can use store bought sugar free caramel sauce. The natural sweetener replaces sugar 1-to-1, but has zero calories, zero net carbs, and zero glycemic index. For those on strict diabetic desserts, consult with your nutrition specialist.
I top the flan with real whipped cream. Most whipped creams are very low in calories about 15 per tablespoon and have only 1 gram of sugar. This is optional of course and you can use any unsweetened whipped topping.

Ingredients:
6 large eggs
3 cups (whole milk)
1 cup crytalized monk fruit sweetener
1/4 teaspoon salt
1 teaspoon vanilla extract
Caramel Glaze Ingredients:
4 tablespoons butter
3 tablespoons (Monk Fruit granulated blend)
1/4 cup heavy cream
1/2 teaspoon vanilla extract
Preparation
Note: Take your eggs out of the fridge a few hours before you start to get them to room temp or place them in a bowl of lukewarm water for about 20 minutes.
Prepare Caramel glaze first:
Place the Monk Fruit sweetener and butter in a large heavy skillet. Continue stirring while cooking on medium heat until the mixture melts and begins to turn caramel colored and thickens like corn syrup. (probably 5-8 minutes depending on your burners) If you notice it begin to smoke remove immediately from the burner. Add the cream and continue cooking until creamy caramel colored. Pour the caramel into a souffle dish and slightly rotate the dish side to side to coat the bottom and sides up to 1/2 inch or so. Set aside while you make the flan. You will notice the caramel has hardened slightly.
Note: if you use pre-made caramel cook in a skillet for a few minutes to harden slightly.
Prepare custard:
In med bowl, beat the eggs for a few minutes. Meanwhile, heat up the milk until warm. Add sweetener and vanilla to milk. Stir to dissolve sweetener.
Let the milk mixture cool down a little and then add about 1/4 cup to the eggs while continuing to beat on low. *If the milk is too hot, you’ll discover that you just made scrambled eggs.
Continue beating and slowly add the milk 1 cup at a time until all of the milk is incorporated.
Let the egg mixture rest to let the foam subside a little, then run through a strainer and slowly pour it into the souffle dish that has been coated with the caramel.
Place the flan dish into a larger oven proof deep dish pan (bain -marie) that has been filled with 1 inch of water.
Cook at 350 for 60 -75 minutes or until a toothpick comes out clean.
Note: I cooked my flan the full 75 minutes.
Let the flan cool in it’s pan and place in the refrigerator overnight or at least 3 hours.
When ready to serve, loosen the sides of the flan with a knife and giggle the pan to loosen it. Watch my video above.
Cover the top of the flan with a deep serving dish and invert it. Spoon out the caramel over the flan.
Serve with real whipped cream. Most whipped creams don’t have any, or only 1 gram of sugar.
+
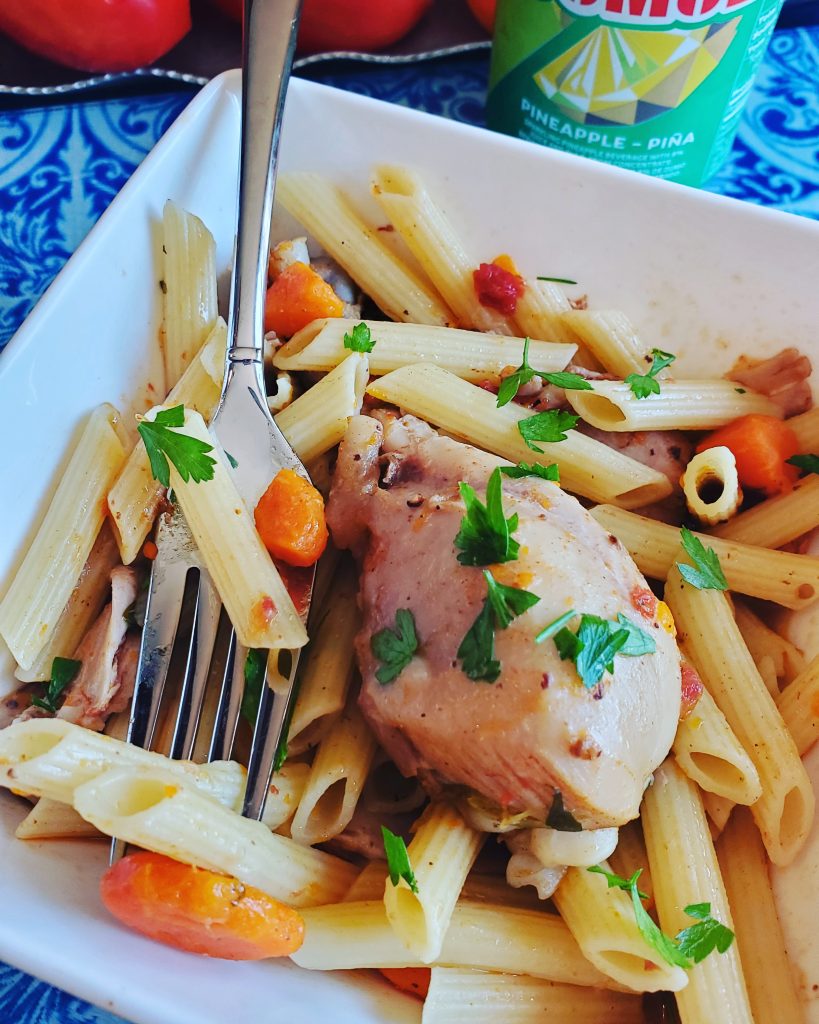
This chicken and pasta recipe is a one pan dish that’s simple to prepare and cooks in under 1 hour. The chicken comes out tender, and full of flavor. Chose your favorite pasta such as ziti, elbows or even spaghetti to complete this comforting dish.
Ingredients:
8-10 drumstick or thighs (skin removed if preferred)
8 oz. to 1 pound of your favorite pasta
1 large onions (chopped)
3 cloves garlic (chopped)
1 bay leaf (whole)
1 cup chopped ripe tomatoes
2 carrots (chopped)
1/4 cup olive oil
1/4 cup white wine
1 tablespoon paprika
1 tablespoon salt
1 teaspoon black pepper (if desired)
2 cups chicken broth
2 cups water
Preparation:
Season chicken with spices and wine and let sit overnight or at least 1 hour in refrigerator.
Let chicken come to room temperature save any liquid from marinade. Brown on both sides in olive oil in a heavy dutch oven pan with a lid.
Add onion, garlic, bay leaf and carrots and stir well. Let cook for a few minutes to brown. Add the tomatoes and broth, cover and cook for about 25 minutes on medium heat.
Cook pasta as directed in package and add to the cooked chicken and cook for another 5-10 minutes or add water to the chicken, let come to a boil and add pasta. Stir well, cover and cook until pasta is cooked. Remove bay leaf. Remove any excess skin on chicken if desired and serve.

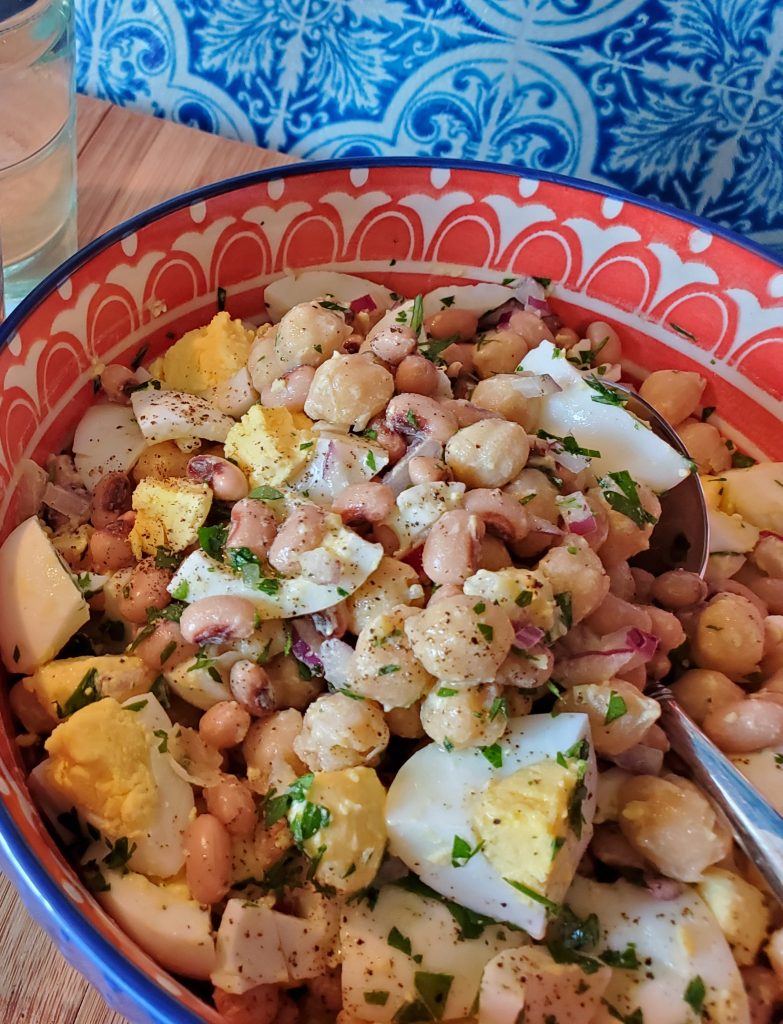
Ingredients:
2 cans of either chick peas or black eyed peas or combine both
4 to 6 boiled eggs (quartered)
1/4 to 1/2 cup olive oil
1/8 cup white wine vinegar
salt and pepper to taste
2 to 3 tablespoons chopped parsley (for garnish)

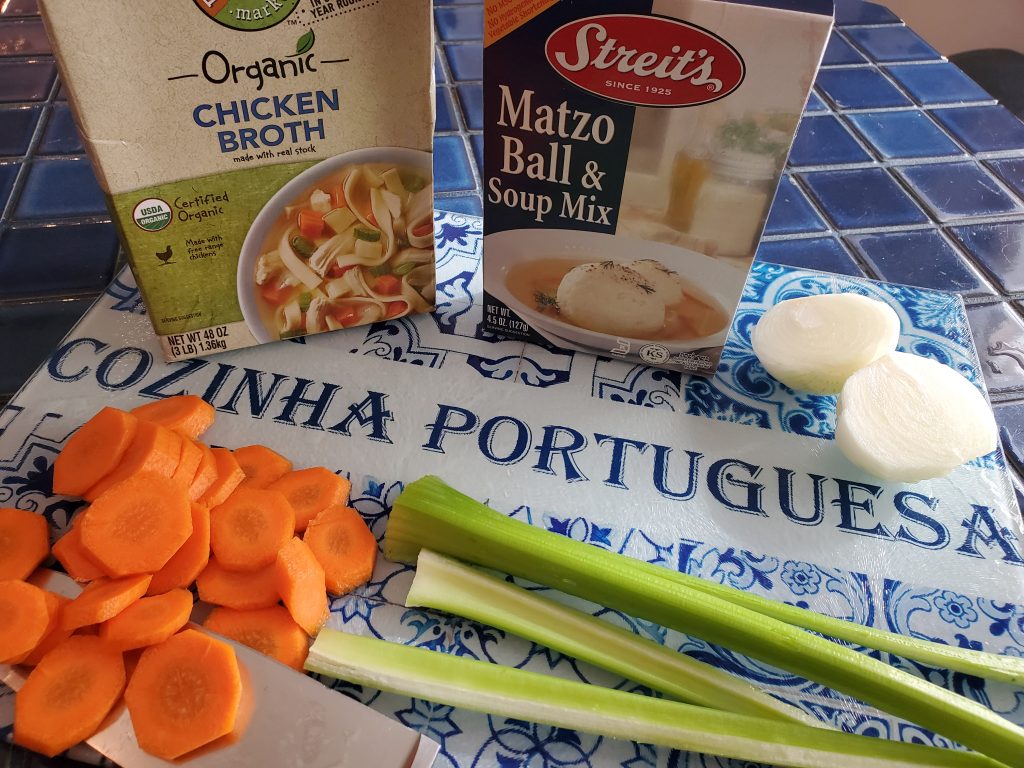
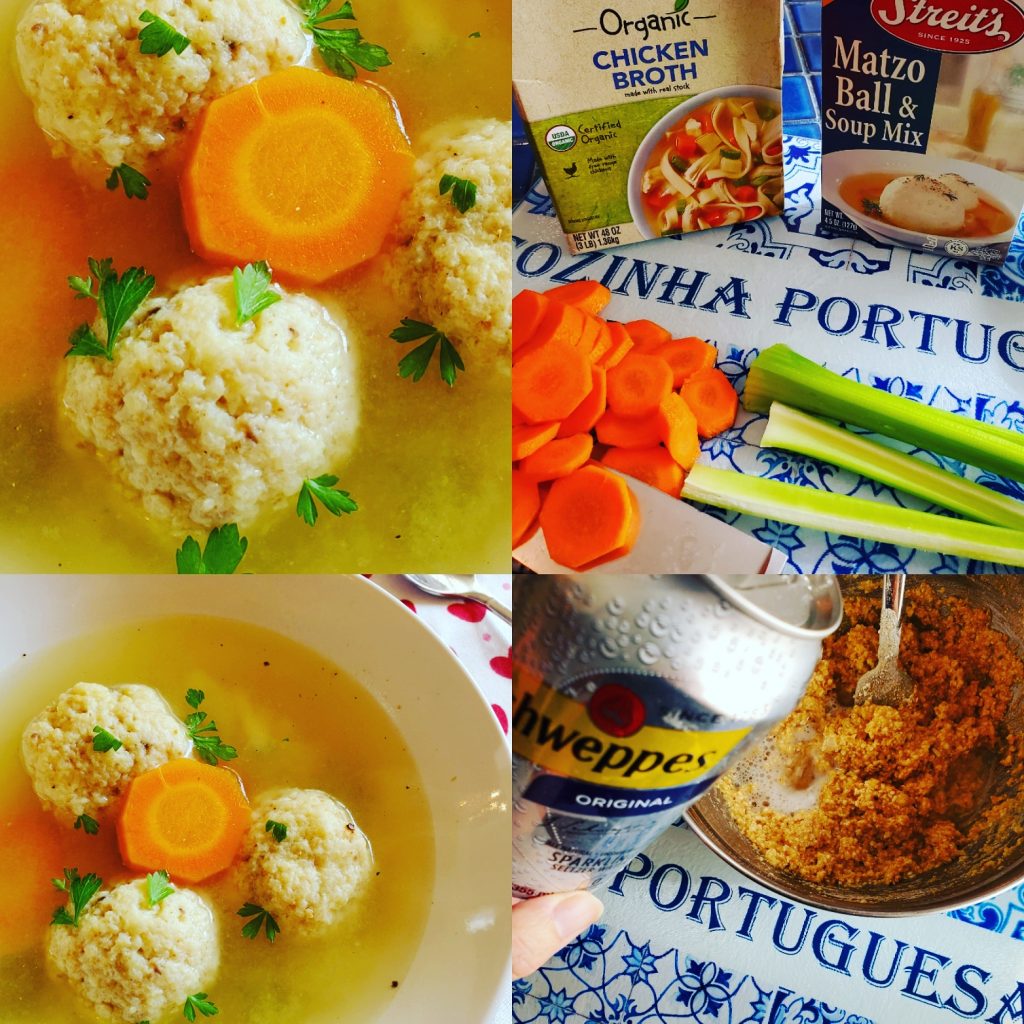
Matzo Ball Ingredients:
3 eggs (separated)
1 and 1/2 tablespoons olive oil
2 tablespoons club soda (seltzer)
1 package Matzo Ball soup mix (I use Streitz)
Soup ingredients:
1 bone in chicken breast
2 stalks celery (chopped)
1 small onion (chopped
2 large carrots (sliced)
8 cups chicken broth or more
4 oz egg noddles (optional)
salt to taste
crushed black pepper
parsley for garnish
Preparation:
Prepare the matzo balls by beating egg whites in a small bowl. In a separate bowl beat yolks, add olive oil, matzo, and seltzer and mix slightly. Fold in egg whites gently until incorporated. Don’t over mix. Place mix in refrigerator to set for at least 20 minutes while you cook the soup.
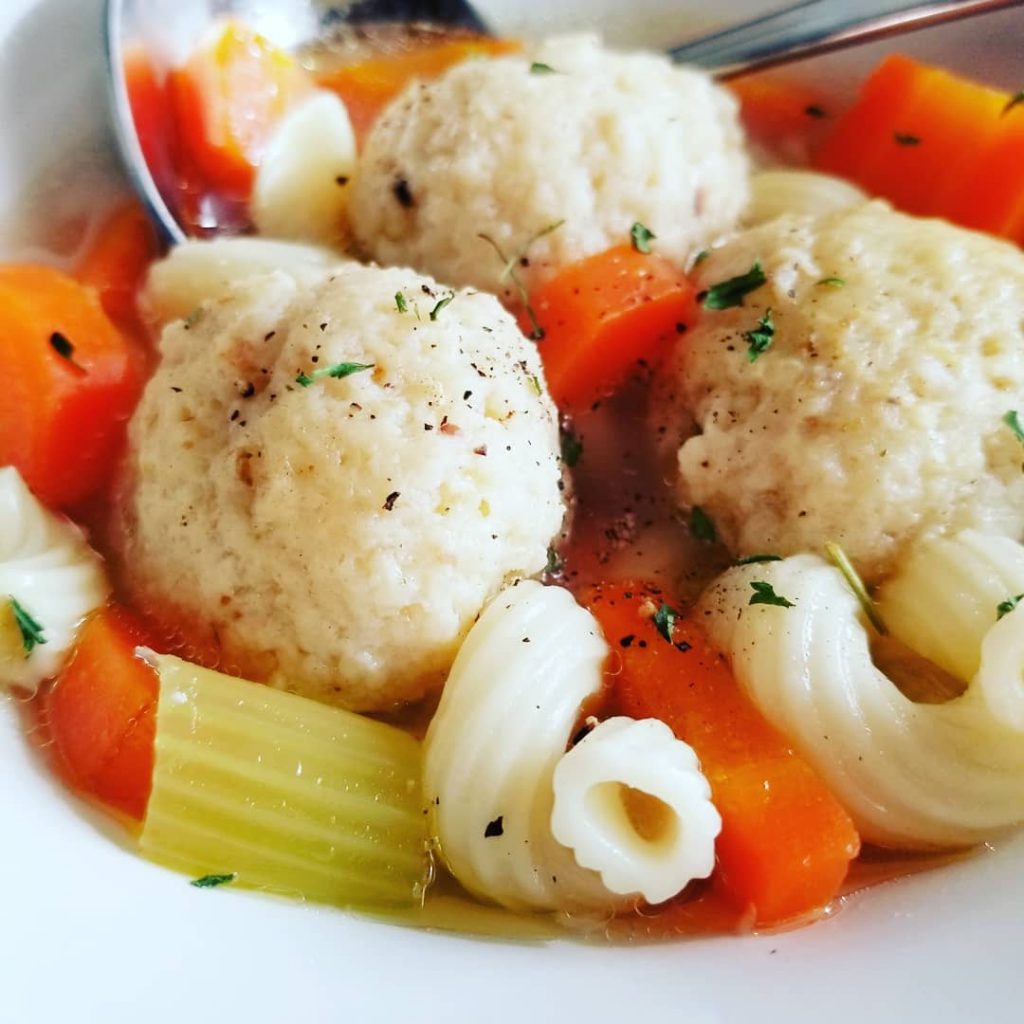
Soup:
Place broth, onion, celery, 1/2 of carrots and soup mix seasoning in a medium soup pan and bring to a boil. Add chicken breast, cover and cook for about 20 minutes on medium heat. Remove chicken and remove any bone, skin and cartilage. Shred chicken and add back into soup.
Make matzo balls:
Spoon 1 teaspoon of mix onto your slightly greased palm and shape gently into balls. *Do not compress. Add to simmering soup.
Add remaining carrots and noodles to soup and let cook along with the matzo balls for about 20 minutes. Stir gently once in a while.
Taste for saltiness and add more salt if desired. Garnish with crushed black pepper and parsley.

Ingredients:
1 (3 to 4) pound roasting chicken (butterflied)
2 lemons (sliced)
1 large onion (chopped) (optional)
¼ cup olive oil
1 tablespoon butter
1 tablespoon salt
2 teaspoons paprika
1 tablespoon garlic powder
½ teaspoon black pepper
1 cast iron grill pan if available
Preparation:
Pre heat oven to 400 degrees F.
Mix salt, paprika, garlic and pepper in a bowl and grind in a mortar and pestle. Marinade chicken and let sit for at least 30 minutes.
Heat a grill pan with half of the olive oil.
Top chicken with olive oil and butter and brown skin side down for 5 minutes. Turn over and grill for another 5 minutes.
Add onions under and around the chicken.
Top with lemon slices evenly.
Cook for 45 minutes to 1 hour until the chicken gets golden brown and crispy. Chicken should reach 190 F.
Cut into pieces and serve in the pan with the onions and lemons slices on top.
Click on image to order
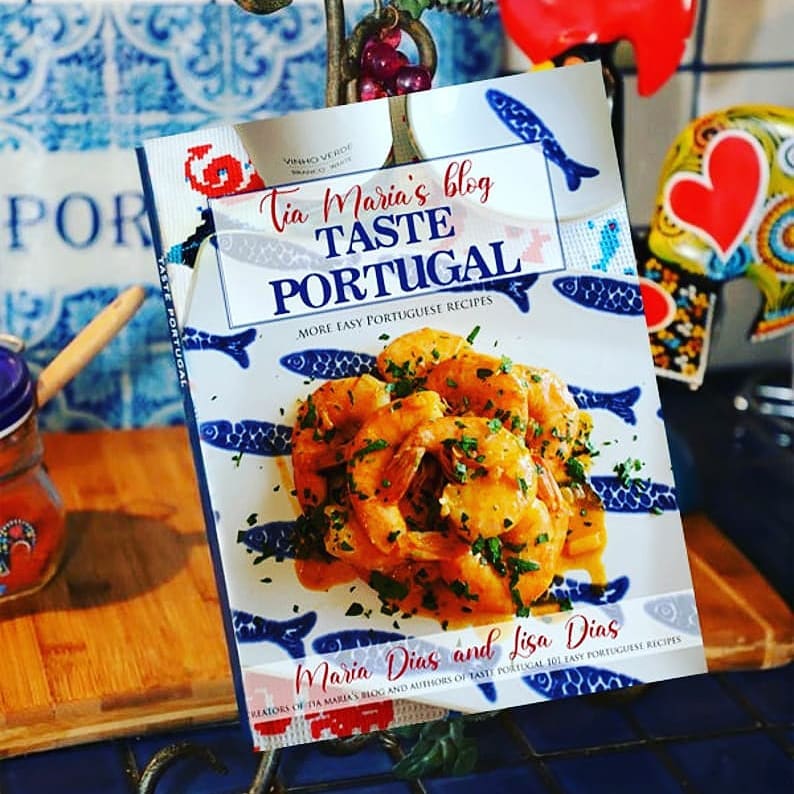
Introducing my second cookbook; TASTE PORTUGAL MORE EASY PORTUGUESE RECIPES. This cookbook has 121 recipes. Including my spice and sauces, soups and how-to’s like “how to cook sardinhas” “how to cook polvo” and “how to hydrate salt cod”. From the beginner to the busy experienced home cook who wants to learn some new, easy, simple recipes. Order a copy on Amazon.com (USA) Amazon.ca(Canada) or any Amazon around the world.


Tia Maria’s blog was recently featured in the Luso Americano newpaper article by Henrique Mano. Find the full article here.
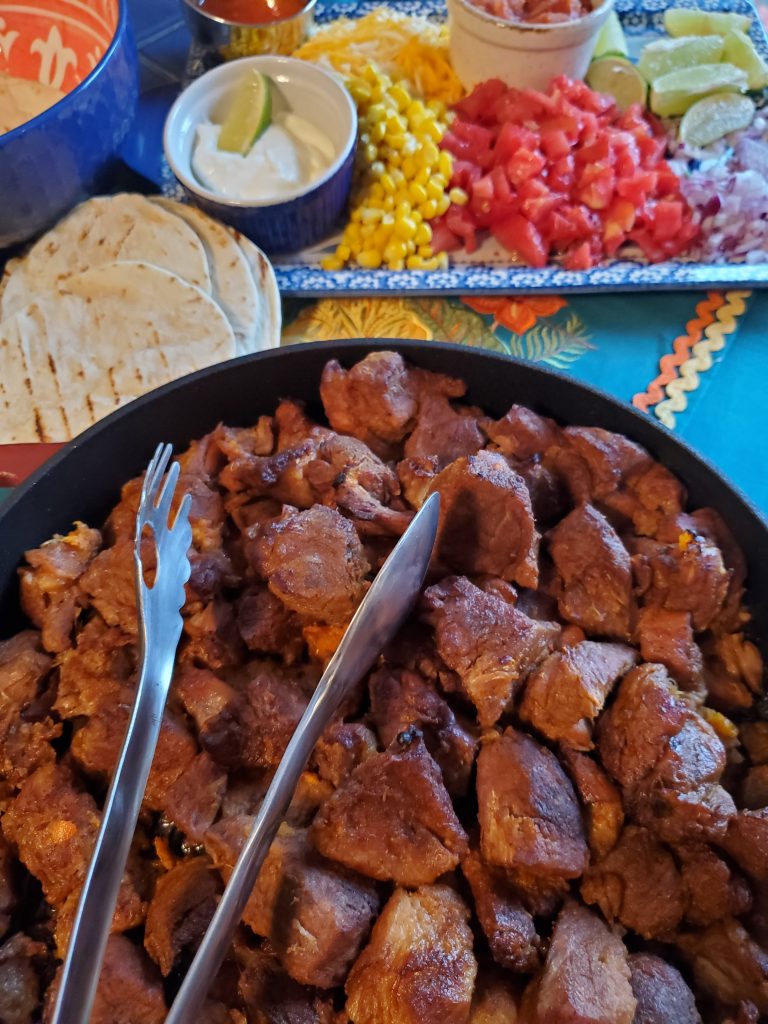
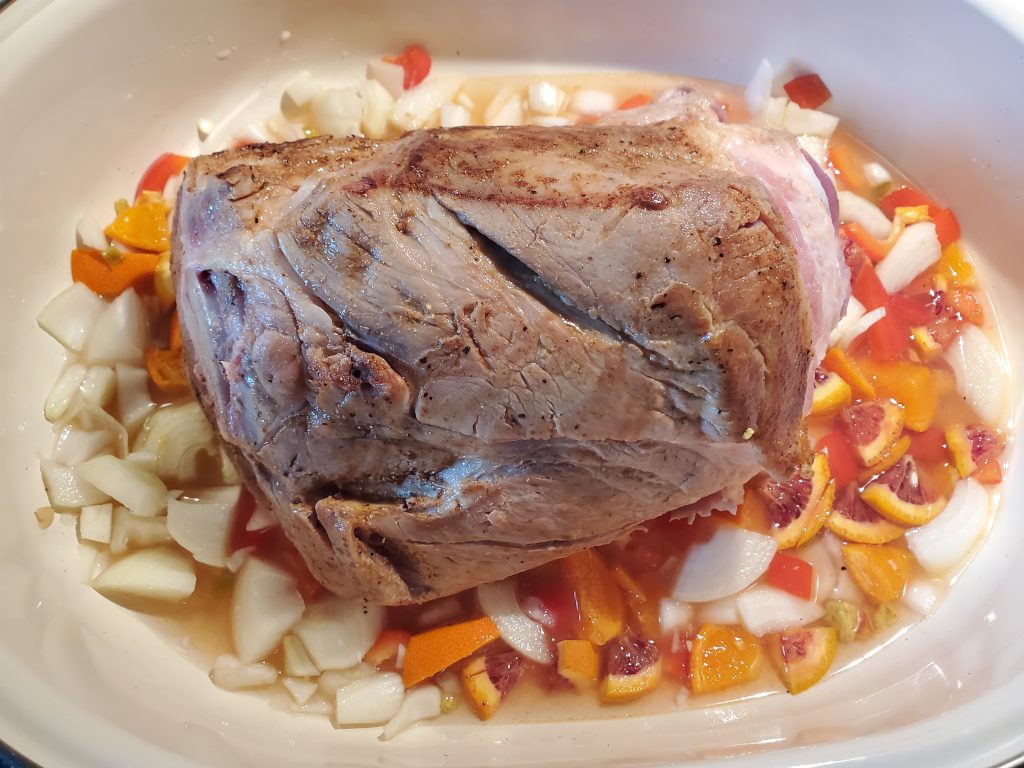
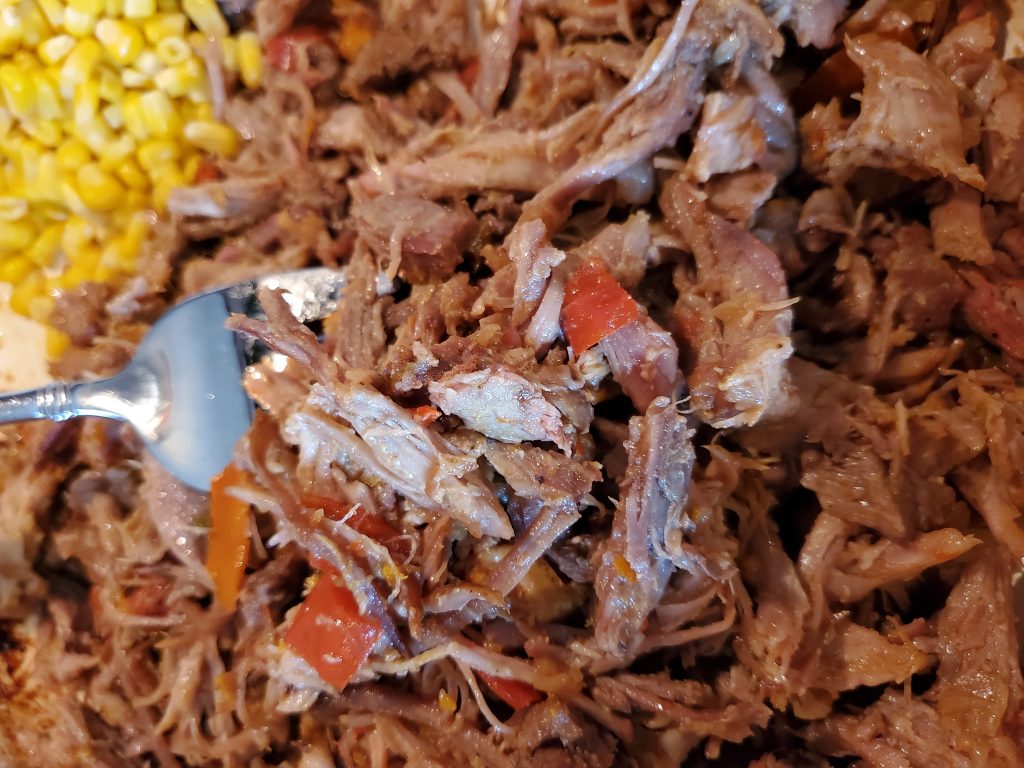
This is the best recipe that’s I ever made for carnitas. The recipe is easy and cooks for about 3 hours in the oven making the meat moist, succulent and very tender which falls apart with a fork. I recommend cooking it in a large cast iron dutch pan for best results. I also browned the top of the meat in the broiler for a few minutes creating crispy edges.
Ingredients:
4 or 5 pound pork but (outer fat trimmed, cut into 2 inch cubes)
1 large onion (chopped)
1 large orange or tangerine (chopped)
3 tablespoons my TASTE PORTUGAL- TIA MARIA’S PORTUGUESE SEASONING
1 tablespoon chili powder
1 tablespoon Portuguese red pepper paste or 2 red chili peppers (finely minced)
1 and 1/2 cup chicken broth
2 tablespoons olive oil
Ingredients to make tortillas: These are optional. You can use your favorite ingredients; small soft warmed tortillas, corn, black beans, chopped red onion, lime wedges, shredded cheddar cheese, salsa, sour cream.
Preparation
Preheat oven to 350 degrees F. The pork takes 3 hours to cook in oven. You remove the lid from pan half way into cooking.
Season pork with my spice mix and chili powder. Let sit for at least 30 minutes or best overnight.
In a large cast iron pan, saute meat in olive oil on all sides. Add the onions, orange, red pepper paste and broth and stir.
Place pan in the oven and cook with lid on for 1 and 1/2 hours. After 1 and 1/2 hours remove lid and cook for remaining time.
Browning the meat in broiler:
Heat a cast iron pan or large tray in the oven. Strain meat from pan and place in cast iron skillet. Broil meat for about 5-8 minutes or until crispy on top to your desired taste.


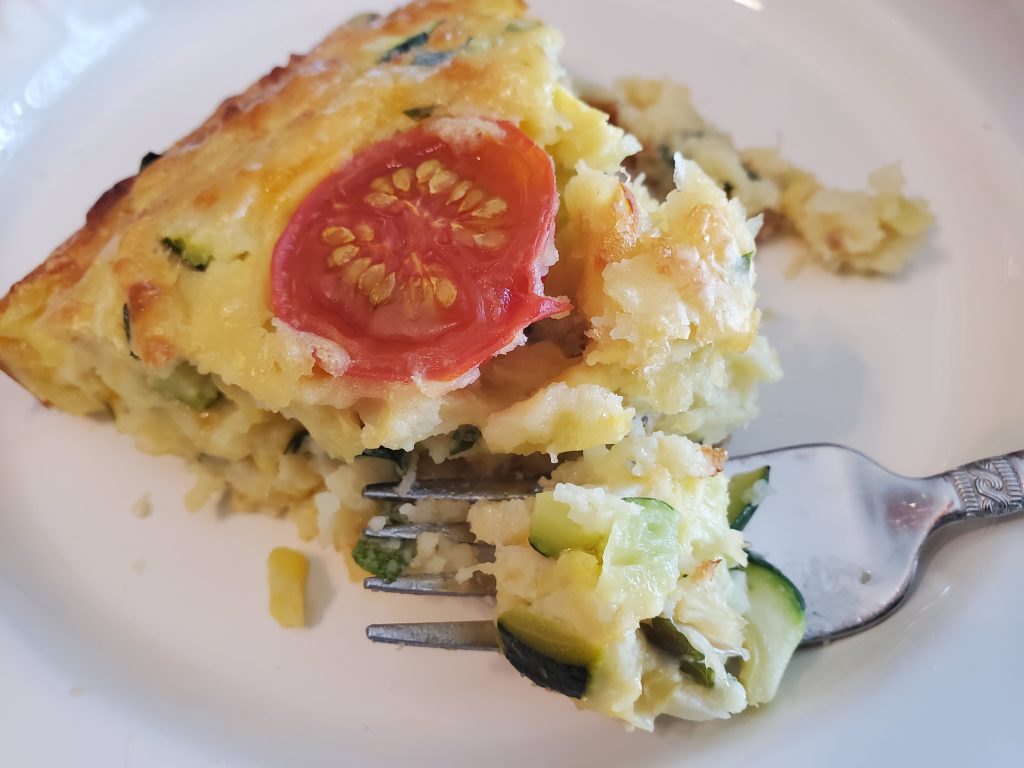
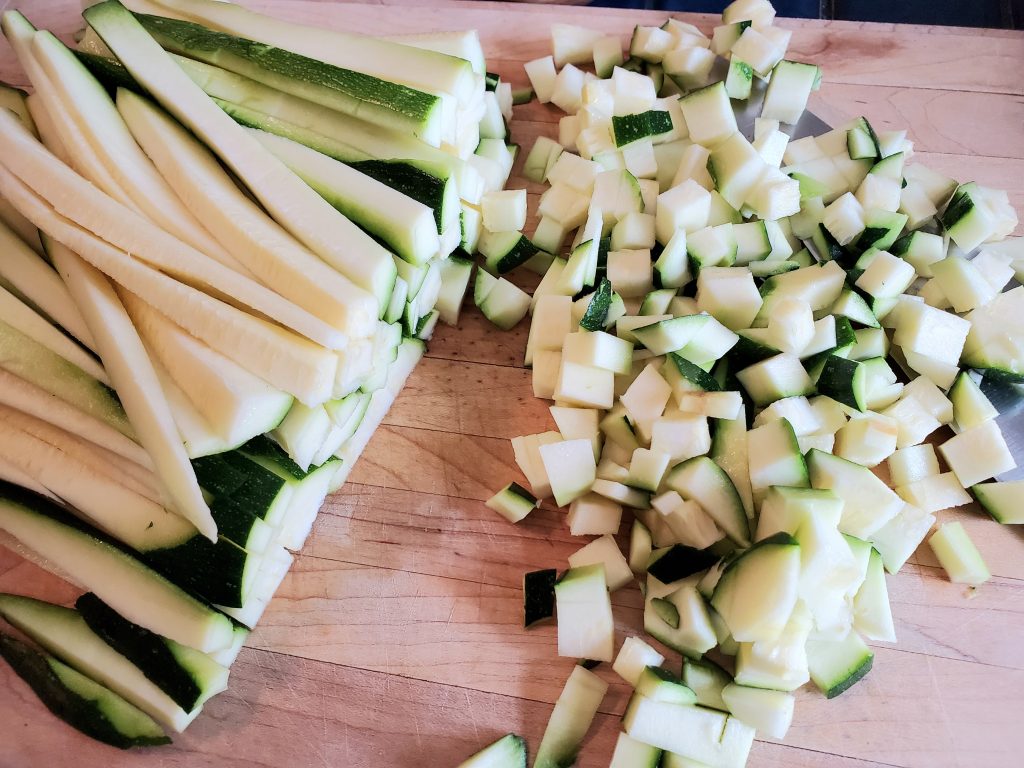
This savory quiche will be your favorite way to use all that summer zucchini that’s in season right now. I bet you have all the ingredients in your pantry too. That’s what makes this dish easy to prepare. It’s a great lunch, dinner, snack or serve as an appetizer.
Ingredients:
3 to four cups (finely diced zucchini with skin on)
8 oz cooked bacalhau (finely shredded)
1 small onion (diced)
4 eggs
1 cup any biscuit mix
1/4 cup olive oil
1/2cup shredded cheddar cheese
1/4 to 1/2 cup pecorino or Parmesan cheese
cherry tomatoes as a garnish (if desired)
1 tablespoon minced parsley
Preparation:
Set oven to 350 degrees F. Lightly grease a pie plate with cooking spray or butter.
Saute onion in olive oil for a few minutes until translucent. Add bacalhau and cook for a few minutes to absorb flavors. Set aside to cool.
Meanwhile beat eggs until foamy. Add zucchini, cheeses and biscuit mix. Add the cooled onion and bacalhau and mix thoroughly.
Top with sliced cherry tomatoes and bake for about 45 to 50 minutes until golden brown.
Serve with a salad and white wine.


Festa food recipes continue this month with these Filhos da Festa. This popular dessert is a favorite at every festa. Some people call them “Malasadas” some call them “Filhos”. Call them any name you want. Enjoy the recipe.
Ingredients:
9 cups all-purpose flour
1 cup sugar
1 and ½ teaspoon salt
6 eggs
1 stick butter or margarine (8 tbsp)
1 teaspoon lemon or orange extract
2 cups milk
¼ cup fresh orange juice
oil for frying (corn oil or vegetable oil works best)
granulated sugar
cinnamon for dusting (optional)
Ingredients to make the starter yeast:
3 tablespoons flour
½ teaspoon sugar
2 packages of dry yeast or 1 small cube yeast (0.6 oz, 17g)
½ cup warm water
First step:
Mix the ingredients in the starter yeast and set aside until bubbles form.
Second step:
Put the milk and butter in a pan on low until butter is melted
In a large bowl, mix eggs, salt, sugar, lemon zest, and orange juice. Beat with electric mixer for 2 minutes.
Add the milk and butter and mix for 30 seconds. Add yeast mix and flour and knead well until the dough is elastic and smooth.
Cover and let rest for 30 minutes.

Punch down the dough, cover and let it rise until doubled.
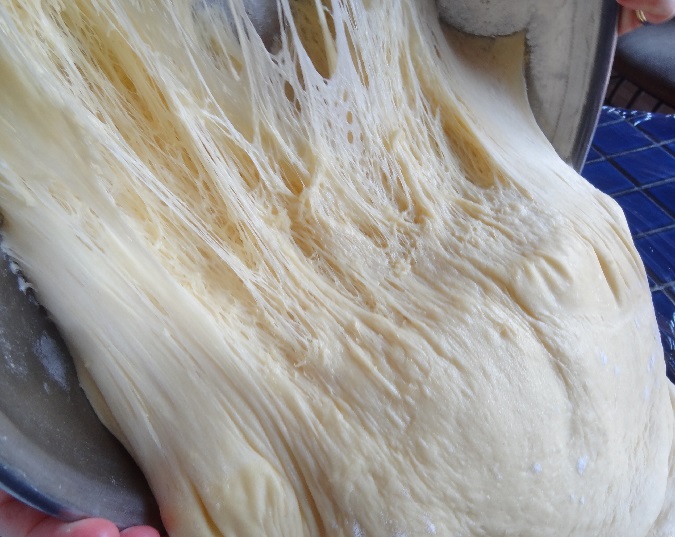
Your dough will look light, airy and elasticy .

In a deep fryer heat the oil to 375 degrees. Using your hands lightly greased with olive oil, stretch pieces of the dough into thin strips of desired sizes of about 3 by 4 inches.
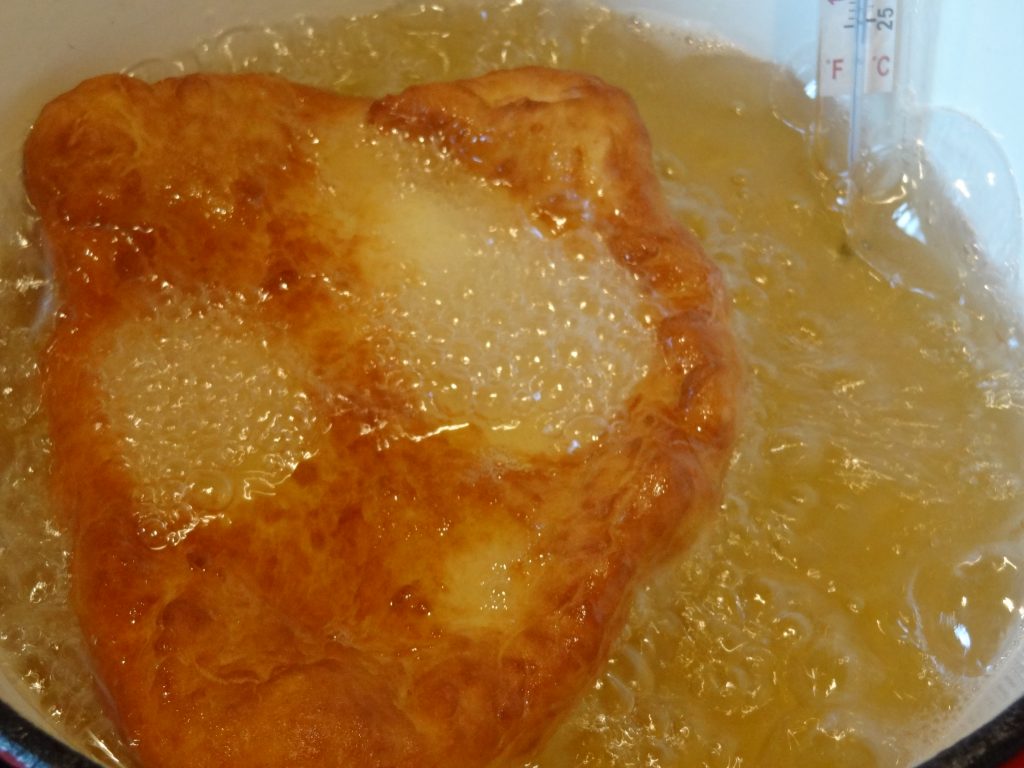
Fry until golden brown.
Drain on paper towels. Dust with granulated sugar while still warm. Note: You can also dust with a mixture of sugar and cinnamon.

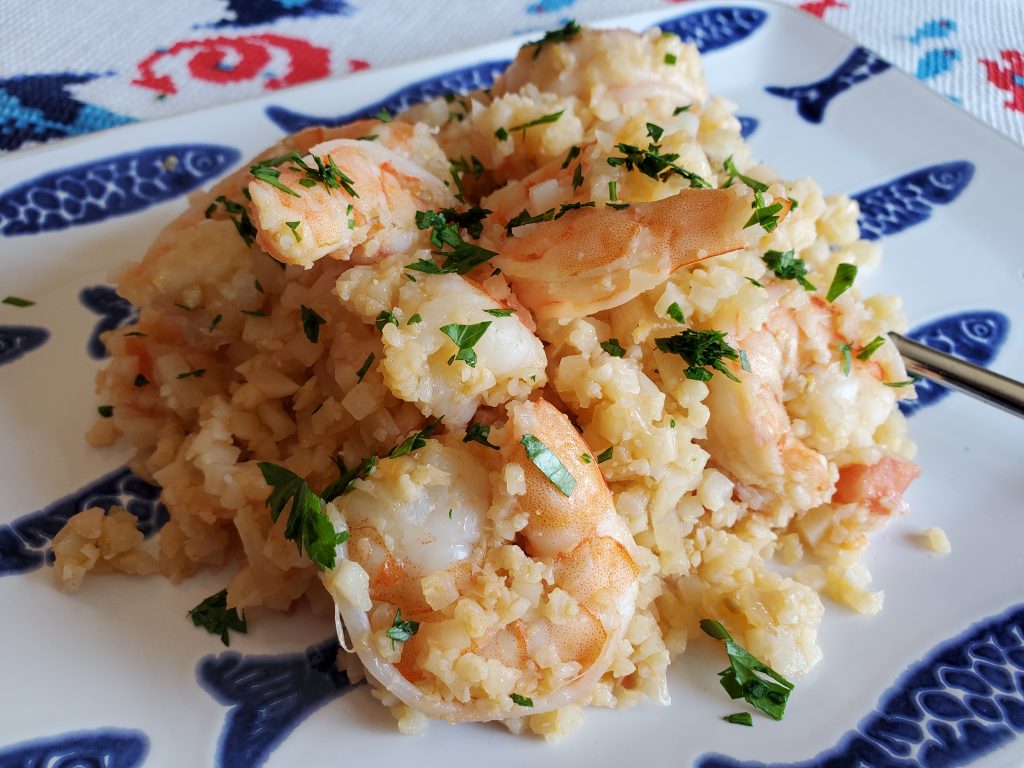
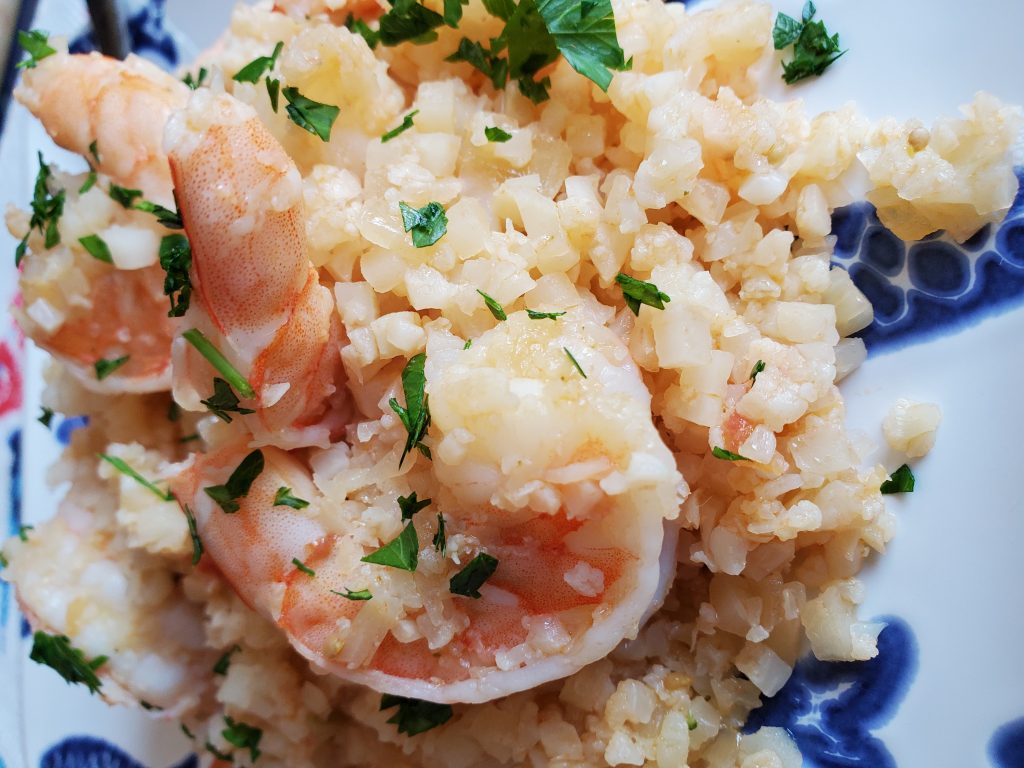
You’ll love this easy, low carb, low calorie version of the classic Portuguese Shrimp and Rice dish that’s one my favorite recipes on this blog. This recipe only takes about 20 minutes to fully prepare and cook. Enjoy!
Ingredients:
1 12-16 oz. package frozen cauliflower rice ( I used Trader Joe’s)
1 small onion (minced)
1/2 to 1 pound raw medium shrimp de-veined and shelled
2 cloves garlic (minced)
2 tablespoons olive oil
1 cube chicken bouillon
1/2 teaspoon salt
1/4 teaspoon paprika
parsley (minced for garnish)
Preparation:
Saute onion and garlic in olive oil until translucent in a non stick skillet. Add bouillon and and let dissolve. Season shrimp with salt and paprika. Add cauliflower to onion and garlic, stir to dissolve frozen pieces, and cook for about 5 minutes while stirring often.
Add shrimp to cauliflower, mix well and let cook for about 5 minutes or until shrimp turns pink and fully cooked.
Garnish with parsley.
Perfect pairing with Portuguese Vinho Verde wine.
Cooking Portuguese is easy! Watch my videos for Piri Piri Frango Churrasco and Baked Piri Piri Chicken!
ORDER SET OF SPICES 1 REGULAR AND 1 SPICY ON PAYPAL OR SCAN QR CODE
FREE SHIPPING IN USA!
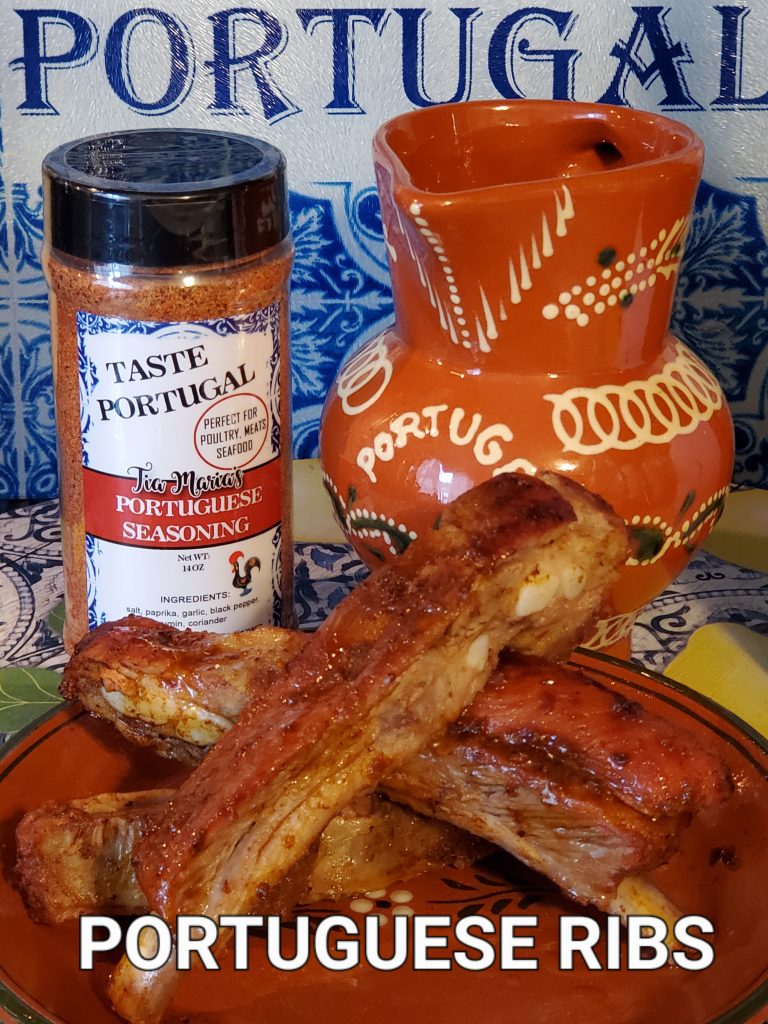
You can’t get the Portuguese Festa experience without enjoying some authentic barbecue chicken while you’re there. The chickens are deliciously flavored with Portuguese spices and are sold whole for the family to enjoy along with some fresh Portuguese rolls. No utensils required because you eat with your hands of course.
Ingredients:
2 whole fryer chickens (butterflied, washed and pat dry)
4 tablespoons my spice mix (REGULAR OR SPICY FOR PIRI PIRI CHICKEN)
2 tablespoons olive oil
1/4 cup white wine
Preparation:
Mix spices with oil and wine to make a “wet rub”. Marinate chickens with wet spice rub one day before or for at least 2 hours before cooking. Store overnight in refrigerator, or let sit at room temperature the same day.
Remove from refrigerator and let come to room temperature before cooking.Set grill to high heat. Place chickens skin side up on grill and cook for about 15 minutes. Turn skin side down and let cook another 10-15 minutes. Move chicken away from flames as it cooks. Lower heat if needed and keep cooking turning on each side as needed. Cook until well done for a charred skin.
Serve chicken cut up with crusty bread, or with any side dish you prefer.

Time to Festa everyone! The months of June through September is “Festa” season throughout Portugal and in Portuguese communities around the world. Since most festas have been canceled this year in the USA due to the Corona Virus, I’ve brought the classic recipes for you to enjoy in your own backyard festa! I’ve started my series of “Festa Foods” posts with my Mini Prego Sliders. I’ve made these smaller sandwiches using mini Papo Seco rolls. Sauted onions add a savory bite and the shoe string fries are a total game changer on the traditional plain sandwich. No Portuguese festa is complete without some Portuguese beer of course. Happy Summer and Happy Festa Everyone!
Ingredients for 1 dozen sliders:
1 dozen mini papo seco rolls (cut larger rolls in half if you don’t have the mini)
12 (4-6)oz sirloin strip steaks cut to 1/2 inch thick
2 large onions (sliced)
1 pound shoe string fries (frozen or fresh) (this is optional)
1 to 2 tablespoons my spice mix (found at this link: https://tiamariasblog.com/portuguese-dry-rub/ )
1/4 cup olive oil
1 teaspoon salt
1/2 teaspoon black pepper
1 tablespoon white vinegar or white wine
Preparation:
Bring steaks to room temperature before cooking. Season with spice mix.
Cook unions in a large skillet in a few tablespoons of olive oil for about 5 minutes. Add salt and vinegar and cook until tender but not overcooked. Leave in skillet and set aside on low heat.
Meanwhile cook fries and keep warm.
When both onions and fries are cooked prepare steaks.
Heat a few tablespoons of oil in large heavy skillet to very hot. Cook 6 steaks at time 2 to 3 minutes on each side depending on your taste of doneness. If you like a rare steak cook less. You may need to add a few more tablespoons of oil in the second batch of steaks.
When steaks are cooked add cooked onions to pan.
Assemble sliders with steak, then onions and fries on top.
1
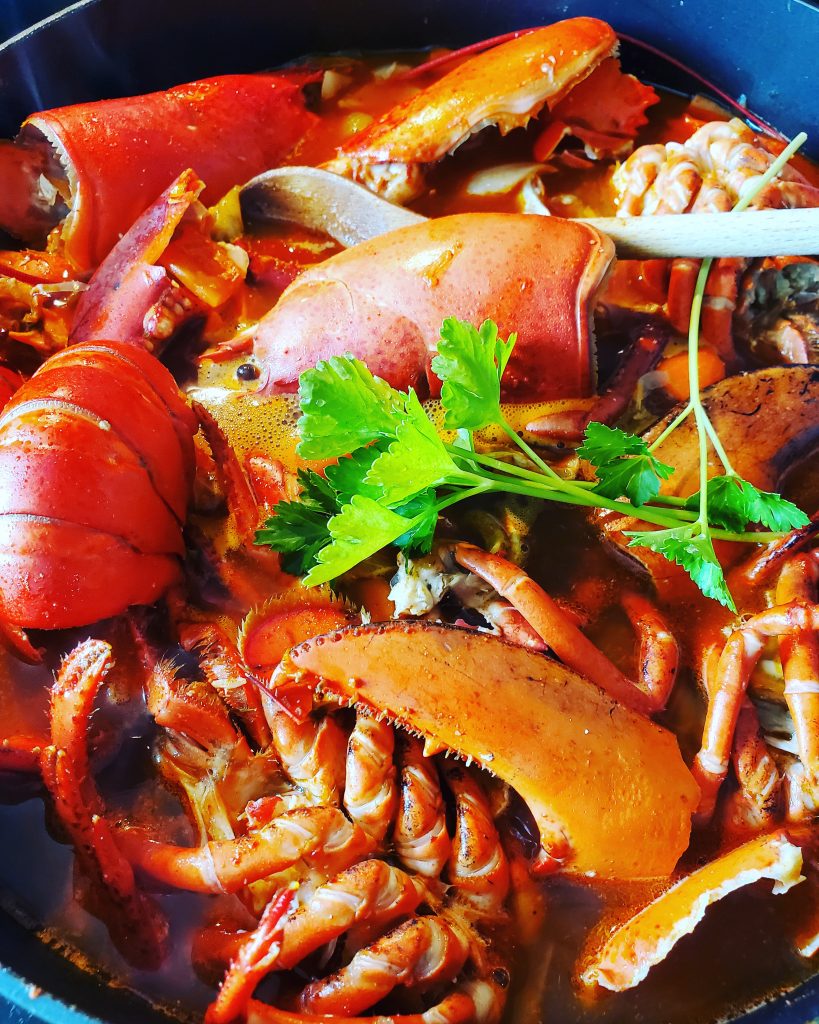
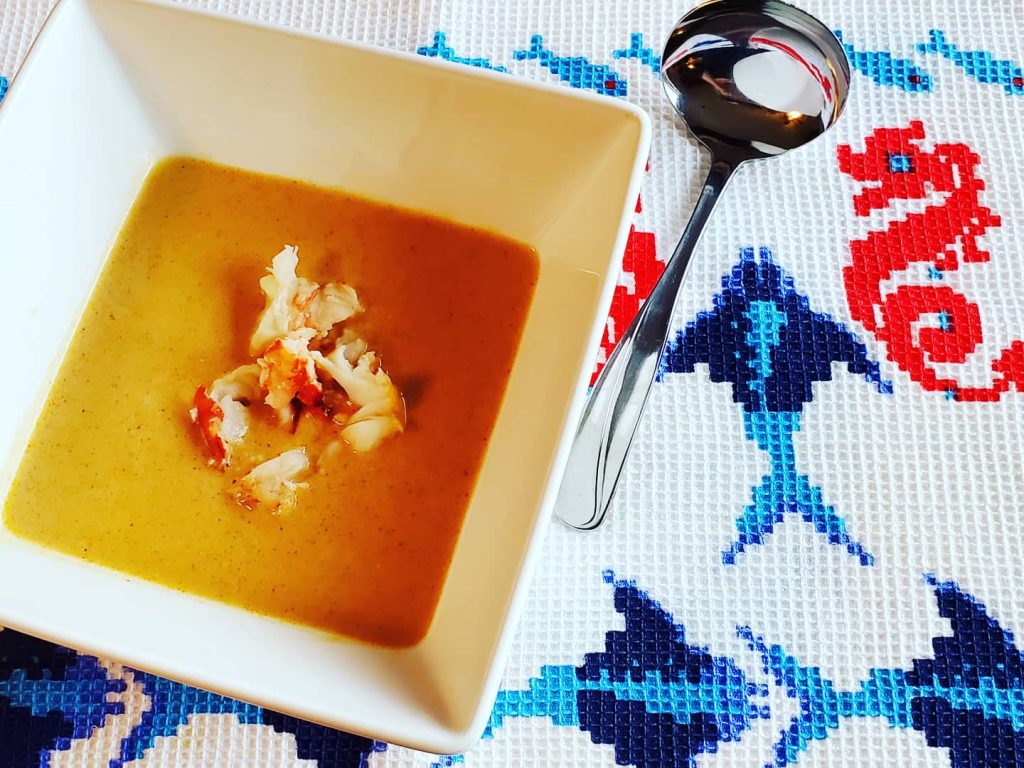
This Lobster Bisque is creamy and full of great savory flavor. Next time you have some leftover lobster shells save them or freeze them to make seafood broth or this perfect special occasion bisque. You can also use leftover shrimp shells to make seafood broths and soups. I hope you enjoy this soup as much as my family did. I also made fresh sourdough bread croutons to serve in the soup but this is optional to your taste.
Ingredients:
4 cups lobster shells (or more if you prefer)
1 to 2 cups lobster meat cut into pieces
4 cups seafood or chicken broth
1 cup water
1 cup white wine
2 tablespoons Portuguese brandy or sherry
1 large onion (chopped)
2 carrots (chopped)
1/4 cup tomatoes (chopped)
1 and 1/2 tablespoons paprika
1/4 cup flour
2 cups half and half
4 tablespoons butter
2 or 3 tablespoons olive oil
2 teaspoons salt
3 sprigs parsley
5 pepper corns
1/4 teaspoon nutmeg
1/4 teaspoon thyme
Preparation:
Place lobster shells in the olive oil and saute for a few minutes. Add the onion and carrots and cook for about 5 minutes stirring often. Add the rest of the ingredients except the lobster pieces, flour, butter, and half and half.
Let cook on medium for about 30 minutes stirring once in a while.
In a small skillet add the butter and 1/4 cup flour and make a paste. Set aside.
Pour the lobster and vegetables into a sieve or very fine strainer into a large heavy pan. Mix the shells well so all the juices go through.
Place pan on low heat and let come to a slow simmer. Add the brandy, and butter/flour paste. Mix well and let it simmer for another 10 minutes or longer on low heat until it forms a creamy consistency.
To serve add a few pieces of lobster in each bowl.


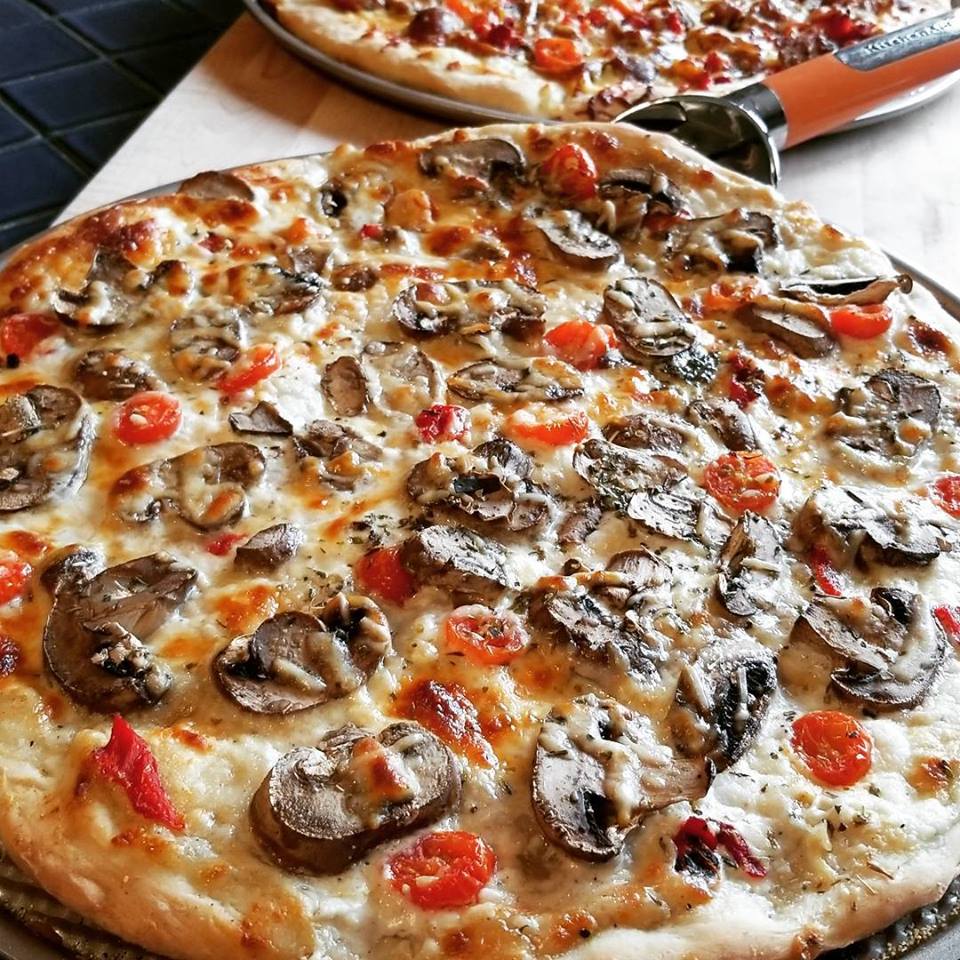
This Pizza Dough can be used to make any kind of your favorite pizza, flatbread or even foccacia breads.


Ingredients:
Place flour, sugar and dry yeast into mixer. Mix ingredients together. Slowly add water and olive oil. Knead for around 1 minute and add salt.
Continue kneading dough until a soft dough/ball forms. Add additional 1 tbsp of flour at a time if dough is too wet/sticky.
Preparation:
When dough has doubled in size, divide in half and place onto pizza pans that have been dusted with a little flour and cornmeal.
Stretch out pizza dough and add your desired toppings.
Bake at 425 F for around 15-20 minutes, depending on your oven.
Pepperoni Pizza Recipe:
Brush pizza dough with a little olive oil. Add desired tomato/marinara sauce and sprinkle 1/2 tsp of Garlic powder. Top with a 1/4 cup Mozzarella cheese, followed by 4oz of sliced Pepperoni. Top with 1/2 cup Mozzarella and 1/4 cup Pecorino cheese. Sprinkle 1/2 tsp of Italian seasoning.
Bake as directed above – enjoy your delicious pizza!
Add any toppings of your choice to make many kinds of pizza. Here are some links to recipes:
Chourico and Egg Pizza/Flat Bread
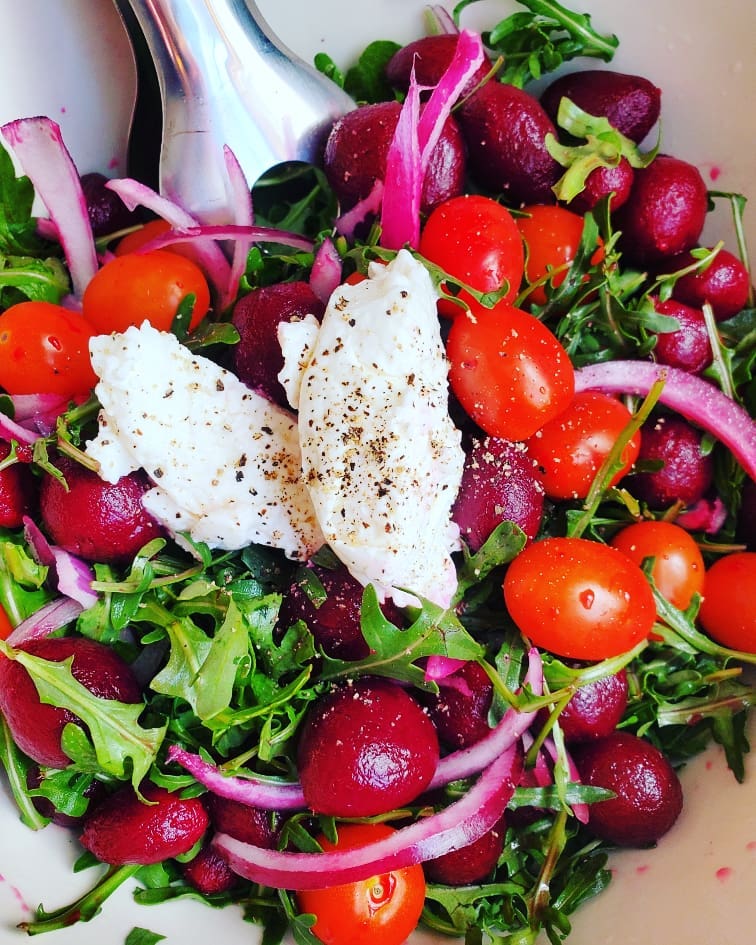
Arugula, Beet, Cherry Tomato and Fresh Farmer’s cheese salad. This healthy salad is full of antioxidants and tastes delicious. Both savory and sweet! Loving the Portuguese flag colors.
Ingredients:
Dressing:
Mix ingredients in a jar or bowl. Set aside.
Preparation:
Mix all salad ingredients in a bowl, except Farmer’s cheese. Add desired amount of dressing. Top with Farmer’s cheese and sprinkle with crushed black pepper.
Enjoy!
This fresh codfish recipe is simple and delicious! Perfect for lent, meatless Mondays or any day of the week. Feel free to use salt cod if you prefer. Here’s the recipe:
Ingredients
Preparation:
Cut codfish into 4 sections. Season with salt, pepper and lemon juice. Set aside to marinate for a few minutes.
In a skillet, add tomatoes, sliced roasted pepper, butter, chicken stock, wine and let simmer on medium heat for around 5-10 minutes, stirring often, to absorb flavors.
Arrange fish evenly in skillet. Cover the fish with the tomatoes/sauce. Cook for 5 minutes, stir (gently to not break up the fish) and cover with lid. Cook on medium heat for an additional 8-10 minutes or until codfish is flaky and white.
Garnish with Parsley and serve.
Easy and delicious – enjoy!
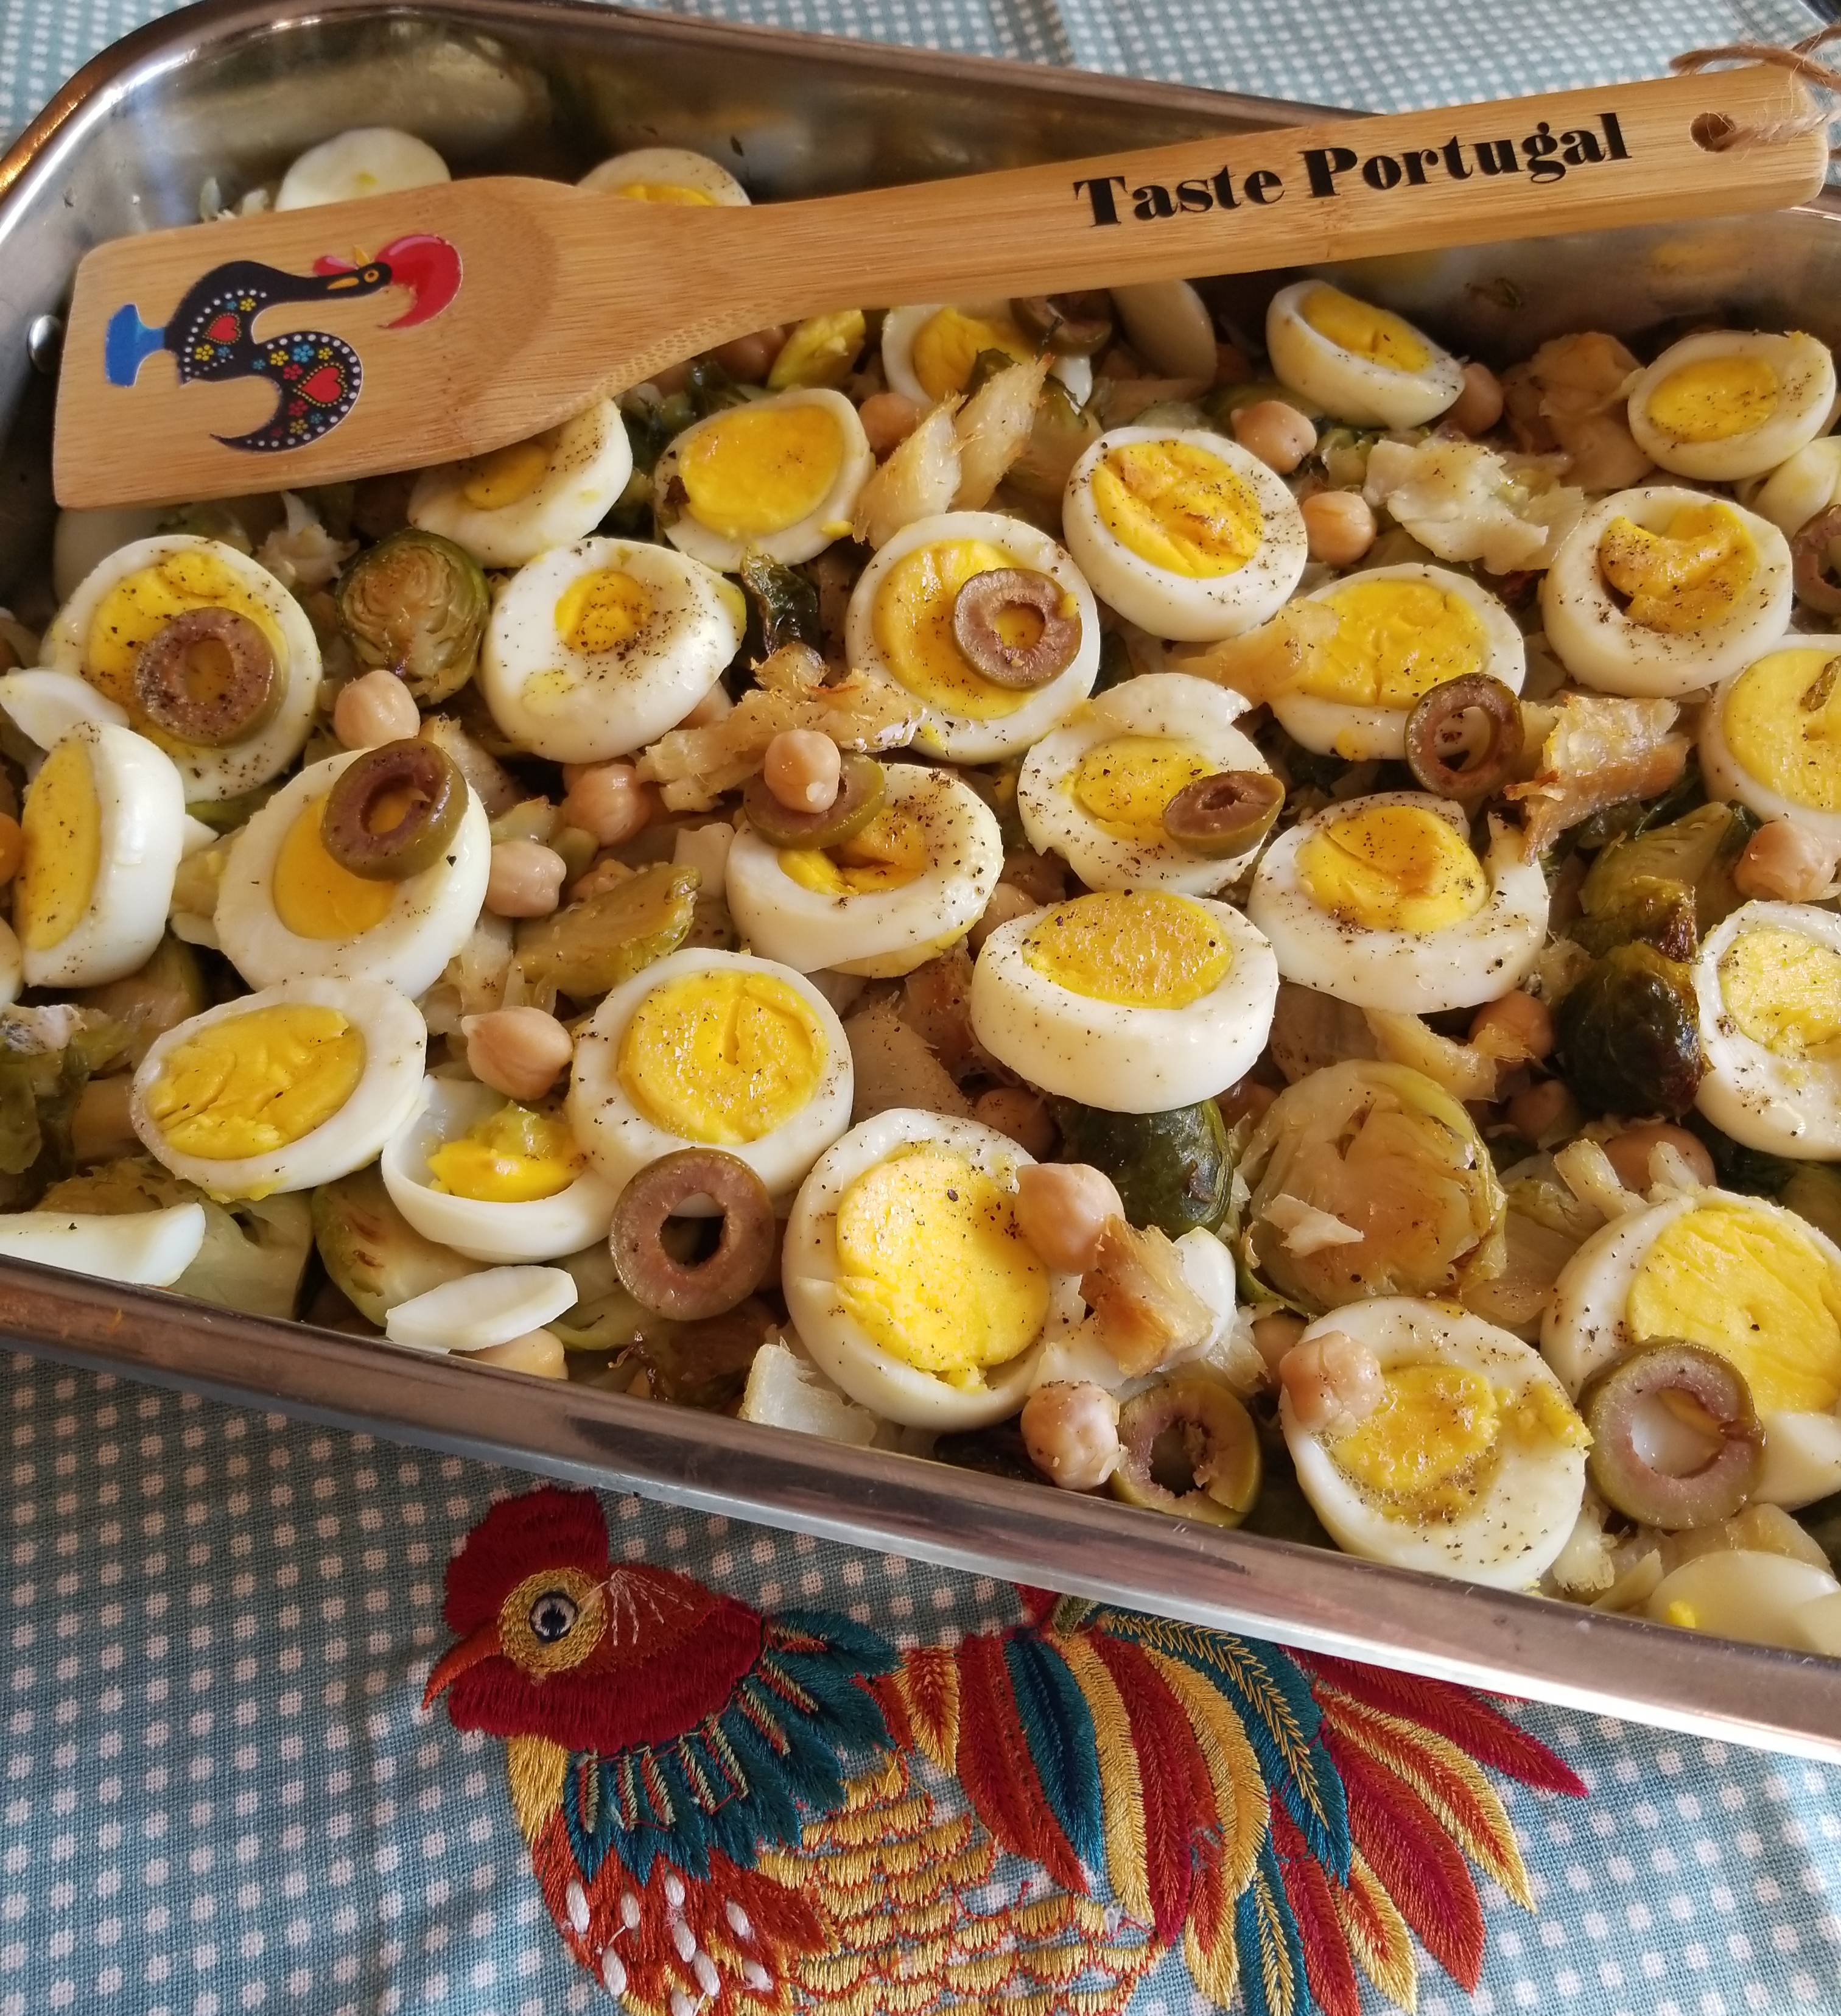
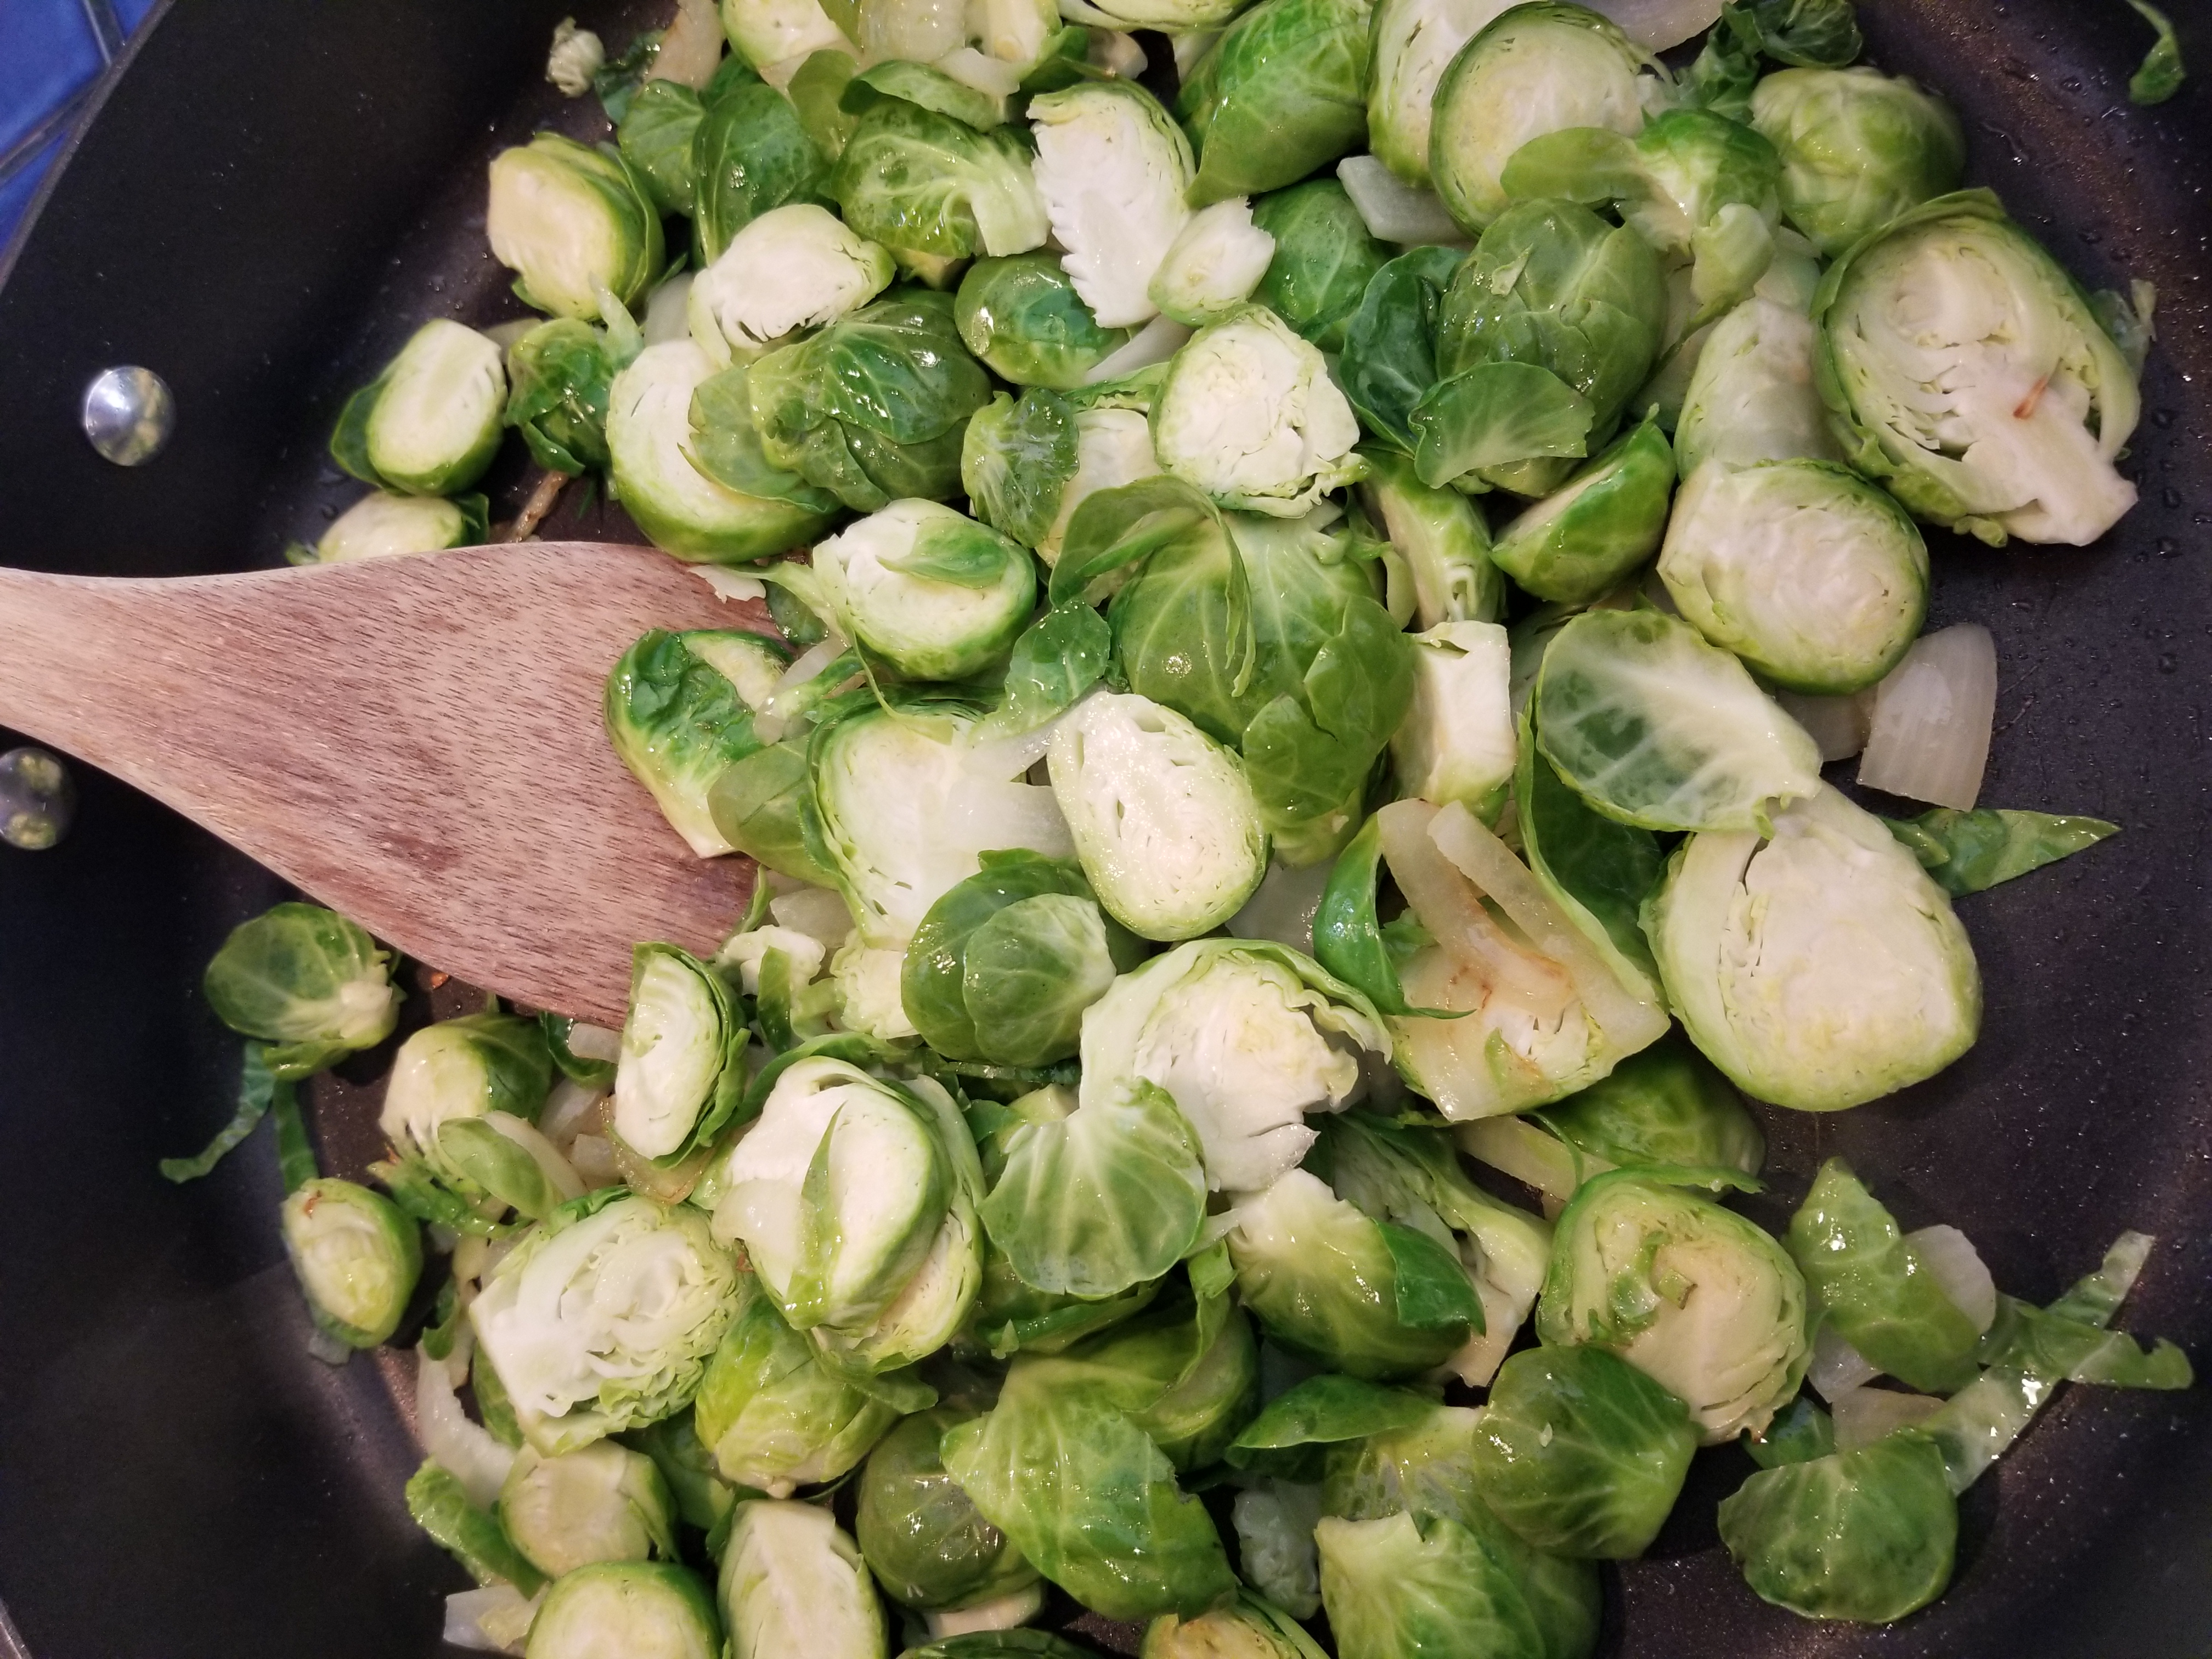
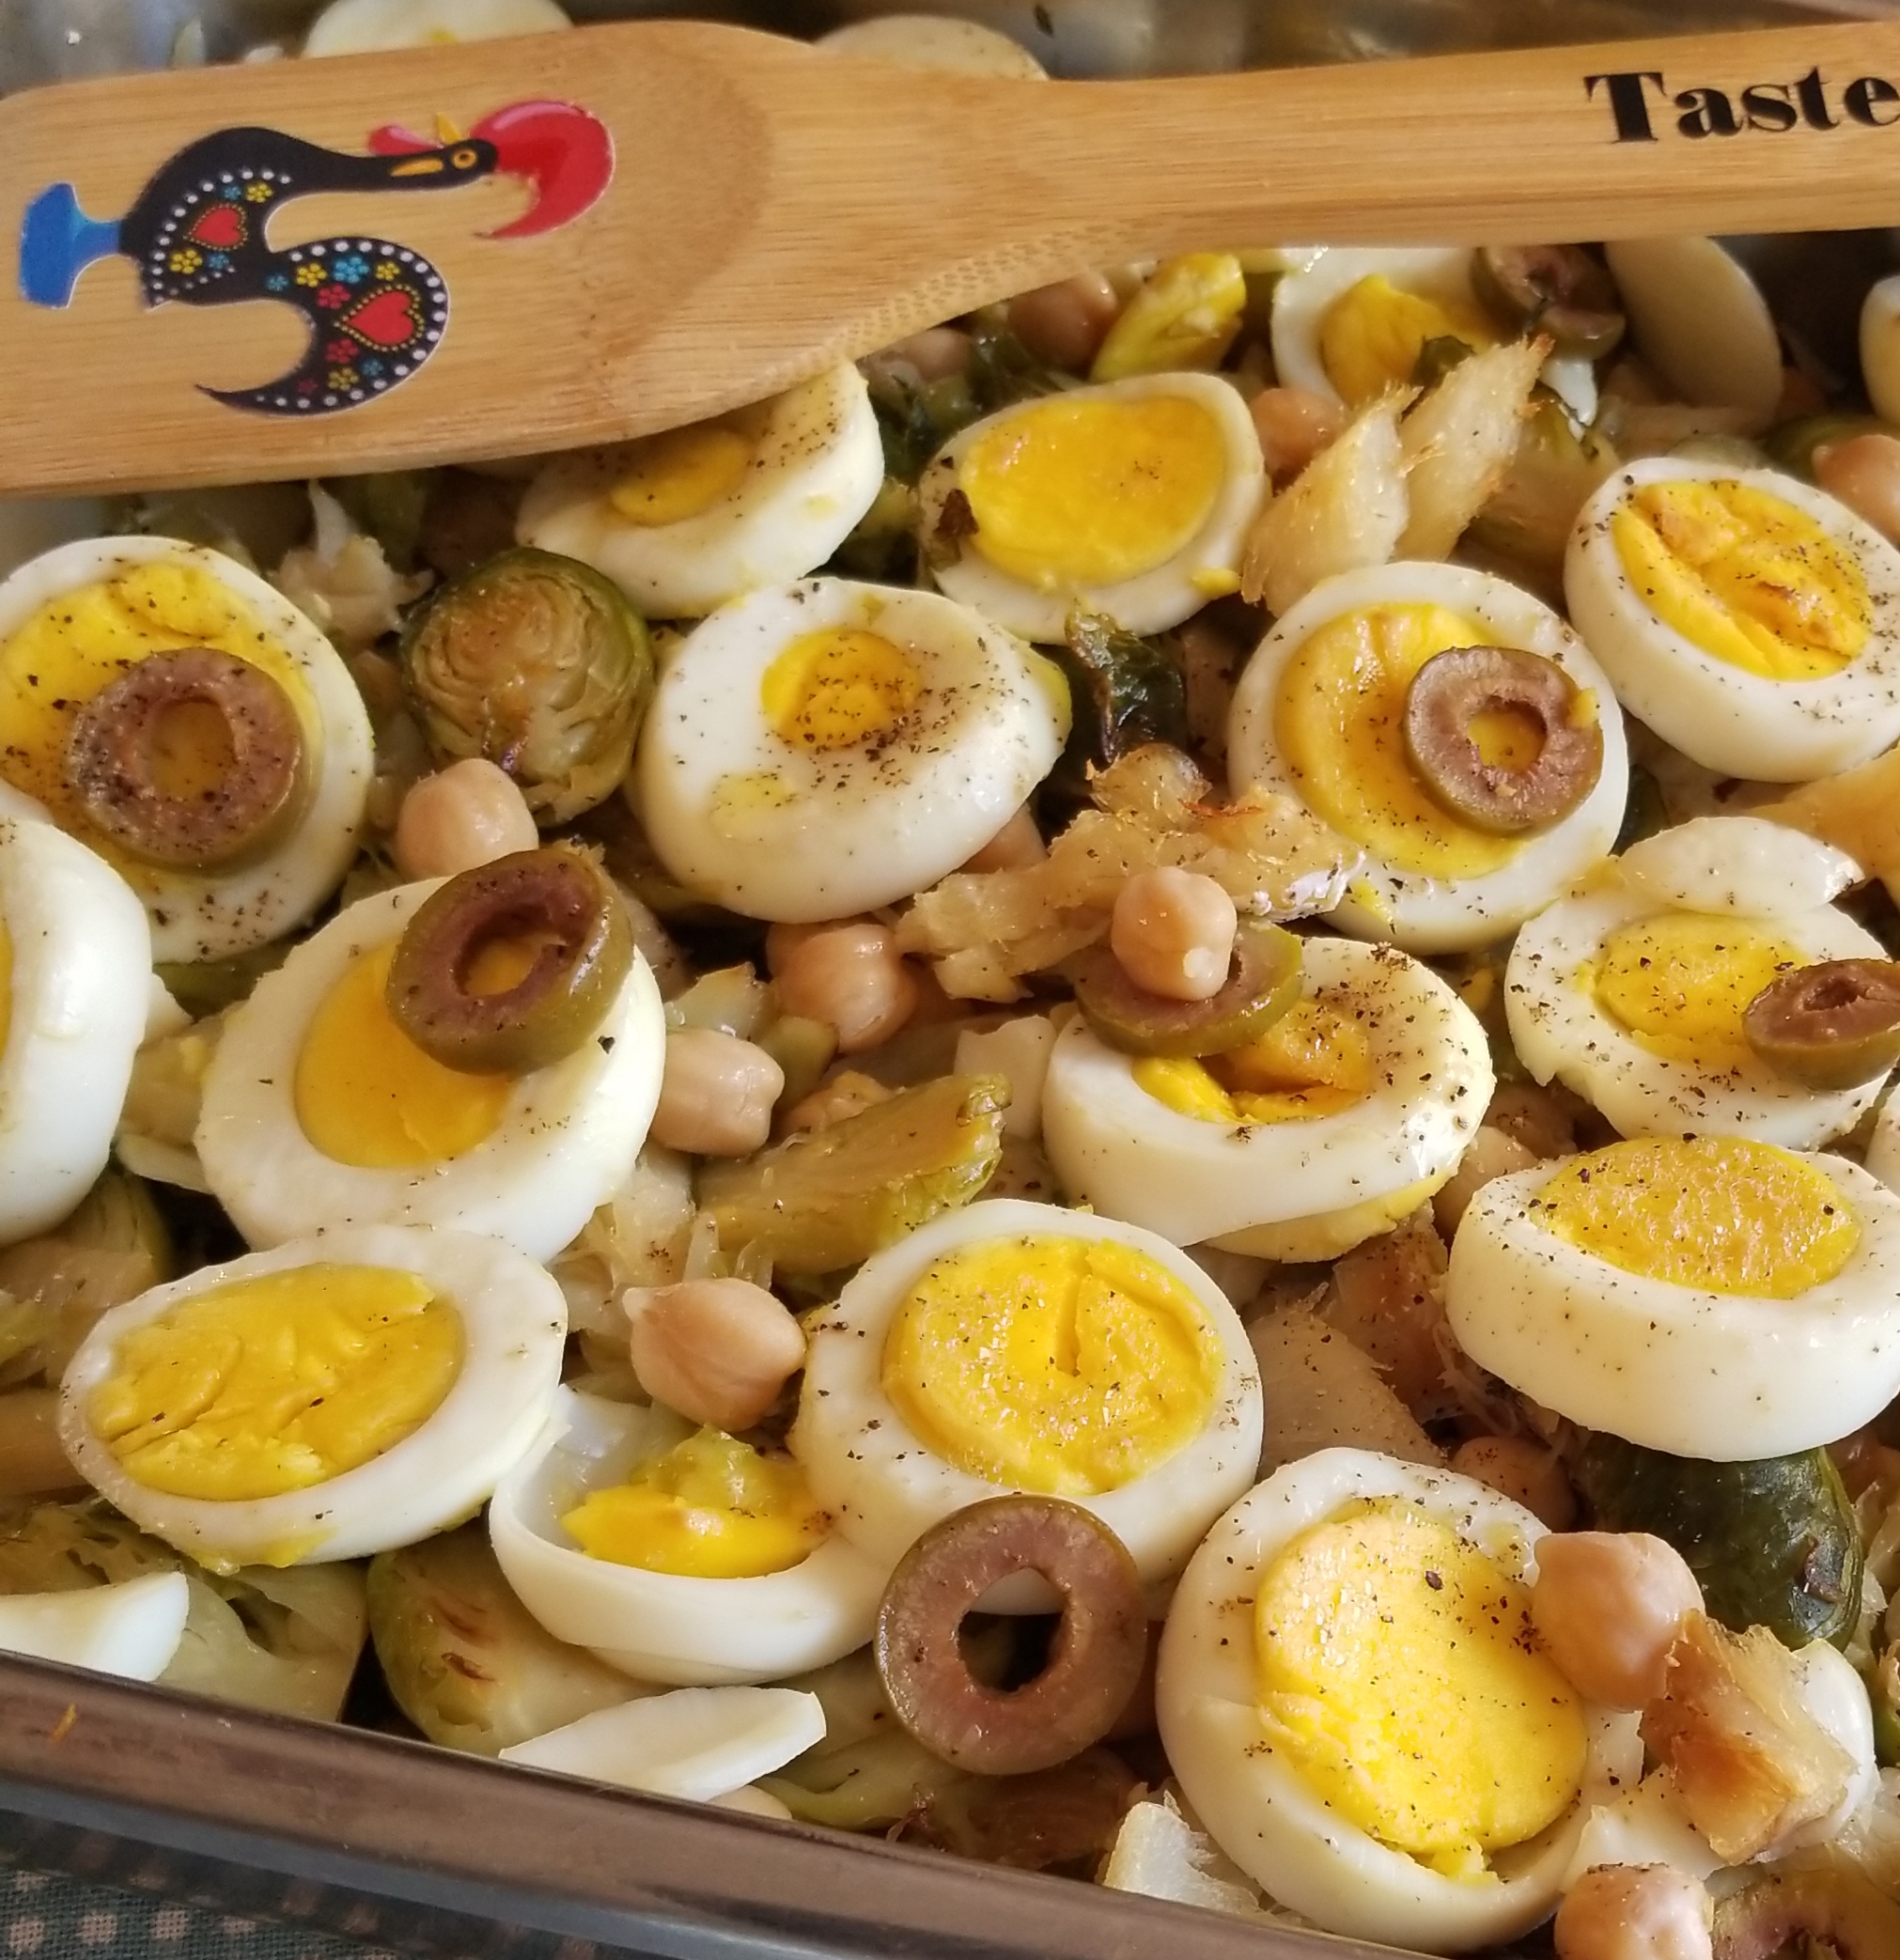
I made this easy recipe last week and it was delicious! Don’t let the simple ingredients fool you because it’s delicious! A perfect side dish or main dish.
Make it ahead and heat up the next day! Enjoy!
Ingredients:
1 pound boneless salt cod (hydrated)
1 32 oz can cooked chick peas
1 to 2 pounds pound of fresh brussel sprouts (sliced in half)
5 eggs (hard boiled and sliced)
1 small onion (chopped)
3 cloves garlic (chopped)
1 teaspoon salt
pepper to taste
1/2 cup olive oil
olives for garnish (optional)
Preparation:
Saute the onions, garlic and brussel sprouts in 2 tablespoon of the olive oil until tender. Mix in the chick peas salt and pepper.
Meanwhile cook the cod for about ten minutes. Let cool and flake into desired pieces.
Coat a deep dish baking pan with a little olive oil. Begin alternate layering with brussel sprouts first, then cod. Top with eggs and olives
Drizzle with remaining olive oil. Bake at 350 degrees F for about 15 to 20 minutes to heat. Serve as a main
Lisbon Blue Shop – Unique handmade crafts and other gifts inspired by Portugal
Hi Everyone! Join me, and my daughter Lisa at our new Lisbon Blue Etsy Shop which we just launched this week. We love to cook, and we love everything Portuguese!
Our shop has unique gifts with Portuguese influences! We’re working on new items to add every week so be sure to stop by and favorite our shop so you get updates on new items. Visit and like our Facebook page where we’ll be posting new items. Here are some of our creations.

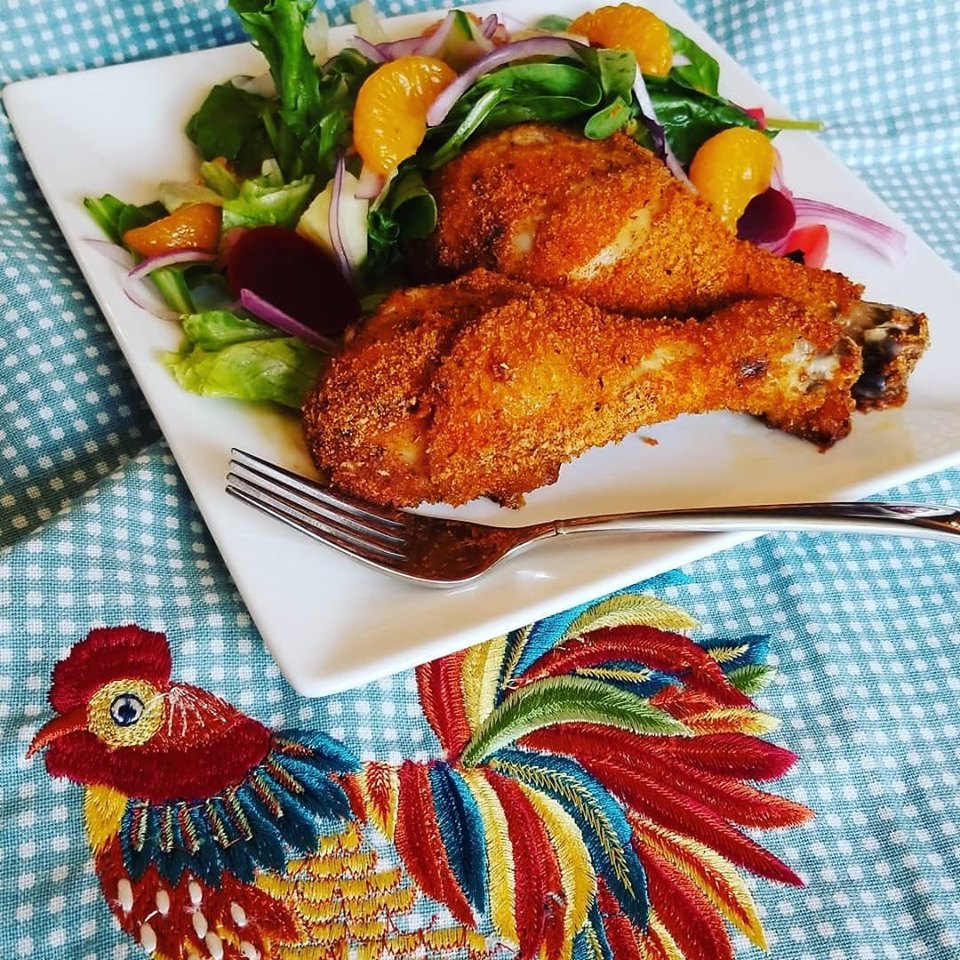
After experimenting with my own Copy Cat – Shake and Bake recipes, I finally came up a winner using some spicy Piri Piri sauce to give it a Portuguese kick! It’s very simple to make using most items you probably already have in your pantry.
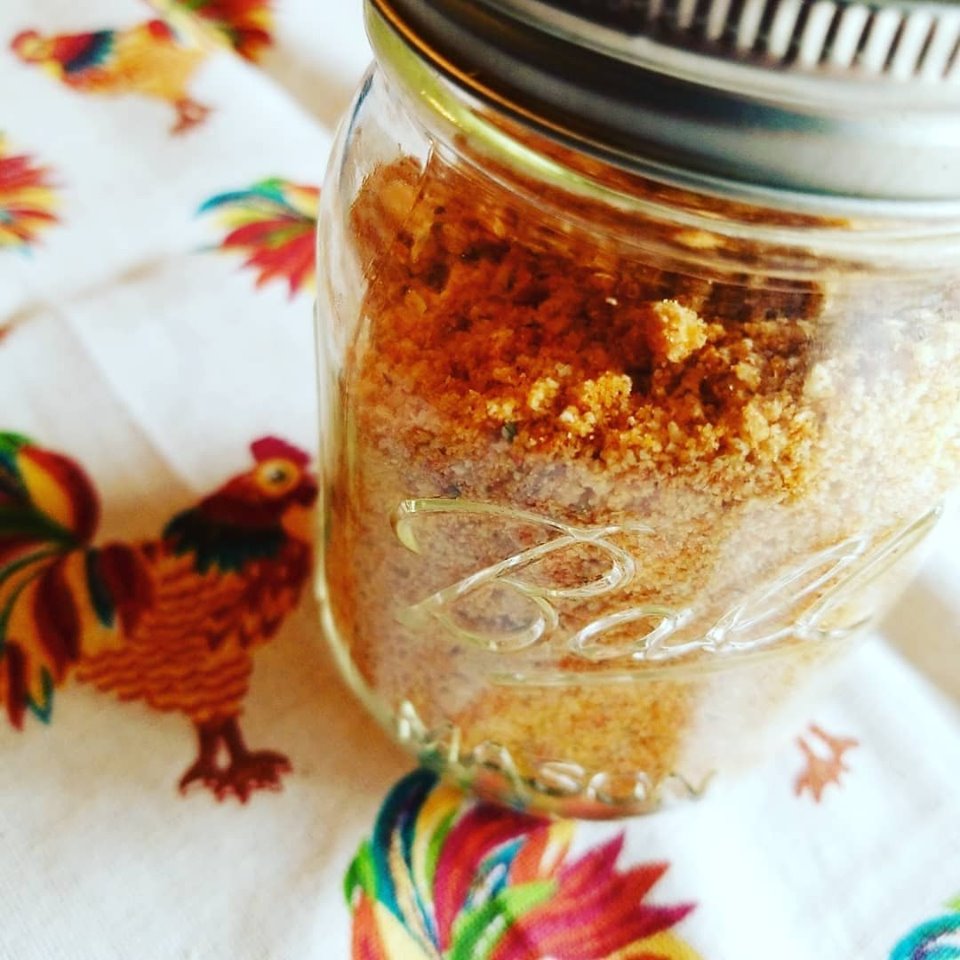
I’ve made this recipe many times and it’s one of those recipes that you’ll keep going making again and again. It’s a perfect pot lock take along dish for your next picnic, since the chicken tastes great cold too! I made a batch of the coating which was enough for about 18 pieces of chicken. It left me with a left over so I placed it in a jar for the next time and stored it in the refrigerator.
I served the chicken with my Beet, Mandarin Orange, and Apple Salad. It’s a perfect summer dish!
Beet, Mandarin Orange, and Apple Salad
4 cups garden salad mix
1/2 cup pickled beets (sliced)
1/2 cup mandarin orange segments
1 small apple (chopped)
1/4 small red onion (sliced thin)
Balsamic dressing
Ingredients:
12 – 18 pieces of chicken legs or thighs
Baking Mix ingredients:
2 and 1/2 cups plain bread crumbs
1 tablespoon salt
2 teaspoons garlic powder
1 teaspoon black pepper
1 tablespoon paprika
1 teaspoon coriander
2 teaspoons Italian seasoning mix
1/4 cup vegetable oil
1 tablespoon piri piri hot sauce (or use any hot sauce)
1/4 cup white wine
Preparation:
Preheat oven to 400 degrees F.
Place chicken in a large bowl. Season with a little salt and splash with the wine. Mix and let sit to room temperature to marinade.
Mix the oil with the piri piri in a small bowl. Place all coating mix all dry ingredients in a plastic zip lock bag. Add the oil. Shake bag thoroughly and mix with you fingers outside the bag incorporating the mix until crumbly.
Spray a large sheet pan or 2 with cooking spray.
When chicken is ready, place 2 pieces at a time into the bag with mix and shake to coat chicken. Shake of excess coating and arrange on pans. Spray chicken with cooking spray. This will create a crispy crust.
Cook at 400 degrees for 45 – 50 minutes. Not need to turn chicken. it will come out crispy and golden brown.
Note that every oven cook temperature various. You may need to cook longer.
You can use the coating mix on boneless chicken or pork but the cooking time will be 20-25 minutes.

 Let’s make Homestyle bread – Pao Caseiro together!


Romeo and Juliet Sandwich is a combination of Portuguese Sao Jorge Cheese and Marmelada
Ingredients:
4 cups flour
3 teaspoons dry yeast
1 teaspoon salt
1 and 1/4 cup warm water
1/4 teaspoon sugar

Preparation:
Place four in a bowl and make a well. Add yeast to warm water and sugar and let sit for 10 minutes to activate yeast. Add yeast to flour, mix slightly.
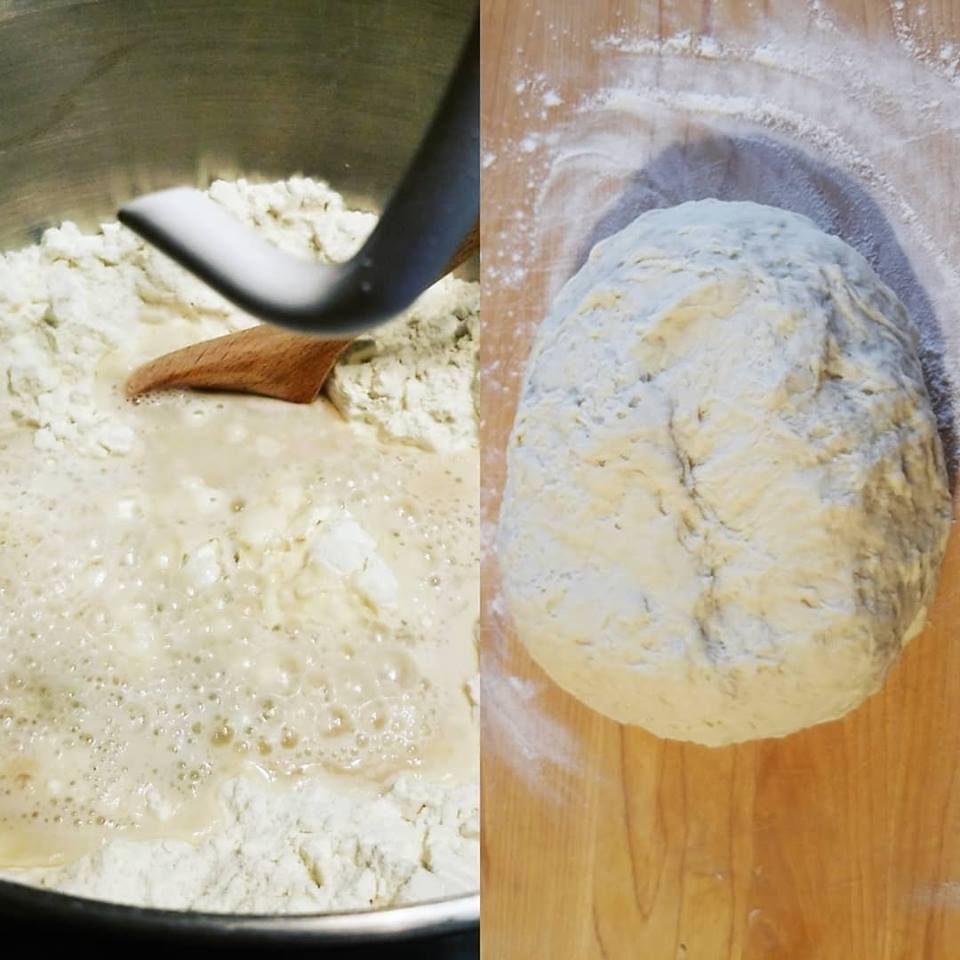
Add salt, 4 more tablespoons water, and mix until a round ball of dough forms. Knead on floured surface for a few minutes.
Place in floured bowl, cover and let rise until double.
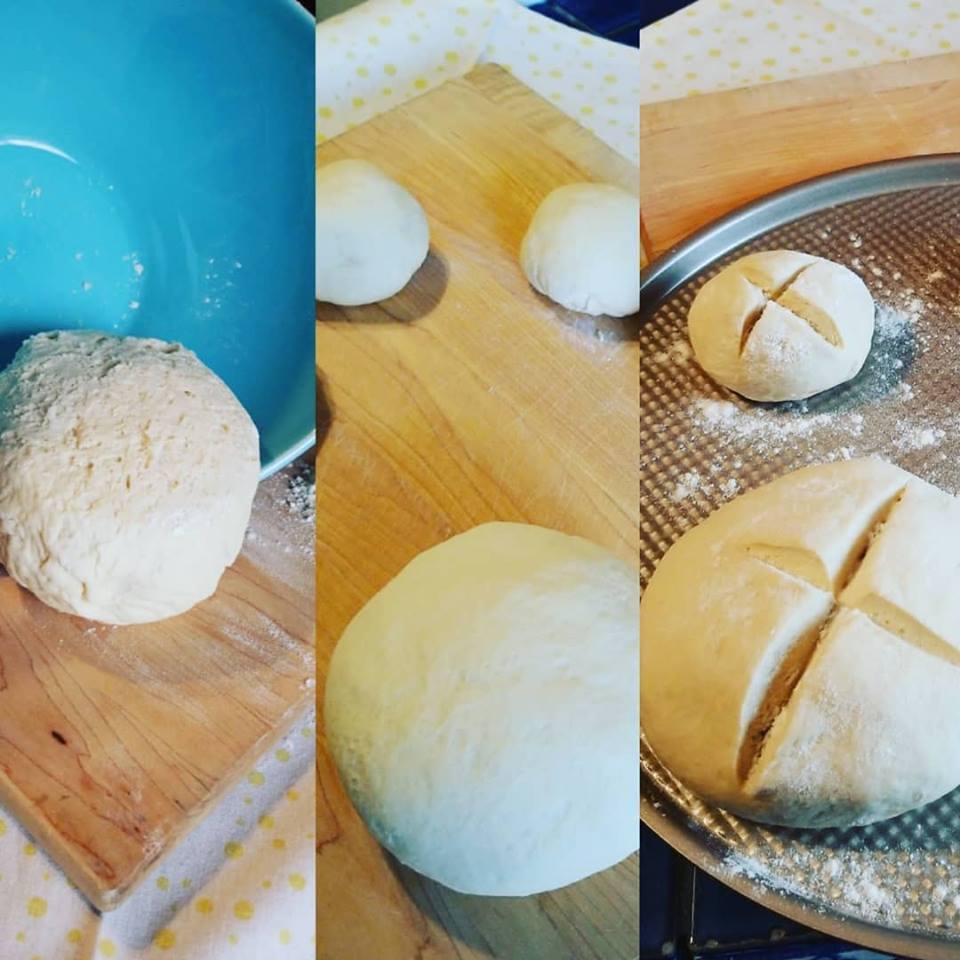
After rise, shape into bread rolls shapes. Cut a cross slit on top, cover and let rise for 30 minutes.
Set oven at 395 degrees F., Sprinkle with a little flour and bake for about 30 min or until a light golden crust forms.
Note: Cooking times may vary depending on your oven.
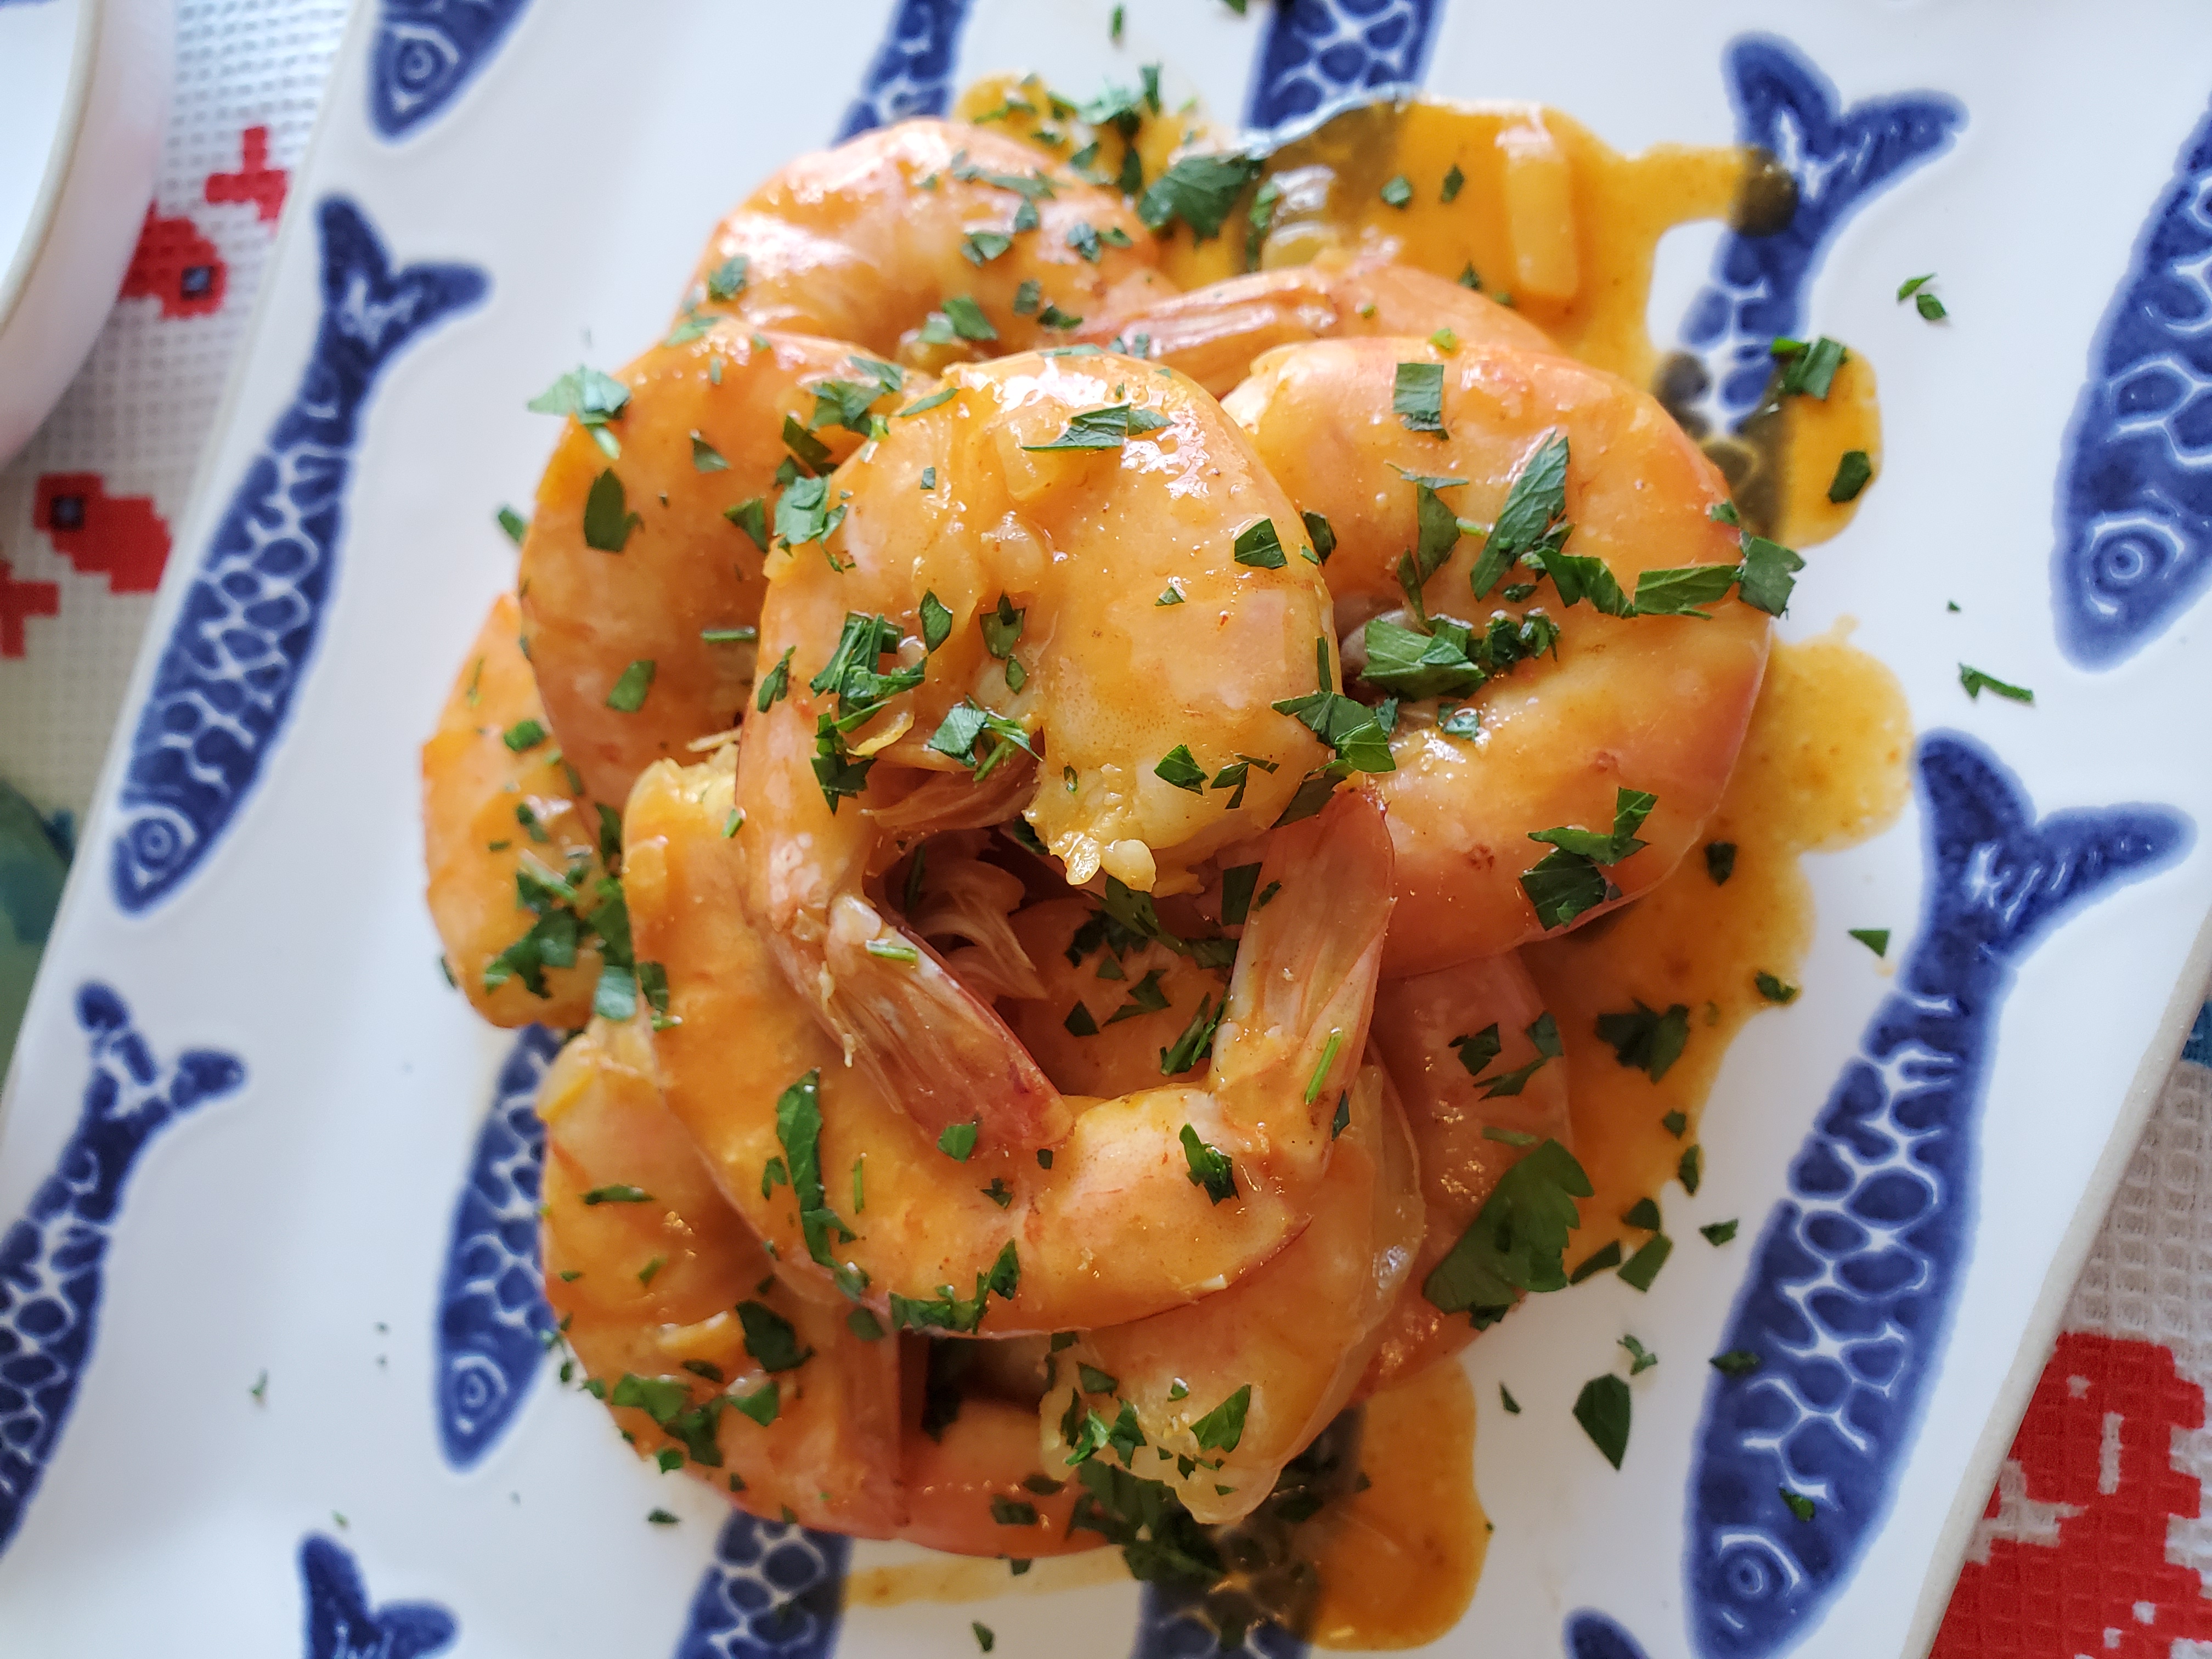

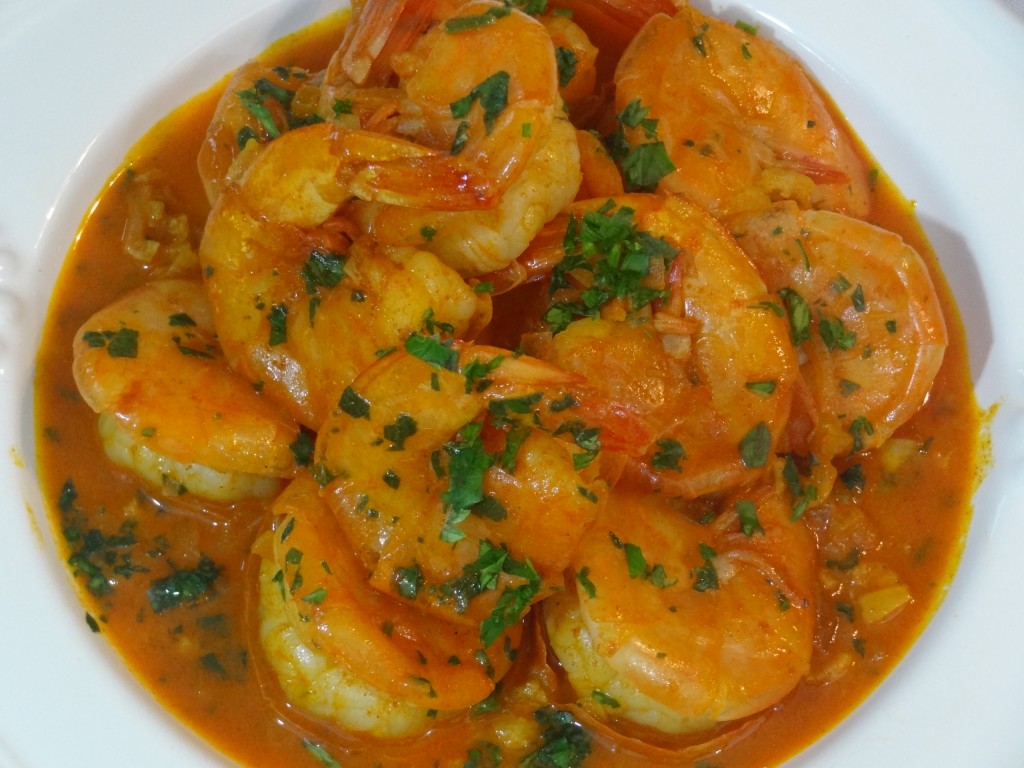
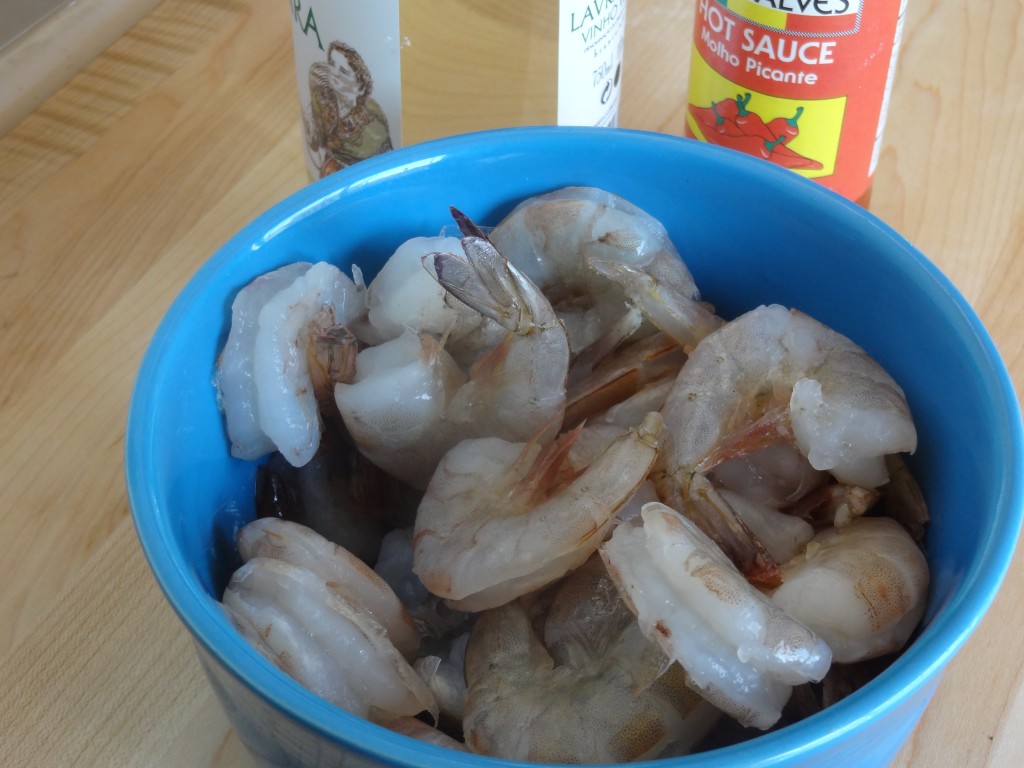
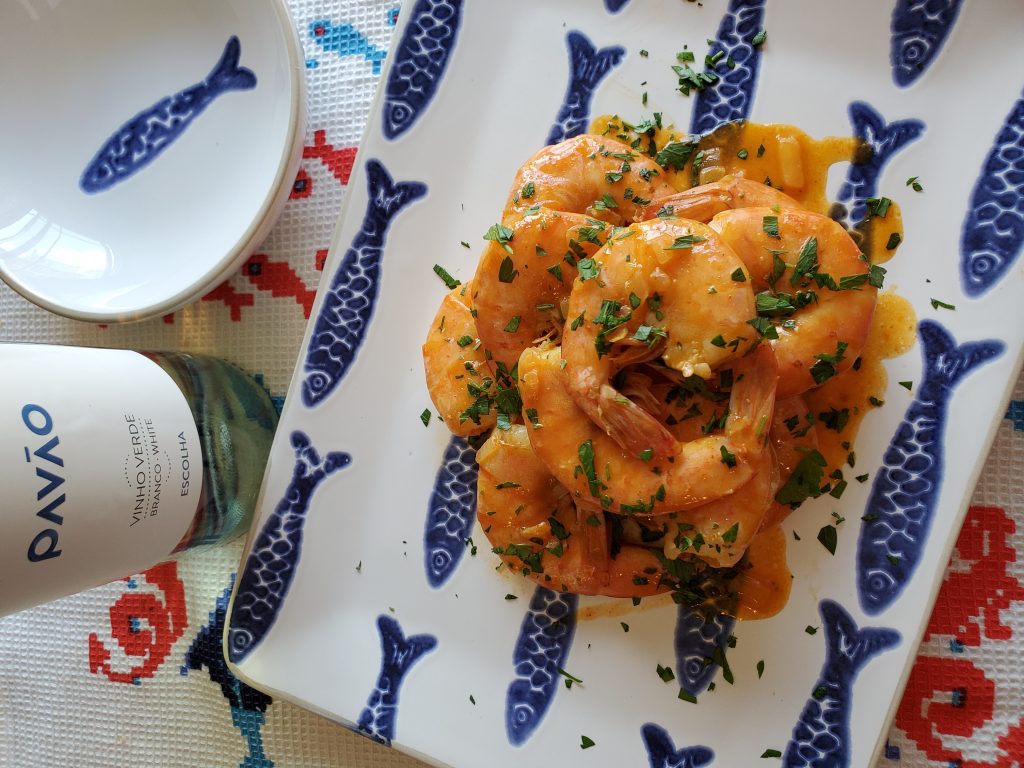
Shrimp Mozambique
This shrimp dish is a party in a pan!
All you need is some good Vinho Verde, fresh crusty bread for dipping into to sauce, and friends to share it with!
Although the reicpe is called a Mozambique, it’s a favorite Portuguese dish served in many Portuguese restaurants. It’s given the name because of the spiciness from the piri piri hot sauce which contains the red hot peppers originating in Africa. Piri Piri means “pepper” in Swahili.
“Piri piri is a cultivar of Capsicum frutescens, a chili pepper that grows both wild and as a crop. It is a small member of the genus Capsicum. The cultivar was developed from the malagueta pepper in southeastern Africa and was spread by the Portuguese to their Indian territories of Gujarat and Goa.” Wikipedia
My favorite wine to serve with this dish is the classic Vinho Verde, but you can substitute with a good dry wine!
Let’s eat! Take one shrimp by tail, and suck the sauce from it. Then peel and eat. Dip crusty bread into the sauce and enjoy it’s savory flavor.
Note: I recommend leaving the shells on because it creates a more intense flavor. The recipe can be made with shell off shrimp and then served with rice or pasta for a main dish.
2 pounds of medium size shrimp (with shells on)
1 small onion ( finely minced)
4 cloves of garlic (minced finely )
1/2 teaspoon of salt
2 tablespoons of butter
2 tablespoons of olive oil
1/2 to 1 tablespoon paprika
1 cup of white wine or Vinho Verde
1 chicken bouillon cube
1/2 to 1 tablespoon of Piri Piri or your favorite hot sauce if you don’t have it available
1 tablespoon parsley (finely minced for garnish)
Preparation
In a medium skillet, add the olive oil, heat to medium and add the onion. Cook onion for about 2 minutes until it becomes translucent.
Add the garlic and cook for about 30 seconds. Add the shrimp and let cook for 1 minute. Add the butter, bouillon and paprika. Stir well and cook for 1 minute.

Add the wine, stir and let come to a boil on medium heat. Add salt. Simmer for a few minutes longer until the shrimp turns pink. Add the piri piri hot sauce.
Cook for a few minutes for the wine to evaporate. Add more piri piri if desired. Garnish with parsley. Serve with crusty bread.

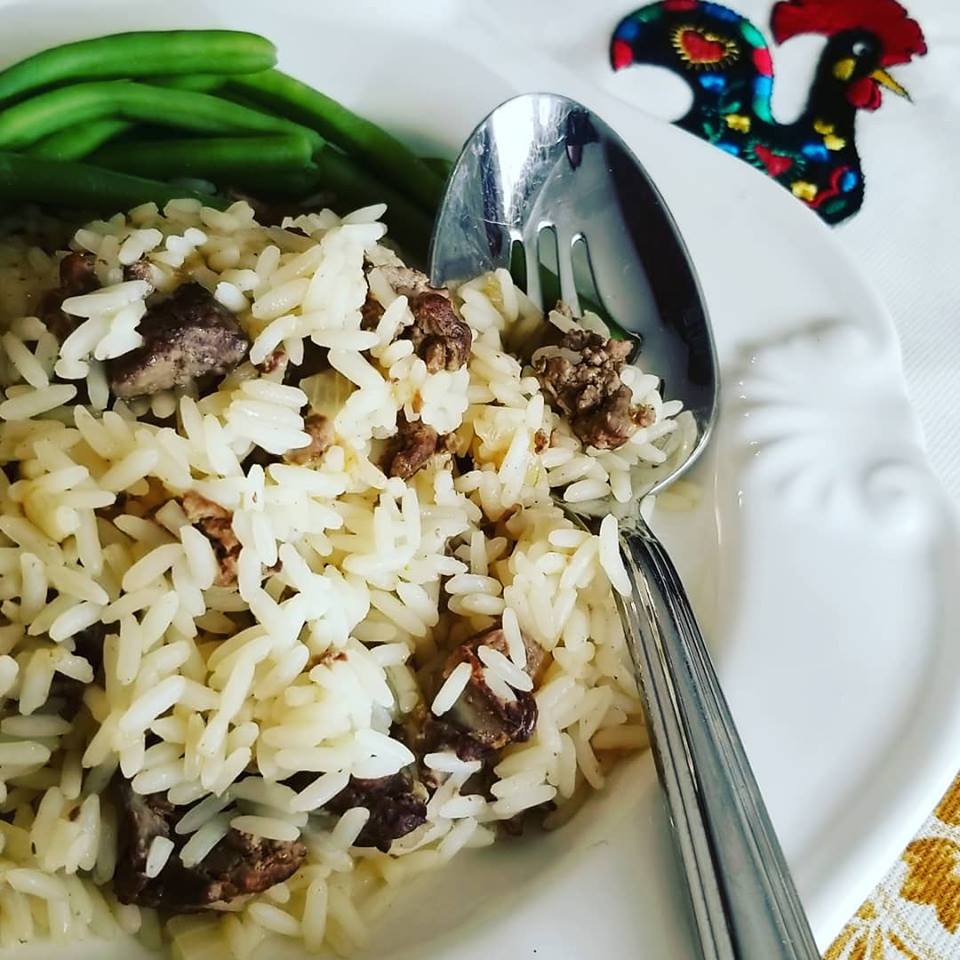
Arroz de Figado – Portuguese Style Dirty Rice
This old classic recipe is on the comeback at upscale restaurants but I’ve been enjoying this dish since my mother taught me the recipe when I was a young girl. Who knew that a peasants dish would end up on the menu these trendy upscale high priced restaurants! It’s simple to prepare, full of flavor and very impressive to serve as a side dish. The “dirty” name comes from the dark sauce from the chicken livers which when cooked, create a brownish appearance to the rice resembling dirt. Enjoy!
Ingredients:
1 pound chicken livers (washed and chopped into 1 inch pieces)
2 cups rice
1/2 small onion (minced)
2 cloves garlic (minced)
4 tablespoons olive oil
4 cups water
1 chicken boullion cube
2 tablespoons white wine
1/2 teaspoon paprika
2 teaspoons salt
Parsley for garnish
Preparation:
Saute half of the onion in 2 tablespoons olive oil and cook until translucent. Bring water to boil and set aside. Add the rice to onion stir to coat the oil and cook for about 30 seconds. Add paprika, stir, and add the water and 1 teaspoon salt. Let come to a boil, cover and let cook for 15 minutes. Set aside until you prepare the liver.
Meanwhile add 2 tablespoons olive to a skillet. Add the remaining onion and the garlic and cook for about 1 minute on low heat until cooked. Add the chicken livers and let brown on all sides. Add the wine and chicken bouillon cube. Stir and cook for a few minutes until liver is fully cooked. Add liver to cooked rice. Mix well, simmer and let simmer for a few minutes to incorporate flavors. Serve with parsley as a garnish if desired.
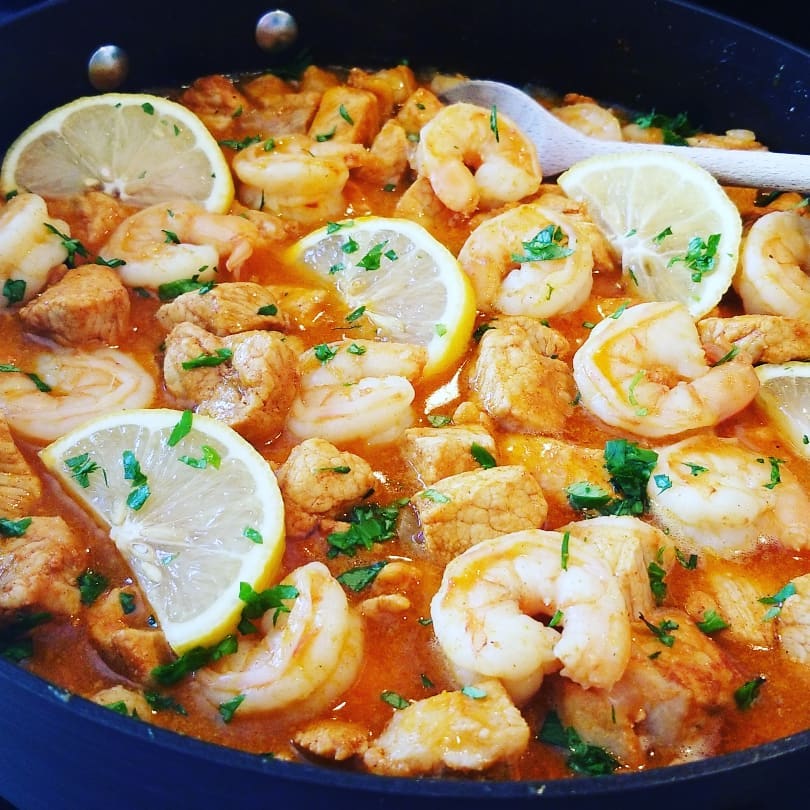
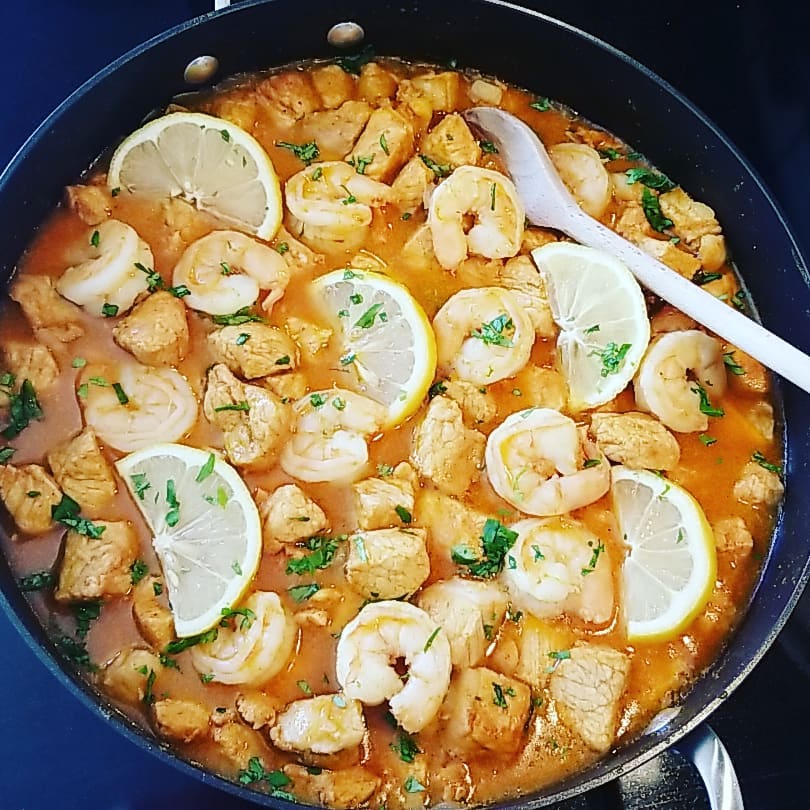
The combination of pork and shrimp in a savory yet slightly spicy sauce can be served as an appetizer with crusty Portuguese rolls, or as a main dish with rice or potatoes. It’s a variation on the classic Carne de Porco à Alentejana with a milder flavor. This is one of those dishes can be adapted to your taste so go ahead and experiment. Those of you that love both pork and shrimp will fall in love with this dish. Enjoy!
Ingredients:
2 pounds pork loin (more or less) (cut into 1-2 inch cubes)
1 pound or more peeled medium shrimp
1 small onion chopped
4 cloves chopped garlic
1 tablespoon salt
1/4 cup olive oil
1/2 cup white wine or Vinho Verde
1 tablespoon smoked paprika
2 teaspoons Piri Piri or Tabasco hot sauce
1 cup chicken broth or (1 cup water and 1 cube bouillon )
1 teaspoon corn starch
chopped parsley
1 large lemon
Preparation:
In a large bowl, season pork with; salt, garlic, paprika, piri piri and wine. Mix well and let marinate for at least 30 minutes or leave overnight.
Preheat large skillet or wok on high heat with 1/4 cup olive oil and add onions.
Cook for about 2 minutes then add pork. Let meat brown on all sides and cook for about 5 – 8 minutes. Add the chicken broth and shrimp and cook for another 5 – 8 minutes until meat is cooked. Mix corn starch with a little water and add to the pork. Mix well and let cook until sauce is thickened. Taste and add more hot sauce to your desired spiciness. Cut lemon in half and squeeze juice of one half over pork. Slice the other half as garnish. Top with parsley and serve. *Note that the pork cooks quickly but depending on your heat setting it may need longer to cook.
*You can make this dish ahead of time and serve later. Let cool and store in refrigerator.


Eggs and peas is humble yet very popular dish. I had a lot of cherry tomatoes in my fridge last week, and as a die hard waste not, want not fanatic I had to use them last week. The dish came out amazing! I added chouriço sausage since my husband is a true chouriço fanatic who literally eat it every day!
This dish so simple but the intense flavor will surprise you. Of course you have to serve it with some crusty bread to soak up all the sauce.

Ingredients:
1 pound package frozen petite peas
1 medium chouriço sausage (1 pound approximate)
1 can (28 oz approximate) chopped tomatoes (or 2 pounds fresh chopped tomatoes) (I used 2 pounds cherry tomatoes in photo)
6 eggs
1 small onion (finely minced)
2 cloves garlic (finely minced)
1/2 teaspoon paprika
1 small bay leaf
1 tablespoon olive oil
1/4 cup red wine
1/4 cup water
1 chicken bouillon cube
parsley for garnish
crushed black pepper for garnish
Preparation:
Saute the onions, garlic, and chouriço in olive oil in a deep dish skillet for a few minutes. Add the remaining ingredients, cover and cook for 10 minutes on moderate heat. Stir once in a while. Crack eggs in a bowl and add evenly over the peas and chouriço. Cover and cook until the eggs are cooked but still runny in the yolk. Garnish with parsley and black pepper. Serve with crusty bread.
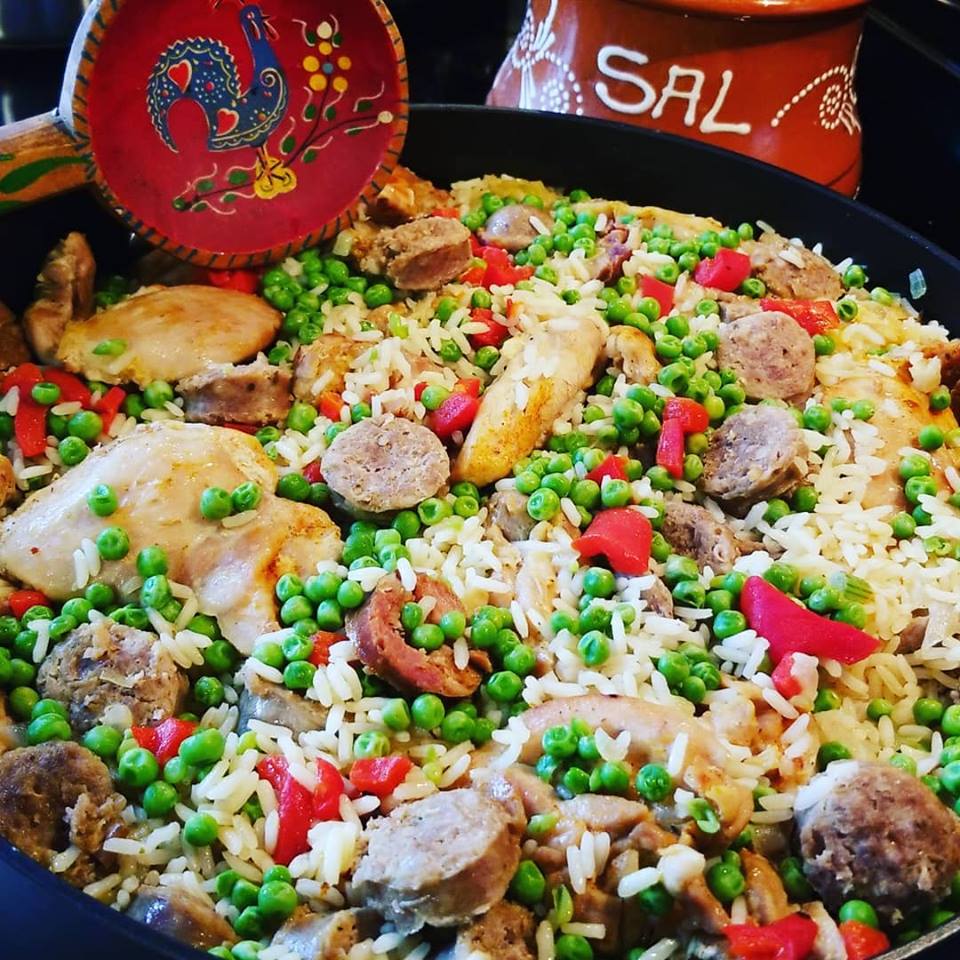
This easy recipe takes only 45 minutes to prepare. you probably have the ingredients in your pantry right now, so go ahead and try it. I used a combination of Portuguese Chouriço Sausage and Italian sausage in this photo, but you can use any or both sausages if you prefer.

Ingredients:
8 boneless and skinless chicken thighs
1/2 to 1 pound Chouriço (slicked) or cooked Italian sausage (sliced) or mix both
2 cups uncooked long grain rice
4 cups chicken broth – or 4 cups water and 2 Knor chicken bouillon cubes
1 small onion (finely chopped)
2 cloves garlic (finely chopped)
1/2 red bell pepper (chopped)
8 oz frozen petite peas
3 tablespoons olive oil
1/4 cup white wine
1 bay leaf
1 tablespoon salt
1 teaspoon paprika
1/2 teaspoon black pepper
Parsley for garnish
Preparation:
Season the chicken with salt, pepper and paprika and let marinade for 1 hour or longer. *You can don’t have to marinade it if you don’t have the time.
In a large skillet, saute the onion, bell pepper and garlic in the olive oil for a few minutes. Add the bay leaf, and seasoned chicken and brown on both sides. Add the sausages and stir together with the chicken. Cook for a few minutes.
Add 1 cup of broth, sausages and the wine, cover and let cook for about 15 minutes stirring once in a while. Add the remaining broth, let come to a boil and add the rice. Let come to a boil and cover. Lower heat to medium and let cook for about 15 minutes stirring once in a while. Add the peas, stir and let cook for 5 minutes. Remove from heat, stir, taste for seasonings. Let sit until ready to serve. *If you like a more well done rice, let cook longer.

These cookies are a perfect snack because they’re packed with healthy granola, nuts and berries. I love the crispy edges and soft chewy interior. It’s a healthy cookie you can give your family since they’re packed with protein. Make a double batch because they won’t last I promise. Enjoy!


Ingredients:
1 (10 oz package approximate) of cranberry nut granola
2 cups flour
2 sticks butter (softened)
2 eggs
1 cup regular sugar
1 cup brown sugar
1 teaspoon baking soda
1 and 1/2 teaspoon cinnamon
Preparation:
Preheat oven to 375 degrees F.. Lightly grease 2 large cookie trays.
Mix flour, cinnamon and baking soda in a bowl.
In a large mixing bowl, mix sugars and butter until smooth. Add 1 egg at a time and mix. Add flour cinnamon and baking soda.
Add granola and mix thoroughly.
*Cool for 1 hour in refrigerator before cooking.
Scoop out batter with an ice cream scooper or a large spoon and shape into balls. Place evenly onto the sheet pan leaving at least 2 inches between each. Flatten slightly with a fork or palm of hand.
Cook for 10 minutes. Adjust heat accordingly to your own oven. They should be golden underneath. They will be very soft, so don’t remove from pan for a few minutes. Use a thin spatula to gently remove the cookies. Let them cool. They will be become crispy and chewy.
Here’s the granola I used, but you can use any flavor or brand you prefer.

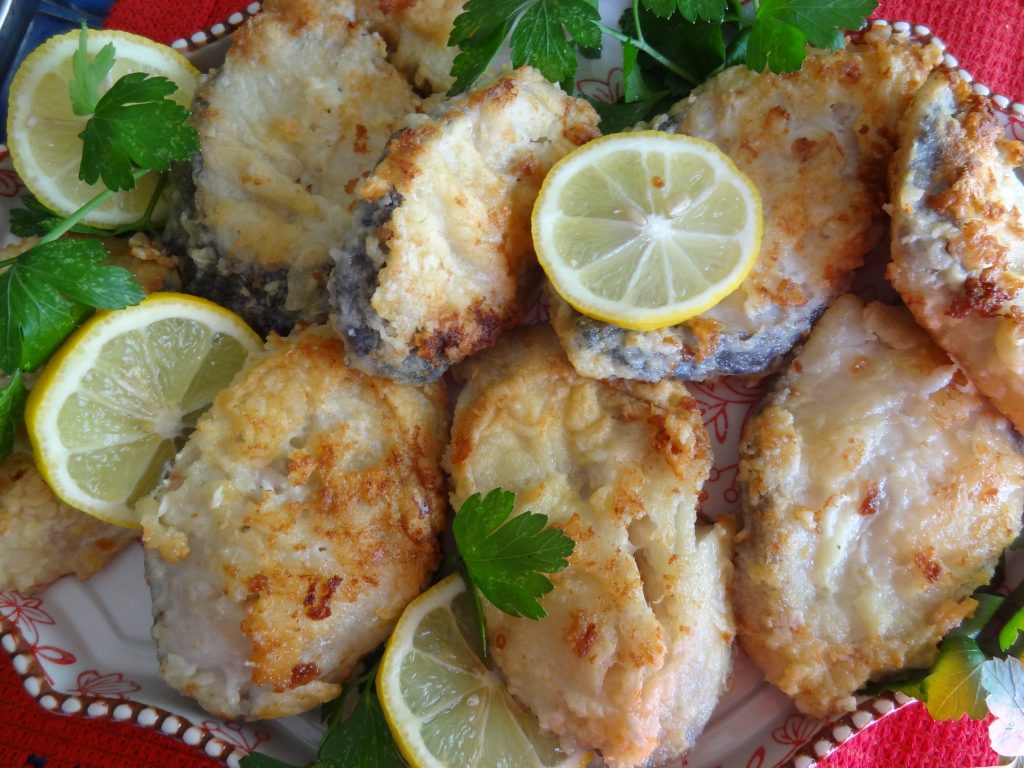 Pescada Frita is fried “whiting or hake”
I make this fish on Friday’s during lent. It’s a tradition that I carry on from my mother. Every time I make this recipe, it brings me back sweet memories of her cooking it during lent, and inviting my brother’s and sisters over to eat lunch with her. This popular recipe is relatively easy to prepare. You’ll enjoy the fresh sea flavor of the fish because it’s lightly fried and only seasoned with sea salt and a squeeze of lemon. I serve it with my Portuguese tomato rice.
Ingredients:
2 pounds whole fresh, cleaned whiting (sliced into 1/2 inch pieces)
*you can also use frozen fish filet portions but defrost completely*
sea salt
1/2 cup flour
2 eggs (beaten)
1/4 cup vegetable oil
1/8 cup olive oil
1 lemon cut in half
parsley for garnish
Preparation:
Season the fish with salt and let sit for about 5-10 minutes then drizzle with a squeeze of lemon juice. *If you use frozen fish, let defrost completely and pat dry with paper towels to absurb any moisture. Dredge fish portions in flour, then beaten eggs and finally into flour again. Shake off any excess flour. Put aside until ready to fry.
Combine both oils in a large skillet and heat to medium. Be sure the oil is hot enough, or you may find the fish will absorb the grease. Gently place each piece of fish into oil and cook on both sides for about 5 minutes on each side until golden brown.
If you find the fish is browning to quickly, lower heat. Test one piece for doneness by flaking a small portion with a fork. The fish should be flaky white.
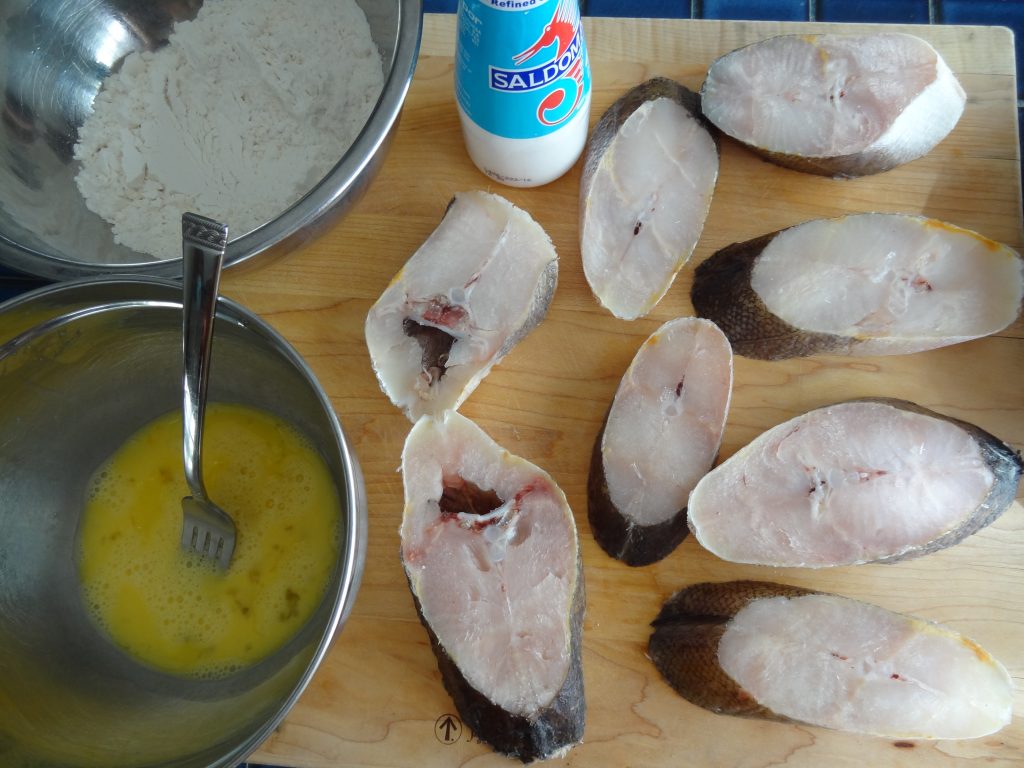
Serve with Portuguese Tomato Rice recipe
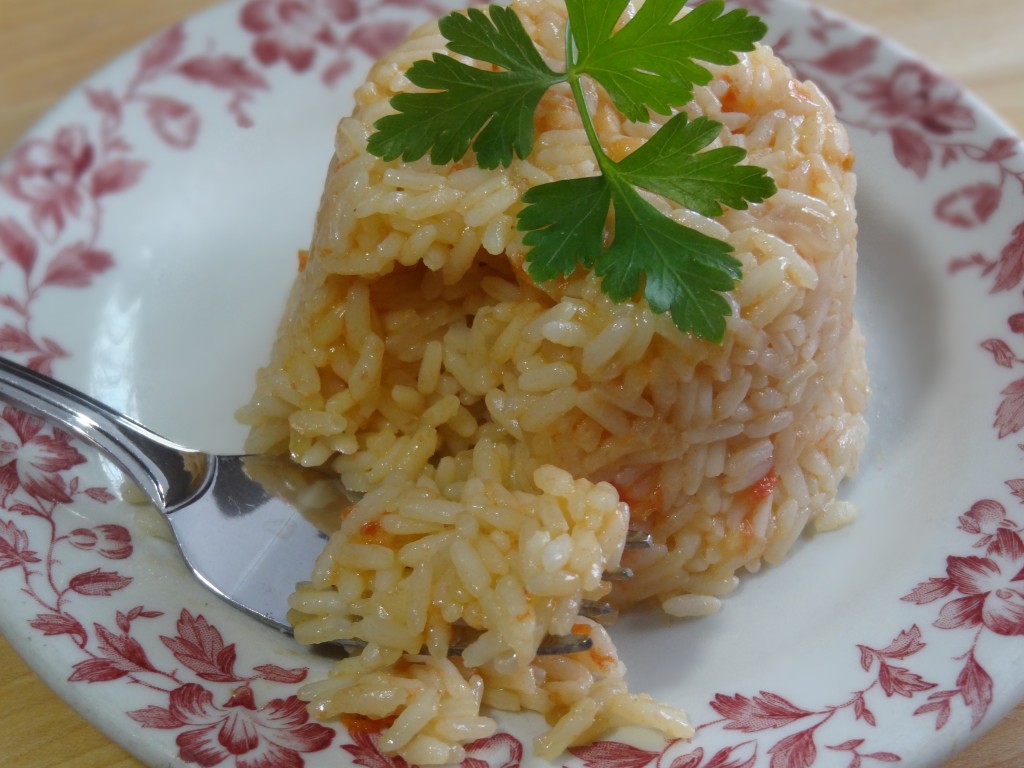
Here’s a great appetizer to serve with this dish. Sardine Pate, Sao Jorge cheese and fresh home-style bread.

These little one bite size appetizers are perfect for your next party, or anytime snack.
My preference it to use Gaspar’s Chourico or Linguica because I find it cooks better, won’t become as dry and retains more flavor in the dough. You can order online directly from their website at Gaspar’s Sausage.


I made these into a wreath at Christmas and it was great hit. They’re perfect for a party, a ball game, or as a snack as well.
Ingredients: Makes about 24
2 sheets of frozen (slightly defrosted) puff pastry sheets or 2 packages of crescent rolls
3/4 pound chouriço sausage
1 beaten egg (for egg wash)
Preparation:
Cut the chouriço lengthwise into 2 inch strips.
Cut the puff pastry into 4 inch triangle or use 1/2 of each piece of the crescent rolls.
Start rolling chouriço inside each strip of dough starting at the larger edge.
Brush with egg wash.
Place in a parchment lined cookie sheet and cook at 375 for about 15-20 minutes until golden depending on your oven.
Watch my YouTube video below .
Serve with mustard dip, plain mustard, or as is.
Mustard dip recipe here or use any mustard
1/2 cup sour cream
1/4 cup grated Parmesan
1 and 1/2 tablespoons whole-grain mustard
1 tablespoons chopped chives
salt and black pepper
Recipe for mustard dip inspired by: https://www.foodnetwork.com/recipes/trisha-yearwood/pigs-in-a-wreath-4555245
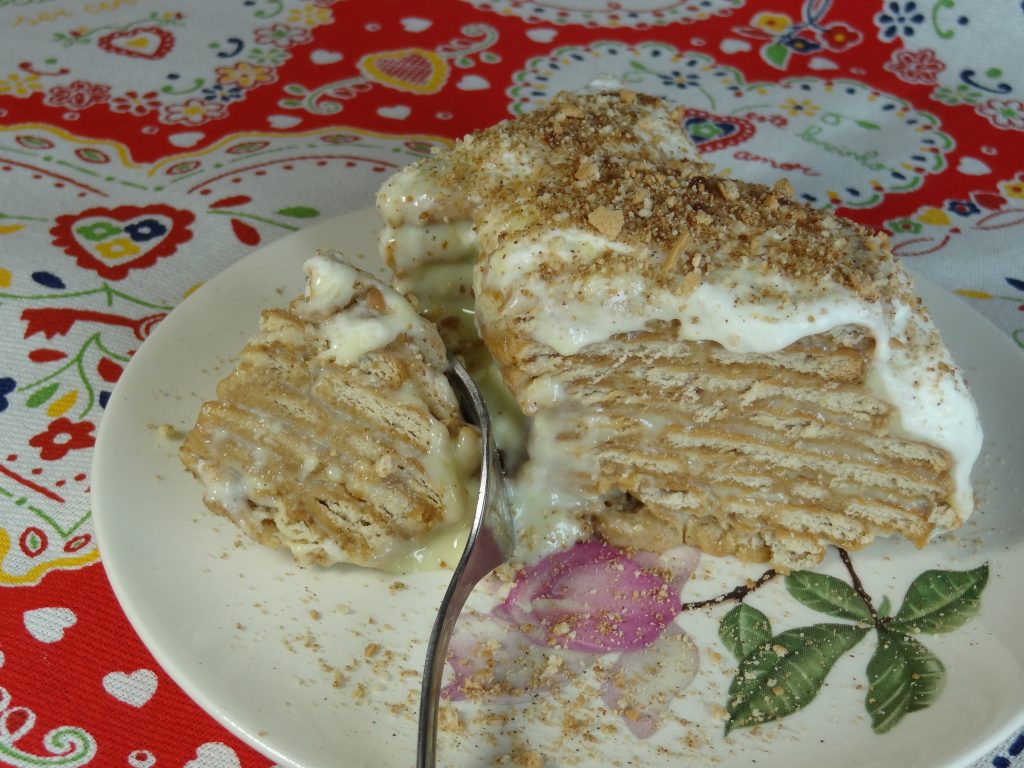
What better way to show your love, by making your friends and family a delicious Bolo de Bolacha Maria cake! This dessert is probably one of the favorites in Portuguese cuisine. There are many recipes from the original recipe which uses softened butter between the layers. My version uses condensed milk and whole milk for a less buttery taste. I adapted this recipe from one given to me by; Carla Almeida of New York. Thanks Carla. Enjoy everyone.
⁸
Ingredients:
1 (14 oz.) can sweetened condensed milk
1 cup whole milk
5 egg yolks (beaten)
2 to 3 large packages Bolacha Maria (Maria Cookies)
5 cups cold black coffee
1 pint whipping cream
1 tsp of sugar
cinnamon
1 tablespoons brown sugar

 Preparation:
In a small saucepan heat milk, condensed milk, and egg yolks until thickened stirring often. A line should form on the bottom of the pan when you run your spoon through it.
Note: Let cool completely before you begin layering the cake.
Beat the whipping cream until stiff peaks form, add the teaspoon of sugar, mix gently, and place in the refrigerator.
Place 6 to 8 cookies in a plastic bag and smash to coarse crumbs. Add the cinnamon and brown sugar and mix thoroughly to form fine crumbs.
Dip first layer of cookies one at a time into the coffee for about 4 seconds and begin arranging in a desired pattern.
Note: If you find the cookies fall apart, dip for only 3 seconds.
Top first layer with a few spoons of milk mixture. Dip each cookie into the coffee and begin assembling each layer with the sweetened milk. Continue layering until you use all the sweetened milk.

Top the remaining layer with the whipped cream followed by the crumb mixture.
Best if cooled in refrigerator for at least 2 hours before serving. This cake will last up to 3 days in the refrigerator.
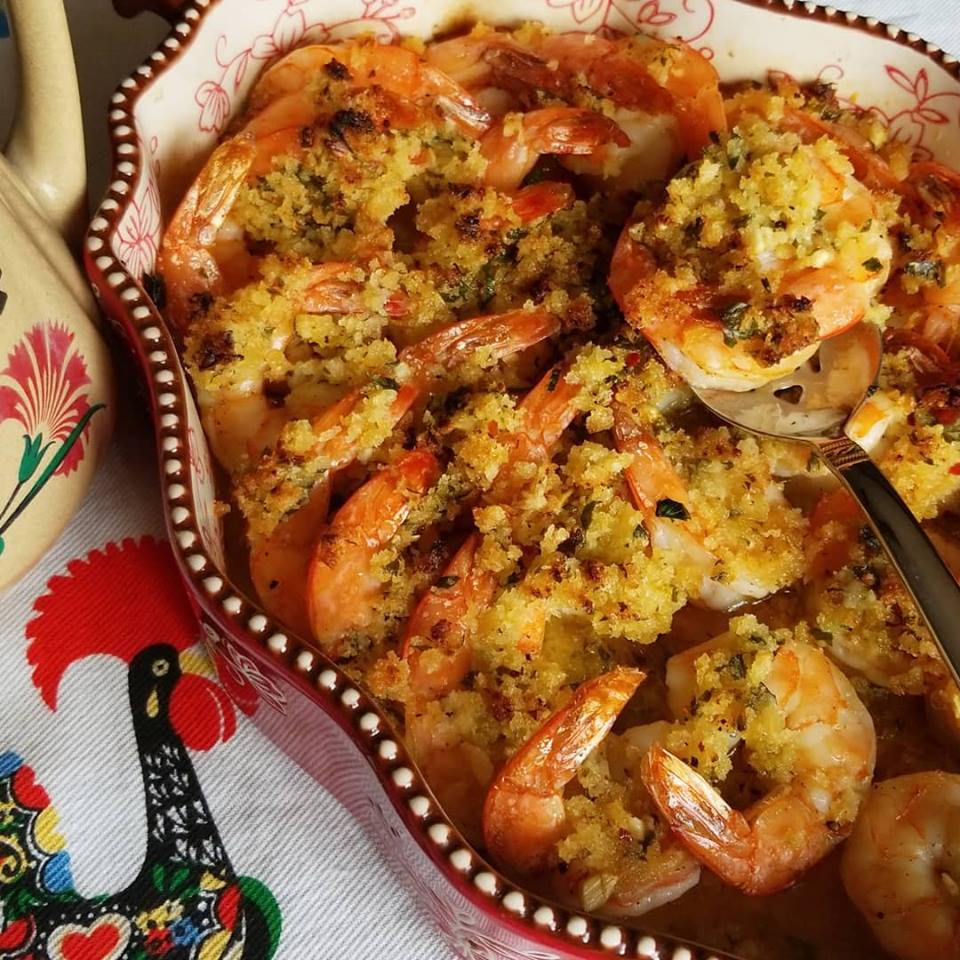
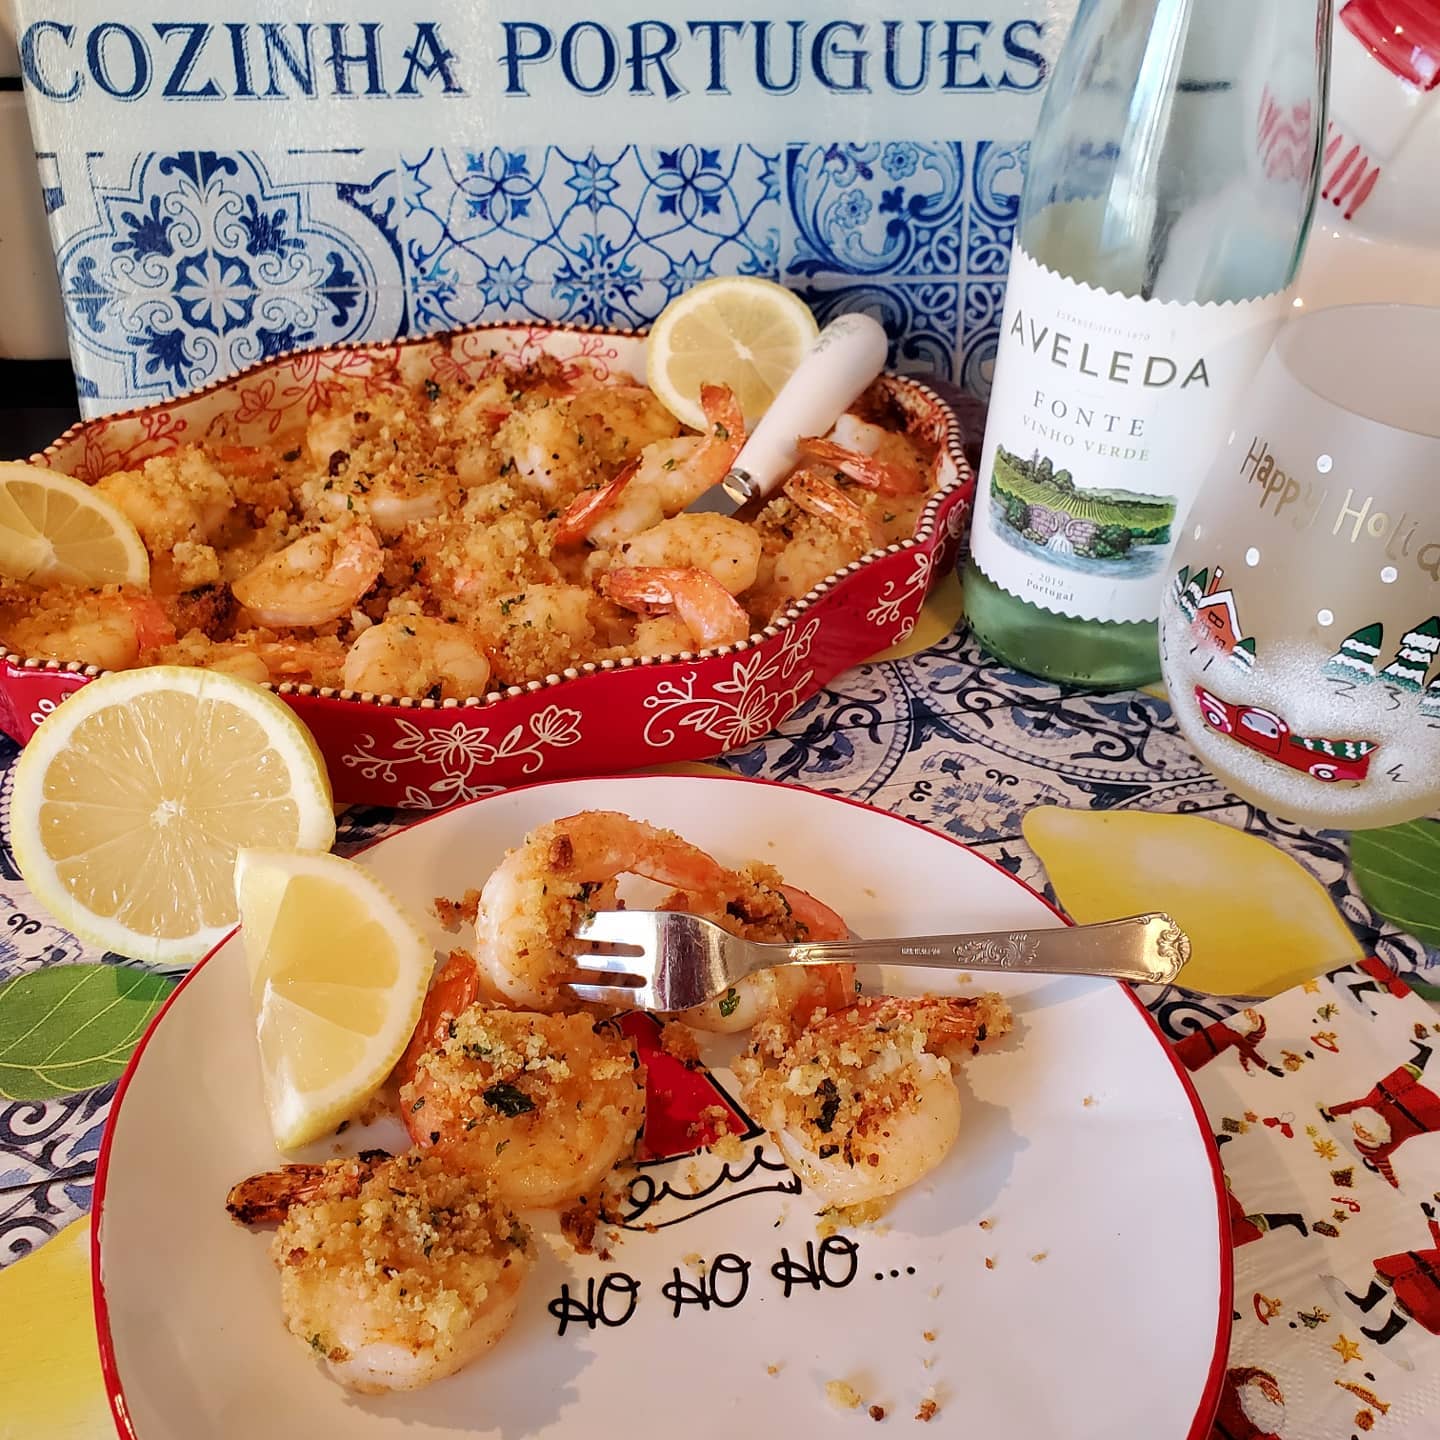
Order this beautiful Glass Cutting Board here
Once you try this delicious recipe, you’ll be making all the time. It’s inspired by a recipe by Ina Garten, but I changed up the ingredients a little. It’s easy to make and cooks in only 15 minutes. Serve as an appetizer with crust bread, or as a main dish with linguini. I would serve it with some Portuguese Vinho Verde of course. Enjoy!
Ingredients:
Shrimp marinade:
2 pounds medium or large shrimp (in the shell)
2 tablespoons Portuguese Vinho Verde or white wine
3 tablespoons olive oil
Salt and black pepper
1/4 teaspoon paprika
Crumb topping:
1 stick of butter (melted)
1 cup panko bread crumbs
4 cloves garlic (minced)
3 tablespoons fresh parsley (minced)
1/4 teaspoon crushed red pepper flakes
1 lemon (zested and juiced)
Lemon wedges for garnish
Preparation:
Preheat oven to 425 degrees F. Peel shrimp leaving the tail. Devein and butterfly the shrimp and place in a bowl with the wine, olive oil, 1 teaspoon salt, 1 teaspoon pepper and paprika. Let marinade for about 5-10 minutes.

Enjoy rosemary all year long for your recipes. It’s easy to grow and dry in your own home.
Step 1.
Cut rosemary stems from the plant.
Step 2.
Rinse and dry on paper towels.
Step 3.
Tie the stems together in a bunch and hang upside down in a dry place for about 2 weeks to completely dry.
Step 4.
When the sprigs are totally dry, remove the needles and place in an airtight jar or mason jar.
 How
How
Traveling Spoon is looking for new hosts in PORTUGAL!
![]()
Contact Regional Manger; Joaquin Abal – joaco@travelingspoon.com


Traveling Spoon is an online marketplace connecting millions of travelers around the world with meaningful local and authentic food experiences in people’s homes. It has recently been featured in Forbes Magazine as the next generation of Culinary Tourism!
Are you a talented home cook, passionate about the cultural traditions that make your cuisine unique? Traveling Spoon offers in-home meals with vetted hosts as well as in-home cooking classes and market tours across +90 destinations around the world They are looking for passionate home cooks throughout the country, and they have trusted Tia María’s leading position among foodie blogs to help spread the word! TS offers its community a platform for doing what they love and sharing it with travelers, while providing its hosts an alternative source of income.
100% of hosts are personally vetted! We find the best home cooks around the world so you can immerse yourself in meaningful food experiences and cultural traditions passed down through generations.
Founders Aashi Vel, and Steph Lawrence want to connect travelers with local, vetted hosts to share the joy of a homemade meal in their home and learn about their cultural and culinary traditions passed down through generations.
 “Our mission is to find you the most meaningful and memorable cultural experiences” Steph & Aashi
Aashi ( left ) is a food and travel enthusiast with a deep passion for creative problem-solving, product innovation and foraging. An industrial designer and patent holder, Aashi has designed several award-winning products. She is a magna cum laude graduate of the Savannah College of Art & Design and received her MBA from UC Berkeley.
Steph ( right ) deeply loves cheese, travel, and learning new cuisines and culinary traditions from around the world. A former marketing consultant, Steph has worked with Alice Waters and the Chez Panisse Foundation, Allison Rockefeller and others to drive marketing and business strategy. She is a cum laude graduate of Dartmouth College and received her MBA with honors from UC Berkeley.

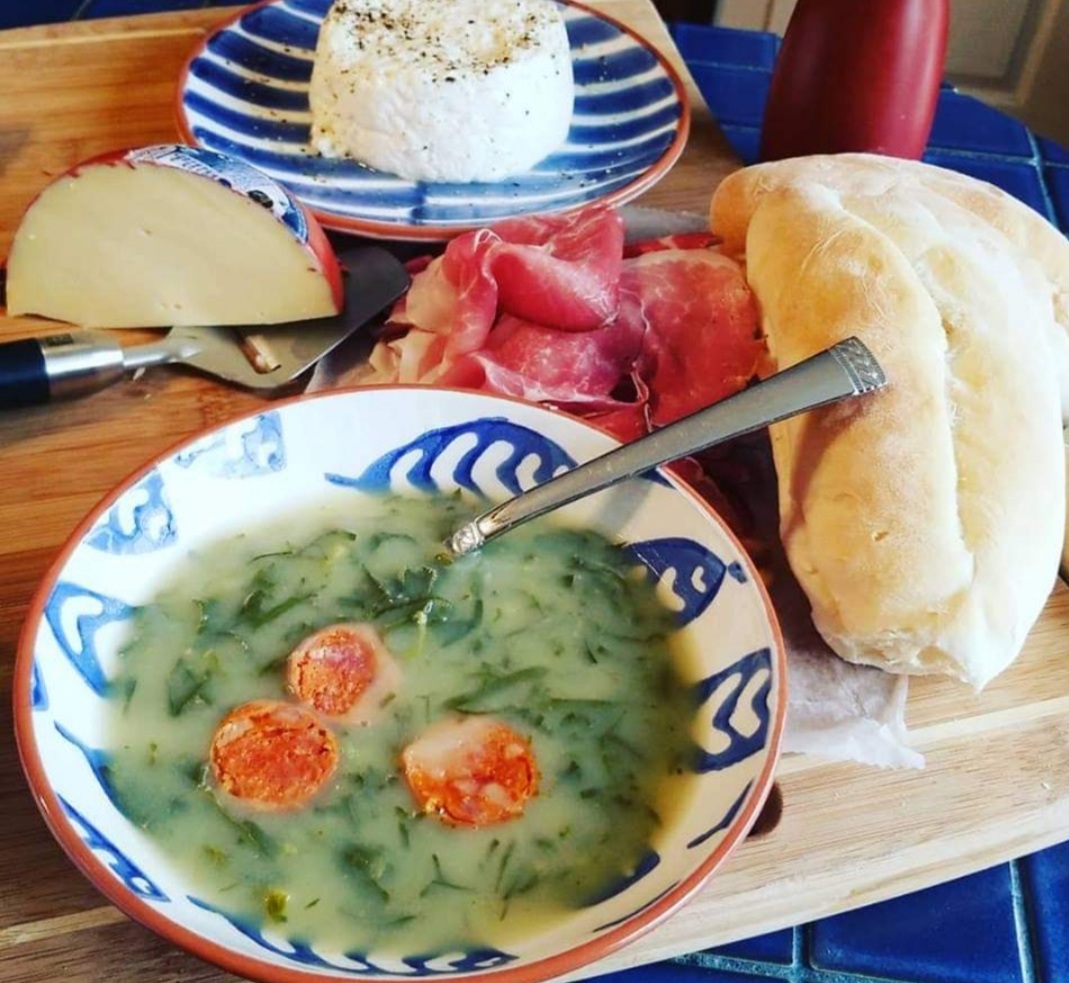
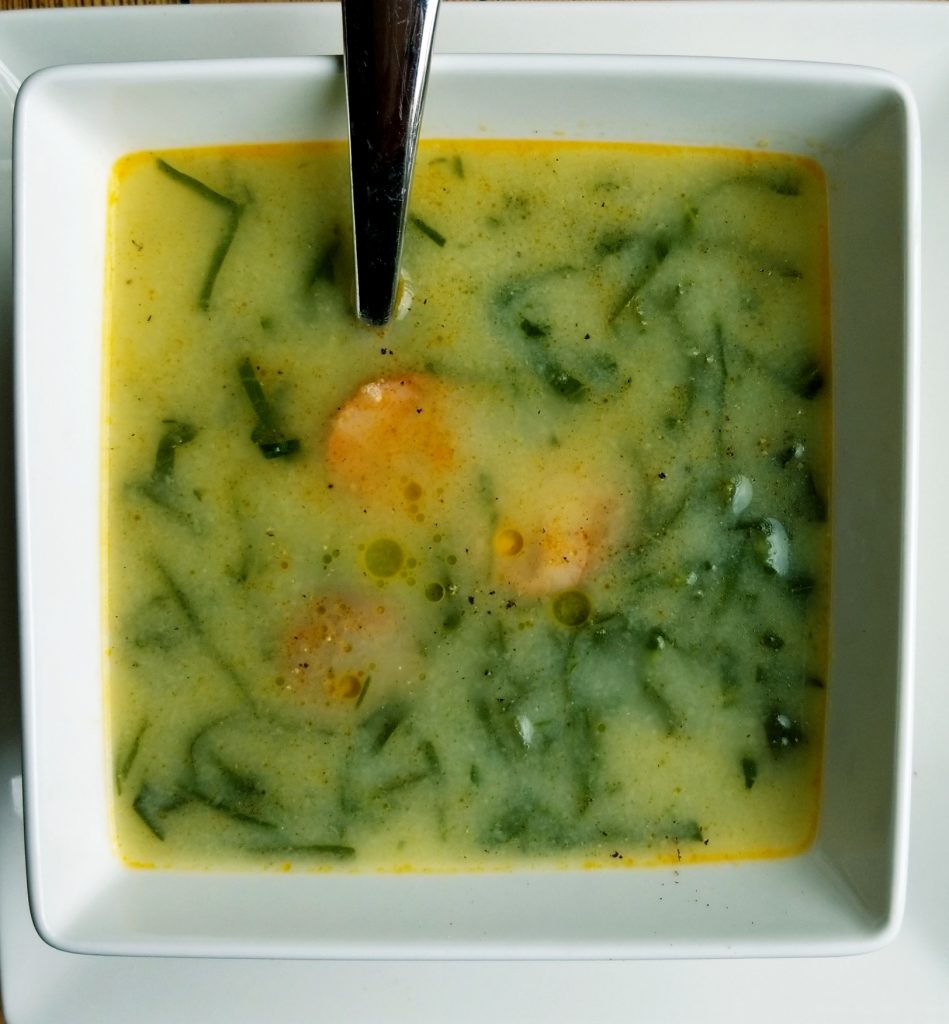 Order cookbooks here Lisbon Blue Shop
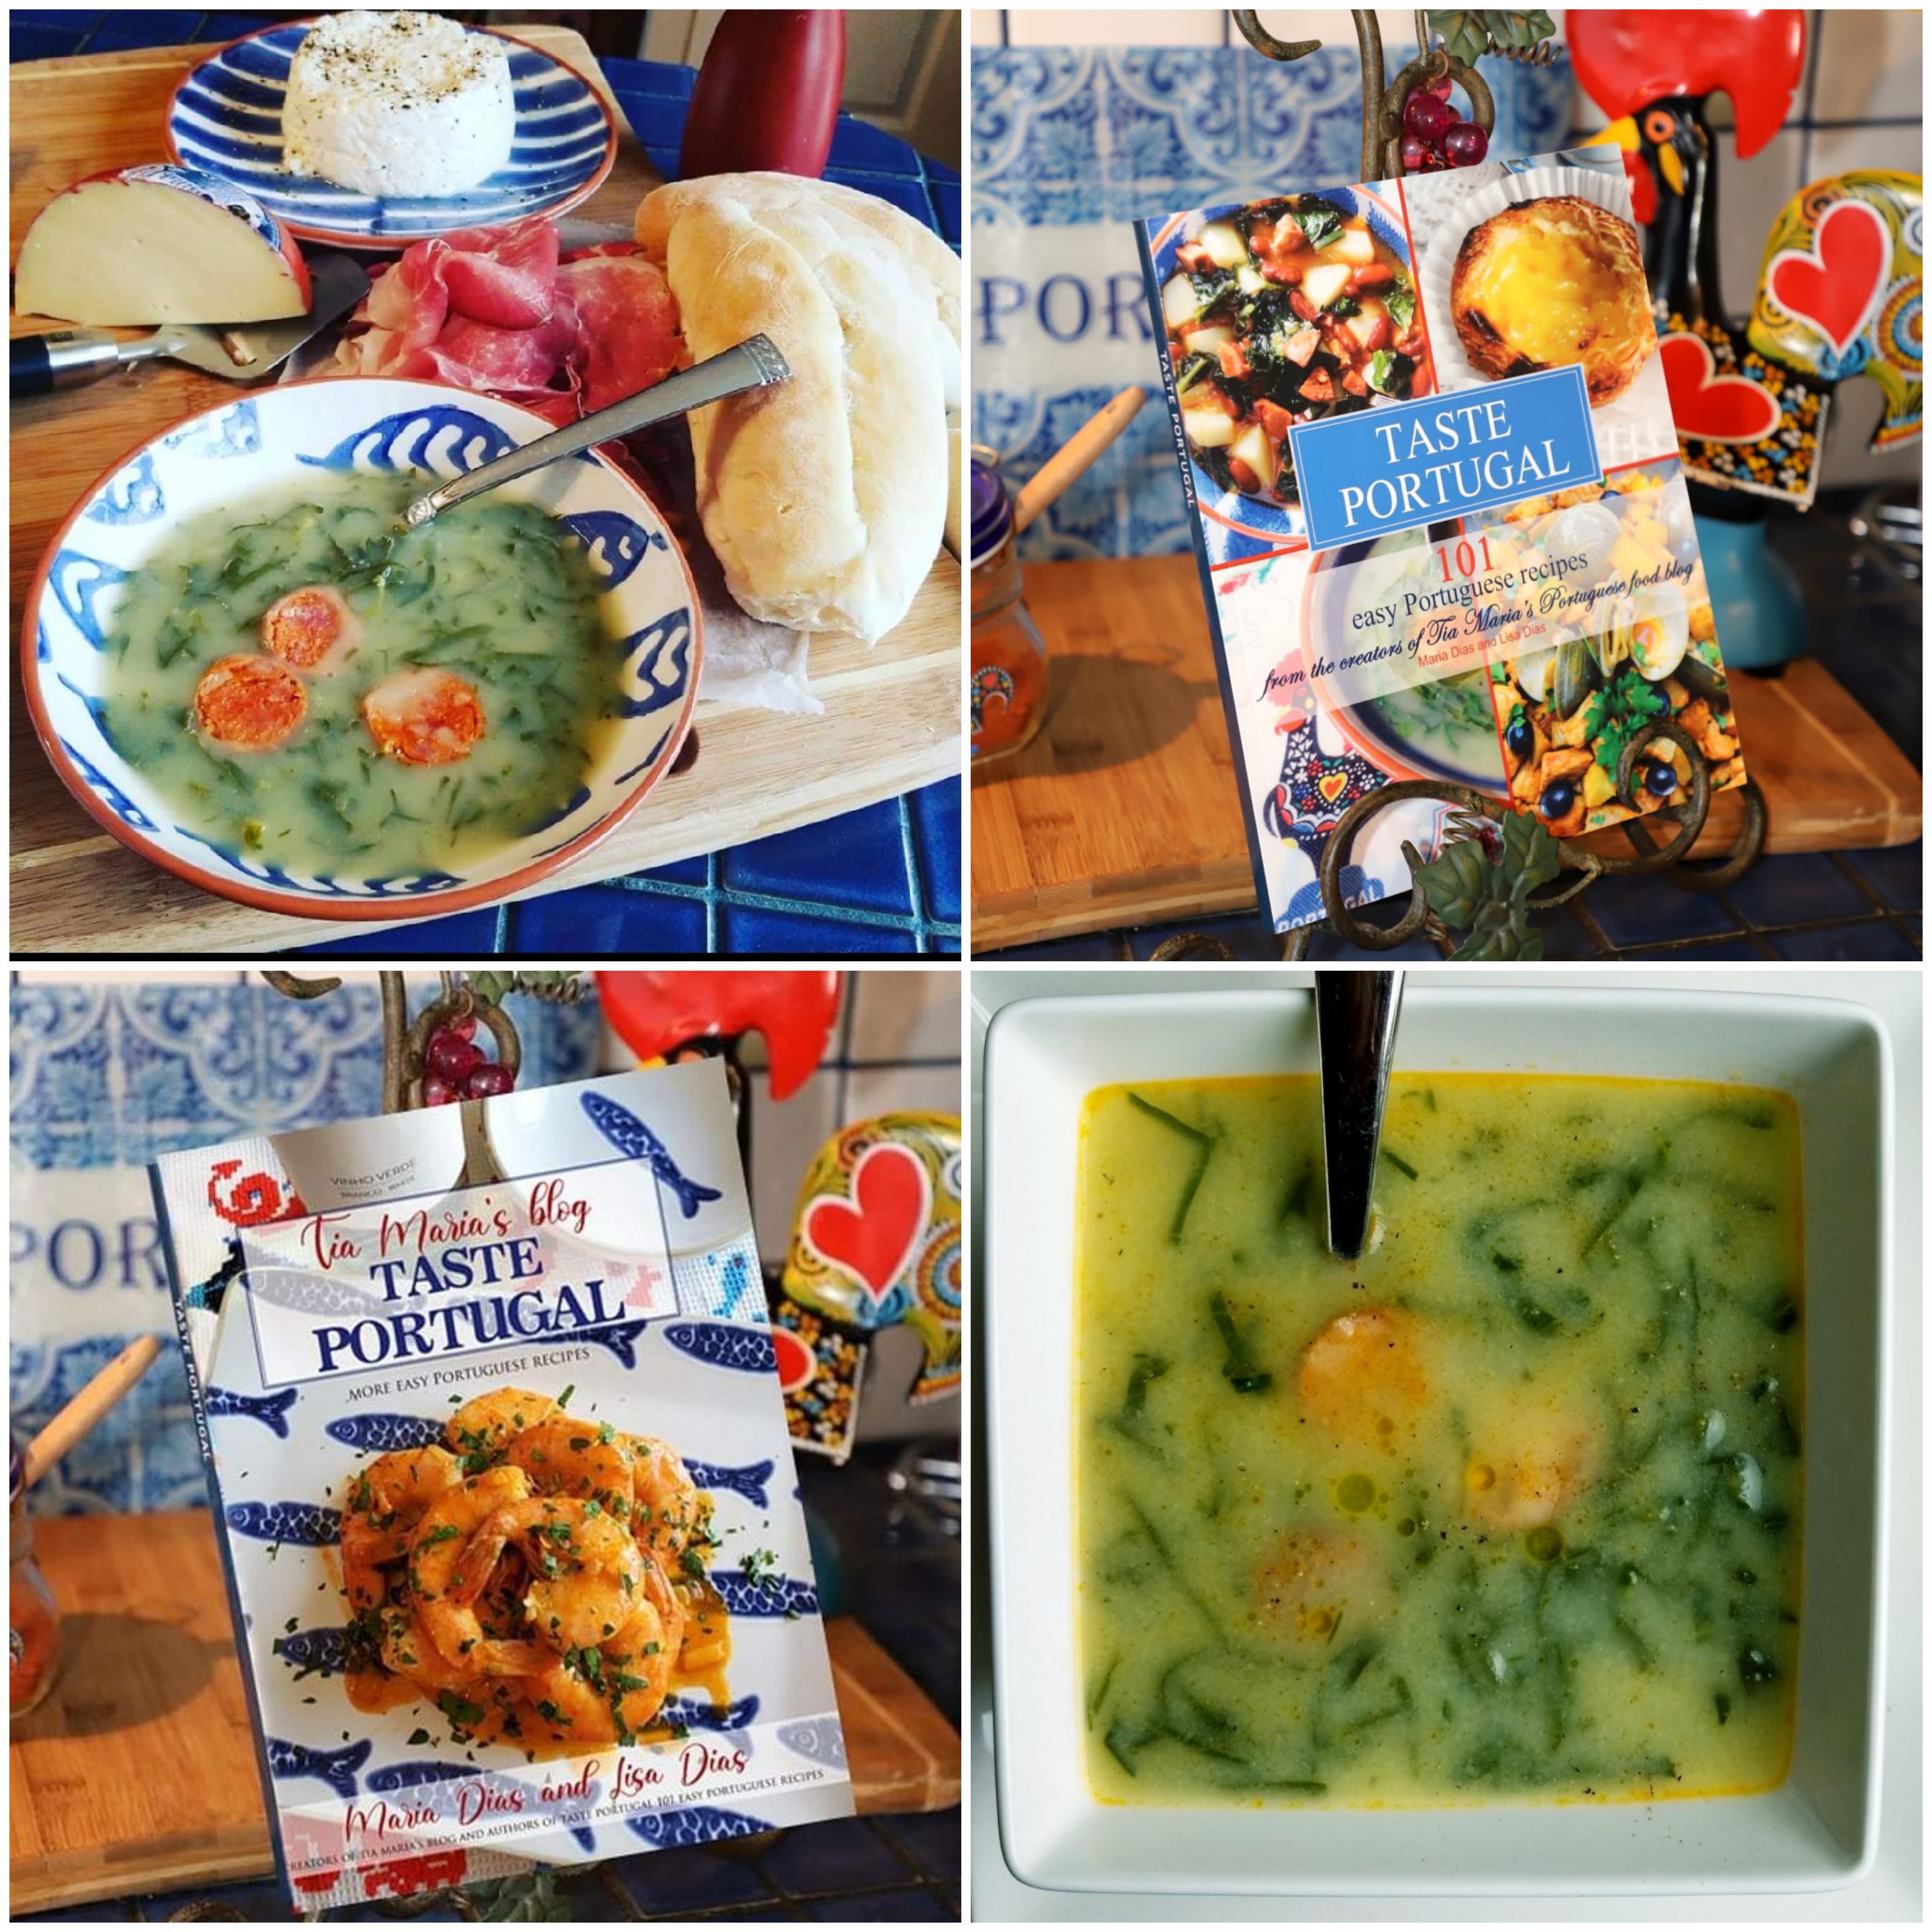
If you love Caldo Verde or Kale Soup like my son, you’ll love my new Keto Diet, low carb recipe for Caldo Verde. He’s on a low carb diet, so that means potatoes are out of his diet.
This recipe tastes pretty close to the original recipe for Caldo Verde here on my blog. I substituted mashed cauliflower for the potatoes and it works! Give it a try and be sure to improvise with your own seasonings.
Find this delicious recipe in my TASTE PORTUGAL MORE EASY PORTUGUESE RECIPES
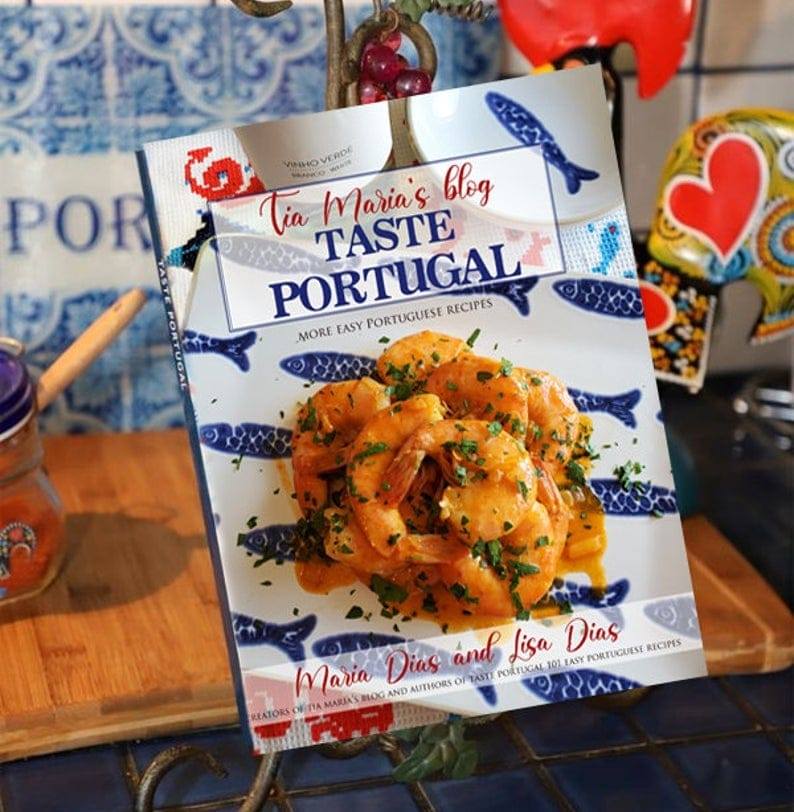
Ingredients:
3 (14 oz) packages of frozen cauliflower or (3 pounds fresh cauliflower)
1 large onion (chopped)
4 cups low sodium chicken broth
4 cups water
2 tablespoons olive oil or more
2 to 3 teaspoons salt
1 teaspoon fresh ground black pepper
1 teaspoon crushed garlic
1 bay leaf
2 to 3 cups finely chifounade collard greens or kale
6 to 8 oz. Chourico Portuguese sausage

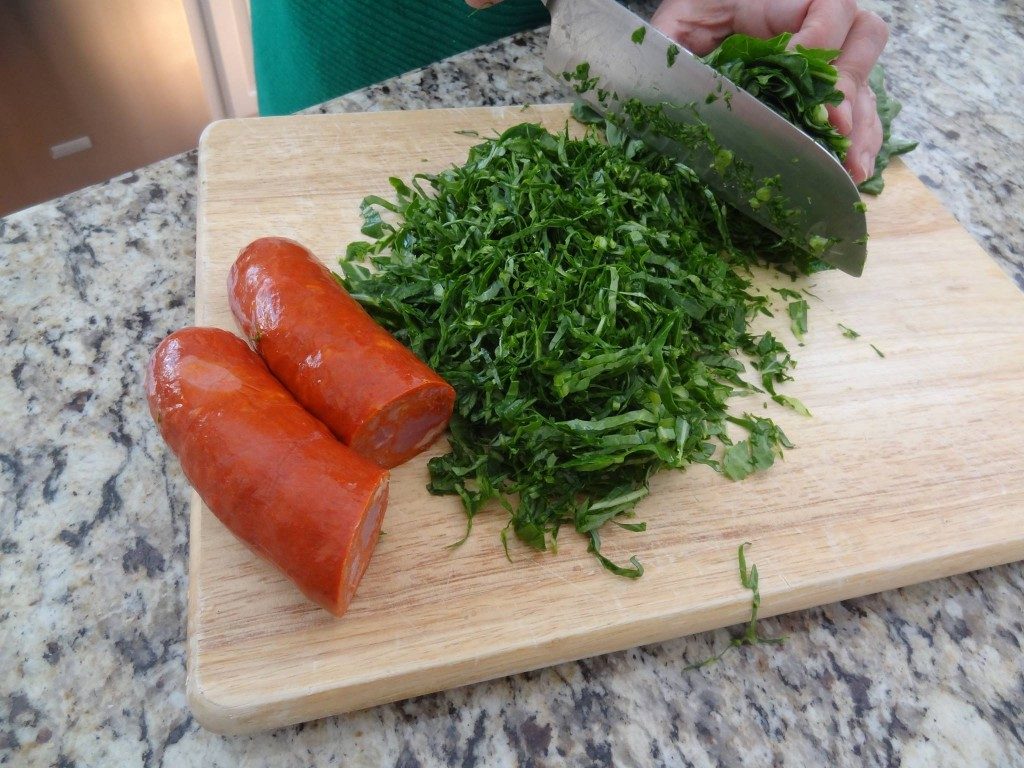 Preparation:
In a medium saucepan bring the water and chicken broth to a boil. Add the cauliflower, onion, salt, pepper and olive oil. Cook for 8 – 10 minutes on medium heat until cauliflower is cooked.
Remove bay leaf. Puree the cauliflower and onion to a creamy consistency.
Add the chourico and collards. Cook for 10 minutes on medium heat until the collards are cooked to your desired taste.
Note: You may need to add more or less broth for a thinner/thicker broth.
Remove the chourico and cut into thin slices. Set aside to serve as garnish with 3 slices for each bowl of soup.
Optional: Add a drizzle of olive oil and fresh ground pepper to each serving.
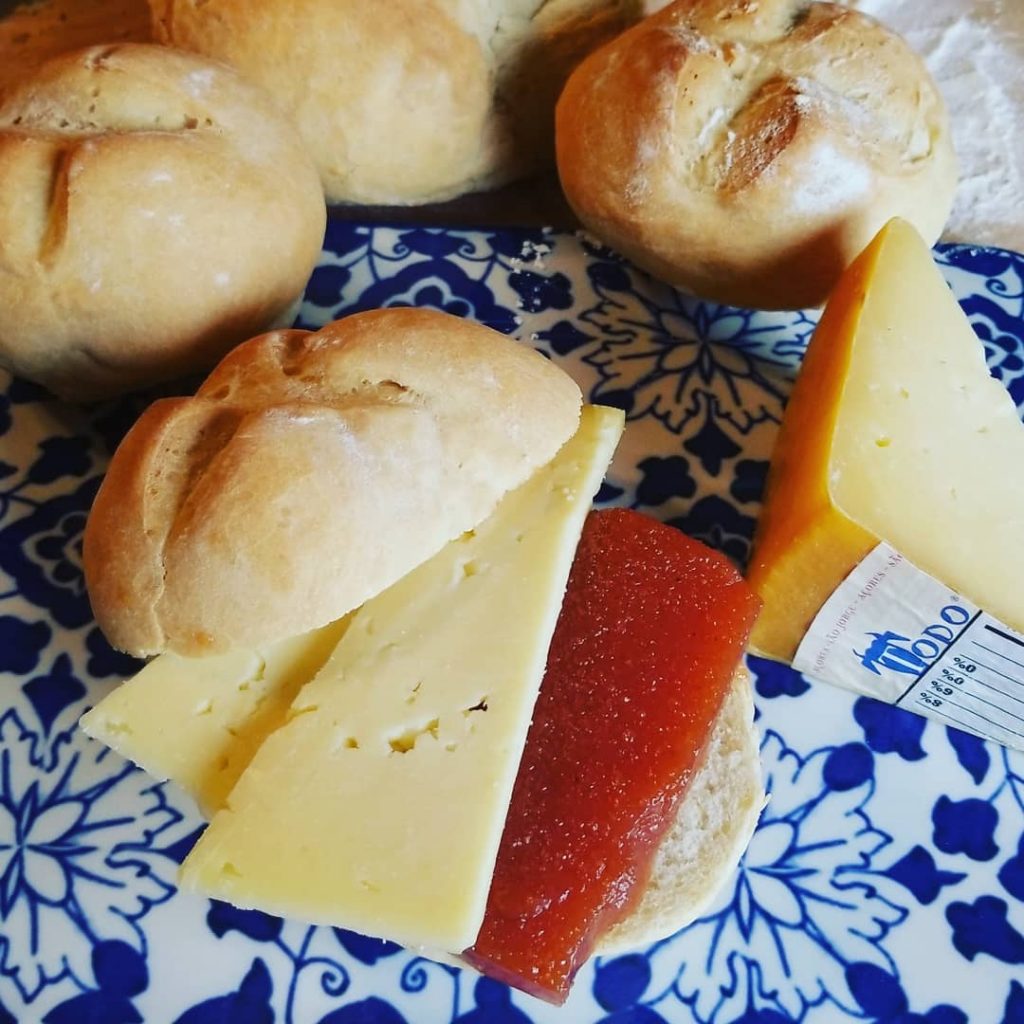 The Romeo and Juliet – Cheese and Marmelade Sandwich
The love story of the perfect couple; Romeo and Juliet, inspired the name for this perfect sandwich combination of tangy Sao Jorge cheese from the Azores, Portugal and sweet Quince Marmelada.
However, feel free to use any of your favorite sharp cheese if you can’t get the Sao Jorge type.
The true Portuguese love story of Ines de Castro and King Pedro happened long before Shakespeare wrote Romeo and Juliet but it is said, that this story of love – tragedy – and of a haunting, may have been Shakespeare’s inspiration.
Prince Pedro, the son of King Afonso IV was the heir to the Portuguese throne. When he was 19 his father had him marry Constança of Castile (Spain) in order to build an alliance in 1340.
Ines de Castro,a daughter of a nobleman from Castile, was a lady-in-waiting to the Princess Constance. Ines was a radiant beauty who stole Pedro’s heart and they quickly fell madly in love.
Click on the image below for the love story.

Recipe for Marmelada – Quince Marmelade
 Ingredients:
4 and ½ pounds Quince
2 and ½ cups sugar
1 cinnamon stick
Water as needed
Preparation:
Wash, peel and remove pits from fruit and cut into chunks. Place fruit in a pan and cover with water. Add cinnamon stick and cook until cooked. Drain and remove cinnamon stick.
Puree with immersion blender until creamy. In the same pan, add sugar and cook on medium heat stirring often until a clear line forms in the center of pan with a wooden spoon.
Cool and place in plastic containers. Store up to 3 months in refrigerator.
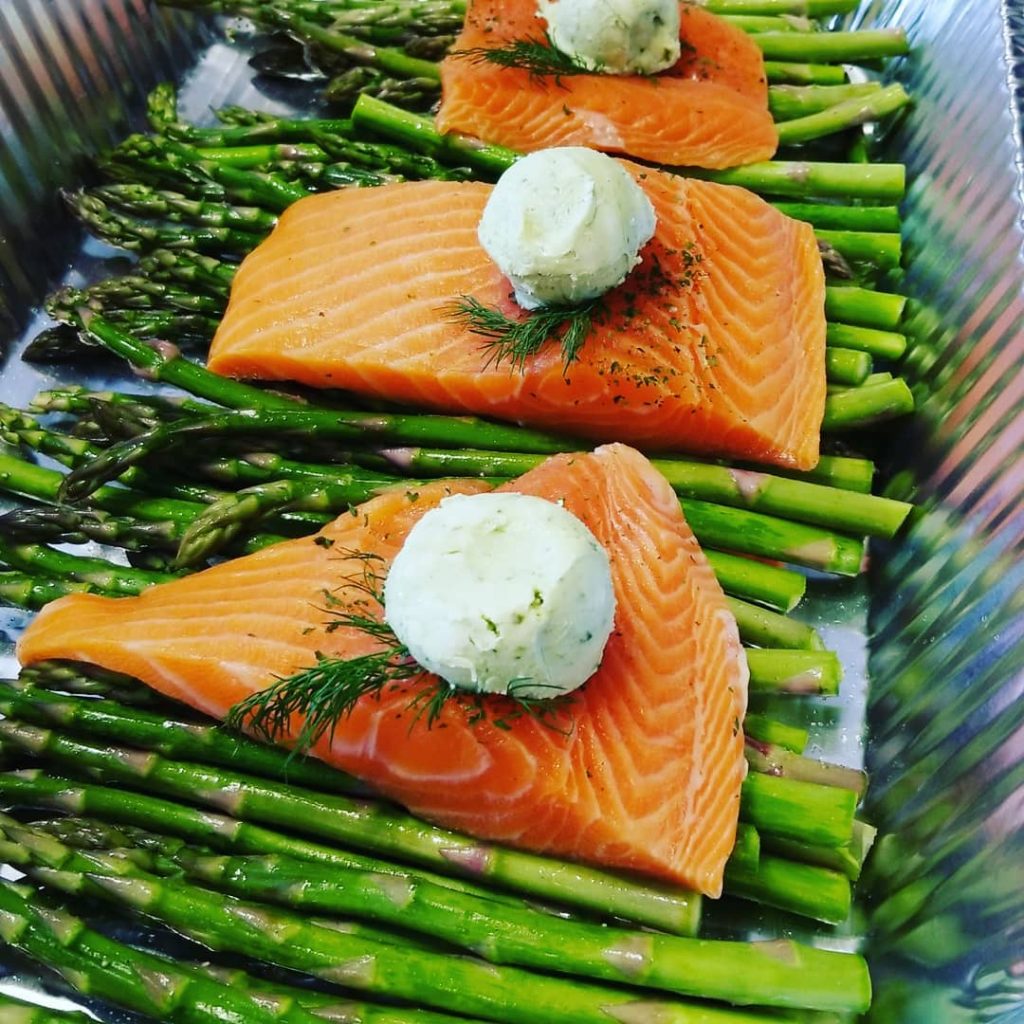 I hope you enjoy this sheet pan Salmon and Asparagus dinner which cooks in only 20-25 minutes. Serve it with a tower of Portuguese Tomato Rice for great presentation.
Make extra because the salmon and asparagus are also delicious served cold as a salad. Enjoy!
Ingredients:
3 or 4 (8 oz) portions of fresh salmon
2 pounds fresh asparagus (washed and edges trimmed)
2 tablespoons olive oil
1/2 teaspoon salt
1/2 teaspoon crushed black pepper
lemon wedges
Basil Butter
1/4 cup basil leaves
3 cloves garlic
1/2 cup butter
1/2 teaspoon salt
1/2 teaspoon lemon juice
fresh dill for garnish optional
Preparation:
Preheat oven to 400 degrees F.
Make the butter first by placing the garlic, basil leaves, salt and lemon juice in food processor. Blend until a paste forms. Add butter and mix well.
Arrange the asparagus flat across a sheet pan. Drizzle with olive oil, salt and pepper and shake pan to coat evenly.
Place the salmon evenly over the asparagus and top with a scoop of basil butter. Place a dill sprig under butter if desired.
Cook for 20-25 minutes until salmon is fully cooked. Drizzle with squeezed juice from lemon wedges.
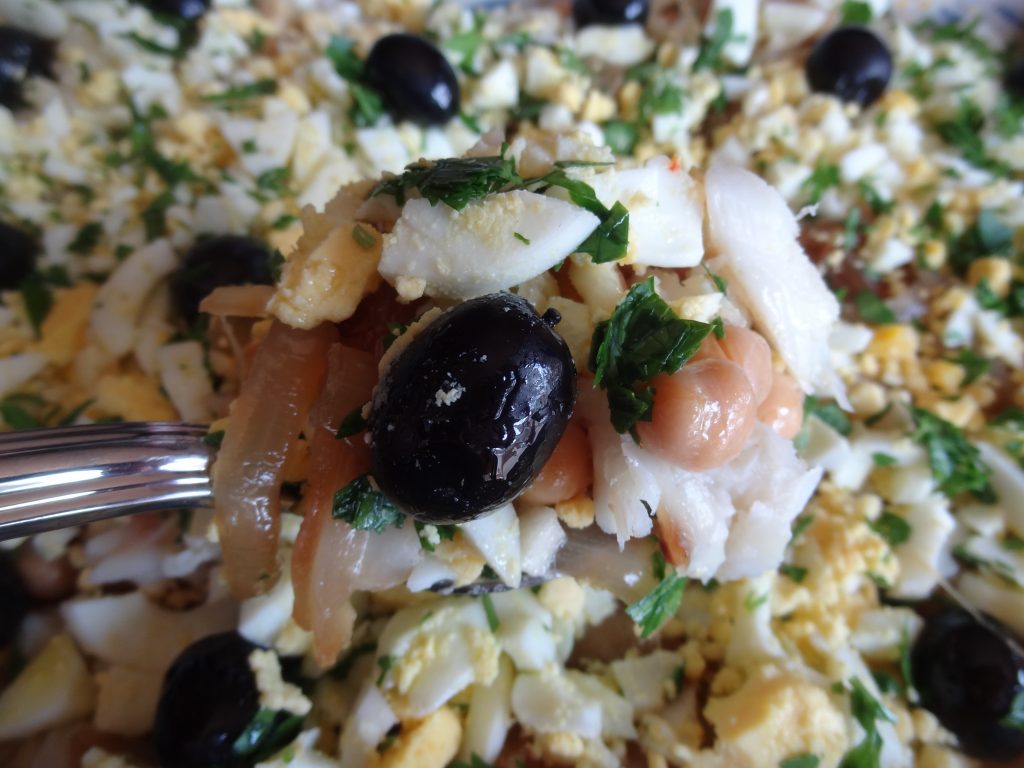 This easy recipe is can be a lunch, snack, side dish or a main dish. Serve it warm or cold. Make this ahead of time and store in the refrigerator. If you don’t have salt cod available in your area, you can use cooked fresh cod or haddock.
Serves 4-6
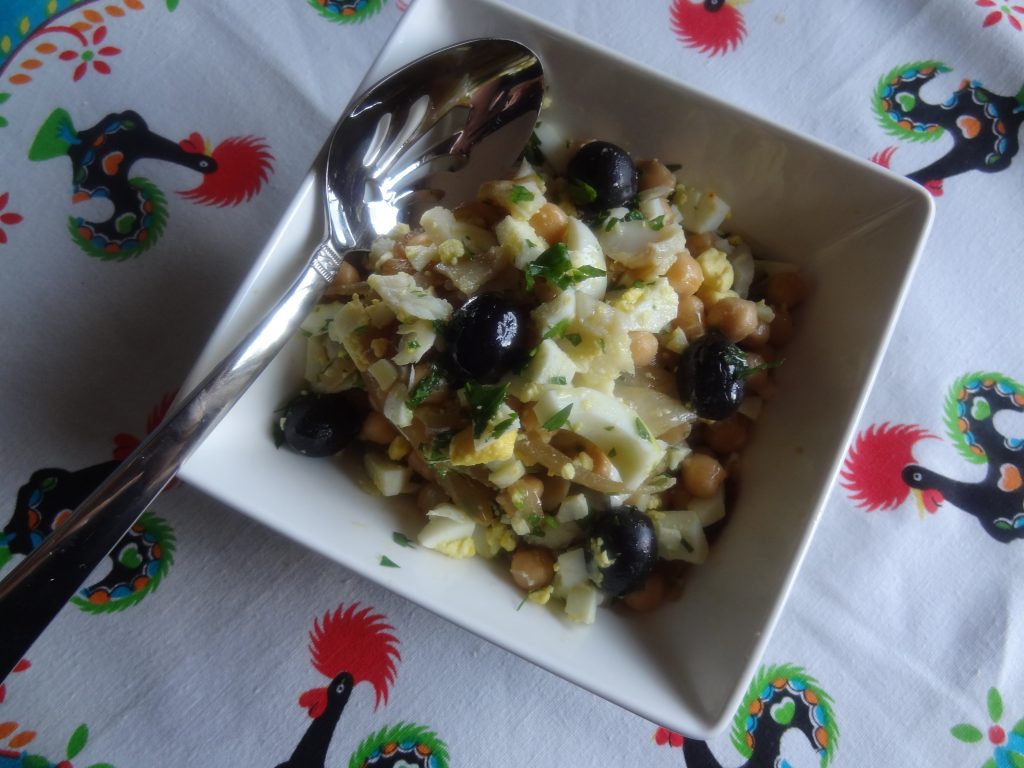
Ingredients:
1 or 2 cans of cooked chick peas (drained and rinsed)
1 pound of cooked salt cod (flaked)
1 large onion (sliced)
3 cloves garlic (finely minced)
6 hard boiled eggs (chopped)
1/2 cup olive oil
3 tablespoons chopped parsley
salt and pepper to taste
2 tablespoons wine vinegar to taste (optional)
olives for garnish
Preparation:
Saute the onion in 2 tablespoons of olive oil for a few minutes. Add garlic and cook for another minute.
Note: If you want to serve this dish warm add the chickpeas and cod to the onions and saute until warm. Then add the garnishes on top before serving.
In a large dish, layer the chickpeas, then the cod. Season with salt and pepper.
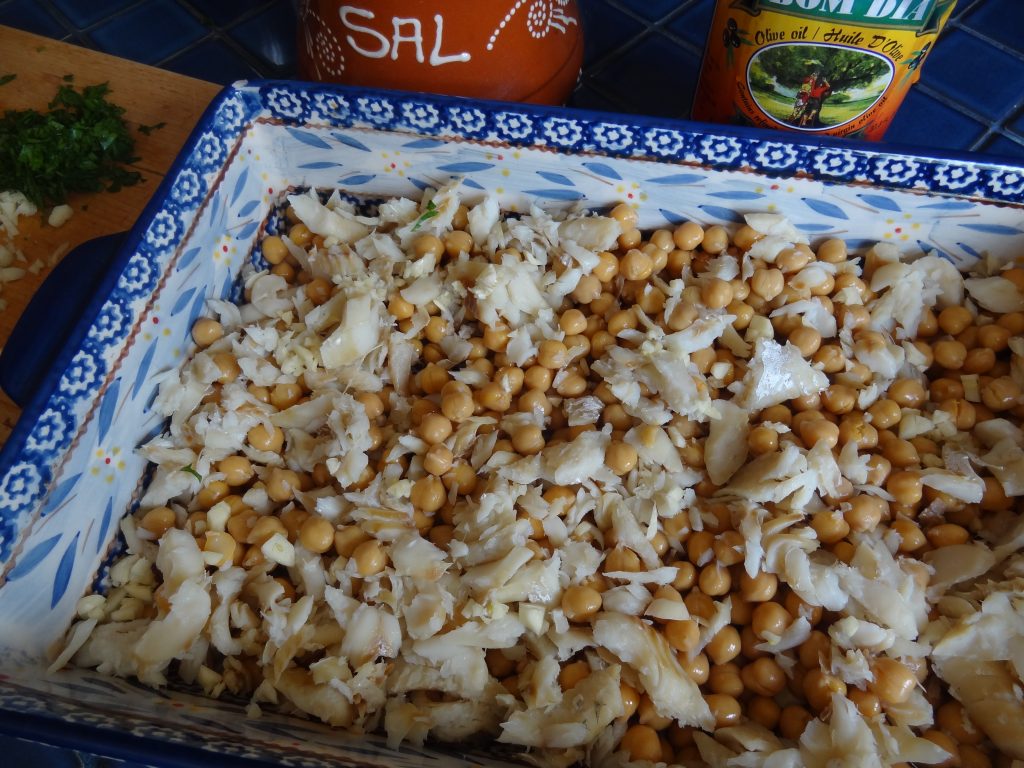
Add the onions, and the eggs. Drizzle with the remaining olive oil and vinegar if desired.
Garnish with the parsley and olives.
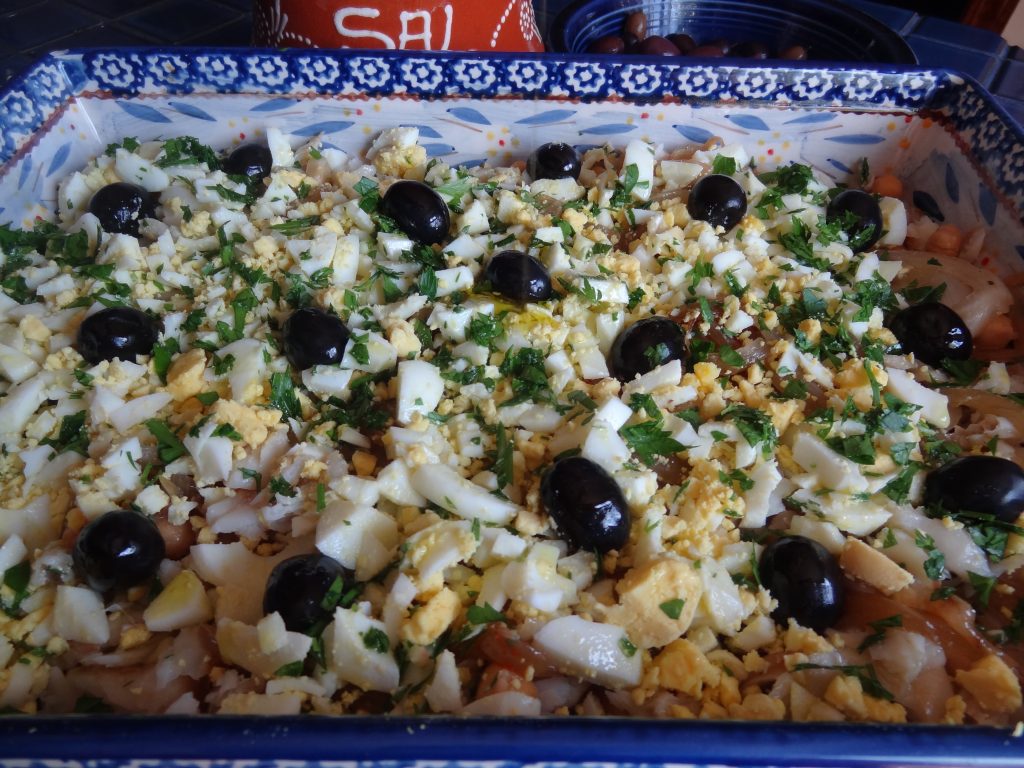

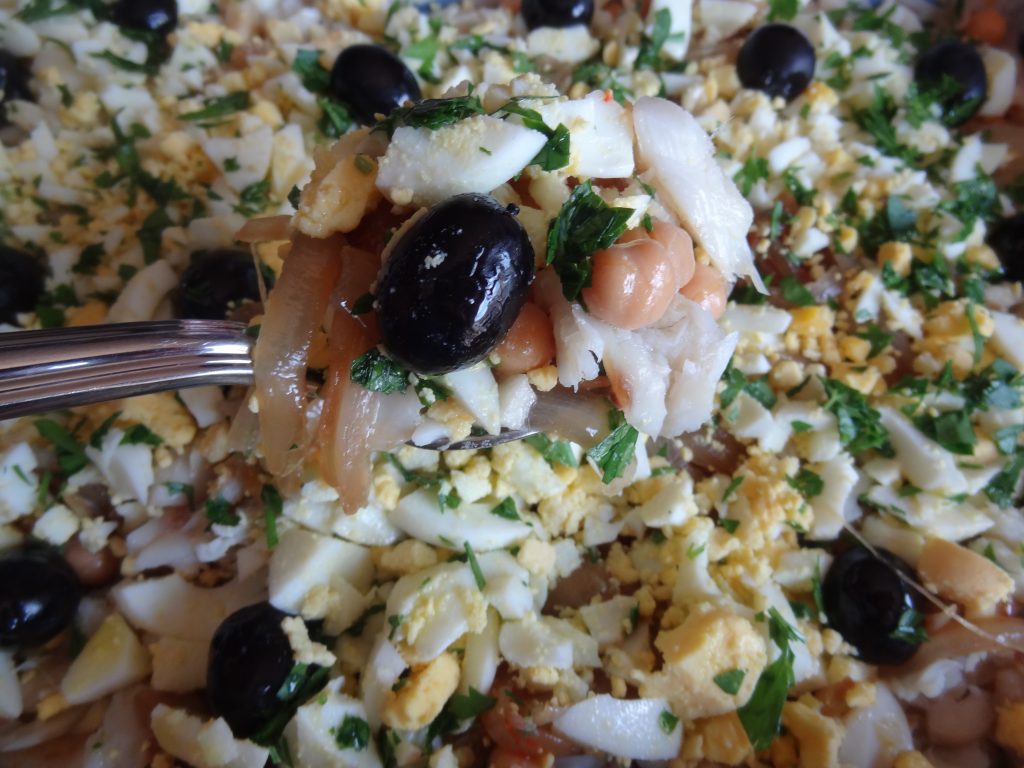

Merry Christmas and Happy New Year everyone.
May the spirit and joy of Christmas bring you; love, peace, health and happiness to you, your family and friends.

 Merry Christmas Everyone! Here’s a special recipe for you.
Recipe #48 Taste Portugal 101 Easy recipes cookbook
Portuguese Baked Stuffed Shrimp
Warning!!! This baked stuffed shrimp will drive shrimp lovers crazy! What makes this a Portuguese recipe? The papo secos of course! They’re perfect to make this stuffing because they have great texture and taste which makes a perfect match with the shrimp.
The dish was a very popular menu item at my brother’s Portuguese/American restaurant many years ago. I’ve adapted it through the years and I make for special occasions and holidays such as Easter and Christmas.
The recipe has a lot of steps, but once you make it and see how easy it is, you’ll never through away your old Papo Secos again! Just freeze the rolls in plastic freezer bags.
The stuffing is very versatile so you can use it to stuff fish, chicken, or even mushrooms (see the photos below). Make a double batch of the stuffing and freeze it in freezer safe plastic bags or bowls.
These shrimp take only 15-20 minutes to bake so it’s an elegant and easy dish to prepare to impress your guests. Serve with Portuguese Rice of course!
Serves 4-6
Ingredients:
2 pounds extra large shrimp (about 10-12 per pound) (peeled & deveined)
3 papo seco rolls (preferably day old)
15 Ritz crackers or any brand of buttery crackers
1 package garlic flavored croutons
1/2 cup celery (finely minced)
1/2 cup onion (finely minced)
3 tablespoons olive oil
1/2 stick (4 tablespoons) of melted butter
1 pound of small or medium raw shrimp (peeled & deveined)
1/4 cup of white wine
1 teaspoon paprika
1/2 teaspoon garlic powder
1/2 teaspoon salt
1 small chicken bouillon cube
2 tablespoons parsley (finely chopped)
Instructions:
Step 1. Peel both sizes of shrimp into separate bowls and reserve the shells. Cook the shells in 3 cups of water and a pinch of salt for about 8 minutes. Strain the broth into a big bowl and let it cool. Throw away the shells.
Step 2. In a small skillet, saute the onion and celery with olive oil for 5 minutes until translucent on medium low heat. Remove the onions and celery with a slotted spoon leaving some of olive oil in the pan. Set the onion mix aside to cool.
Step 3. In the same skillet, add the small shrimp, bouillon cube, garlic, salt and paprika and cook for 1 minute until the shrimp turns slightly pink. Add the wine and cook for another 3 minutes for the wine to reduce. Remove the skillet from the heat and let the shrimp cool while you prepare the bread stuffing.


Step 4. Chop the Papo Seco bread (or any crusty day old bread) into small chunks and place into the bowl with the shrimp broth.
Let the bread sit for about 10 minutes to absorb the broth. Mash the bread with your fingers or a fork until it very dissolved with no big chunks left. The bread should be the constancy of a wet dough like batter. If you find the bread too dry add a little more water.
")
Step 5. Crumble the crackers with your hands into the bread. Add the cooked onions and celery and mix the stuffing very well. The stuffing will be wet, but if you find it runny add more finely diced bread or crackers.
Add the cooled shrimp and parsley into the stuffing and mix well. Taste and add more salt if desired. Set aside while you prep the shrimp for stuffing.
")
")
The stuffing will have a soft dough consistency and a golden delicious color like this photo.
")
Step 6. Prep the large shrimp for stuffing by gently slicing at the curved end in the butterfly cut. The stuffing goes into the center leaving the tail curved over.
")
Grease a cooking tray and place each shrimp butterfly up in the pan. Scoop 1 tablespoon or more of the stuffing into the center of the shrimp.
Step 7. Place the croutons in a Ziploc plastic bag. Close tightly making sure no air is left inside. Crumble the croutons into very fine bread crumb like crumbs. This should yield about 1 and 1/2 cups. Don’t be stingy with the croutons. Pile them on the shrimp since they cook up crispy and flavorful.
Sprinkle 1 teaspoon over each shrimp and then add a little melted butter over each one.
")

***Note you can place the shrimp assembled on a sheet pan, cover with plastic wrap and cook the next day.***
Step 8. Cook in a 375 degree oven for about 15-20 minutes until the shrimp is pink and golden brown.
Remove from the oven. You can leave them in the oven on very low heat to keep them warm before serving or to reheat them.
Be careful since they may become dry if the heat is too high or you leave them in the oven to long. Drizzle more melted butter on top before serving.
")

Make stuffed mushrooms with any leftover stuffing. Wash and dry the mushrooms and remove the caps.
Place them in a buttered baking dish, fill with the stuffing, croutons and butter.
Bake at 375 for 15-20 minutes until cooked. Heat a can of cream of mushroom soup or shrimp soup and gently spoon around the mushrooms when cooked.


“Feliz Natal” or “Boas Festas” translates to “Merry Christmas” or “Happy Holidays”!
The Holiday season in Portugal is celebrated as a time for family, of giving and sharing. Towns and homes are decorated with lights and with “Scenes of the Nativity”, or the Presépio which is the main focal point of the Christmas decorations in the Portuguese homes. Some towns mount a living Nativity Scene, with locals and live animals playing the roles at scene at the birth of Christ.
The creche scene was the idea of St. Francis of Assisi in the 13th Century to re-create the stable where Jesus was born at Christmas.
According to the gospels, the crib represents the stable where Jesus was born, a place that is still worshiped in Bethlehem today, at the Basilica of the Nativity.
Based on the interpretation of the Old Testament gospels, the Nativity was represented in the 4th century by the image of the Baby Jesus lying on the ground, accompanied by figures representing the ox, the donkey and the shepherds. The representation of the Crib began to spread from the 8th century onwards.
In Portugal, many creche scenes have locally crafted clay figures. In the cribs at Estremoz and Barcelos, as well as to the baroque cribs designed by the sculptor Machado de Castro at the Lisbon cathedral or by the sculptor António Ferreira at the Basílica da Estrela.
The nativity from the 18th century is centered around the Nativity and the arrival of the Three Wise Men at Bethlehem, but it also recreates Portuguese rural settings, crafts, professions and clothing worn at that time that are now longer used.
You can find famous Creche here and listings of permanent Creche displays all over the world at friendsofthecreche.org.
Crib Sculpture by António Ferreira at the Basílica da Estrela
Christmas Nativity Portugal
Consoada – Christmas Eve Dinner
On Christmas Eve, a family dinner known as the night of the “Consoada” is celebrated. The word Consoada refers to a small meal that is taken at the end of a day´s fasting and derives from the Latin word consolare, meaning “to comfort”.
For most Catholics, (Advent) the period of preparation for Christmas, begins on the fourth Sunday before Christmas.
Advent is also refereed to as “little Lent,” because, like lent, it is a time of repentance and fasting. Fasting during Advent used to be universal, most Western Christians today treat Advent as a “Before Christmas Day”.
In the North of Portugal (Minho, Porto and Guimarães), it is the custom for people to reserve places at the table set for the Consoada supper for those relatives who have recently passed away, or else to leave the table laid and a candle or lamp lit throughout the night to comfort and warm their souls. Some families light a “Christmas log,” or cepo de Natal, a piece of oak that burns on the hearth.
Traditionally, the Christmas Eve supper consists of abstaining from meat dishes. The traditional fish, is Bacalhau (salted cod), but other regions eat Polvo (Octopus), or another fish. Many appetizers such as, Bolinhos de Bacalhau, Rissois de Camarao, and many other treats are served. Christmas day meals usually consist of meat dishes such as roast Pork, chicken, or lamb.
Visit Tia Maria’s Blog Youtube Chanel for video recipes!
 Bolos de Bacalhau – Cod Fish Cakes
 Rissois de Camarao – Shrimp Turnovers
 Pataniscas de Bacalhau
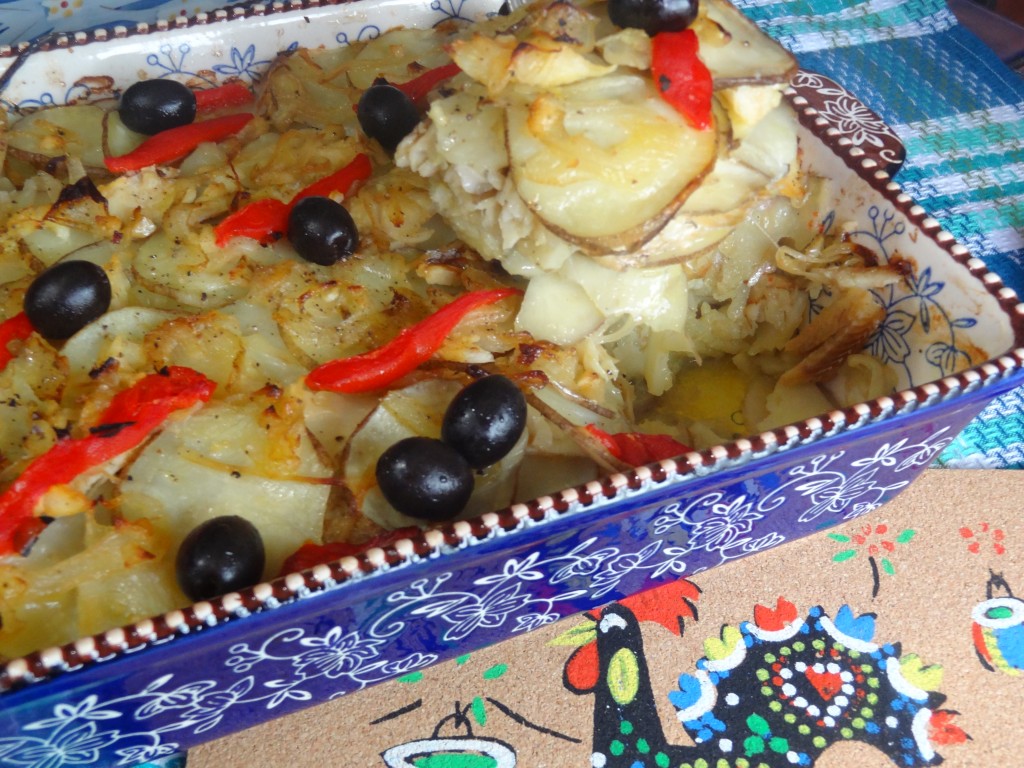 Bacalhau a Maria – Baked Salt Cod with Scalloped Potatoes
 Bacalhau a Gomes de Sa – Salt Cod
Desserts:
Traditional Christmas treats such as Portuguese cheeses, nuts, and fruits and many desserts adorn the Christmas diner table. The most popular desserts are: “filhoses or filhós“, “Sonhos“, “Rabanadas”, “Aletria”, “Arroz Doce”, and “Pao de Lo” are some of the favorites. Many other regional desserts are prepared according to ancient recipes that are passed on from generation to generation.
 Aletria – Sweet Angle Hair Dessert
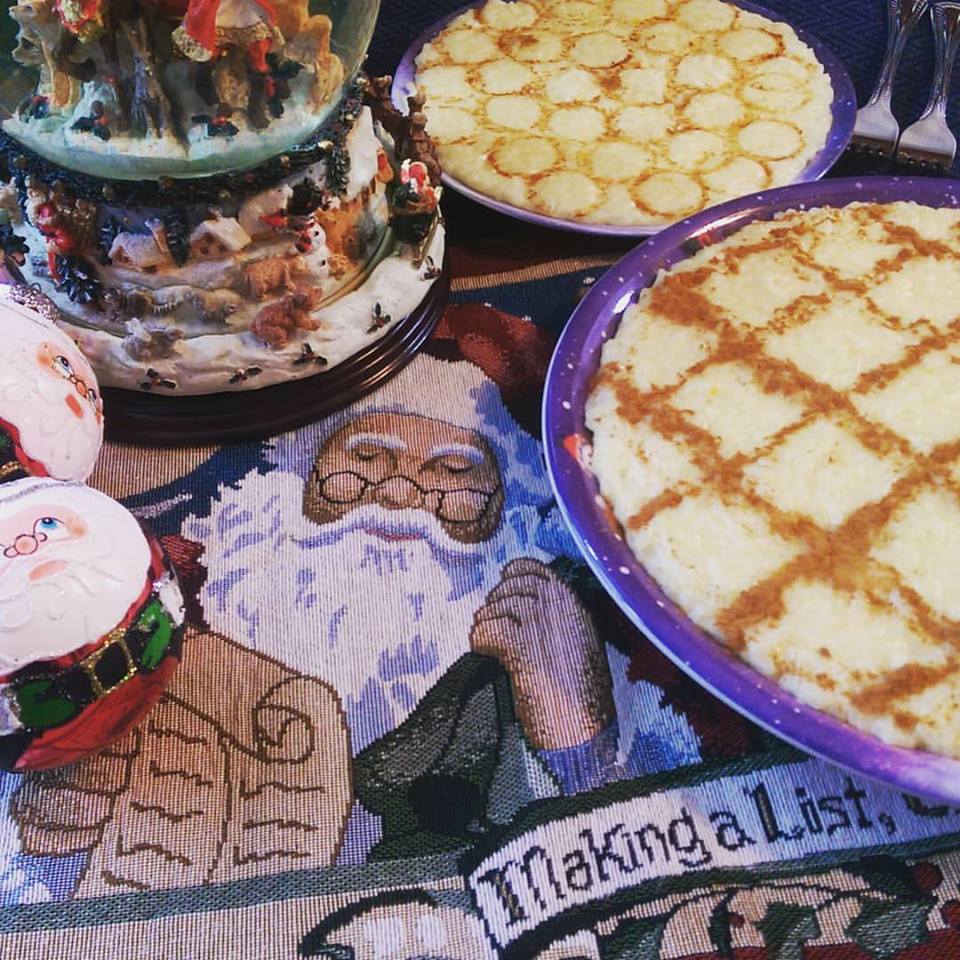 Arroz doce – Sweet Rice Pudding
 Pasteis de Nata – Custard Cups
Missa do Galo – Midnight Mass
Missa do Galo or midnight mass, is a custom among Catholics who celebrate Christmas. The Missa do Galo was first included the Christmas celebrations during the 5th century. It is celebrated at midnight, which is the time referred to as being “in galli cantu” (at cock crow), and it was originally the first of three masses comprising the liturgy of Christmas Day.
During the Missa do Galo, people can admire the crib, which has been specially prepared for the occasion, and, after communion, everyone moves up to the altar to “kiss the Baby Jesus”, an act that is sometimes accompanied by songs of worship.
In the regions of Bragança, Guarda or Castelo Branco, a Yule log is burned in the atrium of the village church after mass. It helps keep everyone warm through the night and to wish family and friends a Merry Christmas.
Gifts
Santa Claus is named “Pai Natal” (father Christmas). Some families open the presents on Christmas Eve at midnight, while others wait until after Midnight mass. Many open the gifts after the Christmas Eve diner. Others open them in the morning of the 25th, Christmas Day. Some families put one shoe of each child next to the chimney or fireplace instead of a stocking. Children right letters to baby Jesus asking for gifts rather than Santa Claus.
Ano Novo – New Year
Traditionally, people go out to the streets to sing “Janeiras” (January songs) between December 25 and January 6. The Janeiras (January songs) is a Portuguese tradition consists of a group of people strolling the streets of a town singing in the New Year.
To the modern eye, Janeiras is like Christmas caroling as this tradition involves a group of friends or neighbors going from house to house singing and sometimes playing instruments. While singing, they review the most important events of the year with a spirit of happiness and great humor. They sing traditional songs and those who pass by are wished a Happy New Year full of luck.
Once the song is done the singers are rewarded with chestnuts, nuts, apples, and cured sausages. These days, chocolates are often offered too. The Janeiras tradition varies from region to region.
In the Algarve, residents form charolas, which are spontaneously formed groups that join together to sing songs of both a religious and a secular nature.
Also in the Algarve, singers receive traditional alms such as one of the seasonal sweet fritters or a glass of brandy. Every year, the municipality of Silves has a festival in January to welcome in the New Year by singing.
New Year’s Eve in Portugal is filled with celebrations. People get together in the 31st December, usually for dinner, and celebrate all night long, saying goodbye to the old year and welcoming the new one — hoping it will bring only good things.
The party in Madeira is renowned for being the most dazzling, with a display of light and color over the whole island you can even see from the ocean. At midnight, there’s a fireworks display in every town.
Everyone eats 12 raisins, with one wish for each month, and drinks champagne to bring in the New Year.
The Bolo Rei (literally the King Cake) is a cake made in the shape of a crown, filled and decorated with dry and crystallized fruits. Hidden inside the cake are a broad bean and a surprise gift. The person who ends up with the slice containing the broad bean is traditionally the one who should provide the next cake. The cake is eaten on Christmas and also on “Dia de Reis” the 12th day of Christmas – Day of Epiphany, when the Three Wise Men arrived at the Nativity and brought gifts to baby Jesus.
Dia de Reis – Kings Day – Day of Epiphany
“Dia de Reis” known as the day of the Epiphany is on the 12th day of Christmas. Children put out their shoes, with carrots and straw to attract the camels of the Three Wise Men hoping that the shoes will be filled with gifts in the morning.
is a particular favorite of the Portuguese during Christmas and is traditionally eaten on January 6, day of Epiphany. The date when the three kings arrived in Jerusalem to greet the newborn baby Jesus. The legend is that the three kings were disputing which one of them would be the first to give their gift to Jesus. Upon their travels they met a baker who baked a cake with a bean inside it. Which ever one of them got the slice of cake with the bean would give their gift first. Through the years coins and trinkets were added to the cake instead of the bean which would bring good luck upon the bearer. Whoever gets the bean has to buy the “Bolo Rei” (King Cake) in the coming year.
New Year in Madeira

During the family reunion on Christmas Eve it is customary in each madeiran household to have chicken broth, apart from other meat dishes. Also, families usually drink the typical homemade tangerine, orange and anise liqueurs or even a glass of Madeira Wine.
On Christmas Day, generally one chooses pork loin marinated in wine and garlic dish or stuffed turkey.
Other common sweets delicacies of this holiday season are the “family cake”, the Madeira Honey Cake, apart from the popular butter rings or honey or butter biscuits.
Meat in Wine and Garlic
1 kg porkloin (with some fat)
2 cups of wine vinegar
Rock salt, to taste
10 garlic cloves
Bread slices, as needed
Bay leaves
Pepper, marjoram, savory
Cut the meat in cubes and season with salt. On the following day, make a marinade with the vinegar, garlic, bay leaves, pepper and herbs. Place the meat in the marinade for at least three days, in a clay pot. Fry with the marinade and serve with the bread, fried in the grease, baked sweet potatoes, fried cornmeal and orange slices.
Madeira Honey Cake
Ingredients for the leavening:
500 g unleavened flour
30 g leavening (baker’s yeast)
about 3 dl water
Knead the flour with the yeast, make a ball, cover with plastic and let rise for 2 to 3 hours.
Remaining ingredients:
1000 g unleavened flour
350 g sugar
300 g butter
150 g lard
clove (about 1.5 g)
fennel (about 1.5g)
15 g cinnamon
50 g nuts
50 g chopped almonds
lemon zest
400 g mixed crystallized fruit
150 g sultanas
15 g baking soda
juice of 1 orange
8 dl Madeira molasses
2 dl Madeira wine
Baking instructions:
Mix the butter with the sugar until creamy, add spices and juice of an orange and a little lemon zest. Melt the molasses and lard together and add to mixture. Add the flour and baking soda and mix for about five minutes. Add to this dough the leaven previously kneaded and continue to mix for an additional 2 to 3 minutes. Lastly, add the crystallized fruit and mix for an additional five minutes. Let rise for 24 hours. Place the dough in greased and wax paper-lined pans (only the bottom of the pan) and decorate the cakes with almonds and nuts on top. Bake them in a 190o degree oven, for 25 minutes. Honey cake is broken by hand.
NOTE: Use pans with removable bottoms, with a diameter of 15 cm and a height of 4 cm and place dough 3 cm high.
Tangerine Liqueur
Ingredients:
1 l sugar cane rum
1 l water
1kg sugar
Rinds of 6/7 tangerines (large and ripe)
Preparation:
Finely cut the tangerine rind, with no white so as to not be bitter. Steep the rinds in the sugar cane rum for 15 days. Once the steeping time has passed, add water and sugar and heat to make simple syrup.
Add simple syrup to the sugar cane rum, removing rinds and filtering the liqueur. It is now ready to serve.
Christmas Tree image credit: http://www.davestravelcorner.com/journals/destination-europe/portuguese-christmas-traditions/
Hello everyone. Here’s our collection of classic Christmas recipes Videos collection. Visit our Youtube Channel and enjoy a Taste of Portugal during your celebrations!
Pataniscas de Bacalhau – Salt Codfish Cakes
Rabanadas – Portuguese Style French Toast
Pudim Flan – Caramel Flan
Pao Doce – Portuguese Sweet Bread
Pao de Lo – Portuguese Sponge Cake -12 Days of a Portuguese Christmas
Biscoitos – Biscuit Cookies – 12 Days of Portuguese Christmas
Arroz Doce – Sweet Rice Pudding – 12 Days of a Portuguese Christmas
Cavacas – Popover Pastry – 12 Days of a Portuguese Christmas

Sonhos – Fried Choux Pastry Recipe
Sonhos (Dreams) are fried pastry. They are made of basic choux paste dough which uses no yeast, or baking powder. The dough is dropped by tablespoons into hot oil and then fried in round doughnut shapes. They are rolled in a dusting of sugar and cinnamon.

The terms “Filhóses” and “Malasadas” are sometimes used interchangeably, and sometimes one refers to doughnuts while the other refers to fried dough as photo above, without a hole in the center.
Filhós, is a fried pasty made of risen flour dough and always referred to as Filhós in the mainland of Portugal. However some of the Islands of Azores and Madeira also call them Filhós. It may get confusing, but it seems that what you call them depends on what region of Portugal your family is from and where you live now.
Malasadas are typically “Portuguese donuts”, a ball of fried yeast dough without a hole in the middle like regular donuts. After frying, they are rolled in confectioners sugar and sometimes filled with cream. This is an example of the famous Malasadas from Leonards Bakery in Honolulu, Hawaii which is famous for their Malasadas. There are many shops throughout Hawaii that feature them as well. This tradition was brought to Hawaii from the Portuguese immigrants from Madeira, Portugal.


Coscoroes – Fried Pastry Recipe
Coscorões are fried dough often referred to as Angel wings, and similar to filhos. However, no yeast or other leavening agents are used to make the dough. They are usually made during the Christmas season.
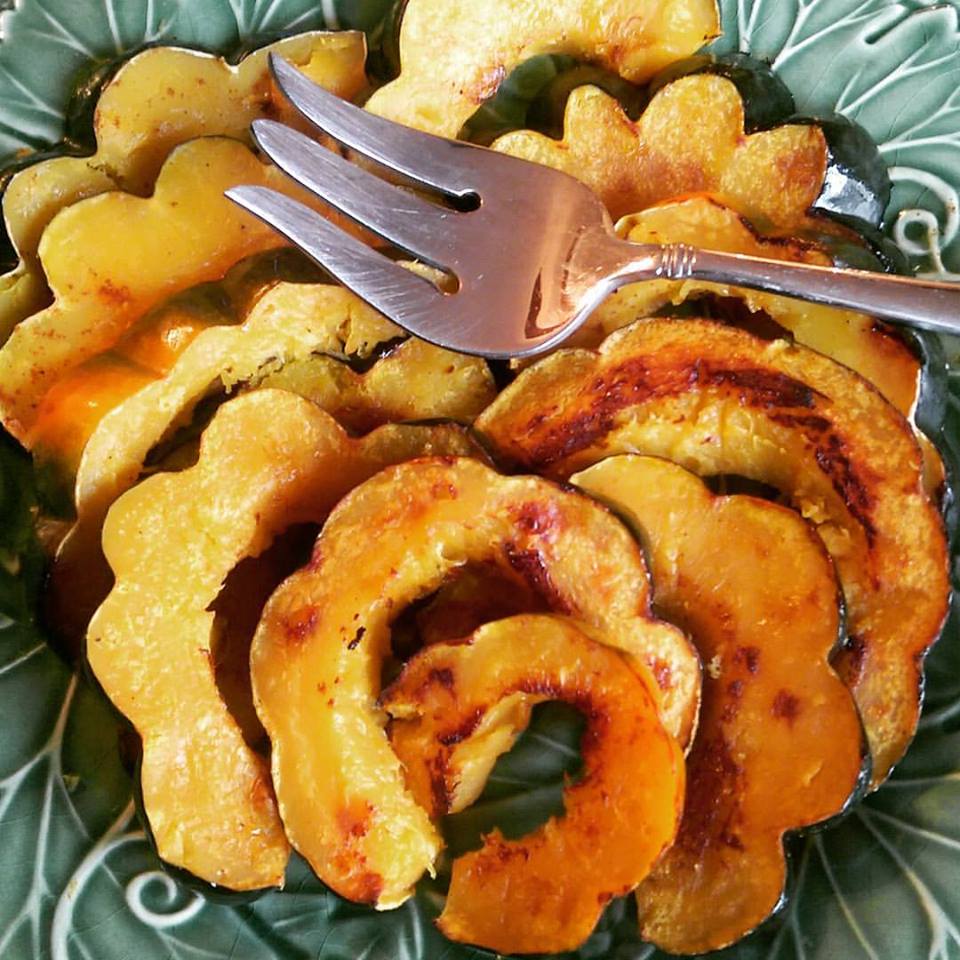 Roasted Acorn squash is easy to prepare. Simply wash the squash and slice it into one inch slices. Remove the seeds with a spoon. Place on a cooky sheet coated with a little cooking spray. Sprinkle with salt a little paprika for color and a little olive oil. Bake at 400 degrees F. for about 20-30 minutes.
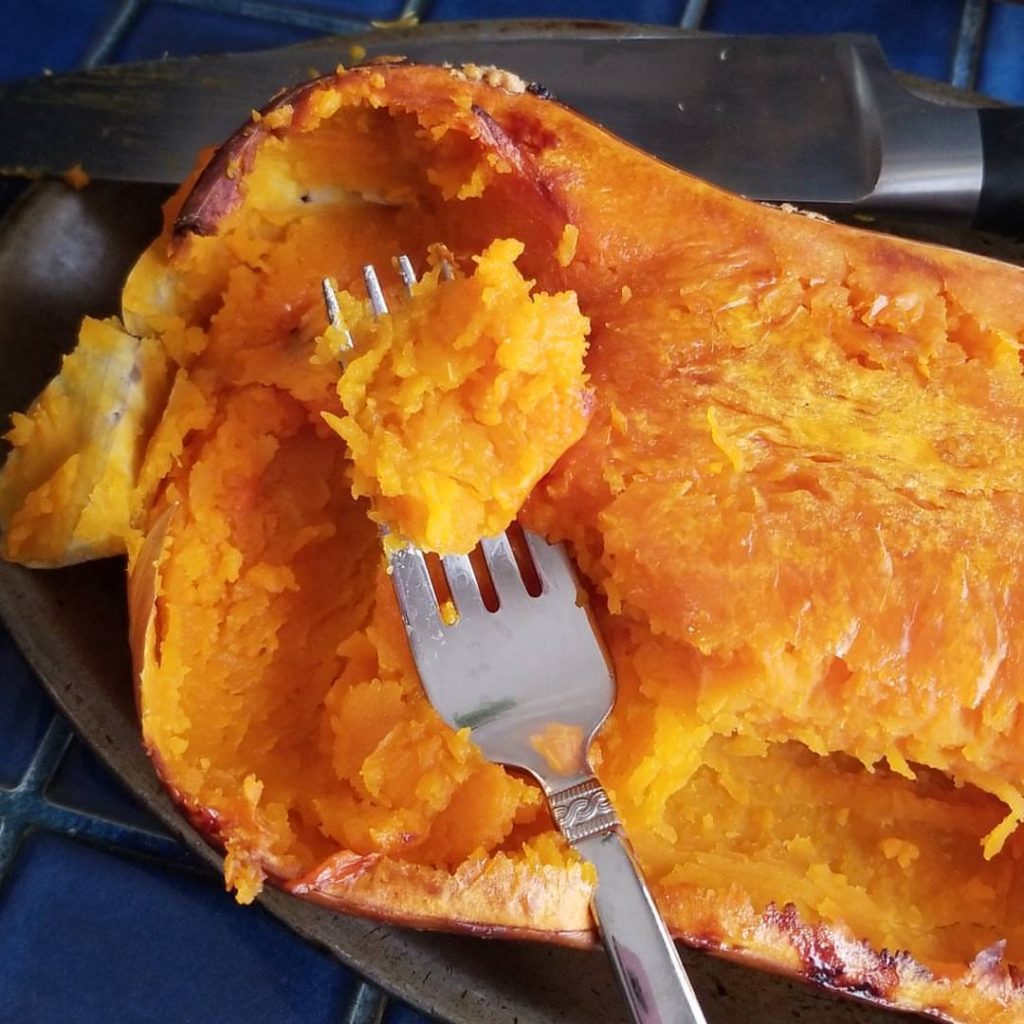
Butternut squash is perfect for roasting. If you like sweet potatoes you’ll love this squash. It’s sweet and velvety. Simply wash and dry the squash. Slice in half and remove the seeds with a spoon. Place on a foil lined cooky sheet. Sprinkle with a little olive oil and salt. Bake at 400 degrees F for about 20-30 minutes. Serve as is or scoop out and place in a serving bowl.

![]() Portugal has the most protected products in Europe, identifying a variety of excellence
Portugal has the most protected products in Europe, identifying a variety of excellence
in food products in terms of taste, authenticity and genuineness, with characteristics having roots in the areas of origin throughout Portugal.
Decades ago, in a small village of Aldeia de Mogege, in Portugal, my cousin Vanessa Oliveira Freitas Toscano de Melo attended primary school. There, she developed fond memories of helping her grandparents on their farm, the traditions, and the land. She would often help by bringing the cows to the pasture, picking the weeds from the strawberries bushes and gathering the eggs from the chicken coop. To this day, the aromas and tastes of the foods she often cooked her great-grandmother Adília’s kitchen remain with her.
This is where the young Vanessa developed her love for Portugal, its food and it’s traditions. Through the years, this love instilled a passion for preserving and sharing the flavors, the artisan products, the foods and the tastes of Portugal. This July, 2017 Vanessa, now a mother of 3, turned her passion into creating her gift basket company called Pote da Gula made with wonderful artisan and handmade products and food products such as pure olive oil, smoked meats, cheeses, jams, wine and other delicacies made in Portugal!
Pote da Gula are personalized baskets made with agrarian and artisan products, and traditional foods, specifically chosen by experts. They are also filled with memories, happiness and a return to the utilization process not just a commercial venture.
“O Pote da Gula serão cabazes personalizáveis que agregarão produtos tradicionais cuidadosamente selecionados por quem sabe. Comida e artesanato. Será também um lugar de memória, de felicidade e de regresso para os seus utilizadores, não apenas um projecto comercial.” Vanessa
Congratulations on your new business Vanessa! We wish you much success and we thank you for preserving and sharing Portuguese tradition around the world!
We Here’s just a few examples of beautiful baskets she has created!


 Artisan products

 Fado Singer Art
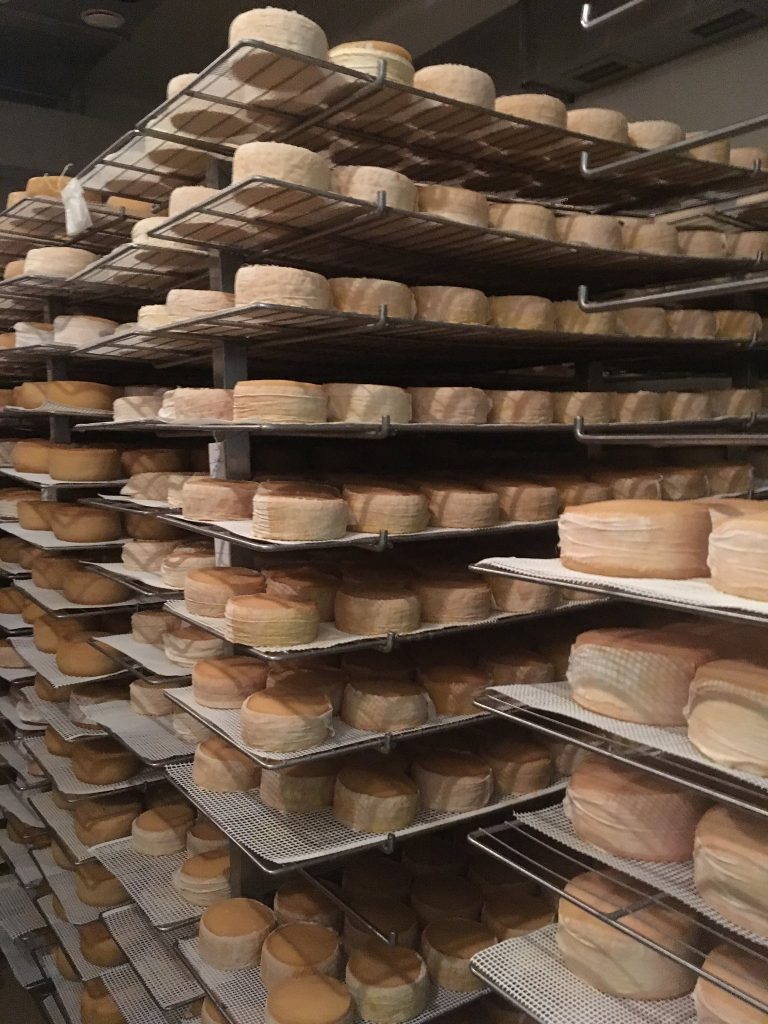 Artisan Cheese
Contact them on their website and place your order in time for the Holidays!
ORDER ONLINE OR CALL (+351) 919608956
Today we’re having a culinary lesson; , “Caldo Verde” is probably the most loved and well known soup in the country of Portugal.
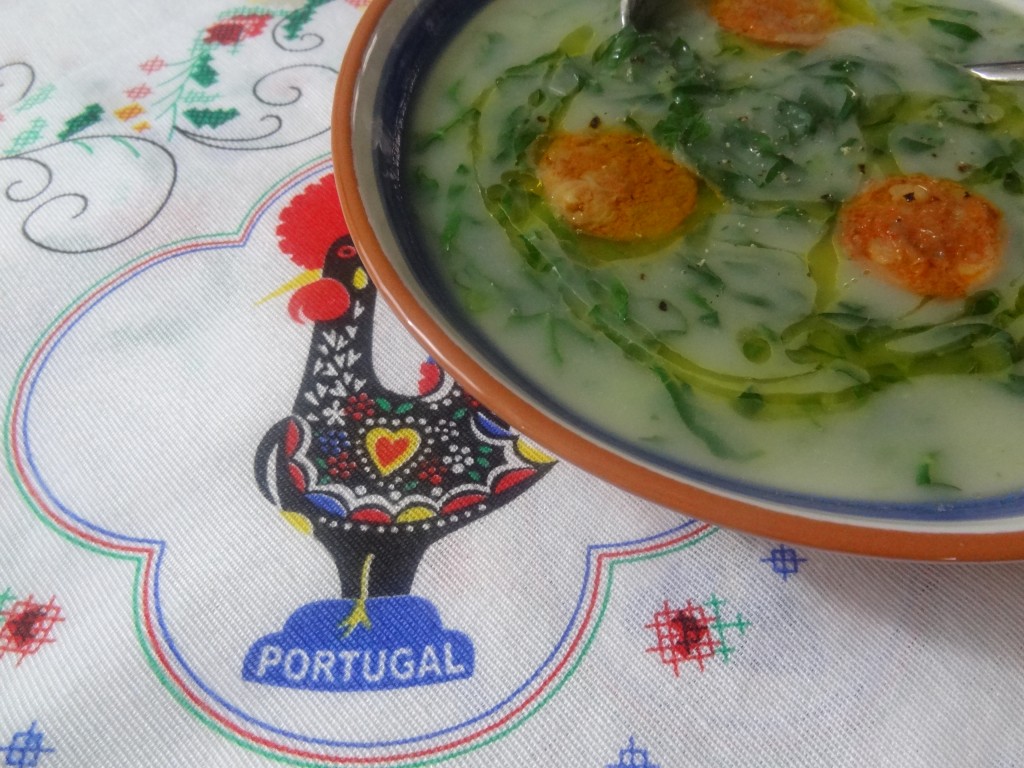 Classic Caldo Verde Soup
Caldo Verde, meaning (Green Soup) originated in the northern Minho region of Portugal and is made with basic ingredients of potato and onion puree, chifanaude collard greens and enhanced with the smoky flavor of chourico sausage.

You may find many variations of Caldo Verde on restaurant menus, but now you know what the authentic “Caldo Verde Soup” should look and taste like. Find my Caldo Verde recipe here.
Sometimes Caldo Verde is mistaken for another classic known as “Portuguese Kale Soup” which is very popular in the United States.
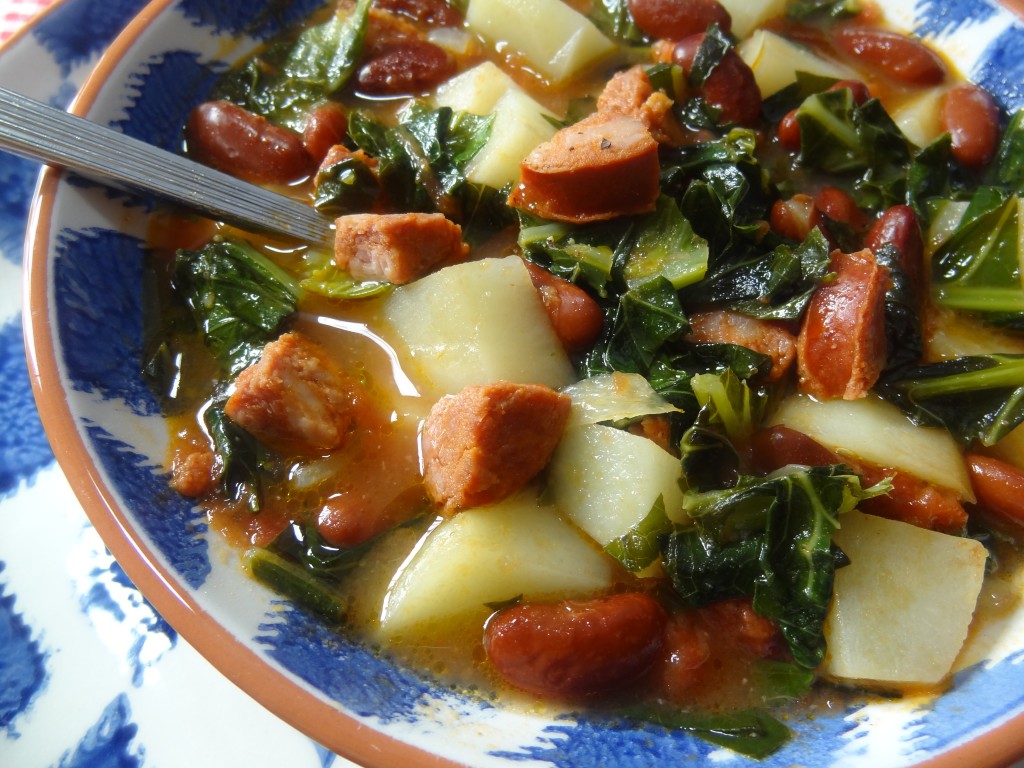 Portuguese Kale Soup
The Kale version, uses cubed potatoes, chopped chourico , tomatoes, and chopped Kale, and it looks nothing like Caldo Verde.
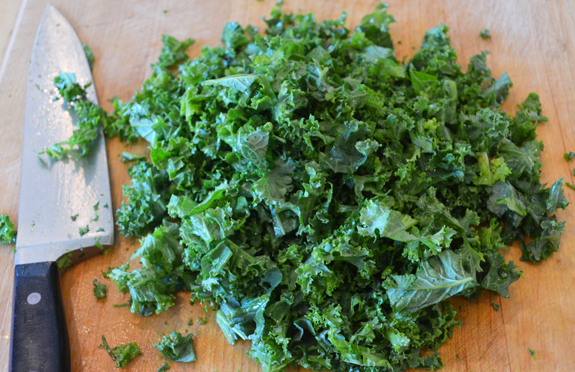
Find my Kale Soup recipe here.
There are many variations of both soups where various beans, meats or even pasta is added to the recipes.
No matter what name, these soups are both delicious, so go ahead and enjoy them!
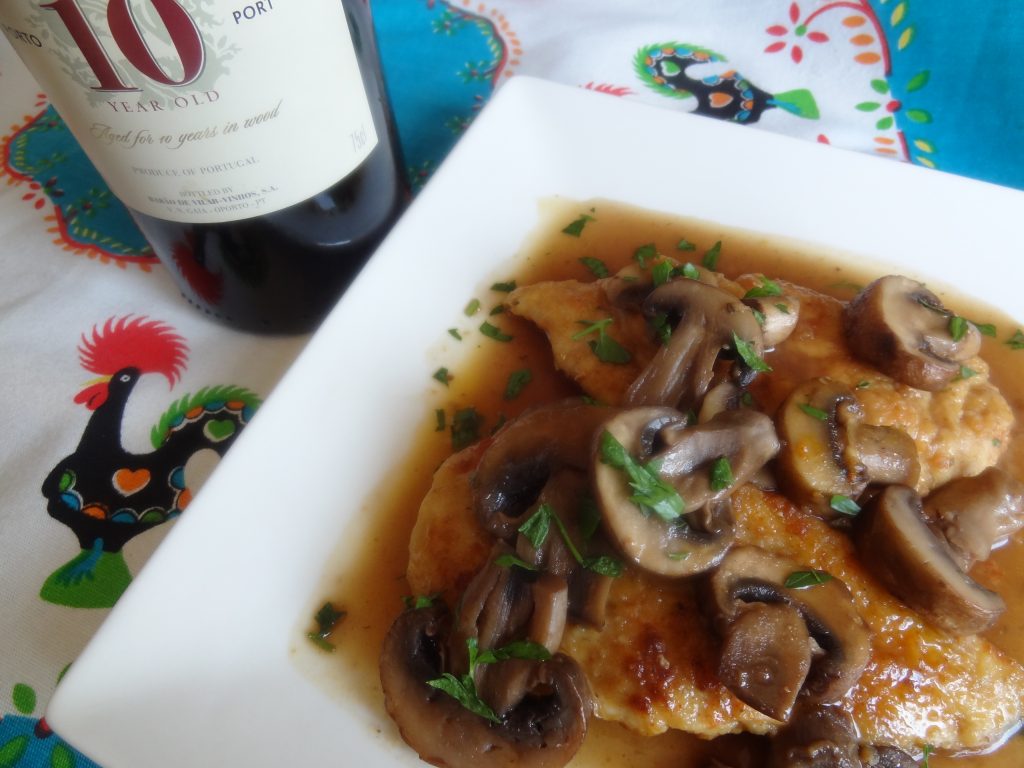 Nothing gets me more mad than to see a recipe with 30 ingredients that I have to go hunting for at the grocery store. It turns me off and I won’t even attempt to cook it! As you know by now, I make Portuguese recipes that are easy to prepare for the every day home cook. I try to make each recipe enjoyable and made with basic every day recipes that we have in our kitchen.
This chicken dish is so easy and simple to make in only 20 to 30 minutes. Once you try it, you’ll add it to your favorite recipe collection. It pairs wonderful with my Portuguese rice recipe. Serve it with Portuguese red wine of course! Enjoy.
Ingredients:
4 boneless chicken breasts
8 oz crimini mushrooms (sliced)
1/4 cup flour
1/2 cup Vinho do Porto (Port wine)
3 tablespoons butter
3 tablespoons olive oil
1/2 cup chicken broth
1 tablespoon salt
1 teaspoon garlic powder
1 teaspoon paprika
1/4 teaspoon black pepper
flour for dredging (about 1/2 cup)
2 tablespoon parsley (finely chopped)
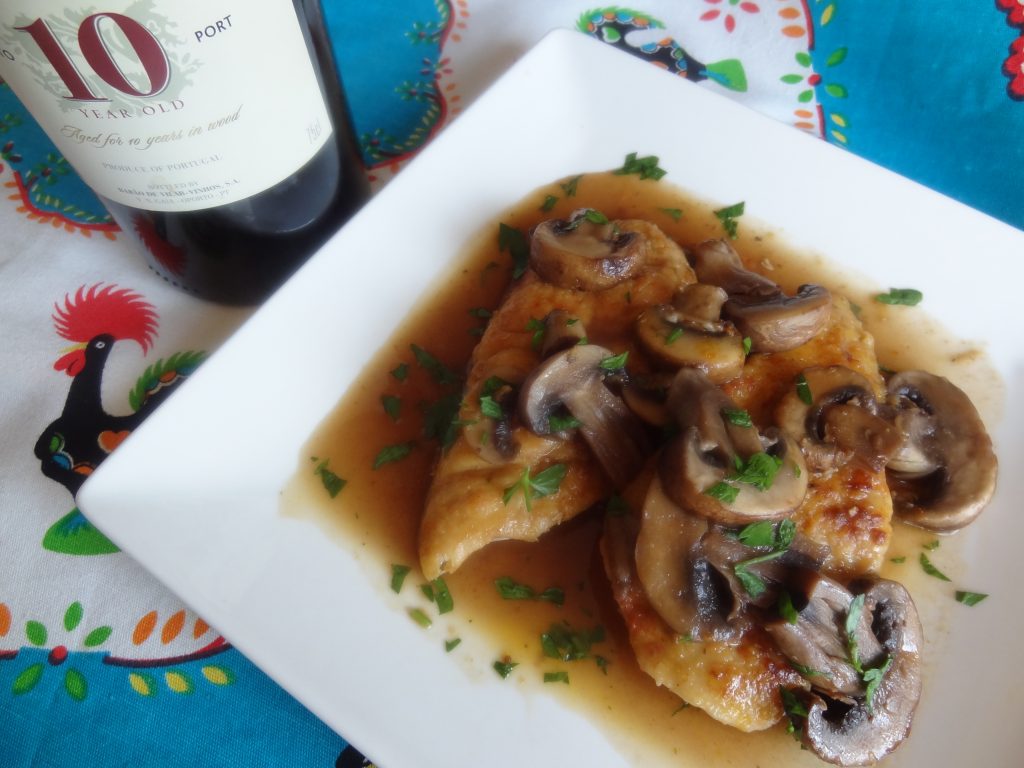
Preparation:
Slice chicken breasts in half. Place each half between plastic wrap and pound with a meat mallet to 1/4 inch thickness. Note: If you have thicker chicken breasts slice them into thirds.
Season chicken and dredge in flour. Set aside for a few minutes.
Saute mushrooms in skillet with 1 tablespoon of butter until tender but not over cooked and set aside.
Place 1 tablespoon butter and 1 tablespoon oil in medium skillet and heat to medium high. When oil is hot add 4 breasts and cook for about 3 to 4 minutes on each side until golden brown. Remove from pan. Add the remaining butter and oil and cook remaining 4 breasts. Remove from pan and set aside. You may need to add more oil or butter as needed.
De glaze same cooking skillet with Port wine and chicken broth and cook for few minutes until wine reduces by a third. Add the cooked chicken and mushrooms into wine sauce. Cook for a few minutes on low heat until the flavors incorporate and the sauce thickens. Leave in pan on warm until ready to serve. Top with parsley before serving. Serve with Portuguese red wine of course.
Serve with Portuguese rice link here.

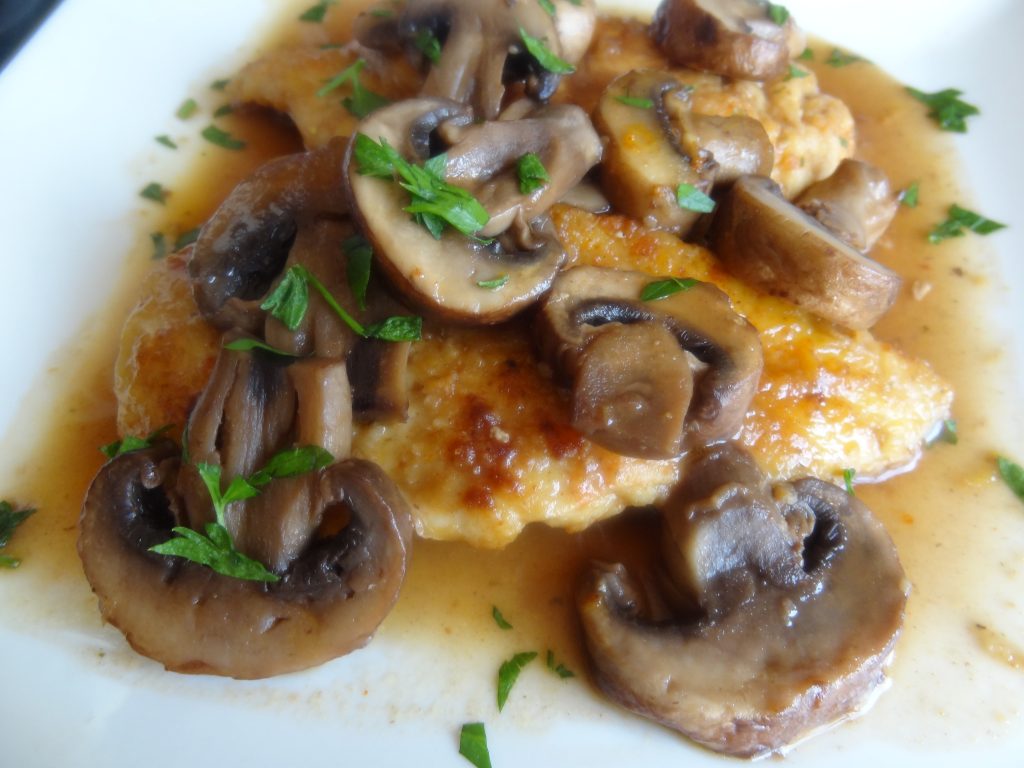 Recipe found in my SECOND TASTE PORTUGAL MORE EASY RECIPES COOKBOOK. ORDER ON AMAZON BELOW
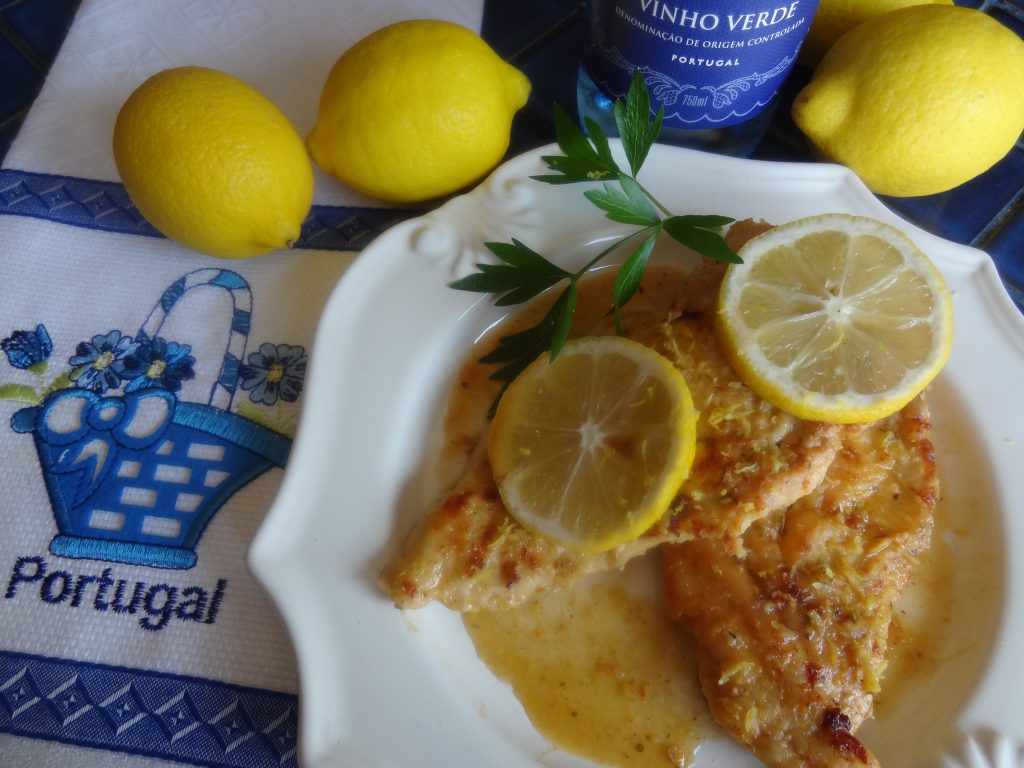 One bite of this chicken and you’ll taste the tangy lemony mouthwatering flavor. It’s simple to prepare and decadent enough to serve for your guests.
It’s different than the standard lemon chicken recipes because I add smoky paprika and a kick of garlic flavor. Using Portuguese Vinho Verde also gives a kick!

Ingredients:
6 boneless chicken breasts
2 – 4 tablespoons of olive oil
1 – 2 tablespoon of butter or margarine
1/4 cup of flour
juice from 1 fresh lemon
lemon zest from 1 lemon
1 tbsp Taste Portugal Seasoning or
(2 teaspoons salt, 1 teaspoon black pepper 2 teaspoons paprika, 2 teaspoons garlic powder)
1/2 cup of Portuguese Vinho Verde wine
1/2 cup of chicken broth
1 teaspoon dried oregano
Parsley for garnish
Preparation:
Cut the chicken breasts in half or into thirds if very thick. Place between 2 pieces of saran wrap and pound to about 1/4 inch thick. This will tenderize the chicken and make it very moist after cooking. Season spices  and let marinate for a few minutes. Coat lightly with the flour in a bowl and set aside while you heat the cooking pan.
Heat 1/2 of olive oil and butter on high heat in a large saute pan. Reduce heat to medium and cook the chicken in batches for about 3 minutes or longer on each side until they turn golden brown, remove them from the pan and set aside. You may need to add more butter and oil if you find it evaporates.
De-glaze the frying pan with wine, lemon juice and chicken broth and let cook for about 1 minute until the alcohol evaporates.
Return the chicken to the pan and let it cook in the lemon sauce for another 3 – 4 minutes on medium heat to incorporate the lemon and wine flavor.
Turn heat to low, add oregano and the lemon zest and cook for about 1 minute. The sauce will thicken as it cooks. If you find the sauce too thick add a little more chicken broth.
Top with lemon slices and parsley for garnish. Serve with Portuguese rice with peas.

One bite brings me home to Portugal!
Bacalhau com Grao is as classic home comfort food, one of the most popular dishes, and served in most Portuguese homes and restaurants. This recipe is versatile, so you can add more or less of the ingredients to your taste. You can serve this dish as a hot bake or as a cold salad. You can also substitute the chick peas with chopped cooked potatoes, or use many bean varieties such as black eyed peas, white beans etc. I sauteed the onions for a sweet flavor addition but many recipes use raw chopped onions. Once you try this recipe you’ll find that you’ll make it often because it’s so easy to make. Enjoy!
Ingredients:
2 pounds of cooked and flaked salt cod
1 large onion (sliced)
3 cloves garlic (minced)
2 large 28 -32 oz. cans of cooked chick peas
6 hard boiled eggs (crumbled)
1 bay leaf
1/2 cup of Portuguese olive oil
3 teaspoons fresh chopped parsley for garnish
olives for garnish
salt and pepper to taste
dash of white wine vinegar
Preparation:
Drain and rinse the chick peas and set aside.
Saute the onions in 2-3 tablespoons of olive oil until caramel colored. Remove bay leaf and add a pinch of salt and pepper.
In a deep dish pan, layer 1/2 of the chick peas, followed by 1/2 of the cod. Top with 1/2 of the sauteed onions and 1/2 of the garlic. Repeat with remaining chick peas, cod, onions and garlic.
Top evenly with eggs and poor the remaining olive oil on top. Add a pinch of salt and pepper and a drizzle of the vinegar. Top with the eggs and place in a 350 F. oven for about 15 minutes or until hot. Garnish with the fresh parsley and olives and serve with more olive oil on the side if needed.
If you want to serve it cold just top with the eggs, parsley and olives and enjoy!
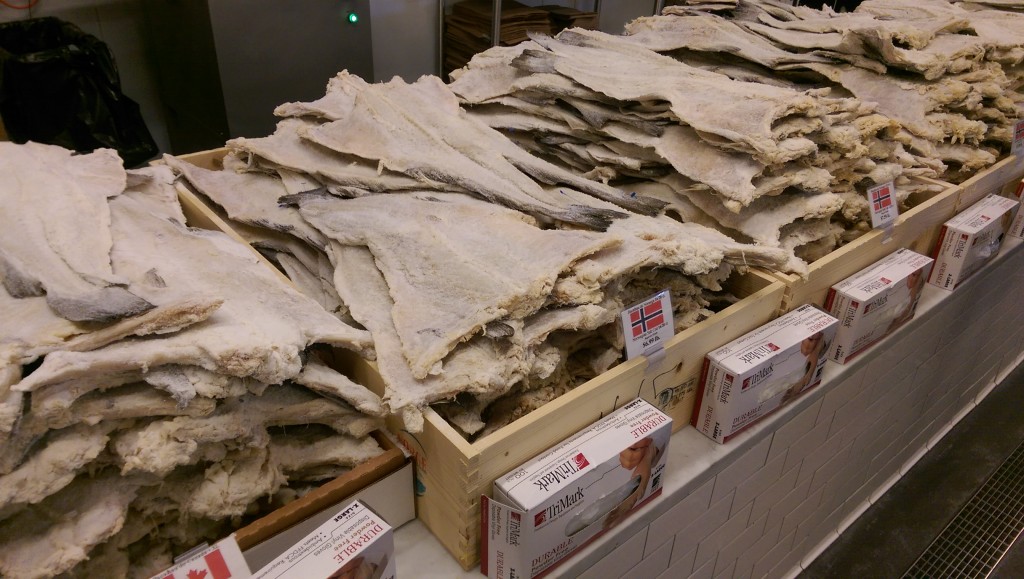
I’ve had many requests for the process of hydrating salt cod (bacalhau). It’s relatively easy to do so I’ve posted some information here for those of you that are novices at cooking with the cod.
This photo above, was taken at Portugalia Marketplace in Fall River. They have an amazing refrigerated room solely for selling the salt cod. It is said that the best salt cod is from Portugal because they use the best cod fished in the oceans of Newfoundland, and then salt cured using Portuguese techniques.
You can find the cod at most Portuguese markets. Some Italian markets or even some Hispanic markets will sometimes carry salt cod as well, but they generally only use the boneless cod. If you’re lucky enough to live where you can find Portuguese salt cod, I suggest you buy the whole fish, since it’s cheaper by the pound.
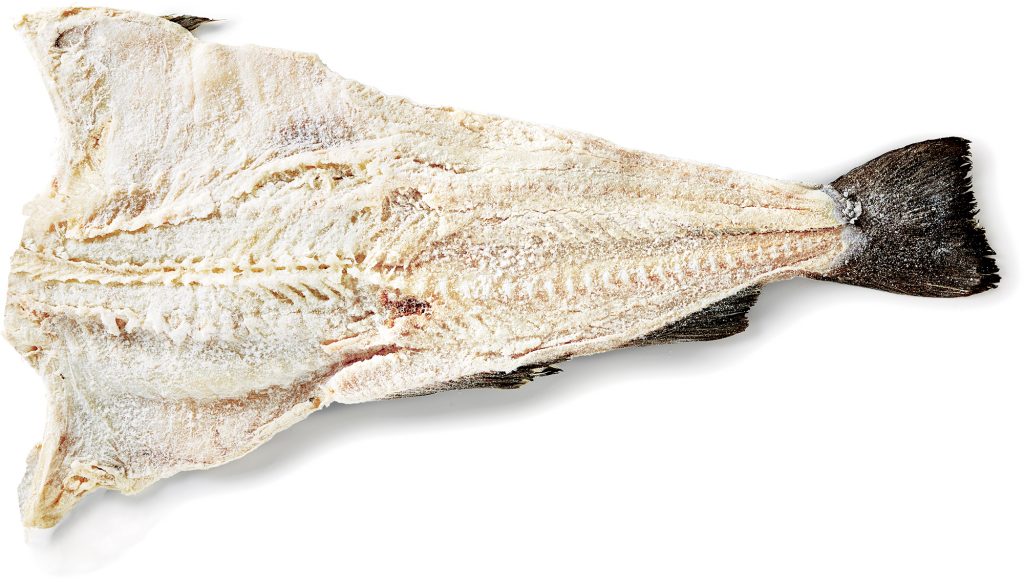
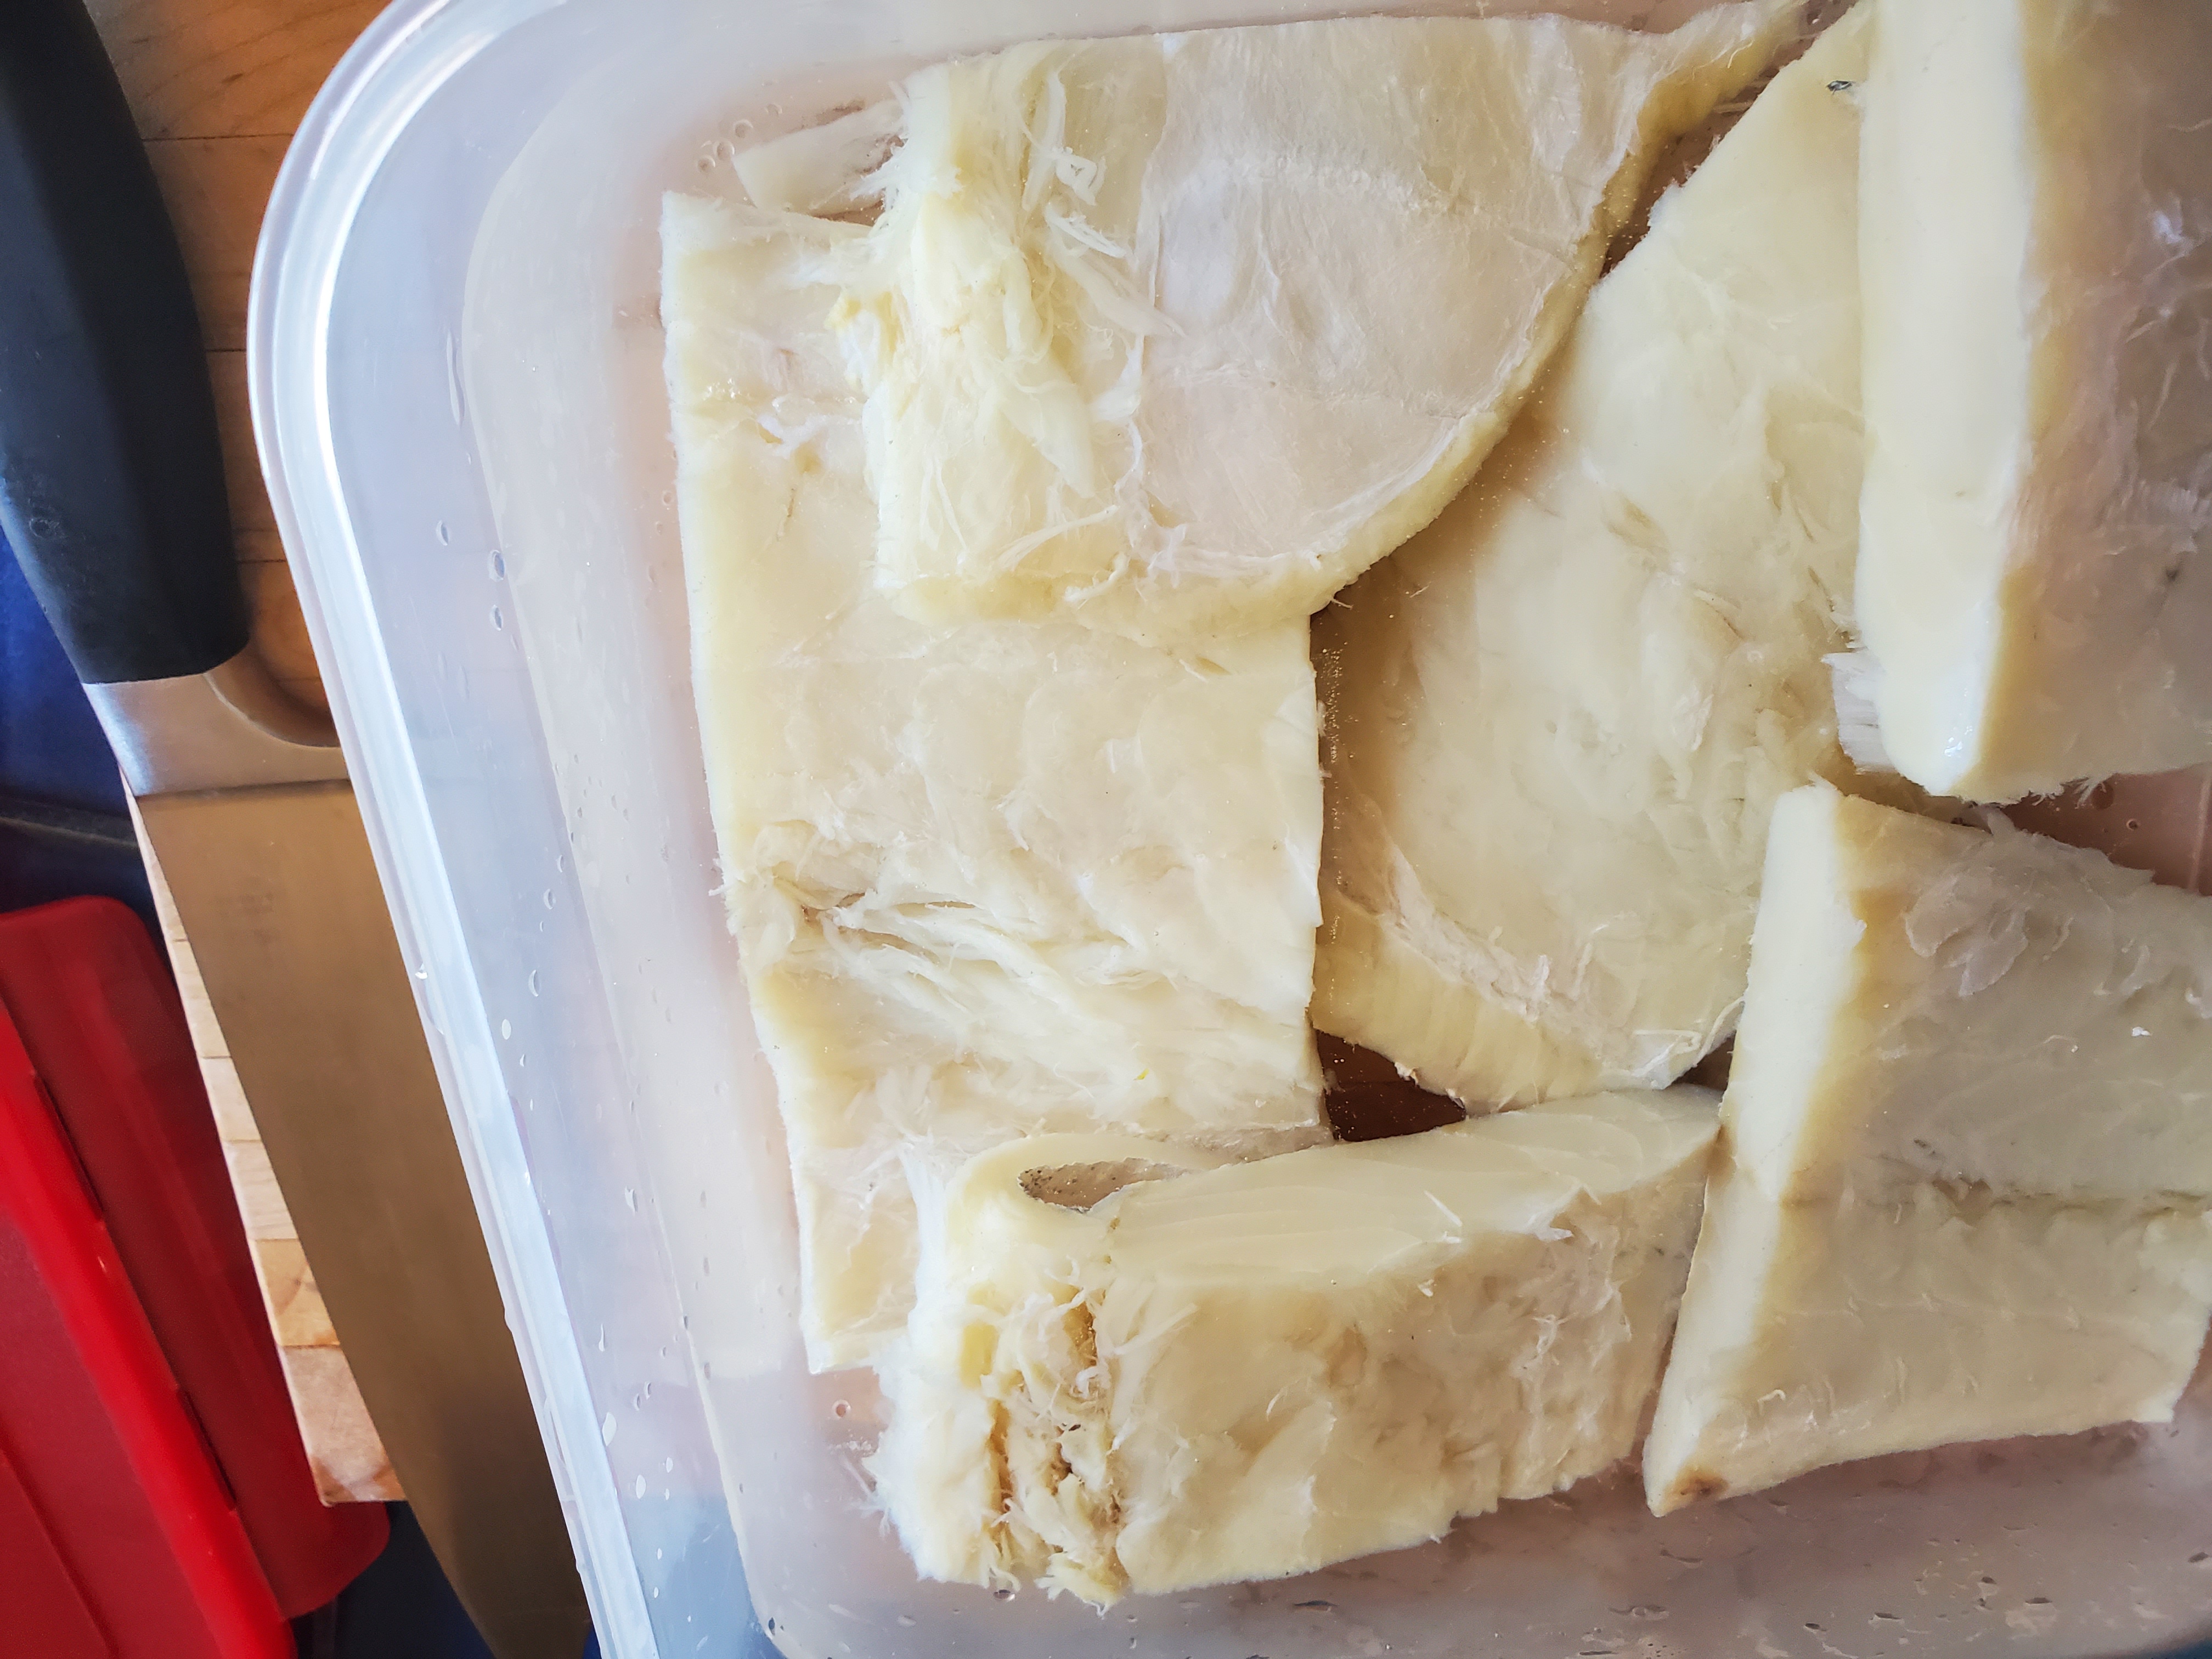
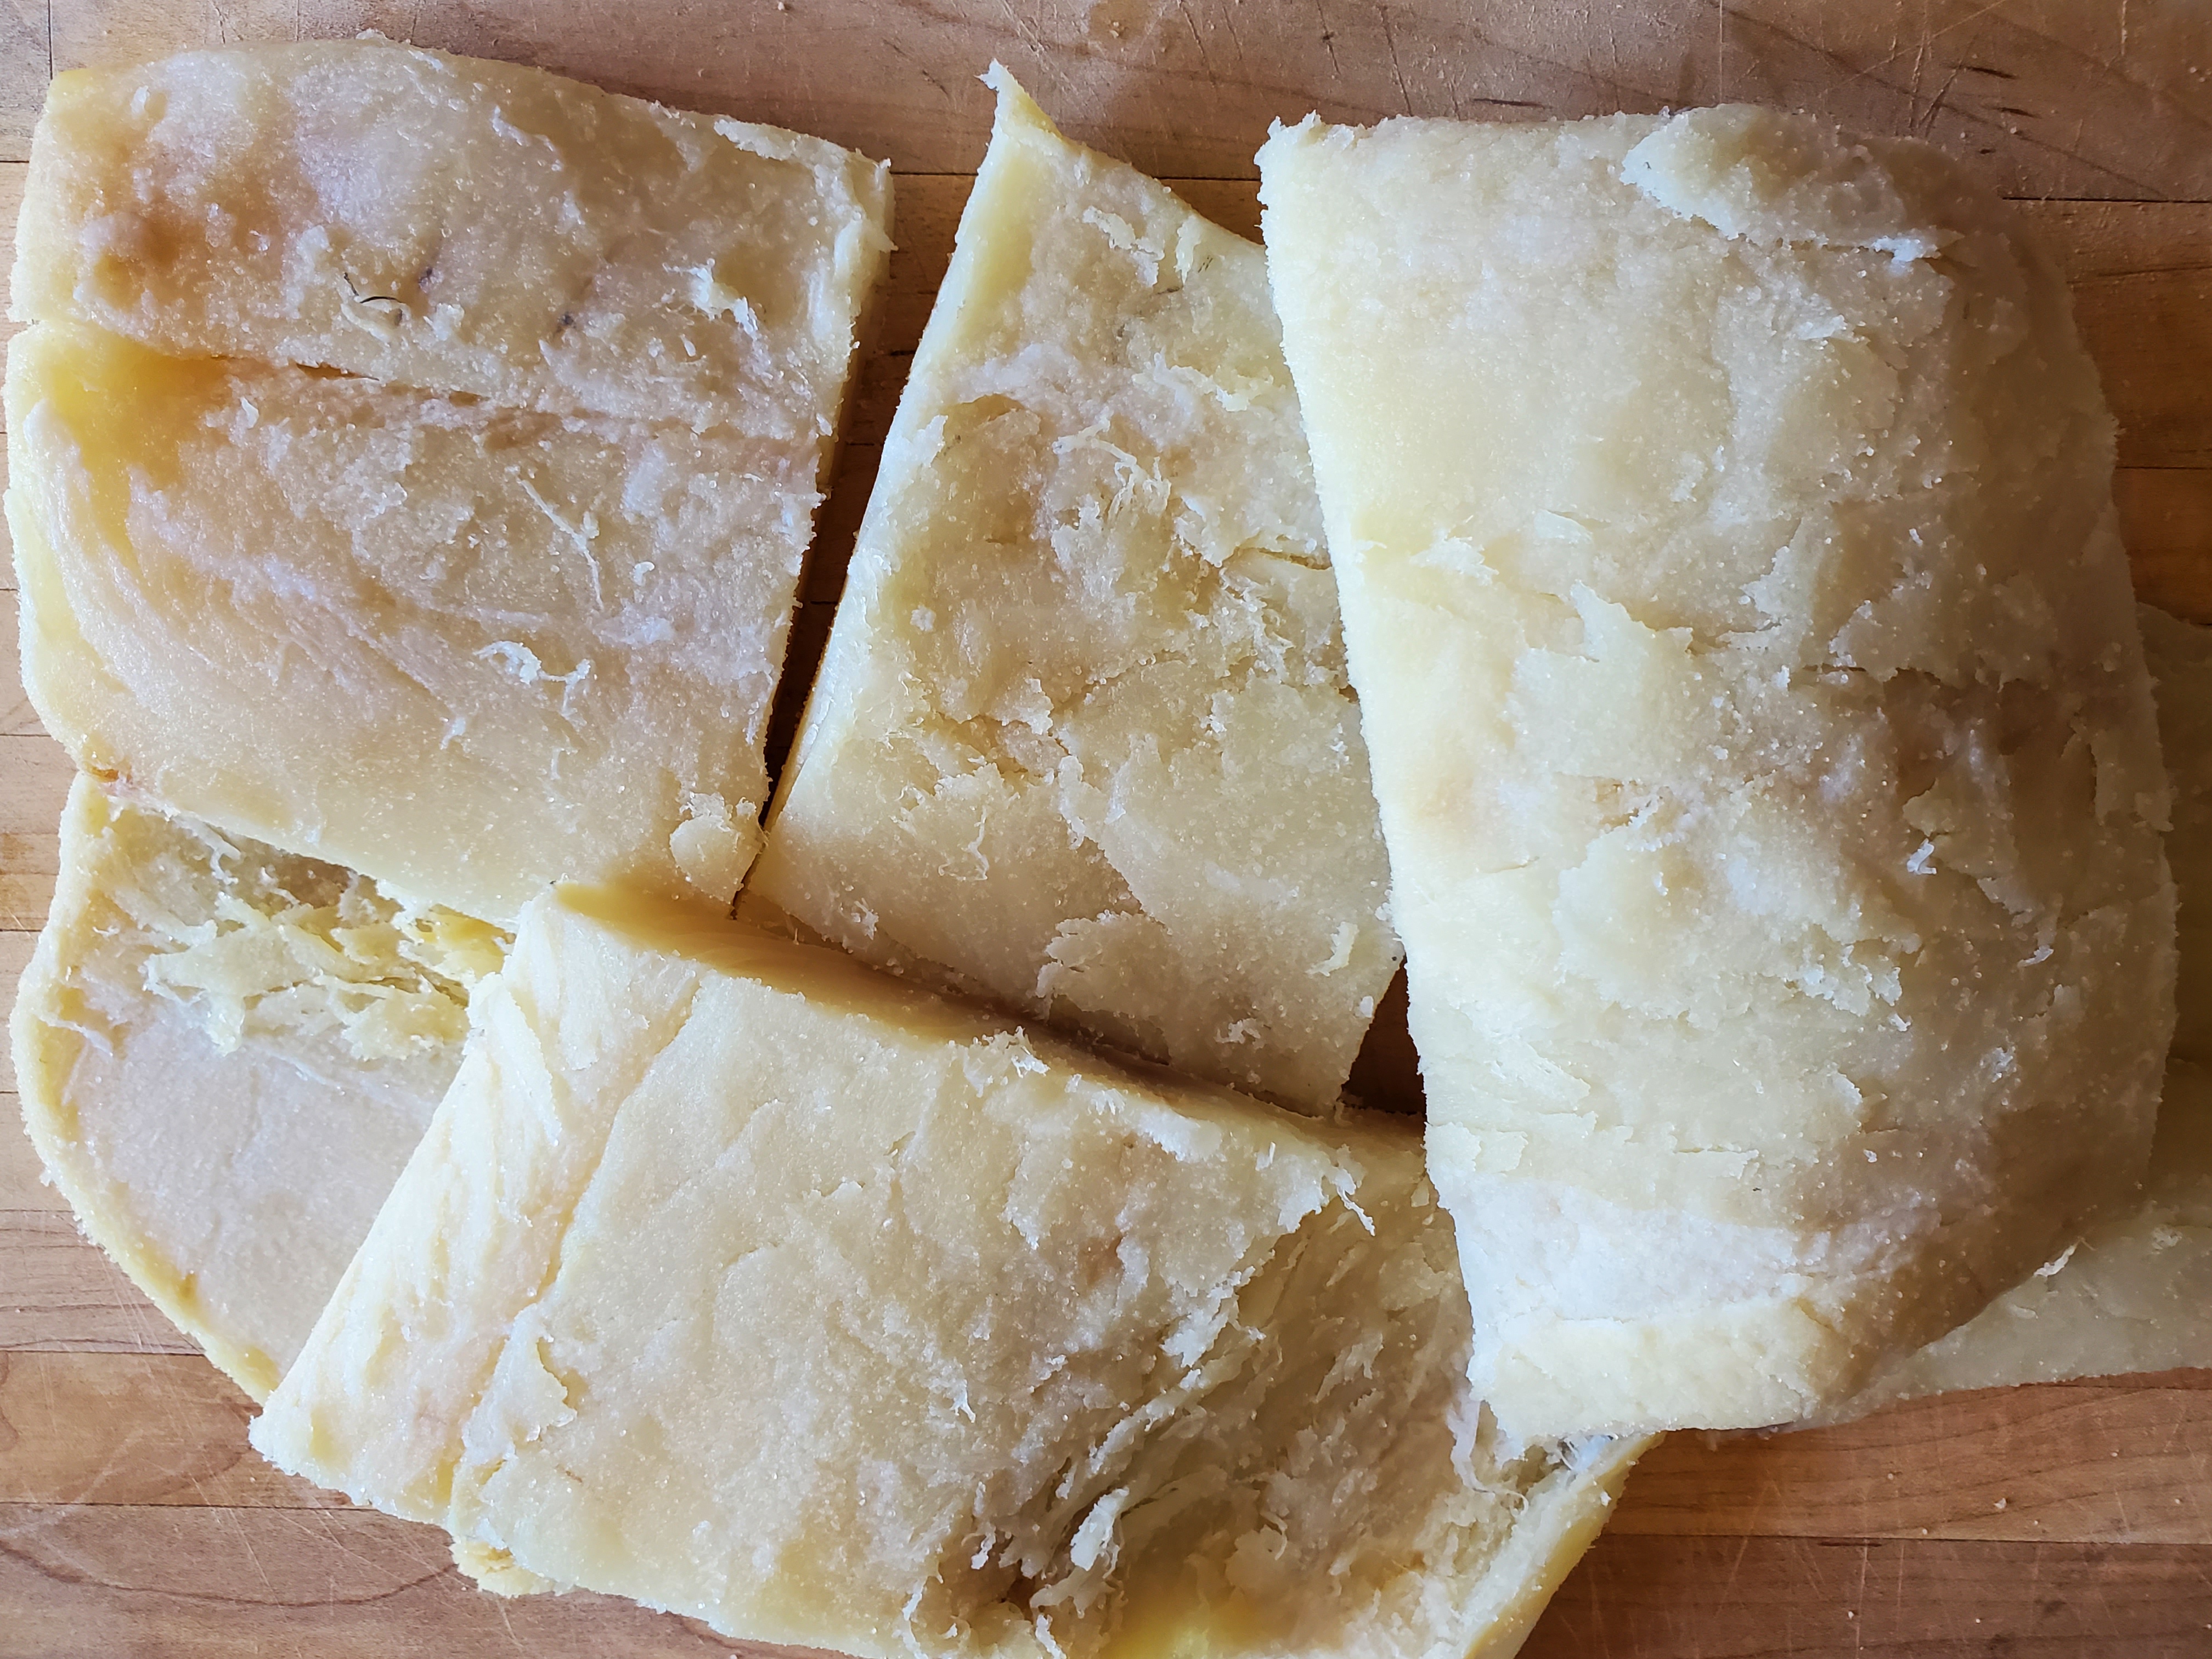
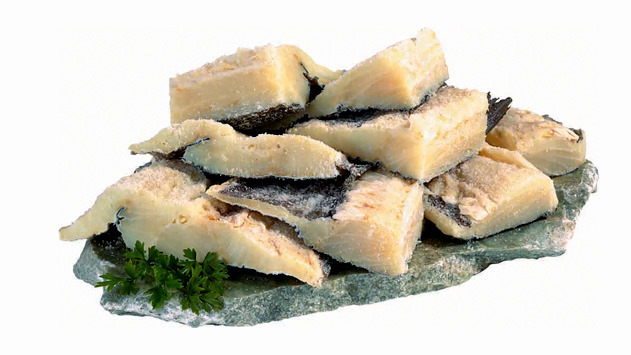
The tail portions and the belly portions are great to make dishes such as Pasteis de Bacalhau (Codfish Croquettes), Pataniscas (Codfish Cakes) or any recipe that uses shredded cod. Most will save the thicker portions to serve in recipes that call for bigger pieces such as; Bacalhau Assado, (Baked) or Cozido (Boiled).
You’ll find many other recipes here on this blog by using the search bar under: Bacalhau, or Salt Cod
This video is very informative for those of you that want to know all about the process.
Process for hydrating salt cod: **Have the market cut it into 8 oz serving portions. Many markets also sell the cod in portioned or boneless packages.
Day 1: Cut salted cod into 8 to 10-ounce portions or have the market cut it for you. Rinse in very cold water to remove the excess salt. Place into a large pan or bowl which is big enough to completely submerge cod. Place in refrigerator, or in a large tub filled with ice to keep the water cold.
Day 2: Drain water, rinse and add very cold water to submerge cod. Place back in refrigerator. Later in the day drain, rinse and add cold water again. Place back in the refrigerator.
Day 3: Drain and rinse cod in very cold water. Cut a small piece from the thickest portion of cod and taste for saltiness. It should have some fishy and salty taste. If the saltiness is to your taste you can proceed to next step. Remove from water, pat dry on paper towels. Store in refrigerator up to 3 days in covered container.
Note: Some people will soak the cod in milk on the last day to remove some of the fishy taste, but this is optional. I like my cod to taste like cod, so I just use water for this process. As you do this more often you’ll find you’re an expert at it and you’ll know the exact timing for the process.
Storing: If you find the cod is to your taste on the third day, go ahead and rinse, pat the cod dry with a towel. Wrap individual pieces with parchment paper, foil, or plastic and freeze in freezer bags and label the date. When you need to cook it, simply remove as many portions as you need and place in the refrigerator overnight to thaw. You can also place in a bowl of cold water for a few hours to thaw.
Note: Boneless cod like this photo below will take less time to soak.
Vinho do Porto (Port wine) is a Portuguese fortified wine exclusively made in the Douro Valley in northern Portugal. Many other countries make port wine but in the EU only wines made in Portugal can be labeled Port or Porto. In the USA wine using the “port” term, are recognized as generic. but the wines name “Porto”, and “Vinho do Porto” are deemed to be exclusively Portuguese.
 Ingredients:
3-4 ripe pears
1 cup Vinho do Porto (Port wine)
2 cups water
1 cup sugar
2 strips orange peel
2 strips lemon peel
1 stick cinnamon
vanilla ice cream for serving
mint leaves for garnish
Preparation:
Place the sugar, port, 2 cups water, lemon and orange peel, and cinnamon in a pan. Cook on medium high for about 5 minutes. Set aside.
Carefully peel the pears and slice of a 1/4 inch piece on the bottom to make them stand. Place the pears upright in the syrup and bring syrup to boil. Lower heat to medium, cover, and cook for about 50 minutes or until a knife cuts easily through the pears. Remove pears and let cool.
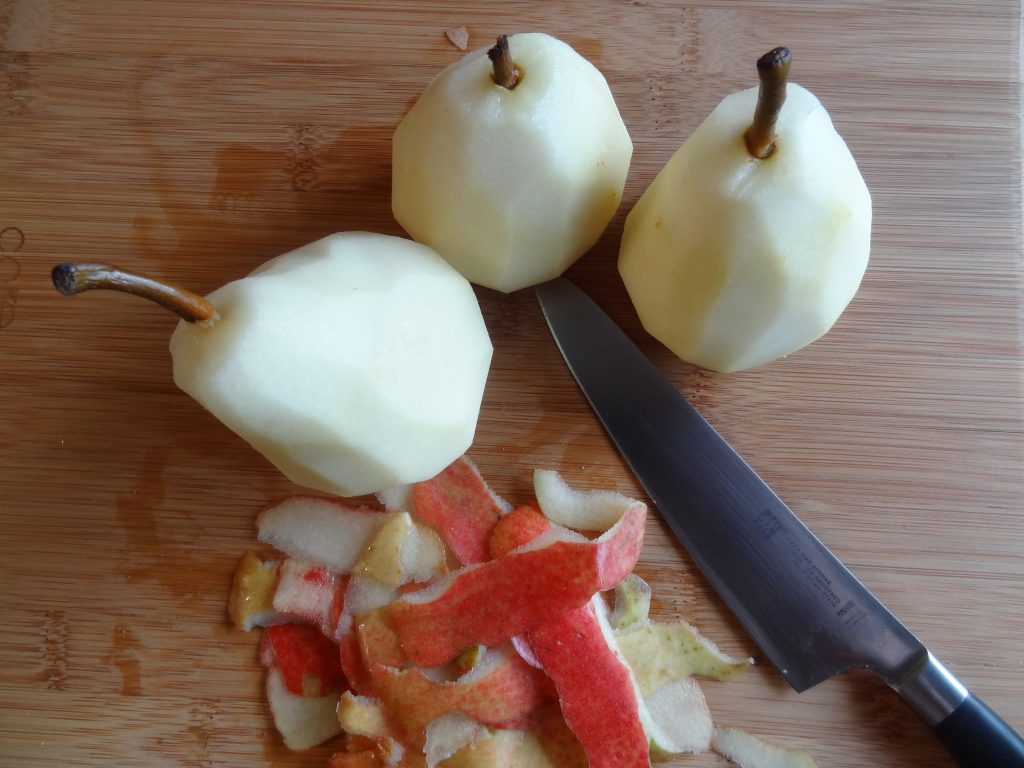
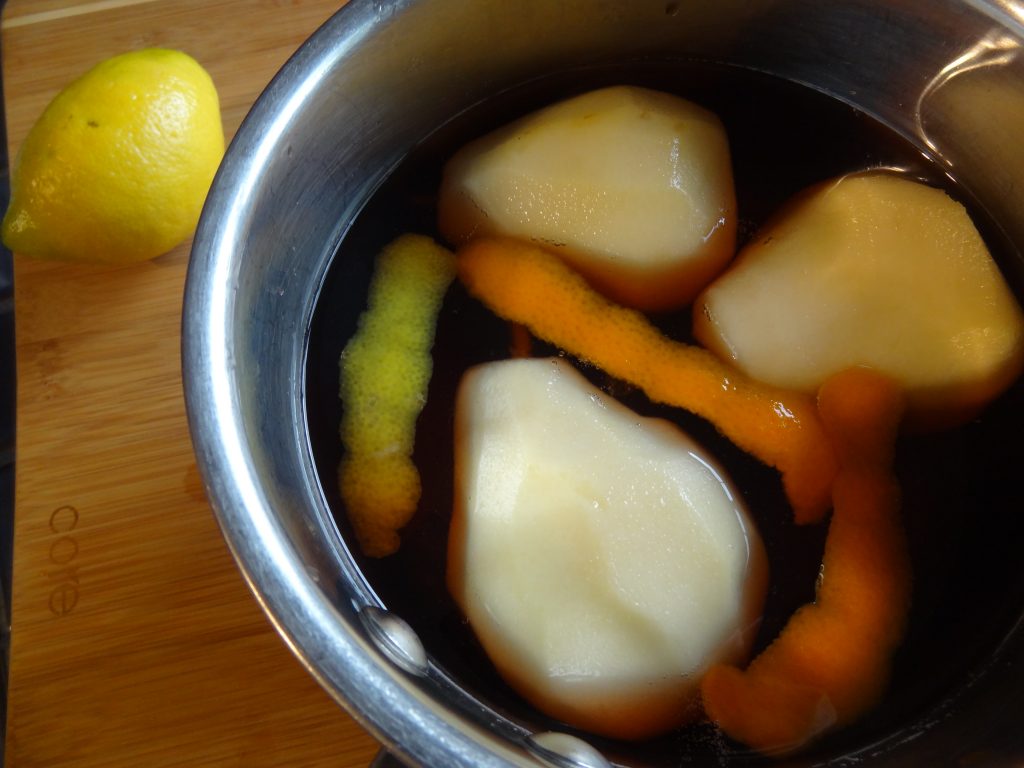 Place pears upright on plate topped with the syrup or make the thick Port glaze below. Add ice cream and garnish with mint leaves.

 Port Wine Syrup Glaze:
Simmer remaining syrup from cooking pears on low heat for another 20 – 30 minutes or until the syrup thickens. Store in jar in the refrigerator up to 30 days. Serve over fruit, ice cream, french toast, pancakes, etc.

Maria Cookies add crunchy layers to this easy trifle recipe. Fresh bananas, strawberries, and home made whipped cream create a melt in your mouth fruit bomb! Bring it to your next cookout or family gathering.
Strawberry season is here!
 Ingredients:
3 large bananas (sliced thin)
1 or 2 quarts of strawberries (sliced thin)
1 package yellow cake mix (follow directions) (or use a pre made store bought cake)
1 package Maria cookies (Bolacha Maria)
2 packages instant vanilla pudding (follow directions)
2 cups (1 pint) heavy cream
3 tablespoons powdered sugar
2 teaspoons vanilla extract


 Preparation:
Prepare cake per package directions. When cake is done, let cool and cut into 2 inches cubes. Set aside.
Prepare pudding per package directions and set aside. Prepare the whipped cream.
Whipped Cream instructions: Place mixing bowl in freezer for a few minutes to chill bowl. Place the cream in mixing bowl and beat until soft peaks form. Add the sugar and vanilla and beat on high until stiff peaks form. Place in refrigerator until ready to begin assembling the trifle.
 Assemble:
Place 1/3 of the cake at the bottom of a large glass bowl. Spread cake with 1/3 of pudding, then layer 1/3 bananas, 1/3 strawberries. Add layer of Maria cookies. Top with 1/4 whipped cream.
Continue layering leaving a top layer of the remaining bananas, strawberries and whipped cream. Top the trifle with crushed Maria cookies. Chill in the refrigerator until ready to serve. Dig in and enjoy!


This shrimp boil was a hit at my family’s cookout! This is a perfect dish for the summer months when it’s too hot to cook because it’s prepared, cooked for only 15-20 minutes, and then served in the same sheet pan. For variety, add a few fresh clams or mussels in the shell! Just adjust the cooking time.
If you prefer, you can even prepare everything the night before, cover with foil and store in the refrigerator to cook the next day. When you’re done eating, just through out the pan for an easy clean up!
Serves 6-10
Ingredients:
2 pounds raw, shelled shrimp
2 – 3 pounds red potatoes (cubed)
1 pound Portuguese chourico or linguica sausage (cut into 1 or 2 inch slices)
4 fresh corn on the cob (cut into 4 pieces)
1 lemon (cut into slices)
SEASONING:
1 tbsp olive oil
1/2 stick melted butter
2 tbsp Taste Portugal Seasoning
1 or 2 teaspoons piri piri hot sauce or Cayenne pepper (optional depending on your taste)
3 tablespoons chopped parsley for garnish
CLICK IMAGE TO ORDER:
Preparation:
Boil potatoes with 2 teaspoons of salt for about 10-12 minutes until slightly under cooked. (do not over cook) Drain and place on a large sheet pan to cool. Cook the corn for about 5-10 minutes, drain, and add to the sheet pan to cool.
Melt butter, oil in a small ramekin for about 30 seconds. Add sseasonings and mix well
When the potatoes and corn are cooled, spread evenly on the pan. Arrange the chourico evenly between the potatoes and corn followed by the shrimp and lemon slices.
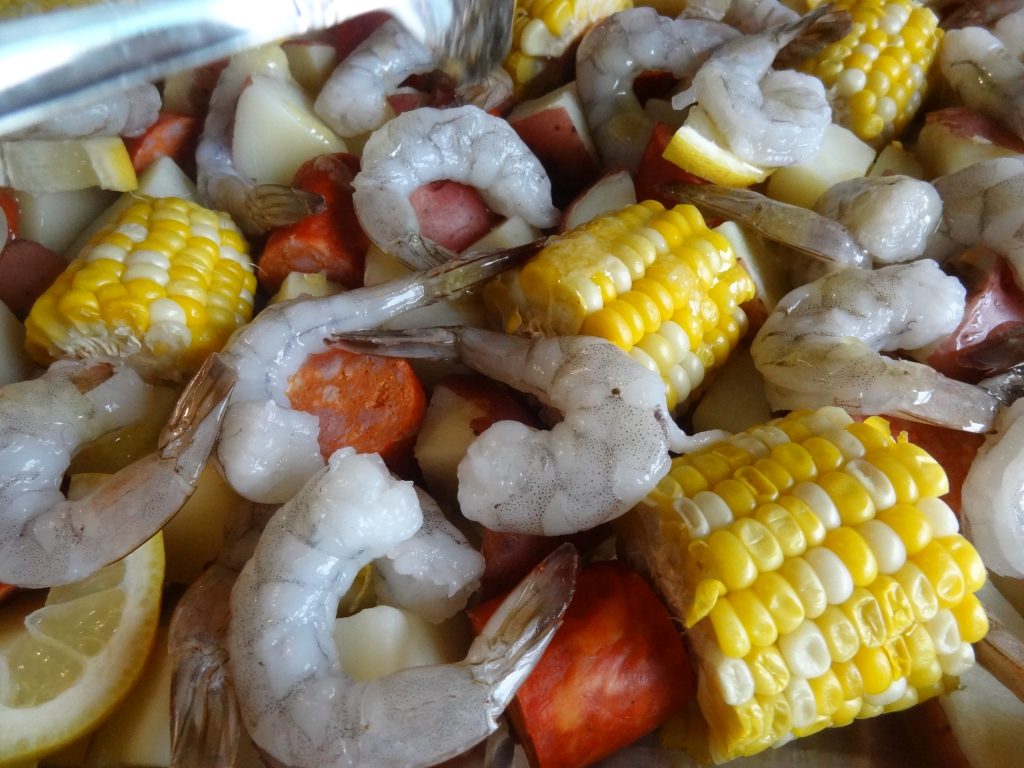
Add the seasonings and mix thoroughly with your hands to coat ingredients evenly.
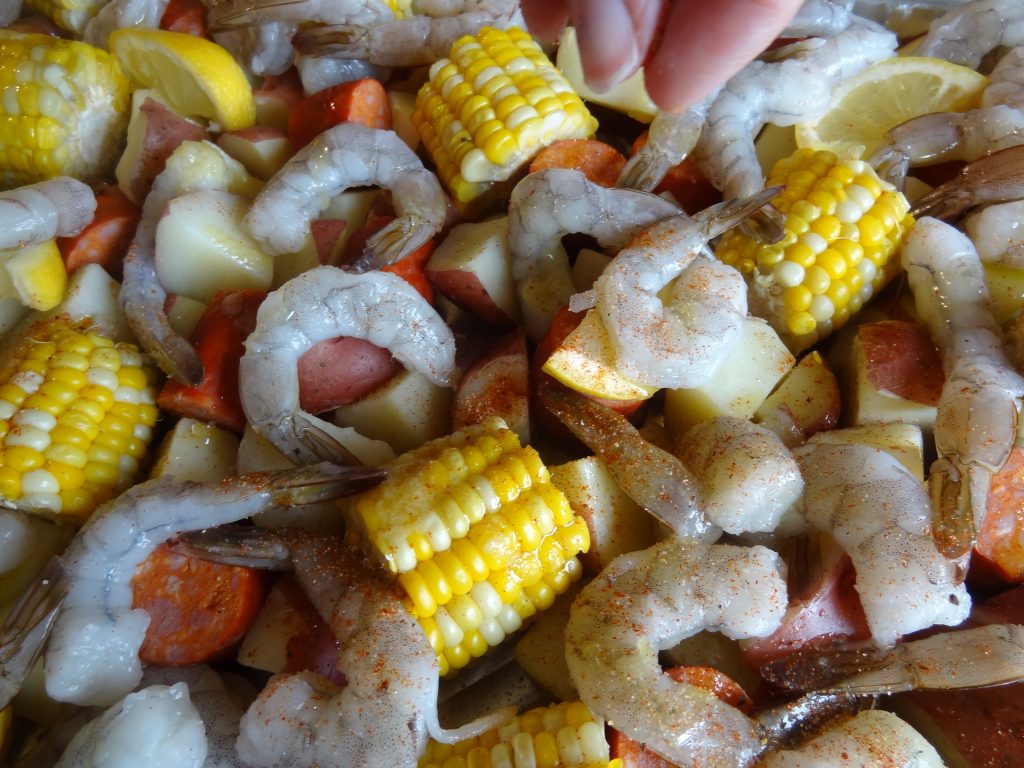 *At this point, you can cover the pan with foil and put it into the refrigerator until ready to cook the next day.*
Cook in heated 425 F degree oven for 15 minutes or until shrimp turns pink and cooked through.
*You can also cook in the same pan, covered with foil on your grill. You many have to alter the cooking time.*
Top with the parsley and serve. Enjoy!
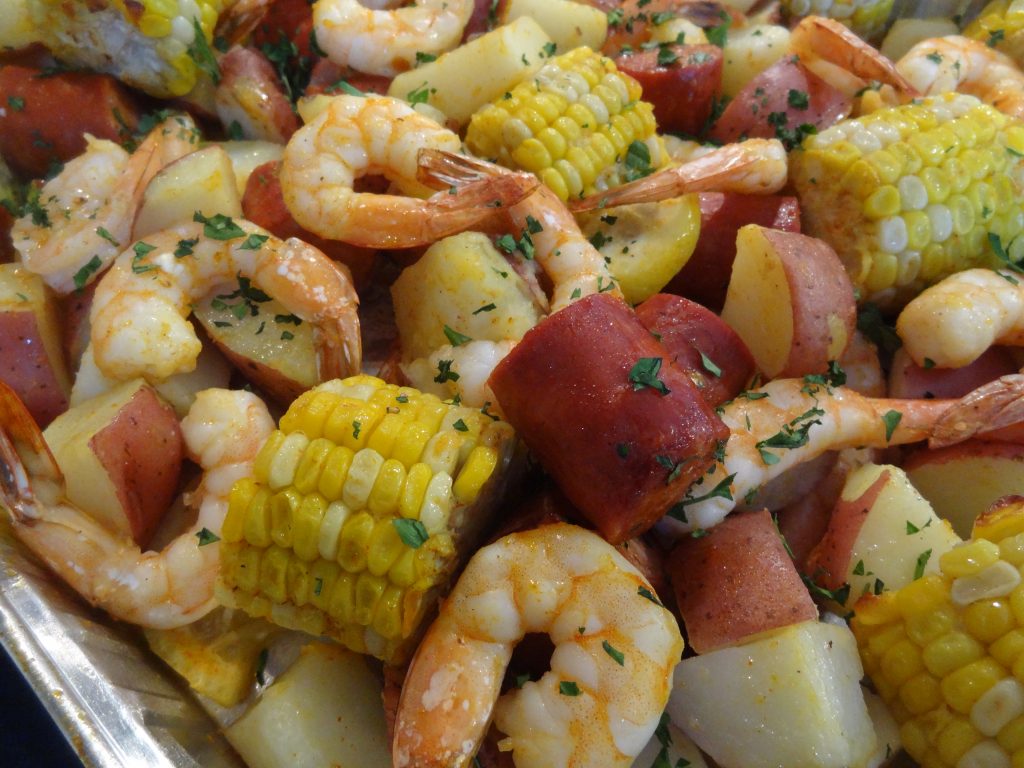
Serve with Portuguese Vinho Verde or any good white wine.
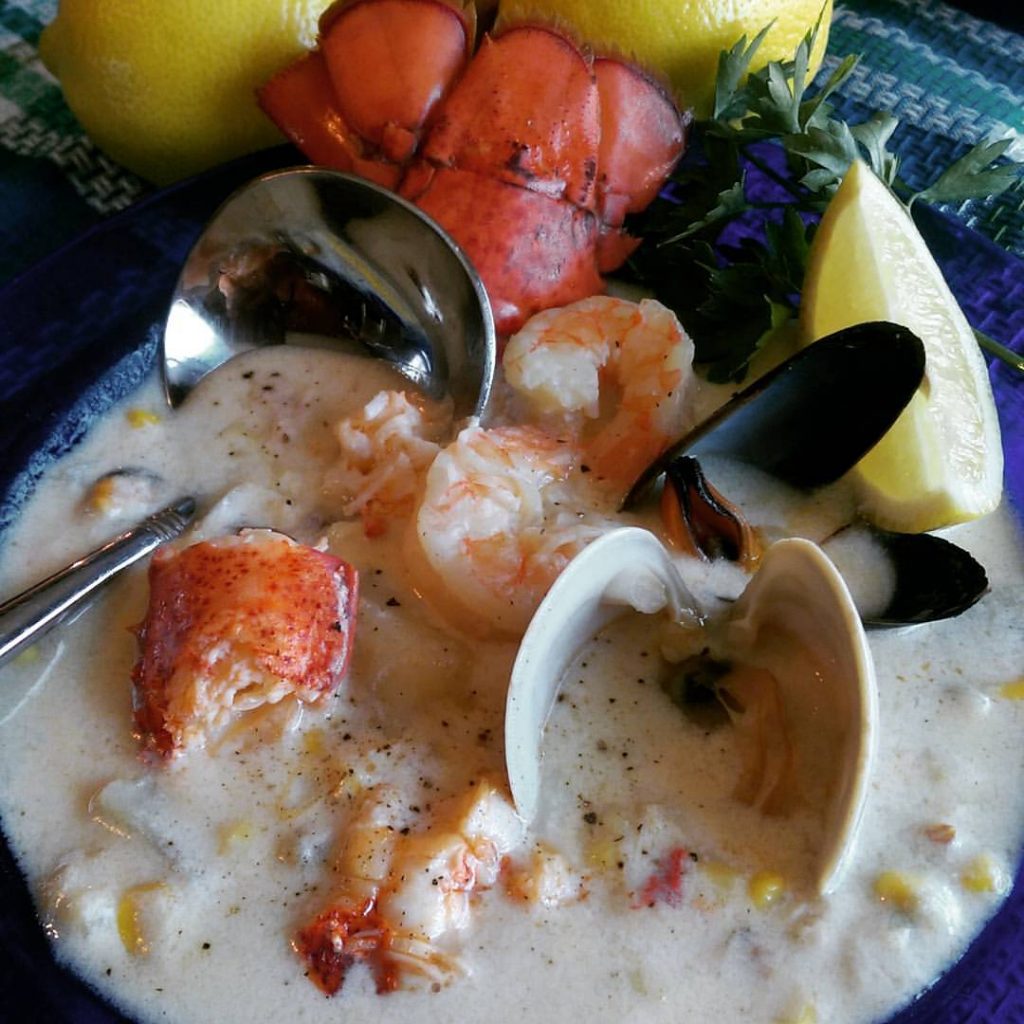
Are you drooling yet? This is my favorite soup which I make every summer after our families Father’s Day clam bake! This is a great way to use up the leftover seafood and corn. Here’s the recipe for the Clam Bake.
I add a little 1920 Portuguese brandy to the broth for an added kick. Serve with an extra shot of brandy to drizzle into the chowder. The flavor is intense, rich and creamy. You’ll never through out that day old lobster again!
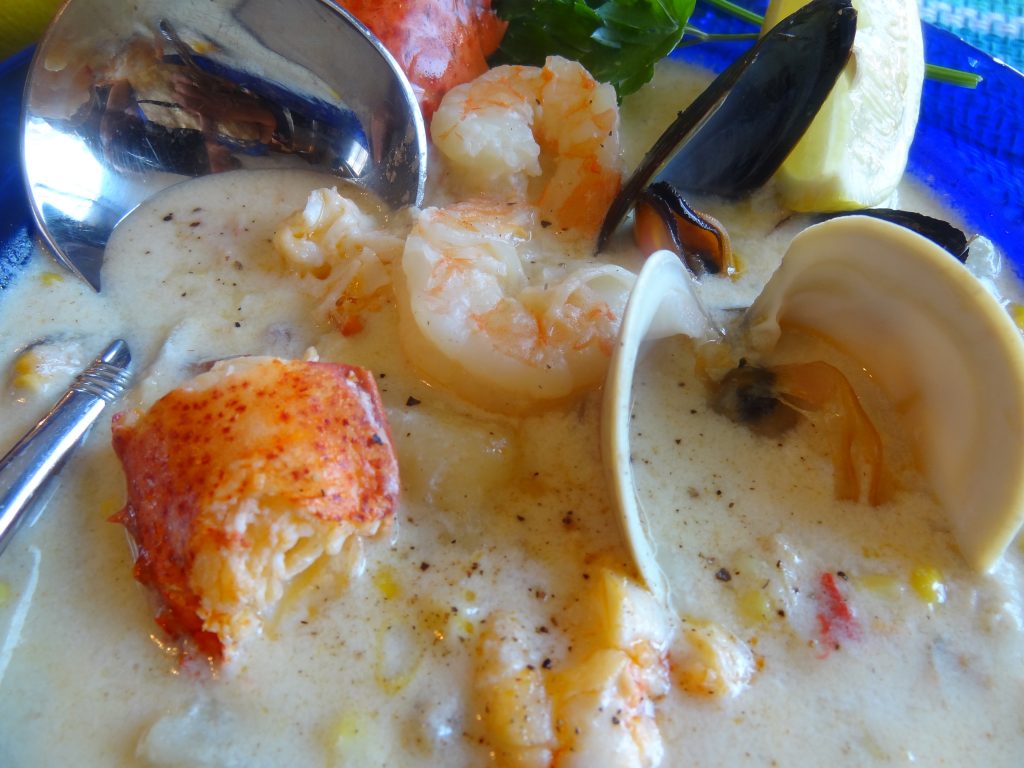
Ingredients:
Lobster shells from 3 lobsters
Meat from 1 lobster (or 1-2 cups) chopped into small pieces
1 pound shelled shrimp (raw or cooked)
1 pound little neck clams (with or without shell)
1 pound mussels (with or without shell)
2 cups of corn kernels
2 tbsp of Brandy (I used 1920 Portuguese Brandy)
2 cups fish or chicken stock
1 small onion (finely minced)
1 celery stalk (finely minced)
4 tbsp butter
1 tsp paprika
1 tsp pepper
2 tsp salt
1/2 cup of flour
2 cups of light cream
1/2 gallon of whole or light milk
Lemon wedges for garnish
Parsley for garnish
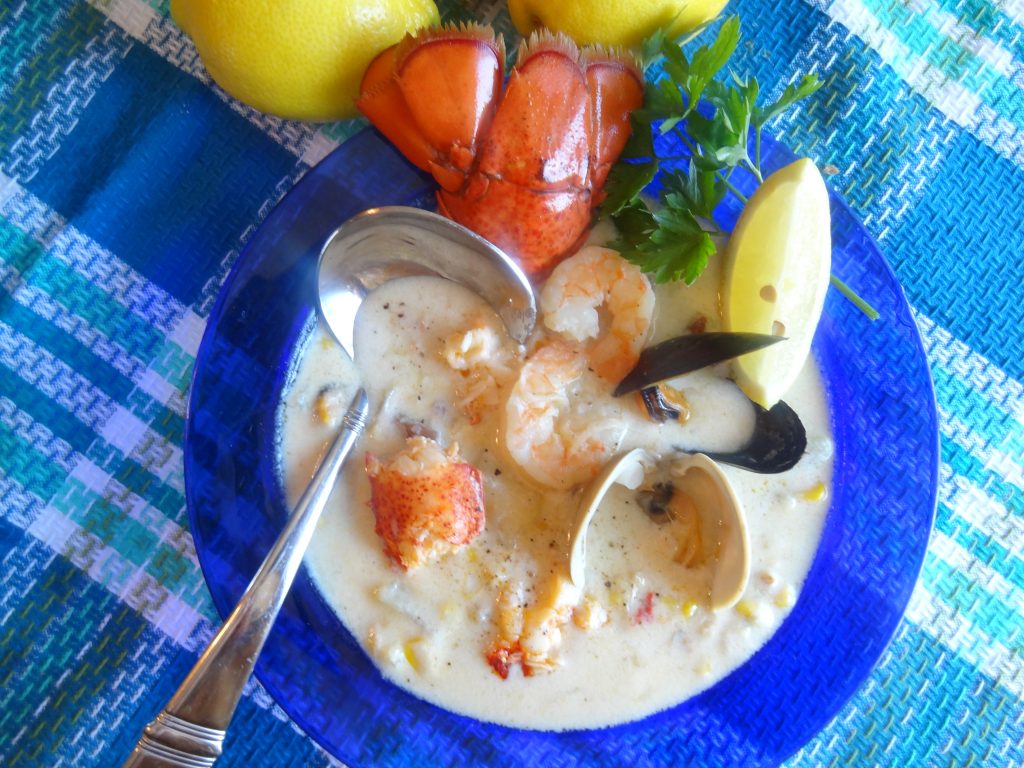 Preparation:
In a medium pan, place the lobster shells in the stock and milk and cook on medium heat for about 10 minutes. This will infuse the stock with the lobster. Strain the broth, remove shells and discard shells.
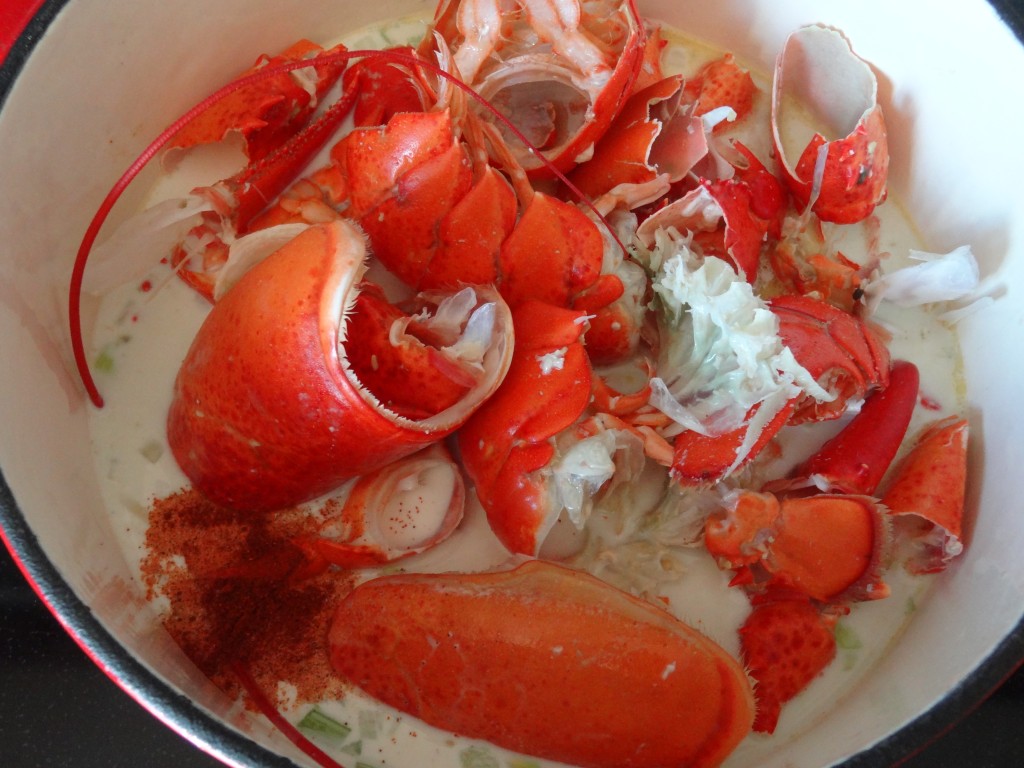
In a large stock pot, saute the onion, and celery in the butter until translucent. Add the flour, and stir until the flour has melted into the butter. Add the seafood, corn, milk broth and remaining ingredients except the cream, brandy, and lobster pieces and stir on low heat. Cook on low for a few minutes.
Cover and continue cooking for 15 minutes on low heat or until thickened. Add the cream, lobster pieces and brandy. Simmer on low heat for another 10 minutes stirring gently. Taste and add more salt and pepper if desired. Note: If you want a thicker chowder milk a little flour with milk in a small bowl and add to the chowder. Cook for a few minutes until thicker.
Serve garnished with lemon wedges and parsley.
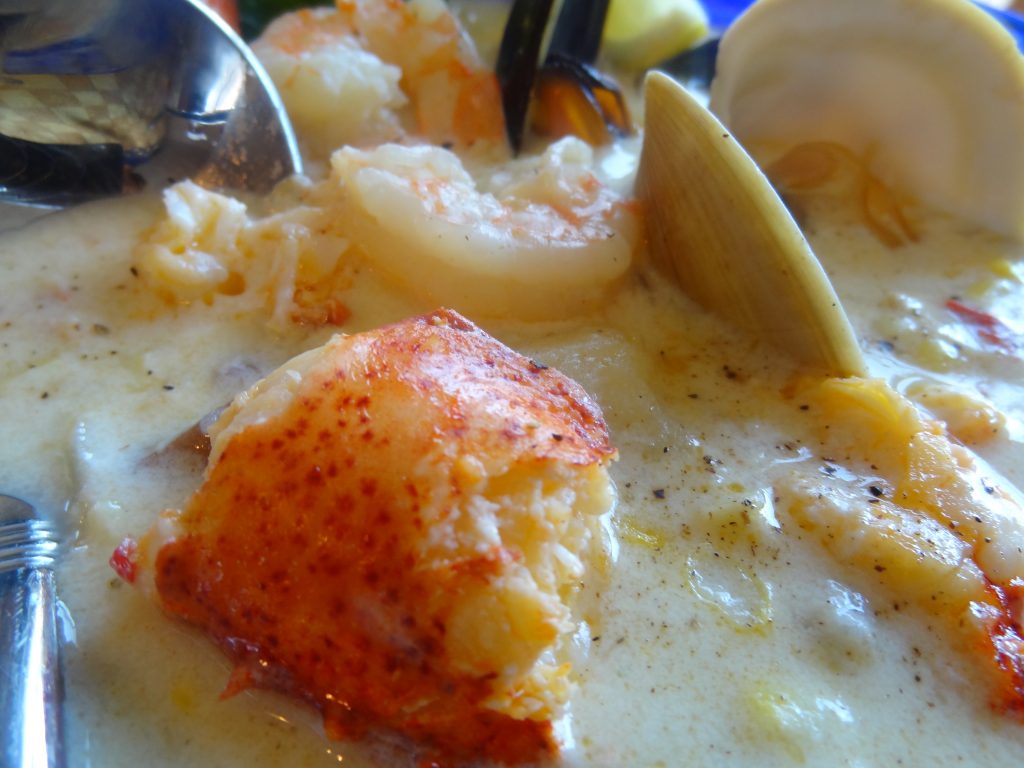 Serve with an additional shot of 1920 brandy. Drizzle it into the chowder for a kick!

The Morais family has been making wine for over a hundred years. In Portugal, the heritage of wine making has been passed down from generation to generation. Joining this age old family tradition with Virginia’s rich history of winemaking, the Morais family has built a legacy which has become an area landmark. The Winery opened its doors to the public in 2011. Since then they have expanded vineyards, wine production and venue space to accommodate the increase of visitors every year. The winery features many varieties of award winning wines which you can sample in the beautiful tasting room, they offer tours and host many weddings and special celebrations throughout the year!
Watch this video of the beautiful and spectacular property!
This summer, they will be hosting a Portuguese food and wine pairing on; Sun, June 25, 2017 – 1:00 PM – 3:00 PM
 I’m so honored that they are featuring my Taste Portugal 101 easy Portuguese recipes cookbook at the event!
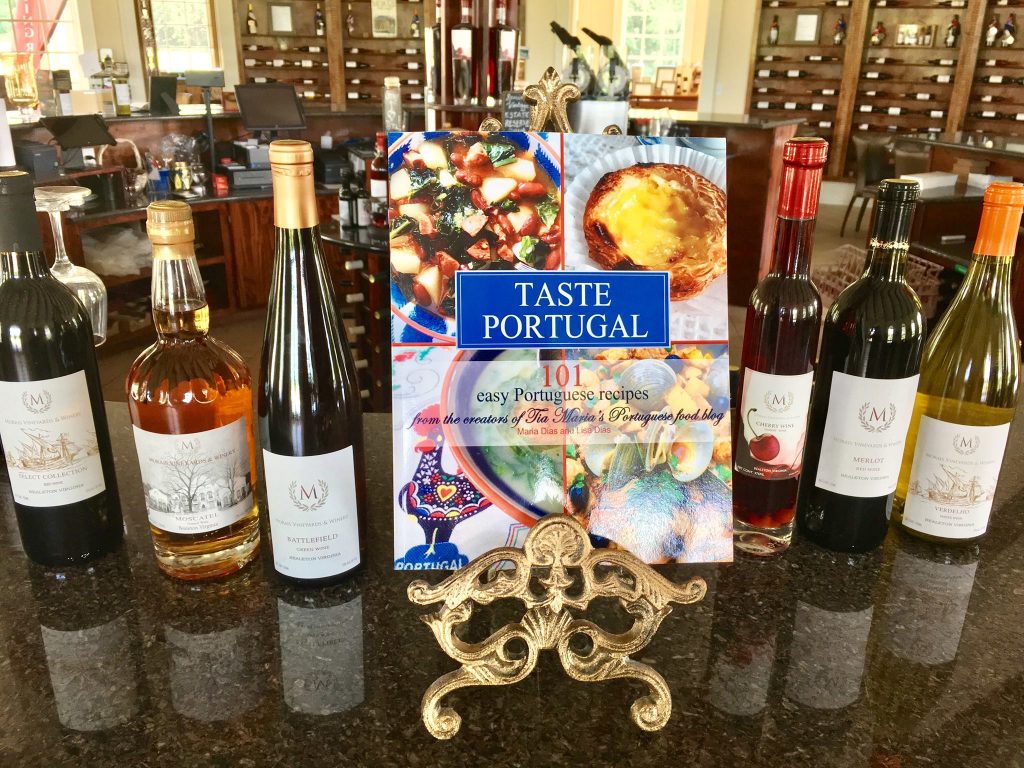 What goes great with Portuguese wine? Portuguese FOOD!
“We are excited to host a Portuguese food and wine pairing at the winery. Portuguese dishes will be provided by the delicious tastes of Columbus Grill and will be paired with Morais Portuguse wine. 5 different tastings from exquisite Bacalhao (cod fish) to a sweet delicous Portuguese pastry. You will learn a little more of the Morais background culture and get a little taste of Portugal! Meet the master of our wines, Vitor, the wine maker and also get to learn more about Portuguese dishes from Columbus Grill.”
Food, wine and culture? Doesn’t get any better than that!
Purchase Tickets Here. PRIZES!! Purchase tickets to our Portuguese food & wine pairing and be entered to win Maria Dias & Lisa Dias “Taste Portugal | 101 Easy Portuguese Recipes” cook book! Lots of delicious authentic Portuguese recipes to learn and master at home! All the dishes in the tasting are in the book. So if you love it here, you can make it at home too! “https://moraisvineyards.com/
Visit their homepage or follow and like them on Facebook!
Morais Vineyards & Winery
11409 Marsh Road
Bealeton, VA 22712
(540) 326-6336

Happy Mother’s Day to all the moms!
“God could not be everywhere, and therefore he made mothers” Rudyard Kipling
Share memories and keep our Portuguese tradition alive. Order my Taste Portugal Cookbook!
 Now that planing season is here, this is a fun project for you or to make with your kids. It make the imagination go wild and brings out your creativity. I used a hanging planter, but you can use any pot you have on hand.
I found most of the supplies at Christmas Tree Shops, Michael’s Craft store and Hobby lobby and use some succulent plants from my garden. Enjoy it and Happy Summer! 🙂
Fairy Garden:
1 hanging planter or any of your choice
potting soil
small rocks
blue rocks or gems for water
multi color rocks
1 small package of moss
Fairy house
Fairies
bridge
live succulents
extra pot liner
plastic bags
pop sickle sticks
cardboard
Assembly:
Fill the pot half up with some filler such as plastic bags or extra pot liner. Cut a piece of cardboard to fit the inside of pot. Poke holes in the cardboard for water to seep through and place into pot. Spread dirt evenly on the cardboard. Place stones around the edges followed by the pieces of moss. Add succulents as desired.
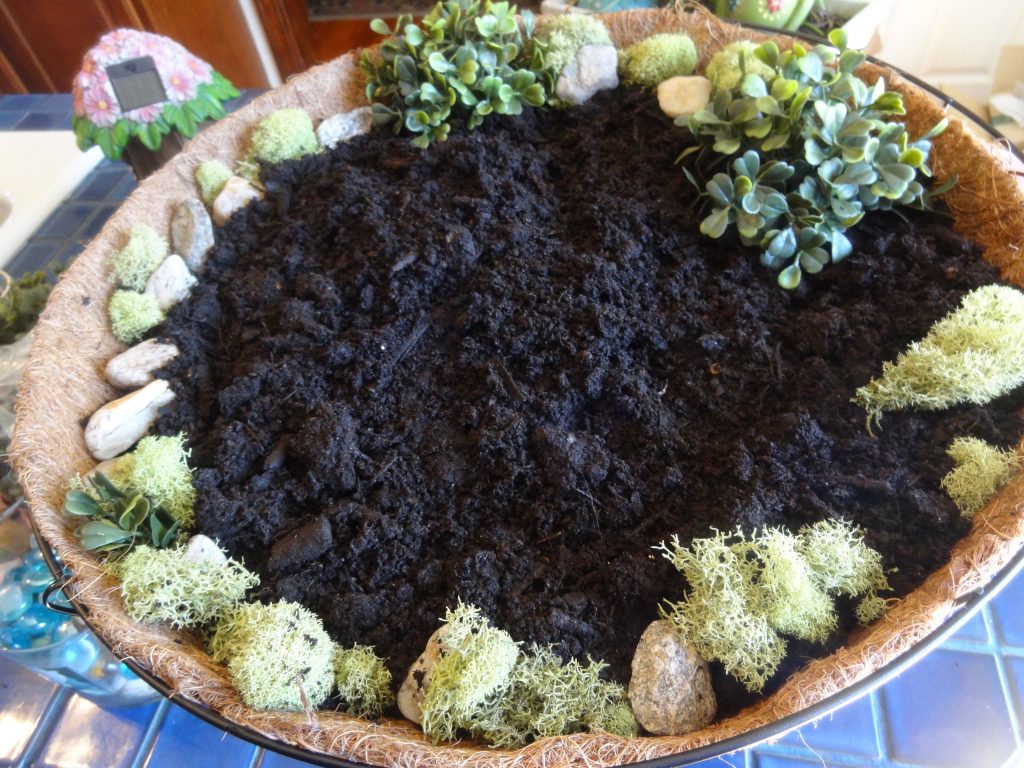 Begin assembling the garden by adding the fairy house first. Then make the brook by placing pop sickle sticks as base of the water so the stones don’t sink into the dirt.
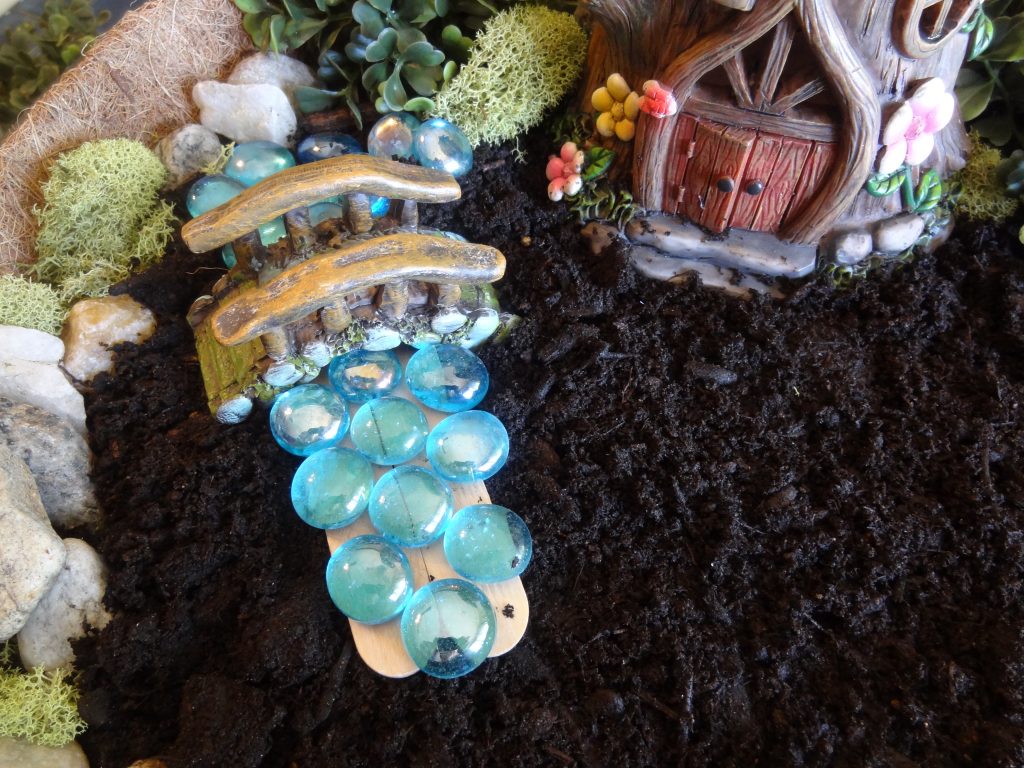
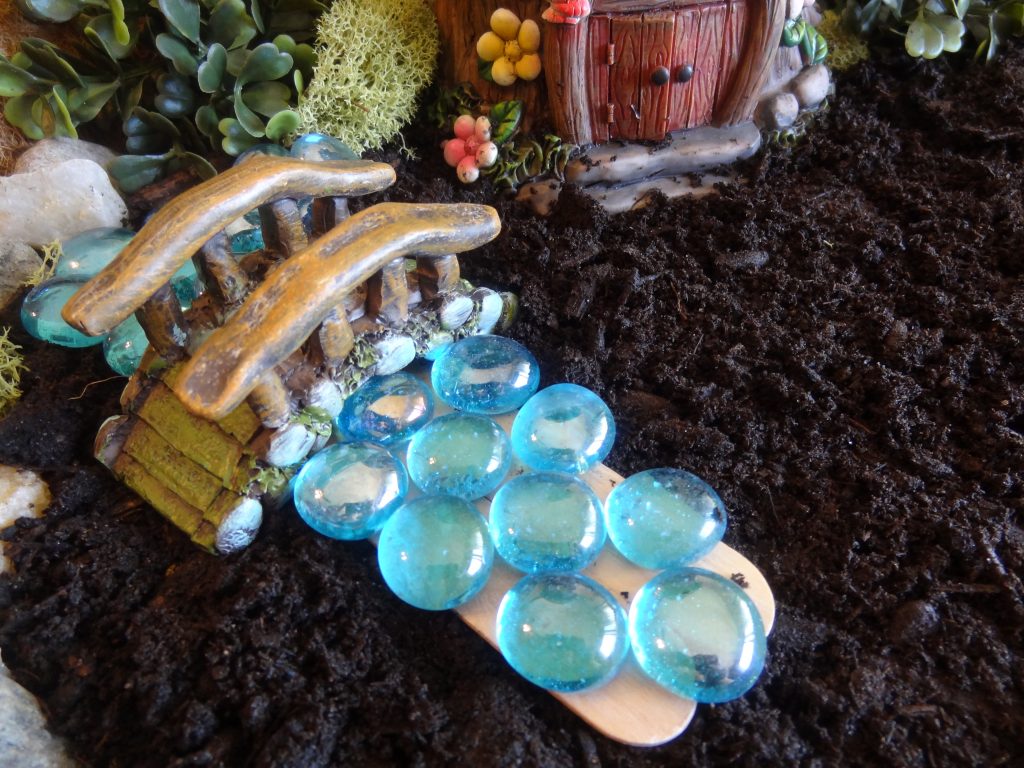 Make a path from the house by making a walkway with more sticks followed by the small rocks. Add more succulents and arrange fairies.


 It’s tea time in the garden.


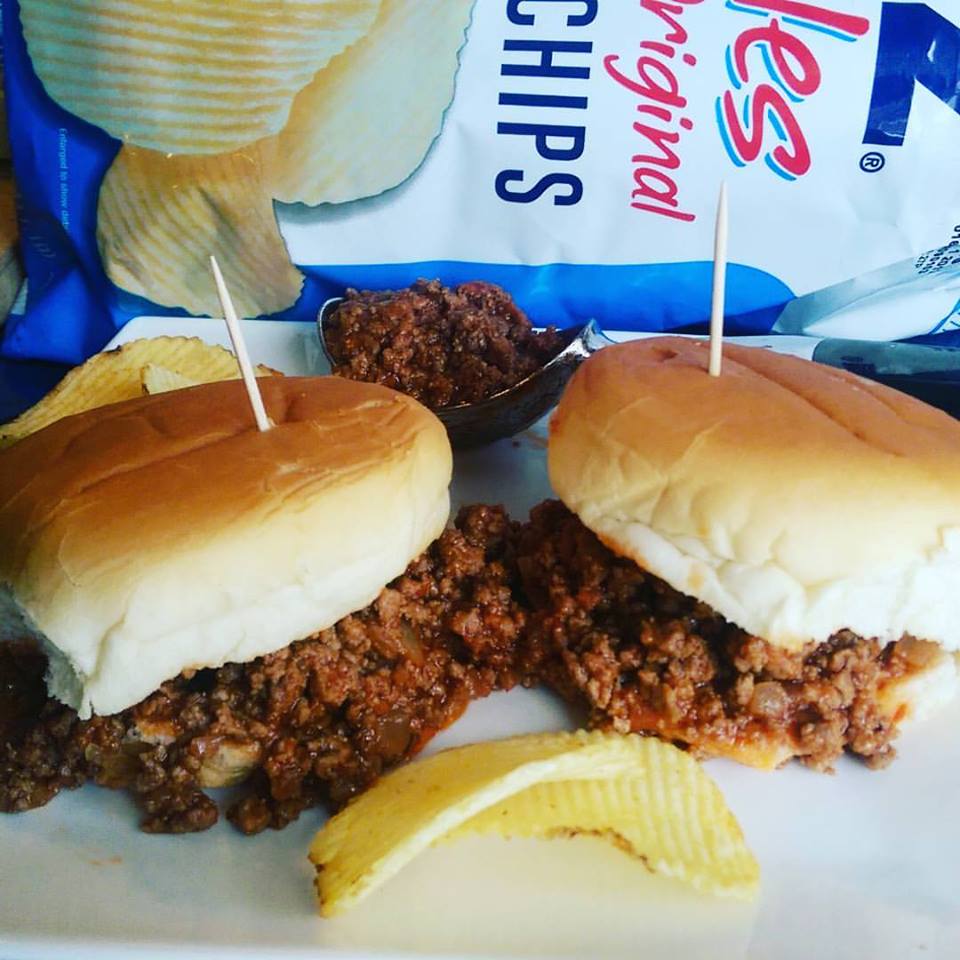 Delicious sliders with a kick of ground chourico Portuguese sausage. I used to call them Sloppy Maria’s but I changed the name to Sloppy Ronaldo Sliders in honor of Cristiano because last year I made them for the World Cup and Portugal won! Maybe my sliders gave Ronaldo good luck!
If you prefer you can leave out the chourico if your family prefers the original sloppy Joe taste. I always make this big batch and I store half of the recipe for the next day, or freeze in small containers for 1-2 person servings. It’s perfect for a busy night when you don’t have time to make dinner or to give as an after school snack.
I took these pictures on live TV after the win!


Ingredients:
2 pounds ground beef or turkey
1 pound chourico or linguica sausage (skin removed and ground in processor) (this is optional to your taste)
2 medium onions (finely minced)
4 cloves garlic (finely minced)
2 cups of crushed tomatoes
2 teaspoons salt
1/4 teaspoon pepper
2 cups ketchup (depending how sweet you want the Joe’s
1 tablespoon tomato paste to thicken if necessary
1 tablespoon piri piri hot sauce more (optional to your taste)
hamburger buns

Preparation:
Brown the ground beef in a large heave saucepan or skillet. Drain the fat and add the onions and garlic to pan. Cook the onions and garlic for a few minutes until translucent along with the beef.
Add the chourico and cook for a few minutes. Add the rest of the ingredients and let simmer for about 10 minutes stirring often. Taste and add more ketchup or brown sugar if you want more sweetness. Add the hot sauce if desired.
Let cook for another 10 minutes on low until the sauce and meats are thick and rich. Add the tomato paste to thicken sauce if needed.
Serve on warm buns.
After game celebration!


This is such an elegant dessert for your next celebration. Flan is very easy to make despite it’s appearance and these two variations on the original flan recipes create a unique taste.
Ingredients:
6 large eggs
3 cups (whole milk)
1 cup sugar
1/4 tsp salt
2 teaspoons either Port Wine or Anisette (Aniz) Liquor
Caramel glaze ingredients:
1 cup sugar
Preparation:
Note:Take your eggs out of the fridge a few hours before you start to get them to room temp or place them in a bowl of lukewarm water for about 20 minutes.
Prepare Caramel glaze first:
Place the sugar in a large heavy skillet. Continue stirring while cooking on medium heat until the sugar melts and begins to turn caramel colored and thickens like corn syrup. (probably 5-8 minutes depending on your burners) If you notice it begin to smoke remove immediately from the burner. If you smell a burned aroma, start over since the syrup will taste bitter. Pour the caramel into a souffle dish and slightly shift the dish side to side to coat the bottom and sides up to 1/2 inch or so. Set aside while you make the flan. You will notice the caramel as hardened which is good.
Prepare custard:
In med bowl, beat the eggs with 1 cup sugar until lemony colored. Meanwhile, heat up the milk until hot but not boiling.
Let the milk cook down a little and then add about 1/4 cup of milk, to the eggs while continuing to beat on low. *If the milk is too hot, you’ll discover that you just made scrambled eggs.
Continue beating and slowly add the milk 1cup at a time until all of the milk is incorporated.
At this point you can beat in, either the port wine or the anisette.
Let the egg mixture rest to let the foam subside a little, then run through a strainer and slowly pour it into the souffle dish that has been coated with the caramel.
Place the flan dish into a larger oven proof deep dish pan (bain -marie) that has been filled with 1 inch of water.
Cook at 350 for 60 -75 minutes or until a toothpick comes out clean. Let the flan cool in it’s pan and place it in the dish in the refrigerator overnight.
When ready to serve, loosen the sides of the flan with a knife and giggle the pan to loosen it.
Cover the top of the flan with a deep serving dish and invert it. Spoon out the caramel over the flan.
Serve as is, decorate with candy pearls or with whipped cream!
+


These little treats have great flavor and a burst of spice from Piri Piri Hot Sauce! I make these so often that I could do it with my eyes closed! Note: If you can’t handle the heat just leave out the hot sauce and they are just as good!
Ingredients:
2 pounds chicken tenders
2 teaspoons salt
1 teaspoon pepper
1 teaspoon garlic powder
1 teaspoon paprika
1 tablespoon piri piri or (hot sauce)
Cooking spray for coating pan and chicken
Coating:
1 tablespoon flour
1 cup bread crumbs
1 cup Panko bread crumbs
1/2 teaspoon salt
1 teaspoon garlic powder
1 teaspoon paprika
Egg wash:
1 egg
1 tablespoon water
1 tablespoon piri piri
Sauce:
1/4 cup hot sauce
2 tablespoons melted butter
Preparation:
Preheat oven to 375 degrees F. Spray a large sheet pan with a heavy coating of cooking spray.
1. Season chicken in a medium bowl. Toss and coat with piri piri. Set aside.
2. Place the coating ingredients in a plastic bag and shake well to blend.
2. Beat the egg wash ingredients in a small bowl until well incorporated.
4. Dredge 3 or 4 pieces of chicken at a time in egg wash. Shake off excess then place in plastic bag. Shake to coat evenly.
5. Place tenders evenly on sheet pan.
6. Spray tops of chicken with cooking spray.
Cook for 15-20 minutes or until golden brown. Cut into one piece. Chicken should not be pink. Turn over and cook a few minutes longer to achieve a darker crispy color on all sides if desired
Mix the hot sauce with the butter and cook for 1 minute to blend flavors. Make a double batch if you like it really HOT! 🙂
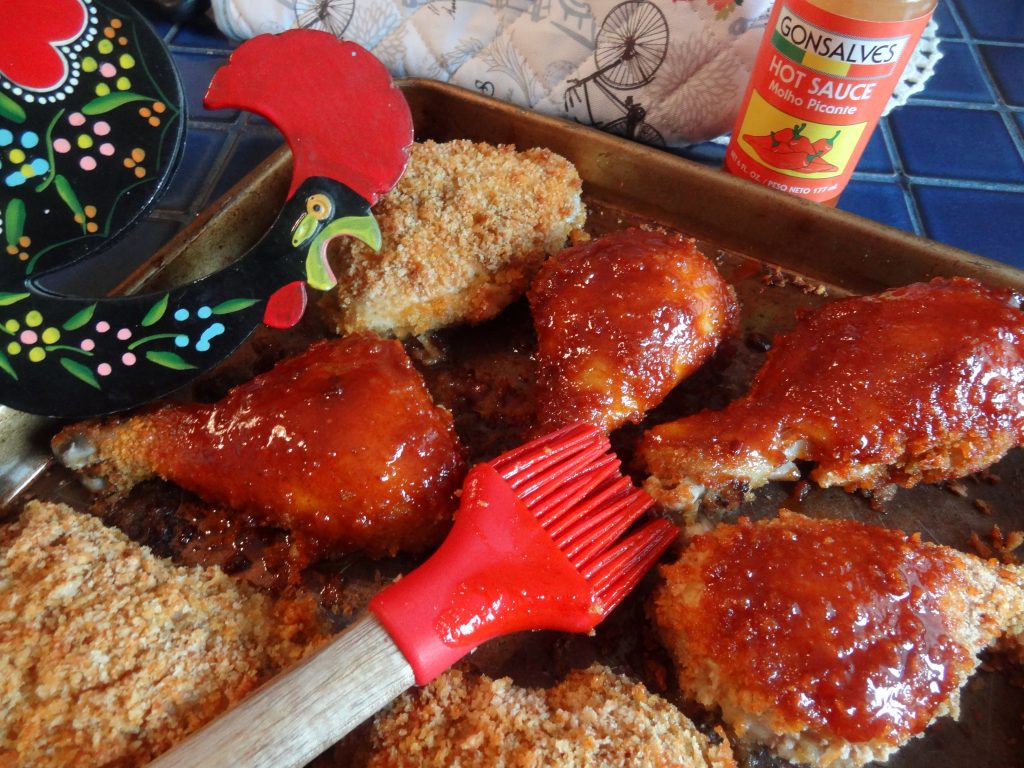 Gallo Spicy Oven Fried Chicken
I never make fried chicken because I try to avoid the grease in my diet, so I bake it in the oven instead. This chicken is oven baked with crunchy panko bread crumbs creating a moist chicken on the inside. I make a hot spicy sauce with Portuguese hot sauce to drizzle on top for great flavor and kick! Of course it’s optional to use the sauce. I usually top half of the chicken and leave the other half plain.
10-12 pieces of uncooked chicken preferably thighs and legs
1 tablespoon salt
1 teaspoon pepper
2 teaspoons paprika
2 tablespoons piri piri or hot sauce
1 teaspoon garlic powder
1 cup milk
1 teaspoon vinegar
Bread coating:
1 and 1/2 cups plain panko bread crumbs
1/2 cup regular bread crumbs
1/4 cup flour
1 teaspoon salt
1 teaspoon paprika
1 teaspoon garlic powder
Hot Sauce:
1/4 cup hot sauce ( Portuguese brand or Tabasco)
1/4 cup vegetable oil
2 tablespoons brown sugar
2 teaspoons paprika
1 teaspoon garlic powder
Preparation:
Mix the milk, vinegar, salt, pepper, piri piri or hot sauce and garlic powder in a large bowl. Add the chicken and coat with the milk mix. Let sit for at least 3 hours or over night in the refrigerator.
Let chicken sit 30 minutes before coating.
Preheat oven to 375 degrees F. Coat a baking sheet with a heavy layer of cooking spray.
Place the coating mix in a plastic bag and shake well. Drain chicken of any milk or pat dry and then place 3 pieces at a time in the plastic bag. Layer evenly on baking sheet. Top with any leftover coating mix if you want an extra crispy layer on chicken. Spray top of chicken with a coating of cooking spray.
Cook for about 40 to 45 minutes until crispy. Note, that ovens vary so check chicken after 30 minutes to adjust time.
While the chicken cooks, make the hot sauce by placing all the ingredients in a small pan and cook for a few minutes. Taste the sauce and add more hot sauce if desired. Brush chicken with the sauce and serve or, if desired; place the chicken back into oven and broil for a few minutes to achieve a sticky crust.
Enjoy!
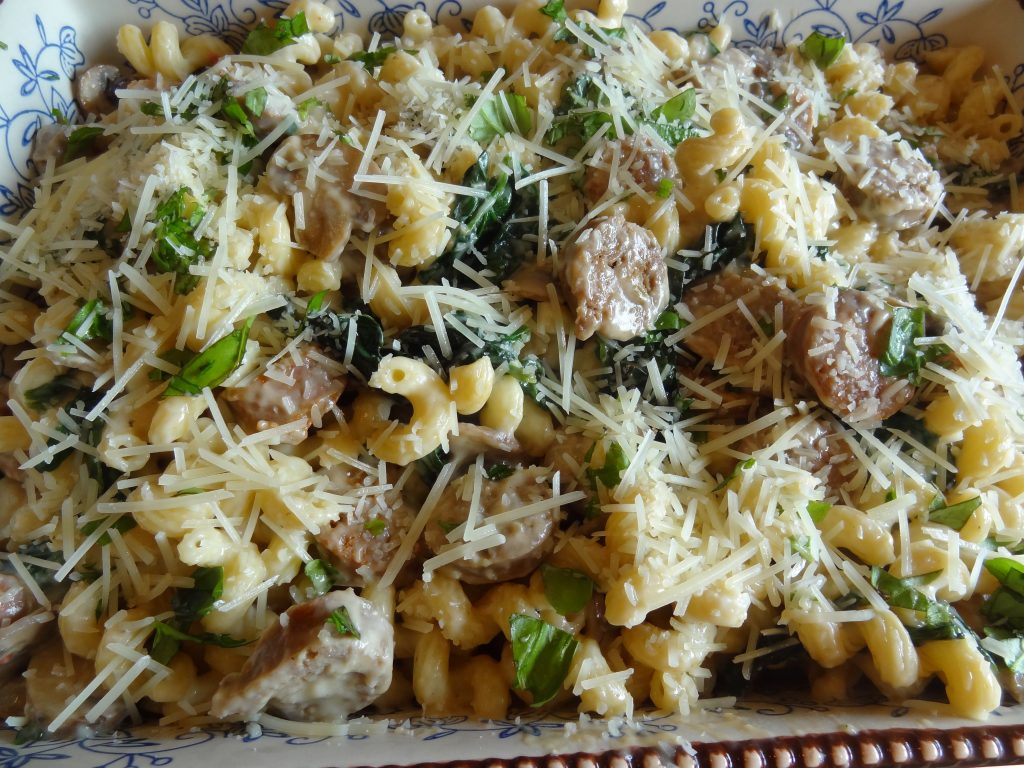
This pasta bake is great for an easy everyday meal and perfect to bring for a pot luck party. Prepare it ahead of time and keep it in the refrigerator until you’re ready to cook and serve.
Ingredients:
2 pounds uncooked Italian sausage
1 (16 ounce) package favorite pasta (any your prefer)
1 pound fresh mushrooms (optional)
1 small onion (chopped)
2 cloves garlic (chopped)
1 pound fresh baby spinach
2 tablespoons sun dried tomatoes
1 pound shredded mozzarella cheese or (any your prefer)
Cream Sauce:
3 tablespoons all purpose flour
4 tablespoons butter or margarine
1 and 1/2 cups milk
1 teaspoon salt
1 teaspoon black pepper
Preparation:
Prepare sausages:
Cook sausages by boiling in 1 cup of water until the water evaporates. Flip the sausages as they cook. When water evaporates remove sausages and cut into slices.
Add the chopped onions and garlic to the same pan and cook for about 3 minutes until translucent. Add the mushrooms and cook for a few minutes. Add the sausages back into the pan, cover and cook until the sausages are fully cooked. Fold the spinach into the sausages and set aside.
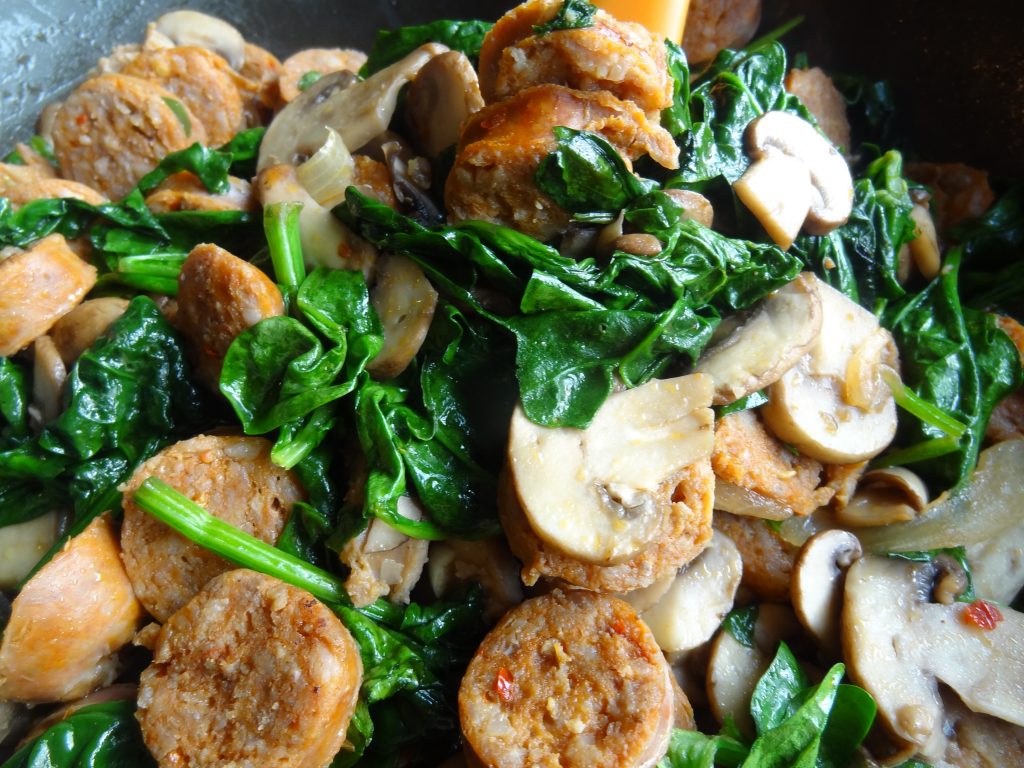
Prepare sauce:
Melt butter in a small pan and add the flour. Stir until it blends with the butter. Add milk, salt and pepper. Cook and stir until thickened. Add 1/4 Parmesan or peccorino cheese. Stir well until cheese melts and set aside.
Cook pasta per package directions and drain.
Add the pasta to the pan with sausages followed by the cream sauce. Mix well to incorporate flavors.
Pour into a slightly greased deep baking dish. Top with the cheese.
Cook at 350 for about 30 minutes covered with foil, then remove foil and cook for a few minutes longer to get slightly golden color.
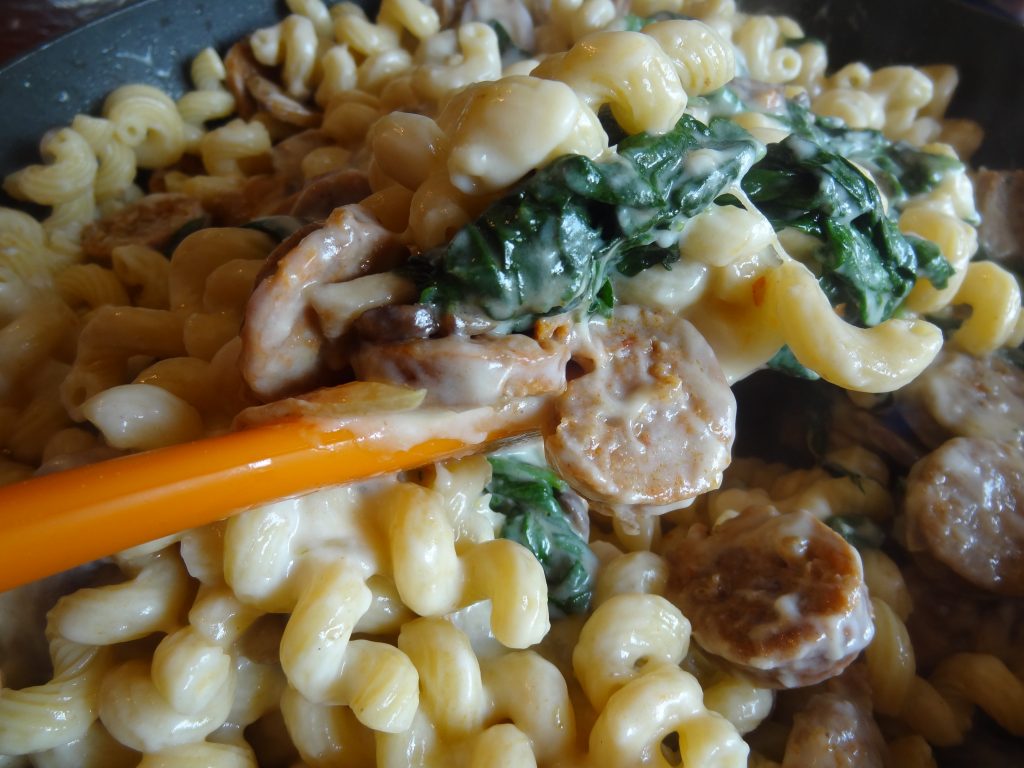
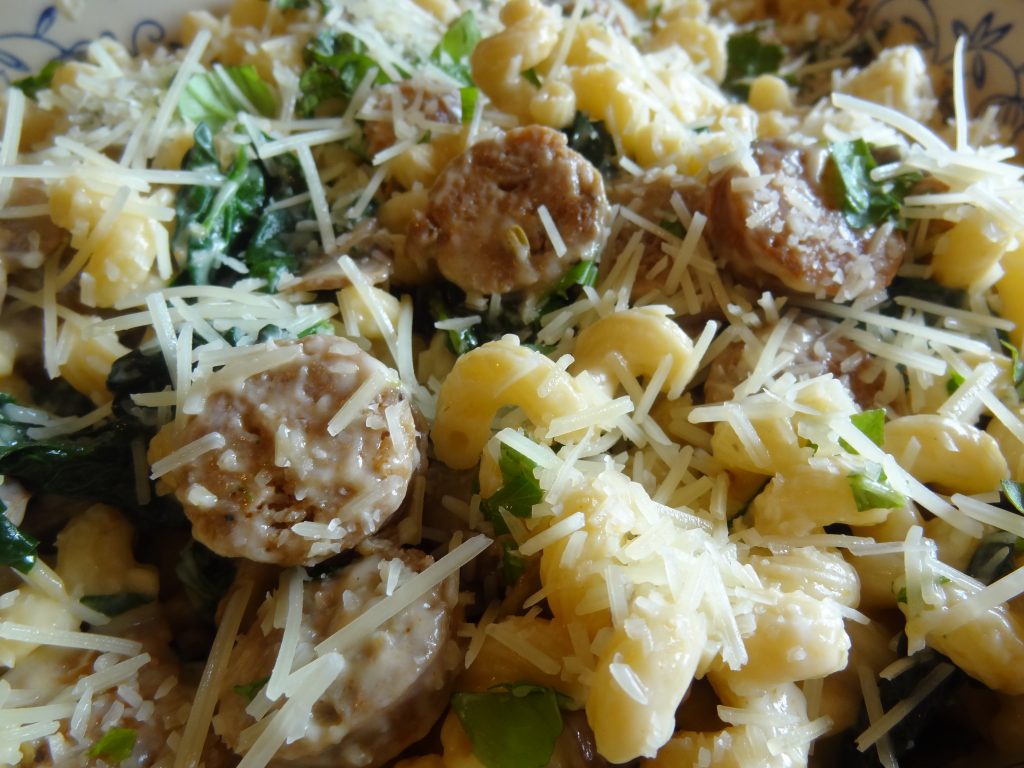


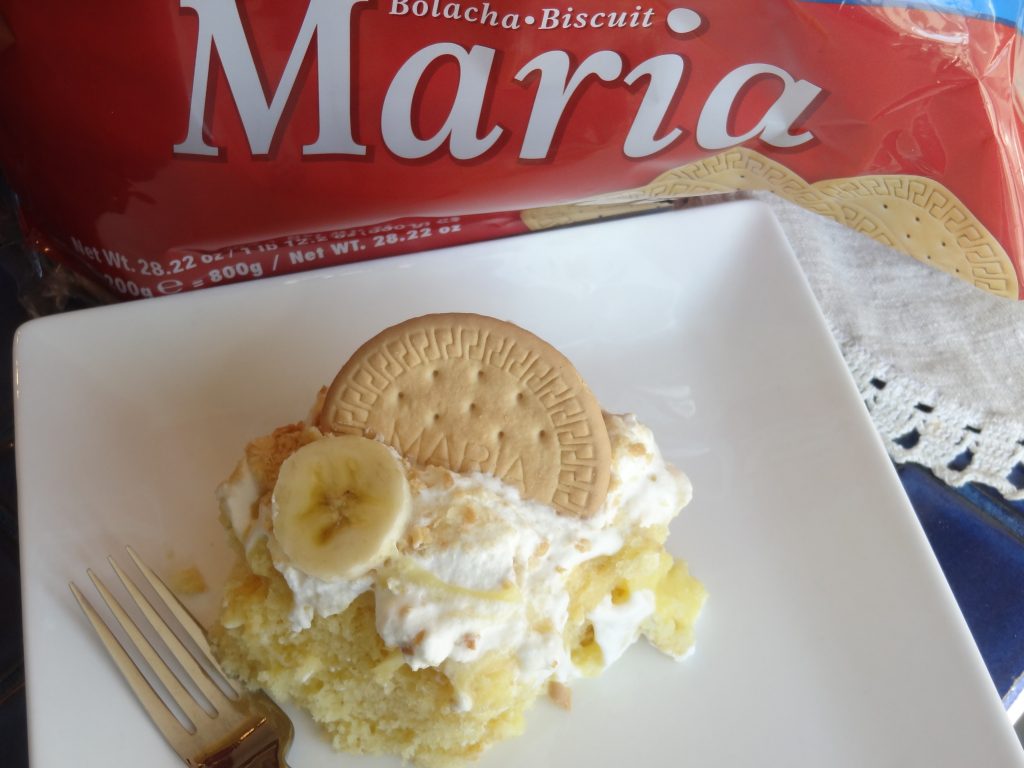
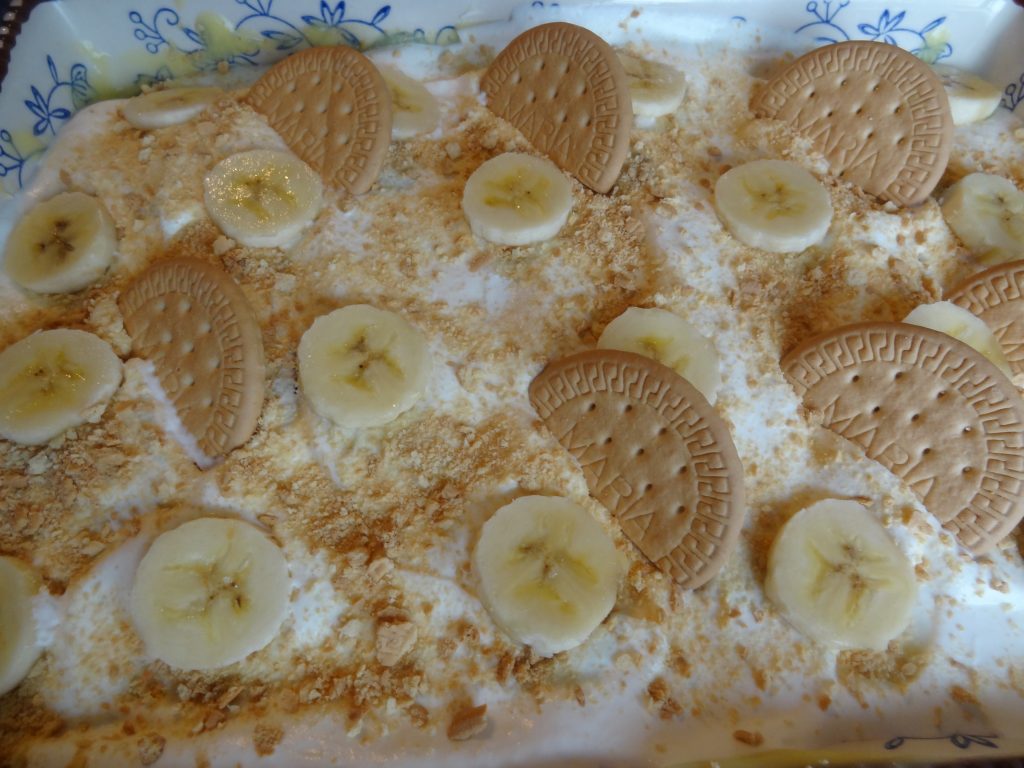
For banana lovers! This cake recipe tastes just like banana cream pie with and added fluffy and moist cake layer.
Perfect for party, pot luck and a summer picnic. I placed it in the refrigerator which gave it a cold sweet taste. It was a big hit with the family and bananalicious!
Ingredients:
1 boxed yellow cake mix recipe (follow package directions)
1 package of instant Vanilla pudding (follow package directions)
3 bananas (sliced)
10 Maria Cookies
1 cup heavy whipping cream
1 teaspoon vanilla
1 and 1/2 tablespoons confectioners sugar
Preparation:
Prepare cake as per directions in a deep baking dish.
While cake bakes prepare the pudding as per package directions. When slightly cooled poke holes with a wooden spoon.
 Spread pudding evenly over the cake and into the holes.
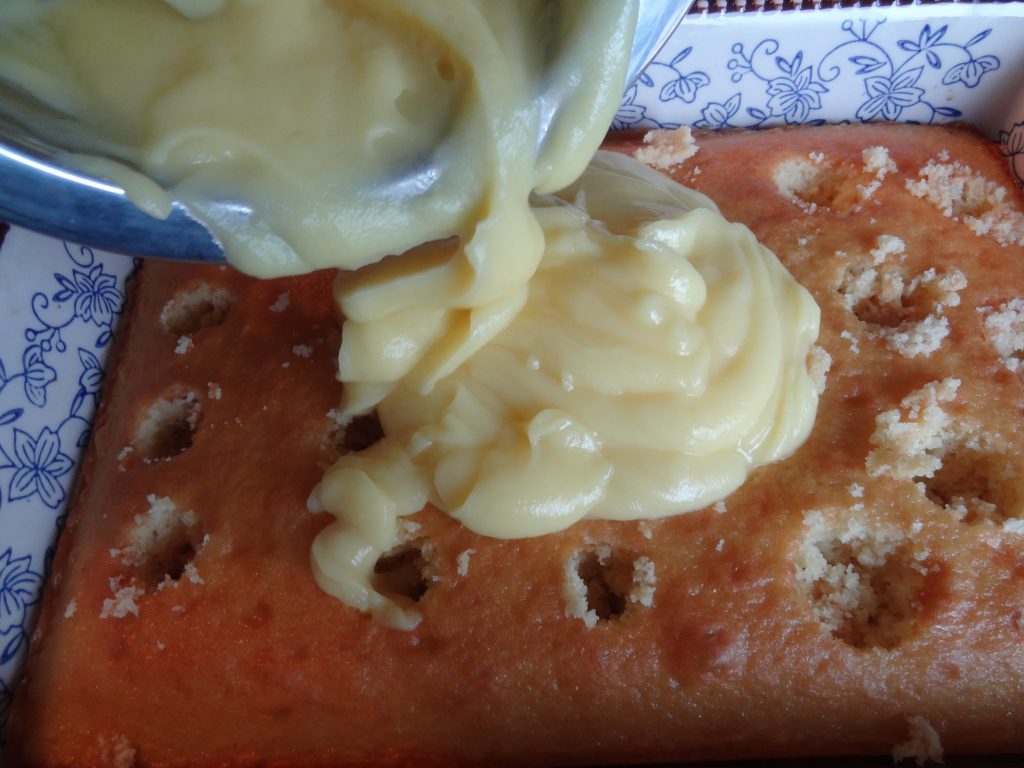 Top forming a layer with 1/2 of the banana slices over the pudding.
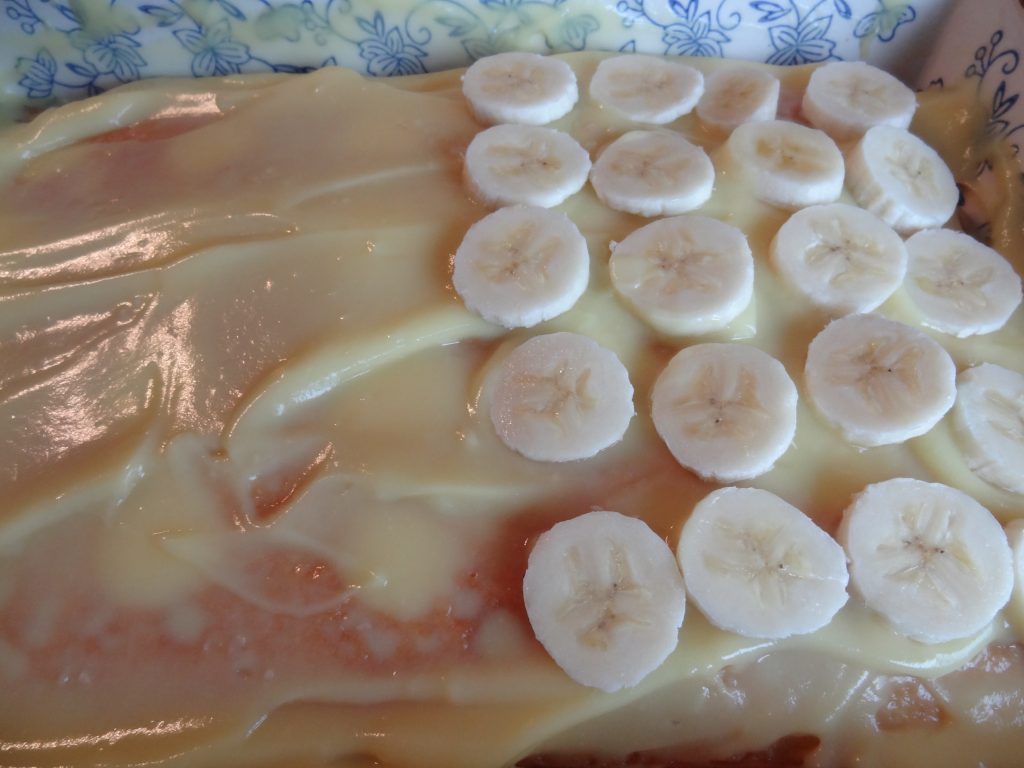 Prepare whipped cream by beating until soft peaks form. Add the sugar and vanilla and beat until stiff peaks form. Spread gently over the banana layer.
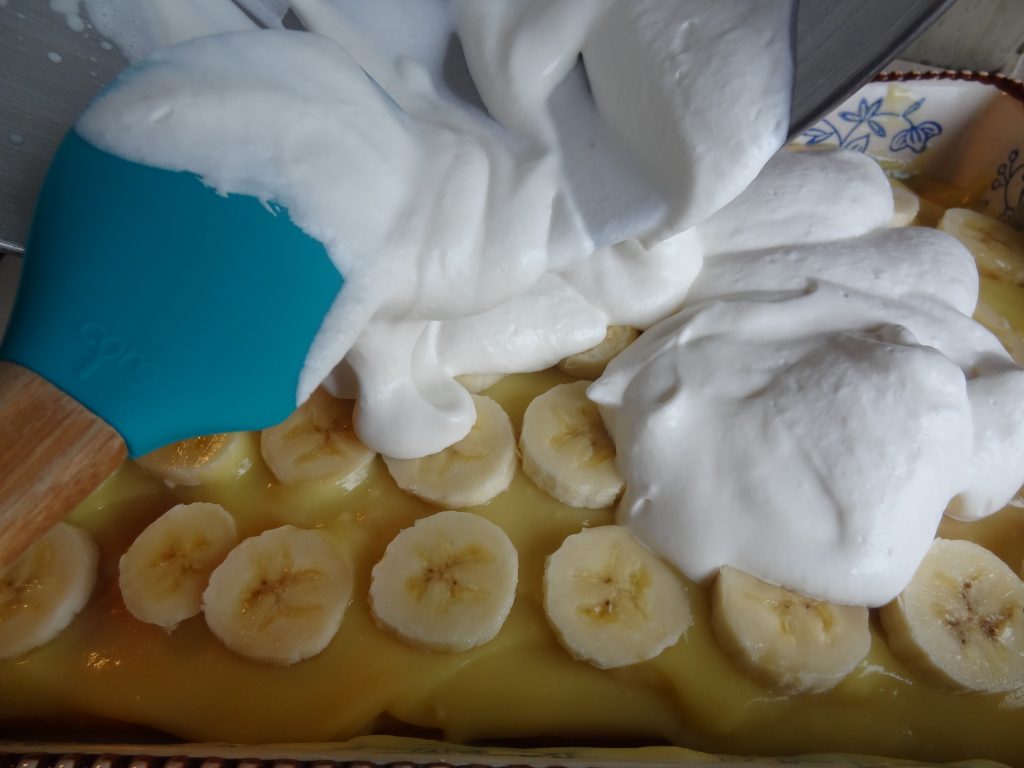 Gently cut the Bolacha Maria in half leaving the Maria letters. Crush the remaining cookies to fine crumbles.
 Top the whip cream layer with cookie crumbles.
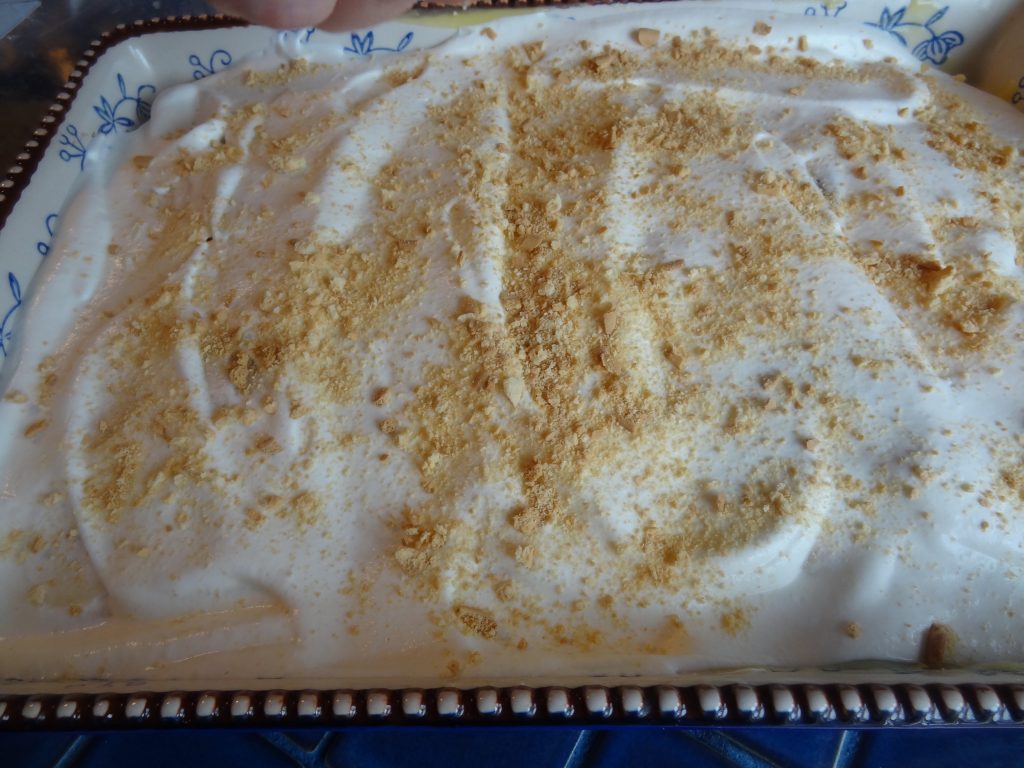 Top with the remaining bananas.
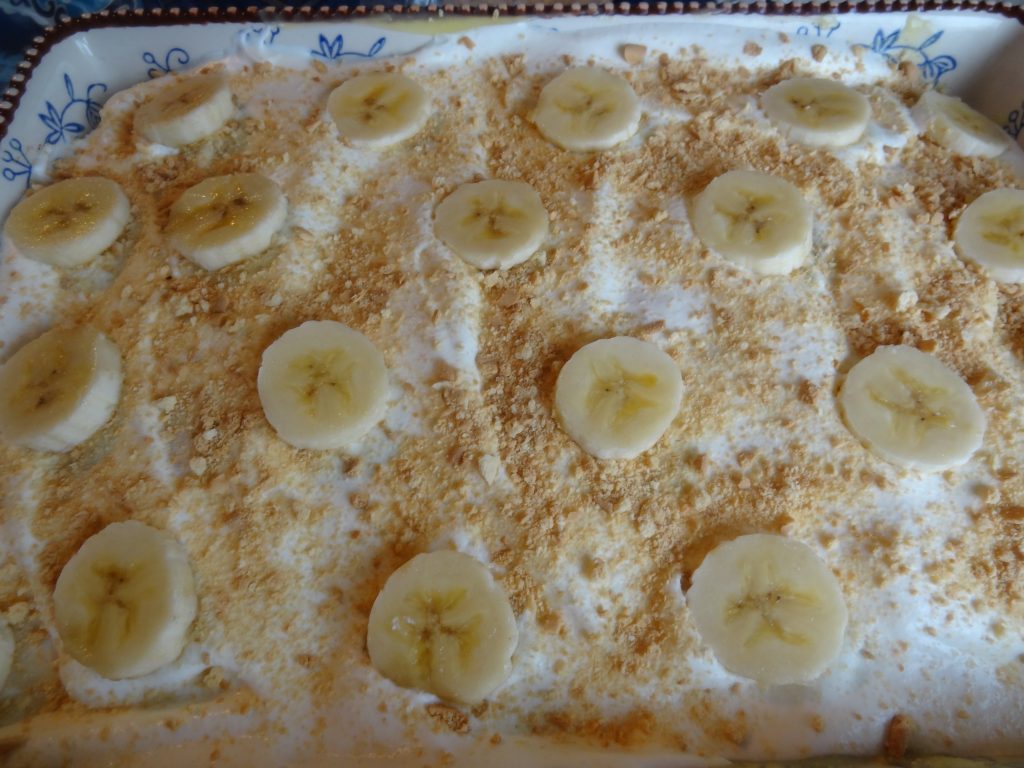 Arrange the cookies on top with the Maria name exposed.
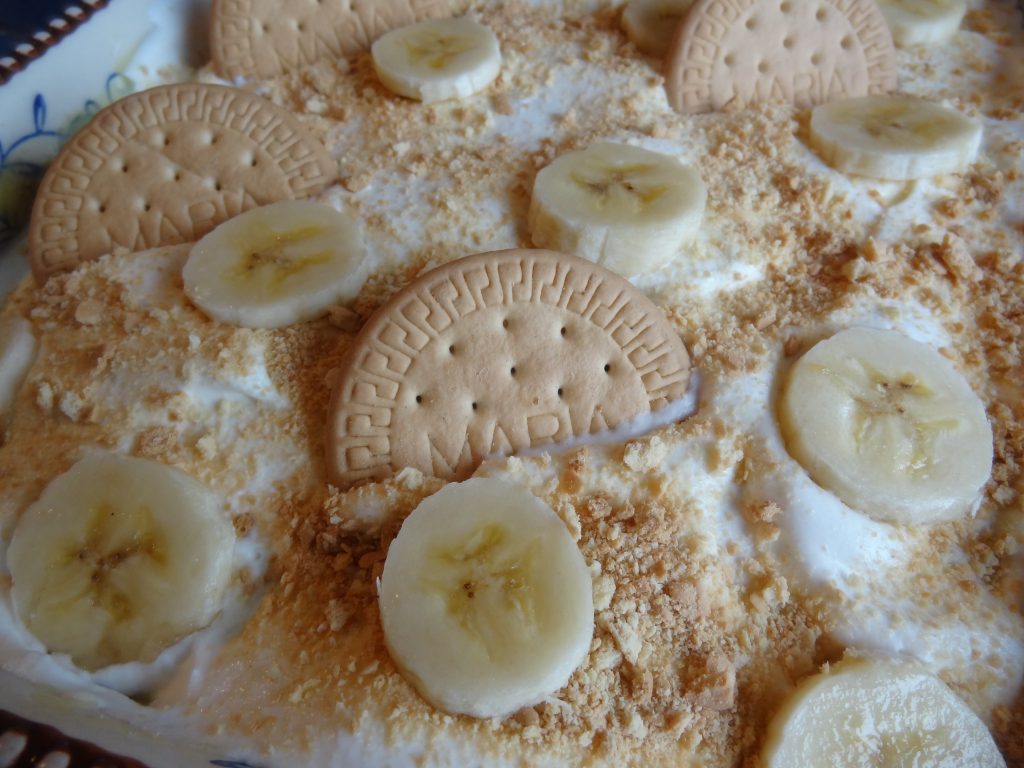 Cool cake in the refrigerator for a few hours if desired. Serve cold

David Leite, is an author, food writer and blog publisher. His first Portuguese cookbook, THE NEW PORTUGUESE TABLE, won the 2010 IACP Julia Child Award, as well as garnering other distinctions.
 Now the acclaimed author has just published his second book; NOTES ON A BANANA: A MEMOIR OF FOOD, LOVE AND MANIC DEPRESSION.
David, who’s family is Azorean was raised in Fall River, Massachusetts in what he cleverly calls a “food crazed Portuguese home.” I think most of us Portuguese American’s can relate to what he means by that little phrase.
The new book will be be published by Dey Street Books, a division of HarperCollins, in April 2017. Pre-Order on Amazon below. You can also order his award winning; THE NEW PORTUGUESE TABLE at the Amazon link below this post.
Visit David’s Blog; Leite’s Culinaria where you’ll find amazing recipes, Portuguese recipes, writings, giveaways and much more! Congratulations to David and we wish him continued success!
Amazon Review: NOTES ON A BANANA: A MEMOIR OF FOOD, LOVE AND MANIC DEPRESSION
The stunning and long-awaited memoir from the beloved founder of the James Beard Award-winning website Leite’s Culinaria—a candid, courageous, and at times laugh-out-loud funny story of family, food, mental illness, and sexual identity.
Born into a family of Azorean immigrants, David Leite grew up in the 1960s in a devoutly Catholic, blue-collar, food-crazed Portuguese home in Fall River, Massachusetts. A clever and determined dreamer with a vivid imagination and a flair for the dramatic, “Banana” as his mother endearingly called him, yearned to live in a middle-class house with a swinging kitchen door just like the ones on television, and fell in love with everything French, thanks to his Portuguese and French-Canadian godmother. But David also struggled with the emotional devastation of manic depression. Until he was diagnosed in his mid-thirties, David found relief from his wild mood swings in learning about food, watching Julia Child, and cooking for others.
Notes on a Banana is his heartfelt, unflinchingly honest, yet tender memoir of growing up, accepting himself, and turning his love of food into an award-winning career. Reminiscing about the people and events that shaped him, David looks back at the highs and lows of his life: from his rejection of being gay and his attempt to “turn straight” through Aesthetic Realism, a cult in downtown Manhattan, to becoming a writer, cookbook author, and web publisher, to his twenty-four-year relationship with Alan, known to millions of David’s readers as “The One,” which began with (what else?) food. Throughout the journey, David returns to his stoves and tables, and those of his family, as a way of grounding himself.
A blend of Kay Redfield Jamison’s An Unquiet Mind, the food memoirs by Ruth Reichl, Anthony Bourdain, and Gabrielle Hamilton, and the character-rich storytelling of Augusten Burroughs, David Sedaris, and Jenny Lawson, Notes on a Banana is a feast that dazzles, delights, and, ultimately, heals. (Amazon.com)
Order THE NEW PORTUGUESE TABLE:
 The Portuguese Community in the USA is embedded on both the East and West coastlines. One of the many examples is the Pedrozo family, a third generation of dairy farmers in California who have Portuguese roots in the Azorean Islands of Sao Jorge, and Flores. Their Pedrozo Dairy and Cheese farm produces Sacramento Valley California’s best Farmstead cheese made from 100% grass fed cow’s milk. The cheese is outstanding and I especially enjoyed the Black Butte Reserve which tastes similar to my favorite Portuguese Sao Jorge Cheese.
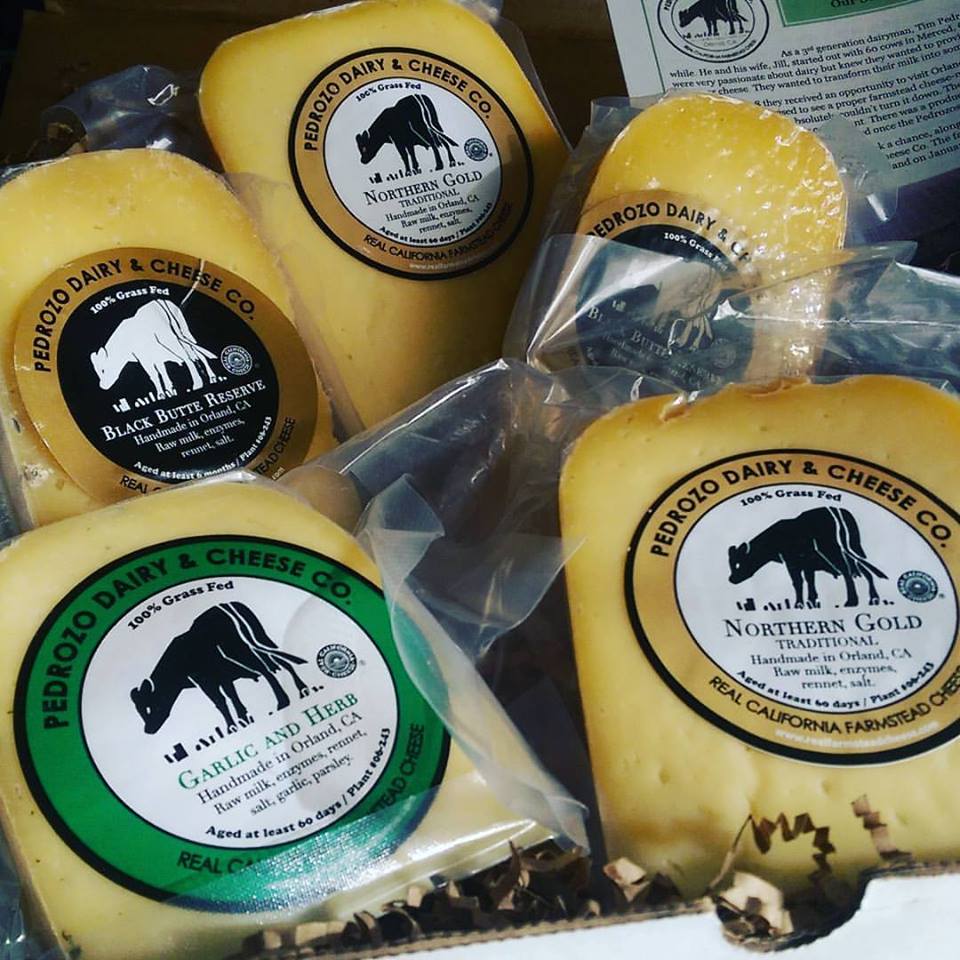
Their vision is to inspire a vision of premier, ecological, heritage farming through a sustainable, family-run grass-fed dairy and cheese operation. To achieve this vision, they produce high quality, traditional farmstead cheese, offer education, tours, they are a resource for the dairy industry and have a total commitment of respect for the cows and the land.
They can be found in various farmers markets and retail shops in California or simply Visit their online shop!
Pedrozo Cheese Featured on Delicious Discoveries with Chef Daniella Malfitano from Element Video Productions on Vimeo.

Pedrozo Dairy & Cheese Co
7713 County Road 24 Orland, CA 95963
Tel: 530-514-3837
Email: tim@realfarmsteadcheese.com
My husband Augie loves, Pizza, football and Piri Piri hot sauce! For this year’s Super Bowl, I’m making him his favorite buffalo style pizza.
I use piri piri (Portuguese red pepper sauce) but you can use your favorite hot sauce as a substitute! Go Patriots! 


Piri Piri Buffalo Pizza
Ingredients:
1 pound pizza dough
1 tablespoon olive oil
1 teaspoon garlic powder
2 cups cooked cut up chicken
1 cup ricotta or cottage cheese
1/2 cup blue cheese salad dressing
1/4 cup ranch dressing
1 and 1/2 cups shredded mozzarella cheese
2 tablespoons piri piri sauce or Tabasco sauce
Corn meal for dusting pan
Preparation:
Preheat oven to 425 degrees F. Sprinkle a sheet pan with a heavy dusting of corn meal. Roll out the dough to the length of your sheet pan. Brush the edges and the pizza dough with the olive oil. Mix the dressings and piri piri together in a small bowl. Spread the ricotta cheese mixture evenly over the dough, sprinkle with garlic powder and top with the chicken pieces. Top with the piri piri and dressing sauce.

Top with cheese and then sprinkle the rest of the piri piri sauce. You can use a much as you like! The hotter the better!
To make a Calzone, roll up the pizza dough gently pinching all sides. Make a batch of extra piri piri sauce (1 tablespoon piri piri, 1/2 cup blue cheese and 1/4 cup ranch dressing) for dipping.
Cook on center oven rack, for about 15-20 minutes until golden brown.

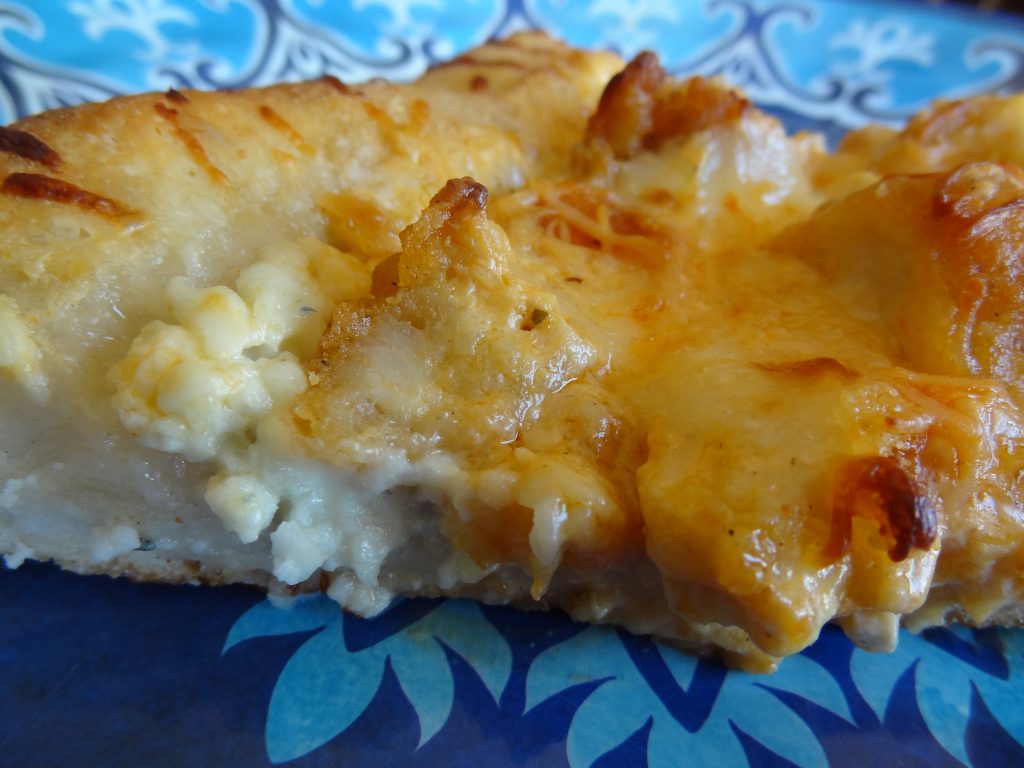

Are you drooling yet? My family went crazy when I made this bread and it disappeared the same day! I barely had a chance to take the photo of the finished bread for this post.
Making this bread is simple and you can substitute any meats you have on hand. Feel free to use more varieties of meats. I had a few slices of salami, so I added them. I used store bought fresh pizza dough from the market but you can follow the recipe below and make your own.
I suggest you make 2 and save one for the next day. It’s also a perfect treat to bring along for your next party this Holiday Season! 🙂
Watch this video of the bread fresh out of the oven!
Ingredients:
1 + 1/2 pound of store bought pizza dough or make your own (recipe below)
1 small chourico or linguica sausage (cut into thin slices)
3 or 4 slices of ham (cut into strips)
3 slices of salami (optional, cut into strips)
1 medium onion (sliced)
1 medium red pepper (sliced)
1 cup of shredded cheese
1 tablespoon plus 1 teaspoon olive oil
1 tablespoon of coarse corn meal
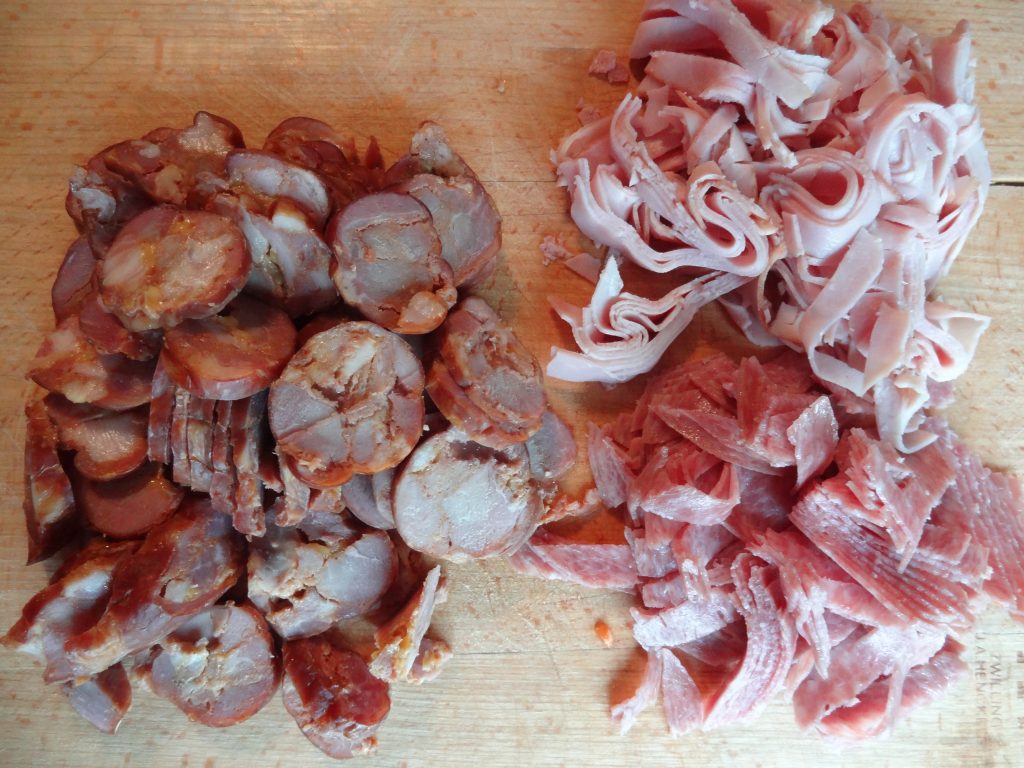
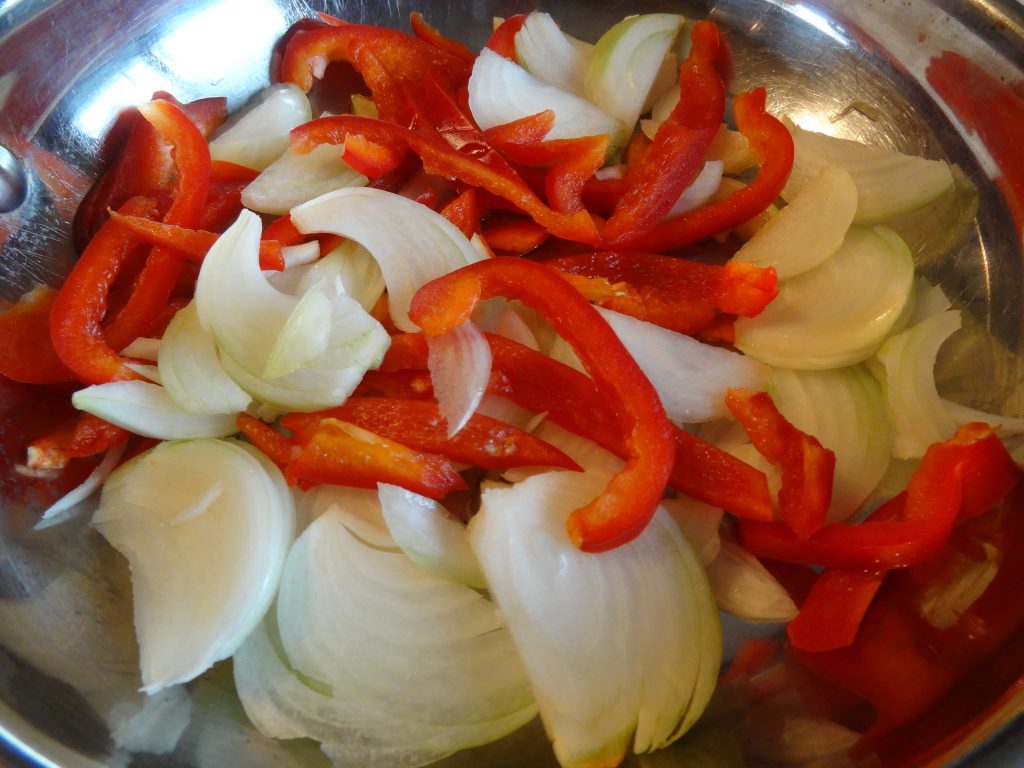
Pizza Dough
3 1/2 cups of flour
1 teaspoon sugar
1 envelope instant dry yeast
2 teaspoons salt
1 1/2 cups warm water
2 tablespoons olive oil
In a medium bowl mix the dry ingredients. Add the water and oil and mix until a ball forms. It you find the dough too sticky add more flour. Grease a large bowl with olive oil and add the dough rolling it to coat with the oil. Cover with plastic wrap, cover with a warm towel, and place in a warm place for about 1 hour until the dough doubles in size.
Preparation:
Preheat oven to 425 degrees F.
Saute the onions and peppers for a few minutes in 1 tablespoon olive oil until translucent and set aside to cool
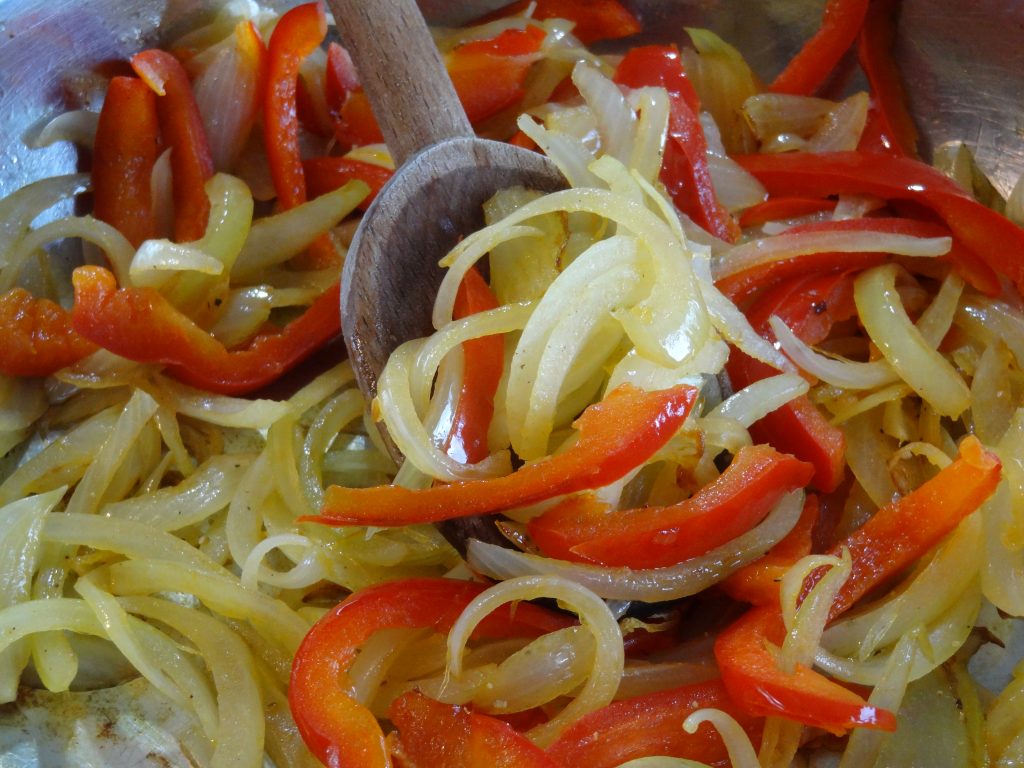
Roll out the dough into a large rectangle. Add a layer of onions followed by a layer of meat.

Begin gently rolling the dough evenly.

Sprinkle the corn meal on a large sheet pan or pizza pan. Place the bread on pan. Brush with a little olive oil.
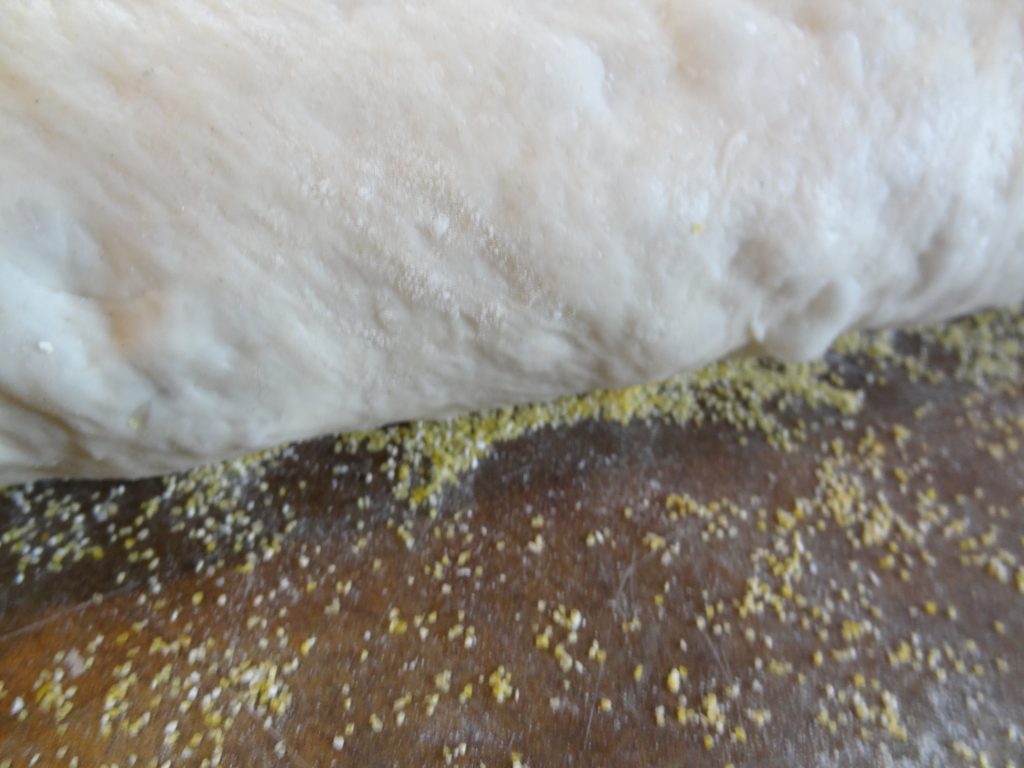
Cook for 20 minutes or until the bread is golden and crispy.

Let cook slightly before cutting. Take a bite and start drooling! Enjoy!


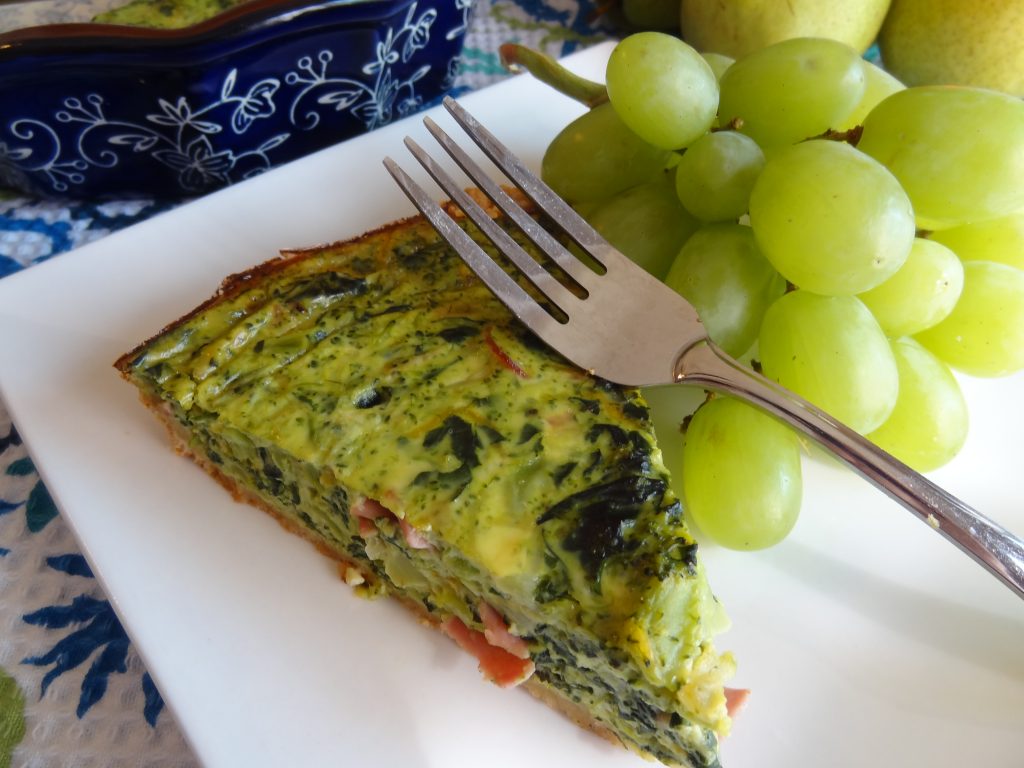
This Spinach Broccoli and Presunto (prociutto) Quiche is savory and mouthwatering. Easy to prepare for a simple lunch, snack or dinner!
You can leave out the presunto if you want a vegetarian quiche. Enjoy!
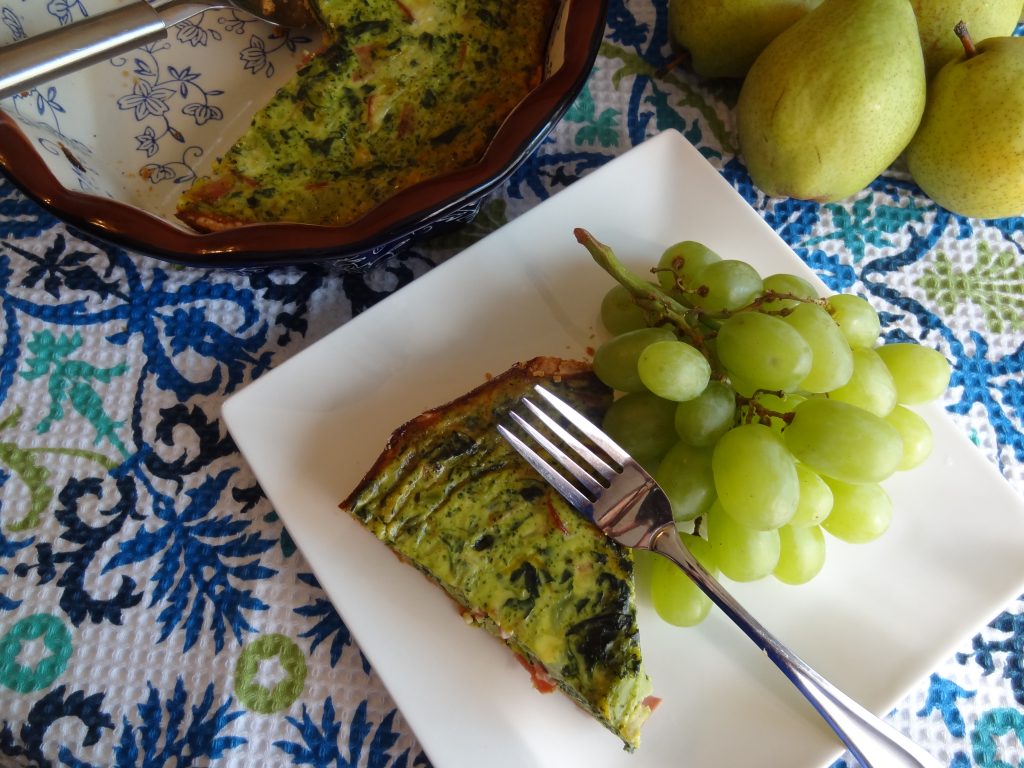 Ingredients:
1 refrigerated pie crust
1 pound fresh broccoli spears (chopped)
1 and 1/2 pounds fresh spinach (approximate)
1 small onion (minced)
1 clove garlic (minced)
3 slices of presunto or ham (cut into small dice)
5 whole eggs
1 and 1/2 cups whole milk
2 tablespoons butter
1/2 teaspoon salt
1/2 teaspoon pepper
8 ounces of shredded cheese (any favorite)
Preparation:
Preheat oven to 375 degrees F.
Prepare pie crust by pressing into a large tart pan, or pie dish.
Saute the onion, garlic and presunto in the butter until onion is translucent. Add the broccoli and cook for a few minutes. Add the spinach and cook until slightly wilted. Season with the salt and pepper.
Drain any liquid and set aside to cool.
Meanwhile, beat the eggs in a medium bowl. Add the milk and cheese and mix well.
Pour the broccoli mix evenly over the pie shell then the egg mixture. Be sure the broccoli is submerged in the eggs.
Cook for about 35-45 minutes until golden. Test by poking with a fork which come out clean.

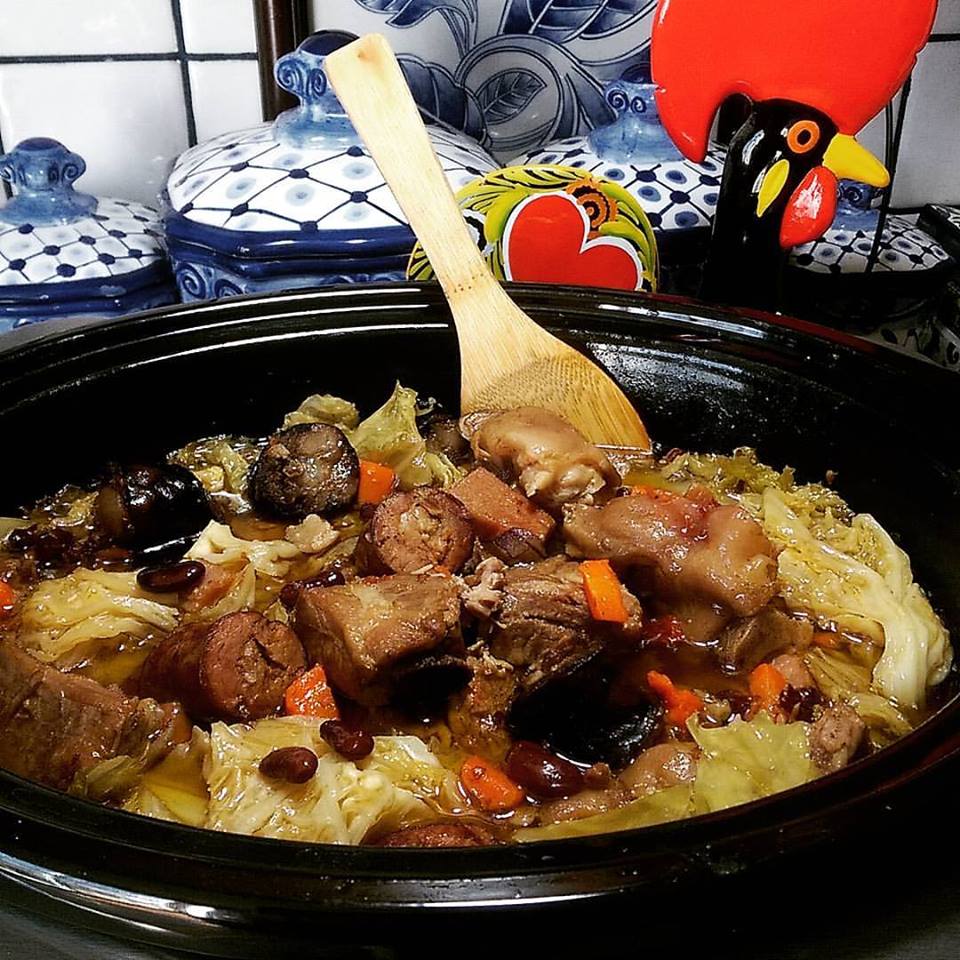
Feijoada originated around the 14th century in the Northern region of Portugal. Generally, Feijoada is made with white beans but in the Tras os Montes region, red kidney beans are used.
During that time meat was scarce, so the poor peasants began using every part of the pig as a staple in their diets along with beans and cabbage which were easily available.
This dish is great served with classic Portuguese rice recipe and Portuguese Bread.
This was the first time I made this recipe in the crock pot and I was so happy with the results that I will be making it this way from now on. The stew cooks itself and the meats come out moist and juicy.
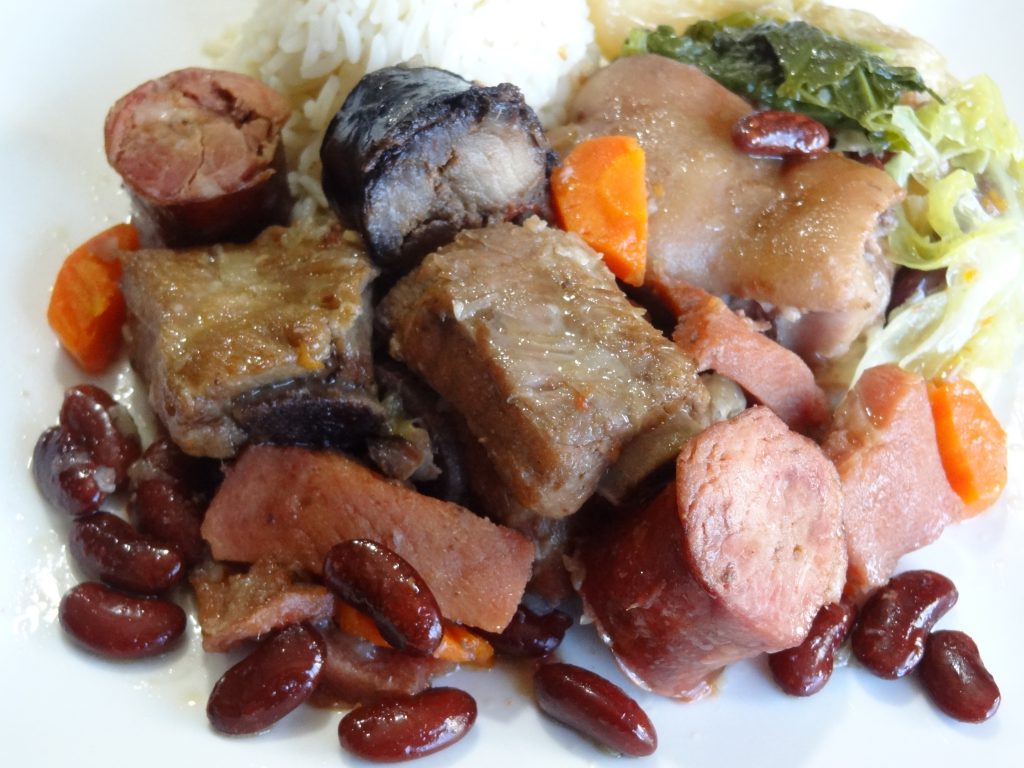
Ingredients:
Need 1 large 6 quart crock pot
1 lb baby back ribs (cut into small riblets)
1 lb chourico sausage (sliced into 1 inch slices)
1 lb blood sausage (cut into(if desired)
1 lb presunto, smoked shoulder ham, or salted pork belly cut into 2 inch strips
1 lb pig hocks or knuckles, pig ears etc. (optional)
1 small regular cabbage, savoy cabbage or any green leafy cabbage (cut into quarters)
2 carrots (sliced)
1 large onion finely chopped
2 large cloves garlic chopped
1/4 cup olive oil
2 bay leaves
1 teaspoon salt
2 or 3 large 32 oz cans cooked kidney beans
1 medium ripe crushed tomato
2 cups of chicken or vegetable broth
Preparation:
Day before salt the ribs and pig hocks or knuckles with 2 tablespoons of coarse salt. Leave overnight in the refrigerator to marinate. Note: You can leave the pork in salt for 3 days before cooking.
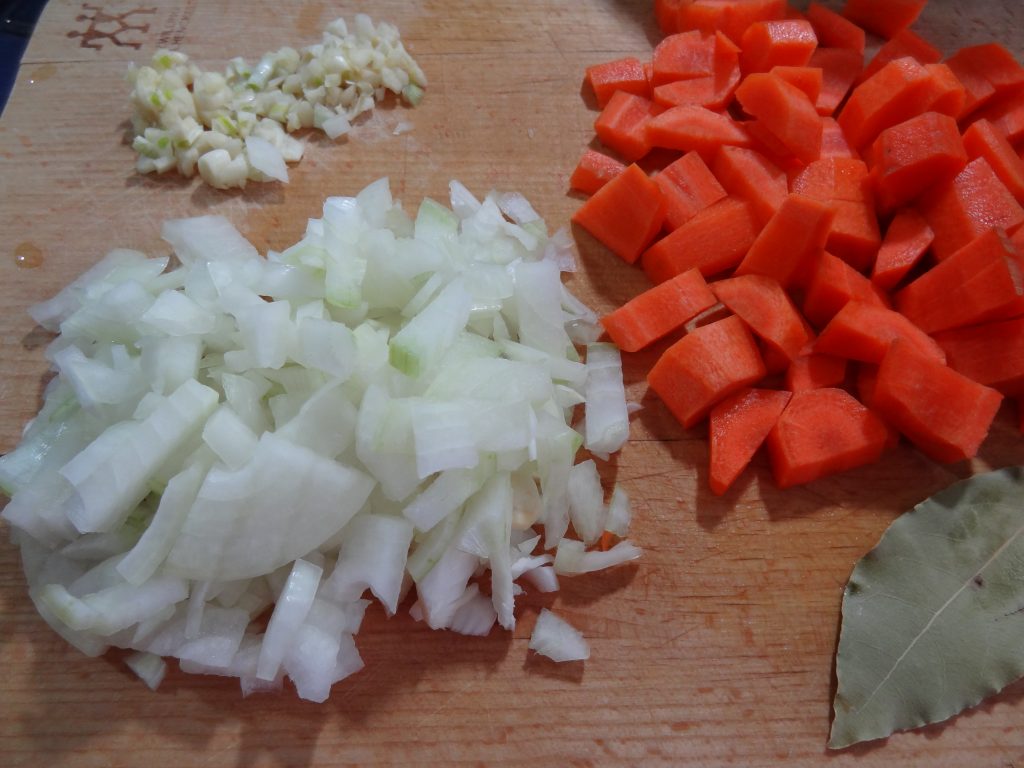
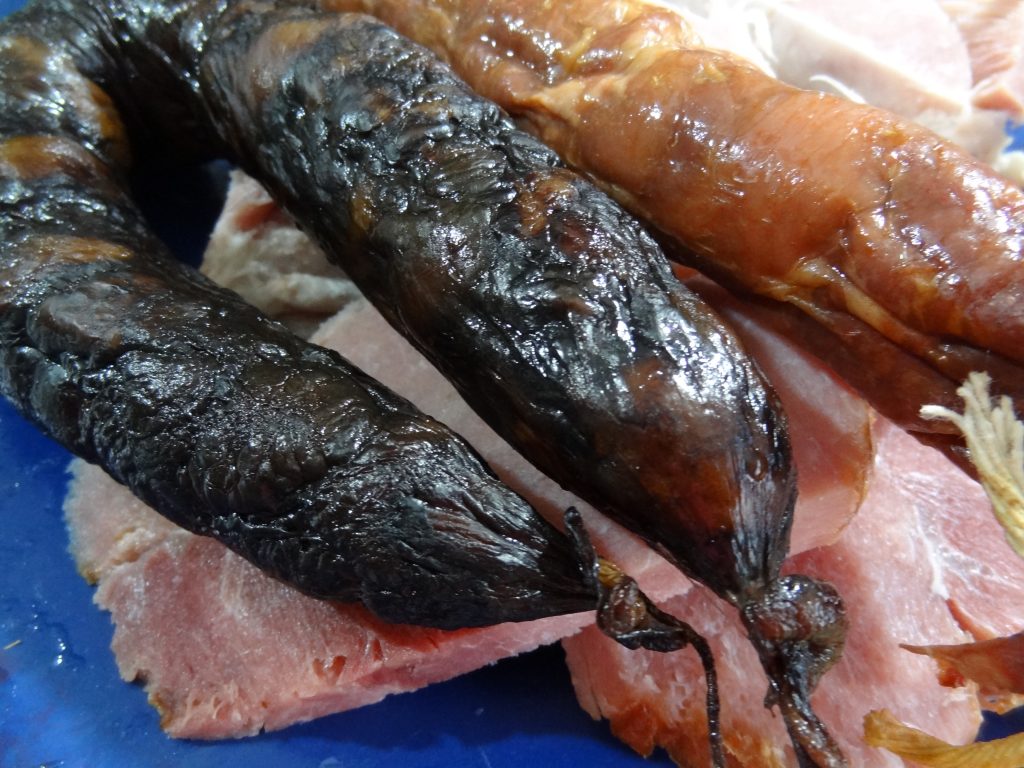
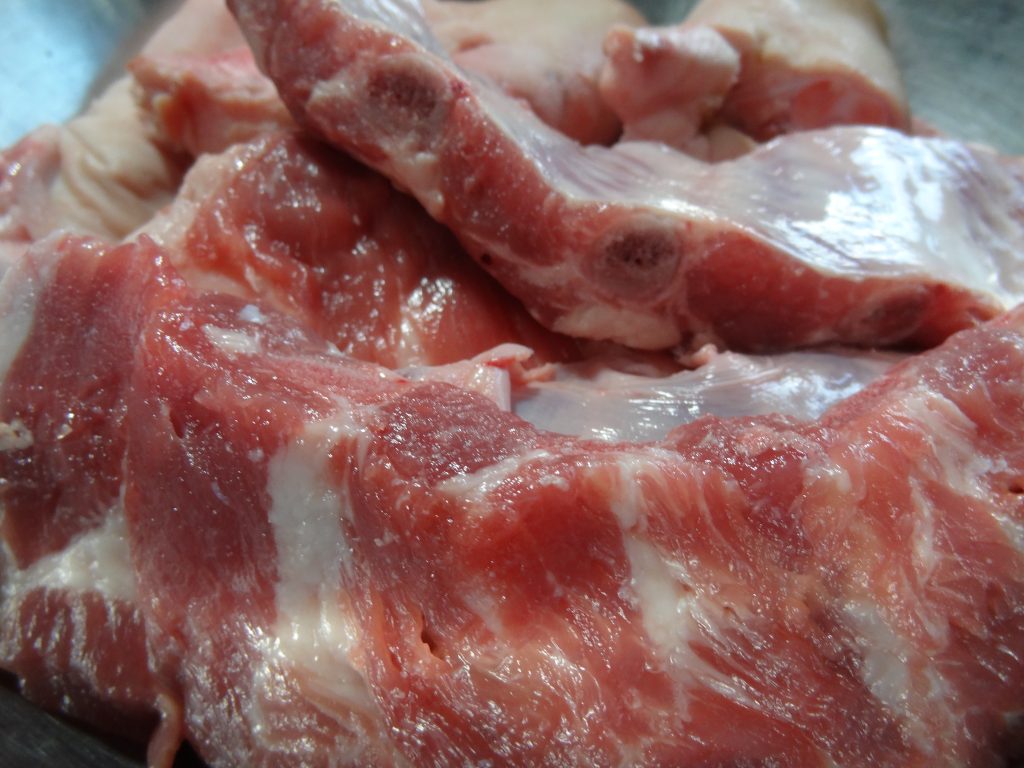
When ready to cook saute the onions, garlic and bay leaf with olive oil in a heavy saucepan for about 3 minutes. 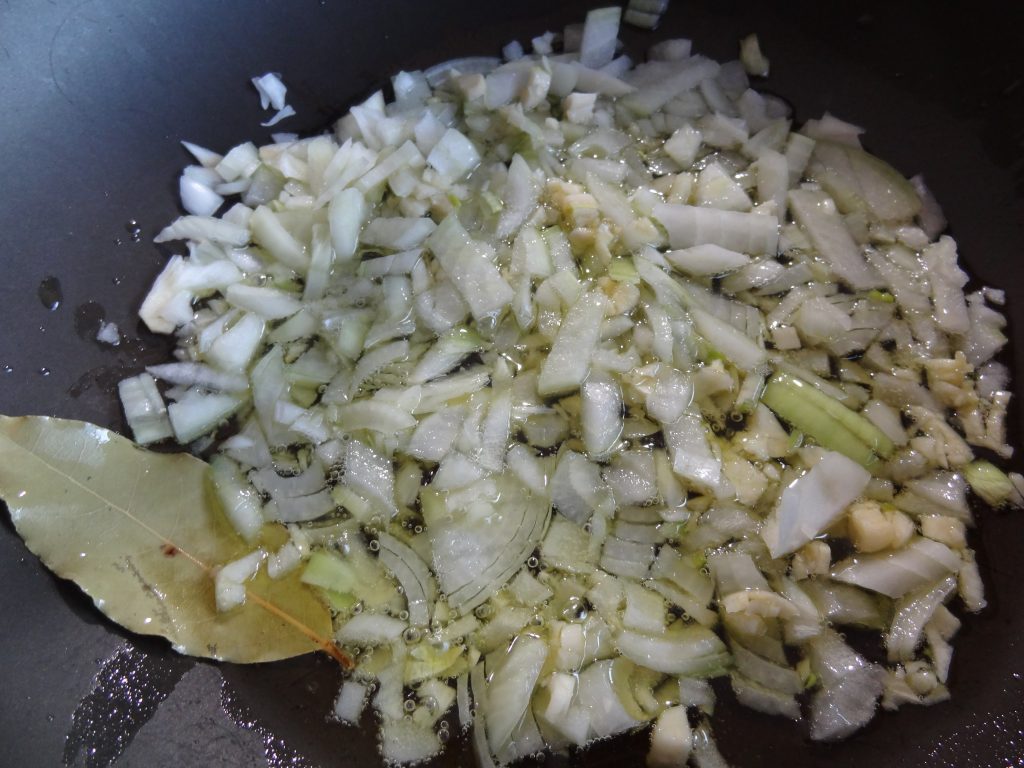
Add the meats to the onion and brown on all sides.
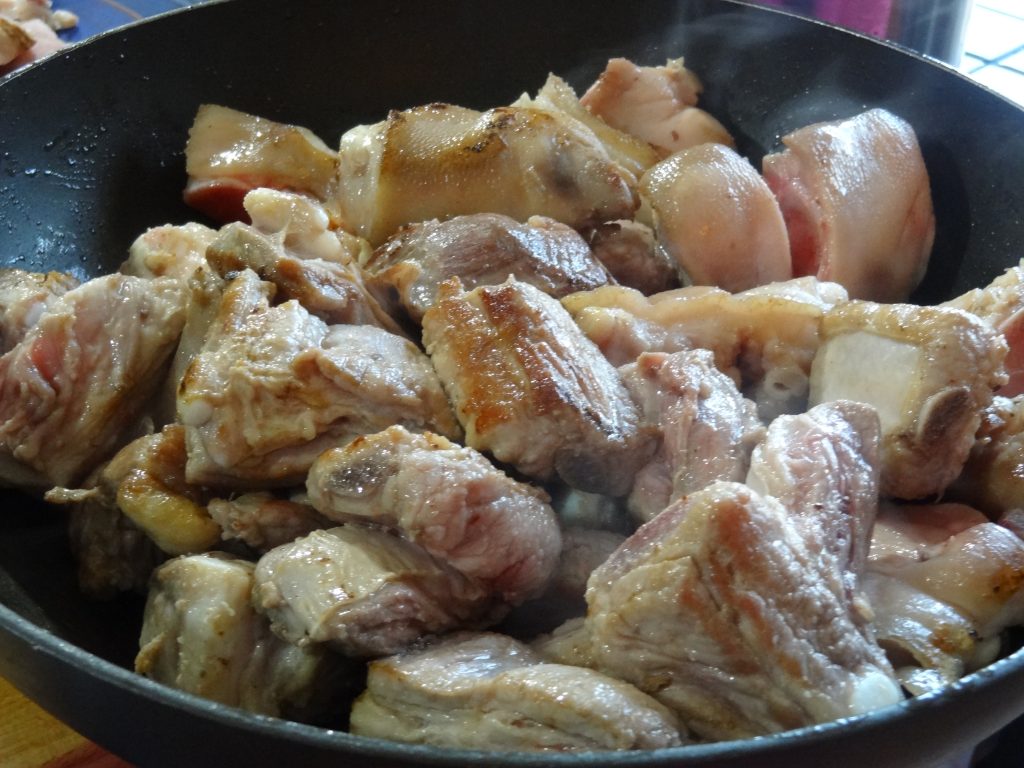
Turn crock on high. Begin layering; onion mix, the meats, carrots, ham
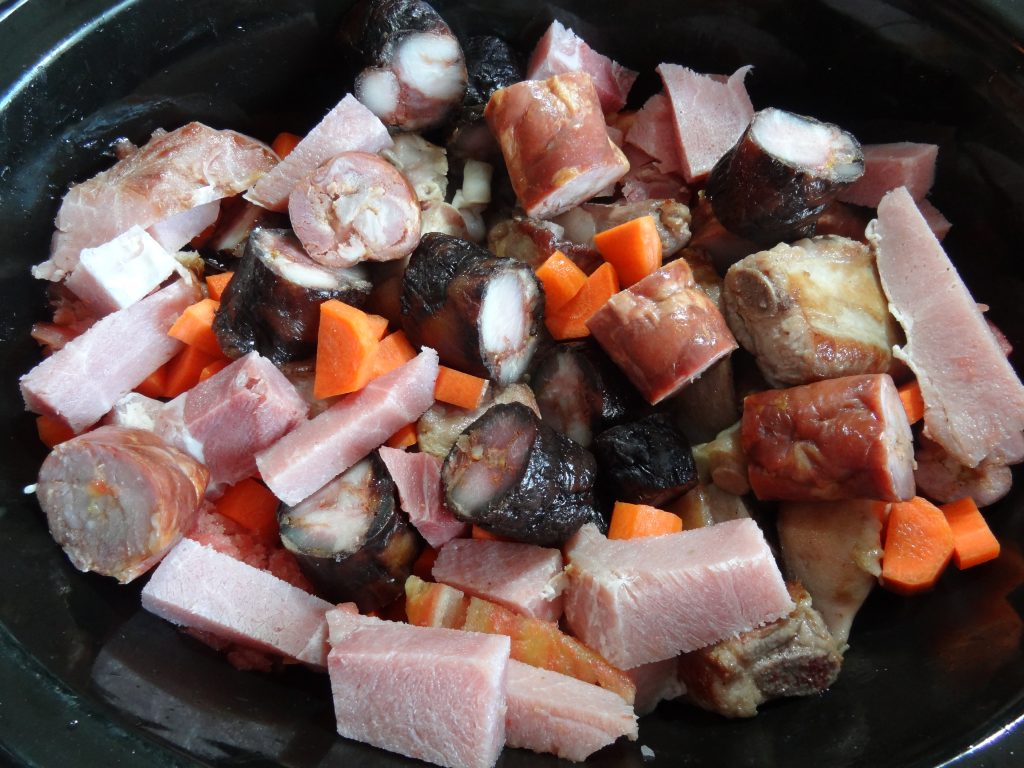
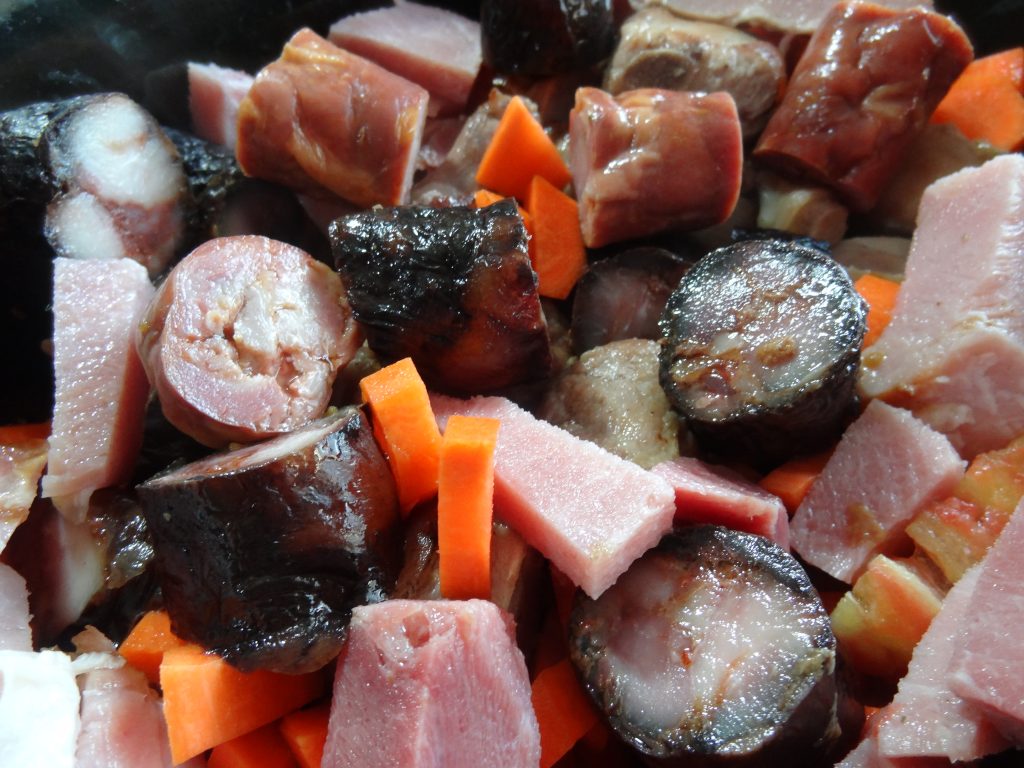
Add the cans of beans.
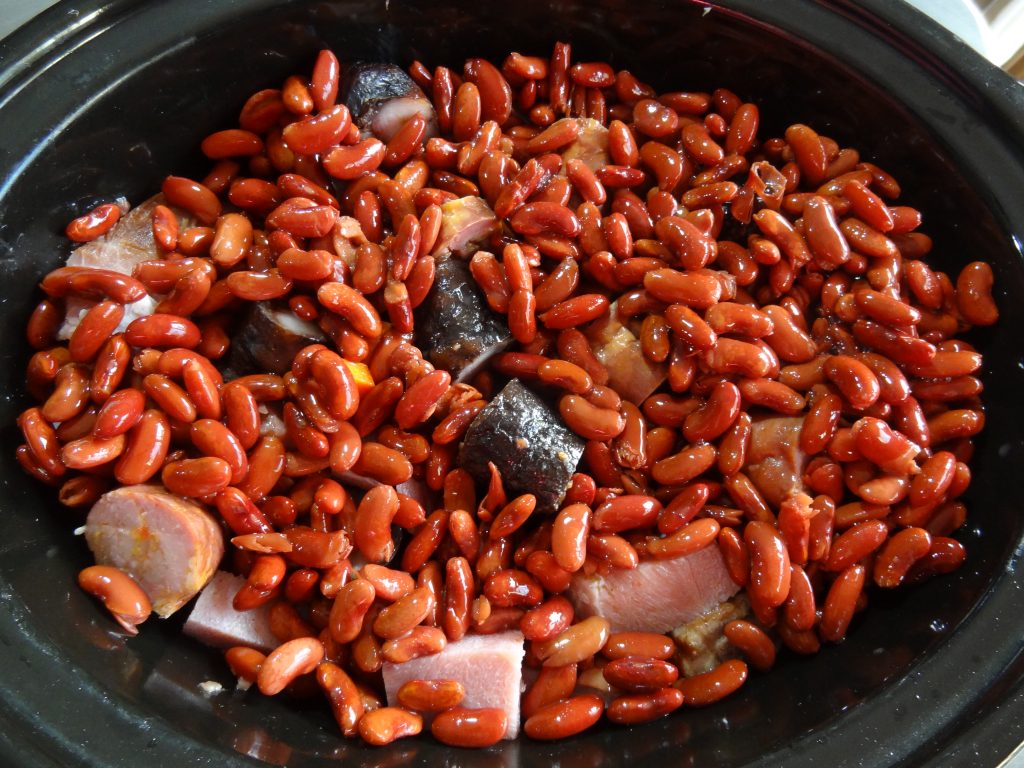
Add the broth and tomato.
Top with the cabbage.
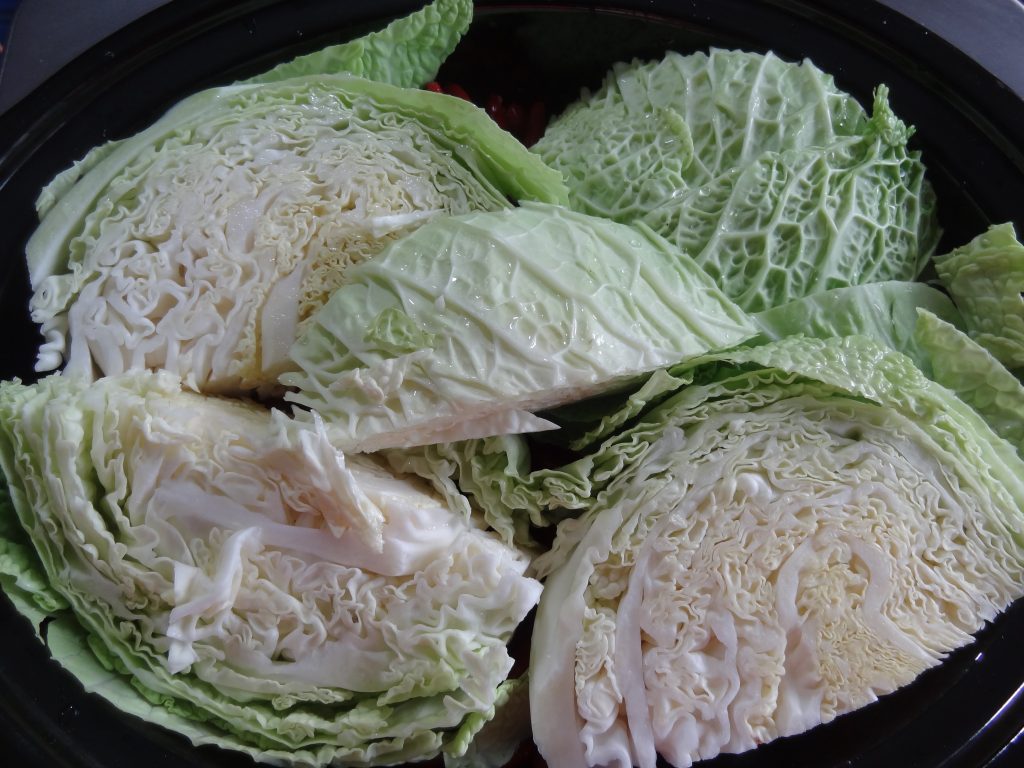
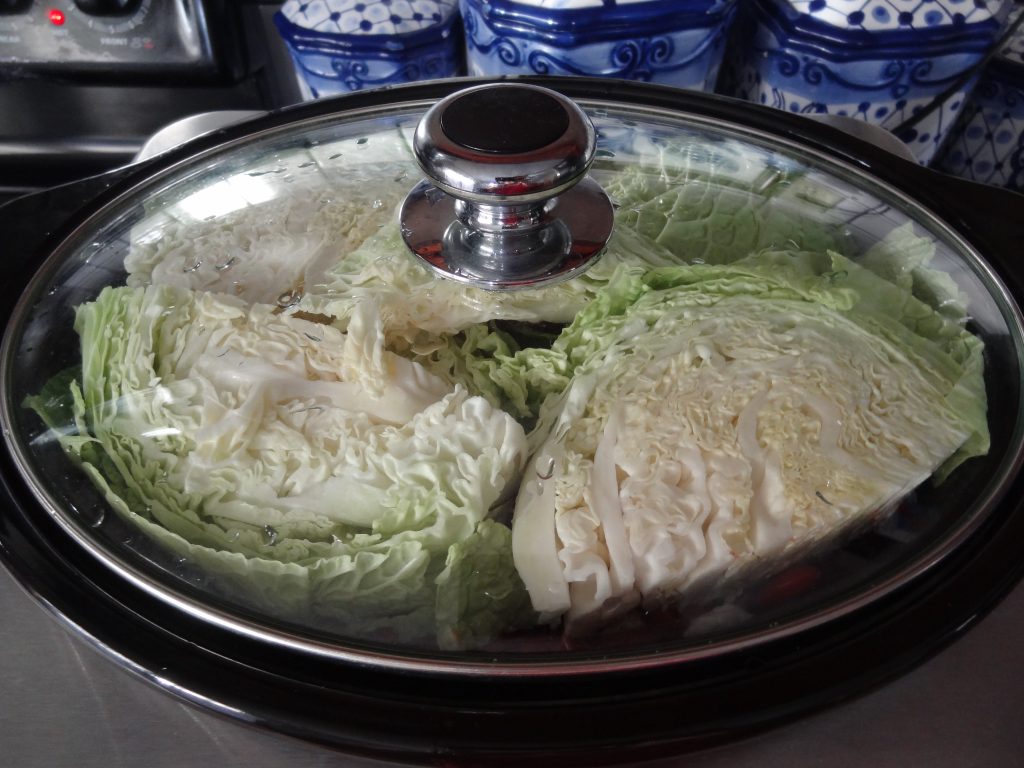
Be sure the lid covers the cabbage. Set the timer for 8 hours on high.
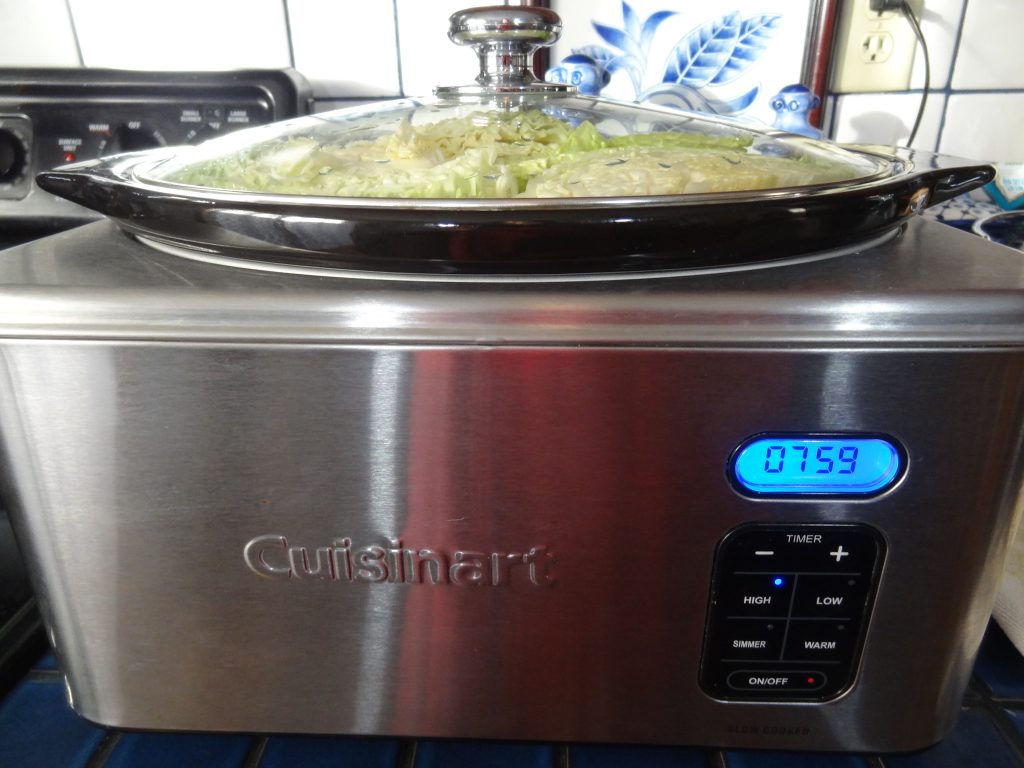
After 4 hours stir gently and lower heat to low. 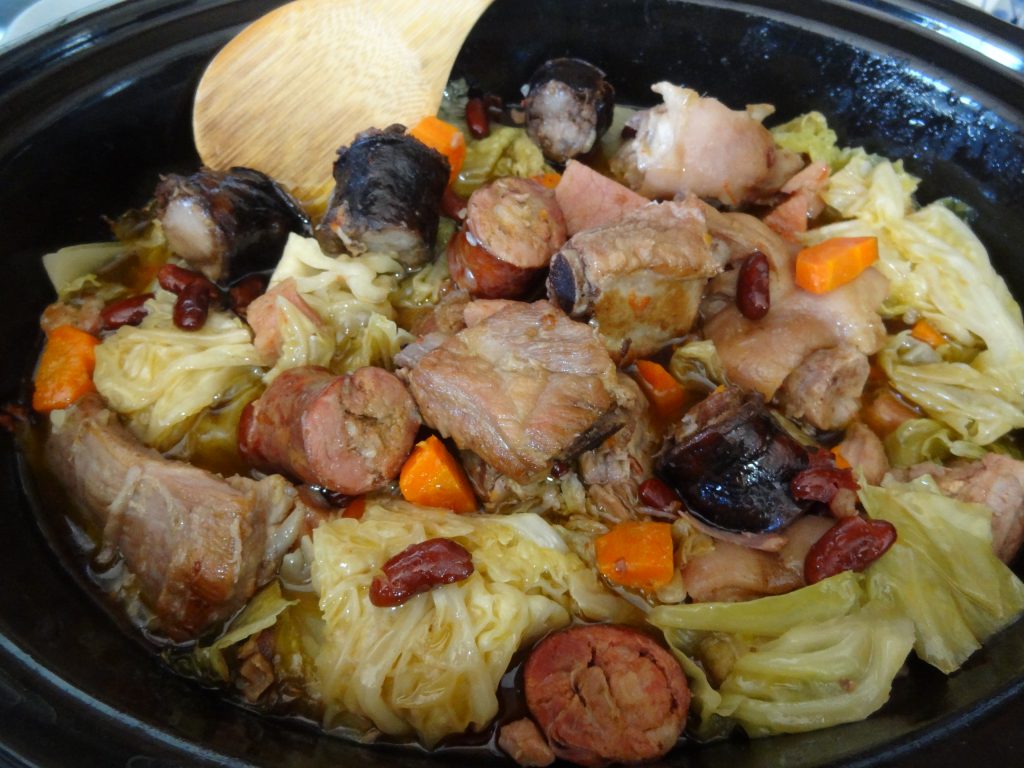
After a few hours check the ribs and pork for doneness. The meat should fall off the bone but intact. The longer it cooks the more flavor it gets. You may need to cook the stew longer or it may be cooked depending on the heat of your crock pot.
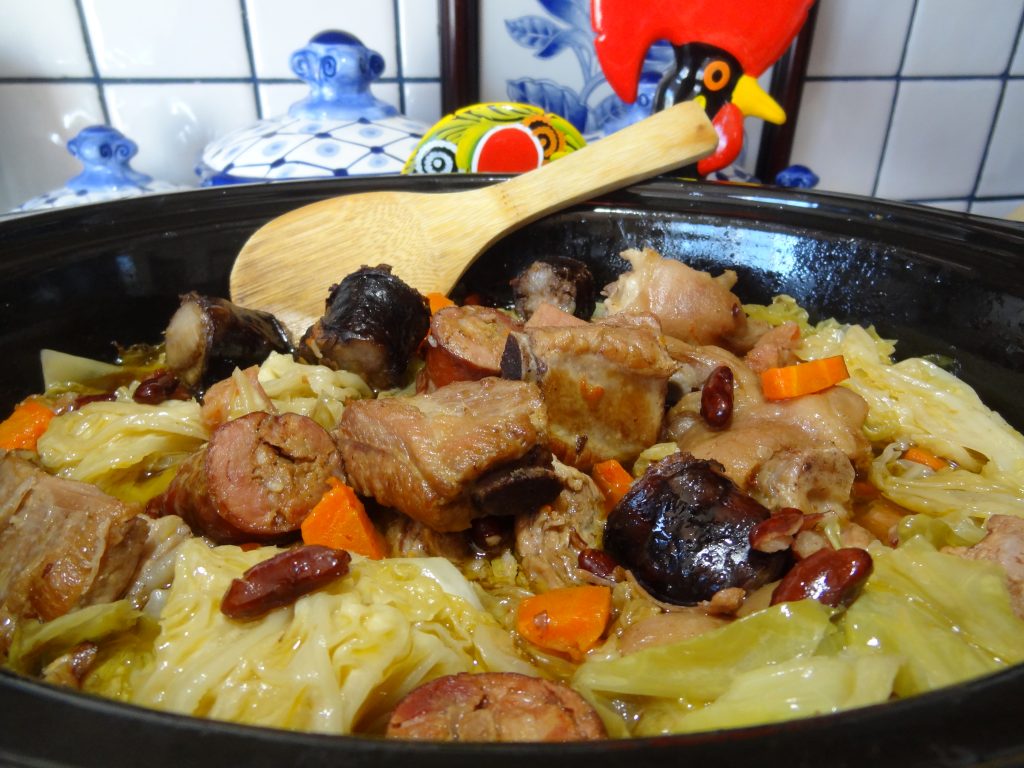
Click here to watch full video: Source: Notícias do Meu País – Episódio 9 – RTP Play – RTP
Hi everyone. Here is the full length video of my episode which aired around the world on RTP!
I hope you enjoy it as much as my family and I did. This was an experience of a lifetime for our family which we will never forget. It brought back sweet memories of Portugal, it connected us to our relatives and it inspired me to keep cooking Portuguese recipes to keep our beautiful traditions, culture and cuisine alive for the next generations.
Thank you from the bottom of my heart to Notícias do Meu País, RTP TV, the host, Tiago Góes Ferreira, and the film crew; Director, Miguel Costa E Moura, Production Assistant, Rita Batista, and Cameraman, Marcel Reis, for making my dreams come true!
Heartfelt thanks to my family both here, in America and in Portugal for their love and support.
A special thank you to Chef Justa Nobre for her wonderful words of inspiration and encouragement! ![]()
![]()

Me and the film crew in Ludlow

Me and Tiago

At Randall’s Farm in Ludlow

Sharing memories from Portugal

At Randall’s Farm

Our family says goodbye!
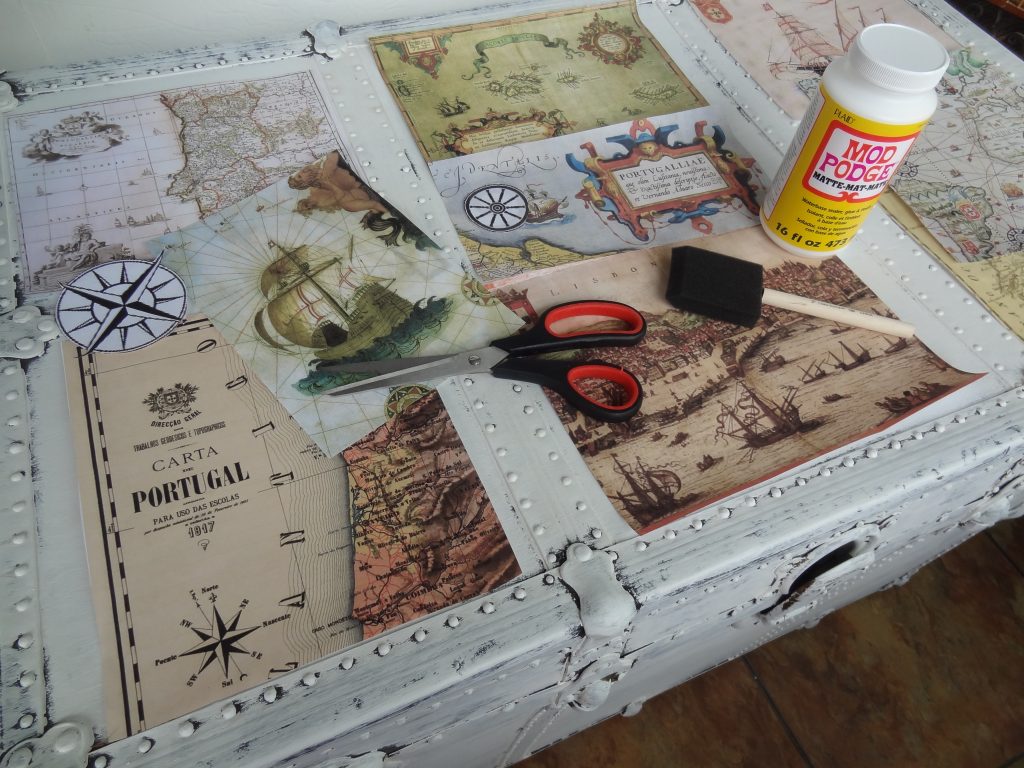
This old antique trunk was dark brown, faded and worn out from over 100 years of travel. It belonged to my Tia Isabel (Aunt Isabel) who traveled to America in 2016 on a ship from Lisbon to Ellis Island in New York City. She was only 16 years old and traveled alone on that ship to come to America the Land of Opportunity during the Industrial Revolution. Now I have a family heirloom which makes a great conversation piece. If you don’t want the Portuguese theme, use any country or destination of your choice. Since most of us are immigrants I’m sure we can all represent our heritage some way. Have fun!
Supplies:
Old maps (I used old maps of Portugal and maps of the Portuguese explorers)
Nautical decals of your choice
Portuguese crest (optional)
1 bottle of decoupage (white matte)
Scissors
Sponge brush
Polyurethane
Instructions:
Paint the trunk with a few coats of white, beige or any color primer you chose. Find old maps on the internet. Here’s a link to some map images.
Cut the maps to fit the tops of the trunk or you can go all the way around if you prefer.

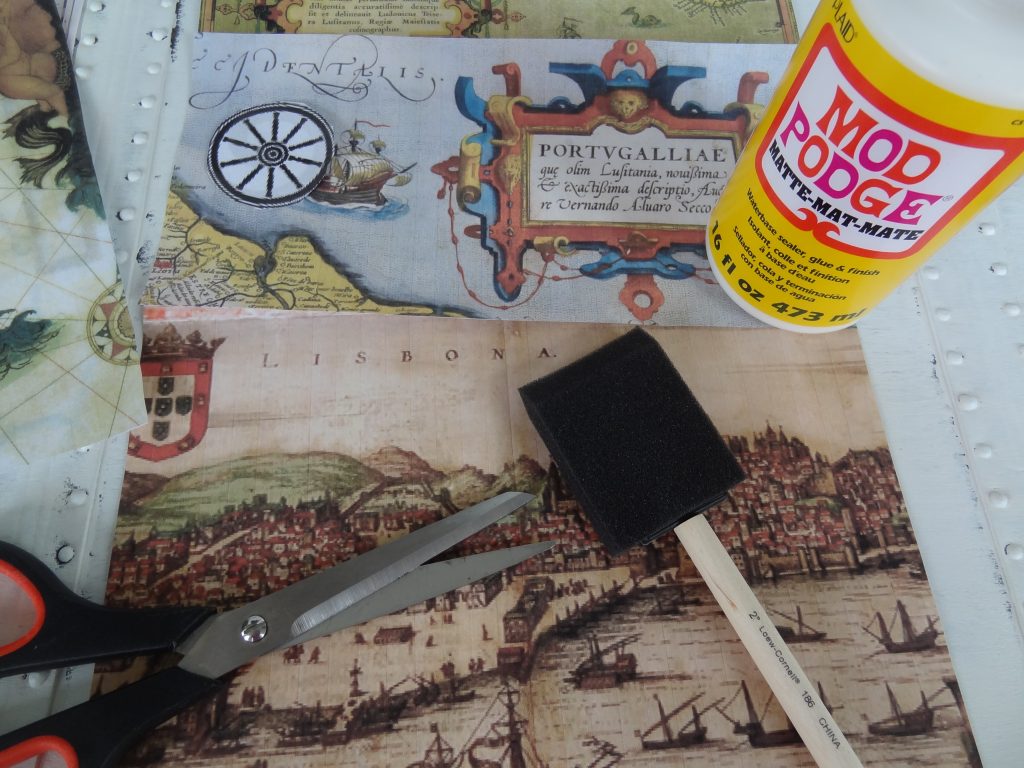
Lay out the maps and decals to make a great pattern or look you want. When ready start coating each section of trunk under the maps with decoupage piece by piece, then gently place the map over the decoupage. Smooth out the wrinkles as you lay on each piece.

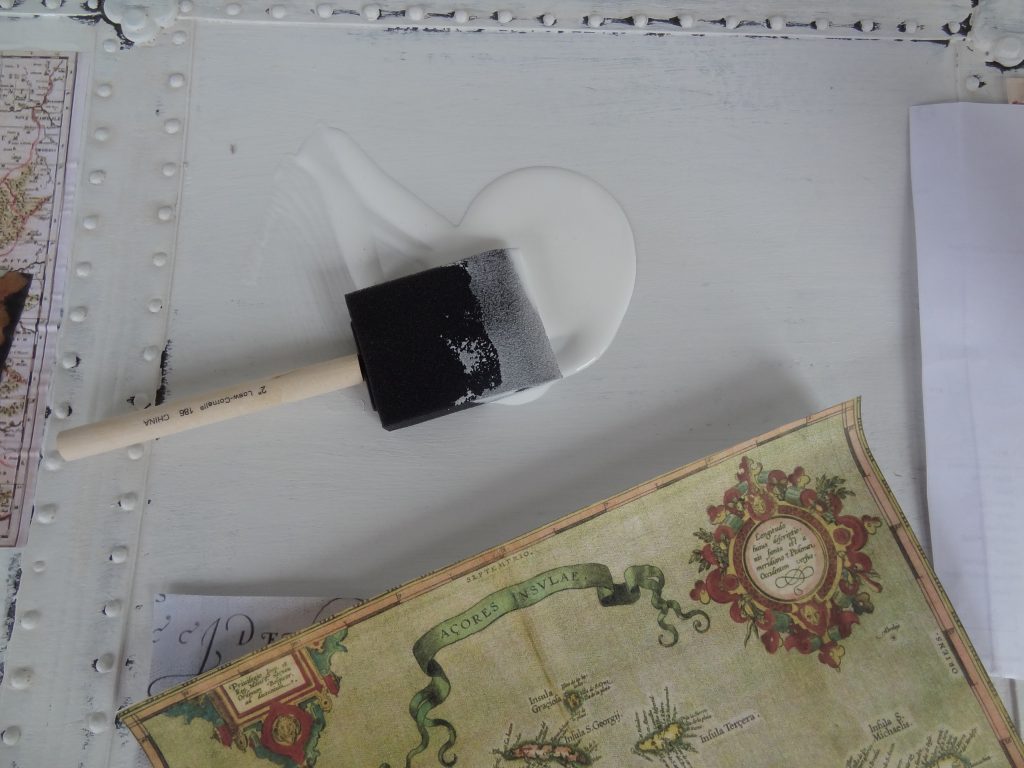


After sticking on each section of map, let the whole thing dry for a few hours and coat with a layer of decoupage. Let dry at least another 2 hours and coat with another layer of decoupage.

When completely dry paint over with a coat of polyurethane.
 Place desired monogram or number on the front. I used a “D” for my last name but you can also put your house numbers on it.
I printed out a letter D on my printer but you can also find numbers at craft stores. Using the same method apply the monogram with the decoupage and let dry 2 hours.


He’s the finished product.

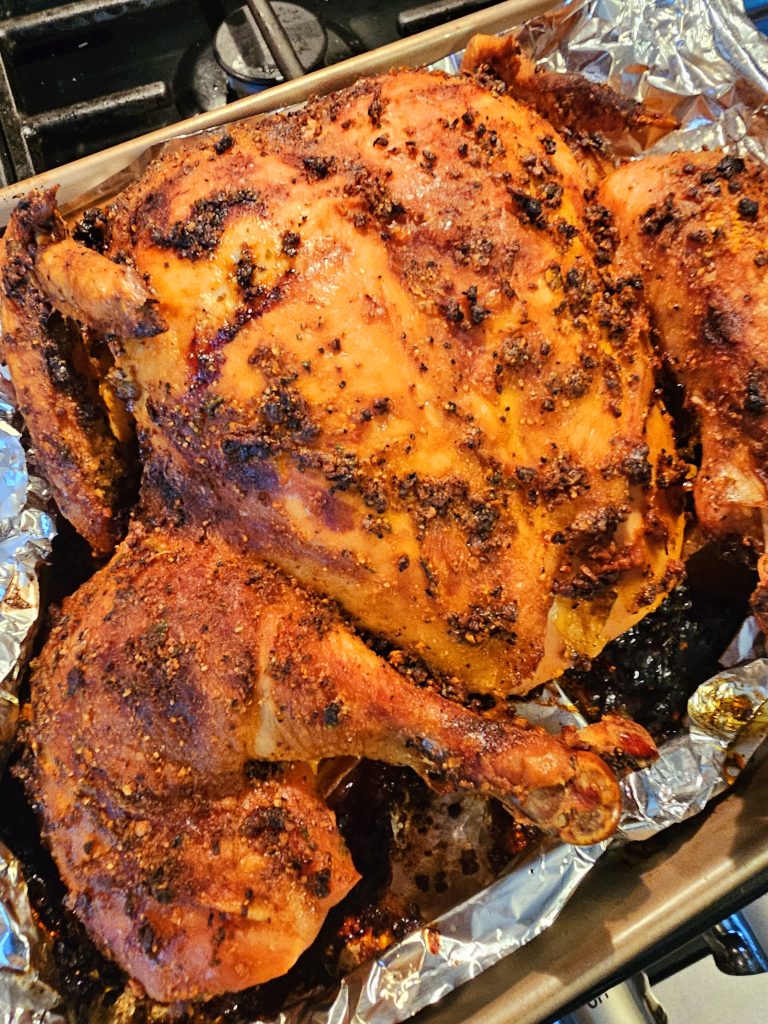

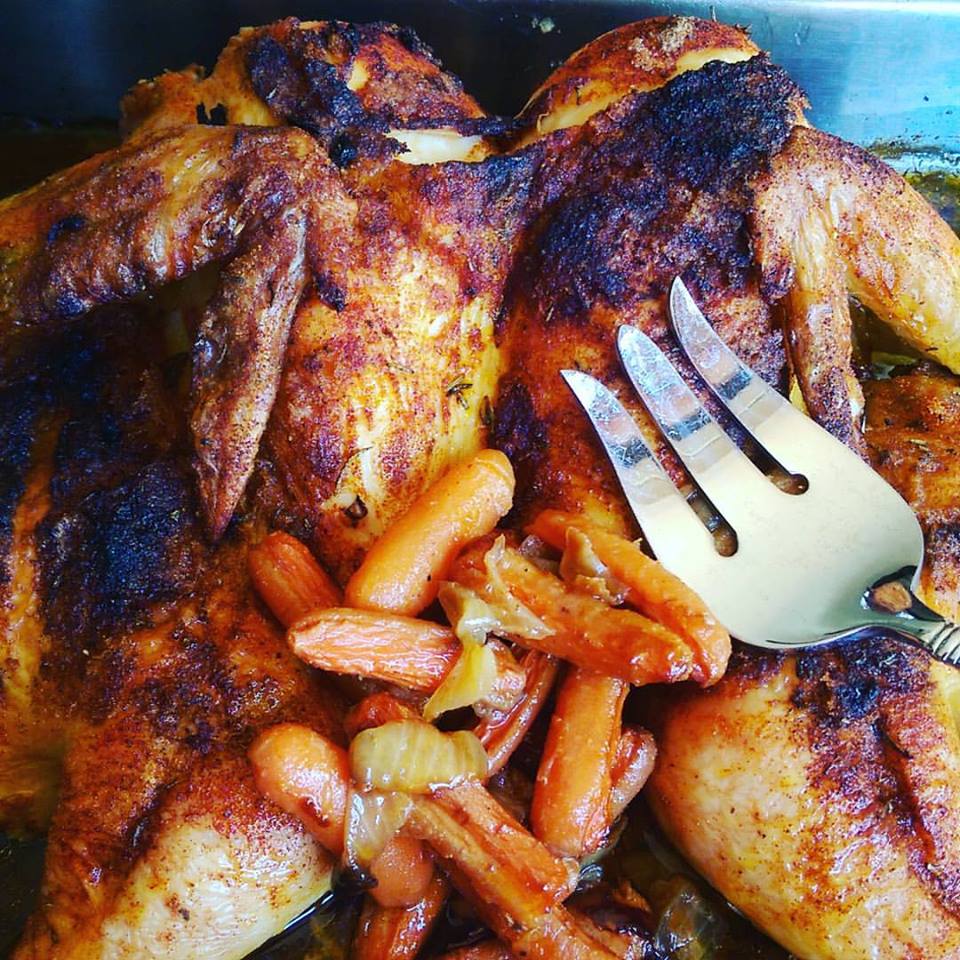 Pure Portuguese comfort food! Look at that color!
Bring a taste of Portugal into kitchen table with one of the most popular dishes in Portuguese cooking. It will bring back sweet memories of your Avo’s, mae’s or pai’s home cooking.
The secret to getting this dark crispy look in your baked is to cook it at a higher 400 degrees F. for about 1-2 hours depending on the size of your chicken.
I love a crispy skin and a well done chicken that’s why I get this dark crispy look. Use a meat thermometer if you’re not sure on cooking time. Chicken should reach at least 190 degrees when done. The onions and carrots will also get a beautiful color and delicious caramelized taste! Be sure to double the recipe and you’ll have leftovers for the next day.
Ingredients:
1 or 2 (3-4 pound) roasting chickens
2 to 3 tbsp TASTE PORTUGAL SEASONING per chicken (use regular or spicy seasoning for piri piri style)
2 tbsp olive oil
2 tbsp white wine
1 large onion (chopped)
1 pound chopped carrots or baby carrots (optional)
Preparation:
Wash chicken and pat dry. Make a rub with seasoning, oil and winem Let sit overnight in the refrigerator or at least 1-2 hours to marinate.
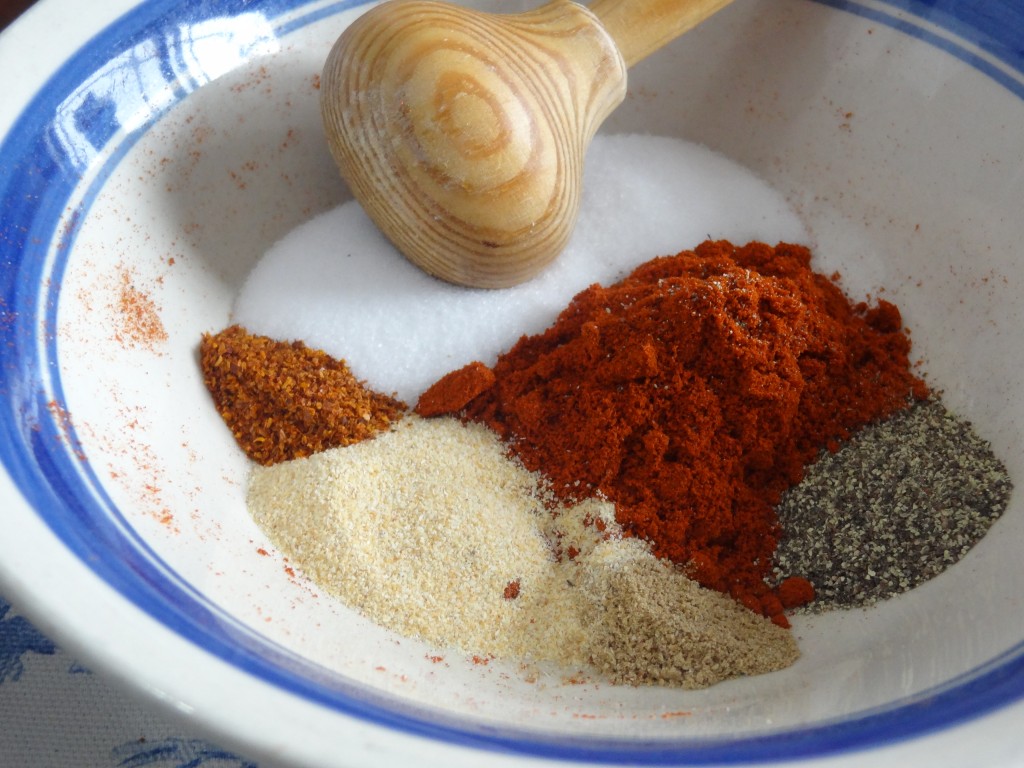
When ready to cook, remove chicken from the refrigerator and let sit for about 15 minutes to reach room temperature. Preheat oven to 400 degrees F.
Grease a large roasting pan with olive oil and add the chopped onions and carrots. Place the chicken on top of the vegetables. Cook for 2 hours until the chicken is crispy and golden brown. Half hour into cooking, shake pan and stir the vegetables.
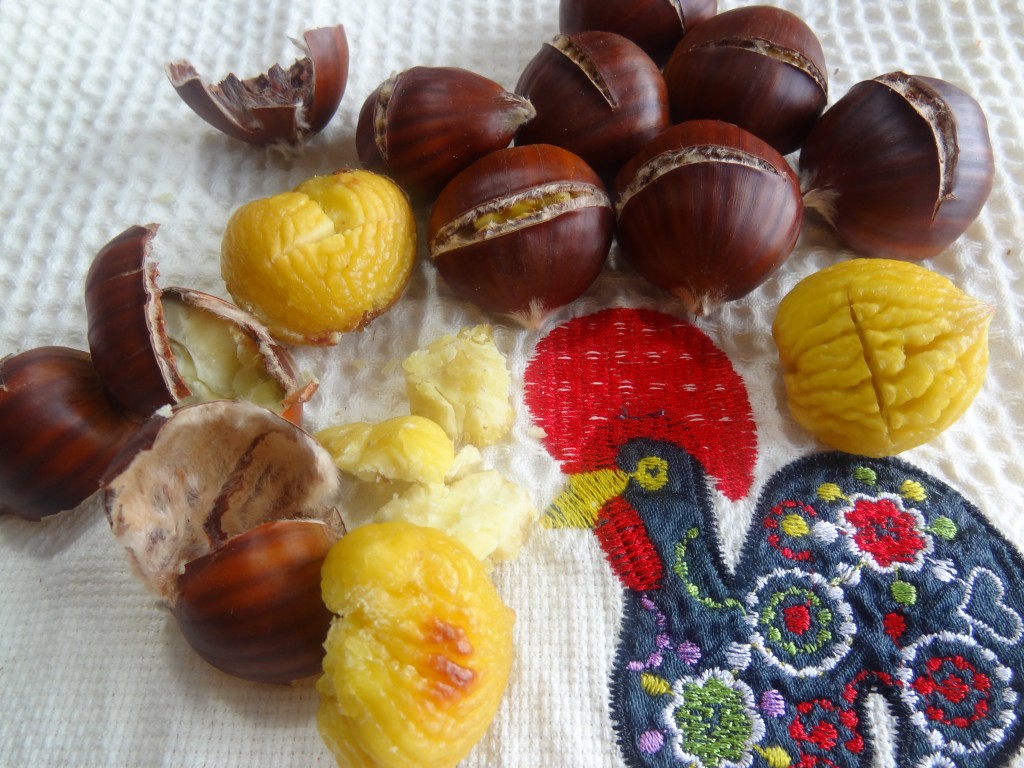
How to roast chestnuts:
1. Using sharp knife, make an incision about 1/8-inch deep through the top of chestnut.

2. After slitting place the chestnuts on roasting pan and roast them 400 degrees for about 20 – 30 minutes. To check for doneness, squeeze one holding a dish towel and it should be soft.
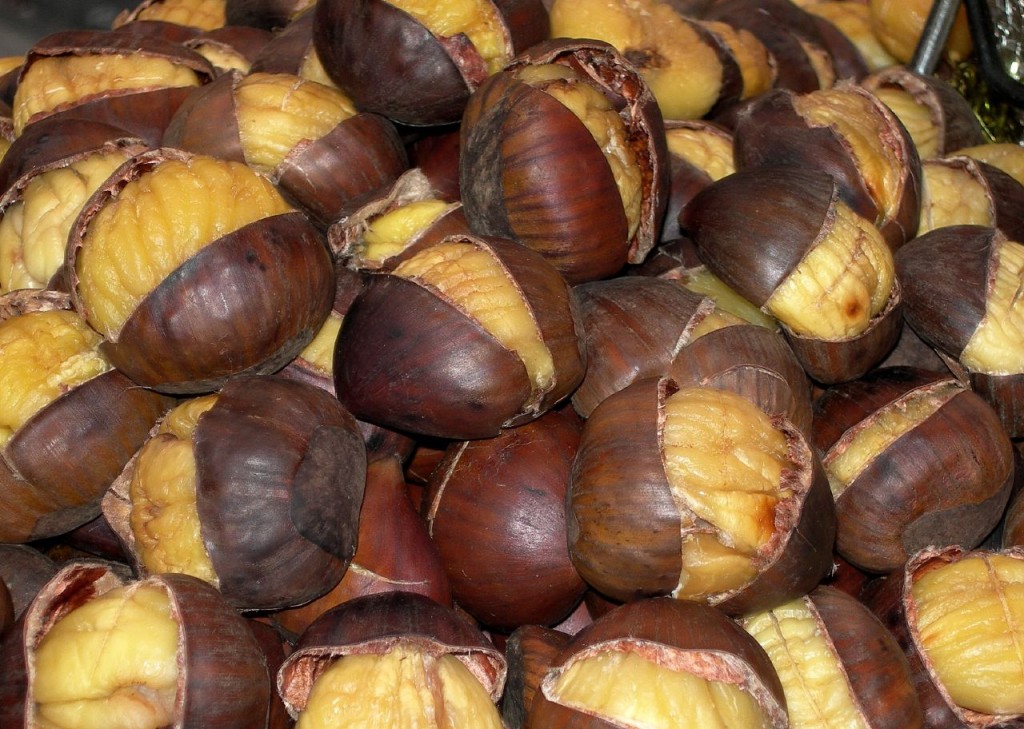

This is my family’s favorite seafood dish which I learned from a Portuguese chef many years ago. I make it for Christmas Eve dinner every year. The combination of ingredients and spices blend perfectly with the fresh seafood and creates a rich flavorful broth. The seafood will pair perfectly with Portuguese rice.
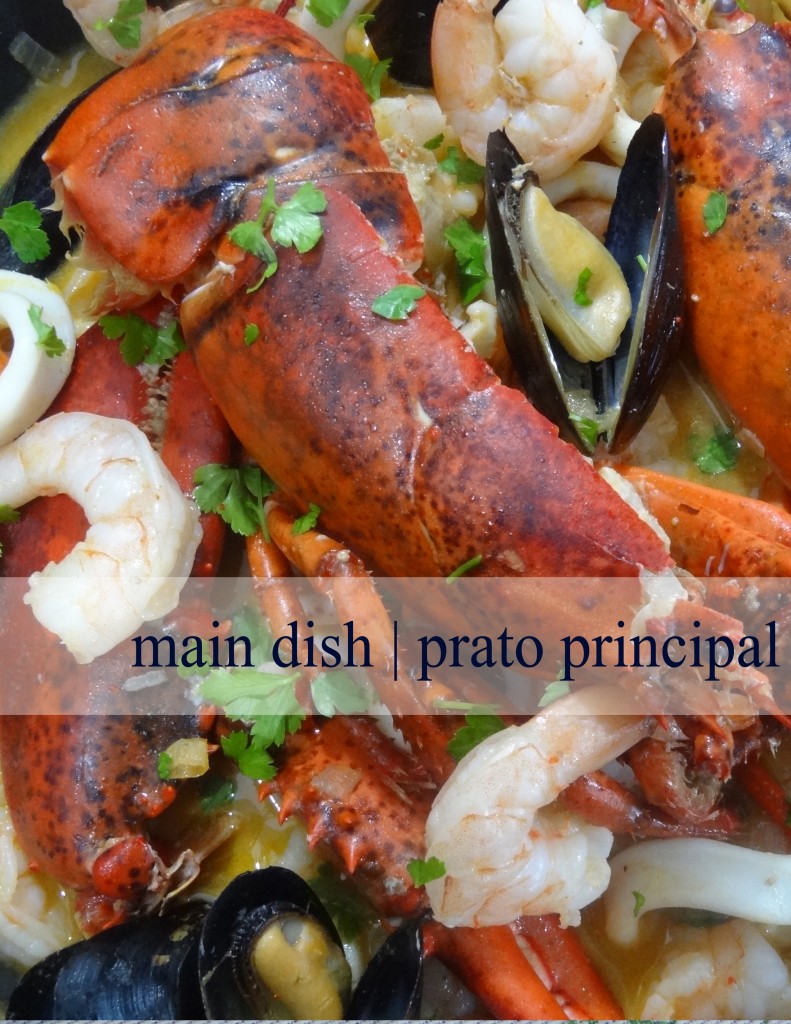 Serves 2-4
Ingredients:
1 whole uncooked lobster (chopped into quarters)
1 pound raw, peeled and de-veined Shrimp
1 pound little mussels or little neck clams (washed)
½ pound scallops
½ pound of squid (cut into rings) (optional)
1 small onion (finely chopped)
2 cloves garlic (minced)
¼ cup olive oil
1 cup Vinho Verde or white wine
1 teaspoon salt
1 teaspoon paprika
1 cup chicken broth
2 tablespoon butter
2 tablespoons chopped cilantro (garnish)
Squeeze of lemon juice
Dash of hot sauce (if desired)
Preparation
Saute the onions and garlic in the olive oil in a large heavy skillet on medium heat for one minute. Add lobster, and saute for a few minutes on low heat. Add clams, wine, paprika, salt and pepper, cover and let cook for 5 minutes.
Add the chicken broth, shrimp, squid, and scallops, cover and cook on medium heat for another 5 minutes or until the clams open.
Add butter and continue cooking for another 5 minutes for the butter to thicken the sauce.
Taste for saltiness and add hot sauce or more seasonings if desired.
Add the chopped cilantro and top with a squeeze of lemon juice before serving.
Serve with rice.
Note: You may substitute chicken broth with 1 chicken bouillon cube and 1 cup water.
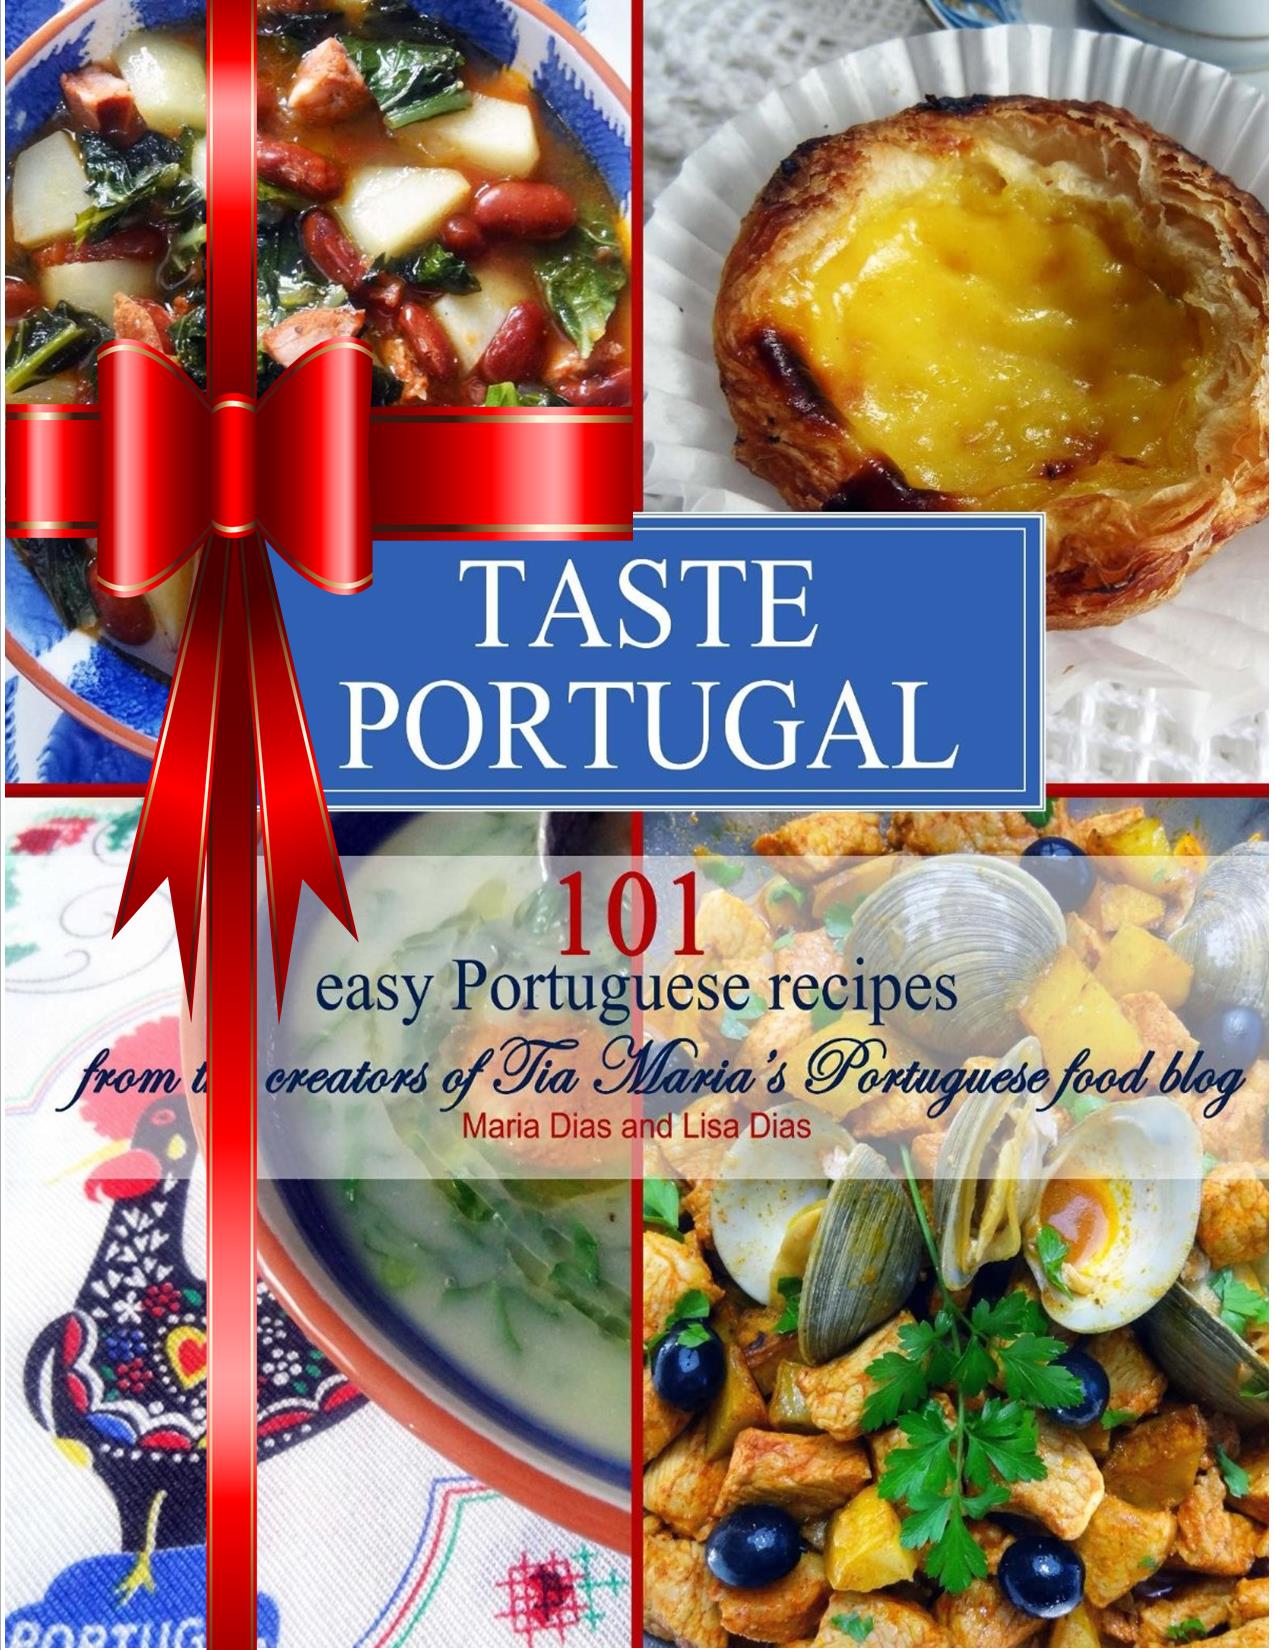

I also dry my mint and make mint tea. I enjoy mixing both cidreira and mint for wonderful mix of flavor. Follow the same instructions for drying mint as you do the lemon balm.
 Buy this beautiful custom Galo de Barcelos Mug at Lisbon Blue shop

Growing your own Lemon Balm tea is easy and you’ll get to enjoy herbal organic tea all year long with these easy steps! This tea is perfect for you to enjoy on a quiet afternoon, a lazy Sunday, when you need a little comfort, or when you have an upset stomach.

“A member of the mint family, lemon balm (Melissa officinalis) (Cidreira in Portuguese), has a lovely lemon flavor and the ability to gently calm the nerves and lift one’s mood. Native to the Mediterranean, lemon balm’s medicinal and culinary use dates back over 2,000 years. Avicenna, the 11th-century Arab physician, wrote that lemon balm “causeth the mind and heart to become merry.” http://www.thekitchn.com
Notice the beautiful Vintage made in Portugal Vista Alegre tea cups that were my mothers.

The final results after they dried in my kitchen for 3 weeks.
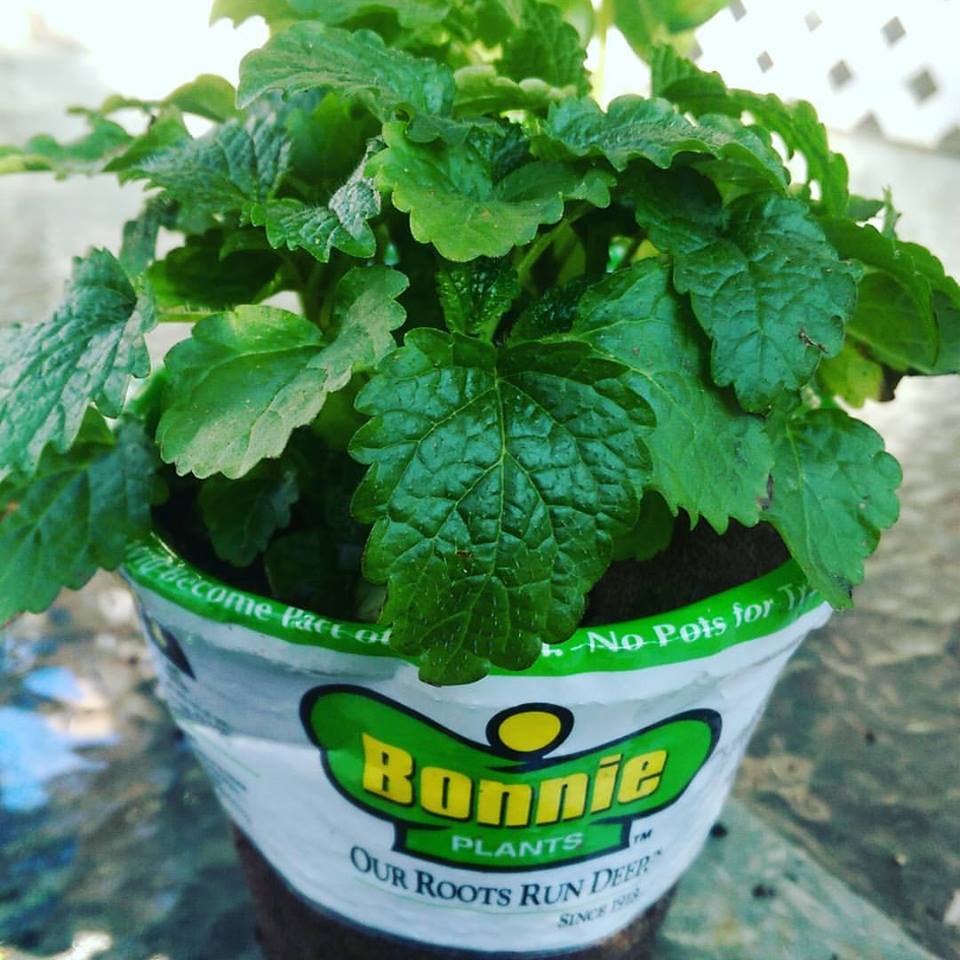 I planted in the spring from a small pot which I transplanted into my vegetable garden but you also grow it in a large pot all summer long. They require vertually no maintenance except watering which makes this so easy to grow.
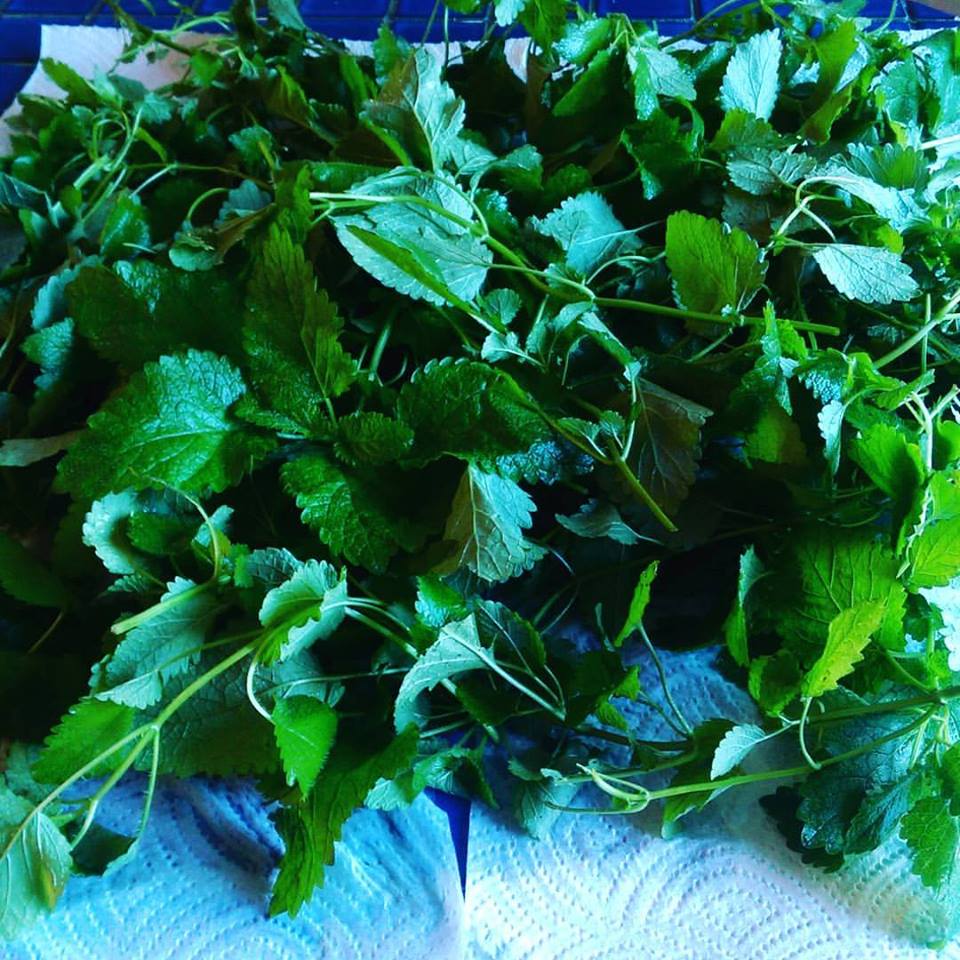 How to dry the lemon balm leaves for tea:
Once the stems grow to about 1 foot in height and before they start to sprout seedlings trim the plant at the stem bottoms. Place in a bowl of very cold water and rinse 2 or 3 times to wash thoroughly.
Place leaves in a salad spinner or shake off the excess water gently not to break leaves. Place on paper towels to absorb water and turn them over. Replace the paper towels until all the moister is absorbed from the leaves. Let dry for a few hours or overnight on the paper towels.
 Grab each piece gently by each stem and create a bunch tied with food safe twine or string. Hang in your kitchen or in a cool dark place for 2-3 weeks until the leaves are completely dry.
When leaves are dry break of the leaves and place into a food safe mason jar, a clean jar from your pantry or a food safe tin for storage. Close the lids tightly. You can place the leaves in zip lock bag but the leaves may break easily, that’s why I prefer a jar. The tea will store until the next summer when you’re ready to make a fresh new batch.
 Make Lemon Balm tea by boiling about 2 tablespoons of the leaves in 2 cups water for about 3 minutes and let seep on low heat for another 5 minutes. The longer it seeps the deeper the flavor. However don’t took too long since the tea will get bitter. You can adjust the boil time to your preference.
 I never through out my day old Papo Secos (Portuguese rolls) because they are perfect for making stuffing like this one for these delicious baked pork chops.
You will never fry pork chops again once you try this recipe because they come out moist and flavorful.

Ingredients:
6 pork chops (1 inch thick)
2 teaspoons salt
1 teaspoon pepper
1 teaspoon garlic powder
2 teaspoons paprika
2 eggs (beaten)
2 cups seasoned bread crumbs
Stuffing
3 Papo Seco rolls (cut into cubes)
1 tablespoon olive oil
1 tablespoon butter or margarine
1 small onion (diced)
1 small celery stalk
2 cups chicken broth (or 1 chicken bouillon cube with 2 hot water)
1 tablespoon parsley (chopped)
1/2 teaspoon dried thyme
1 cup cooked corn
Preparation:
Step 1: Cut a slit into each pork chop for stuffing. Season with the spices and set aside while you make the stuffing.
Step 2: Prepare stuffing by sauteing the onion and celery in the butter and oil for about 3 minutes until cooked. Add the bread and the rest of the stuffing ingredients except corn and mix well with a fork until the bread is soft and it has absorbed the broth. Add the corn and mix well. If you find the stuffing too wet add more bread, or add more broth if too dry.
Step 3: Place the beaten eggs and bread crumbs into 2 separate bowls big enough to hold the pork chops for dredging.
Stuff the pork chops with about 2 or 3 tablespoons of stuffing and secure with 2 toothpicks. Coat chops with the egg on both sides, then dredge into the bread crumbs.
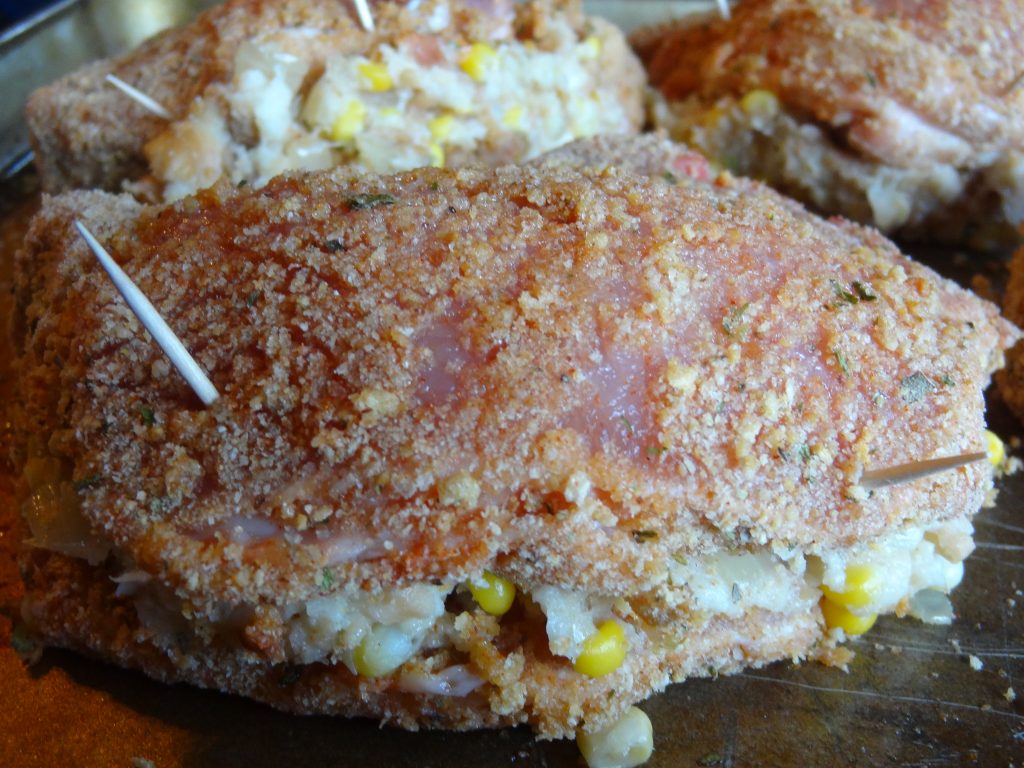 Place on greased cooking tray and spray the tops with a coating of cooking spray.
Cook at 350 degrees F for about 45 minutes or until golden brown and temperature reaches 165 degrees. This recipe goes great with my Portuguese tomato rice recipe.
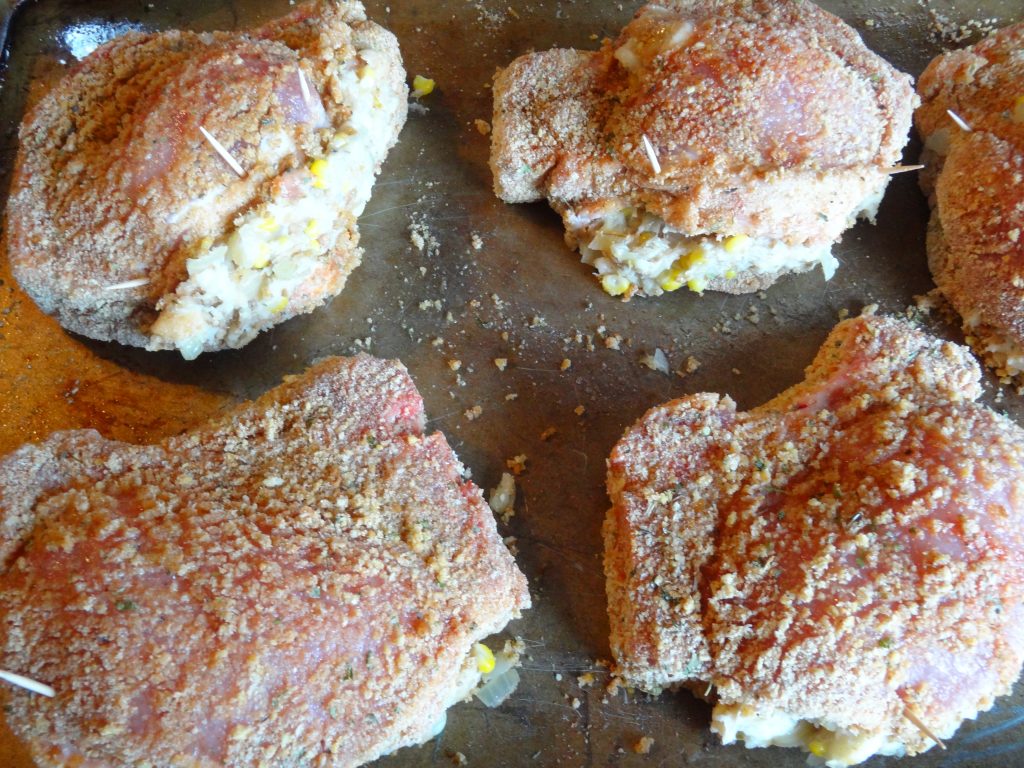

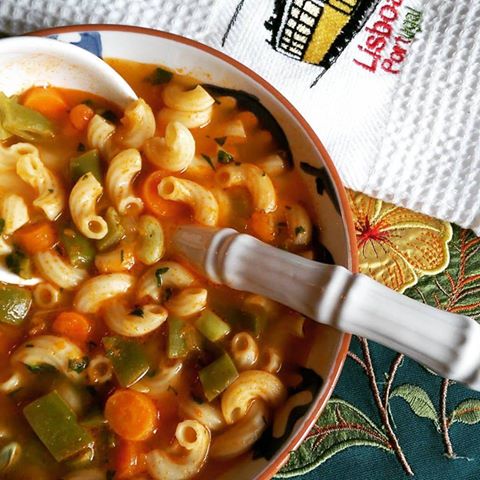 The cool weather is here. Let the soup cooking start. This soup is a bowl of healthy eating. Just serve with some crusty bread and dinner is served!
Ingredients:
2 pounds garden green beans (cut into 1 inch pieces)
2 large carrots (chopped)
1 large carrot (sliced)
1 large onion (minced)
1 clove garlic (minced)
1 large chopped tomato (seeded and skinned)
2 cups elbow macaroni (uncooked)
4 cups chicken or vegetable broth
4 cups water
1 teaspoon salt
1/2 teaspoon pepper
1 bay leaf
2 large sprigs parsley (chopped)
1/4 cup olive oil
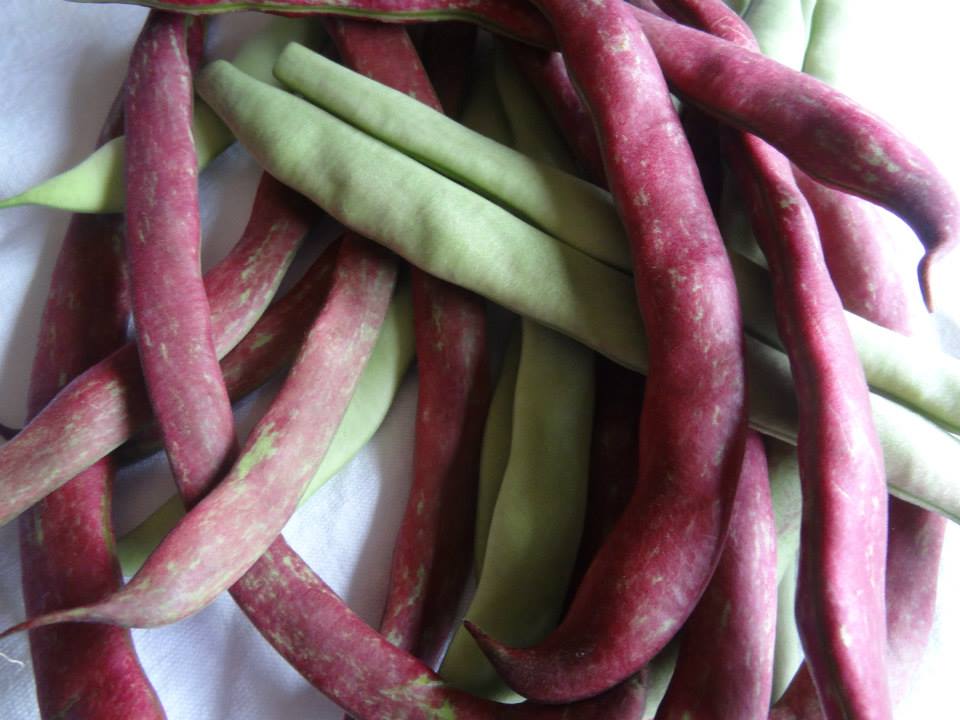
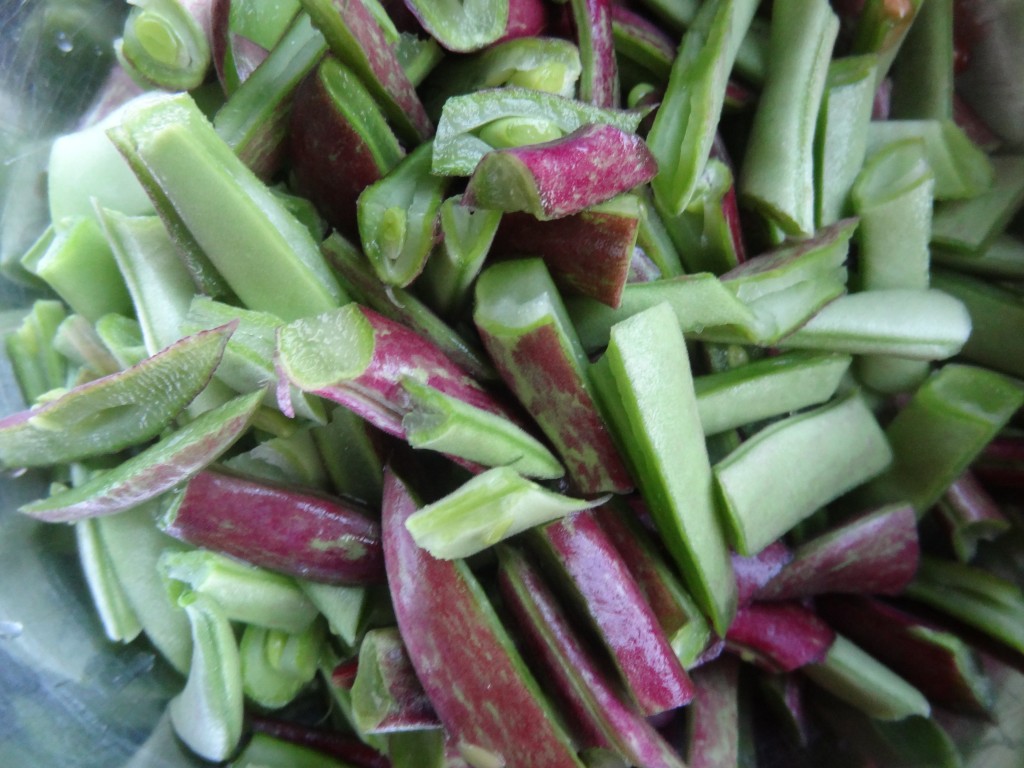
Preparation:
Saute onions, garlic and bay leaf in olive oil for few minutes. Add the tomato and chopped carrots and cook for about 3 minutes stirring often.
Add the all of the remaining ingredients except pasta sliced carrots and parsley. Bring to a boil and cook for about 5 minutes. Add the macaroni and sliced carrots and cook on medium for about 15 – 20 minutes until pasta is cooked.
Taste the soup for saltiness and add more if desired. Take soup off heat and let it sit to thicken. Add more broth if you like your soup thinner. Garnish with parsley and a little drizzle of olive oil.
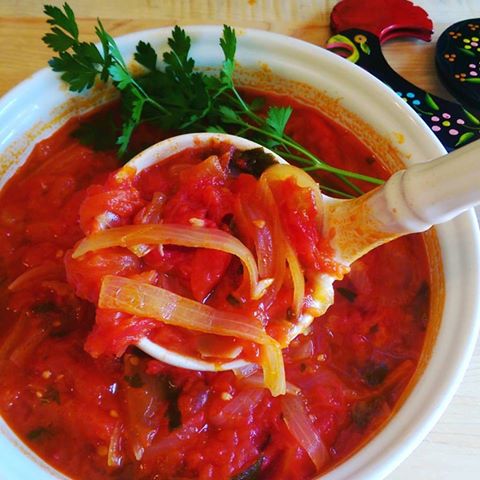 This Cebolada (Onion Sauce) is great to put on steak, pork chops or as a base for baking fish. I like to make large batch and freeze into portions for later use.
To defrost simply leave the sauce defrosting overnight in the refrigerator or heat on low heat in a heavy saucepan.
Ingredients:
3 – 4 pounds ripe tomatoes (skinned, and partially seeded)
3 large onions (sliced)
1 large red bell peppers (sliced) optional
5 cloves garlic (minced)
2 large sprigs parsley (chopped)
1/2 cup white wine
1 teaspoon salt
1/2 teaspoon black pepper
1 teaspoon sugar
1/4 cup olive oil
1 chicken or vegetable bouillon cube
Preparation:
Saute the onions, peppers and garlic in olive oil until translucent. Add the rest of the ingredients and cook on low medium heat for about 20 -30 minutes stirring often.
The sauce will thicken as it cooks. Taste for saltiness and add more to your taste. If you like the sauce thicker, simply add a tablespoon of tomato paste to thicken and let cook for a few minutes longer.
Let sauce cool and place into portions in freezer safe Tupperware or plastic. Store in freezer for a later use.
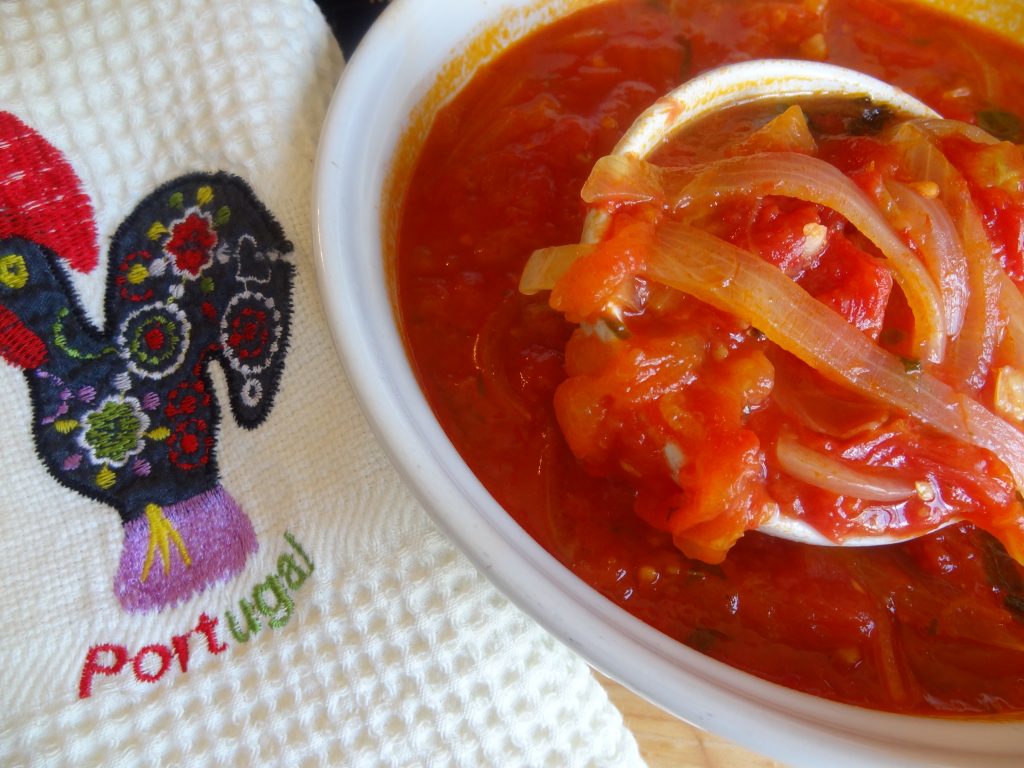
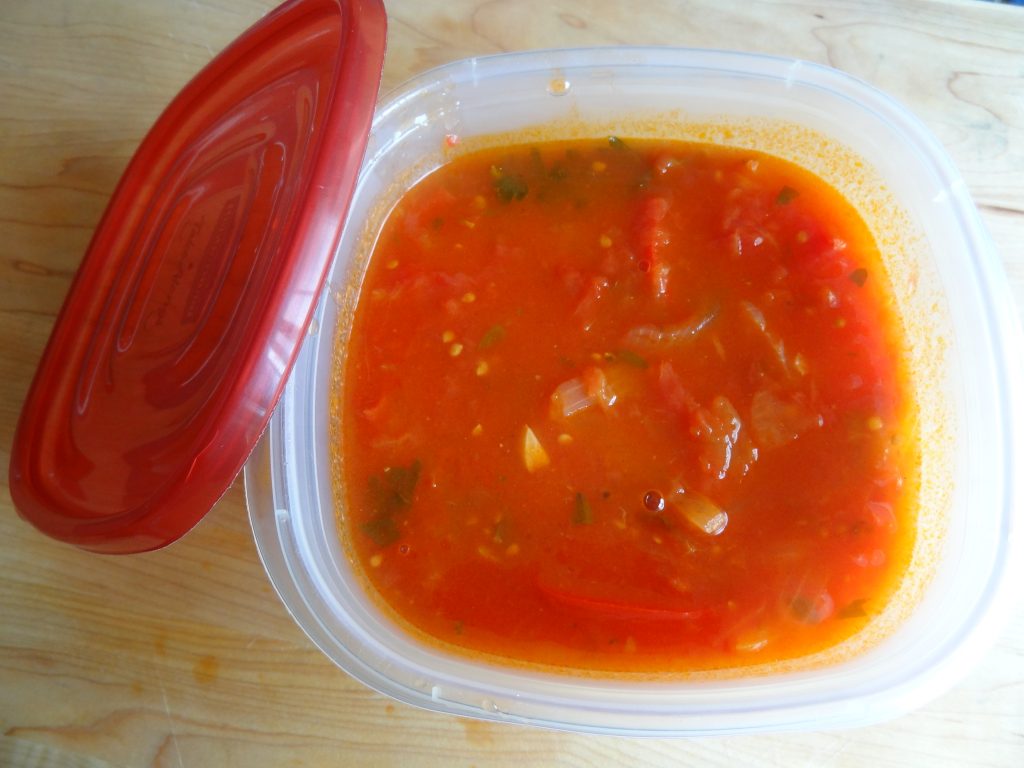
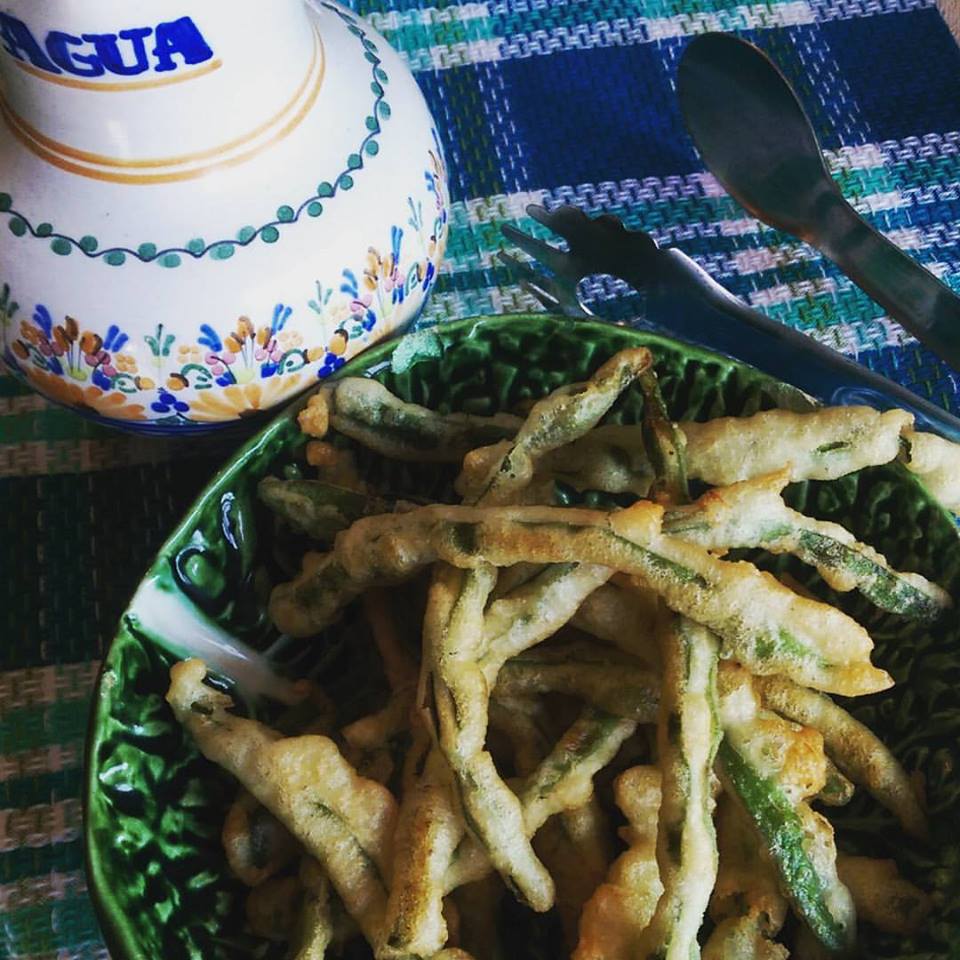 Did you know that the cooking method used in Japanese cooking “tempura” was taught to the Japanese by the Portuguese Explorers? So the next time you order anything tempura at a restaurant you can thank your Portuguese ancestors.
Peixinhos da Horta means fish from the garden because these lightly tempura fried green beans resemble small fried fish. I grow my own Portuguese heirloom green beans in my garden, but you can substitute the recipe with any green beans. I took this picture below of one from my garden which measured 11 inches long. As you can see, the green beans resemble Italian flat green beans.
The beans are silky and nutty flavored which are perfect for soups, salads and as add ins to stir fry, rice and pasta dishes as well.
Ingredients:
2 pounds green beans
1 and 1/2 cups flour
1 teaspoon baking powder
1 egg
1/2 teaspoon salt
1/4 teaspoon pepper
1 teaspoon lemon juice
1 tablespoon olive oil
1 cup beer or seltzer soda
Oil for frying
Preparation:
Cut of stems and wash the green beans and cook for about 3-5 minutes until tender. Drain put aside and let dry. (Note: I cut my green beans in half since they were long and wide, but it’s up to your taste.)
Meanwhile, mix all of the ingredients except green beans and mix to form a slightly thick pancake like batter. Let the batter sit for a few minutes to thicken. If you find the batter is too thick add more liquid.
 Heat the oil on medium high heat. Dredge the green beans in the batter. Test the oil for readiness by dipping a green bean into the oil. If the batter sizzles, the oil is ready.
Begin frying each green bean by shaking off excess batter and dip into the hot oil one by one. Flip the beans onto the other side as they become golden. Drain on paper towels. Watch this video: for frying technique.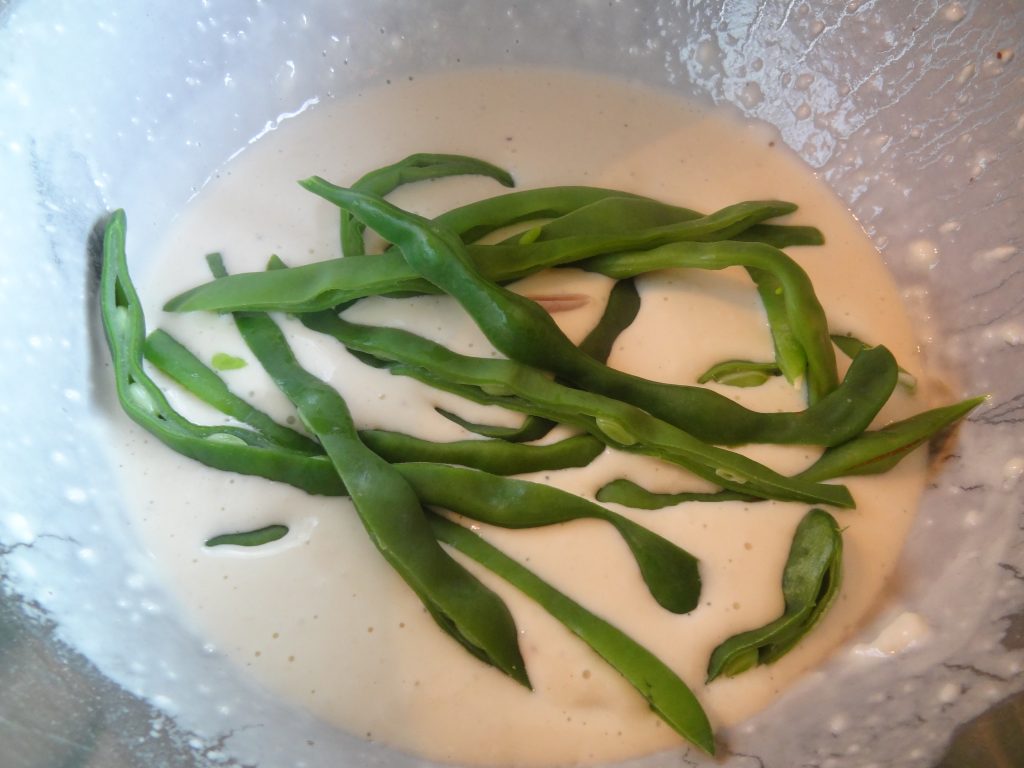

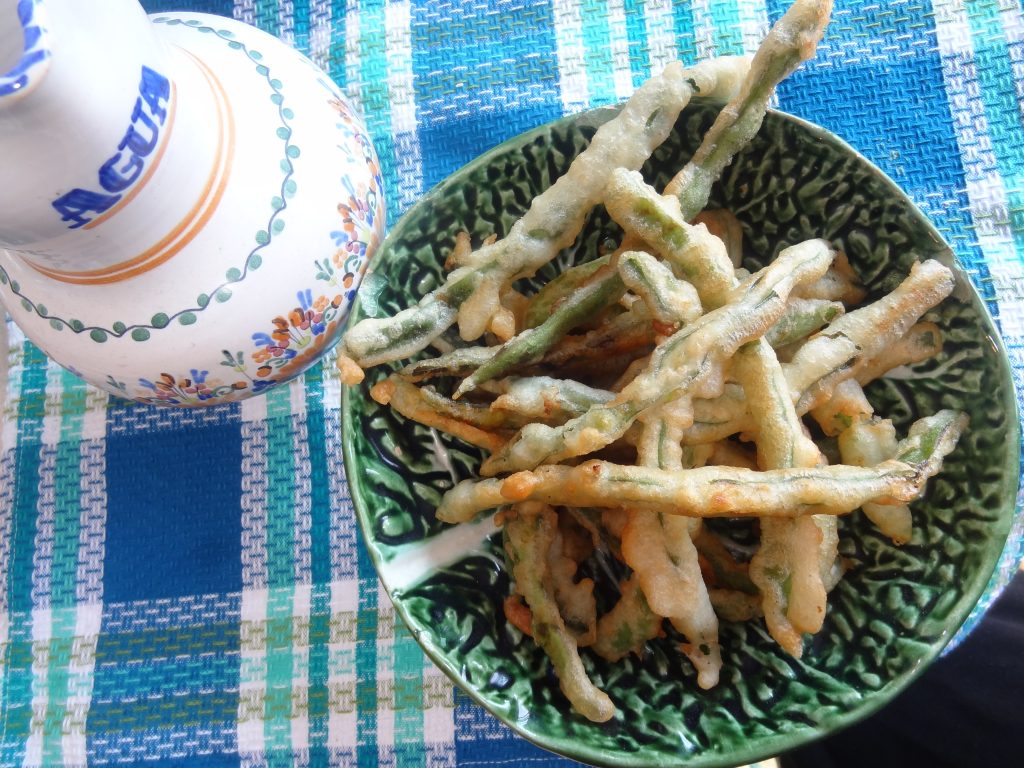
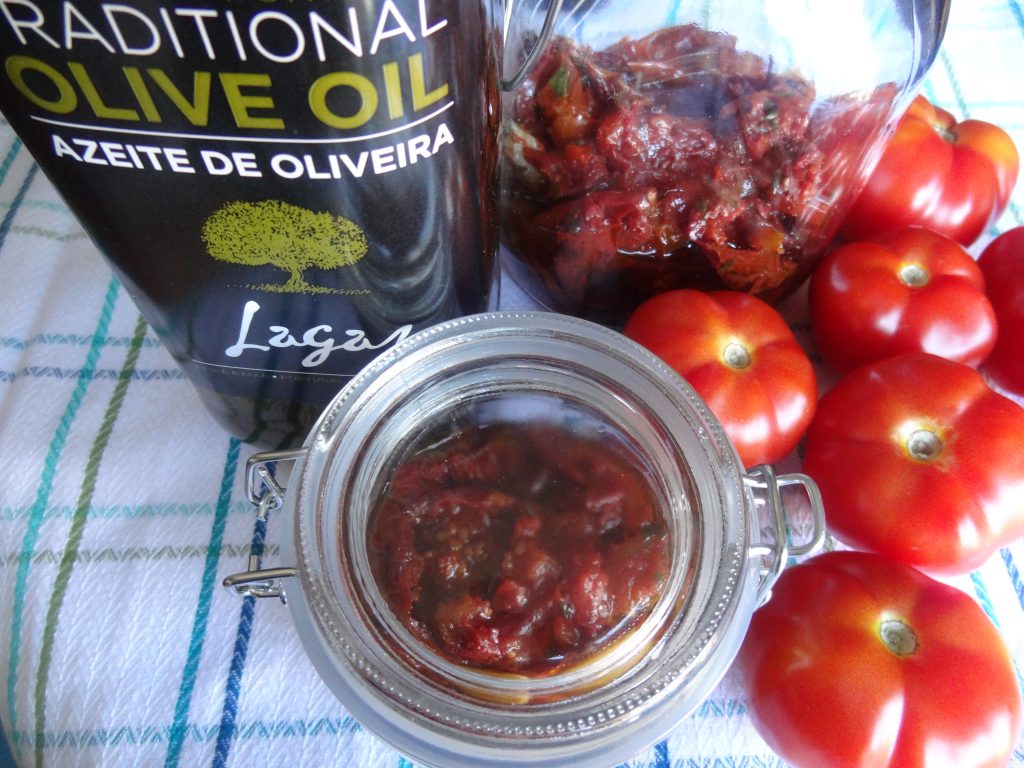 I had a very bountiful tomato harvest this year so I had to use the tomatoes in many different recipes. These sun dried tomatoes came out perfect! This was the first time I made the recipe and I was pleasantly surprised at the results. These tomatoes last up to 1 – 2 months in the refrigerator and are great on pizza, bruschetta, served on toast or crackers as appetizers, as a garnish or as an add on to sauces and soups!
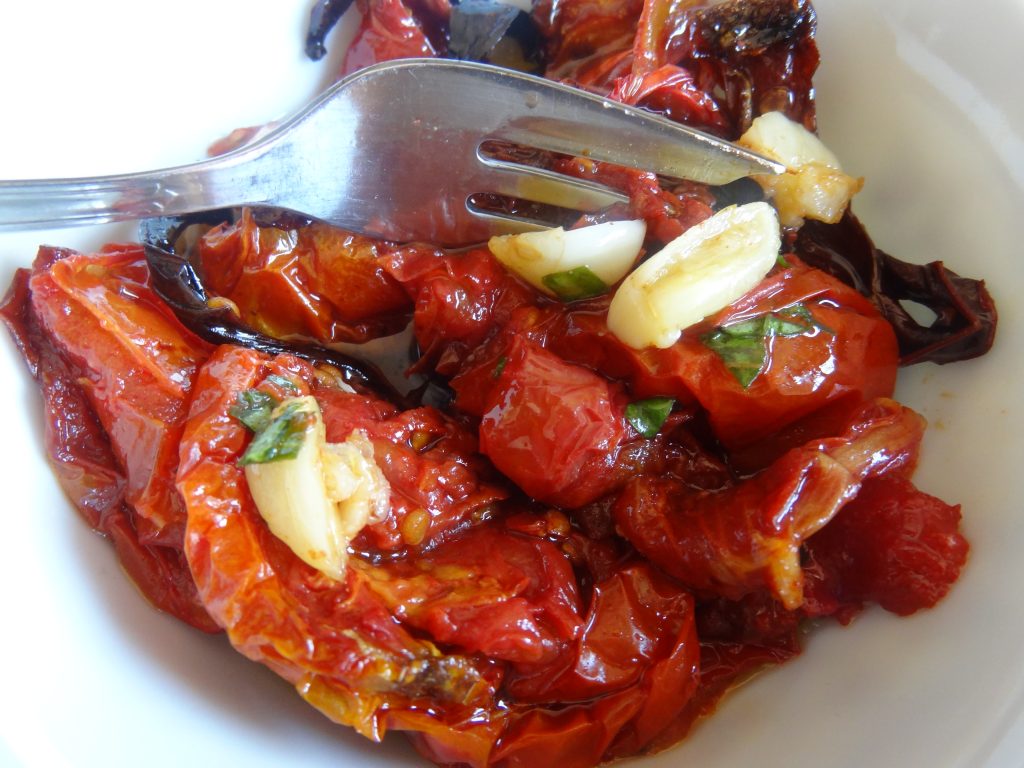
Ingredients:
Ripe tomatoes (3 pounds or more)
(small red tomatoes sliced in half and seeded, or thin sliced larger tomatoes mostly seeds removed)
Sea Salt
Portuguese Virgin Olive Oil (2 cups or more)
Garlic (about 8 cloves or more)
Basil (optional)
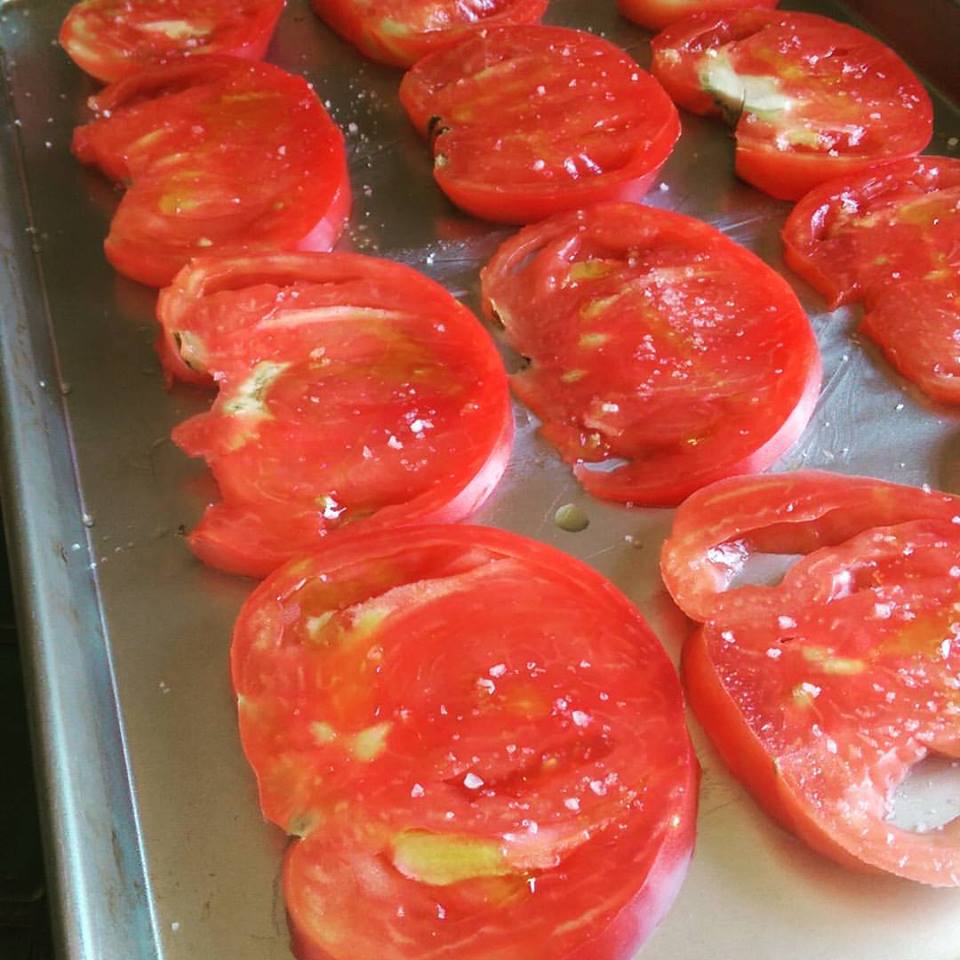
Preheat oven to 200 degrees F. Place the tomatoes slices and haves on lightly greased baking sheet. Sprinkle with a little drizzle of olive oil and salt.
Cook for about 6-10 hours depending on how much moisture your tomatoes have. Check after the 6 hours to see it they are dried.
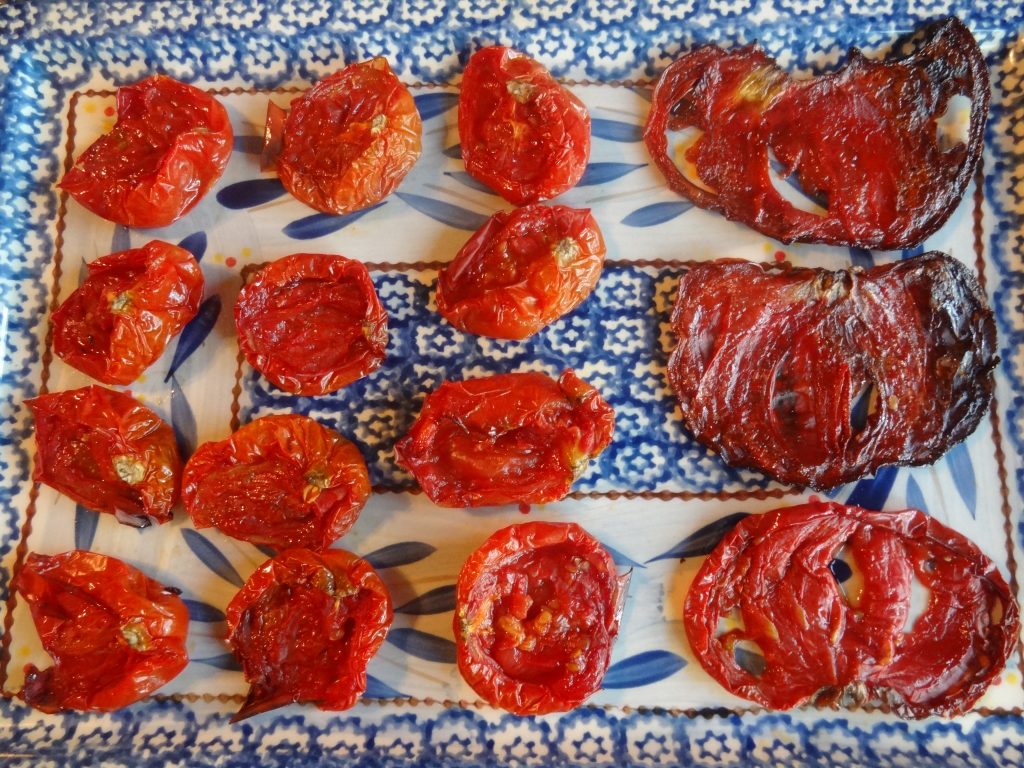
While the tomatoes dry, mix 1 cup olive oil with the garlic and cook on low heat for about 5 minutes or until the oil is infused with the garlic and let cool. Chop basil if desired and add to the olive oil and garlic blend.
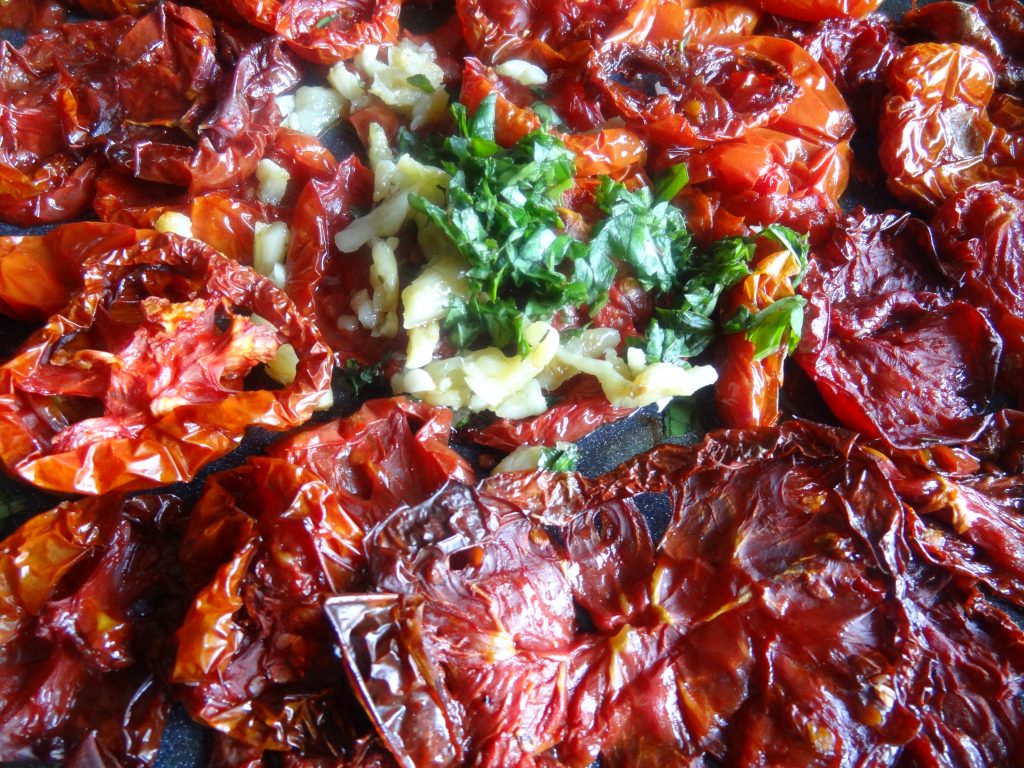
When tomatoes are done, let cool and mix in the olive oil blend. Place the tomatoes into very clean mason jars or clean lidded jars. Add more olive oil to cover and store in the refrigerator.
They’ll stay edible for up 1 month in the oil. Check for signs of mold or a rancid smell before using them. If you find mold discard them.
If you find the oil has thickened and turned a whitish color, just remove your desired amount of tomatoes and let the oil reach room temperature for about 30 minutes. It will thin out. 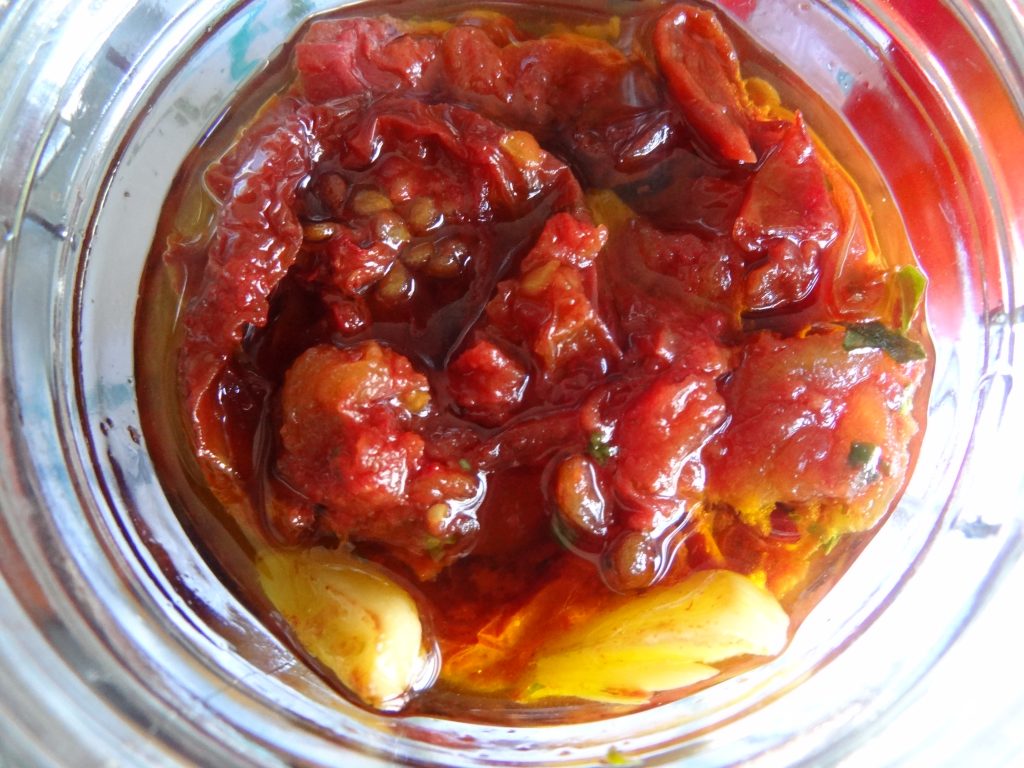
Try my brushcetta recipe:
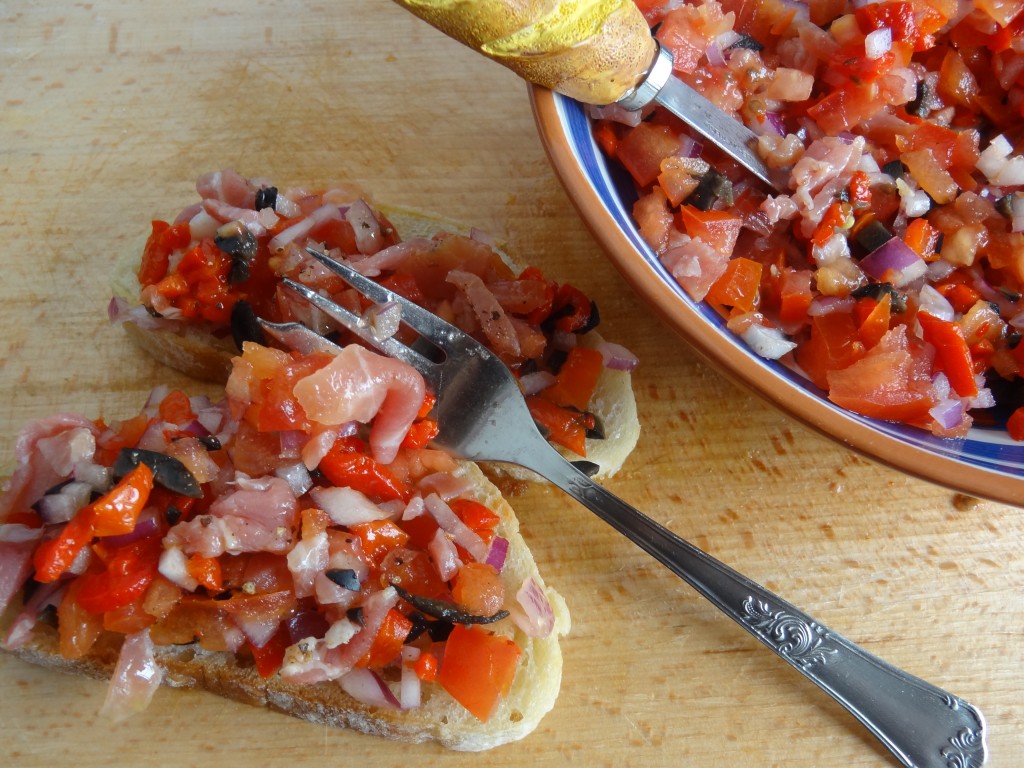

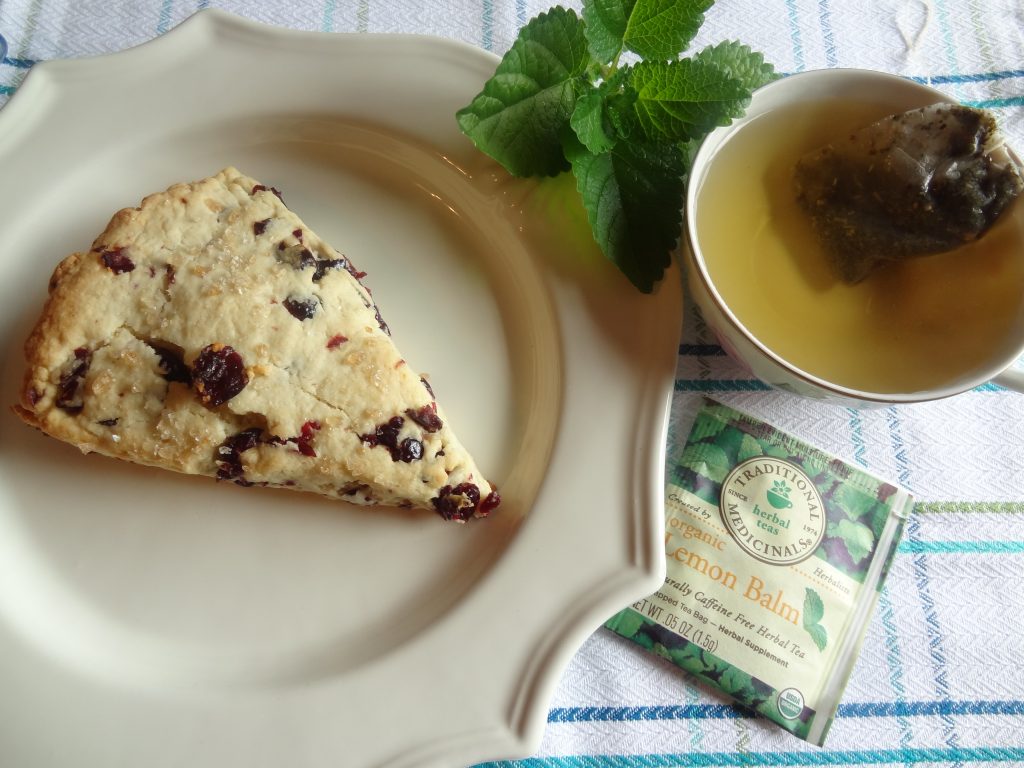
Invite your friends over for these Cranberry Lemon Scones and enjoy the company! They’re a perfect breakfast or anytime treat.
I served mine with Lemon Balm Tea (Cha de Cidreira) which is my favorite tea. My mother made this tea just about every day and grew her own lemon balm in her garden. She dried the leaves to make tea all year long. I also grow my own now and make tea on a regular basis. It’s a soothing calming tea and good for when you have an upset stomach as well.
“A member of the mint family, lemon balm (Melissa officinalis) has a lovely lemon flavor and the ability to gently calm the nerves and lift one’s mood. Native to the Mediterranean, lemon balm’s medicinal and culinary use dates back over 2,000 years. Avicenna, the 11th-century Arab physician, wrote that lemon balm “causeth the mind and heart to become merry.” http://www.thekitchn.com
How to dry the lemon balm leaves for tea:
Cut the branches and trim off the larger stems. Wash and dry them and lay them out on paper towels or newspapers. Place in a dry place for about 1 week or more until the leaves are dry and brittle. Break the stems and leaves into small pieces and place in ziploc bags or a jar. Store in your cupboard.
When ready to make tea, boil 1 tablespoon of the dry tea leaves per 1 – 2 cups of tea for about 5 minutes. Let seep for another 5 minutes or longer depending on how strong you like it

Cranberry Lemon Scones
Ingredients:
2 cups flour
1/3 cup sugar
1 stick cut into chunks (8 tablespoons of very cold butter)
1/2 cup sour cream
1 egg
1 teaspoon baking powder
1/4 teaspoon baking soda
1/2 cup dried cranberries
1 teaspoon lemon zest
1 teaspoon of coarse natural sugar
Preparation:
Preheat oven to 400 degrees F.
Mix all dry ingredients and cold butter food processor or mixer until well blended.
(do not over mix)
Add remaining egg and sour cream to mixture and pulse until well blended and crumbly.
Add the cranberries and lemon zest and give the processor a few pulses just to mix slightly.
 Shape into a circle of 3/4 inch thickness on a slightly floured surface.
Sprinkle with the coarse sugar.
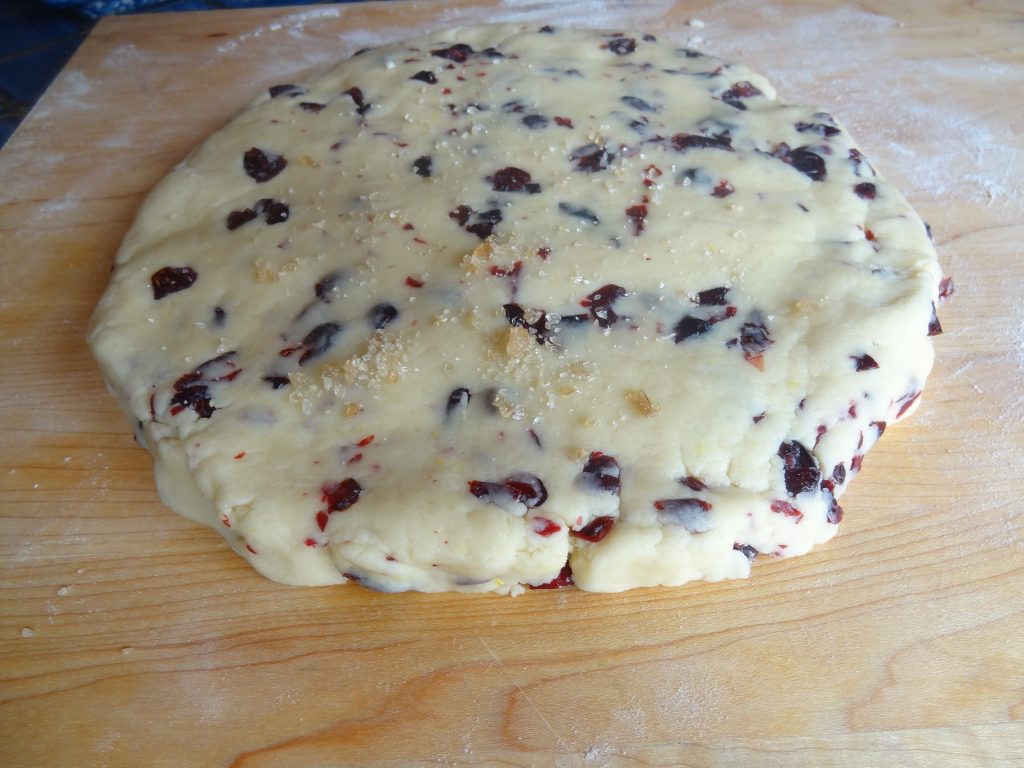 Cut into 8 equal pieces.
  Place on lightly greased cookie sheet.
 Bake for about 15-20 minutes or until lightly golden brown.
Look at that beautiful golden color.
 Light and flaky!

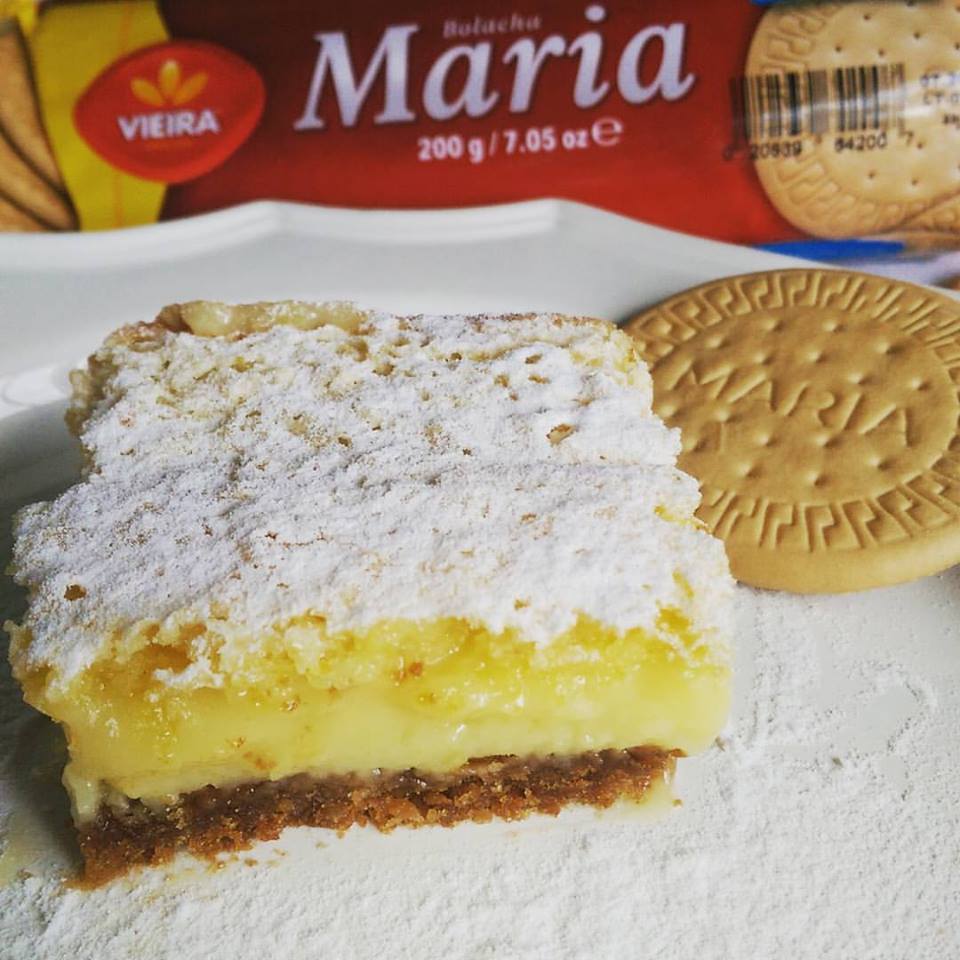 What an light and easy dessert for summer! I know most of you probably have the needed ingredients right in your kitchen pantry so go ahead and try it this weekend!
I don’t know anyone that doesn’t like lemon bars and I know everyone, will love these! Enjoy!
Filling:
6 large eggs
2 cups sugar
1/2 cup flour
zest and juice of 4 or 5 large lemons
powdered sugar (for decoration)

Crust:
1 package 7.05 oz Maria Cookies (coarsely ground) (I placed them in a ziplock and pounded with a kitchen mallet for a coarser ground)
1 tablespoon brown sugar
2 teaspoons cinnamon
5 tablespoons butter
Preparation:
Preheat oven at 350 degrees F.
Mix the crust mixture in a bowl using a fork until well incorporated. Press the crust mixture into bottom of a ceramic or glass deep baking dish approximately 7 x 11 inches and bake for about 15-20 minutes or until golden brown.
Meanwhile, whisk together flour, sugar and eggs in a bowl until smooth and creamy. Add the lemon zest and juice and mix until well blended.
Pour the mixture over the slightly cooled crust and bake for about 20-25 minutes at 350 degrees F, or until set. Let cool and refrigerate for at least 2 hours before serving.
Dust with powdered sugar and cut into desired squares. Enjoy!
If you long to visit Portugal, taste the foods, learn some history, learn about the cuisine, and mingle with the locals, I suggest you pick up a copy of The Portuguese Travel Cookbook. It’s the next best thing to physically traveling there. If you’re planning a trip, take the book along with you because it’s a great guide to plan your journey!
“This book shows you the Portuguese way of saying; I love you through food.” (The Portuguese Travel Cookbook)
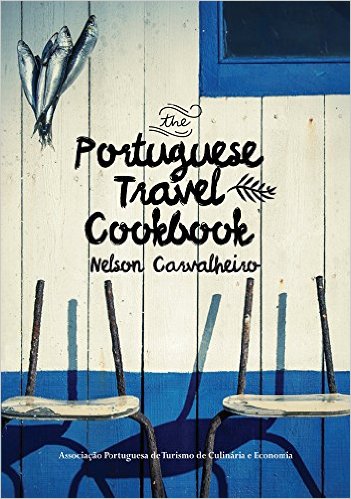 Nelson Carvalheiro, the author, is a travel writer, award winning blogger (FITUR 2014/2015) and a photographer. Visit Nelson’s award winning blog nelsoncarvalheiro.com. Visit his webpage to order the cookbook in Portuguese.
The cookbook has won the award the Portuguese Gourmand Winner of World Book Awards 2016, the author tells us; “My love for Portuguese cuisine knows no boundaries or limits, is something that is in my soul, in my skin and in my heart. It is the Portuguese identity that matters the most and something I strive to preserve for future generations.” He also says that since he was a little boy, his favorite hobby is and always has been “eating.”
Like most of us who grew up with the comforting meals made by our Portuguese mother’s, grandmothers, and relatives, the passion for our cuisine is deep in our soul, because it brings back joyous memories of home.

The author put his heart and soul into this cookbook which reflects the love between this man and his beloved country. Nelson and his photographer, Emanuele take us on a journey around Portugal spanning 300 cities, towns and villages from the beaches of Algarve to the mountains of the North. They visited almost 90 restaurants and tasted over 250 dishes. Stunning photography by Emanuele brings us up close to heartwarming simplicity of the old landscape, villages and rusticity of the many faces of Portugal’s inhabitants. It also includes 50 traditional authentic Portuguese dishes from the places he visited.
I read his book these past few weeks while on my vacation on the shore of the Rhode Island, nicknamed; “The Ocean State” which has a vast coastline like Portugal. I sat on my beach chair with my toes digging into soft sand often looking up at the sunny landscape where the ocean meet the clear blue sky. I said to myself, that if I sailed off into that ocean, in a straight horizontal line, I would place my feet on the very distant shores of Portugal. Although the distance between Nelson and I, is far and wide, as I read the book, I felt a bond and a connection to him because we have the same love for the food of Portugal, it’s cultural identity and it’s heritage.
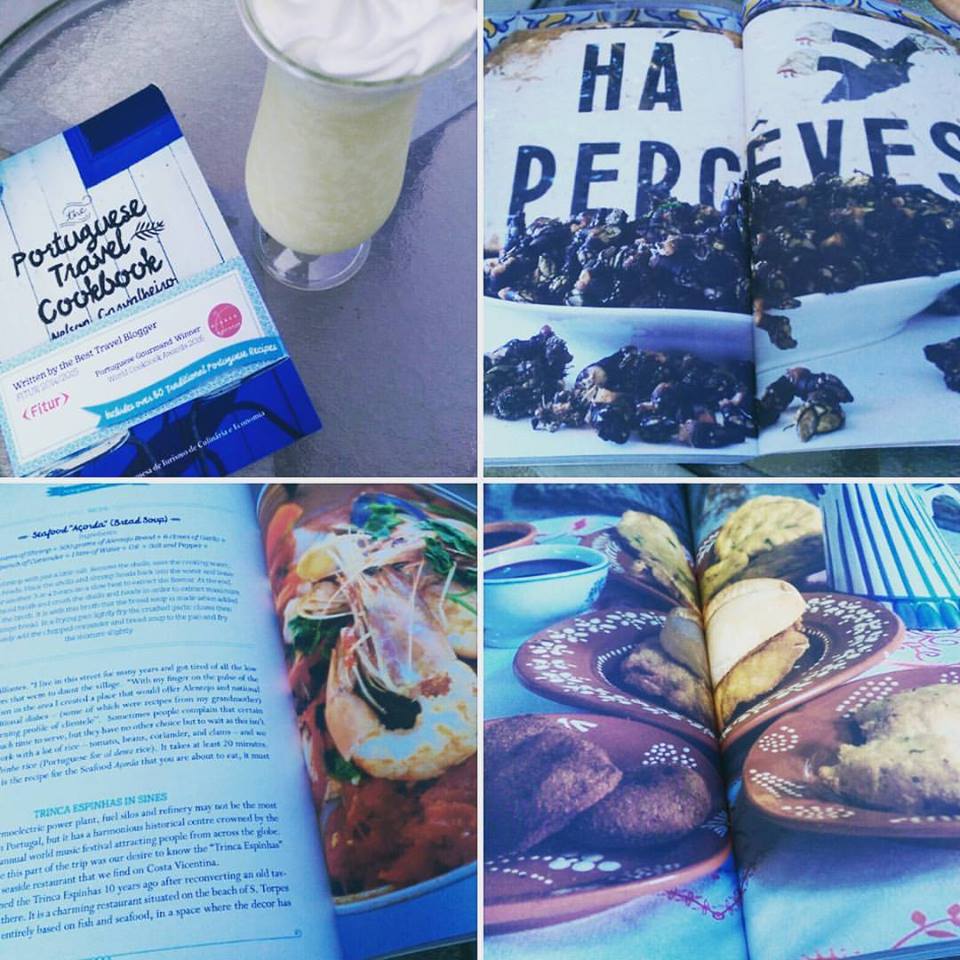 The cookbook took me on a spiritual, inspirational, and educational journey. Reading each page I felt as if was there traveling right alongside him, meeting the locals, listening to the stories from those faces that bring me back to the past. I could and taste the dishes so lovingly prepared by fisherman, farmers, chefs and locals he introduced me to. The familiar names which are so recognizable, the faces in the photographs that remind me of my ancestors and the foods that brought me sweet memories of family, love and home.
Portugal is a part of me. I have often longed to travel the paths which Nelson so lovingly paved for me and this book brings me to the same rustic tables he dined in the forgotten countryside of the north, I can taste the wine from the vineyards that grow in the mountains and valleys of the Douro. I see the Algarve with it’s beautiful beaches, cliffs and amazing seafood dishes. In the Alentejo I taste the wines, savor the rich foods from the land, and listen to the Cante Alentejo, (Alentejo popular singing) from those that love the land and sing about the joys and sorrows of life. Here’s the sample Nelson put in his book below.
“I am indebted to the earth, the earth is in debt to me. the land pays me with life; I pay the earth by dying.”
Although I left Portugal as a young girl, this cookbook made me feel as if I never left. Happy travel to Portugal everyone!
The food and the 50 authentic recipes had me at hello.
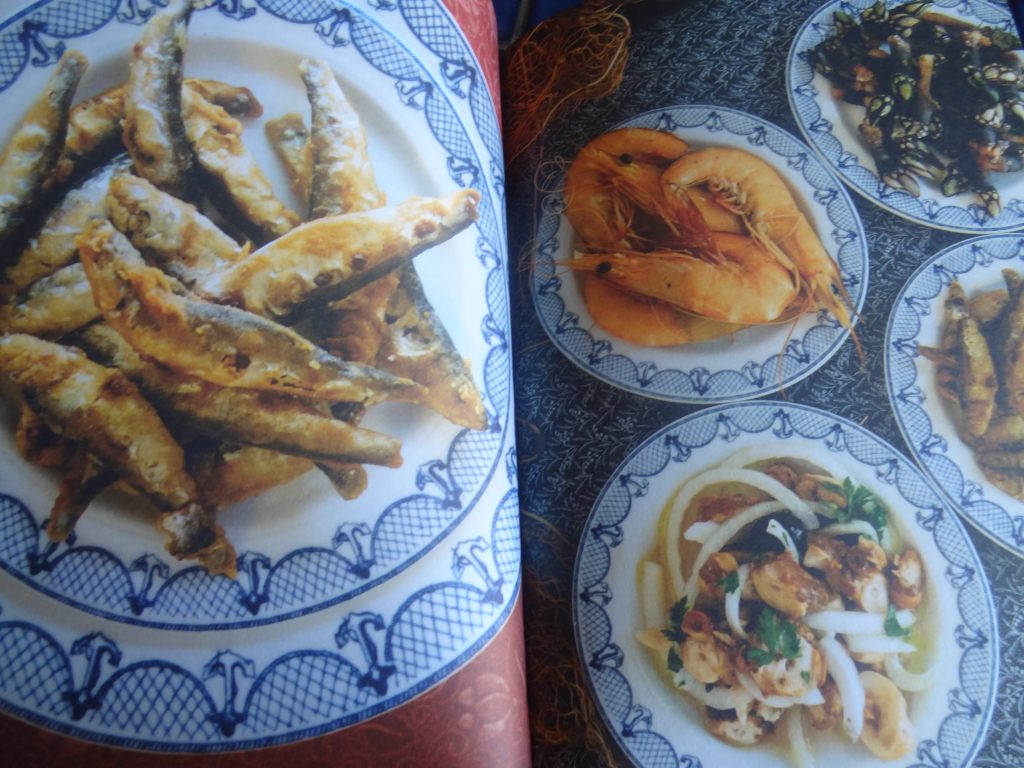
The beautiful rustic faces of our heritage remind me of my ancestors.
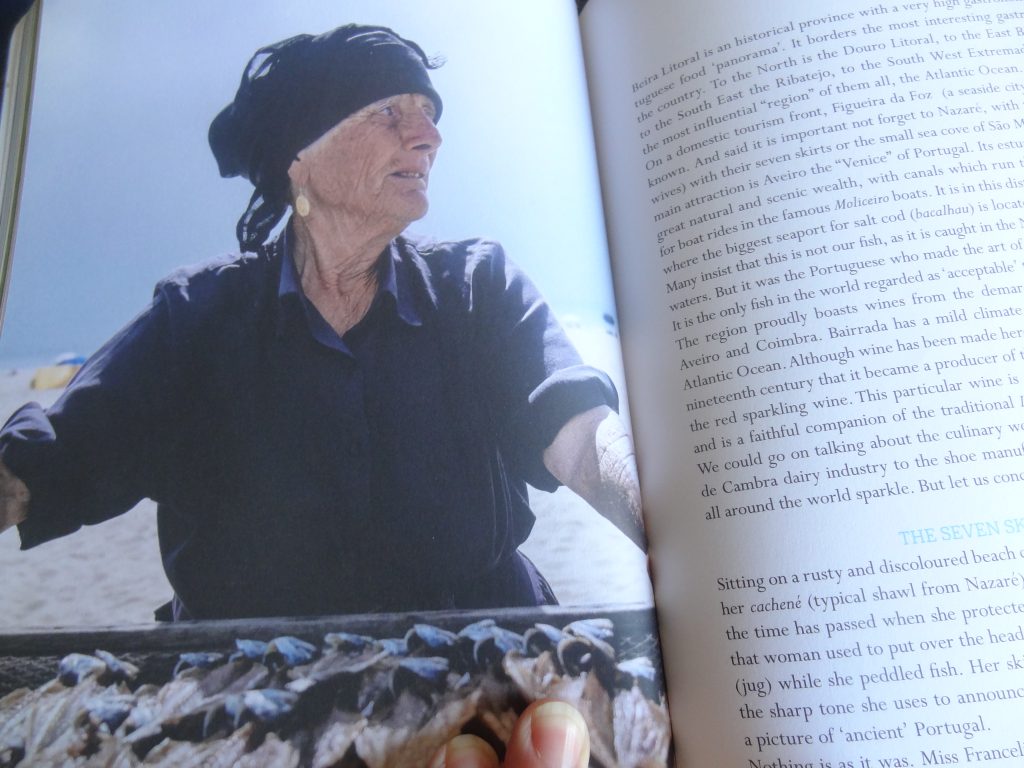
The spectacular photographs want me to jump on the plane and visit.

The beautiful cities and landscapes bring me to another time in history.

*Contest open to residents of USA and Canada only. Winner will be chosen at random on August 22, 2016.


You’ll love these egg rolls because they’re lite and easy to prepare. You can enjoy them any day of the week and no take out needed! Whenever I make these egg rolls I also make my easy Won Ton soup! Here’s the recipe.


Ingredients:
1 package of egg rolls wrappers
1 pound of ground pork (I used turkey for lower calories)
1 small yellow onion (thinly sliced and chopped)
1 shredded carrot
2 cloves garlic (minced)
1 large head of napa or bok choy cabbage (Chiffonade into strips)
8 oz of fresh bean sprouts
3 tablespoons soy sauce
1 teaspoon sesame oil
1 teaspoon salt
1/4 teaspoon black pepper
1 egg (beaten)
2 tablespoons of oil (for sauteing)
Cooking Spray
1 tablespoon olive oil
Sweet and Sour sauce for dipping
Preparation:
Heat the vegetable oil in large wok or saute pan. When the oil is hot add the pork. Season with salt and pepper and fry for a few minutes. Add the onions and garlic and cook for a few minutes longer until the pork is cooked.
Add the cabbage, carrots and sprouts and cook for 1 minute stirring once in a while. Add the soy sauce and sesame oil. Taste the filling and add more salt and pepper, or soy sauce if desired. Stir well remove from the heat and cool completely. Drain off any excess liquid.

Baking:
Preheat oven at 350 degrees F. Place 2 – 3 tablespoons of the filing in center of the wrapper and fold in the ends toward the center. Spread a little of the egg wash around the edges. Fold in sides and roll like a jelly roll. Repeat.
Coat a baking pan with cooking spray and place the rolls evenly in pan. Brush tops of the egg rolls with olive oil and cooking spray. Cook for about 12-15 minutes or until golden brown.
You may need to turn the egg rolls over to get all side crispy but this is optional. Note: You can also fry them in hot oil until golden.
Serve with soy sauce and sweet and sour sauce.
Frying:
Fry in oil for about 5-8 minutes until very golden crispy. Place on paper towels to absorb any grease.
Air Frying:
Spray prepared egg rolls with cooking spray on both sides. Cook at 400 degrees for about 8-10 minutes turning them over half way into cooking process.
Hot Lobster Rolls
I only have 3 words to say; Yum! Yum! Yum!


Makes 2-3 lobster rolls
Meat from 1 cooked lobster
1/2 stick of butter
Juice from 1/2 lemon
pinch of paprika
Hot buttered and toasted buns
Preparation:
Melt butter in a small saucepan, add the lemon juice, lobster meat and paprika.
Heat to warm. Serve on buttered and toasted hot dog buns! Eat slowly and savor each bite!
Taste Portugal cookbook was 1 of 5 cookbooks featured in an article;

 Julie is a British expat in Portugal who has a Portugal travel and lifestyle blog; Julie Dawn Fox in Portugal. She has passion for travel, writing and photography. She shares her information about the food, art, culture and off-the-beaten-track highlights of this fascinating and diverse country while inspiring visitors to explore the less touristy parts of Portugal from Northern Portugal to the Azores.
Stop by her website for great information on traveling, lifestyle, and the foods of Portugal! As Julie says on her website; “Trust me you’re going to love Portugal”!
Thanks for the great review Julie!
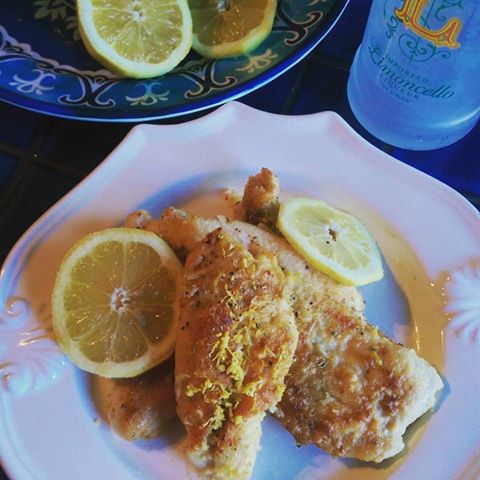
You will love this lemony flavored chicken! The recipe is simple to make and takes very little time to prepare.
I served the chicken with my recipe for Green Bean Rice which pares perfectly with lemony sauce.
Serves 4-8
Ingredients:
4 boneless chicken breasts (cut in half and pounded to 1/4-1/2 inch thick)
1 teaspoon salt
1/2 teaspoon pepper
1/2 teaspoon garlic powder
1/2 cup all purpose flour
1 cup chicken broth (or 1/2 chicken bouillon cube and 1 cup water)
1/4 cup Limonchello liquor
Zest of 1 lemon
Lemon slices
1/2 teaspoon dry oregano
1/4 cup olive oil
1/2 stick margarine or butter
Preparation:
Season the chicken with the salt, pepper and garlic powder. Coat with flour and set aside.
Heat 1/2 of the olive oil and 1/2 of the butter in a saute pan until hot. Cook 1/2 of the chicken in the oil for about 5-8 minutes turning chicken over on each side until golden brown. Set cooked chicken aside. Add the remaining oil and butter and cook the rest of the chicken and set aside.
Deglaze the pan with the chicken broth and limonchello and cook for about 3 minutes on high for the liquor to evaporate.
Place the chicken back into the pan. Add the lemon zest and simmer for about 5 minutes until the sauce thickens. Add the oregano, cover and let sit on low heat until ready to serve. Top with fresh lemon slices and serve.

My family loves bacalhau so I’m always trying new recipes. This week I gave the classic “Bacalhau a Gomes de Sa” a makeover by making it as a scalloped potato layered bake. It was very simple to prepare since I didn’t have to cook the potatoes a head of time like the traditional recipe.
The thin sliced potatoes mixed with the sweet onions and olive oil tones down the saltiness of bacalhau creating a wonderful blend.
This recipe is pretty versatile so you can go ahead and add lots of bacalhau or as little as you wish. We all decided that I would make this recipe from now on. Enjoy everyone!
Serves 6-8
Ingredients:
3-4 pounds of 1/8 inch thin sliced potatoes (washed with skin on)
1 and 1/2 pounds to 2 pounds of hydrated de-salted bacalhau (salt cod)
3 large onions (sliced 1/8 inch)
4 cloves of garlic (finely chopped)
1 cup of olive oil
1 teaspoon black pepper
1 teaspoon or more salt to taste
1 large roasted red pepper (cut into strips) (fresh or jarred)
Optional garnish: chopped parsley, sliced hard boiled eggs
Preparation:
Cook the cod in boiling water for about 5 -10 minutes depending on thickness.
Saute the onions and garlic in 1/4 cup of the olive oil until caramel colored.
Coat a large deep dish oven pan with olive oil and spread a small layer of the cooked onions.
Begin layering; potatoes, cod followed by onions and olive oil, then salt and pepper.
Complete the layers with the onions on top and arrange the red pepper on top.
Top with foil. When ready to cook, preheat oven to 400 degrees F.
Cook for 30-40 minutes covered with foil. Remove foil and cook for 30-40 minutes longer.
Test for doneness by piercing one potato in the middle of the pan.
Garnish with black olives and serve with extra olive oil for serving.


These lettuce wraps are easy to make since all you have to do is prepare the shrimp and then assemble then assemble.
The Asian dipping sauce brings out the flavor of the shrimp and adds a little kick. The wraps will be a perfect little appetizer, a lite lunch, snack or dinner as well. Enjoy!

 Baked Coconut Shrimp: Click here for the recipe page
Ingredients:
Boston bib lettuce
Shredded carrots
Bean sprouts
Peanuts (optional)
1 coconut shrimp recipe: Click here for the recipe page
1 Asian dipping sauce recipe: Click here for the recipe page
Happy Mother’s Day to all the moms!
“God could not be everywhere, and therefore he made mothers” Rudyard Kipling
Share memories and keep our Portuguese tradition alive. Order my Taste Portugal Cookbook!
![]()
These cinnamon rolls are easy to make and perfect for your morning coffee. When I bake breads or pastries that require risen dough, I try to use fresh yeast because the dough rises better. I get the fresh yeast at my local bakery who sells it for only .75 cents for a 2 oz cube which is a bargain! You can also find the yeast in the refrigerated section at the grocery store.

Ingredients:
4 and 1/2 cups regular flour (plus extra if needed)
1/2 cup regular sugar
1 egg
1 cup of milk
1 stick (8 tablespoons of butter or margarine) (melted)
1/2 teaspoon salt
1 and 1/2 packages of dry yeast or 1 cube (.6 oz) Fleishman’s cake yeast
A .6-oz cube of cake yeast is roughly equivalent to 1½ to 2 teaspoons instant yeast or 2 to 2¼ teaspoons active dry yeast.
Filling:
1 tablespoon melted butter
1/4 cup brown sugar
1 teaspoon cinnamon
1/2 cup of pecans (chopped optional)
Glaze:
1 cup confectioners sugar
1/4 teaspoon vanilla extract
1 and 1/2 tablespoons water or more
Preparation:
Warm the milk in a small pan and add melted butter. Test with you finger to be sure the mixture is warm but not hot. Add the yeast, and 1 teaspoon of flour, and 1 teaspoon of sugar. Stir to dissolve and let sit for a few minutes for yeast to activate.
Beat egg in large mixing bowl then add the milk and yeast mixture. Mix slightly. Switch mixer to a dough hook and add flour 1 cup at a time.
Mix the dough for at least 5 minutes and continue beating until the dough is smooth, elastic and air bubbles form. Remove dough and knead for a few minutes on floured surface. Add more flour if you find the dough too wet. Shape into a ball and place in a greased and floured bowl. Let rise for an hour or until doubled.
Grease very well a 13×9 inch deep dish baking pan. Mix the filling in a small bowl by mixing the sugar cinnamon and nuts. Roll dough into 18×12 inch rectangle. Brush the dough with the 1 tablespoon of melted butter.
Spread the filling evenly on the dough. Roll like a jelly roll and pinch the ends tightly.

Grease a knife and cut the dough into 15 even slices.

Place evenly into the pan. Cover and let rise in a low warm oven for about 20 minutes.


Preheat the oven to 400 degrees F..Bake rolls for about 25 minutes or until slightly browned. Note: Don’t let them overcook or they will get dry.
Let cool slightly. Make the glaze by mixing the ingredients and stirring until velvety smooth. Drizzle with glaze and serve.
Note: If you like a lot of glaze on the rolls, just double the recipe.

I made this pork for my husband’s birthday and it was a hit with the whole family! It came out perfectly with a beautiful golden color. The orange and onion combination brings a sweet taste and pairs well with the spices.
This company roast serves many people so it’s perfect for your next party or event! Serve it with any side or stay with the Portuguese theme with sides such as Portuguese roast potatoes or Portuguese rice! Enjoy!
Ingredients:
1 (8) pound boneless pork loin (The photo is 1 loin cut into pieces)
2 large oranges (1 sliced, 1 for juice and zest)
1 large onion (sliced)
Marinade:
1 cup of white wine
1/4 cup of olive oil
2 tablespoons of melted butter or margarine
1 tablespoon salt
1 teaspoon black pepper
4 cloves garlic (finely minced)
1 tablespoon paprika
1/4 teaspoon thyme 0r rosemary (optional)
Preparation:
2 hours or day before:
Make marinade: Zest one orange and squeeze out juice. Place in a small bowl and add the remaining ingredients. Mix well. Save the other orange for later.
Place the onions evenly in a deep baking pan. Place the pork over the onions and pour over the marinade. Top with the orange slices.
Let marinade at least 2 hours or overnight in refrigerator.


When ready to cook, preheat oven to 350 degrees F. Remove the pork from the refrigerator at least 20 minutes before cooking.
Cook for about 1 hour, then coat pork with the pan drippings. Cook for about 15-20 minutes longer. Check temperature with meat thermometer which read about 160 -165 degrees F.
Let sit for 10 minutes before slicing. Reserve the drippings and place the sliced pork back into the pan with the drippings. Serve the onions and sauce over the pork.
Note: Every oven cooks at different temperatures. Adjust your cooking time accordingly.


I made this salad last week and it was absolutely amazing! The sweet berries mixed with the tangy beets go great together and the almonds gave it a nutty crunch. It’s packed with great antioxidants so it’s good for you too!
I made a simple balsamic vinaigrette but you can can use any berry dressing you prefer. This is the type of salad that you can be creative with and more or less ingredients, any type of beery or nuts you choose.
It’s a keeper for all of your summer meals! Enjoy!

 Ingredients:
1 pound or more of spring salad mix or more
1/2 small red onion (finely sliced)
1 cup of sliced pickled beets
8 ounces of blackberries
2 tablespoons of goat cheese
1/2 cup of sugared almonds or pecans (optional)
Balsamic Vinaigrette:
1/4 cup olive oil
1/4 cup of balsamic vinegar
1/2 teaspoon of salt
1/2 teaspoon of regular mustard
1/4 cup crushed black pepper
2 garlic cloves (finely minced)
Preparation:
Place salad in bowl. Top with the beets, blackberries, and onions. Top with crumbled goat cheese and almonds.
Prepare the dressing by whisking all ingredients very well. When ready to serve pour dressing over salad and toss gently or in individual salad bowls.
Note: Pour dressing sparingly to your taste only when ready to serve or the lettuce will wilt.


This potato salad is enhanced with the leaks and red onions which give it a sweetness. The dill gives it a kick. I only add a half cup of mayonnaise because I like a lite salad, but you can add more if you prefer.
Ingredients:
2 pounds potatoes (Peeled or unpeeled chopped into 1-2 inch cubes)
1 leek (chopped into small pieces)
2 small carrots (chopped into small pieces)
1/4 red onion (finely minced)
1 tablespoon salt
1 teaspoon pepper
1/2 teaspoon garlic powder
1/4 teaspoon paprika
2 teaspoons dill (finely minced)
1/2 cup of mayonnaise
Preparation:
Cook the potatoes with the carrots, leeks and salt for about 10 minutes until slightly tender. Do not overcook or the potatoes will get too mushy.
Drain and place in a large bowl. Add all the ingredients and fold gently. Sprinkle with more dill before serving.
 You can make a great healthy soup in just 15 minutes with this easy recipe. Enjoy!
Ingredients:
2 packages of frozen tortellini soup mix (I use Angy’s)
2 scallions (finely sliced)
1/2 roasted red pepper (cut into small cubes)
4 cups of fresh spinach
Black pepper for garnish
Chopped scallions for garnish
Preparation:
Cook the tortellini to package directions. Add scallions, red pepper and spinach during the last 5 minutes of cooking time.
Season with black pepper and scallions before serving.


This one pot dish for any day of the week has always been a family favorite. It’s often requested and called; Portuguese Chicken and Rice. I’ve added mushrooms for a variation, but this is optional to your taste. Enjoy!
Ingredients:
8 to 10 pieces of chicken (I used skinless thighs)
2 cups long grain
1 medium onion (finely chopped)
1 large carrot (chopped) optional
1 large ripe tomato (chopped)
2 tablespoons olive oil
2 teaspoons of salt
1 teaspoon pepper
1 teaspoon garlic powder
1/4 teaspoon paprika
1 bay leaf
6 or more cups of boiling water
1 Knorr chicken bouillon cube or 1 cup chicken broth
1 large carrot (chopped) (optional)
1 cup frozen peas (optional)
chopped parsley for garnish
Preparation:
Season the chicken with the spices and let marinade for a few hours or overnight in the refrigerator.
Brown the chicken on both sides in the olive oil in a very large deep skillet. Add the onion bay leaf and tomato, and saute for about 5 minutes.
Add the water, bouillon, cover and let simmer for about 15 minutes. Add the rice, stir let come to a boil and cover. Let cook for about 15 minutes longer.
Taste the rice for doneness. I like a firm rice, but if you prefer a more well done rice cook longer. Add more boiling water if you find the rice has dried out.
When the rice is cooked, turn off heat and spread the mushrooms over it and cover. The steam will cook the mushrooms so need to keep cooking.
When ready to serve top with chopped parsley or scallions.

This one pan meal has protein, fiber, and all the vitamins you need for a healthy lunch or dinner. It also makes a great side dish. It pairs perfectly with salt cod (bacalhau) tuna or fish. Enjoy!
Serves 2 as main dish, or 4 as side dish
Watch the youtube video from our Youtube page!
Ingredients:
4 cups of kale (stalks removed and chopped)
1 can of chick peas
1 small onion (chopped)
2 cloves of garlic (chopped) (optional)
4 eggs (boiled and quartered)
1/4 cup olive oil
1 teaspoon of vinegar (optional)
Salt
Pepper

Preparation:
Saute the onion and garlic in half of the olive oil for about 1 minute on medium heat. Add the kale and saute stirring once in a while. You will notice the kale will start to wilt as it cooks. Lower heat and cook the kale to your desired preference for as little as 5 minutes to 10 minutes or longer.
Drain and rinse chick peas and add to the kale. Cook until the chick peas are warm. Add the salt and pepper to taste.
Drizzle with the remaining olive oil and vinegar before serving.

 This recipe is one of the easiest I’ve ever made! I served the shrimp with white rice an Asian cucumber salad on the side. Enjoy!
Baked Coconut Shrimp
Ingredients:
1 pound medium shrimp (peeled and devained with tail on)
2 egg whites (beaten)
1/2 cup shredded sweetened coconut
6 tablespoons Panko bread crumbs
3 tablespoons flour
1/2 teaspoon salt
1/4 teaspoon black pepper
cooking spray
Asian Dipping Sauce: (optional)
1/4 cup soy sauce
1 tablespoon brown sugar
1 tablespoon rice vinegar
1 tablespoon orange juice
1/2 teaspoon sesame oil
1/2 teaspoon sesame seeds
1/4 teaspoon crushed red pepper flakes or a dash of hot sauce
Asian Cucumber Salad
1/2 English cucumber (sliced very thin)
Asian Dipping sauce
Shrimp Preparation:
Season shrimp with salt and pepper and let sit for a few minutes. Grease a baking sheet with cooking spray and preheat oven to 450 degrees F.
Dip shrimp into egg whites in a small bowl. Mix the remaining ingredients in a small bowl and heavily coat each shrimp with the mixture.
Place shrimp on baking sheet and spray top of each with cooking spray. Cook for 8-10 minutes until slightly golden brown.
Meanwhile make dipping sauce by mixing all the ingredients in a small bowl and let it sit until ready to serve.
 Preparation for Cucumber Salad:
Make a double batch of the Asian dipping sauce. Place cucumbers in a small bowl with sauce and let sit for at least 30 minutes to absorb flavors and serve.


Nothing is more comforting than a hearty bowl of soup in a snow storm! This soup cooked in 30 minutes so it’s an easy lunch or dinner. It’s packed with vitamins and protein from the kale and chick peas, and if you’re a vegetarian, simply substitute the broth using vegetable broth and use cheese tortellini instead of meat. You can also cheat a little by using a tortellini soup mix which I often do! Enjoy and stay warm this month. Spring in just around the corner!
Tortellini Kale Vegetable Soup
Ingredients:
1 (12 oz.) package of uncooked tortellini with meat or cheese
4 cups of kale (roughly chopped)
2 large carrots (sliced into 1/4 inch)
1 28 – 32 oz can cooked chick peas
1 large onion (finely chopped)
1 32 oz can of chopped tomatoes with Italian seasonings
4 cups chicken broth
4 – 6 cups water
2 cloves garlic (finely minced)
1 bay leaf
1/4 cup olive oil
Salt
Pepper
Preparation:
Saute the onion, carrots and bay leaf in the olive oil for a few minutes. Add the tomatoes and let simmer for 5 minutes.
Add the broth, water, salt and pepper and let come to a boil. Add the chick peas, kale, and tortellini. Let come to a roiling boil. Reduce heat to medium and let cook for about 20 minutes or longer depending how you like your vegetables. Taste soup and add more seasonings if desired.
Add a drizzle of olive oil and more pepper to bowl before serving. Serve with crusty bread and butter and your dinner is served!
Kale photo credit (http://www.onceuponachef.com/2014/06/asian-kale-slaw-ginger-peanut-dressing.html)


Broccoli Apple Salad

The pictures tell the story, so there is no need to tell you how deliciously good and healthy this salad is! The best part is; no cooking involved! Enjoy it!

Ingredients:
2 cups broccoli florets (finely chopped)
4 small apples (cored and finely chopped)
1/4 cup dried cranberries
1/4 cup of onion (yellow or red finely minced)
Seeds from 1/2 of whole fresh Pomegranate
1/4 cup of chopped walnuts and almonds or a mix
1 tablespoon of fresh lemon juice
3 tablespoons of mayonnaise
1/2 teaspoon of fresh cracked black pepper
pinch of salt
fresh spring salad mix (optional for serving)
Preparation:
Gently toss all of the ingredients into a large salad bowl. Taste and add more lemon juice, salt and pepper to taste. Serve over spring salad mix, crackers, pita bread or as is. Enjoy!!


In the Island of Madeira, during the family reunion on Christmas Eve it is customary to have chicken broth, apart from other meat dishes. Also, families usually drink the typical homemade tangerine, orange and anise liqueurs or even a glass of Madeira Wine.
On Christmas Day, a dish of Vinho d’ Alho, pork loin marinated in wine is served.
Ingredients:
2 pounds of pork loin (with some fat cut into 2 inch cubes)
1 cup of red wine vinegar
1 cup of dry white wine
2 tablespoon of kosher salt
10 garlic cloves (chopped)
3 Bay leaves
1 teaspoon black Pepper
1 teaspoon dried red pepper flakes
1 teaspoon of paprika
1/4 cup olive oil
Preparation:
Cut the meat in cubes and season with salt. Let marinate for 12 hours. Make marinade with the vinegar, wine, garlic, bay leaves, pepper, pepper flakes, paprika and 1/4 cup of the olive oil.
Place the meat in the marinade for at least three days in the refrigerator. The traditional way is to marinate in a food safe clay pot but you can use a ceramic bowl or plastic bag.
Drain the meat from the marinade and cook in hot heavy skillet in a little olive oil. Cook in batches until browned on all sides and fully cooked.
The traditional way to serve the pork is with crusty bread that has been fried in the same pan using any leftover oil.
Serve with bread, potatoes, or rice.
Image credit: portuguesefoodrecipes.com

Start your New Year’s Eve festivities with this healthy Holiday Berry Nut Salad. I’m still finishing up with the leftovers from Christmas so I made this healthy salad using all of the leftover fruits, nuts, and specialty cheeses and cold cuts!
The dressing is a simple and light Balsamic Apricot dressing that pairs perfectly with the saltiness of the cheese and cold cuts!
Ingredients:
4 – 6 cups of Organic Spring Mix lettuce
1 carrot (sliced thinly into shreds) (optional)
6 – 12 blackberries
1/4 cup dried cranberries
1/4 cup dried cherries
6 -12 dried figs (cut in half)
1/4 cup almonds
1/4 cup walnut halves
1/8 cup cashews
1 or 2 oz. of Goat or Farmers cheese (crumbled)
2 slices of Gouda, Portuguese cheese or any other you prefer
3 or 4 slices of presunto (or Italian prosciutto) (rolled)
3 or 4 slices of any specialty cold cuts of your choice cut into strips
Dressing:
1/8 cup of olive oil
1/4 cup Balsamic vinegar
1/8 cup of Apricot preserves
1 drop of mustard
1 pinch of salt
1 dash of crushed black pepper
Preparation:
Place the spring mix on a large platter and arrange the ingredients on top. Mix all of the dressing ingredients in a small bowl and serve over the salad directly before serving.
You can make this salad in the morning and serve later. Enjoy!


When I owned ran my deli/coffee shop I made soups every day so I had to come up with new soups for a change to the menu. This Tortellini Minestrone Soup was one of my favorites to make because it was so simple, yet full of flavor. If you’re looking for a quick fix dinner on a cold day, you’ll just love how easy this is to make. It pairs perfectly with a grilled cheese sandwich or even a big slice of crusty bread! Enjoy!
Ingredients:
1/2 pound of fresh or frozen tortellini
1 28 -32 oz. can red kidney beans
1 16 oz can of chick peas
1 can chopped tomatoes
1 bay leaf
2 large carrots (sliced to 1/4 inch)
1 large celery stalk (diced)
1 medium onion (diced)
2 cloves garlic (diced)
2 tablespoons olive oil
4 cups chicken broth
4 cups of water
1 teaspoon salt
1/2 teaspoon pepper
1 tablespoon or more fresh chopped basil
1/2 teaspoon oregano
Parsley for garnish
Red pepper flakes for garnish
Preparation:
Saute the onion, garlic, celery, carrot, and bay leaf in the olive oil for about 5 minutes on medium heat. Add the broth, water, tomatoes and seasonings.
Let come to a boil and cook for 5 minutes longer. Add the beans, chick peas and tortellini. Let come to a boil, stir cover and let cook for about 15-20 minutes until tortellini is tender. Taste and add more seasoning if desired. Turn off heat until ready to serve. Add the parsley, red pepper flakes and more olive oil as garnish.

Most of us remember the delicious home fry rounds that our moms or grandmothers made for us. My mother was not exception. Every time the grandchildren spent the day at her house she would make them these fries with eggs. It became a tradition with all the kids in the family to expect to fed Avo’s fries and eggs for lunch. I kicked up the recipe with some spices, but you can just add a little salt if you prefer. These potatoes are almost always served with the famous dish; Bife a Portuguesa – Bife a Cavalo, (Steak on Horseback) which is a favorite on most Portuguese restaurant menus.

Ingredients:
3 large Russet Potatoes (scrubbed, washed, unpeeled, and sliced into 1/4 – 1/2 inch slices)
1 teaspoon salt
water
1 teaspoon salt
1/2 teaspoon garlic powder
1/2 teaspoon paprika
2 tablespoons oil (for frying)
2 tablespoons olive oil (for frying)
Piri Piri or any hot sauce for seasoning (optional)
Fresh Parsley (finely chopped)
Preparation:
Place the potatoes in a pan with enough cold water to cover them, add salt, ring to a boil and cook on high for about 15 minutes or until fork tender. Drain, cover with a lid and place the pan on the stove top for the moisture to evaporate for about 5 minutes.
Meanwhile heat 1/2 of both oils in a large skillet. Mix the salt, garlic powder and paprika in a small bowl.
Remove the potatoes from the pan and lay flat on a large sheet pan. Sprinkle with a light coating of 1/2 of the seasoning mix.
Fry the potatoes in batches with the oils on both sides until golden brown. Sprinkle with the remaining seasonings while still warm. When ready to serve, top with the parsley and piri piri if desired.

Nothing says fall like hearty soups made with a thick rich broth made with fall harvest vegetables. I used 3 different kinds of squash from my garden, but you can use whatever you prefer. My husband loves Pasta Fagioli soup, but I added extra flavor and richness with the squash. The soup is even better the next day so don’t be afraid to make this big pot of soup! The next day, just pick some crusty Portuguese bread or make your own Pao Milho – Corn Bread to go along with the soup and dinner is done! P.S. My husband loved it and so will your family! Enjoy the fall harvest!
 Look at the beautiful fall colors in these squash
Ingredients:
Note: You may use the following squash or substitute with your favorite.
1 cup Butternut squash (peeled and chopped into 2 chunks)
1 cup Acorn squash (peeled and chopped into 2 chunks)
1 cup Delicata squash (peeled and chopped into 2 chunks)
1 32 oz can of small white cannelloni beans
8 oz (1/2 package) of elbow pasta
1 small onion (finely chopped)
1 stalk of celery (finely chopped)
3 cloves garlic (finely chopped)
3 carrots (cut into 1/4 inch slices)
1 small ripe tomato (seeded and chopped into small pieces)
5 cups or more of water (depending on how thick you want the broth)
3 cups of chicken or vegetable broth
1/2 teaspoon pepper
1 tablespoon salt
1/4 cup olive oil
1 tablespoon fresh parsley (finely chopped)
1 tablespoon fresh basil (finely chopped)
1 teaspoon piri piri or hot sauce
1 tablespoon shredded Parmesan or pecorino cheese
Olive oil for garnish

Preparation:
Place the onion, garlic, celery and olive oil in a large soup pan or dutch oven. Cook for a few minutes until the onion is translucent. Add the squash and tomato, salt and pepper and saute for about 5 minutes. Add the water and broth and let come to a boil. Cover the soup and let cook for about 10 minutes until the squash is tender. Remove from heat and puree vegetable with an immersion blender to your desired consistency. Return to stove and let come to boil. Add the pasta, beans and the carrots and let cook on medium heat for about 10 minutes until the pasta is almost fully cooked. Add the parsley, and basil, stir and taste. Add the piri piri sauce if desired and more salt and pepper if needed. Remove from heat until ready to serve. The soup will thicken the longer it sits. Add a drizzle of olive oil and a the shredded cheese into each bowl if desired when serving.


Why get take out when you can cure your Asian cravings at home with this easy recipe for chicken and broccoli. All you need is one big stir fry pan which makes clean up even easier. Serve this with Jasmine rice recipe, or linguini pasta.
My tip: When ordering take out Chinese, I always ask for chop sticks and extra soy sauce and sweet sauce and of course the fortune cookies, which I save to create this dish at home. My family loves using the chop sticks and it feels like real take out!
Here’s a fortune cookie sayings archive to share with your family! 🙂
My favorite is: A smile is a passport into the hearts of the others!

Serves 4-6
Ingredients:
3 large boneless chicken breasts (cut into thin 2 inches pieces)
3 cups of broccoli florets
2 small carrots (cut into thin 2 slices)
1 tablespoon of corn starch
sesame seeds for garnish (optional)
peanuts or cashews for garnish (optional)
3 – 4 tablespoons of vegetable or canola oil
Sweet Sauce for seasoning
Soy sauce for seasoning
Sauce:
1 scallion (sliced)
2 cloves of garlic (finely chopped)
2 teaspoons of fresh ginger (finely chopped)
1/2 cup of soy sauce
1 cup of chicken broth
1 tablespoon of brown sugar
1 tablespoon of orange juice
1/4 teaspoon of crushed red pepper flakes
pinch of salt
Preparation:
Mix the sauce ingredients in a small bowl. Place the 1/2 sauce ingredients into a medium bowl or plastic bag, add the chicken and let marinade for at least 1 hour.
Heat 1 tablespoon of the oil in a large wok or non stick skillet on high heat. Drain the chicken and add to the oil cooking in batches and browning on both sides. Add more oil as needed.
When chicken is done, remove from pan and set aside while you cook the vegetables.
Add 1 tablespoon of oil to the same pan. Heat to high and add the vegetables. Stir fry the vegetables for about 5 minutes until slightly crispy. Don’t worry if they aren’t cooked through. They will cook longer when you add in the chicken.
I like my broccoli very crispy but you can cook longer if you prefer. Remove the broccoli from the pan and set aside.
Add the remaining 1/2 marinade to the pan and let come to a boil. Add the cornstarch and cook for a few minutes to thicken. Add the chicken and vegetables to pan and stir to coat with the sauce. Let cook for about 5-8 minutes to absorb all the flavors together.
Taste the sauce and add more soy sauce, sweet sauce, and the red pepper flakes if desired. When you achieve your desired flavors add the sesame seeds and nuts, and serve.

 Look at that beautiful color on the broccoli.


Never throw away your day old bread. Make this Panzanella salad. Simply cut the bread into 1 inch cubes, coat with a little olive oil and your favorite seasonings and cook in your oven for a few minutes until crispy. This salad is easy to make and you can substitute the meats with any you prefer. Enjoy!
Ingredients:
Chourico sausage (thinly sliced)
Presunto (Prociutto * thinly sliced and chopped)
Tomatoes (cut into chunks)
Cucumbers (cut into chunks)
Apple (cut into chunks) This is optional
Cheese (cut into small cubes)
Red Onions (sliced thinly)
Olive oil
Red wine vinegar or Balsamic vinegar depending on your preference
Salt
Pepper
Basil (chopped)
Crusty Bread cut into cubes or store bought croutons
Preparation:
Place the tomatoes, cucumbers, tomatoes, chourico, presunto, and onions in a deep salad bowl.
Make dressing by mixing equal parts oil and vinegar and then add salt and pepper to your taste in a small jar and shake well.
Pour dressing over the salad. Top with basil and the croutons.
Note: Make the salad ahead of time and store in the refrigerator before adding the dressing if you want to serve it later in the day.
 This is a cake which was once served to a King of Portugal has become the traditional cake of AlfAlfeizerão and is famous throughout Portugal.
In Portuguese tradition, it is said that this cake has its origins from the Monastery of Stª. Maria de Cós, a nuns convent which was founded in the Twelfth century by Abott D. Fernando in Cós, Alcobaca, Portugal.
Around the Fourteenth century, the nuns of the monastery taught the Pão-de-ló , recipe to local women of the nearby town of AlfAlfeizerão which is a few miles from Alcobaca and was the home town of the Sir Knight Vitorino Froes, a close friend of the then King Don Carlos.
The King often visited Knight Froes estate S. Martinho do Porto, where the best delicacies and desserts where served. Pão-de-ló was a favorite and revered dessert at that time. The legend is that, on one occasion, the cake was served slightly unbaked which gave it a runny consistency in the middle upon slicing it. However, the king instantly fell in love with this cake and from then on insisted it be served in this same way.
4 eggs – 4 ovos;
8 egg yolks – 8 gemas;
1 and 1/4 cup granulated sugar – 250 g de açúcar;
1 cup flour – 125 g de farinha;
1 teaspoon whiskey – 1 colher (chá) de aguardente; (optional)
Zest from 1/4 of 1 lemon – raspa de ¼ de limão; (optional)
Butter or margarine for greasing pan – manteiga (para untar)
Beat the eggs, egg yolks, sugar, with the lemon zest and the teaspoon of whiskey for about 10 minutes until light and fluffy and double the volume.
Bata as gemas, os ovos e o açúcar, com a raspa de limão e a colher de chá de aguardente, até obter um creme fofo e volumoso.
Fold in the flour gently until all incorporated.
Junte suavemente a farinha sem bater muito.
Grease a cake pan very well or use and bake the cake at 320 F. for about 15-20 minutes.
Unte uma forma com manteiga. Leve ao forno a 160ºC, durante cerca de 15 a 20 minutos.
Remove the cake slowly from the pan so it does not split open.
You may bake in a round cake pan which is lined with parchment paper.
Deve ser desenformado cuidadosamente para não abrir.
Nota: para o pão-de-ló de Alfeizerão há umas formas artesanais feitas propositadamente. Também o pode fazer em forma redonda lisa, forrada com papel.
Recipe credit:
https://www.facebook.com/deliciasdaestrela/app_160650480751745
https://artesviagensesabores.wordpress.com/2008/04/20/pao-de-lo-tipo-alfeizerao/
 When you take one bite of this flat bread you’ll taste the delicious savory flavor of the chourico and eggs breakfast that you enjoy on weekend mornings!
This flat bread is my husbands new favorite! He loves everything with chourico and, he’s also is a pizzaholic so its a perfect combination for his taste buds. He did request more eggs on top the next time I make it! Now he wants me to make a flat bread out of his other favorite dish, Carne Alentejana! I better get experimenting. Enjoy!
Find this recipe along with recipe for dough in my Taste Portugal More easy Portuguese recipes cookbook.
Ingredients
1 lb of pizza dough (find recipe on this blog)
1/2 to 1 whole chourico or linguisa sausage cut into spices
eggs (as many as you want for topping pizza)
1 small onion (thinly sliced)
1 clove garlic (finely minced)
1 or more cups shredded cheese (any favorite)
2 tablespoons chopped fresh basil
2 teaspoons olive oil
Fresh cracked pepper
1/4 cup Shredded Parmesan cheese
Flour and course corn meal for dusting pan

Preparation:
Preheat oven to 425 F.
Spread out pizza dough into a thin desired shape on a cookie sheet that has been dusted with flour an a little course corn meal.
In a small skillet add one teaspoon of olive oil and saute the onions and garlic for about 2 minutes on medium heat.
Add the sliced chourico and let brown for a few minutes. Set aside to cool.
When dough is cool, spread the chourico evenly on the dough. Sprinkle with the basil and the shredded cheeses.
Break the eggs gently and place evenly spaced on top. Drizzle the remaining olive oil over the eggs and chourico.
Top with fresh cracked pepper. Cook for about 15-20 minutes until the dough is golden brown.


This is my husbands favorite sandwich. He is definitely a chouricoholic and never says no to anything with chourco! This recipe is simply easy to cook and the best part is it’s so delicious. A perfect easy dish for breakfast, lunch or dinner! Enjoy!

Ingredients:
1/2 small chourico sausage (sliced lengthwise)
1/2 small onion (finely sliced)
1 egg
2 tablespoons olive oil
1 teaspoon white wine
Salt & Pepper to taste
1 Portuguese roll or any favorite bread
Preparation:
In a small skillet on medium heat place 1 tablespoon of olive oil and heat until hot, but not smoky. Add the chourico and cook until golden brown and slightly crispy on both sides.
Remove from pan when done and add the onions. Cook onions on medium until golden brown stirring often. If the pan is to hot lower heat. I like my onions slightly undercooked but you cook them more or less to your preference.
Add the wine and cook for about 2 minutes stirring often. Remove onions from heat and set aside while you cook the egg.


Add the remaining 1 tablespoon of olive oil to a nonstick skillet on medium heat. When the oil is hot but not smoky, add the egg and fry until the edges are crispy. Lower heat if necessary.
Turn off heat and remove pan from burner.
Place the chourico on bread with the onions on top.


Add the fried egg on top of the onions and serve with the bread over it or on the side.


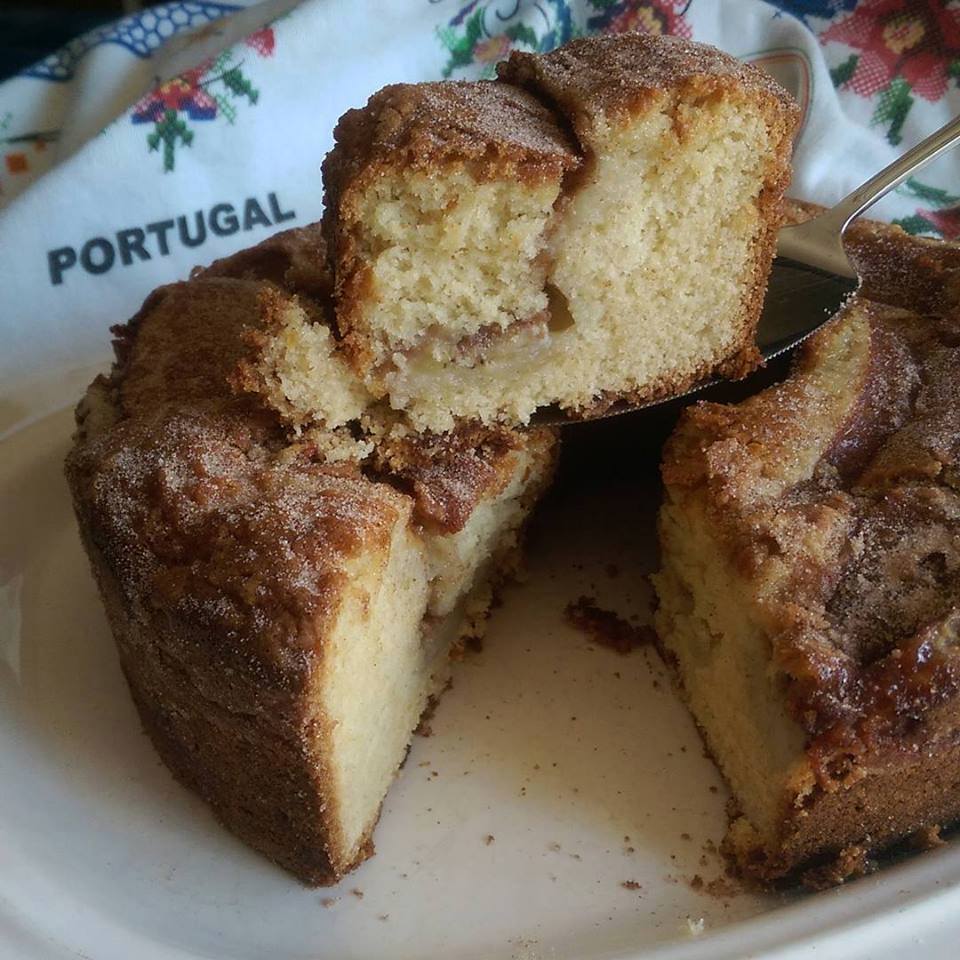

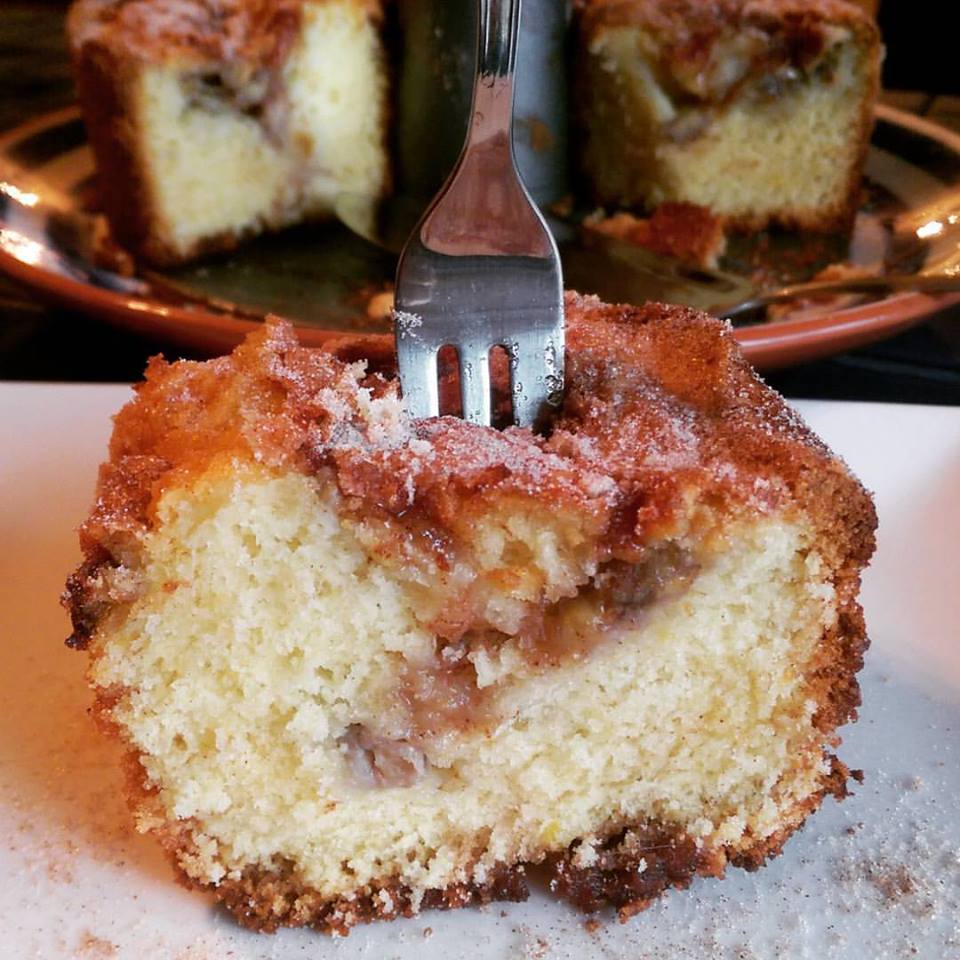
This warm banana bread is irresistible! The recipe for this batter is very light and fluffy, with a touch of sugar and cinnamon. FYI, did you know that the word “banana” originates from the Portuguese word “banana”?
This recipe is shared from a fan of Tia Maria’s Blog!
Thanks Mary! I’ve posted the recipe in both English and Portuguese as shared by Mary. Enjoy!
Um bolo de banana quentinho… hum irresistível! A receita dessa massa é muito levinha e fofinha e leva um toque de açúcar com canela. Prepare essa delícia!
Recipe by: Mary Connie De Pao
Ingredients:
3 eggs – 3 ovos (separated)
1/2 cup orange juice – ½ xícara (chá) de suco de laranja
1 and 1/2 cups of sugar – 1 e ½ xícara (chá) de açúcar
1/2 cup vegetable oil – ½ xícara (chá) de óleo
2 cups sifted flour – 2 xícaras (chá) farinha de trigo peneirada
1 tablespoon baking powder – 1 colher (sopa) fermento químico em pó
2 large ripe bananas – 2 bananas ( grandes) nanica madura
Sugar and cinnamon for topping – (1/4 cup sugar + 2 tsp cinnamon) Açúcar e Canela para decorar
Preparation:
1. Beat the egg yolks, orange juice, sugar and the oil in a blender or kitchenaid mixer.
1- No liquidificador bata as gemas, o suco de laranja, o açúcar, o óleo.
2. Cut the bananas lengthwise into thin strips and reserve for later.
2- Corte as bananas no sentido de seu comprimento, em fatias bem finas. Reserve.
3. Place the egg and sugar mixture into a large bowl and add the flour a little at a time mixing well.
3- Passe a mistura para uma tigela e adicione a farinha aos poucos.
4. Add the baking powder and mix well.
4- Acrescente o fermento em pó e misture.
5. In a separate bowl, beat the egg whites to form stiff peaks.
5- Em outra tigela bata as claras em neve.
6. Gently fold the egg whites into the batter until mixed.
6- Coloque delicadamente as claras na massa de bolo e misture.
7. Pour the batter into a greased and lightly floured bundt pan.
7- Despeje a massa em uma forma untada e polvilhada com farinha de trigo.
8. Place the banana slices over the entire top of the cake batter.
8- Em cima da massa adicione as fatias de banana cobrindo toda a superfície do bolo.
9. Make a mixture of sugar and cinnamon and sprinkle 1/2 of mixture over the banana cake.
9- Faça uma misturinha de açúcar e canela e salpique em cima do bolo de banana.
10. Bake in pre heated oven at 350 degrees F. for approximately 45 minutes until golden.
10- Leve ao forno pré-aquecido 180° por aproximadamente 45 min ou até que esteja dourado.
11. Sprinkle on the rest of sugar and cinnamon and cook for another 5-10 minutes.
11. Salpique o resto de açúcar e canela em cima do bolo e leve of forno por aproximadamente 5 -10 min.
12. Let cool slightly and remove cake.
12. Deixe esfriar um pouquinho e desenforme.
12. Serve
12- Sirva a seguir.
Note: Mary doubled the recipe for an extra large cake.

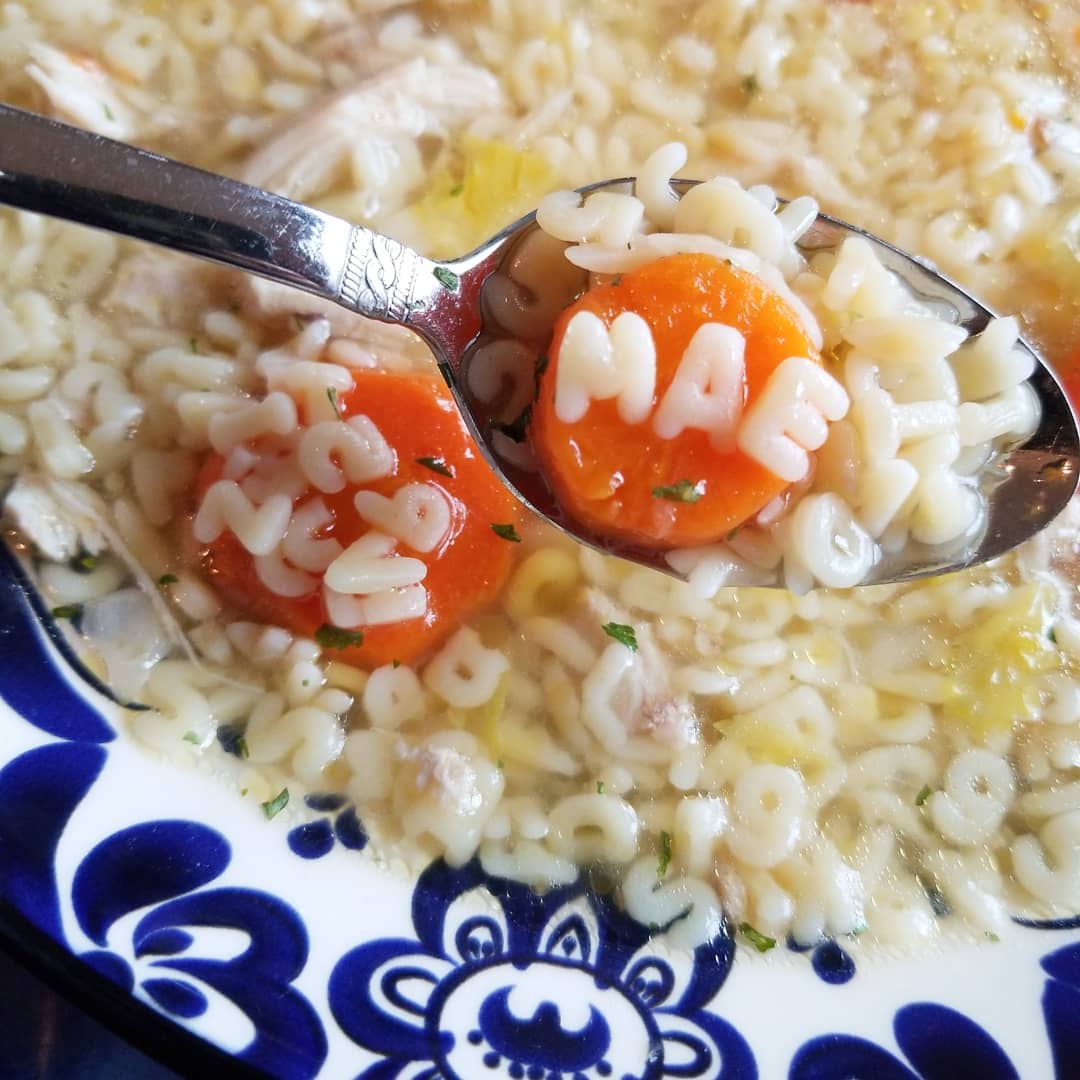
A perfect remedy for a Spring cold. This Chicken Noodle Soup will be ready in under 60 minutes. I used stars, but you can use rice or any favorite small pasta.
Ingredients:
6-8 cups of water
1 Chicken leg quarter
1 cup of star or any small soup pasta
1/2 small onion (chopped into small pieces)
1 garlic clove
2 medium carrots (thinly sliced)
2 stalks celery (Chopped into small pieces)
2 chicken boullion cubes
1 teaspoon salt
1/2 teaspoon black pepper
1/2 teaspoon crushed red pepper flakes
Parsley for garnish
Preparation:
Bring water to a boil in a medium pan. Add the chicken, onion, garlic, 1 celery, salt, and bouillon cubes. Let come back to a boil, cover and let cook for 45 minutes on medium heat.
After the 45 minutes remover the chicken from pan. When cool, remove the meat from the bone and chop into small pieces.
Add the chicken back into the soup along with the pasta, remaining carrot, celery, pepper flakes, and black pepper. Cook on medium uncovered for about 10 minutes.
If you want a thinner soup, add more water and let it come to a boil. Taste and add seasonings to your taste.
Serve with parsley flakes and more red pepper flakes if desired.
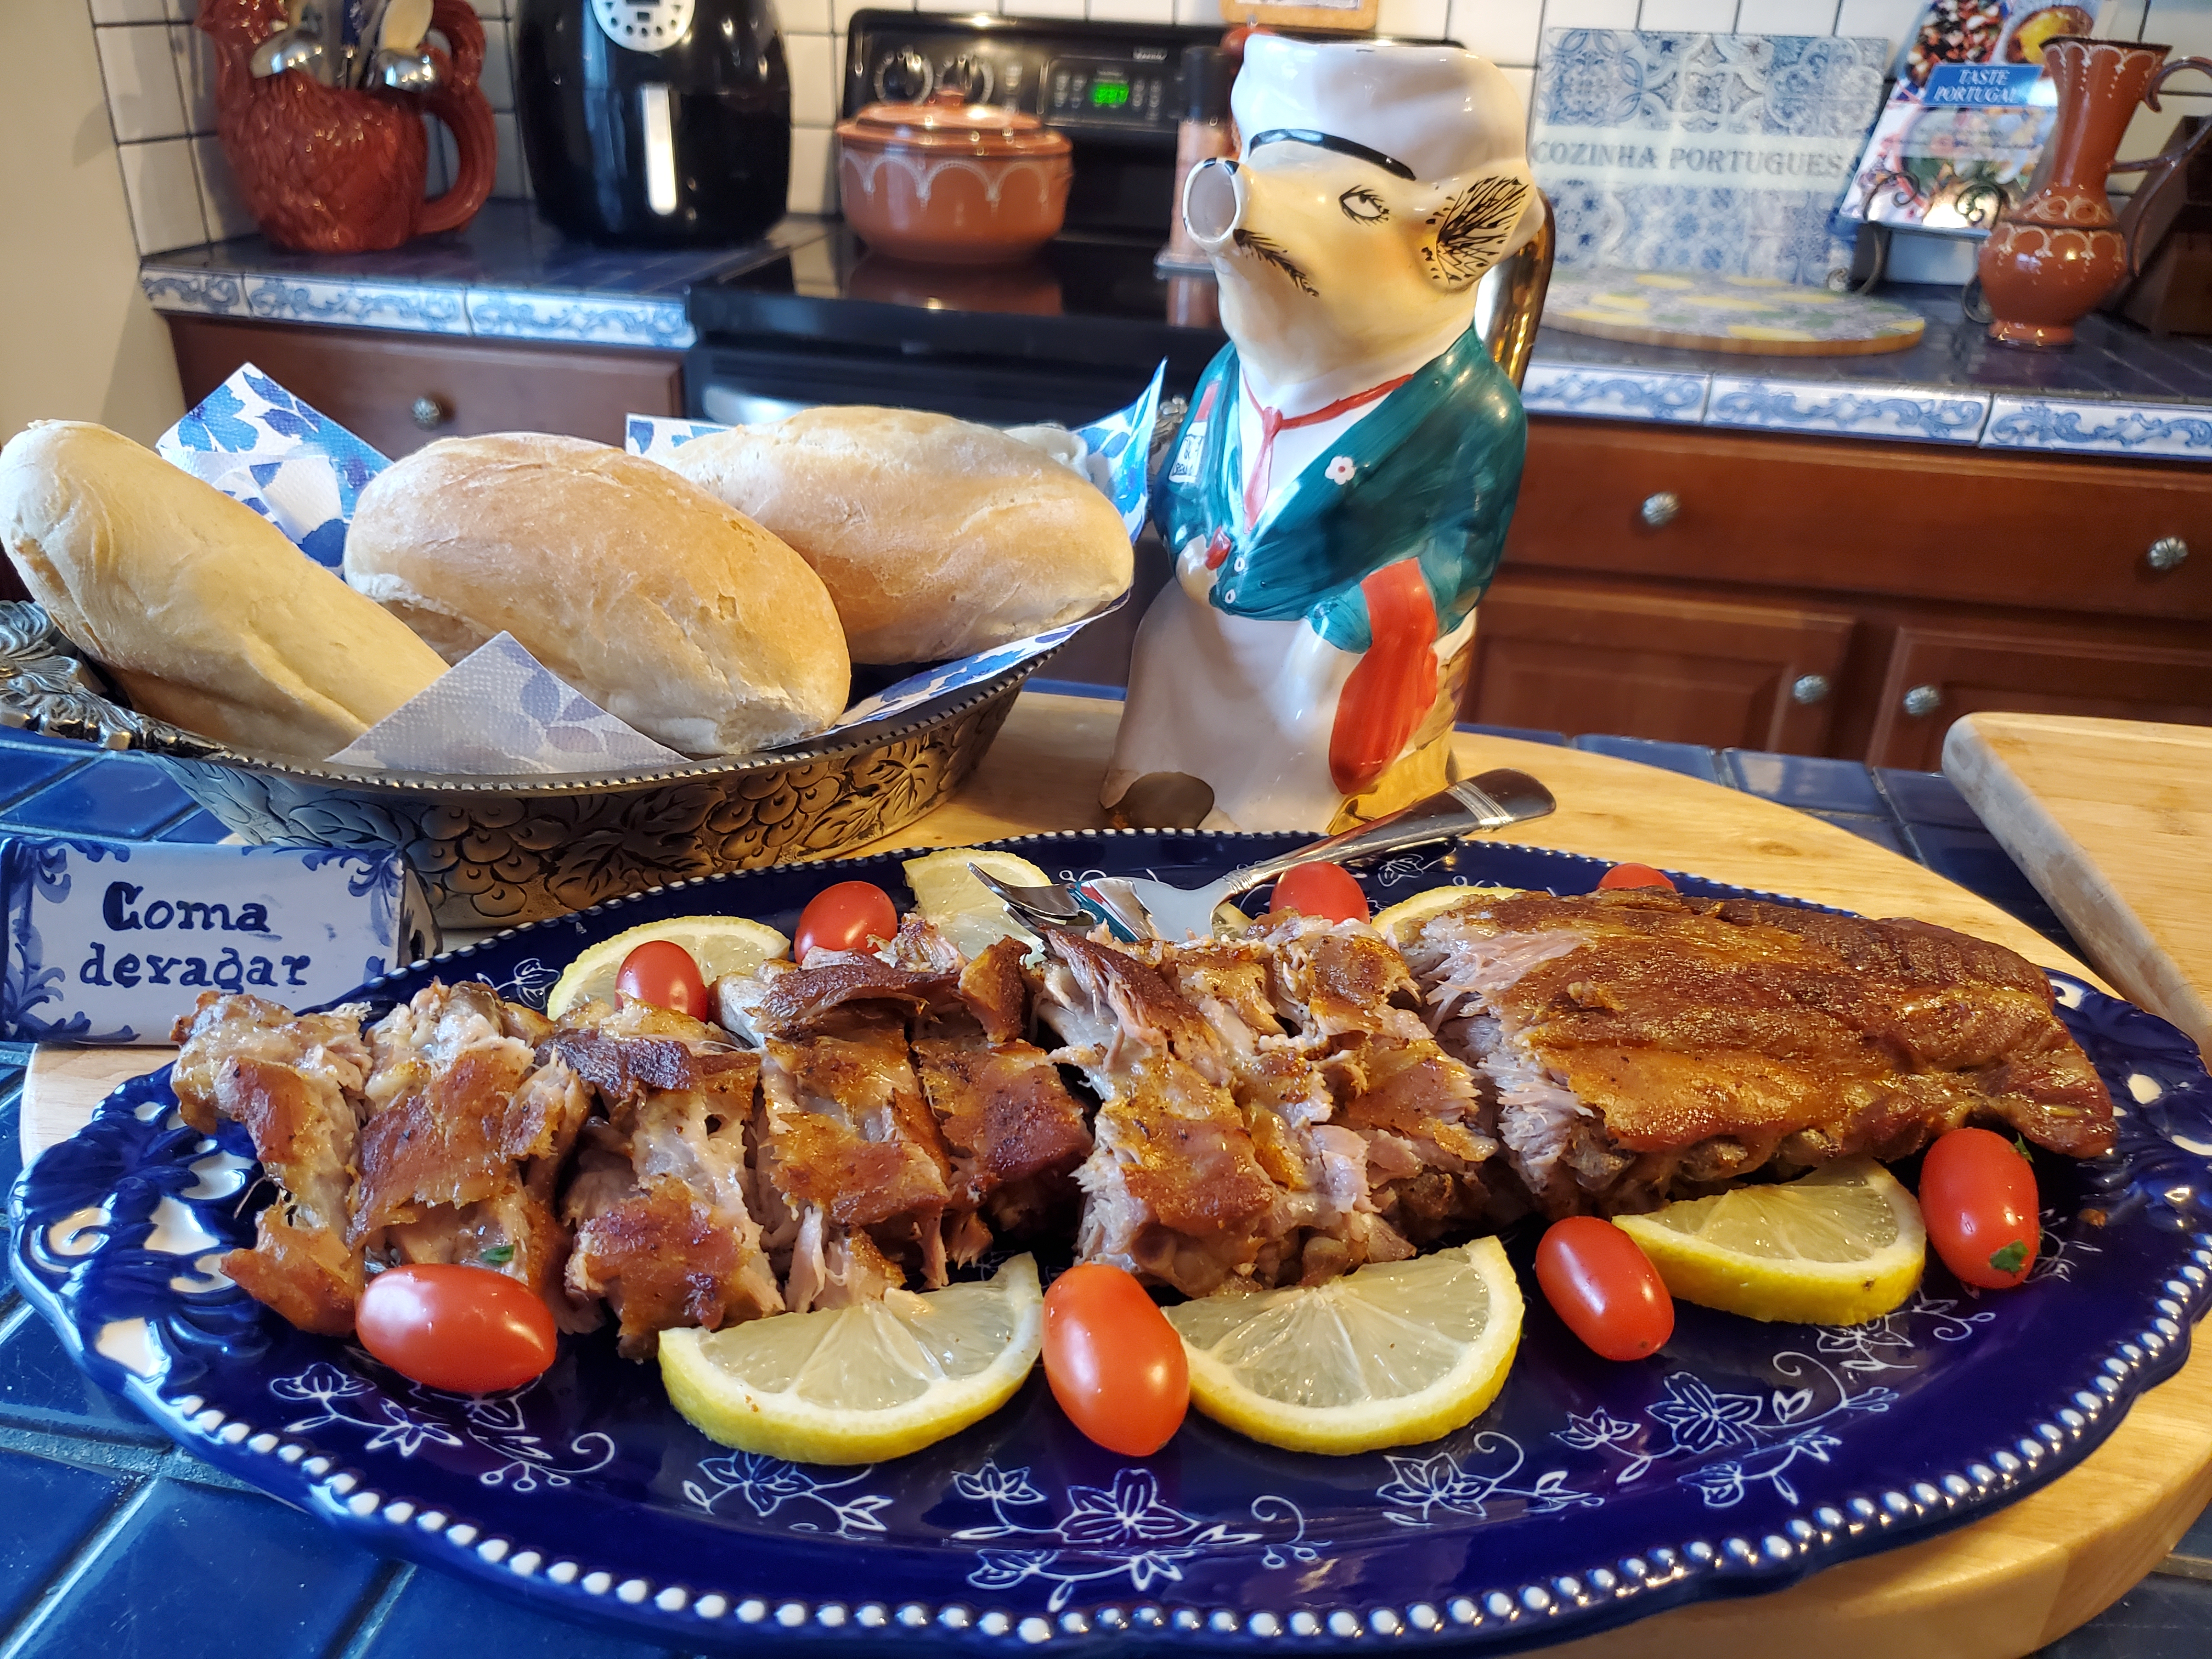
These ribs are fall off the bone with my spice mix recipe. You can bake them or cook out on the grill using the same technique. Enjoy!
Watch my Portuguese Rib video recipe on Youtube below. Subscribe and follow for the latest videos added.


Ingredients:
3 tablespoons my Taste Portugal Spice Mix (regular or spicy blend)
2 racks baby back ribs
2 tablespoons olive oil
1/4 cup white wine
My Barbecue Sauce: Optional
1 cup Ketchup
3 tablespoons Brown sugar
1 tablespoon Soy sauce or Worcestershire sauce
1 tablespoon White Vinegar
Note: If you want to cover with barbecue sauce, mix ingredients in a small bowl and spread over the ribs 15 minutes before end of total cooking time.
Preparation:
Mix seasoning and rub over ribs on both sides. Drizzle with wine and olive oil. Cook at 325 for 2 hours covered with foil. Cook uncovered for the last 30 minutes to create a crispy top.
When done, cover with foil and place in the oven to keep warm until ready to serve.


Lisbon Cobb Salad
During lent, it often becomes a challenge to create new and interesting dishes. This is my take on Cobb Salad by making a Lisbon salad.
I use Portuguese tuna fish packed in olive oil, but feel free to substitute with regular tuna and any of your favorite vegetables to create your own version.
Serve it with Portuguese Vinho Verde and fresh crusty bread! Enjoy and bom apetite!
 Gourmet Portuguese canned goods
Ingredients:
1 can of Portuguese tuna or sardines packed in olive oil (or any brand canned fish or seafood you prefer)
Green Leaf Lettuce
Tomatoes
Onion
Carrots
Hard boiled eggs
Pickles
Olives (optional)
Dressing:
Olive Oil
White or red wine vinegar
Salt
Pepper
Canned goods image credit: http://www.vascodagama.ca/gourmet-market/conserves-bompetisco-santacatarina
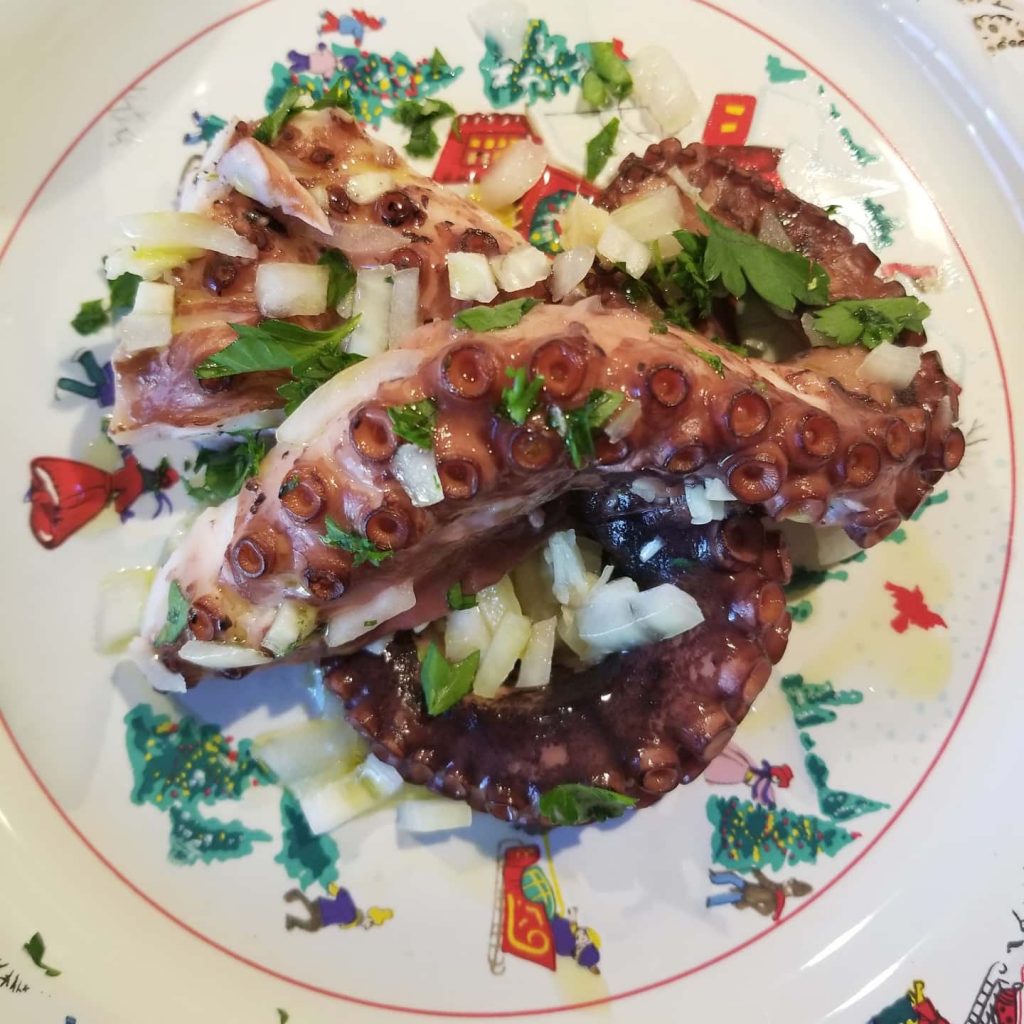
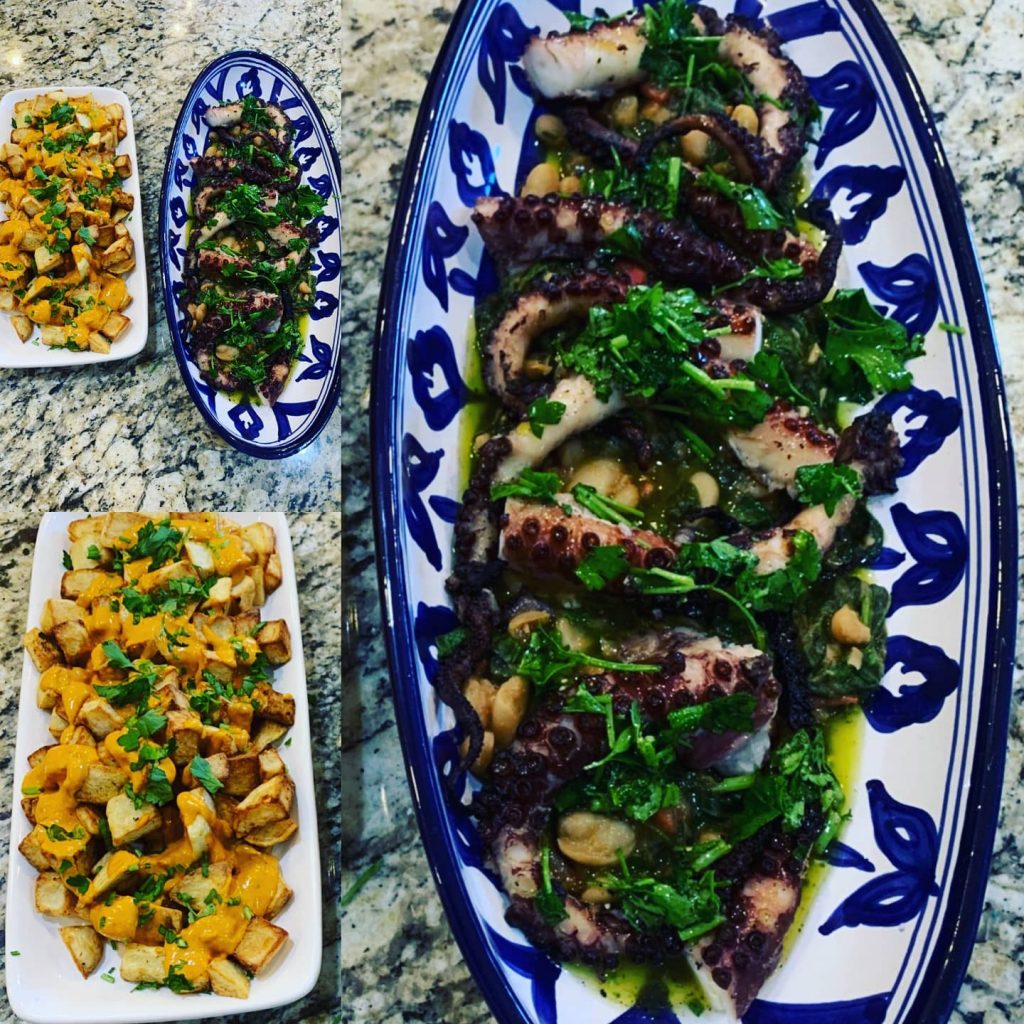
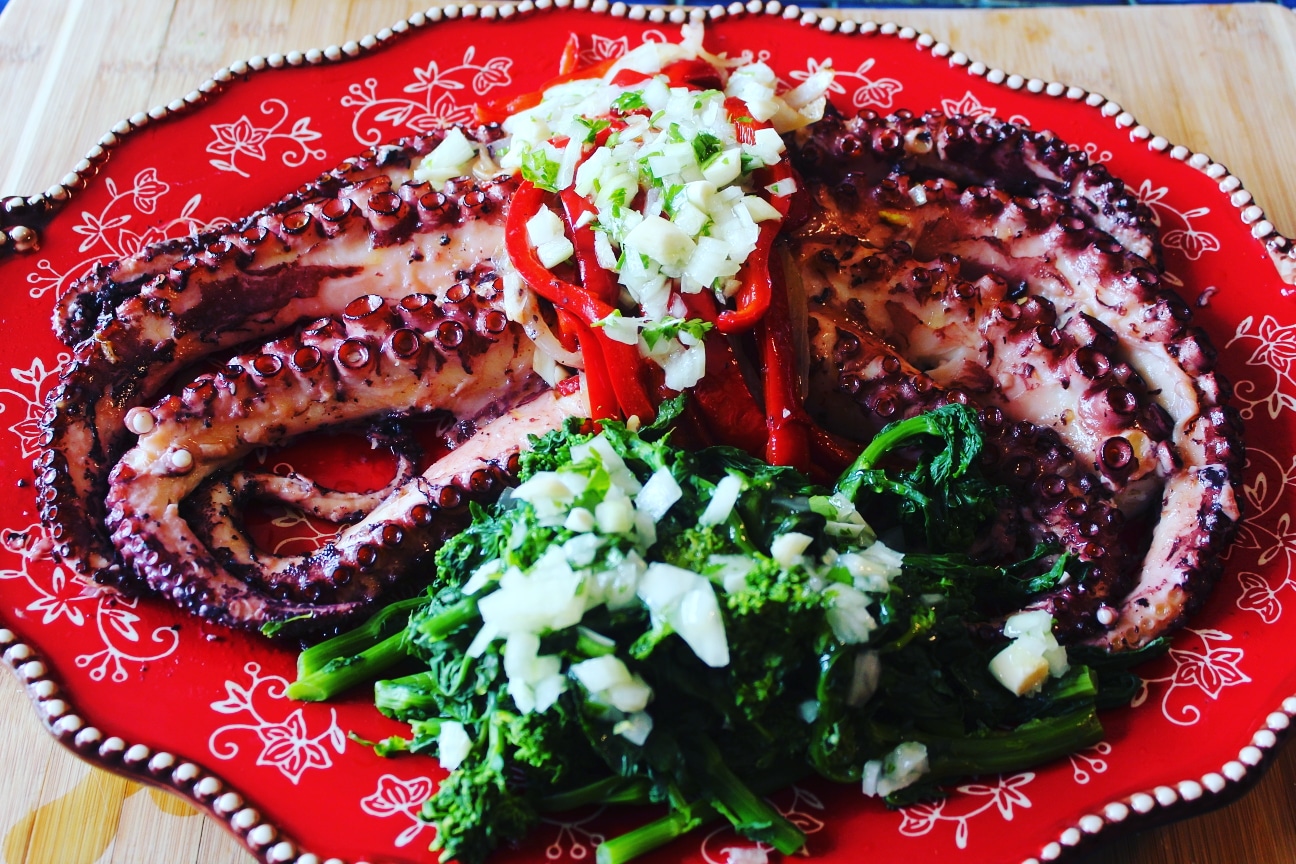
Baked Octopus is a must have at Christmas Eve at my home. Don’t be intimidated by the thought of cooking octopus because it’s relatively easy to prepare.
Serves 2-4
Ingredients:
2 -3 pounds of octopus
1 large onion
1 large onion (chopped)
2 pounds of small round potatoes (washed and dry)
1 large red bell pepper (chopped)
3 cloves garlic (chopped)
½ cup of olive oil
¼ cup of olive oil
1 tablespoon white vinegar
1 teaspoon salt
1 teaspoon pepper
1 bay leaf
Parsley for garnish
Olive oil and vinegar for garnish
1 bunch of Broccoli Rabe
Preparation:
If our octopus is frozen, let thaw overnight in the refrigerator in a big bowl. It has a lot of water, so have a bowl big enough to hold the water.
1. Bring enough water in large pan to a boil with 1 large onion. When ready to cook, rinse the octopus with very cold water and remove the beak. You can just cut the head off and discard it. I use the head by chopping into little pieces and use it in omelets, rice, seafood dishes or as a salad.
2. Grab the octopus by the head and dip the tentacles slightly into the boiling water, remove and dip again in the water 2 more times.
3. Put the octopus into the boiling water and let cook on medium heat for 30 minutes or longer until the octopus is tender. (test by cutting a little piece off the tentacle)
Note: You don’t want to over cook since it will be too mushy.
4. Meanwhile, place the potatoes in a deep baking dish and season with salt and pepper to taste. Top with ½ of the raw chopped onion and ½ cup olive oil and cook at 400 F for about 30 minutes shaking the pan once in a while.
5. Saute remaining chopped onion, red pepper, garlic, and bay leaf in ¼ cup olive oil for about 2 minutes. Add the vinegar and cook for a minute. Set aside.
6. When octopus is cooked, drain and place in the pan with the potatoes and cover with pan juices. Add the cooked onions. Cook at 350 degrees F until the potatoes are fully cooked and the flavors are well incorporated.
To serve, cut the tentacles into serving portions of about 1 or 2 to each person. Serve with the potatoes, onions and peppers. Garnish with parsley, olive oil and vinegar if desired.
Broccoli Rabe: Rinse, cut off thick stems and cook in boiling salted water for at least 8-10 minutes until tender. Drain and serve with more chopped onions garlic and olive oil. Serve over the octopus or on the side.

It is said that the now famous; Francesinha was invented in the city of Porto, Portugal, in the 1960’s by Daniel da Silva, a returned emigrant from France who tried to adapt the croque-monsieur to Portuguese tastes. There is no standard recipe for the sandwich which is typically made with ham, Portuguese sausage, and steak but there are many adaptations using different types of ham, sausages and various roasted meats other than steak. The rich beer and tomato based sauce that covers the sandwich is a secret but there are many variations. Some use a tomatoes, while others use various ingredients to create the sauce with different levels of spiciness added.
The sandwich is famous throughout the city of Porto and featured at many restaurants. Visit the “For the Love of Port” website for their article “Best Fransicinha in Porto”; A comprehensive tasting and find the very best preparation of the sandwich throughout the city.
Here are 2 interesting videos of how the recipe is made which I enjoyed watching.
Recipe from Portuguese Soul Food:
Recipe by pratos-e-travessas.blogspot.com
 Image credit: http://pratos-e-travessas.blogspot.com
Ingredients: 1 francesinha
2 slices of white, but not to soft, slices with aprox. 2 cm/0.8 inches thickness (I buy a whole loaf and cut it into slices)
1 linguiça
1 fresh sausage
1 small veal steak
2 slices of mild ham
7 to 8 thin slices of cheese
1 egg
Sauce: serves 4 or 5
6,6 dl beer (2 cans)
4 dl semi skimmed milk
1 dl whisky
2 dl tomato passata
1 bay leaf
1 medium carrot, peeled
1 small veal steak
2 cubes of meat stock
2 tsps corn starch dissolved in a bit of milk
Salt to taste
Black pepper to taste
Piri Piri (portuguese hot chili sauce)
Fries:
Potatoes cut into
Corn, soy or sunflower oil to fry
Preparation:
*Place all the ingredients for the sauce (except the corn starch and the piri piri) inside a heavy bottomed pan and take to the heat. Cook for aprox. 30 minutes in meddium heat. Season with salt and pepper and remove the carrot, bay leaf and steak.
*Add the dissolved corn starch to the sauce a bit at a time, stir, let it come to a boil and if it´s still to runny add a bit more. Don´t make a very thick sauce, it should fall from the wooden spoon in a constant thread, ending up in thick drops.
*Remove from the heat and add the piri piri to taste, which in my case means lots of it.
*Grill the meats, I use a press grill because it´s easier to cook the sausage and linguiça. Cut the sausage and linguiça in half and then in 4 equal parts.
Fries:
*Cover the potatoes with cold water and keep in the fridge for 30 minutes or up to a day.
*Fill a deep frying pan up to 2/3 with oil and heat it very well, drain the potatoes and clean them with a kitchen towel. Fry in small batches until golden. Drain on top of kitchen paper.
*This way the fries will be crisp outside and soft on the inside.
Assembly:
*On top of a slice of bread place first a slice of cheese, on top place a slice of ham, then the 4 pieces of linguiça, on top the steak, followed by the fresh sausage, another slice of ham and another slice of cheese, top with the other slice of bread and on top a slice of cheese. Place one slice of cheese in each side of the sandwich – You can hold the cheese with skewers and remove them once the cheese is melted, later – and place one more on top.
*Put the sandwich inside a preheated oven for a couple of minutes just so the cheese starts to melt but let it toast. If you used skewers now is time to remove them.
*Fry the egg in a bit of hot oil.
*Remove from the oven, put the fried egg on top of the sandwich and immediately pour the very hot sauce over it – you want the bottom of the sandwich immerse in sauce – and serve with the fries and a cold, cold beer.
*Keep a bowl with the sauce near so you can add more as you go.
Thank you to Maria do Carmo Pereira and the Luso Americano Portuguese newspaper in USA, for featuring my new cookbook in today’s issue!
“Luso – Americano” was founded in 1928 in Newark, New Jersey by a group Portuguese people including; Dr. J. Lobo, Dr. M. Conceição Junior, Manuel Castro and Valentim Rocha.
Currently, the “Luso – Americano is the only source of information written in the Portuguese language with circulation in the Portuguese and Brazilian communities in the United States.

Be sure to pick up a print copy of the newspaper, or click on the link below, for their online edition.
LusoAmericano – De aprendiz de cozinheira a blogger e autora, Maria Dias planeia já o segundo livro de culinária. By Maria do Carmo Pereira
Visit the Luso Americano Book Store to purchase a copy of my book!
![]()
Subscribe to the online edition of the newspaper at this link
Luso-Americano Newspaper
88 Ferry Street
Newark, NJ 07105
Telephone: (973) 589-4600
FAX: (973) 589-3848
66 Union Street
Newark, NJ 07105
Telefone: (973) 344-3200
FAX: (973) 344-4201
E-mail: classified@lusoamericano.com
 Photo credit: http://www.turistaprofissional.com
Happy Valentine’s Day
Hundreds of years ago, young women of marring age began making “Lenços dos Namorados” – Sweetheart Handkerchiefs, to show love for their sweethearts.
They were made of linen or cotton and embroidered with several romantic and love-related motifs with flowers, birds, hearts, and verses from love poems.
The motifs meant; a rose = woman; a heart = love; a lily = virginity; a red carnation = some provocation; and doves = the symbol of the couple in love.
This handcraft was a typical clothing used by young women looking for love in the Minho province of Northwestern Portugal.
 “Our love when end, when this love can fly”
The handkerchiefs have their origin in the 17th century, when they were used among the Portuguese nobility as “marriage proposal handkerchiefs,” but later became popular as a way to start dating someone. Young girls at that time learned embroidery at an early age and later used these techniques to show their admiration for their loves.
These young women would often embroider a handkerchief and give it to their sweetheart as a sign of their love just before he would leave on a sea journey to the former colonial provinces. The men would then wear the handkerchief in public to show everyone they were in a committed relationship.
Today, the craft is a regional certified handcraft where a committee evaluates the handkerchiefs strict criteria including the motifs, the threads, size and colors. If it meets their requirements, they certify it as an approved handicraft.
What began for my daughter Lisa and I as a challenging labor of love by simply sharing recipes on this Blog, has now transformed into a commitment of preserving the rich Portuguese food culture, promoting the nation’s cuisine, and inspiring people to learn how to cook these recipes so they can pass them on to the next generation.
A heartfelt thank you to all of our fans for your encouragement and support!

Obrigado!
Maria and Lisa

The 101 recipes contained in our cookbook have many recipes from Tia Maria’s Blog along with other classics dishes in Portuguese cuisine. The recipes are easy for the everyday home cook to prepare, they’re made with simple ingredients, and they require basic equipment that most home cooks have in their kitchen.
Recipes include; Soups, Appetizers, Side Dishes, Breads, Main Dishes and Desserts!
Come along, let us show you how to cook 101 easy Portuguese recipes so you can taste Portugal!

My daughter Lisa made Portuguese Pot Roast dinner on Sunday. It came out fabulous! This perfect pot roast is pure comfort food for the cold months. The sauce is so flavorful that you’ll want soak it all up, be sure you have a lot of fresh crusty bread on hand for dipping. Enjoy!
Ingredients:
1 (4) Pound Pot Roast
1 tablespoon salt
1 teaspoon pepper
1 tablespoon flour
4 tablespoons olive oil
4 large carrots (cut into chunks)
4 stalks of celery(chopped)
2 onions (chopped)
5 garlic cloves (chopped)
1 can chopped tomatoes
1 and 1/2 cups beef broth
1 chicken bouillon cube
1 cup red wine
2 tablespoons Madeira wine or any Portuguese brandy
1 sprig rosemary
1 teaspoon oregano
1 teaspoon basil
1 teaspoon thyme
Instructions:
Preheat oven to 350 degrees.
Season the beef with salt and pepper, dredge in flour and sear both sides in 2 tablespoons of olive oil in an oven proof dutch oven. Remove meat and set aside.
To the same pan, add 2 tablespoons of olive oil, onions, celery, garlic and carrots and let cook for about 5 minutes.
Add the tomatoes, wine and brandy and cook for another 5 minutes. Add the broth, bouillion, remaining herbs and bring to a boil.
Add the meat back into the pan, cover and cook in oven for 2 hours.
Uncover, and cook for another 1 and 1/2 to 2 hours longer until meat is tender and falls apart.
Remove bay leaf and rosemary stem before serving.
Place the potatoes in the oven during the last 1 hour of pot roast cooking.

Rosemary Potatoes:
2 pounds of potatoes (washed, scrubbed, and cut into cubes)
1 small onion
1 teaspoon salt
1 teaspoon rosemary (chopped)
2 tablespoons olive oil
1 teaspoon garlic powder
1 teaspoon pepper
Instructions:
Place all ingredients into a bowl and toss to coat well. Place the potatoes in a nonstick baking casserole dish or pan coated with cooking spray.
Cook for 1 hour tossing potatoes every 15 minutes.
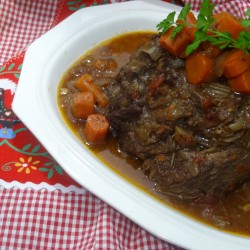

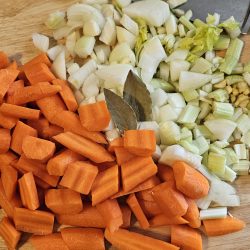

Soup season is here and what better way to warm up than with this hearty, vitamin packed soup. I used fall root vegetables which are season now, and white northern beans which give the soup a flavorful base.
You may substitute the kielbasa with Portuguese Chourica sausage if you prefer for a spicy kick!
To make this soup vegetarian, leave out the kielbasa. Pick up some fresh rolls and dinner is served! Enjoy and stay warm!
Ingredients:
1 pound of fresh Kale ( finely chopped)
1/2 pound Kielbasa (chopped into desired pieces)
6-8 cups or more of water (depending on how thick you want the soup)
1 small onion (finely chopped)
2 cloves garlic (chopped)
1 large carrot (chopped into 1 inch cubes)
1 small rutabaga (nabo) chopped into 1/2 inch cubes)
1 cup butternut squash (finely chopped into 1/2 inch cubes)
1 large potato (cut into small cubes)
1 can of white northern beans
2 cups chicken or vegetable broth
1/4 cup olive oil
1 bay leaf
1 teaspoon salt
Black pepper to taste
Parsley for garnish
Instructions:
Place oil, vegetables and kielbasa in a large soup pan. Saute for 5 minutes until the onion and kielbase becomes slightly browned.
Add the water, stir and add the remaining ingredients except the kale and beans. Bring to a boil and cover.
Cook for 20 minutes on low medium heat. Continue cooking the vegetables to your desired consistency.
Leave the vegetables whole, or puree if you like a thicker soup.
Add the kale and beans, cover and cook on low for 10 minutes longer.
Add more seasonings as desired.

This recipe for Kale Soup will take less than 30 minutes to prepare. This soup is very popular but it is often mistakenly called Caldo Verde Soup which is the most popular soup in Portugal. However, Kake Soup uses chunky potatoes and chopped kale rather than a potato puree. So the next time you see a restaurant menu offering these soups you’ll know the difference before you order.
There are many variations of this recipe. Some cooks use pasta instead of potatoes or add white beans or chick peas instead of the red kidney beans. Go ahead and experiment with your favorite ingredients! Enjoy!
Serves 6-8
Ingredients:
3 medium potatoes (peeled and chopped into 1 inch cubes)
4 cups chicken broth or (4 cups water and 1 chicken bouillon cube)
2 cups water or more
3–4 cups kale or collard greens (chopped)
3 tablespoons olive oil
1 large onion (chopped)
2 cloves garlic (chopped)
1 bay leaf
1 (32 oz.) can red kidney beans
1 teaspoon salt
½ tsp pepper
Olive oil for garnish
1 16 oz. can roma (or any ripe) tomatoes (chopped)
1/2 small chouriço or linguica sausage (cut into pieces)

Instructions:
In a large soup pot, cook onions and garlic in the olive oil until translucent for a few minutes.
Add the chouriço, potatoes, salt, pepper, and bay leaf. Stir and cook for about 5 minutes. Add the water and broth and bring to a boil. Add the cabbage, beans, tomatoes, and bring to a second boil.
Cover, reduce heat to medium low and continue cooking, stirring once in a while until the potatoes are tender for about 20-30 minutes.
Taste, add water if needed to make a thinner broth and cook longer if you desire. Serve with a drizzle of olive oil on top if desired before serving.
Note: Substitute with any green leaf cabbage or red kidney beans with any type of beans for different variations.

Arroz de Tomate – Tomato Flavored Rice
This rice pairs well with fish and poultry, but you can serve it as a side dish for any meal. My father was named Dinis after Rei D. Dinis (1279 – 1325) he also loved rice as did the once reining king!
He first showed me how to make rice it when I was a young girl. To obtain a fluffy rice you should gently coat it with the olive oil or butter and let it stir fry gently for about a minute or two. This process allows the grains to stay intact and not get mushy while cooking.

To read more about the popularity of rice in Portugal visit this link from Catavino.com.
Excerpt from Catavino.com:
Portugal’s rice production along the Tejo River estuary has been documented since the 18th century, rice was cultivated in the southern regions of Portugal well beforehand – inherited from the Moors. It was during the reign of King D. Dinis (1279-1325) that rice was first referenced, curiously as a luxury product found only on the dining tables of the wealthy. Centuries later, the production of rice was outlawed, due to a high risk of malaria from the poor growing conditions. By the 19th century, rice became highly prized and produced, extending beyond the river basin to the North. Consequently, the Portuguese government changed their tune from rice as a “tolerable grain” to an agricultural powerhouse, thereby creating better conditions to ensure its success. By the beginning of the 20th century, a solid base for rice production had been established provoking the dissemination of rice fields across the country. credits: http://catavino.net/portuguese-rice-arroz-carolino/
Ingredients:
2 cups uncooked rice (preferably long grain Carolina Rice or Uncle Bens)
1 small onion (finely chopped)
4 cups boiling water
1 chicken boullion cube
2 large very ripe tomatoes (peeled, seeded, chopped)
1 teaspoon salt
1 bay leaf
1 tablespoon of olive oil
Instructions:
In heavy medium pan, saute the onion and bay leaf in the oil for a few minutes on medium heat until translucent. Add the rice, stir to coat with the oil for about 1 minute. Add the boiling water, salt, boullion and tomato.


Stir, cover and cook on medium heat for about 15 minutes stirring often. After fifteen minutes stir and taste for saltiness. Cover, remove from heat and let the rice absorb moisture as it sits until ready to serve.
Note: I like a firm rice, cook rice longer if you prefer it more will done.
To form the rice tower lightly grease a small ramekin with margarine. Pack the rice firmly in the ramekin and flip onto a plate.


")

This easy recipe requires not baking and makes an elegant dessert. Bolo de Bolacha Maria is traditionally made with butter, or sweetened condensed milk, but my version uses home made pastry cream which makes it lighter and uses less sugar. You’ll find that you have all the ingredients for this recipe in your pantry. If you don’t have Portuguese Maria Cookies, you can use the Mexican Maria Cookies found in most grocery stores as an option. Enjoy!
Makes 1 small cake or approximately 4 parfaits
Ingredients:
1 package of Bolacha Maria (Maria Cookies any brand)
1 or 2 cups of warm strong black coffee
2 cups of whole milk
3 large egg yolks
1/2 cup of sugar
1/4 cup of corn starch
1/2 teaspoon of vanilla extract
2 tablespoons of butter
pinch of salt
Whipped cream
Instructions for Pastry Cream:
In a small saucepan heat the milk, 1/4 cup of the sugar, vanilla and pinch of salt until scalding but not boiling and set aside.

Meanwhile mix the egg yolks with the remaining sugar and corn starch until smooth and creamy.
Slowly add the yolks to the milk beating as you pour. Cook the mixture on medium heat for two minutes until it thickens stirring constantly.
Pour the cream into a bowl and add the butter. Beat with a mixer for about 5 minutes until very smooth and creamy.
Cover the bowl and place in the refrigerator for at least 2 hours to cool completely and thicken.
Dip 1 cookie into the coffee for about 5 seconds and place into the bottom of parfait glass. The cookie shouldn’t fall apart, if you find it gets too soft dip the cookie for only a few seconds.
Spread pastry cream on top of the cookie and continuing layer to your desired height leaving the last layer with the cream on top.
Crumble a few cookies in a plastic bag and sprinkle on top.
If you want to make the cookie mold with ribbon it’s very easy to do.
Place whole cookies around the sides to form an even square. Wrap a ribbon around and make a bow. Add tiny flowers for a nice effect.


Store in the refrigerator for a few hours to set. When ready to serve top with fresh whipped cream and cookie crumbles.
You can also make this recipe as individual parfaits but don’t top with the cream until ready to serve.
Store in the refrigerator for up to 3 days. Enjoy!


I appeared on Portuguese TV – SIC NOTICIA/SAPO on Tuesday June 10, Portugal day. The news piece featured Portuguese Sweet Muffins – Bolos Levados from the Portuguese company 3mealmuffin company of Fall River.
Mr. Lopes sent my family his delicious muffins and I can tell you, they were simply delicious! The muffins are available in many markets in New England and will soon be able to order online via their website in the near future.
The muffins have gained much popularity in the recent years and are now featured at many famous upscale restaurants. Paul Lopes, owner of the company says his muffins are used as burger and sandwich buns in many New York City restaurants such as the famous Tribeca Grill, and at Madison Square Garden. They are also used in many upscale restaurants around the country, in Miami, and at the famous Craigs Restaurant in L.A. Ca.


When the Lopes family came to this country 46 years ago, Mr. Lopes’s mother-in-law, Beatriz Caetano, noticed that no one was making the kind of breakfast muffins they ate in the Azores.
Tiberio Lopes, the Portuguese muffin patriarch, got the idea for his product while working at Chaves Market, a Portuguese market that did not sell bolos levedos. Beatriz gave Tiberio and Leonor the recipe.
In 1975 the husband-and-wife team started the baking business out of their garage. They found a distributor who brought the muffins to mom-and-pop shops in Cape Cod.
Their muffins became a hit and the demand was enough to start a mail order business. It catered to customers who got to know the product while vacationing in Cape Cod and wanted to get the muffins back home.
This led to them moving out of the garage and into their first and smallest bakery on South Main Street.
In 1988, the Lopes’s got their first big break. A story in the New York Times featured the family and their product. The muffins were already being sold to restaurants in the city including high-end eateries like Balducci’s.
Another publication called “Food Finds” also featured the muffins. Today the Food Channel has a show based on the book which looks at local specialty foods.
The Bakery only makes Portuguese Muffins, which they brand as 3-meal muffins due to the fact that they are not just considered breakfast food by their customers. The branding is also a way of shaking off the competition that has followed the names they have given the product since introducing it. They wanted to separate themselves from everyone who tried duplicating their muffins.
The Central Bakery family is proud to be baking the Original Portuguese Muffin since 1975. credits (http://3mealmuffin.com/our-distributors
You can find Leonor Santos’s recipe for Bolos Levedos here.


Fire Grilled Sardines with Onions Peppers
Sardinhas Assadas com Cebolada

 Get this beautiful PORTUGAL TILE GLASS CUTTING BOARD AND I’M HERE FOR THE SARDINHAS HERE
Sardines season in Portugal is from the month of May to October.This sustainable food is extremely popular and is very healthy because the sardines are loaded with calcium, vitamin E, protein and contain good fish oil.
Portuguese sardines have the Blue Label awarded by the Marine Stewardship Council, which means fishing of sardines in Portugal takes account the sustainability of the sea resources. Sardine catches happen all along the Portuguese Coastline but the most favored sardines come from Algarve. Portimão in the Algarve, is where you eat the best fresh grilled sardines, especially at the Sardine Festival during the first 10 days of August. 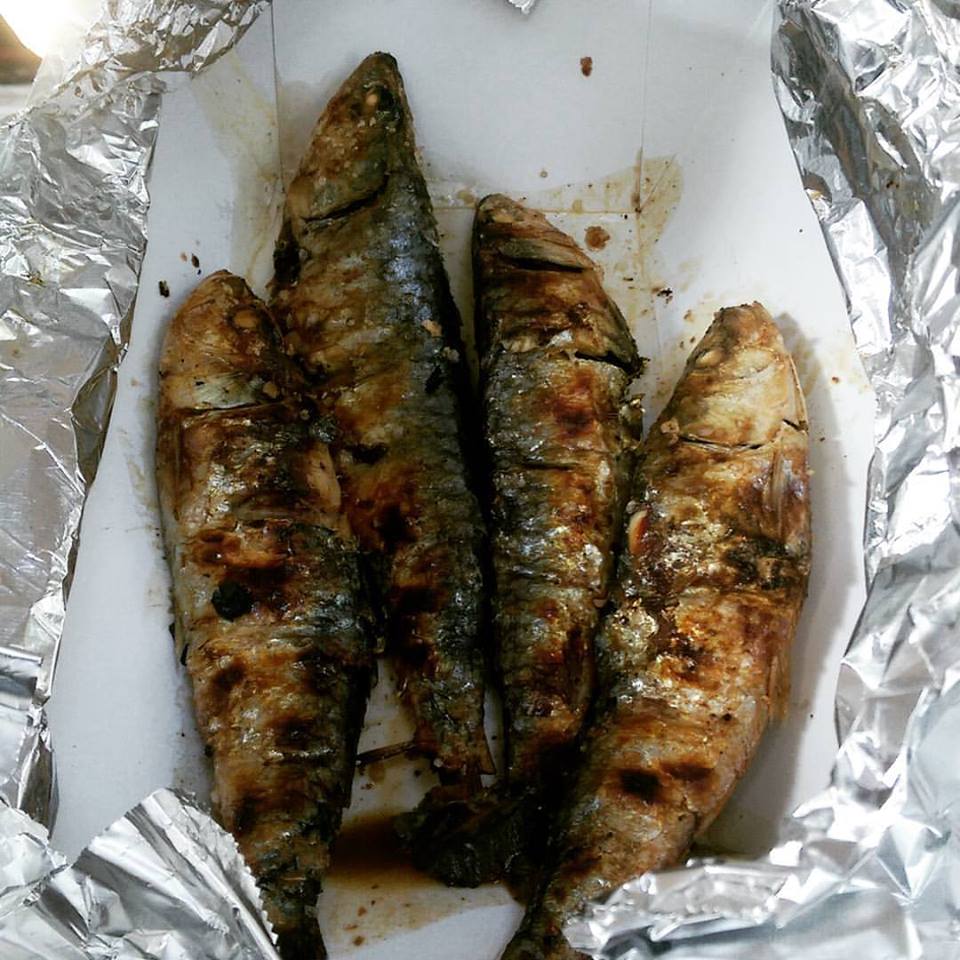
Most festivals and picnics in Portuguese communities feature sardines. The festivals for the Saints; John, Peter and Anthony feature grilled sardines and often sold by the dozen at these festivals along with Portuguese rolls; Papo Secos or other crusty breads.
When served as a main dish, they are accompanied by the humble boiled potatoes, grilled onions and peppers and a simple salad with olive oil vinaigrette.
Serves 6-8
Ingredients:
1 to 2 pounds of Fresh or Frozen Sardines
1 large red bell pepper
1 large green bell pepper
1 large onion (sliced)
2 large garlic cloves (chopped)
Portuguese olive oil
Sea salt
Pepper
Preparation:
Step 1: If your sardines are frozen, defrost them slightly in a large bowl by rinsing them with cold water and covering them with a good coating of sea salt. Let them sit for about 30 minutes to absorb the salt. Drain any moisture from the bowl and set in the refrigerator until you’re ready to grill.
Step 2: Heat the grill on high.
Step 3: Rub the onions and peppers with salt, pepper and a little olive oil. Cook peppers and onions on the grill until the skin has charred and fully cooked all around. Place peppers in a brown paper lunch bag and set aside. Place the onions aside in a medium heat proof bowl on the grill to keep warm.
Step 4: Meanwhile place the sardines on a slightly greased charcoal or gas grill on medium high heat. Let the sardines cook until they turn golden brown and slightly crispy, turning them gently not to break the skin.
When they are fully cooked, cover with foil and place them on a platter in a warm place.
Step 5: Remove the peppers from the paper bag and peel off the skin. You’ll find the skin will come out easily.
Slice the peppers into strips and mix with the onions. Add chopped garlic, olive oil and more salt and pepper. Heat slightly and pour the mixture over the cooked sardines.


You won’t believe the magic that happens when you make this cake! It’s very easy to make and perfect for a party.
This cake is a Mexican recipe, but it has become very popular in the last few years because it’s like having two desserts; chocolate cake and caramel flan all in one bite!
You can use any cake batter such as vanilla, lemon etc. so be creative if you want!
Ingredients:
Cake:
1 Package of Devil’s Food chocolate cake mix
3 eggs
1 cup of water
1/3 cup of vegetable oil
Caramel sauce glaze:
1 cup of any jarred caramel sauce or make your own sauce (recipe below)
Flan:
1 can (14 oz) sweetened condensed milk
Note: You will need an extra large bundt pan for this recipe
Preparation:
Prepare Caramel glaze first:
Place 1 to 2 cups sugar in a large heavy skillet. Continue stirring while cooking on med heat until the sugar melts and begins to turn caramel colored and thickens like corn syrup (probably 5-8 min depending on your burners). Note: if you smell a burnt smell, start over because the sauce has burned.
Pour 1/2 cup of the caramel topping evenly in bottom of bundt pan gently rotate the pan to coat bottom and up 1 to inches up the sides.
Flan preparation:
Mix all flan ingredients in a blender or in a mixer at high speed for about 45 seconds.
Cake Preparation:
Preheat oven to 350 degrees. Heavily grease a large 12 cup bunt pan with cooking spray or margarine.
Mix cake mix with water, oil and 3 eggs in a large bowl, with electric mixer for about 3 minutes on medium speed. Pour cake mix gently and evenly into the bundt pan covering the caramel sauce.
Slowly pour the flan mixture over the chocolate batter.
Note: The flan mixture will be very runny over the chocolate batter. Don’t worry if you think this is not right. Magic happens as the cake cooks the flan sinks to the bottom and the chocolate cake rises to the top.

Cover the cake with heavy foil that has been coated with cooking spray and place in a deep roasting pan big enough to hold the cake pan in 2 inches of water.
Special Note: I used my large Turkey roasting pan which was big enough to hold and cover the cake pan and it came out perfect! This is optional and you can use any deep roasting pan but be sure to cover the cake pan very tightly with the foil if you don’t use a roasting pan cover.
 Bake the cake for about 1 hour and 10 minutes.
Here is what the cake will look like after it’s baked.
 Place the cake still in the roasting pan on the counter and let it cool for at least 2 hours or more to completely cool.
When the cake is completely cooled gently loosen the sides with a thin knife. Place a large serving platter over the pan and invert the cake.
When you invert the cake, it will come out with the chocolate cake on the bottom and the flan on top.
Pour any remaining caramel from the pan over the flan.
 If you want to serve the cake the next day, place it in the refrigerator overnight and invert the next day since this will keep the cake moister.
Add the remaining 1/2 cup of the caramel sauce and whipped cream before serving if desired.

Find this recipe in my new cookbook!

TASTE PORTUGAL 101 EASY PORTUGUESE RECIPES
<iframe style="width: 120px; height: 240px;" src="//ws-na.amazon-adsystem.com/widgets/q?ServiceVersion=20070822&OneJS=1&Operation=GetAdHtml&MarketPlace=US&source=ac&ref=tf_til&ad_type=product_link&tracking_id=portuguesedin-20&marketplace=amazon®ion=US&placement=1500978663&asins=1500978663&linkId=36ff97e9142d7f0be9983cc115a3b2f4&show_border=false&link_opens_in_new_window=false&price_color=333333&title_color=0066c0&bg_color=ffffff" frameborder="0" marginwidth="0" marginheight="0" scrolling="no">
</iframe>
TASTE PORTUGAL 101 EASY PORTUGUESE RECIPES EBOOK
<iframe style="width: 120px; height: 240px;" src="//ws-na.amazon-adsystem.com/widgets/q?ServiceVersion=20070822&OneJS=1&Operation=GetAdHtml&MarketPlace=US&source=ac&ref=tf_til&ad_type=product_link&tracking_id=portuguesedin-20&marketplace=amazon®ion=US&placement=B00PQRIO8M&asins=B00PQRIO8M&linkId=c84134abd64b08df2109ea9a07cd4d23&show_border=false&link_opens_in_new_window=false&price_color=333333&title_color=0066c0&bg_color=ffffff" frameborder="0" marginwidth="0" marginheight="0" scrolling="no">
</iframe>

This recipe is very easy to make despite having a lot of different ingredients.
I adapted it from the Pioneer Woman. She used tortillas in the soup instead of rice. If your family loves Mexican, they’ll go crazy for this soup! Enjoy!
Ingredients:
2 cups of cooked boneless leftover chicken (shredded)
1 small onion (minced)
1 small red pepper (minced)
2 cloves of garlic (minced)
2 tablespoons of olive oil
1 tablespoon of chili powder
1 teaspoon garlic powder
1 teaspoon paprika
1 teaspoon salt
1 tablespoon tomato paste
1 or 2 cups of crushed tomatoes
1/2 cup Hot Salsa
1 large can of black beans
1 cup of rice
10 cups of water
2 chicken bouillon cubes
2 tablespoons of corn flour (medium grind)
1 cup of corn (optional)
Topping suggestions:
Tortilla Chips
Shredded cheese
Sour cream
Salsa
Chopped tomatoes
Chopped onion
Avocado
Instructions:
Saute the onion, garlic, and peppers in the olive oil, in a large heavy soup pan.

Add the salt, pepper, spices, tomato paste, tomatoes, salsa, water and bouillon and let cook on medium for about 5 – 10 minutes for the spices to blend.
Add the beans, rice, corn flour and chicken and cook for about 20 minutes on medium low heat stirring once in a while so the corn flour does not stick.
Do you notice the Gonsalves brand of corn flour?


Taste the soup and add more seasonings to your taste. Continue cooking for another 10 minutes on low heat. The soup will thicken as it cooks so you may need to add more water if you like a thinner soup.

While the soup cooks, prep the toppings. You can add as many as you like to your taste.

 The soup was a big hit last night! Enjoy the recipe!

Order these beautiful ceramic mugs and glass cutting boards here Lisbon Blue shop 

When I was a little girl, I would wake up on Christmas Eve mornings smelling the aroma of the sugar and cinnamon sprinkled on the warm Rabanadas that my mother had made for our Christmas Eve dessert table.
This classic old time dessert is delicious and has become one of my favorites which I make very often for my own family any time of the year. I think about my dear mother every time I make them, and that’s a good thought!
The traditional way to make them is by frying them in hot oil, but I grill them with margarine for a lighter version.
Ingredients:
1 loaf day old crusty bread
2 cups milk
3 large eggs
1 tablespoon sugar
1/2 teaspoon cinnamon
butter for cooking
sugar and cinnamon for topping
Instructions:
Slice the bread into 1inch slices and place in a deep dish pan. Beat all the other ingredients in a bowl.
Pour the egg mixture evenly over the bread. Let the bread slices sit in the egg for about 30 seconds and then flip them over to absorb into the other side
Meanwhile on medium high heat, melt butter in a large flat skillet or griddle. When the skillet is hot, lower the heat to medium and gently place the slices of bread on the grill greasing the pan as needed.
Cook both sides of the bread until golden brown and it becomes firm to the touch. If you find the bread still soggy, continue cooking them on low heat for longer.
Sprinkle with sugar and cinnamon while still hot. Enjoy!

This recipe makes a large pot of chili that can serve 10-12 people so you’ll have enough for the next day, or freeze it for next week!
For a vegetarian option, simply leave out the meat because it’s just as good.
Serve the chili with Blue Corn Tortilla Chips and my home made Corn Muffin recipe.

Ingredients:
2 lbs ground turkey or beef
1 large onion (finely chopped)
1 large red bell pepper (finely chopped)
1 large green pepper (finely chopped)
3 cloves garlic
2 tbsp of olive oil
1 tsp salt
1/2 tsp crushed black pepper
crushed red pepper flakes or hot sauce to taste
3 tablespoons chili powder
1/2 tsp paprika
1 small can crushed tomatoes
1 (32 ounce) can red kidney beans
1 (32 ounce) can black beans
1 (32 ounce) can pinto or any favorite beans
Or use any favorite beans
Garnish Options:
Shredded Mexican or your favorite cheese
Tortilla Chips
Sour cream
Chopped Avocado
Chopped onions
Cilantro
Salsa
Instructions:
In a large dutch oven or heavy pan, brown the meat in the olive oil. Remove the meat and add the onions, garlic and both peppers to the pan.
Cook the vegetables in the pan drippings until translucent. Add the meat back into the pan and stir well.
Add all of the remaining ingredients, stir well, and let the chili come to a slow boil on medium heat.
Continue cooking for about 30 minutes on low heat stirring very often so it does not stick.
If you like a thicker chili mash about 1 cup of the beans with the back of your stirring spoon. If you like it thin, leave as is or add a little more tomato or a cup of stock.
Store in refrigerator after it cools and freeze in food safe plastic containers.

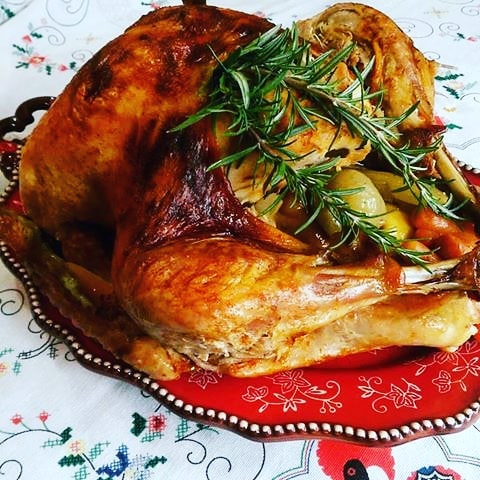

A Portuguese Thanksgiving menu – Enjoy!
There are many variations to preparing at Thanksgiving Turkey. Some people brine the turkey for 48 hours while others simply rub the turkey with soft butter before baking.
I take this easy route. I marinate the turkey the day before Thanksgiving with basic Portuguese spices which enhance the turkey flavor but dot not overpower it.
Then I brush it with Olive oil, which will give the turkey a beautiful golden color when it’s cooked.
Happy Thanksgiving to all!
Ingredients:
2 -3 tablespoons of salt
1 lemon
1 large onion
1 large celery stalk
3 large sprigs of parsley
1 large carrot
1/4 cup of olive oil
1 tablespoon garlic powder
1 to 2 tablespoons paprika
2 tablespoon butter
1/2 cup vinho verde or any white wine
Steps to prepping your turkey
Step 1
Remove packaging. Remove the neck and giblets from both cavities of the turkey.
Step 2
Wash the turkey, the neck and giblets in very cold water.
Step 3
Rub the inside and outside of the turkey evenly with the salt.
Step 4
Slice the lemon in half and rub the inside and outside of the turkey with the lemon half squeezing the juice as you rub.
Place the used lemon halves inside the cavity.
Step 5
Place the butter underneath the chicken skin over the breast
Step 6
Sprinkle the paprika, pepper and garlic powder evenly over the chicken leaving a small amount to marinate the cavity.
Step 7
Place the neck and gizzards inside the turkey. Add the wine and remaining spices into the cavity to marinate.
Step 8
Place the celery, onion and carrot inside the cavity.
Step 9
Drizzle and rub the Olive oil over the Turkey.
Step 10
Place in the refrigerator overnight or up to 48 hours before cooking.
Step 11
Take the turkey out of the refrigerator at least 30 minutes before cooking.
*Remove the neck and gizzards from the cavity and save in the refrigerator until you are ready to make stock for my Portuguese Stuffing.
Cook the turkey with the remaining vegetables inside the cavity to add flavor.
My roaster is over 50 years old and it makes a perfect turkey every time!
Cook in Roasting pan, or cover with heavy aluminum foil. An average turkey of about 15 pounds will take about 3 hours to cook at 350.
My tips:
*Even if your timer pops up, it may not mean its fully cooked, test the turkey with a thermometer which reach 165 degrees.
*Marinate the turkey with the pan juices every hour.
*If you like your turkey skin dark colored remove the foil during the last 30 minutes.
*My simple test to see if the turkey is cooked, is this; Try to pull the thigh away from the body, if the thigh bone doesn’t break off easy, then continue to cook the turkey longer.
*Let the turkey sit at least 20 minutes before carving.
*Warm the turkey with a little bit of hot chicken or turkey broth.
** Do not discard the cooking juices. Simply strain it, let it sit for a few minutes, remove any excess grease from the top and cook it in a few tablespoons of flour for at least 5 minutes on low heat.
** Save the remaining gravy to make Turkey Pot Pie!
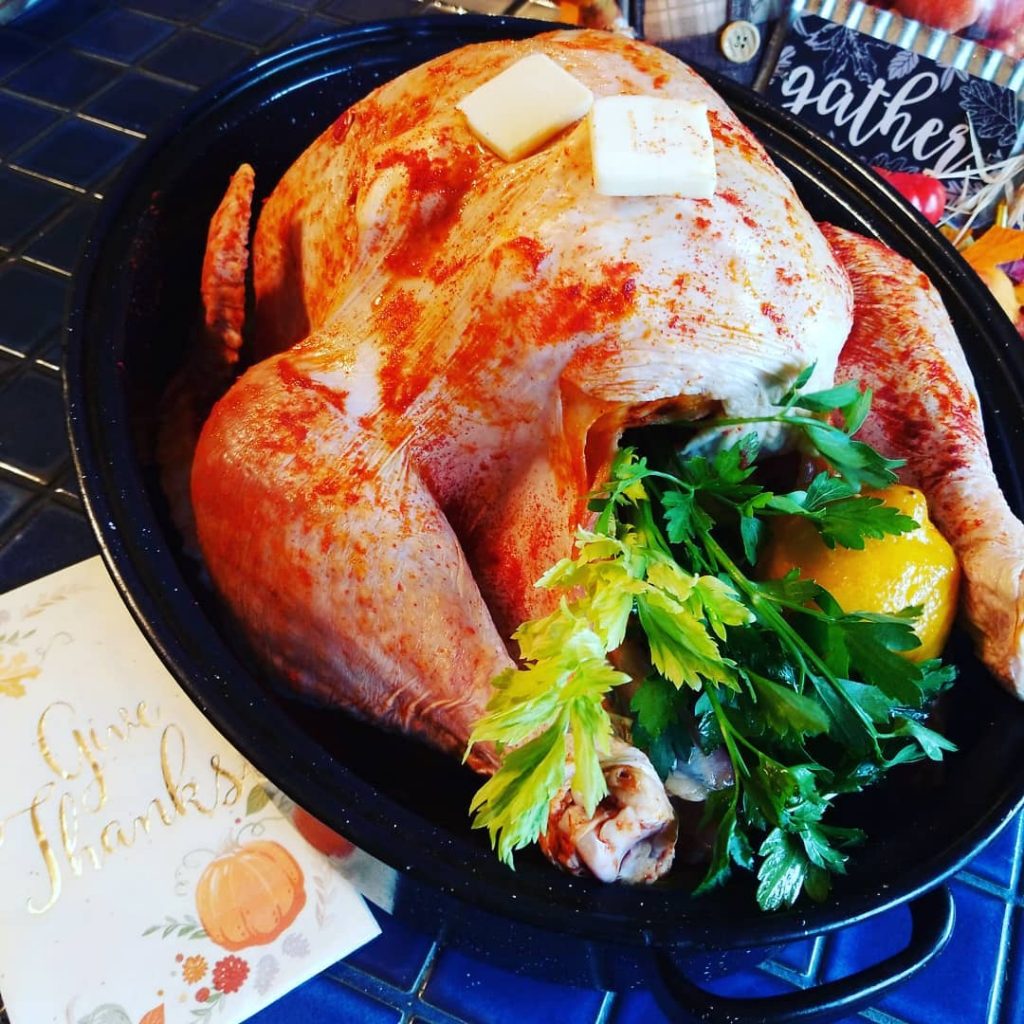
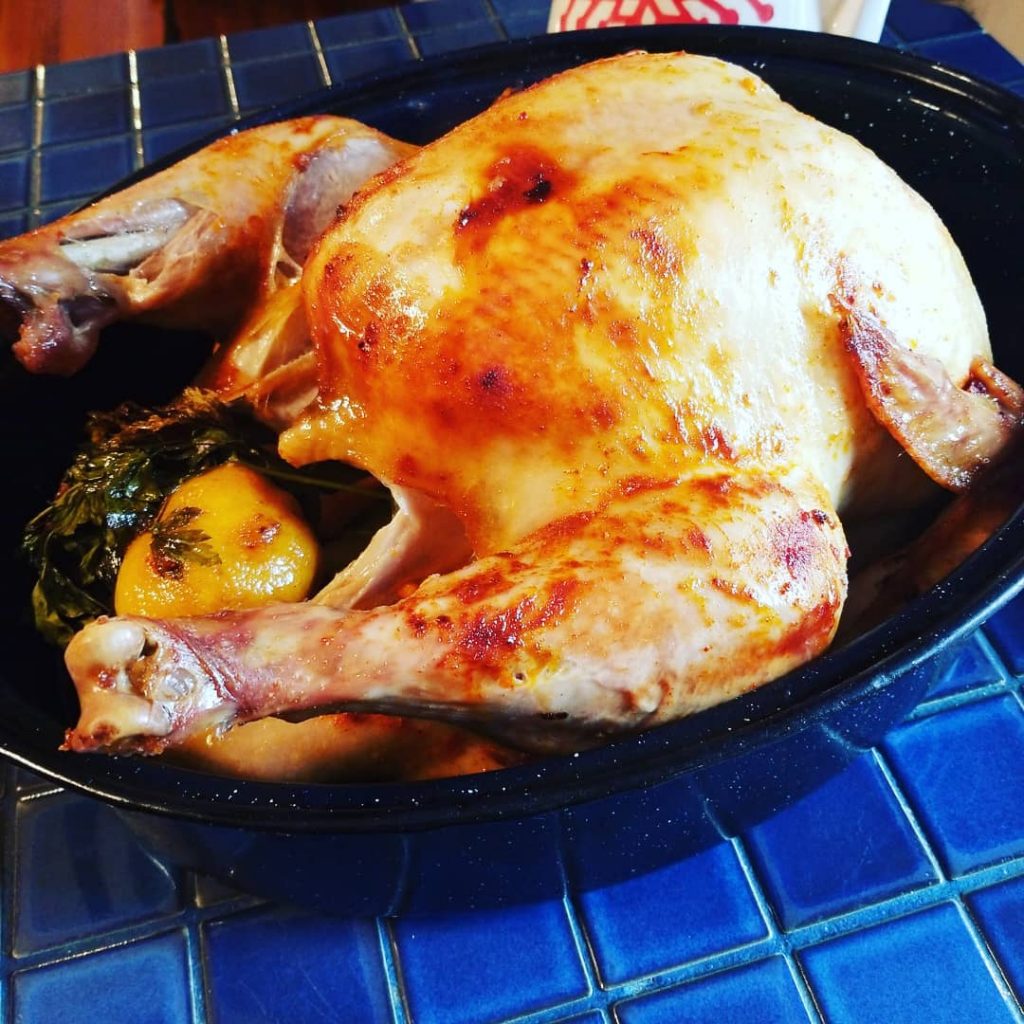
Get your pumpkin on!
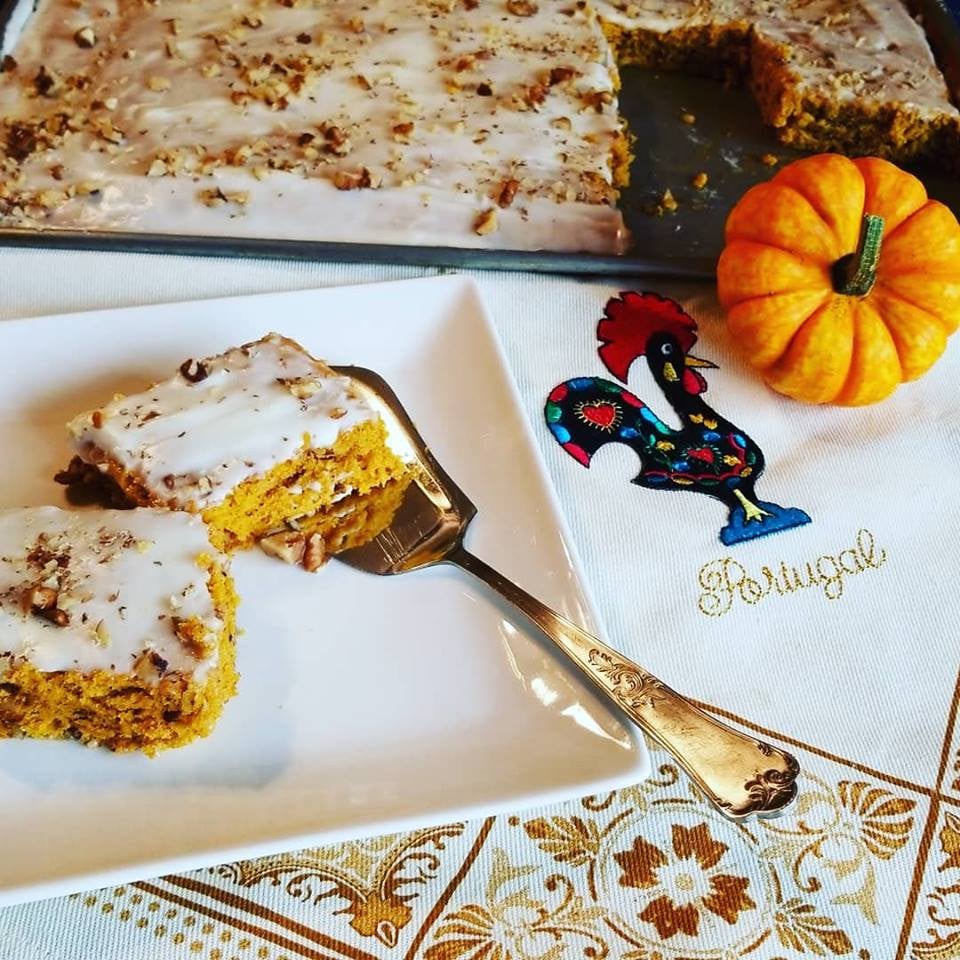

Pumpkin Cake With Cream Cheese Frosting is a delightful dessert for those of you that want something different instead of pumpkin pie this Thanksgiving.
This cake is moist and full of flavor! Perfect addition to your Thanksgiving pot luck dinner, or as an add on to your dessert table!
It uses no oil and only 2 tablespoons of margarine for those of you on a low fat diet.

Ingredients:
2 cups of flour
1 + 1/2 cups of sugar
1 (15 oz can) of pumpkin
3 large eggs
5 oz of fat free vanilla yogurt
2 tbsp of butter or margarine (melted)
1 tsp salt
2 tsp baking powder
1 tsp baking soda
1 +1/2 tsp of cinnamon
1/2 tsp nutmeg
1 cup chopped walnuts (optional)
Frosting:
3 oz cream cheese (soft)
1 + 1/2 cups of confectioners sugar
1 tbsp butter (soft)
1 tbsp milk
Instructions:
In a large bowl, beat the eggs and sugar until light and lemony colored.
Add the yogurt, butter and pumpkin and beat for a few minutes.
In a separate bowl combine the flour, cinnamon, nutmeg, baking powder, baking soda and salt. Add to the pumpkin mixture and mix for about 3 minutes until smooth and creamy. Combine the nuts if desired.
Pour into an into a greased (15 x 10 x 1) baking pan or a deeper cake pan if you want a cake like dessert.
Bake at 350° for 25-30 minutes until a toothpick comes out clean. Cool completely before frosting.
Frosting instructions:
Mix all ingredients in a small bowl until creamy. Set aside until the cake is completely cooled and frost.


Pumpkins photo credit: http://www.koco.com
“É dia de São Martinho;comem-se castanhas, prova-se o vinho”
“It’s Saint Martin’s day; we eat chestnuts and drink the wine”
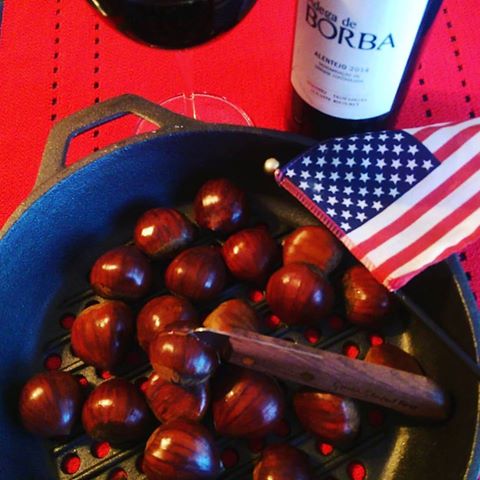
Dia de Sao Martinho – Saint Martin’s Day is celebrated each year on November 11.
Martinho, was a Roman soldier who encountered a bad storm on a winter day wearing only his cape to to keep him warm.
While riding through the storm, he was approached by a beggar who was shivering with the cold. Upon seeing the beggar, Martinho cut his cloak in half to share it with the beggar. When Martinho did this good deed, the clouds broke up, the storm ended and beams of sun shined in the sky.

That night, Martin had a dream of Jesus, who was wearing the half-cloak he had given away to the beggar. A voice spoke, saying; “’I tell you with certainty, since you did it for one of the least important of these brothers of mine, you did it for me.”
Martin became a changed man and became a patron of the poor.
From this day on, he began looking at and treating people differently and was later canonized as a saint.
St Martin’s day is celebrated in many countries of Europe, as signifying the end of Fall and beginning of winter.
In Portugal, the first wine of the season is tasted and the harvested chestnuts are eaten around a bonfire.
The weather in Portugal during this time of year is generally mild and summer like, thus called; Verão de São Martinho (St. Martin’s Summer).
As the storm dissipated by the good deed of Sao Martinho, we thank God for the good summer like weather on the saints feast!
Chestnuts
The scent of roasting chestnuts during the Holiday’s is an instant heart warming feeling!
The season for chestnuts is October through late December. Look for unwrinkled shells and a glossy brown shell.
Avoid dingy shells with small pin holes. They feel very firm to the touch. Smell them for a scent of mold which means that they are not good!

How to roast Chestnuts recipe:
1. Using sharp knife, make an incision about 1/8-inch deep through the top of chestnut.
2. After slitting place the chestnuts on roasting pan and roast them at 350 degrees for about 35 minutes.


Here is a video of a different recipe with a great demonstration of the process!
Photo credit:
http://ladies-with-bottle.blogspot.com/2011/11/chestnut-liqueurfor-christmas.html


This recipe is deliciously easy! It’s my daughters recipe that she adapted from the Pioneer Woman.
What a scrumptious surprise to find this beauty waiting for me on the kitchen counter last night!
Perfect to serve to your family, yet it can be an elegant after dinner dessert for your guests!
Enjoy!
Ingredients:
1 box of frozen Puff Pastry (Pepperidge farm has 2 sheets)
4 Apples (cored, halved and sliced into very thin slices)
1/2 cup brown sugar
1/2 cup regular sugar
1/2 tsp cinnamon
1/4 tsp salt
Powdered Sugar for dusting
Instructions:
Defrost the pastry dough for about 20 minutes. Spray 2 sheet pans, with non stick spray or lightly grease. Heat oven to 415 degrees.
Place apples slices in a medium bowl and add the sugars, salt and cinnamon. Toss well and let them sit to absorb the flavor.
Cut the pastry dough into thirds which will give you 6 tarts.
Place the apple slices in a row overlapping each other onto the pastry dough.
*Note: She used unpeeled apples, but you may peel them if you prefer.

*Do not use the excess liquid from the apples since it may run over the pastry and cause burning.

Bake for 18-20 minutes until the pasty is golden brown.
Remove from pan and set on a platter to cool.
Dust with the powdered sugar and serve.

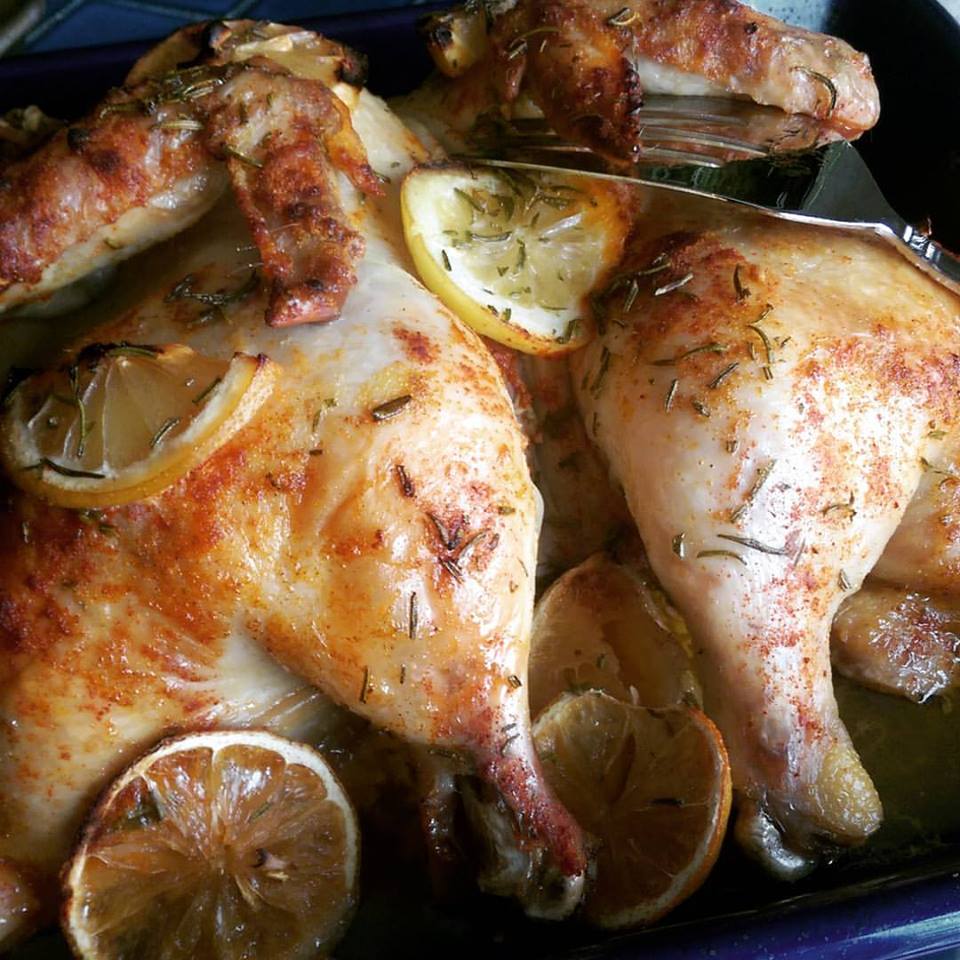
Lemon Rosemary Chicken is typically not a Portuguese dish, but I add paprika to give it a smoky flavor and a beautiful golden crust!
I like my chicken very well done with a crispy skin so I let the chicken cook for about 2 hours. Serve with sweet potatoes or roasted potatoes.

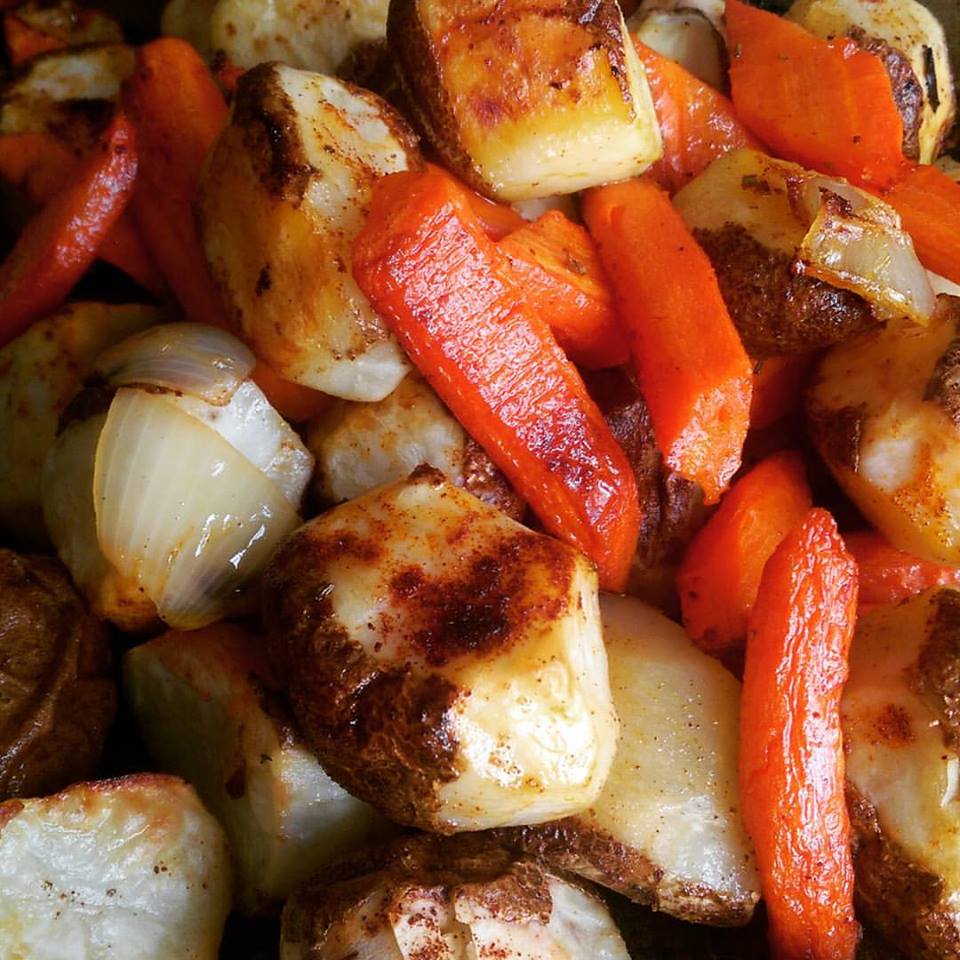
I recommend you cook 2 chickens so you can have the leftovers all week. Just double the recipe and make my easy Chicken Pot Pie Recipe!
Ingredients:
1 roaster chicken
2 lemons
2 tablespoons butter or margarine
2 tablespoon olive oil
1 tablespoon salt
2 teaspoons garlic powder
1 tablespoon paprika
1 tablespoon rosemary (finely chopped)
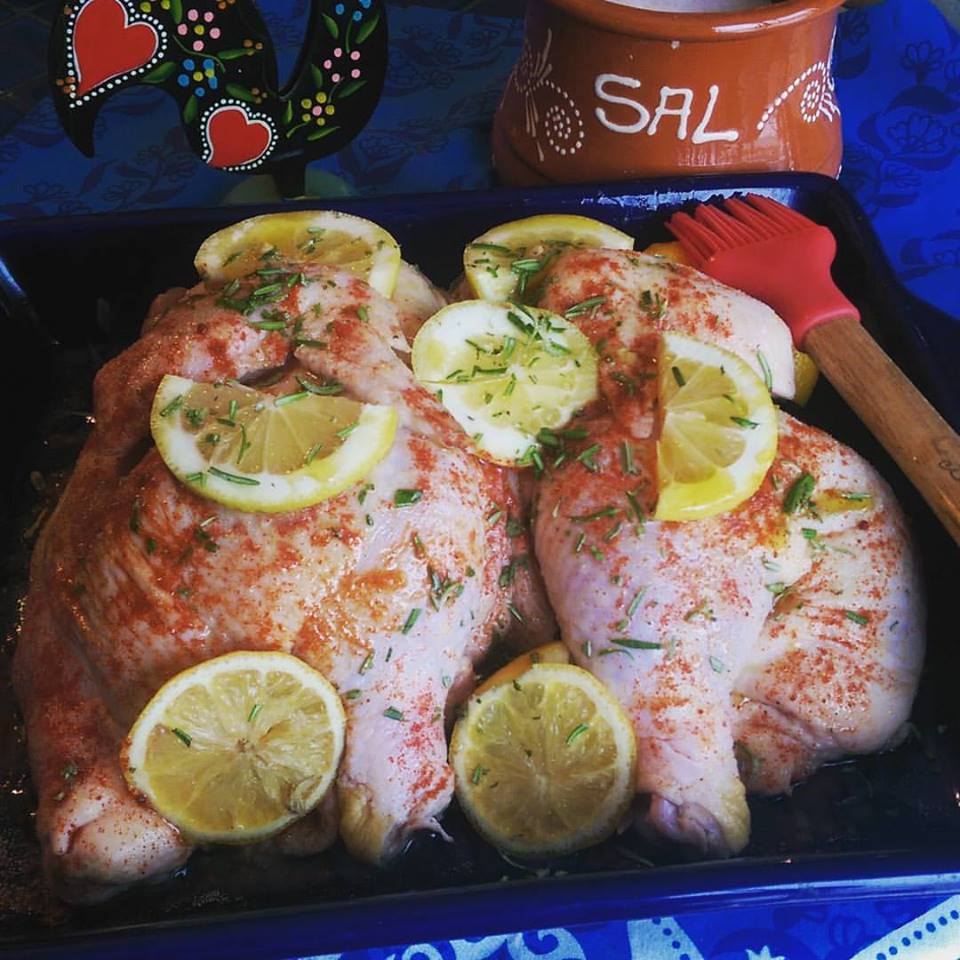
Instructions:
Butterfly the chicken in half or cook whole if desired. Place in a roasting pan.
Slice the lemons in half and squeeze the juice from 1 lemon over the chicken. Cut remaining lemon into slices.
In a small bowl mix the salt, garlic powder, paprika and rosemary. Rub the seasoning mix over the chicken and add lemon slices.
Bake at 400 degrees for 1 + 1/2 – 2 hours until the chicken skin has become golden and crispy.
Note: You may notice your timer has popped up, but let the chicken continue to to cook longer to obtain a crispy golden color.
Remove the chicken from oven and cut into the thigh joint. If you find the juices clear, the chicken is cooked. If you have a meat thermometer, the temperature should read 180 – 190 degrees.
Let it rest for about 8 minutes before carving! Enjoy!
In this photo, I cooked the sweet potatoes along with chicken and left out the lemon slices. It was outstanding!

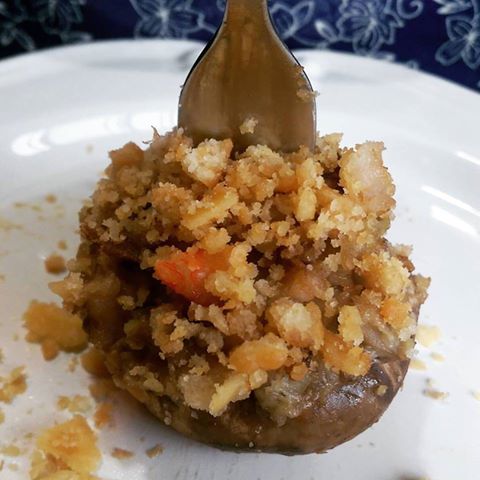 This stuffed mushroom recipe is perfect for a special occasion appetizer. It’s deliciously decadent, and full of flavor.
The mushrooms come out moist, and the crunchy topping adds texture creating a perfect bite! Enjoy!
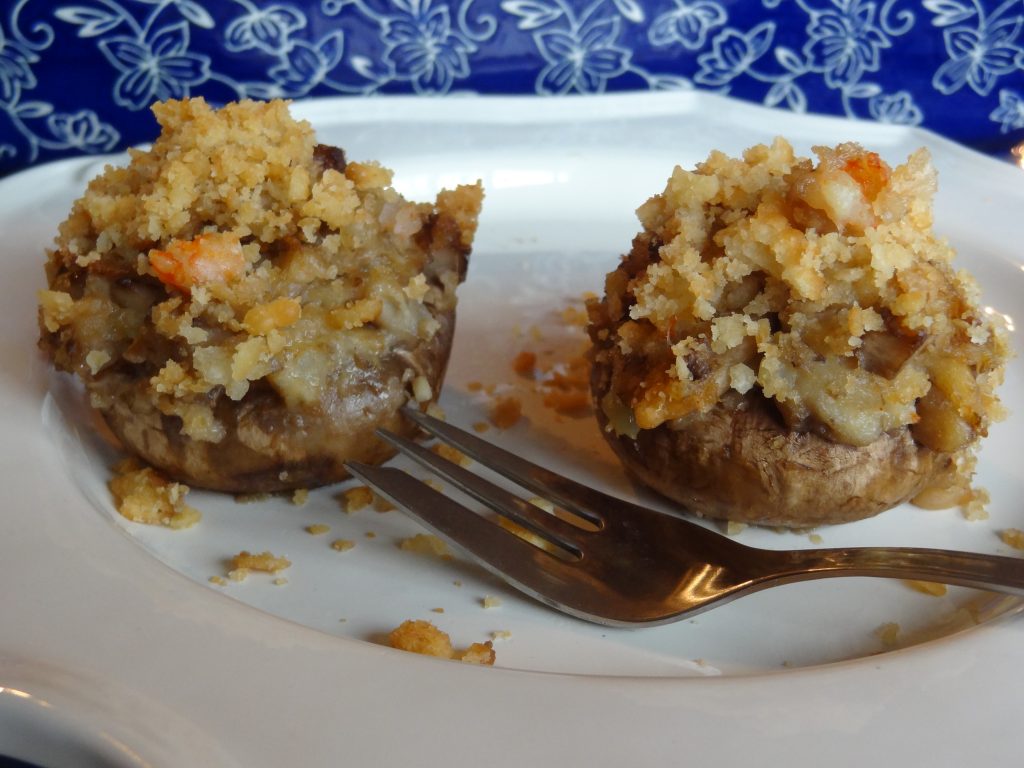
Ingredients
2 packages of white mushrooms
1 can finely chopped clams
1/2 cup of finely chopped raw shrimp
2 tbsp of finely chopped onion
2 tbsp of butter or margarine
1/4 tsp of Paprika
1 tsp very finely chopped parsley
1/2 cup of bread crumbs
1 cup of garlic flavored salad croutons
1 cup of ritz crackers
1/4 cup melted butter or margarine
Shrimp Sauce (optional)
1 can of shrimp soup
1/4 cup of milk
Instructions:
Prep mushrooms by removing the stems. Save stems to use in a different recipe in the refrigerator.

Rinse and pat dry. Place the mushrooms in a lightly greased medium baking pan. Saute the onion in the butter for about 1 minute in a small skillet.
Add the shrimp and cook for 1 minute and set aside off heat. Drain the clams but save the juice for later. Add the clams and paprika to the cooked shrimp.
Place the crackers and croutons in a food safe plastic bag and crush with your kitchen mallet until very crumbly.
Place 1/2 of the cracker mix, and bread crumbs in a medium bowl. Add the seafood mix, and parsley, and mix well.
Slowly add a little of the clam juice until your stuffing is moist but not mushy. *If you find it to dry, add a few tbsp s of water.
Fill the mushroom caps with the stuffing. Top each mushroom with 1 tsp of the remaining cracker mix. *Don’t be afraid to use all of the topping mix.

Coat each mushroom cap with a little melted butter.
Cook at 350 for about 15-20 minutes or until the stuffing is golden brown and slightly crispy.
Mix the shrimp soup with the milk and heat in a small skillet.*The soup should be smooth but not runny.
Place the mushrooms onto your serving platter and spoon the shrimp sauce around them.
*You can make these mushrooms ahead of time, store in the refrigerator, and heat them in the oven with the shrimp sauce.


This appetizer creates a memorable cooking experience for your guests. The flaming chouriço creates a crispy browned skin and savory flavor. Chourico sausage is cured so don’t worry if think you haven’t cooked it long enough. Chourico sausage is cured so don’t worry if think you haven’t cooked it long enough. Serve with fresh crusty bread.
Recipe Ingredients:
1 Whole Linquica or Chourica Sausage
2 – 4 oz Whole grain – Alcohol (Preferably Portuguese)
1 Cooking Vessel – Assa Chourica Cookware
Long fireplace matches

Instructions:
Wash and dry the Chourica with paper towels. Place 2 oz of Alcohol in the bottom of the dish.
Make a few cuts into the top of the Chourica and place on cooking dish.
Light a match and slowly light the alcohol.
Let the flames cook the Chourica until crispy. *Caution* Do not touch flames
Turn the Chourica over to cook the other side if desired.
If the flames die out before the Chourica is cooked, start the process over!
Remove the Chourica onto a serving plate and serve in slices.
Serve with Portuguese bread such as Papo Seco, Caseiro, or Milho!
Enjoy!
Flaming chourico image credit: golisbon.com

Shrimp is loaded with protein, low in calories and only takes 5 minutes to cook!
This easy recipe takes less than 30 minutes to prepare but tastes like a high end bistro dish. I recommend that you keep a few 1 pound bags of frozen uncooked shrimp for quick meals like this one.
I make this recipe every few weeks and my family never gets tired of it!
Serve this dish with my Foccacia Bread for more Garlicky goodness!
Ingredients:
Shrimp Marinade
1 lb Shrimp
1/4 tsp salt
1/4 tsp paprika
1/4 tsp Garlic powder
1/4 tsp Chili powder
1/2 tsp Piri Piri or Tabasco Sauce
Dash of Vinho Verde or White wine
Pasta Ingredients
1/2 package of Capellini Pasta *Or any you prefer
1/2 tsp salt
3 tbsp olive oil
3 large cloves garlic finely minced
1 tbsp butter or margarine
1 cup of frozen or fresh petite baby peas
1 squirt of lemon juice
2 tsp finely chopped parsley
Pecorino Cheese *optional
Fresh cracked pepper
Instructions:
Place all ingredients for the Shrimp Marinade in a small bowl and let marinate for 5 minutes. * Do not let the shrimp sit too long in the marinate.
Cook pasta in 1/2 tsp of salt and drain. Grill the shrimp on the grill or in a skillet for about 5 minutes or until pink. Set aside.
Place the olive oil, butter, and garlic in a skillet and cook on medium heat until garlic is translucent.
Add the pasta and peas and toss gently. Cook for about 5 minutes on low heat until pasta has absorbed the garlic and oil, and is hot.
Stir in the shrimp. When ready to serve, add parsley and the lemon juice. Top with cracked pepper and Pecorino to taste.
Enjoy!
Garlic, Olive Oil & Rosemary (Alecrim) Foccacia Bread

Cavacas – “Portuguese Popover Dessert”. The taste and texture is similar to a profiterole with a creamy, sugary glaze over the top.
This classic dessert most likely originating in Caldas da Rainha is a favorite in the Portuguese community for celebrations and Holidays. It’s easy to make and it requires few ingredients. Traditionally a glass of Port wine is served along the this delicate dessert.


Ingredients:
Makes 12 large cavacas
8 extra large eggs (room temp)
½ cup plus 2 tablespoons olive oil
2 cups sifted all-purpose flour
¼ cup milk
pinch salt
olive oil (for greasing tins)
Icing:
2 cups confectioner’s sugar
3 to 4 tablespoons milk
zest of 1 lemon
Preparation:
Here’s our YouTube Video page for you to follow along with the instructions:
Add the flour mixture and beat for at least 10 minutes until the batter has reached a light creamy consistency. Add milk half during the last 5 minutes.
Grease large muffin tin or popover tins with 1 teaspoon olive oil to each section on bottom and up the sides. Fill each section 1/2 full with batter.
Cook at 350 degrees F. for 40 to 50 minutes. Note: *Do not open the oven or they will collapse! 🙁 Also note the ovens cook at different temperatures so keep an eye on them. If you notice they start to brown too dark remove from the oven.
Let cavacas cook slightly.
Meanwhile, In a small bowl make the icing by combining the confectionery sugar, and the lemon zest with milk until It reaches a smooth consistency. Taste and add more lemon zest if you prefer a lemony icing.
*If you find the icing too thick add milk, it it’s to soft add more sugar. Drizzle the icing over the Cavacas.
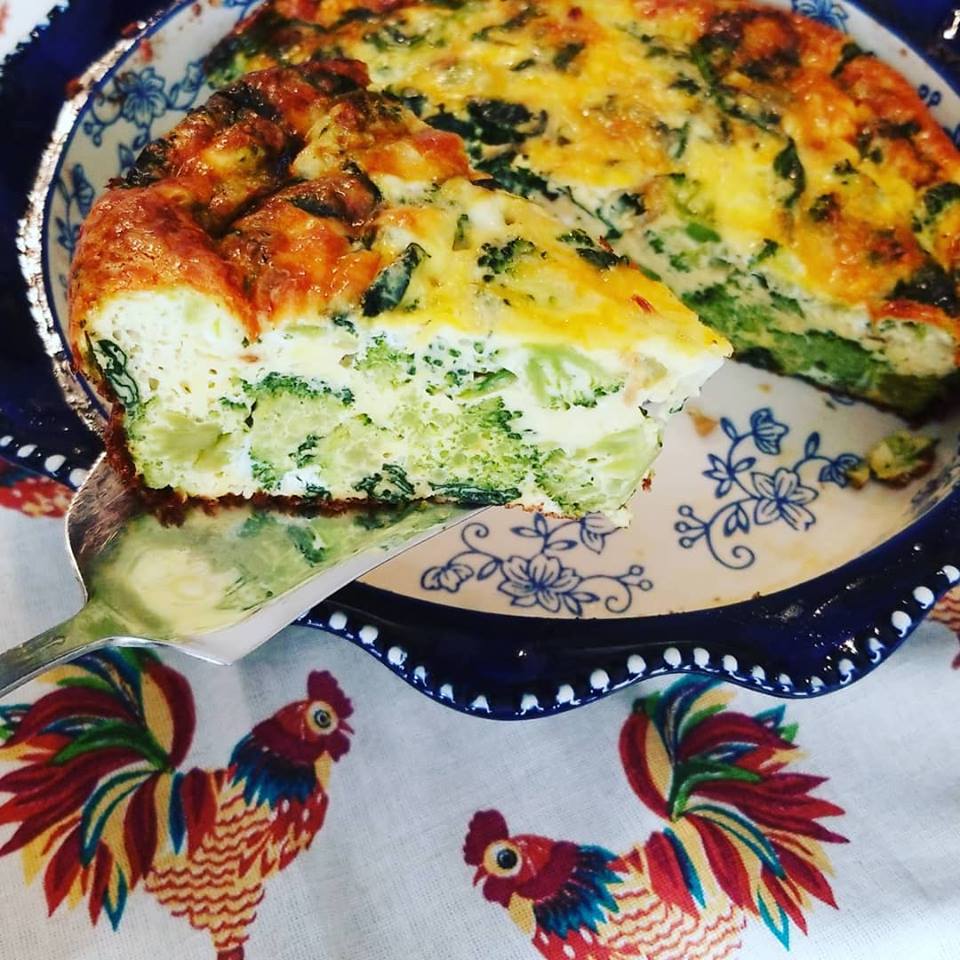
Crust-less Spinach and Broccoli quiche is an amazing savory dish. This is my go to dish for meatless hearty lunch, but I also prepare it as a side dish.
Did you know that 2 cups of Spinach has only 20 calories and 2 cups of Broccoli has 60?


Ingredients:
1 pound package frozen broccoli spears or (1 bunch fresh)
4 cups fresh Baby Spinach (approximate)
1/2 small onion (finely minced)
6 eggs
1 cup whole milk
1 cup shredded cheese
1 tablespoon melted butter or margarine
1/2 teaspoon salt
crushed black pepper
Preparation:
Pre heat oven to 350 degrees F.
Steam or cook broccoli in a small amount of water until tender. Drain, chop into small pieces and place in a bowl. Cook spinach in a skillet with butter and cook until slightly wilted. Drain any moister and add to the broccoli. Let mixture cool.
Beat eggs with milk, salt and pepper. Add to the broccoli mix and mix well.
Grease a deep dish souffle pan or baking dish with margarine or cooking spray. Add broccoli mix evenly submerging the mix into eggs. Top with the cheese.
Bake at 350 for 25-30 minutes until a tooth pick comes out clean.
Let sit for 5-10 minutes before serving. Enjoy!


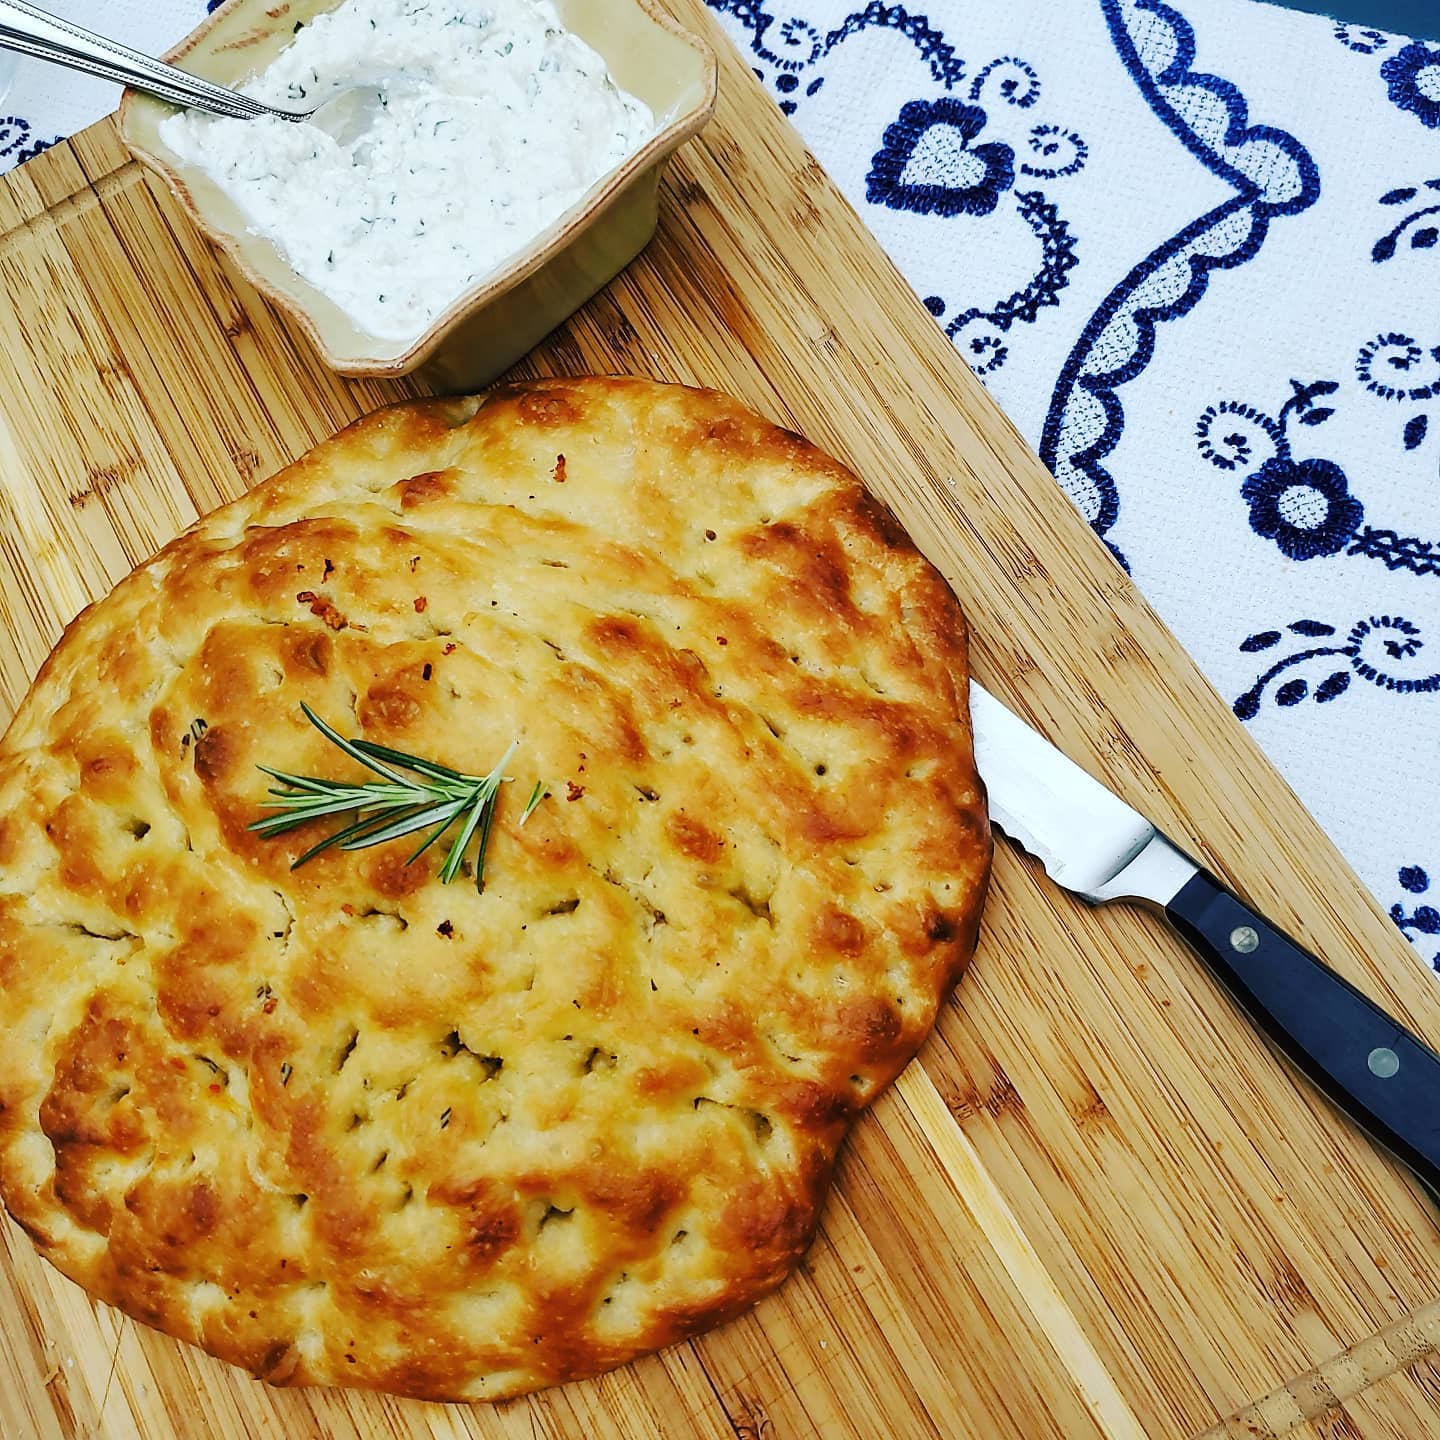
Making this flat bread took me back to my family’s hometown. Travassos, is a small village in Tras os Montes, Portugal near the city of Montalegre.
The bread for whole village was made in a communal oven shared by all. One local man, was in charge of preparing the wood fired oven twice a week. On those days, each family including our own, would bring their dough to bake their bread early in the morning.
The bread, called a “Bica” was simply made with flour, water, yeast and salt, sifted and mixed with the old traditional, wooden Peneira (flour sifter), and Maceira (dough mixer).
The next time you pass by a Panera Bread restaurant, you’ll know how it got it’s name. Panera is a flour sifter…Peneira in Portuguese!


This recipe uses garlic and rosemary, but you can adapt it by adding your favorite toppings such as pesto, sun dried tomatoes, olives, etc.
Ingredients:
5 1/2 cups flour
1 3/4 cups warm water
1/4 cup olive oil
1 package of yeast
1 tbsp salt
1 tbsp sugar
Toppings:
2 cloves garlic
1/4 cup olive oil
Rosemary
Sea Salt
Instructions:
Step 1
Place yeast warm water, salt & sugar in a small bowl. Stir well and let sit for about 10 minutes until bubbles form.
Step 2
Place flour n a large mixing bowl. Add olive oil, and the yeast mixture in the center of the flour and mix with dough hooks.
Mix until a round ball forms. * You may need to add a few sprinkles of flour if the dough is too sticky.
Remove from bowl and knead for 5-10 minutes until a smooth ball forms. Place in floured bowl, cover with plastic and a towel and set in a warm place for 1 hour or until the dough has doubled.
Mix the olive and garlic in a small bowl and set aside until the dough has risen.

When your dough is ready, brush a large baking sheet with some of the olive oil from the small bowl with garlic. (use olive oil only)
Spread the dough on the sheets. Use your fingers to spread the dough and make indentations to form crevasses.

Set the dough aside in a warm place for about 1 hour until it has doubled.
Preheat oven to 425 degrees.
When the dough has risen the second time, brush with the remaining olive oil and garlic, add rosemary and sea salt.* Add more or less to your desired taste. * At this point you can add sun dried tomatoes, pesto, olives, etc.

Cook for 20-25 minutes or until light golden brown.
Serve hot or cool and store for the next day!
Great for your Sardine cook outs this summer !

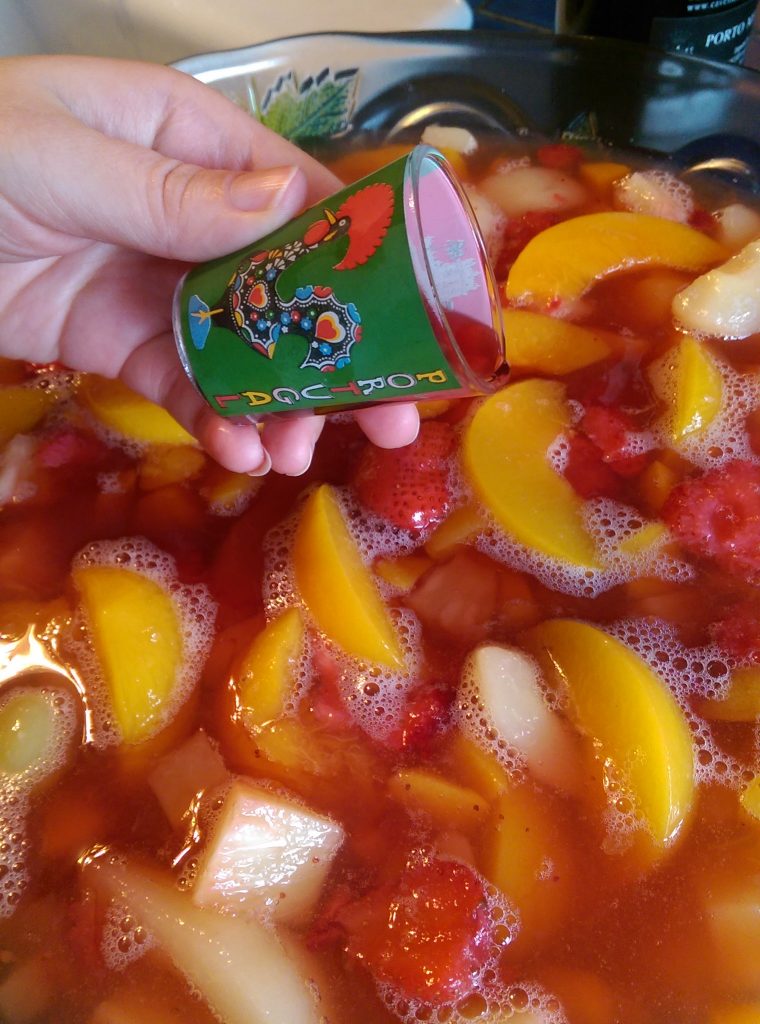
You’ll love this fruit salad for summer picnics, Holidays and for family celebrations. It’s so simple and easy to make, because you don’t have to peel and slice the fruit.
The secret to this recipe, is that you use a packages of frozen strawberries in syrup.
*You may substitute the recipe with low calorie canned fruit, or use any of your favorite fresh fruits.
However, to obtain the rich sweet flavor of strawberries and Port you must use the frozen strawberries in syrup.
*If you want to make this for children, leave out the Port wine, it’s just as delicious!

Ingredients: Serves 12-24
Note: These ingredients are all optional so substitute with your favorite fresh or canned fruits.
1/2 cup Vinho do Porto – (Port wine)
2 cups fresh strawberries cut into slices
1 (16 oz) container frozen strawberries in syrup
1 can chunk pineapple with juice
1 can sliced peaches
1 can fruit cocktail
1 can sliced pears
1 cup grapes
1 – 2 cups chopped cantaloupe (optional)
sliced bananas (optional)
*Note if you want a low calorie option use fruit in its own juice and not sweetened
Instructions: Prep time – 10 minutes
Place all ingredients into a large bowl. Stir gently to incorporate the wine into the fruit.
Place it in your refrigerator or in a cool place for at least 2 hours before serving but it’s better if left overnight in your refrigerator to allow the port wine to infuse the fruit.
When ready to serve, transfer the fruit into a large glass punch bowl. Serve with a ladle into individual glass cups or bowls.
Store in refrigerator for up to 3 days if you have any left over that is! Enjoy!
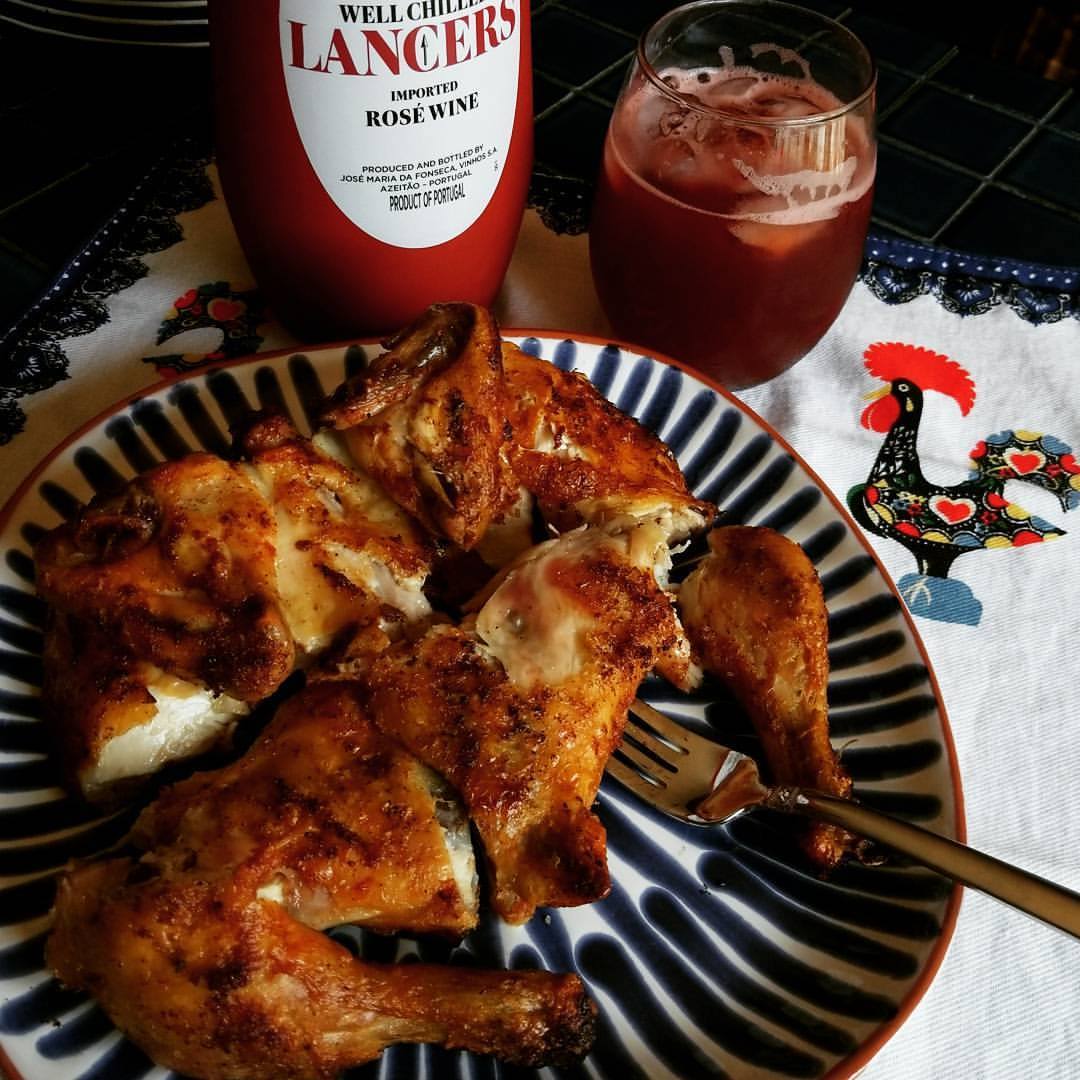
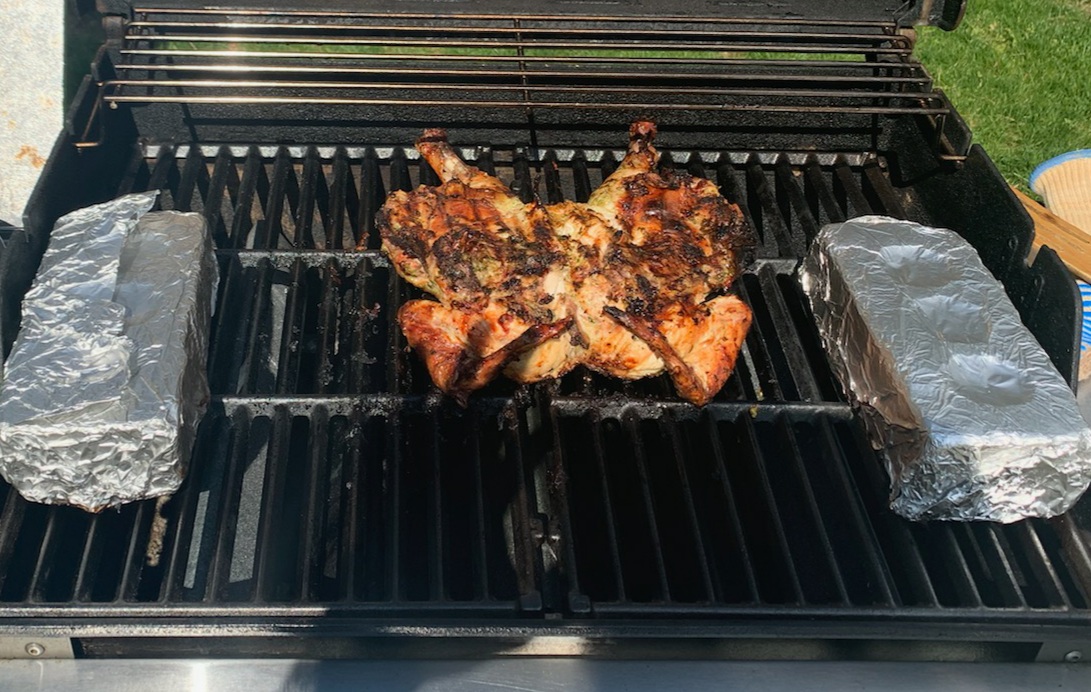
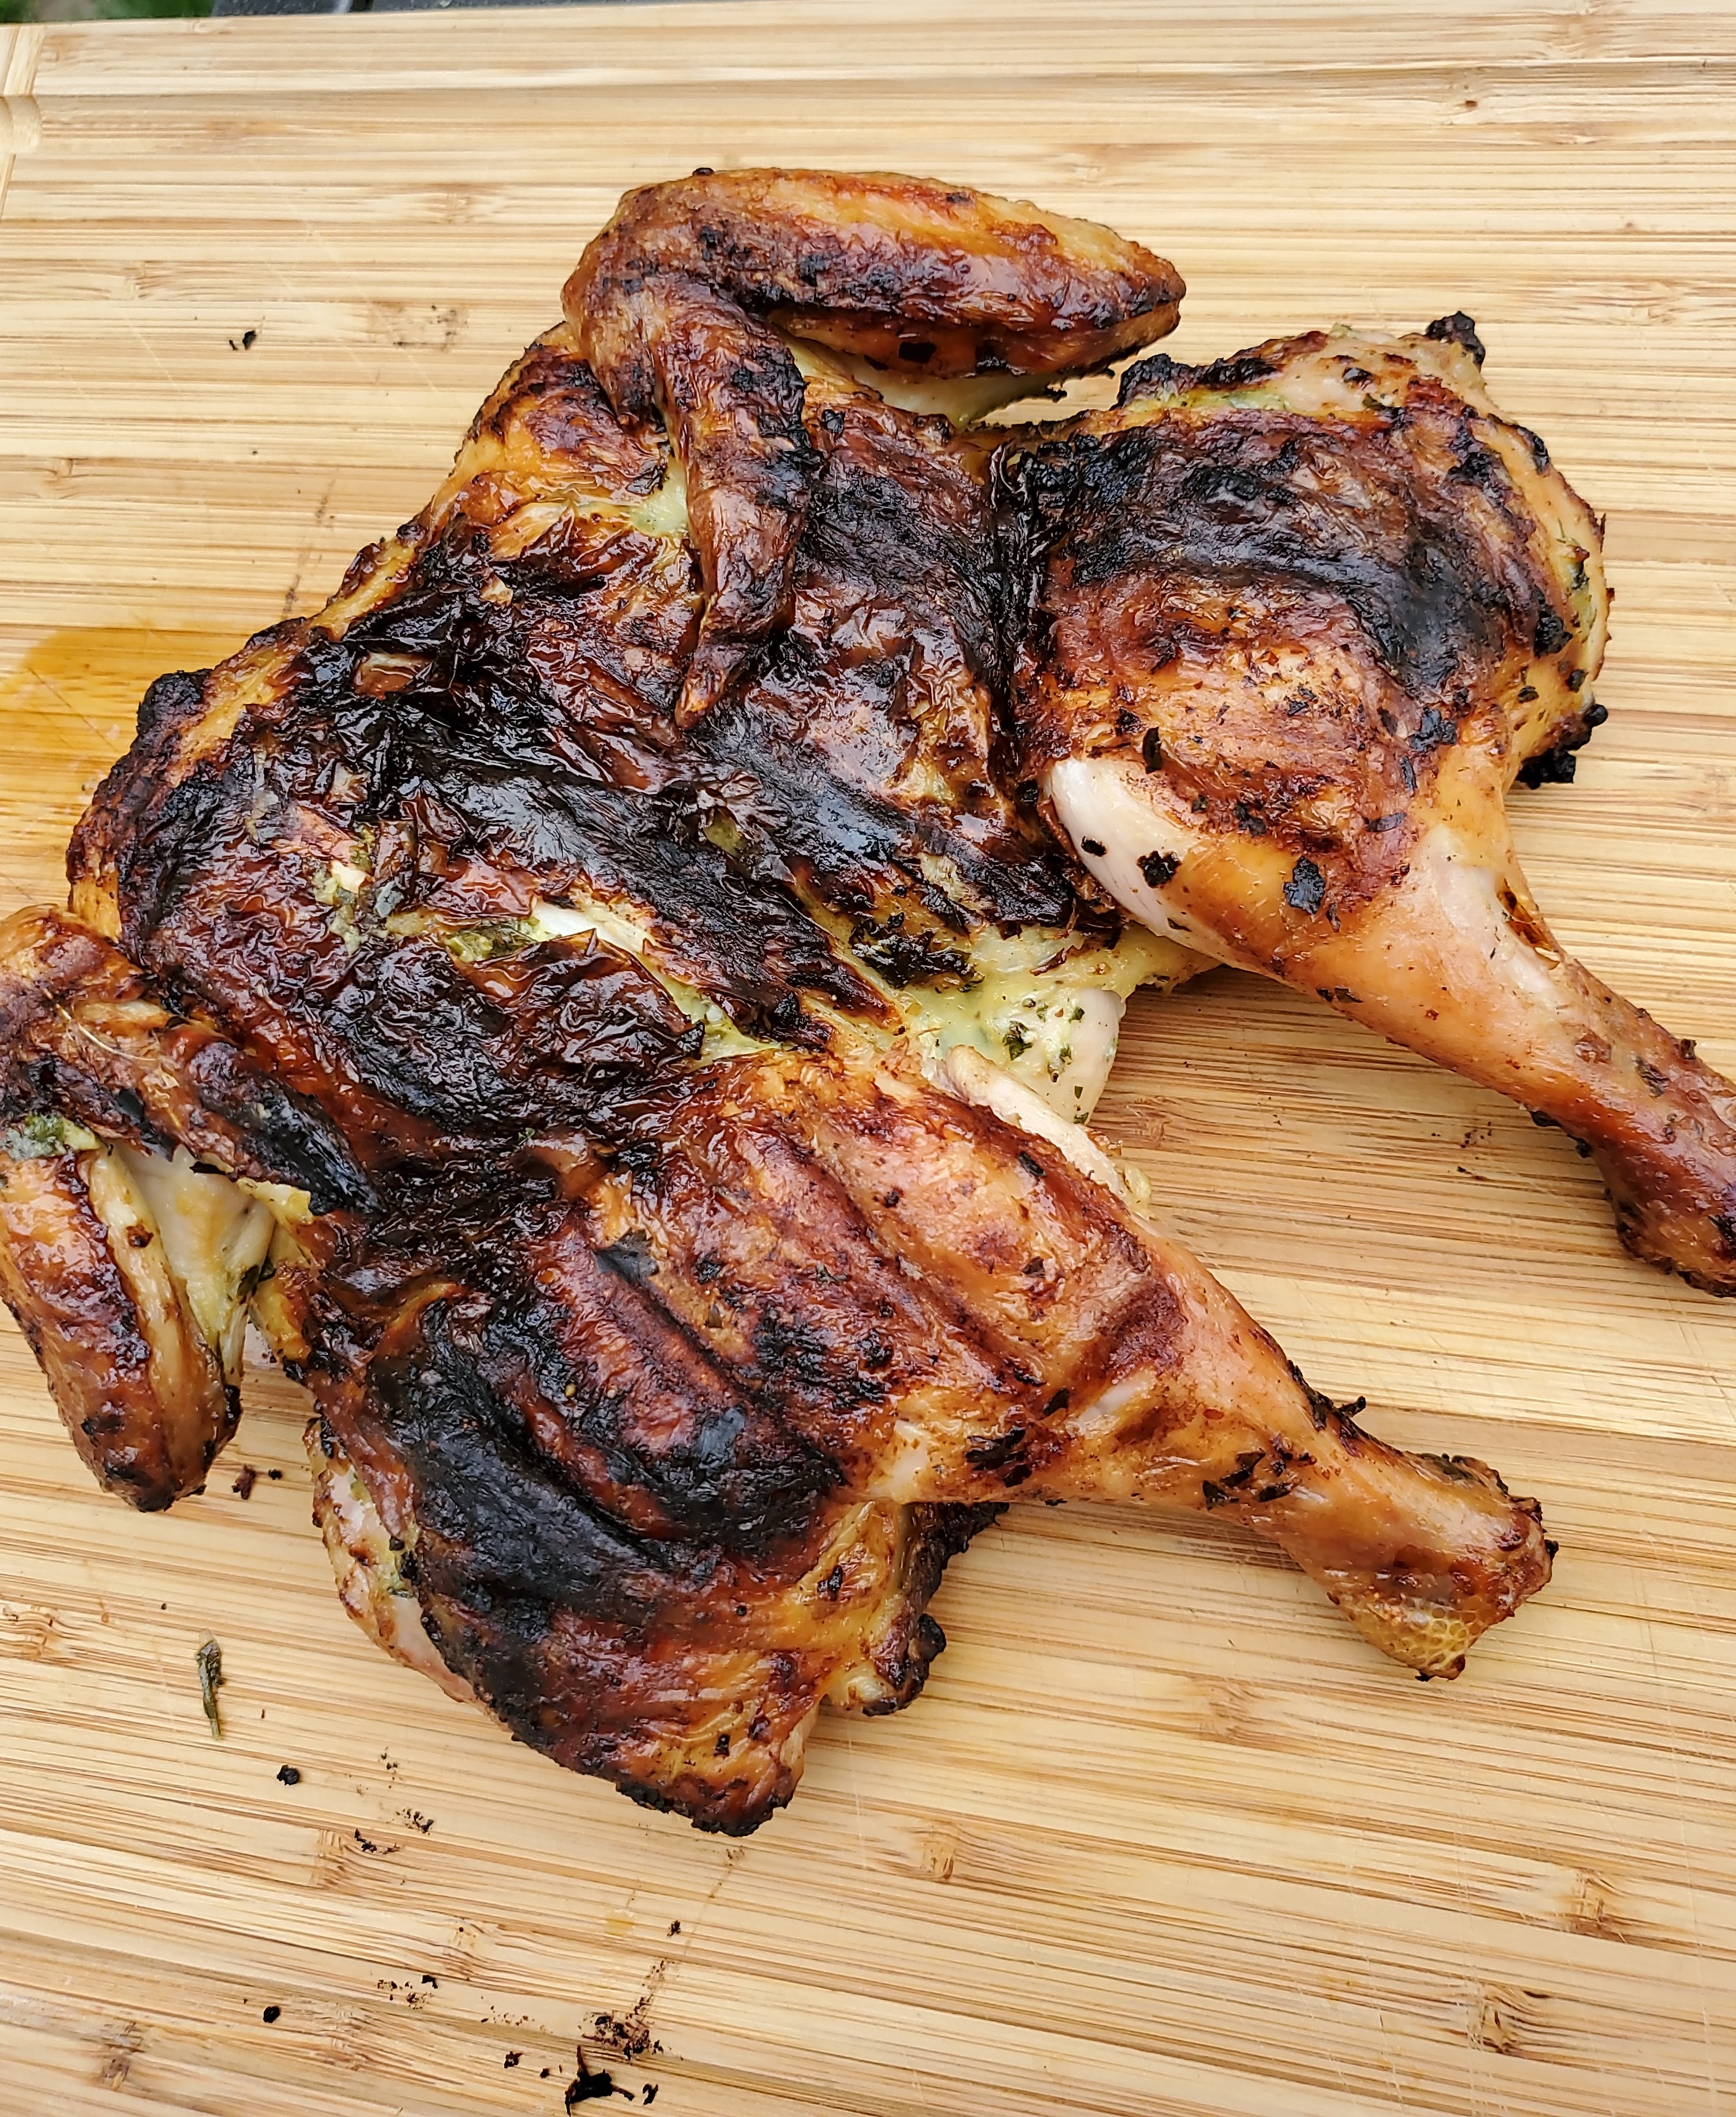

Portuguese “Frango Churrasco” – Barbequed Chicken, is one of the most popular dishes for summer cookouts.
There are many different recipes for this dish from using basic salt and pepper to adding oregano and rosemary.
My recipe, combines the classic Portuguese style spices, with an American twist of using a “Brick” to cook the chicken.
The chicken will cook quicker because it literally cooks on both sides with the heat from the hot brick cooking the top of the chicken and the hot grill cooks it on the bottom. You’ll notice you’ll get a great golden sear on the skin from the pressure of the brick as the chicken cooks slowly.


Ingredients:
2 small fryer chickens (3 to 4 lbs each)
4 cloves garlic crushed
2 tbsp salt
1 tbsp paprika
1/2 cup white wine
Juice of 1/2 lemon
2 tbsp Piri Piri or Tabasco sauce (Add more to taste)
2 tbsp olive oil
Cooking Marinade to brush on chicken:
2 tbsp butter or margarine
1/2 cup white wine
Leftover marinade
You will also need:
2 bricks wrapped in foil or a large heavy cast iron skillet
Preparation:
Butterfly the chicken by cutting down the back bone. Mix all the ingredients to form a marinate in a small bowl and reserve 2 tablespoons.
Coat the chicken with the marinate. Place in a shallow pan or plastic bag and store in the refrigerator.
Let it marinate for at least 2 hours or best, if left overnight.
Wrap 2 bricks with foil and place on the hot grill to heat up.
Grill should be hot then lowered to medium.
* Bricks will be hot – Use oven proof gloves.
When ready to cook, remove chickens from pan or the plastic bag.
Place the chickens skin side up on the grill and place one brick on top of each one. If you don’t have a brick use a heavy iron skillet. Close the grill and let chicken cook for 10 minutes.
In a small saucepan, mix reserved marinade with the butter and 1/2 cup of wine. Place saucepan on top of the grill and cook to evaporate the wine or heat up for a few minutes on your stove top until boiling point.
After 10 minutes check the chicken and turn over, skin side down.
Place the brick back on top of the chicken, close the grill and let cook for 5 minutes.
Begin Coating the chicken with the leftover marinade to moisten the chicken as it cooks if needed.
Check the chicken every 5 – 8 minutes to be sure it’s not burning. If you see flames, developing simply move the chicken off the flame to a different location on the grill.
After 1/2 hour, the chicken should have a good sear and charred color on it.
Lower the heat if you notice flames burning the chicken. Continue cooking for another 30 – 45 minutes, or until the legs are fully cooked turning every 10 minutes.
*Note: All grills are different so you may find that you need to cook your chicken for a longer time.
*Cut through the legs and thighs for faster grilling.
You may also finish cooking the chicken in the oven for 10 minutes at 350.
Serve with my Potato Salad or Rice recipe.
Enjoy!
These classic pastries are everyone’s favorite. Once you experience just how easy they are to make at home, you’ll never buy them at a bakery again.
Unless of course, your lucky enough to be in one of the famous pastry shops in Lisbon!
Before we get started, I want to share with you the history of this famous pastry that was first created over 200 years ago!
Portuguese Egg Custard Tarts, famously known as Pastéis de Belem are famous in many countries all over the world.
The original Pastéis de Belem, were first created by nuns who lived at the Monestary of Jeronimos in Belem, Lisbon in 1837.
Casa Pasteis de Belem is located in the town of Belem in Lisbon, Portugal. The official name of the town is “Santa Maria de Belem” but its referred to as “Belem”. The name “Belem” originated from the Portuguese word for “Bethlehem”.
Many bakeries have tried to replicate the recipe to no avail. The equally famous; “Pasteis de Nata” it’s copy cat version, has become a famous substitute for the original at every Portuguese bakery throughout Portugal and many other countries around the world.
The famous recipe is kept a secret. “The secret can only be memorized, it can’t be written down”, says the pastry chef who was carefully selected among 80 co-workers.
Café Pastéis de Belém below, sells approximately 20,000 pasteis per day! Wow!
 Photo Credit: (http://www.flickr.com/photos/cialowicz/6122617070/)
The pastry’s name was trademarked in 1911, which means the company is the only one that can call the famous sweets by that name. Visit this dessert site; desserteater.com for more on the history of one of the world’s most popular desserts!
In, December 2011, Pasteis de Belem was listed by Lonely Planet # 2 of 583 things to do in Lisbon, #5 of 12718 restaurants in Europe and # 42 of 382 restaurants in Portugal. (desserteater.com)
Watch this video of the famous bakery of Pasteis de Belem.
Find this complete recipe plus 100 other recipes in my new cookbook!
Click here to order Taste Portugal cookbook!

Makes 18 – 24 depending on size of your tins
Ingredients:
1 lb – Defrosted Puff Pastry Dough – *Note: Your local bakery may sell it, or buy: (Pepperidge Farm Puff Pastry Dough

2 cups whole milk (must be whole milk not low fat or skim)
1 1/2 cups sugar
1/2 cup flour
1 cup water
2 slices lemon rind
1 stick cinnamon
7 X Large egg yolks (room temp)
Cinnamon for garnish


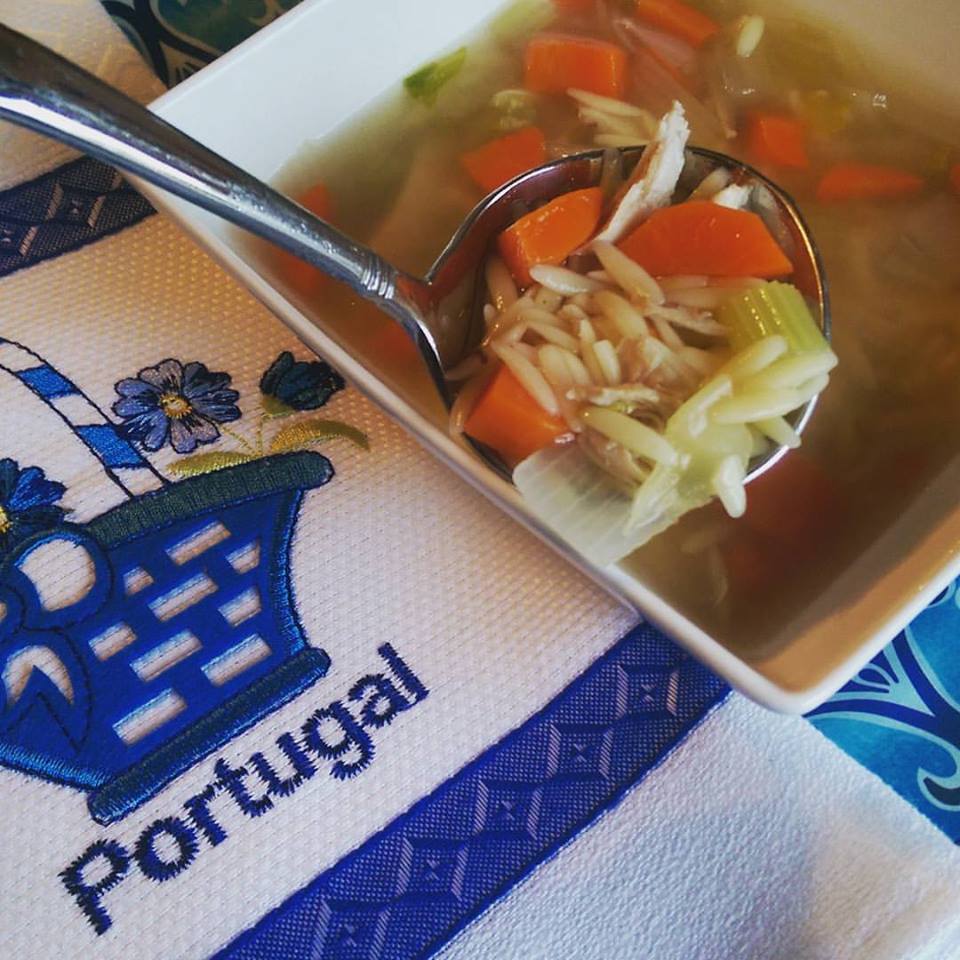
Big Fat Portuguese Wedding Soup
When I first saw the movie “My Big Fat Greek Wedding” with my friends many years ago, they laughed hysterically at the quirky customs, the outrages family members and the huge bridal party.
Although I did love the movie, I found nothing strange about it since I had lived through many of the same big crazy weddings many times.
In fact, I’ve probably been to over 100, “Big Fat Portuguese Weddings.” Some I attended as a guest, while others, as a waitress during my teenage years.
There is a large close knit Portuguese community in my hometown. It seems that there is literally a Portuguese wedding every week during the summer months where everyone is invited!
Lists of the 300-500 guest’s addresses are handed down from generations to the next who follow the same traditions, customs and even serve the same menus.
A recent email request for the chicken soup that is served at Portuguese weddings brought back the memories from weddings attended long ago and the soup that is still on the menu.
An abundance of food is very important for any Portuguese wedding. Generally, the menus consist of a wide range appetizers such as Bolinhos de Bacalhau (Cod Fritters), Rissois de Camarao (Shrimp Turnovers), Folar (Meat stuffed bread) Roast Suckling Pig, Shrimp Cocktail, Cheese, Fruit, Presunto and other cold cuts, a soup course; Caldo Verde (Green Soup) or Chicken Noodle Soup, a fish course which varies from; Seafood Paella, Fish Fillets with Shrimp Rice or Bacalhau a Gomes de Sa (Salt Cod Casserole), and a meat dish with either; Roast Pork Loin, Roast Beef, or Steak.
Later in the evening a buffet is served similar to an “Italian Venetian” hour with many of these same items along with other traditional classics such as Feijoada (Bean stew), Dobrada (Tripe), and many other classic desserts and pastries to many to mention.
Here’s my recipe for “Portuguese Wedding Soup”. It contains a secret ingredient used by some of the caterers.
Keep it a secret if you wish, it’s up to you! Enjoy!


Portuguese Wedding Soup
Ingredients:
3 lb fresh Chicken (whole or cut into pieces)
12 cups water
1 large chopped onion
2 large celery stalks
2 large carrots
2 cloves garlic (peeled)
3 sprigs parsley
1 tbsp salt
1 /2 tsp freshly cracked pepper
1 – 1/2 cups ORZO pasta (or white rice)
(1/2 tsp crushed pepper flakes optional)
Instructions:
In a large stock pot, place the water, onion, 1 stalk of celery, 1 carrot, salt, 2 sprigs parsley and garlic and bring to a boil. Add the chicken and let it cook on medium for 2 hours. (If desired: remove one chicken breast after 1/2 hour of cooking time, remove bones, dice the meat and reserve for later).
After 2 hours remove the chicken and vegetables. Strain the soup through a strainer to remove any scum or fats. *Note: (Discard the chicken and vegetables since they have lost their nutrients and con not be re-used). Place the pan with the broth back on the stove and bring to a low boil. Slice remaining carrot and celery into desired small slices.
(TOP SECRET-Restaurant TIP: For an even more Chicken flavored soup, add 1 or 2 KNORR Chicken Bouillon cubes to taste)…HUSH.. HUSH!!
Add the ORZO or rice to the soup and cook on medium for 10 minutes. After 10 minutes, add the diced carrots, celery and the reserved diced chicken to the soup and stir.
Let the soup cook on medium for additional 10 minutes. Remove the soup from heat. Season to taste by adding more salt if needed and add the fresh black pepper. Garnish with chopped parsley.
(*Note: – Some people like to add 1 mint leaf as garnish instead of Parsley) (*Note: Add crushed red pepper flakes to kick up the soup if you want a little heat. The crushed red pepper is great to relieve nasal congestion, but do not give to your younger children).
Serve, or store in refrigerator after the soup cools. Enjoy!

The dog wags his tail, not for you, but for your bread.


The dough is placed in round shaped pans to form the bread. There is no need to let the dough rise for hours like most bread doughs.
Watch the videos at the end of this post to see the old world traditions of making this bread.
Ingredients:
3 and 3/4 cups of white corn flour (you may also use fine yellow corn flour)
3 cups of flour
3 cups boiling water
1 tablespoon melted butter
2 teaspoons sugar
2 teaspoons salt
Yeast Starter:
1/4 cup warm water
1/2 teaspoon of sugar
2 teaspoons powdered yeast
1 tablespoon of flour
Instructions:
Make the yeast starter and set aside.

Place the corn flour in a mixing bowl and add the boiling water butter, sugar and salt. This will start the cooking process of the corn flour.
Mix well with a dough hook or with your hands if the dough is cool enough to handle. Let the dough rest for about 5 minutes and add the flour a little at a time.
Add the yeast mix and knead until the dough is smooth and can be shaped into a ball.


Place dough on a floured surface and shape into a ball. Coat the top of the dough with corn flour.


Form the dough into a flat round shape and place in a greased cake pan or pie plate.
Meanwhile preheat oven to 450 degrees. Let the dough double in size for about 30 minutes or longer.

You’ll notice the cracks forming on the dough but that is what gives the dough an artisan appearance.

Cook for about 45 minutes until the crust is dark. Hit the bread with your knuckles and listen for a hallow sound. You may need to cook the bread longer depending on your oven since temperatures vary.

Let cool before slicing. The bread will be very crusty. If you want a softer crust, place the cooled bread in a food safe plastic bag for a few hours.

I wish you could taste it with that melted butter!

Watch this video to see the old process of making Pao Milho and cooking it in a wood fired oven.
Making Pao de Milho old tradition Part I
Part II
Part III
Part IV
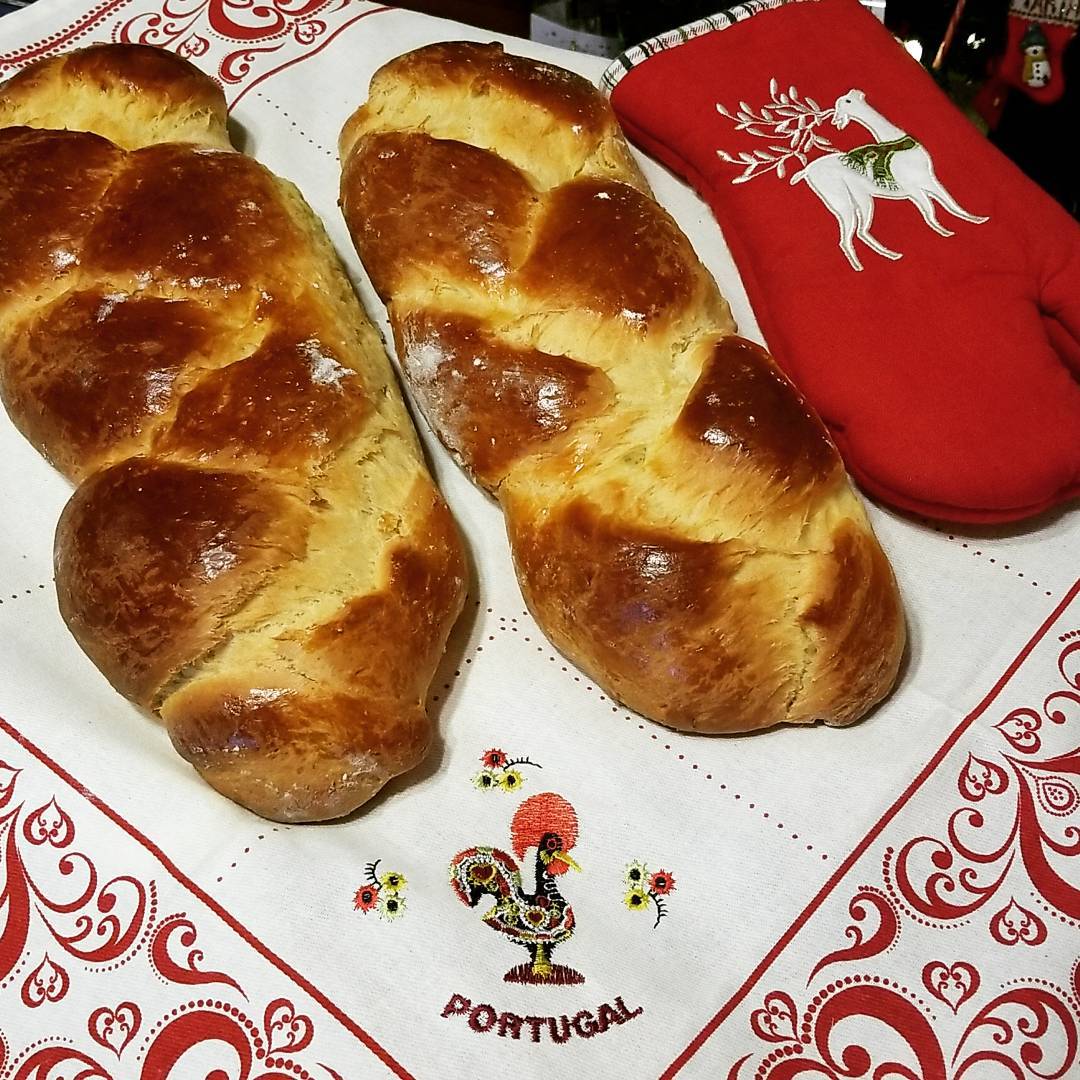
 Portuguese Sweet Bread Christmas Braid
Watch my video recipe on my Youtube channel
I’ve tried many recipes and finally come up with this perfect one to share with you. The bread comes out light and fluffy and delicious.

Preparation:
Heat milk, but do not scald. Remove from heat and stir in margarine until melted. Add sugar, salt and mix. Let the milk cool down.
Meanwhile Make yeast starter by mixing packages of yeast with ¼ cup of warm water and ¼ tsp of sugar. Stir yeast until dissolved and let it rest until you see bubbles activating.
Beat eggs for a few minutes then add to the milk in a large mixing bowl. Add the yeast to the milk along with the whiskey and beat for 2 minutes.
Begin adding the flour 1 cup at a time until it’s all incorporated. Use your dough hooks or your hands to knead for about 10 minutes. The batter should be very silky and smooth but not sticky. Add more flour if you find the dough sticky.
Remove dough from mixer, place on a floured surface and knead for about 5 minutes until it is smooth and soft.Place the dough into a large floured bowl and cover with plastic wrap and a warm towel. Let it rise in a warm place for 2 to 3 hours or until doubled.
After the dough has doubled, punch it down and let it rise for 30 minutes longer. Place your dough on a floured surface and form your bread either into a braid, loaf or mini buns.
Let the dough rise for another hour or in a warm oven for about 20 minutes or until almost double.
Preheat oven to 325 degrees F.
Brush tops of the bread with egg wash and bake for 30 minutes. After 30 minutes, turn the heat to 300 and cook for 30 minutes longer until the bread has a golden caramel color.
Note:: Do not over bake since it may get the bread dry.
Mini buns cook in less time, approximately 45 minutes.
You may find oven temps will vary, adjust accordingly.
Makes approximately 2 loaves, 1 large braid or 12 buns


 Gaspar’s……”The Portuguese Sausage that the whole world can enjoy!”

“You don’t have to be Portuguese to love Linguica and Chourico”
|
When Manuel A. Gaspar emigrated from Portugal to the United States in 1912, he brought with him a desire for a better way of life, as well as his skill and recipes for making those traditional Portuguese smoked sausages (Linguica and Chourico). Little did he realize then, that four generations later, the Gaspar family would still be making those delicious sausages according to his original recipe and standards of quality.
|
 |
For nearly a century Gaspar’s Sausage Co., Inc. located in North Dartmouth, MA. has been recognized as the largest manufacturer of Portuguese smoked sausage in the United States. It has become the largest manufacturer of Portuguese sausage in the country, producing well over three million pounds each year. Located in Southeastern Massachusetts, the name Gaspar has become synonymous with sausage. Today, this family owned business continues in the same tradition of its patriarch by producing their Linguica and Chourico according to this time-tested recipe. Gaspar’s Linguica and Chourico are readily available at all major supermarket chains throughout New England and can also be found in parts of New York, Virginia, Pennsylvania, North Carolina, Florida and Bermuda.
|
|
Today, all of Gaspar’s products can be enjoyed anywhere in the United States through the company’s mail order/Internet division. So, whether you’re originally from New England or simply someone whose taste buds enjoy the unusual, call Gaspar’s at 1800-542-2038 and indulge yourself or someone special with a truly delectable experience. You’ll be glad you did!! Be sure to visit Gaspars’ website where you’ll find some of their favorite recipes and other products such as Portuguese Sweet Bread and Portuguese Muffins! Order products online at www.linguica.com
|
| LINGUICA: Similar to kielbasa but with its own unique flavor, Linguica (pronounced lin-gwee-sah) is a mild pork sausage still manufactured according to an old Portuguese recipe. It is a fine blend of lean pork with a mixture of such basic spices as vinegar, salt, paprika and garlic. Stuffed into a natural casing, Linguicais then smoked until the special flavor and federally required temperatures are reached. Gaspar’s Linguica comes in many shapes and sizes. The Linguica franks and patties are great on the grill, and the Bite Size cocktail franks make a great appetizer. It even comes ground which makes a great pizza topping! |
| CHOURICO: Made from the same good meats as Linguica, Chourico (pronounced shoor-reese) has a heartier spiced flavor. Its main difference from Linguica is that it is a hot sausage whereas Linguica is mild. Gaspar’s Chourico is available in mild, regular and extra hot versions and the regular is available as round patties, franks, and ground in addition to the traditional sausage shape! |
| TURKEY LINGUICA & CHOURICO: For those looking for a low fat option without sacrificing the classic flavor, Gaspar’s also makes Turkey Linguica & Chourico. containing low fat turkey meat instead of pork! |
| ANDOUILLE, KIELBASA, SALPICAO & MORE: Gaspar’s is more than just Linguica and Chourico. we make some other great sausage products as well! Our other offerings include Andouille, Kielbasa, Salpicao, Chourizos and Morcela. (available seasonally) |
| GIFT PACKS: If you are looking to try a variety of our products or would like to send a great gift to a friend or relative please take a look at our pre-selected gift packs combining the most popular varieties of products! (Available ONLINE only) |
GASPAR’S SAUSAGE COMPANY, INC.
384 Faunce Corner Road,
North Dartmouth, MA 02747-1257
Order products online at www.linguica.com
Phone: 1-800-542-2038
Here’s a favorite “Flaming Chourica” Recipe just in time for the Holidays!

This appetizer creates a memorable cooking experience for your guests. The flaming chouriço creates a crispy browned skin and savory flavor. Chourico sausage is cured so don’t worry if think you haven’t cooked it long enough. Chourico sausage is cured so don’t worry if think you haven’t cooked it long enough. Serve with fresh crusty bread.

Recipe Ingredients:
1 Whole Linquica or Chourica Sausage
2 – 4 oz Whole grain – Alcohol (Preferably Portuguese)
1 Cooking Vessel – Assa Chourica Cookware
Long fireplace matches
Instructions:
Wash and dry the Chourica with paper towels. Place 2 oz of Alcohol in the bottom of the dish.
Make a few cuts into the top of the Chourica and place on cooking dish.
Light a match and slowly light the alcohol.
Let the flames cook the Chourica until crispy. *Caution* Do not touch flames
Turn the Chourica over to cook the other side if desired.
If the flames die out before the Chourica is cooked, start the process over!
Remove the Chourica onto a serving plate and serve in slices.
Serve with Portuguese bread such as Papo Seco, Caseiro, or Milho!
Enjoy!
Flaming chourico image credit: golisbon.com

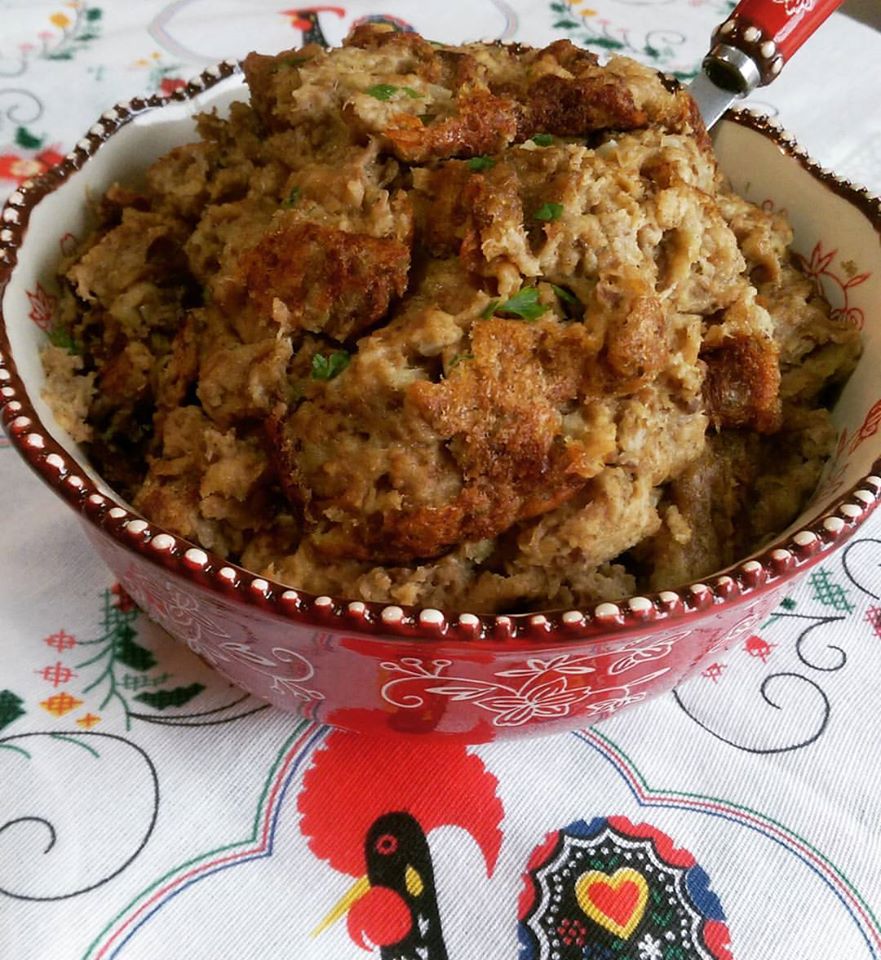
I get many requests from people looking for lost recipes, but especially around the Holidays.
There are many reasons why people don’t have their family recipes.
Some family members didn’t want to share them, the recipes were not written down, or they just hadn’t taken the time to learn the recipe until it was too late.
This Thanksgiving, I encourage you to sit down with the cooks in your family, write down their recipes and share the family traditions and history!
In this post, I’m sharing a little of my own family history along with my family’s favorite Thanksgiving recipe which I only cook once a year!
My family came to America in 1963, when John F. Kennedy was President of the United States. We came here, thanks to my Aunt Isabel, my mother’s sister, who immigrated to America when she was only 16 years old.
She sailed here by ship and passed through the historical landmark of Ellis Island in New York. She eventually became a US Citizen and later filed the paperwork for my mother and her family to immigrate!
My parents were typical Portuguese immigrants, who idolized President Kennedy because he was a proponent of Immigration, which eventually led to the Immigration Act of 1965.
This act, allowed my two older brothers who were living in Brazil at that time to join our family in the USA a few short years after we arrived here.
A soft velvety tapestry of JFK hung on the walls of most Portuguese family living rooms those days. I still have the one my parents had, neatly stored away in my cedar chest as a reminder of our family’s journey of coming to America.
President Kennedy was assassinated only 6 months later and like so many of others, I remember exactly where I was the moment I heard about it. I cried but I don’t think I knew why it affected me so much. Perhaps it was because my mother was crying.

Like so many before them my parents grew to love America and they were happy and grateful to move here. They followed the dream of a better life for their family, opportunity, and freedom from living in a country ruled by Salazar who was the dictator at that time.
I remember my first day in America, but that story is for another day and another recipe.
Like most Portuguese immigrants in America, my family has embraced the tradition of celebrating Thanksgiving since we were very grateful for the blessings of the food, our health, friends, and family.
I was very young when I watched my mother prepare our family’s first Thanksgiving diner, but I remember it vividly.
A friend of hers came by the night before Thanksgiving to teach her how to brine the turkey, and to make the stuffing.
I didn’t understand why they had to drown the poor bald turkey in a big plastic tub filled with salt, water and lemons since it was already dead anyway!
I watched in horror as they prepared the stuffing by peeling the sagging skin hanging off the turkey neck and then chopping up the cooked heart and the liver! Yuk!. I said to myself, I would never make that stuffing for my family, but of course I did.
Despite hating what I saw, I couldn’t leave that kitchen because I wanted to see, what this Thanksgiving cooking fuss was about anyway?
Many years later, I began preparing my mother’s stuffing recipe for my own family and it’s become the favorite side dish on our Thanksgiving table every year!
I hope you enjoy it as much as we do!
*Note that every family has a special Thanksgiving stuffing recipe. Some use meats in their stuffing, while some add chourica to the bread mix. I also use Pepperidge farm stuffing mix for an authentic Thanksgiving flavor. I suggest you try this recipe a couple of times to perfect to your taste by substituting your favorite meats, or bread stuffing mix. You can order chourica online at Gaspars Linguica.
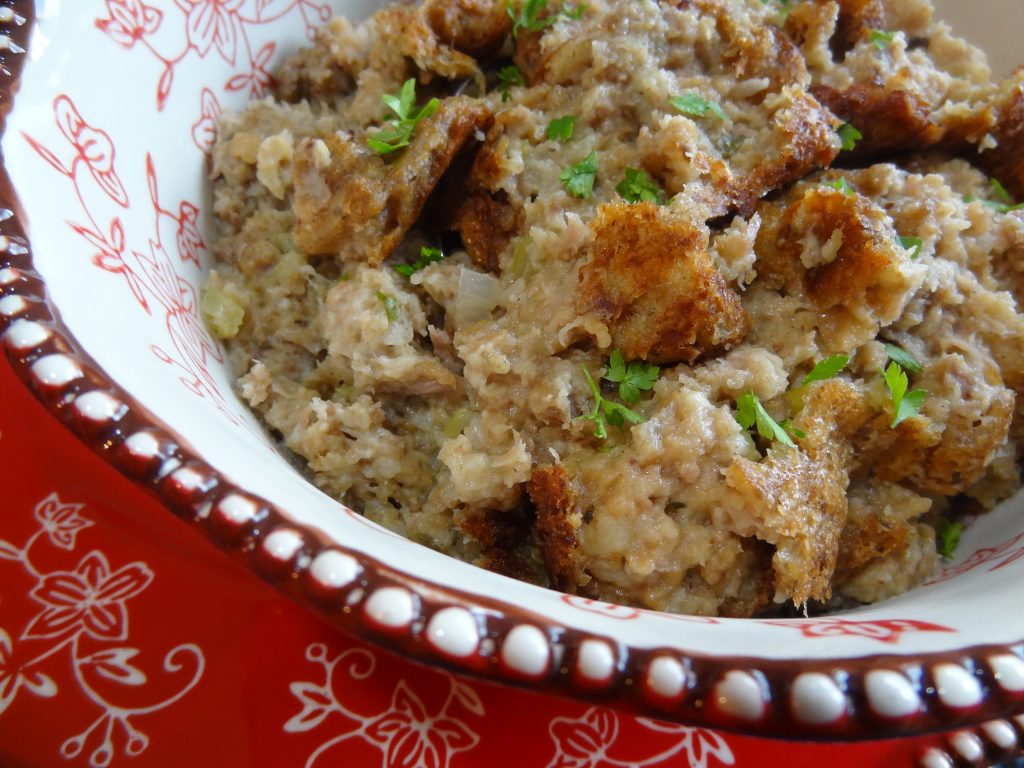
Portuguese Style – Thanksgiving Stuffing with Giblets – Serves 12 +
Ingredients:
Giblets & Stock
Turkey Giblets (which come inside turkey – neck, liver, heart, gizzard)
1 medium onion (chopped)
1 celery stock (chopped)
4 cups of water
4 cups of chicken broth
2 cloves of garlic
1 tsp of salt
1 tsp of pepper
Ground Meat & Bread Stuffing
1 lb ground beef, ground turkey, or sausage meat (this is optional)
1/2 cup diced Chourica or Linguica sausage (this is optional)
1/2 tsp garlic powder
1/2 tsp Paprika (omit if you use chourica)
1/2 tsp salt
1/2 tsp pepper
1 small diced onion
3 tbsp of olive oil
3 or 4 day old Portuguese rolls cut into cubes
4 cups of Pepperidge Farms stuffing mix with herbs (optional but use more bread instead and add 1/2 teaspoon of sage)
2 eggs
2 tsp very finely chopped parsley
Preparation:
How to cook giblets and stock:
Step 1:
Place the water, onion, garlic, celery, stock, and seasonings in a large stock pan and bring to a boil.
Rinse the giblets and neck and place them (except the liver) into the pan.
Cover, and cook on medium heat for at least 1 hour.
*Add liver during the last 10 minutes of cooking.
*The giblets should very well cooked, let cook longer if needed.
Remove the giblets from pan but save the stock. When giblets and neck are cooled, trim the meat by removing any ten-dints, veins or skin.
Place the trimmed meat in a food processor and pulse until they are the consistency of ground meat or leave chunky if you prefer.
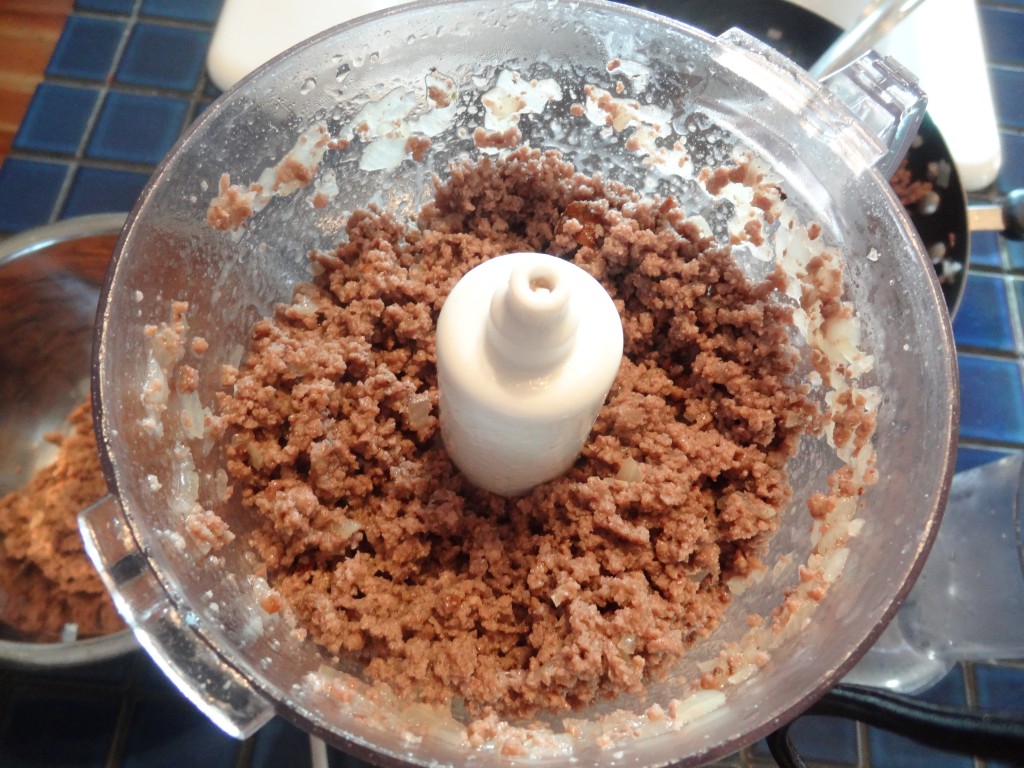
Step 2
*Prepare meat for stuffing
Saute ground meat in olive oil with onions and seasonings until cooked. Add the diced Chourica the meat and mix.
Place in a food processor and pulse about 5 times until you get a smooth like consistency – (or chunky if you prefer
Step3:
Strain your giblet turkey broth into a large bowl. Add the Portuguese rolls.
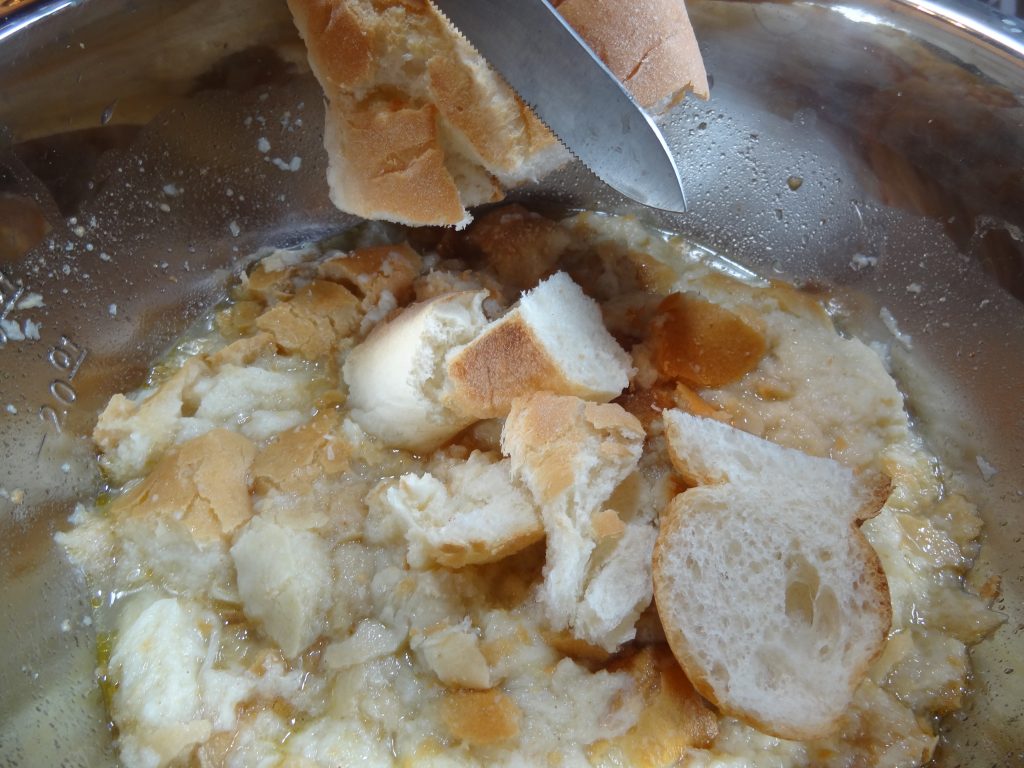
Let the rolls absorb the broth until they are soft. Add the cooked onion, garlic and celery from the broth. Mash well with your hand or a potato masher.
Add stuffing mix, ground meat mixture, and giblets. Mix until well incorporated.

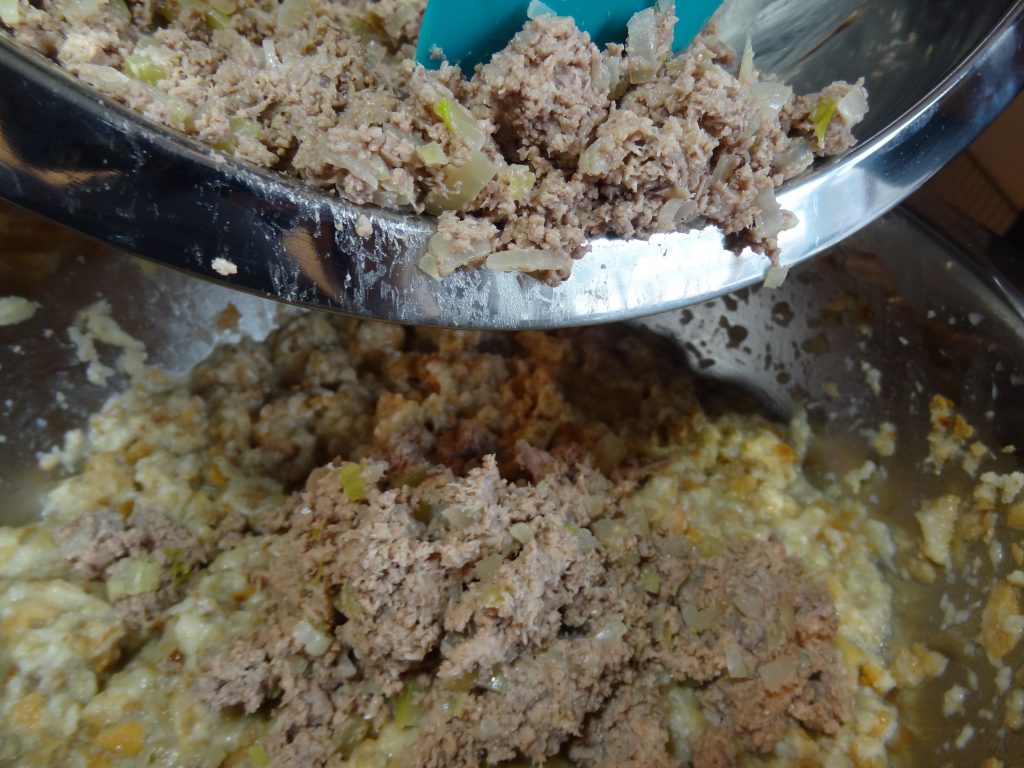
At this point it’s up to you, if like a wet stuffing leave it alone, if you like a dry stuffing, add more stuffing mix or bread. If you find the stuffing dry add more broth.
Taste the stuffing and add salt or seasonings to your taste.
Add 2 eggs, and parsley. Mix well.
Spray or grease with margarine, a souffle, or baking pan which is at least 4 inches deep and big enough to hold all of the stuffing
Pour in the stuffing and cover with foil. Cook for at least 45 minutes at 350. If you want a crispy top remove foil during the last 15 minutes.

* Important – If you make this the day before. Let it cool – cover and store in refrigerator. (Heat up in the oven for 20-30 minutes at 350 F oven, or one portion at at time in the microwave.)
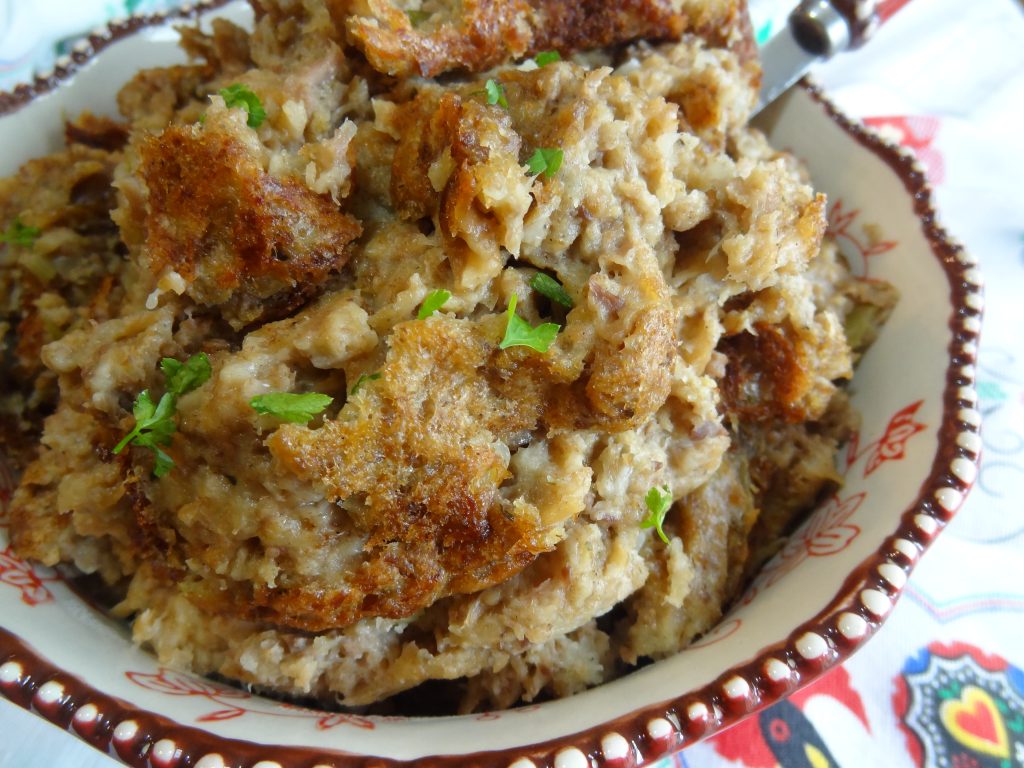

Shrimp & Pork Dumplings!
This is an easy recipe for all your parties! You will never order dumplings out again once you try this easy recipe! I made about 48 dumplings with this recipe using Nasoya wrappers but you can use any brand you want.
You can find them in the fresh produce section of your market. I made 2 batches for a party and they were the first to go! Normally when you order these out, you’d pay $5.95 for 6. I spent about $12.00 for 48.
I always make it an Asian theme dinner so I make Won Ton Soup and Egg Rolls too! Find the recipes here.

Ingredients
1 package won ton wrappers (48)
12 oz raw ground pork
8 oz (about 15 medium 20 small) finely chopped raw shrimp
4 oz finely chopped water chestnuts (rinse & drain can)
1/4 cup finely chopped celery
3 finely chopped scallions
2 tsp sesame oil
2 tsp soy sauce
4 tsp corn starch
Instructions:
Mix all ingredients except wrappers and 1 tablespoon of scallions in a small bowl until all incorporated. Place 1 teaspoon of filling in center of each wrapper.
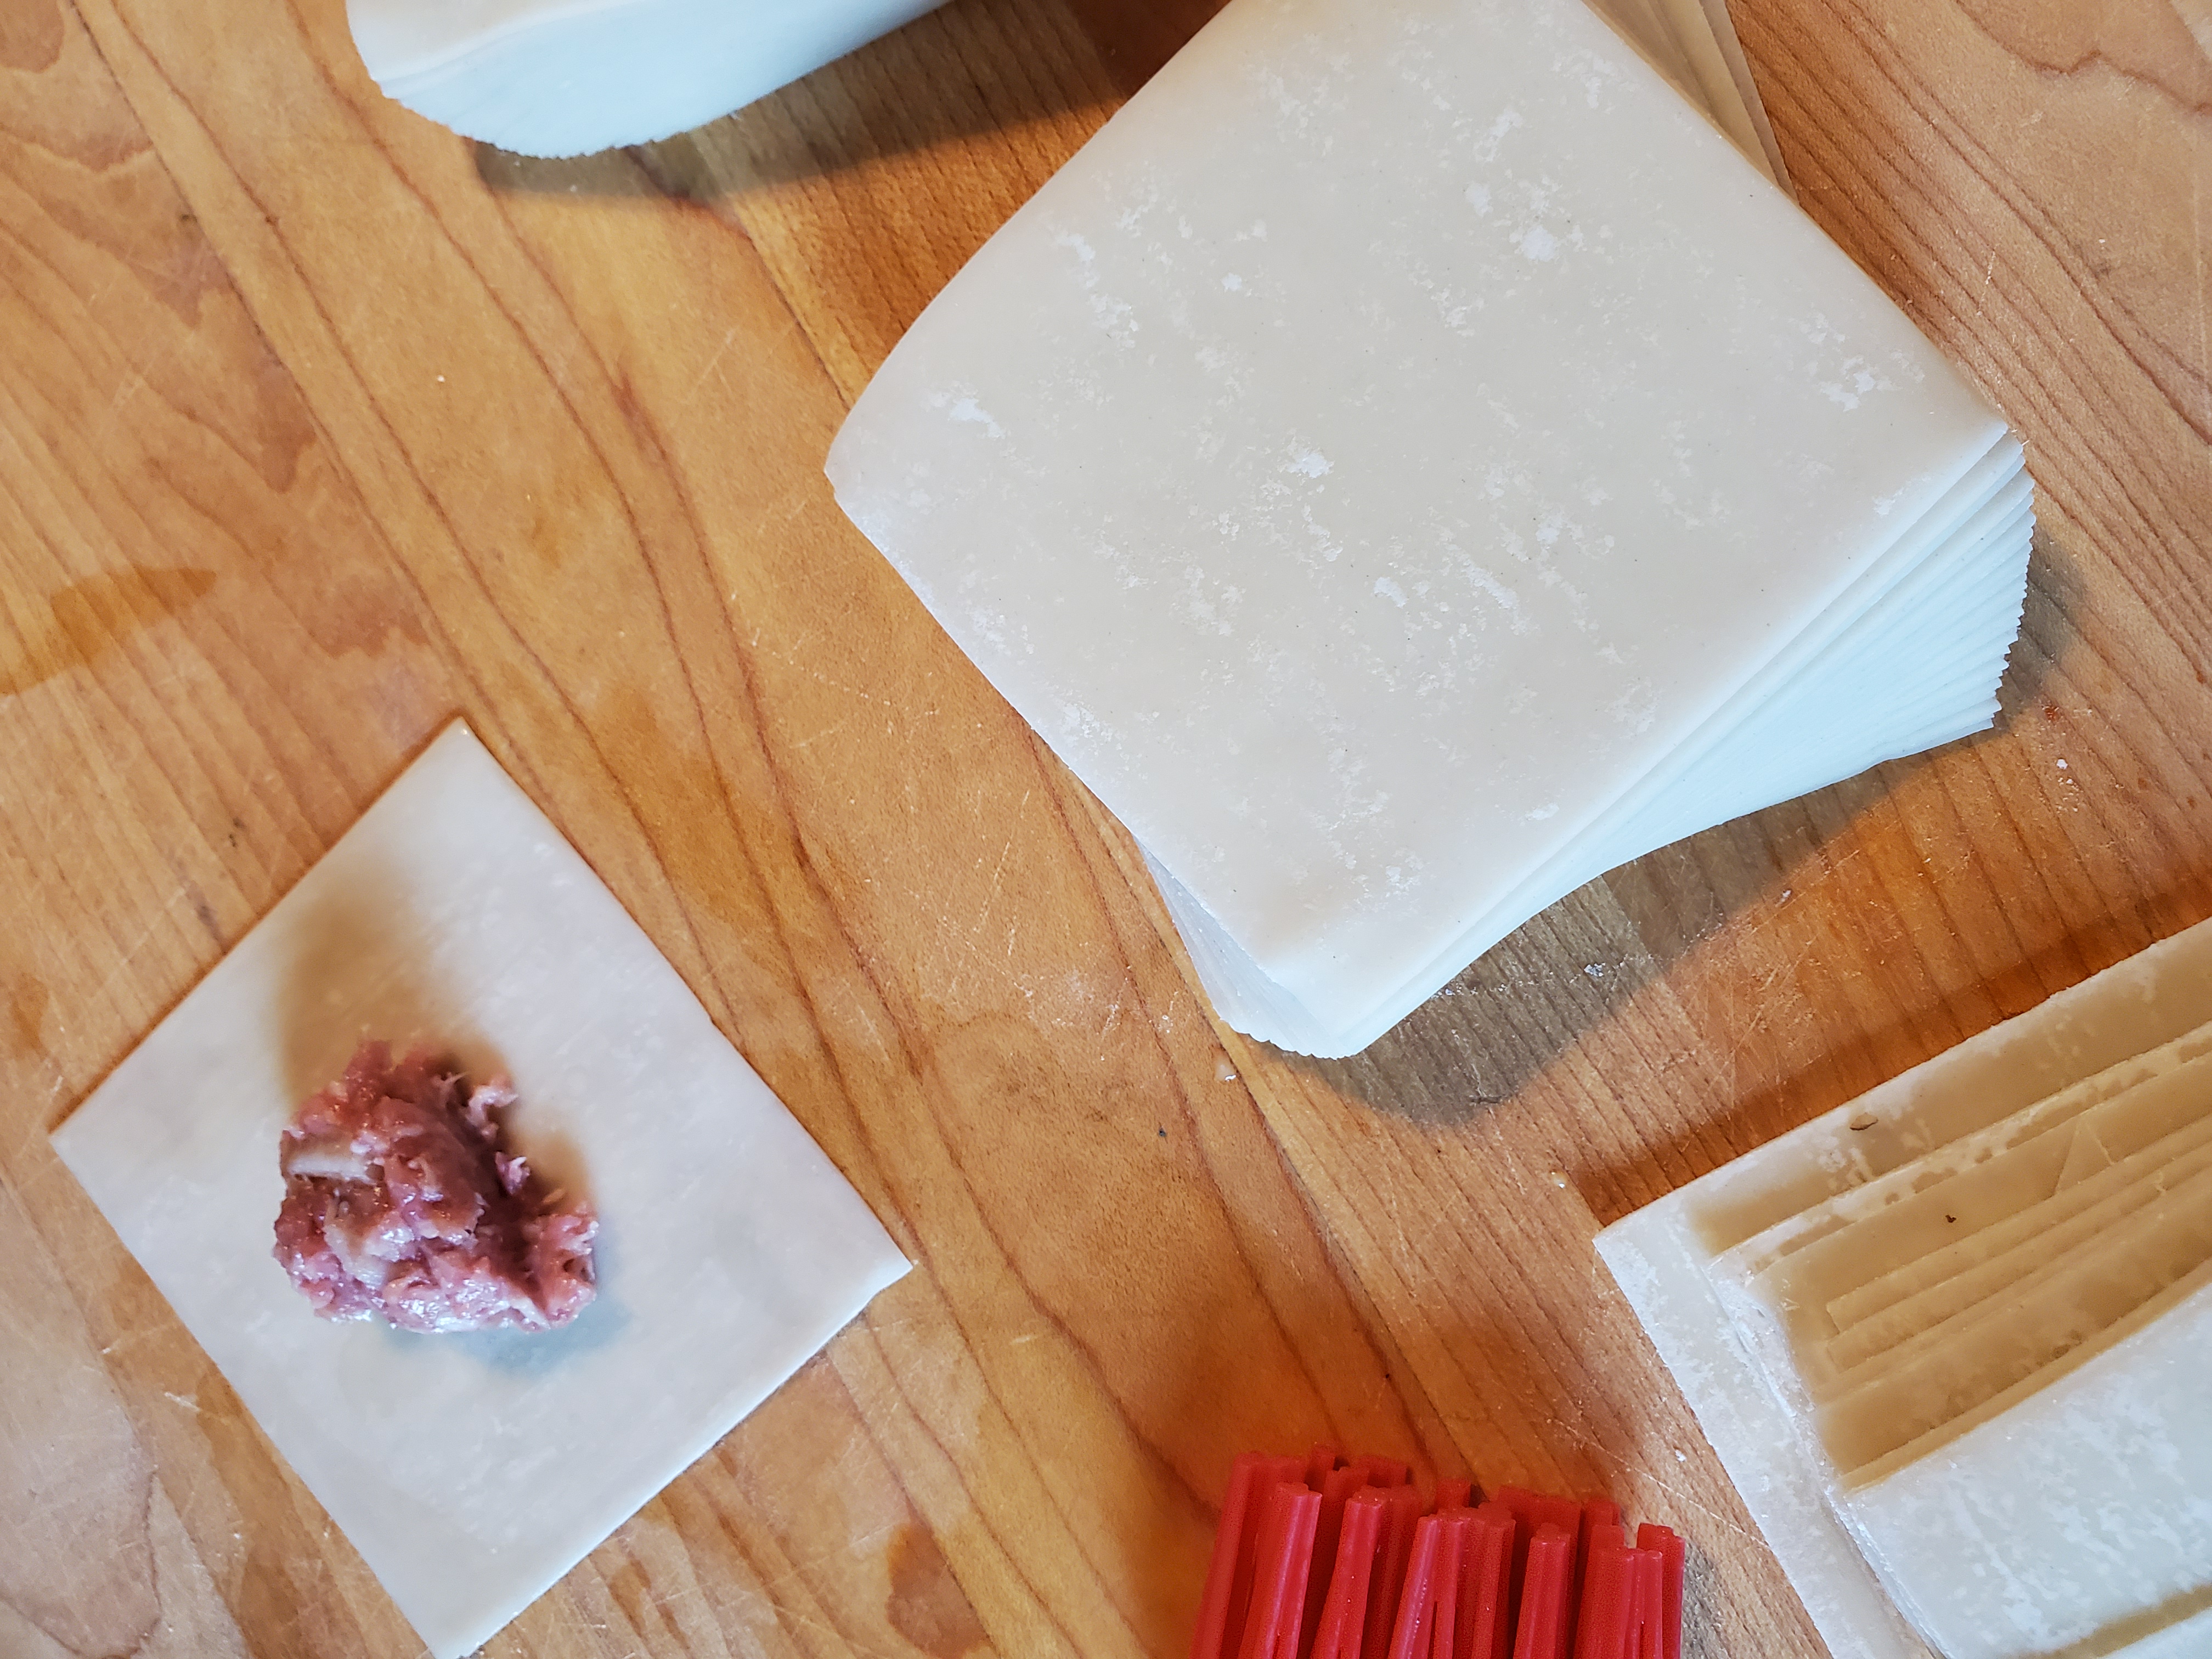

Moisten the edges with water and fold over to form a triangle. Pinch firmly to seal edges. Adjust filling accordingly by adding more or less filling. Set the dumplings aside until ready to cook.
In a medium skillet, heat vegetable oil to medium – high heat. Place about 12 dumplings at time in the oil and let them brown for about 3 minutes, turning them over as needed. Reduce heat if you notice the dumplings are browning too dark.
Set the dumplings aside onto a platter until they are all browned. Add 1/2 cup water to the skillet and let it come to a boil.
Add 12 dumplings at a time back into the skillet, reduce heat to medium, cover and let them cook for about 5 minutes or until cooked through.
Add more water if needed. Test one to see if it’s cooked through. Don’t let them over cook because the dough will become mushy and fall apart.
You can make these ahead of time to serve later, but let them cool and place in the refrigerator until ready to serve. Reheat by browning them in a greased skillet on low heat, or in your oven.
Serve with Soy Sauce topped with chopped scallions. Enjoy the Party!
 There’s an old saying in Portugal that says; “Porto works while Lisbon plays”. However during the Festa de Sao Joao – St John’s Festival, which is held on June 23-24th the city celebrates the birth of Saint John the Baptist.
On that day, the city of Porto comes alive and puts on one of Europe’s best summer festivals.
Porto is the second largest city in Portugal. It’s one of Europe’s’ oldest cities and in 1996 it was registered as an official UNESCO World Heritage site.

The name Porto is said to have originated by the Roman’s Latin world Portus Cale – meaning the name of a settlement along the river Douro “Port of Cale”. Some historians believe that it’s where the county’s name “Portugal” came from.
As many of you know, the infamous “Port Wine” derived it’s name from the area where it is produced.
Many traditional pagan rites connected with fire, water, and love are observed celebrating the “Summer Solstice”.
The festivities begin on the 23rd, the night of St. Johns Eve. In the afternoon the Avenida dos Aliados is filled with a parade of “Marchas” folk music, singing and dancing until the hour of midnight where there is a spectacular fireworks display on the “Ribeira” the coast along the Douro river. Visit Porto Tourism Official site for information on the planned events.
When the firework display finishes, singing, dancing, and the traditional marches continue as the people dance their way from Ribeira up to Foz on the Atlantic coast where they wait for the sun to rise.
 Here they follow an ancient folklore tradition by bathing in the ocean before sunrise to ward off evil since it is believed that the water on St. John’s Eve has spirit healing quality.


Along the streets you’ll find cafes and booths offering the traditional foods such as the most favorite food, sardinas assadas as well as many souvenirs.
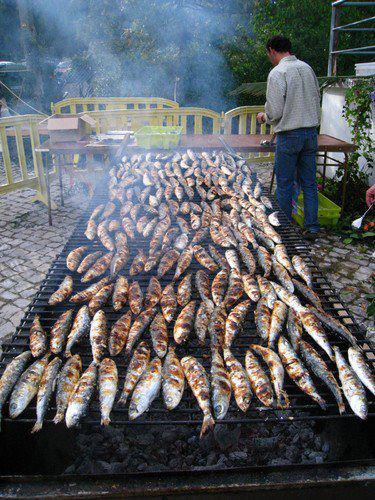
In old folklore it was custom to hit each other on the head with “garlic flowers” but in Porto these days they use plastic hammers. Potted basil plants (manjericos) with a short poem of four versus, are exchanged as a ritual.
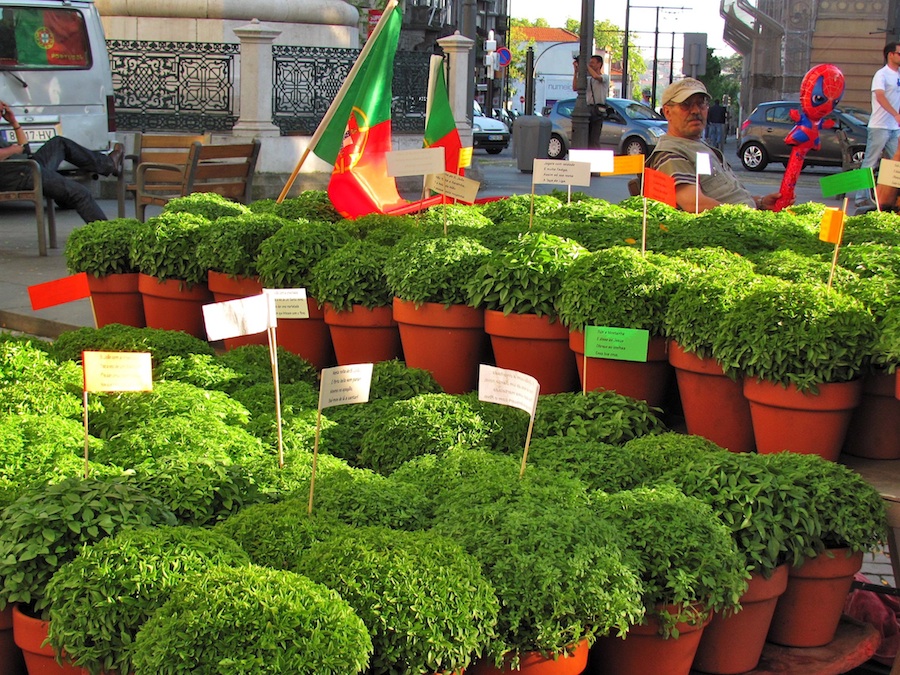
On the 24th the Regatta of Rabelos Boats parade takes place along the mouth of the Douro river. These wooden boats have been used for centuries to transport the world renowned Port Wine.
I learned many things that I didn’t know about the “Festa de Sao Joao” which my mother had always reminded of every June. It amazes me how the Christian celebrations are closely tied into the old pagan rituals.
I know that’s how they were able to convert many people to Christianity by allowing them to observe the rituals of Summer Solstice, Winter Solstice for Christmas, Spring Equinox for Easter, and so forth…
I’m glad that I remembered this year and I was able to share with you some of the traditions of our native home- Portugal.
Listen to one of the classic songs of the celebration – “Sao Joao Bonito”

 Pasteis de Carne
Pasteis de Carne are savory meat pies made with puff pastry dough that are perfect for parties, tailgating or anytime! This recipe is so easy to make, that it will be one of your favorites for entertaining. I buy my puff pastry sheets at my local Portuguese bakery, but you can also use Pepperidge Farm puff pastry sheets.
These meat puffs freeze well so you can make them ahead of time but of course they’re best eaten freshly cooked. Store in refrigerator for up to 3 days.
Ingredients:
2 sheets Puff Pastry squares ( I use Pepperidge Farm)
1 lb ground beef
1/4 cup chopped onion
1 clove chopped garlic
1 tsp chopped parsley
salt and Pepper
1 chicken boullion cube
1/4 cup shredded cheese (optional)
1 egg and 1 tsp water (beat together for egg wash)
Instructions:
In a large skillet, cook meat until browned. Remove from pan, drain and set aside. In same skillet add unions, boullion and garlic and cook until golden brown. Add onion mix to meat and let cool.
Place meat mixture in food processor and pulse 5 times or until the meat is of a fine consistency. Add parsley and cheese and pulse 2 times.
Roll out dough and cut into 3″ x 6″ rectangle. Place 1 tablespoon meat in center of rectangle. Fold over one side onto the other to create a square pinching edges. *Freeze any leftover meat in a plastic bag and the pastry in a separate bag for next time.
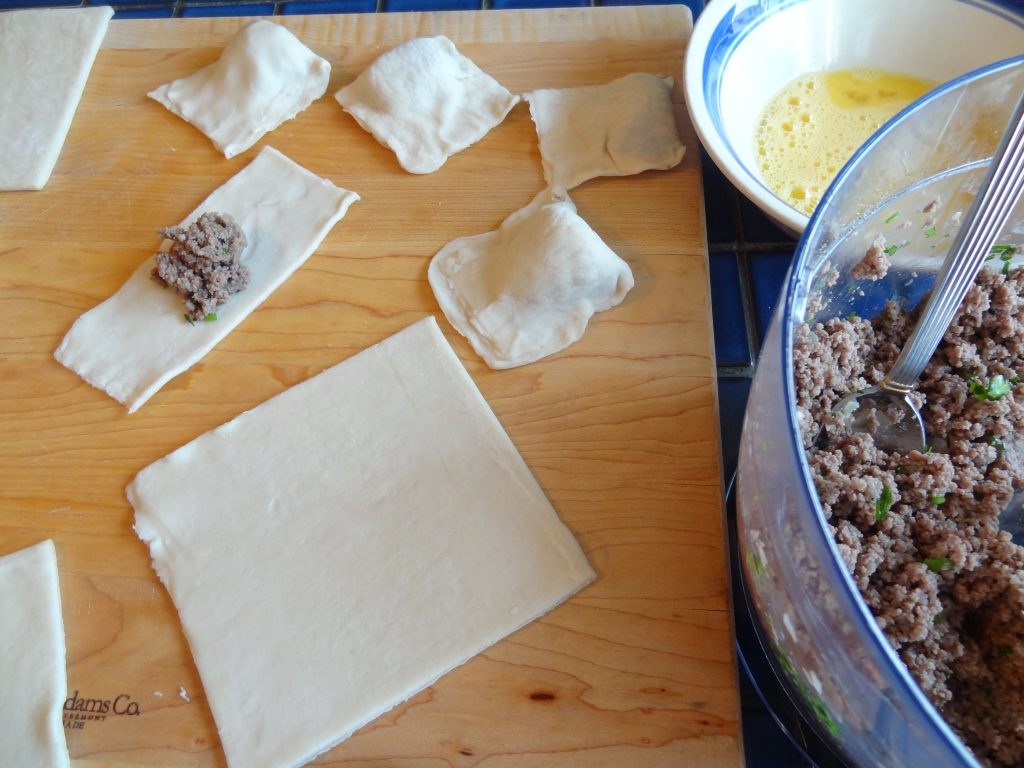
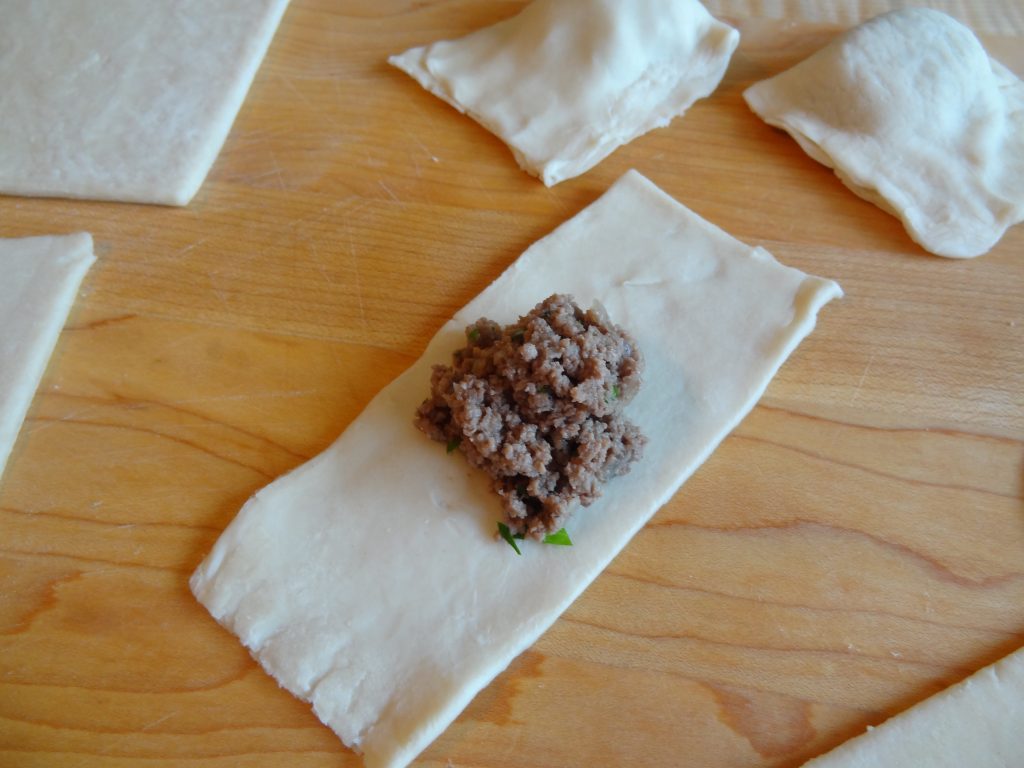
Cover 2 baking sheets with parchment paper. Place puffs onto the paper and brush with a light egg wash.

Cook in preheated oven at 400 degrees for 15 minutes or until golden brown. *Every oven has different heat temperature watch the pies.

Serve warm or at room temperature.
Freeze or store in refrigerator 3 days after cooking. Enjoy!

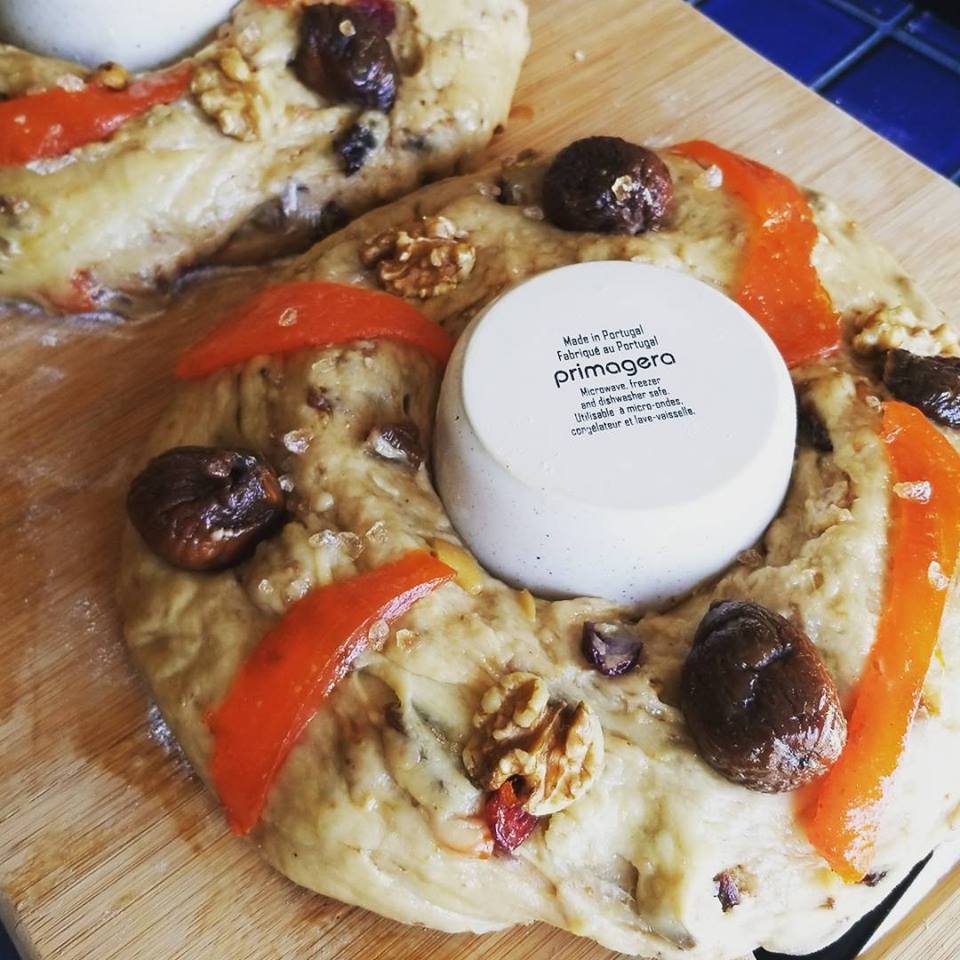
Bolo Rei is Portugal’s king of cakes. It’s traditionally eaten throughout the Christmas season, but mostly on January 6, the twelfth day of Christmas, which is known as King’s day.
The date is when the three kings arrived in Jerusalem to greet the newborn baby Jesus. The legend is that the three kings were disputing which one of them would be the first to give their gift to Jesus. Upon their travels they met a baker who baked a cake with a bean inside it.
Which ever one of them got the slice of cake with the bean would give their gift first. Through the years coins and trinkets were added to the cake instead of the bean which would bring good luck upon the bearer. The cake without the fruit on top is often called Bolo da Rainha! My recipe inspired by Cascaistravel.com. Enjoy!
The cake was introduced to Portugal by the Confeitaria National bakery run by the Casteneira family for over 100 years.
Visit the website for the history of the origin of the recipe at confeitarianacional.com.
Watch the video of the famous bakery at: www.portugaldailyview.com/portuguese-christmas-cakes
Ingredients:
Yeast
2 tbsp active yeast
2 tsp granulated sugar
1 tablespoon flour
1/3 cup warm water
Dough
1 cup finely chopped assorted crystallized fruit NOTE: (I used dried apricots, dates, and raisins in my cake)
1/2 cup seedless raisins
1 teaspoon finely grated lemon rind
1 teaspoon finely grated orange rind
2 tablespoons port wine
2 tablespoons rum
1 teaspoon salt
1 and 1/4 stick butter (10 tablespoons)
1 cup granulated sugar
3 eggs
2 egg yolks
5 cups all purpose flour
1/2 cup warm milk
1/4 cup chopped almonds
1/4 cup chopped walnuts
Topping
crystallized fruit of your choice, such as pineapple, cherries, or figs
1 egg for egg wash
confectioners sugar
Instructions:
Prepare the yeast mixture
In a small bowl mix together the yeast, sugar and flour and warm water. Stir and let sit for a few minutes for yeast to dissolve and activate.
For the Dough
In another bowl add the chopped crystallized fruit, raisins, grated lemon and orange peel, port wine and rum. Leave the fruit to soak up the liquid while you prepare the dough.
In a large bowl beat the butter and sugar together with an electric mixer until smooth and creamy. Beat in the eggs and egg yolks one at a time. Gradually beat in the flour and the milk. Then add the yeast mixture to the dough.
Add the almonds, walnuts and pine nuts and the crystallized fruit mixture.
Lightly mix in more flour as needed to create a sticky bread like dough.
Cover and leave to rise in a warm place for about one hour or until it has doubled in size.
Take the dough and knead for about one minute, then shape into a round loaf and place on a greased baking tray.
Using your thumbs, open up a hole in the middle of the dough so that you are left with a wreath shape, or crown. I used a greased and floured ramekin and placed it in the middle of the wreath to form the wreath.
Note: To add the surprise: Make a hole with a knife on one side of the wreath and push the wrapped broad bean into the dough. Choose another spot on the wreath, make a hole with the knife and push the wrapped coin into the dough.
Topping
Decorate the wreath with a few crystallized fruits. Beat the egg and brush over the wreath. Cover and let rise in a warm place for about one hour or until it has doubled in size.
Remove ramekin and bake in a preheated over at 375 degrees F for about 40 minutes or until golden brown. Cool and dust with powdered sugar.

Pão de Ló – “Sponge Cake” Just as the translation is easy, so is the recipe. This cake is so easy to make that you’ll find yourself making it again and again. The recipe uses no oil, butter or fats so it’s virtually fat free!
This classic dessert is so versatile that you can make it for all the holidays, special occasions, bring it to a pot luck diner as a dessert, or just make one when you’re craving a simple cake. Enjoy!….. and…..Happy Holidays!
This is a Christmas photo of the classic – Portuguese – Pao de Lo which I give as home made Christmas gifts for my family and friends.

*Please note: There is Silk – Poinsettia in the center
(Do not use real Poinsettias with food items)
Pao de lo recipe:
You will need an extra large bundt pan to cook the cake. If you don’t have an extra large pan be sure to use parchment paper all around so the cake doesn’t over spill.
Here’s our youtube video cooking the recipe.
Please subscribe and like our page for the latest video postings!
Ingredients:
10 brown eggs (room temp)
1 1/2 cups sugar
2 cups sifted flour
1/4 tsp salt
1 tsp baking powder
1 tsp (grated lemon peel – Optional)
Preparations:
Make sure your eggs are room temp or place them in a bowl of warm water for about 15 minutes.
In a large bowl beat the eggs until foamy. Add sugar and beat for at least 20 minutes until batter becomes very thick, stiff peaks. (Add lemon at this point if desired)
Note: If using a kitchenaid mixer, mix for only 10-15 minutes until stiff peaks form.

While the sugar and eggs are beating, mix flour, salt and baking powder in a small bowl.

When the batter is ready, add the flour mixture very slowly 1/4 cup at a time on low speed or fold in with a spatula.
This should only take about 3-5 minutes. (Don’t over beat, this is important)
Grease a large tube pan. (Aluminum works best). If your pan is smaller, line the top few inches of the cake pan with parchment paper in case the batter rises over the top. Poor batter into the pan and shake slightly to spread evenly.

Cook at 350 degrees F. for 45 minutes or until a toothpick comes out clean.
Let the cake cool for about 10 minutes. Invert the cake pan right side up onto a serving dish.
(Note: This cake freezes well so you can make it ahead of time. Slice into pieces for individual servings or freeze the whole cake. Make sure it’s completely cooled, wrap in saran wrap and heavy foil or in Freezer bags.)

Pao de Lo – Easter Decoration
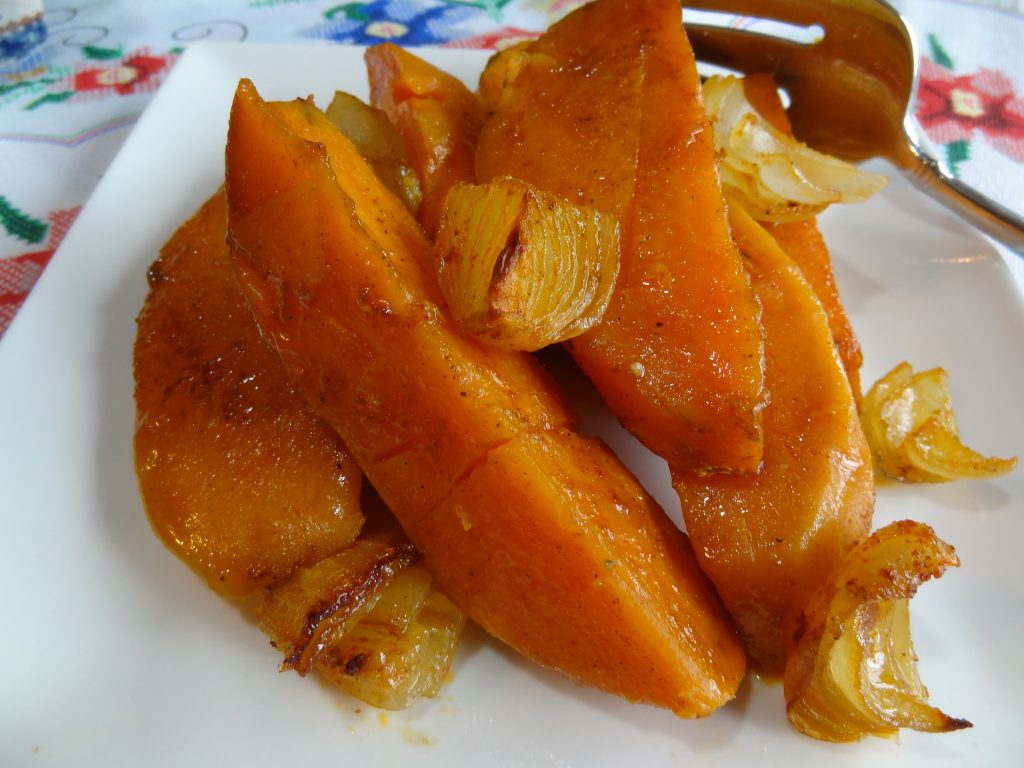
Portuguese Roast potatoes are a hit at every party! They’re a perfect side dish for your roast beef, roast chicken, pork and delicious with your Holiday Baked Ham.
Ingredients:
2 pounds any potatoes ( washed, peeled or slightly peeled)
If making sweet potatoes (peel and cut into quarters)
2 large carrots (peeled and quartered) optional
1 small onion (chopped)
1 teaspoon salt
1 teaspoon garlic powder
1/2 teaspoon pepper
1 teaspoon Paprika
1/4 stick of melted margarine or butter
1/4 cup of olive oil
Instructions:
Place all ingredients into a large mixing bowl. Toss well to coat.
Place seasoned potatoes into a medium olive oil greased baking pan.
Cook at 400 degrees for about 1 hour or until fork tender. Toss potatoes every 15 minutes to achieve a crispy texture. Do not use a fork to turn over potatoes, use a spatula. Enjoy!
You can also cook the potatoes in small cubes, but cook for only 30-40 minutes.
Did you know that there’s an old Portuguese saying?
“There are 365 recipes for Bacalhau – one for each day of the year.”
Try this easy and delicious recipe for Pataniscas (Salt Cod Fish Fritters). They are similar to clam fritters made in New England but these are pan fried into a flat shape.
This recipe brings me back sweet memories of my dear mother who taught me how to make them when I was a little girl. We would make these on Sunday mornings for family trips to the beach or during family trips with a long driving distance. We’d stop half way into the trip at the roadside rest stops to enjoy these along with good Portuguese cheese, presunto, bread, and Portuguese wine.
If you love Bacalhau you’ll love these. They’re so simple yet so good, the intense flavor of the Bacalhau, combined with the sweetness of the onions and parsley in the batter gives this classic a taste, which you’ll crave again and again.
Serve them as an appetizer, or as a main dish with my rice recipe. Oh by the way, make extra because they taste even better the next day! Enjoy!
Here’s our youtube videos. Stop by and subscribe for the latest videos! Our latest video in Portuguese for those of you that requested it. enjoy the recipe and happy Portuguese cooking!
Ingredients:
1 lb boneless Salt Cod (Bacalhau)
4 eggs
1 1/2 cups flour
1/2 small minced onion (or Scallions)
2 teaspoons fresh minced parsley (or 1 tsp dry)
1/4 tsp black pepper
1/2 tsp garlic powder
1 tablespoon olive oil
salt to taste
1 cup of cold water from poaching the bacalhau
1/2 teaspoon baking soda optional
1/4 cup Olive oil for frying
1/4 cup Vegetable oil for frying
Instructions:
Hydrate the Cod in water for 1-2 days in cold water in refrigerator changing the water 2 times a day.
Cook the Salt Cod in boiling water for about 5-8 minutes. Let it cool, and then shred it into flakes. Reserve 1 cup of water and let it cool.
In a bowl, mix onion, parsley, bacalhau, flour, salt, pepper, garlic powder, and the olive oil, and mix well. Beat the eggs with the cold water and add to the bacalhau mix. Stir well to incorporate.
Add more salt and pepper is desired. Note: I like a pancake like texture and appearance so I make a thinner batter. If you like a thicker style flat cake use less water.


In a heavy skillet, add half of both oils to reach 1/4 inch in pan and heat to medium.
Note: (You may use all veg oil, or corn oil if you wish).
Test the oil temp by placing a tiny amount of batter in oil. If batter sizzles it’s ready to fry in. (If you see the oil begin to smoke, lower the heat.)
Spoon silver dollar size pancake batter into pan. Pat them down to cook flat into oval shapes to about 1/4 inch. Cook until golden brown on each side.


Place them onto paper towels or use brown paper lunch bags to absorb any grease. Serve hot or cold….Top with squeezed lemon if desired. Make a double batch because they’re better the next day.

Sonhos, are light and fluffy doughnut like pastries that melt in your mouth! Generally, they’re served around the Holidays but this popular fried pastry is a favorite at almost every Portuguese celebration. They are quite easy to make unlike filhos which are made out of risen dough and have a much longer process time.
Good luck to those of you are making these for the first time! Enjoy!
Sonhos
Ingredients:
6 extra large eggs
2 cups flour
3/4 cup water
3/4 cup milk
1/2 tsp salt
1/2 stick butter or margarine
1 slice lemon rind
Sugar and Cinnamon for topping
Instructions:
In a large heavy pan, place the water, milk, butter, lemon rind, and salt over medium heat and bring to boiling point. Stir in the flour and stir with a wooden spoon until the flour becomes a soft dough which turns into a ball shape that separates from the sides of the pan. This is similar to a basic Choux paste that is used for baking eclairs and cream puffs.
Remove the dough from heat and place into a medium bowl. Let the dough cool for a few minutes. Beat in one egg at a time making a smooth batter.
Heat the oil to 365 degrees. Shape the dough into round doughnuts by using 2 large tablespoons. Fry the dough by 4 or 5 pieces at time until golden brown while keeping the heat at a steady temperature. * NOTE. If you find the dough is turning brown too quickly reduce the heat to a lower setting. They should cook slowly.
**IMPORTANT**Pierce sonhos slightly with a fork all around as they cook. NOTE: If you find they are too dark and still raw in the middle, lower the heat so they cook through at a slower temperature.
Drain on a new clean brown paper lunch bags or on paper towels.
While still hot, roll sonhos in a mixture of sugar and cinnamon.
Watch this video for the demonstration. The recipe varies from mine.

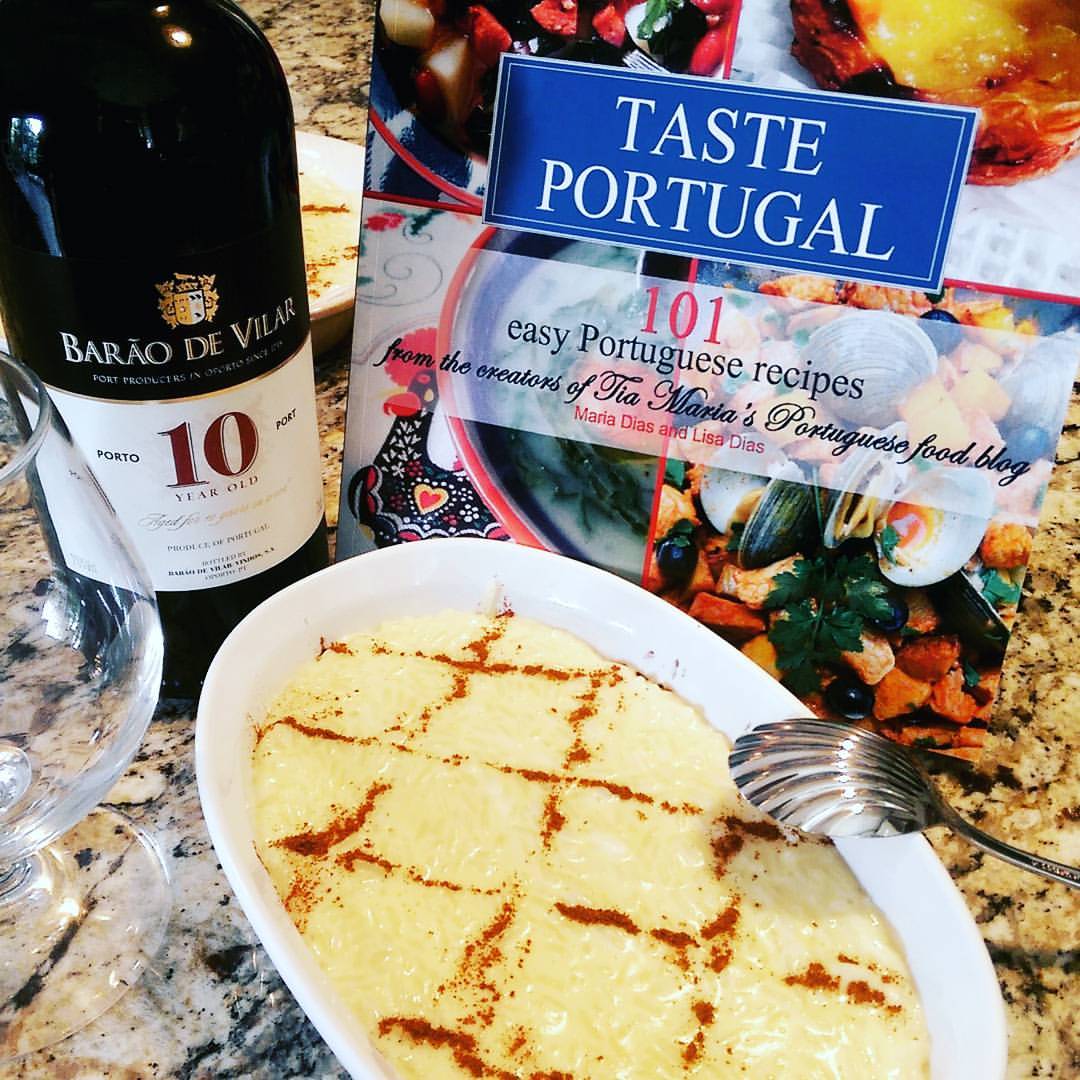
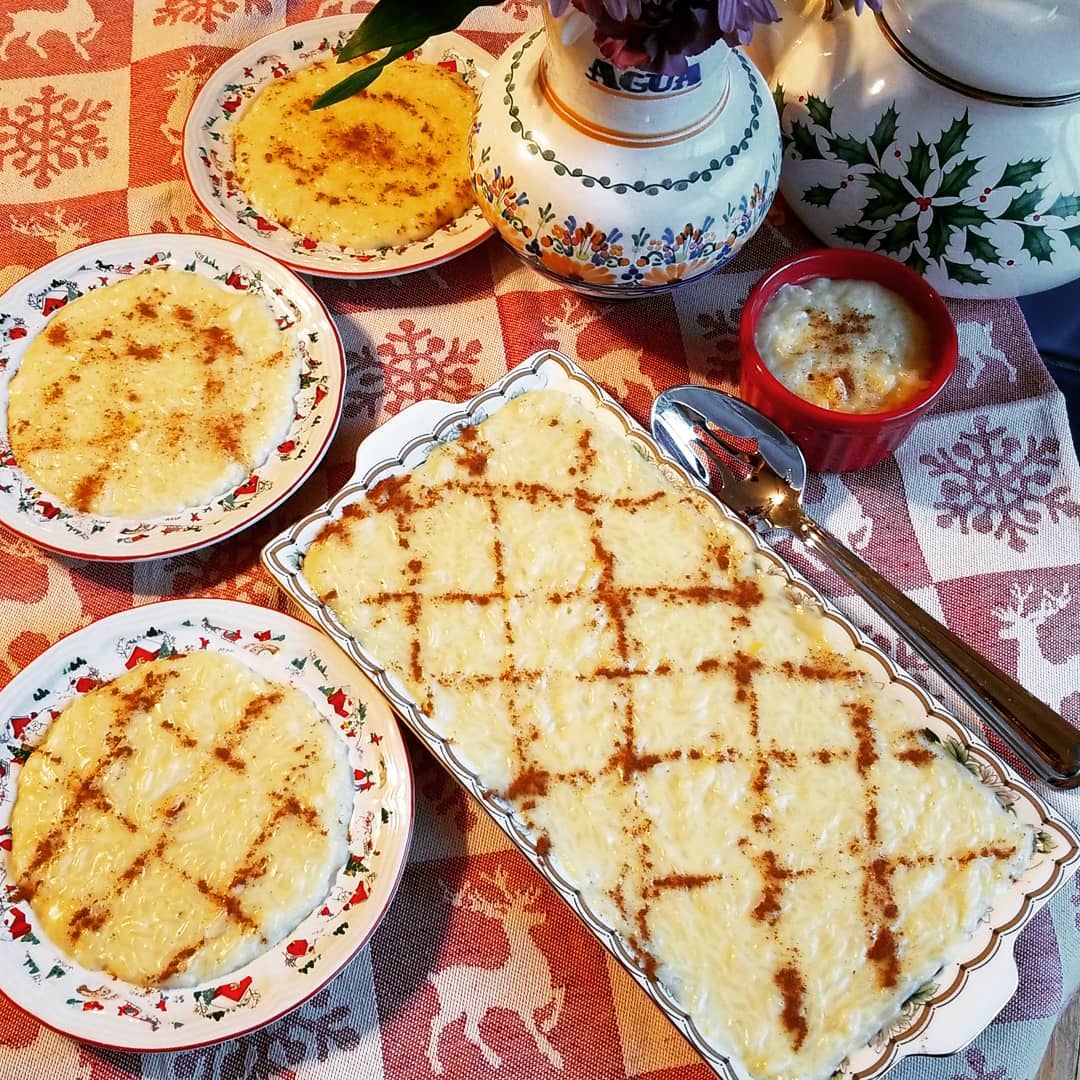
Come on and jump in! It’s delicious!
Arroz Doce – Sweet Rice Pudding, has always been my family’s favorite served on Christmas Eve. This is one of the most famous Portuguese desserts served around the Holidays and at celebrations. But I everyone loves it any time of the year! It’s pure Portuguese comfort in one bite!
Aletria, a sweet pasta dessert is also a traditional dessert for the Holidays. Enjoy!
Makes 6-8 servings
Ingredients:
Meanwhile beat egg yolks.
Temper the eggs by adding a few tablespoons of the rice mixture to the eggs and mix well.
Remove from heat. Add the remaining eggs into the rice and stir well.
*Be sure the rice is not boiling. Simmer for about 1 minute.
Remove lemon peel and cinnamon stick.
Pour into a large serving platter or individual servings.
Let cool and garnish with powdered cinnamon.
To make design: Dip a small shot glass into water, then into the cinnamon.
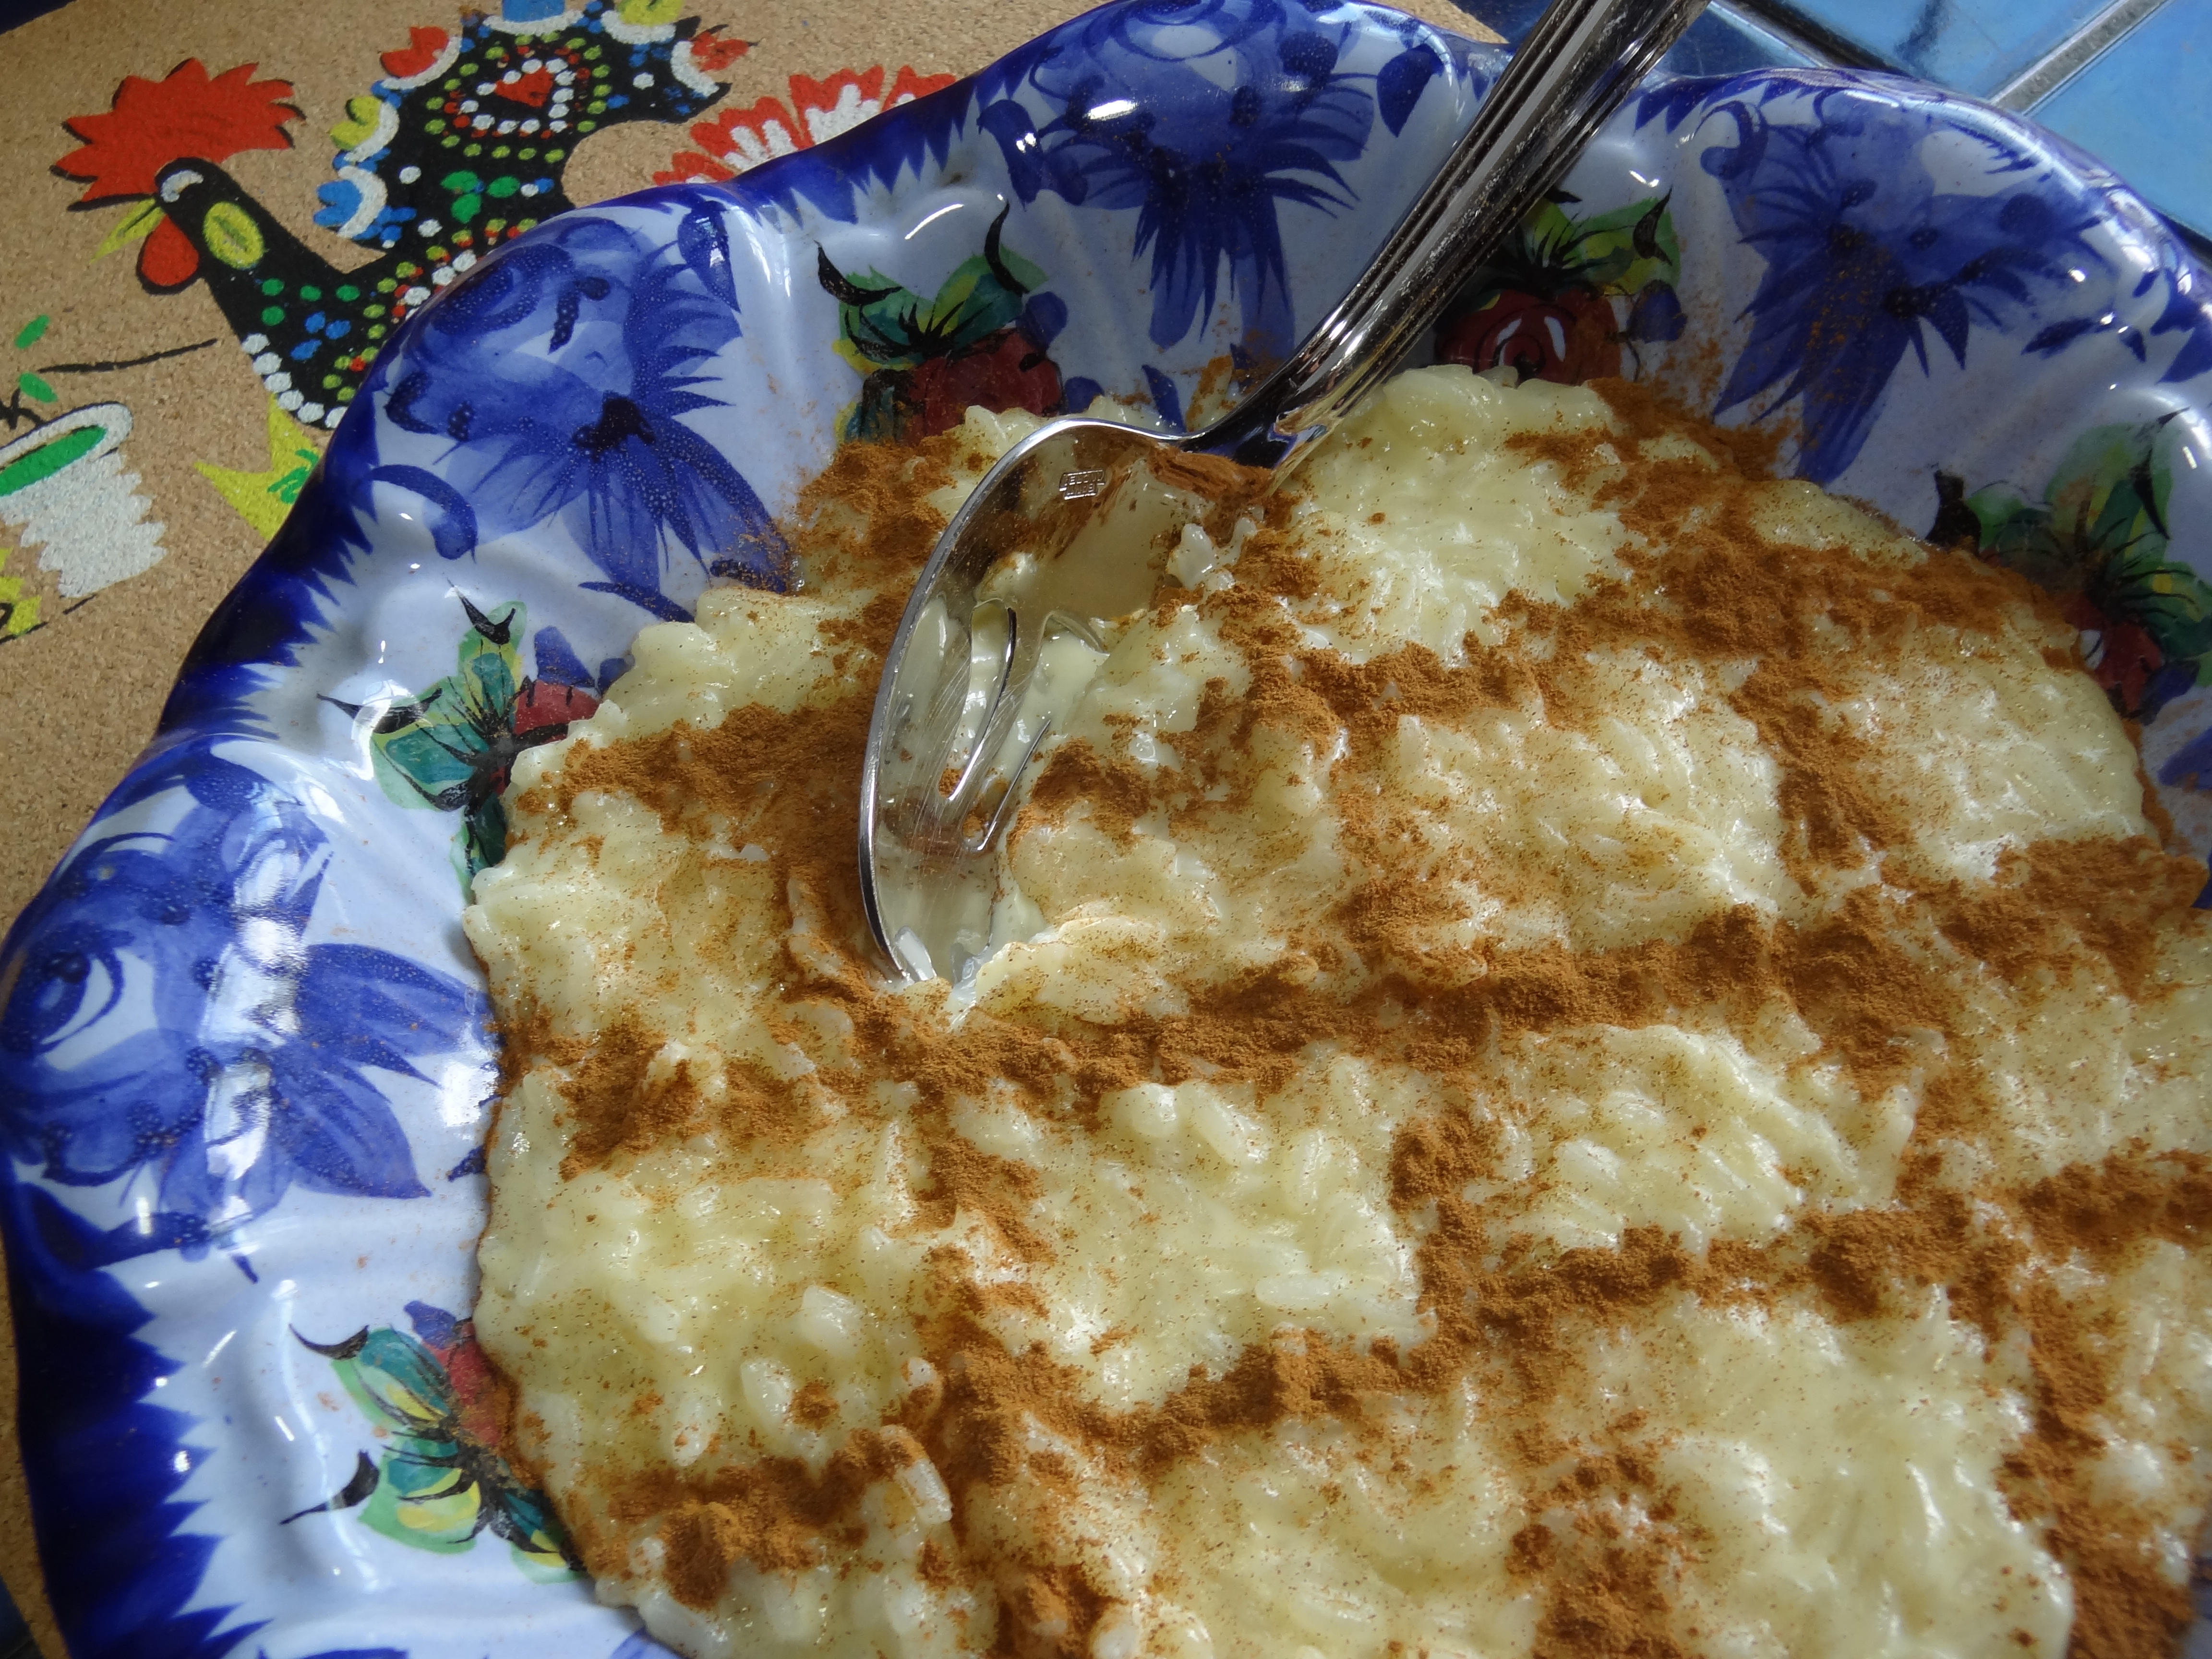

Gently indent desired circles to form design of your choice.
Store in refrigerator up to 3 days.
Here’s the gallery of the photos I took.
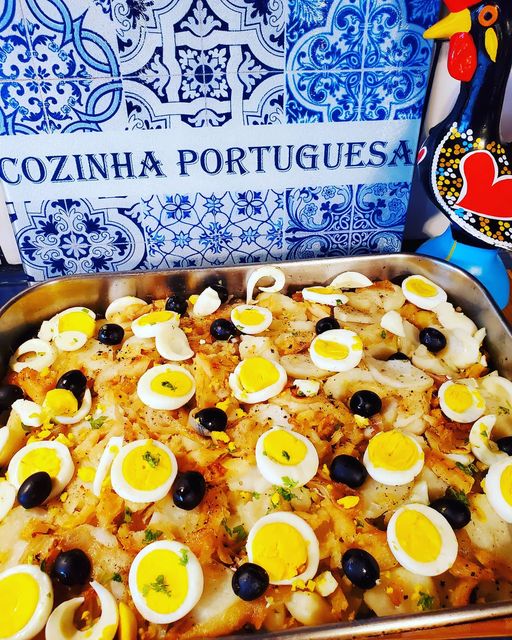
BACALHAU A GOMES DE SA
There’s a saying in Portugal; “There’s a recipe using Bacalhau for 365 days of the year”!
But this classic, is not only a year round treat it’s also a must have Christmas favorite.
In fact it wouldn’t be a traditional Portuguese Christmas Eve diner without it!
Ingredients:
2 lbs boneless salt cod
(Re-hydrate cod by soaking in large pan with water for a few days in fridge changing the water twice a day)
Click here for link to “how to hydrate salt cod”
4 pounds small peeled potatoes cut into 1 inch slices
2 large onions (sliced)
3 gloves chopped garlic
1 bay leaf
1 tablespoon salt
1 teaspoon black pepper
1 cup olive oil
6 hard boiled eggs (sliced)
1 cup olives
2 to 3 teaspoons chopped parsley
2 to 3 cloves of chopped garlic or 1 teaspoon garlic powder
Instructions:
In large pan, place potatoes covered with cold water. Add salt, and cod. Cook for about 10-15 minutes until cod is flaky.
Remove cod fish from pan and set aside to cool. Cook potatoes for another 8-10 minutes or until cooked. Pierce with a fork for doneness. Drain potatoes and set aside to cool. Slice potatoes into 1/4 to 1/2 inch slices.
In large skillet, saute sliced onions, 1/2 tsp salt and bay leaf in 1/2 cup of the olive oil until golden brown. Add garlic during the last 2 minutes of cooking. Remove the bay leaf and let the onions cool for a few minutes.

Grease a large deep oven proof pan with olive oil. Start layering the potatoes, flaked cod then onions.
Drizzle olive oil and pepper over each layer. Add garlic powder if you like more garlic flavor.
Make sure you end up with onions on top. Cover with foil and cook for about 20 minutes.
Arrange cooked egg slices on top of the onion layer.
Cook uncovered for another 5-10 minutes to desired crispness.
Remove from oven and add parsley and olives for garnish. (add more salt, pepper or garlic if desired)
Enjoy!
https://tiamariasblog.com/hydrate-salt-cod-bacalhau/

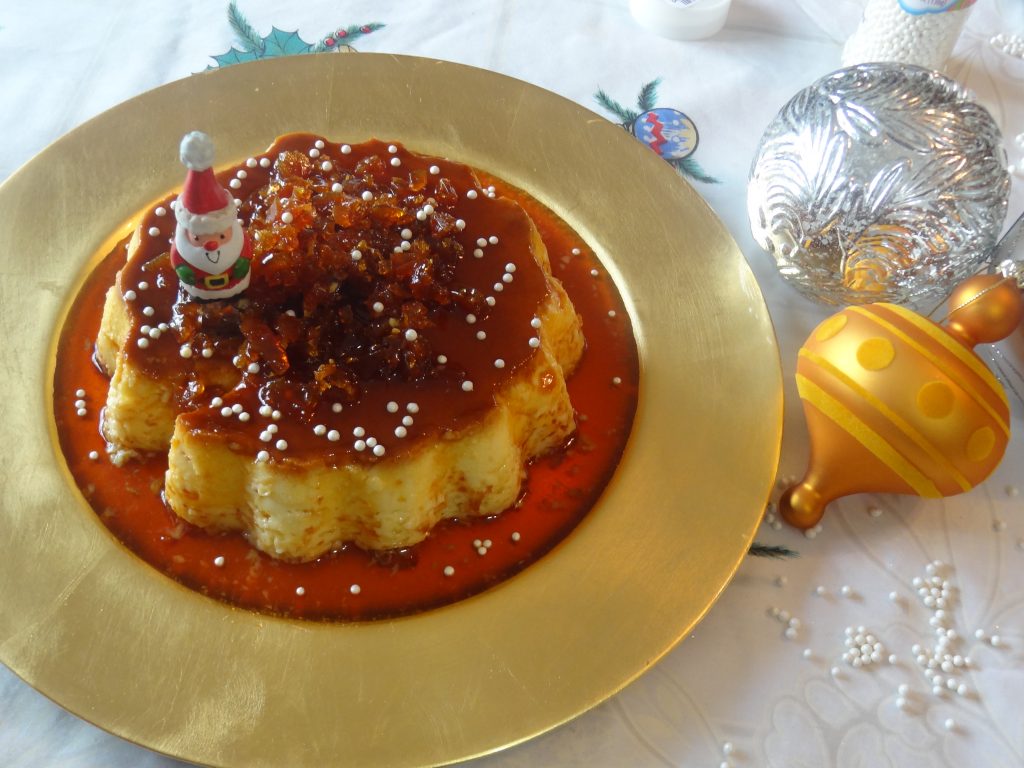
Hi Foodies,
It took me years to finally make a good caramel flan until I finally discovered the reason why I wasn’t successful. The reason was because I didn’t use whole milk. I also made the mistake of mixing cold milk with the cold eggs.
You have to warm up the milk and use room temperature eggs. Now my flan comes out perfect every time and it’ s a family favorite at every celebration.
My family enjoys lots of the candied caramel on top too and usually fight over it! Enjoy!
Flan ingredients:
6 large eggs
3 cups whole milk
1 cup sugar
1/4 tsp salt
1 tsp either; (this is optional: vanilla, anisette liquor, or caramel glaze)
Caramel glaze ingredients:
1 cup sugar
Instructions:
Take your eggs out of the fridge a few hours before you start to get them to room temp or place them in a bowl of lukewarm water for about 20 minutes.
Prepare Caramel glaze first:
Place the sugar and water in a large heavy skillet. Continue stirring while cooking on med heat until the sugar melts and begins to turn caramel colored and thickens like corn syrup.(probably 5-8 min depending on your burners).
If the sugar is hardening too quickly, just drizzle a little water around the edges of the pan into the sugar.
Take the pan of the heat and let it rest for one minute. OUCH! It’s very hot! If you smell a burned smell, it means you’ve cooked it too long, so start over again.
Coat the bottom and up to 1 inch on the sides of a medium oven proof souffle pan with the caramel sauce. Let the Caramel harden and put aside while you make the custard. (Poor a few tablespoons of the caramel onto a small butter sheet pan and let it harden.)
Prepare custard:
In med bowl, beat the eggs with 1 cup sugar until lemony colored. Meanwhile, heat up the milk until hot but not boiling.
Let the milk cook down a little and then add about 1/4 cup of milk, to the eggs while continuing to beat on low. *If the milk is too hot, you’ll discover that you just made scrambled eggs.
Continue beating and slowly add the milk 1cup at a time until all of the milk is incorporated.
At this point you can beat in, either the 1 tsp vanilla extract, the anisette, or the caramel glaze if you desire.
Let the egg mixture rest to let the foam subside a little, then slowly pour it into the souffle dish that has been coated with the caramel.
Place the flan dish into a larger oven proof deep dish pan (bain -marie) that has been filled with 1 inch of water.
Cook at 350 for 60 -75 minutes or until a toothpick comes out clean. Let the flan cool in it’s pan and place it in the dish in the refrigerator overnight.
When ready to serve, loosen the sides of the flan with a knife and giggle the pan to loosen it.
Cover the top of the flan with a deep serving dish and invert it. Spoon out the caramel over the flan.
Break the hardened sugar that you let sit in the sheet pan into small pieces and place on top of the flan.
You can place the souffle dish into a shallow bowl of hot water to melt the remaining caramel or brake up the hard caramel to serve on top as seen in the picture.
Serve as is, decorate with candy pearls or with whipped cream!
It’s amazing!
Cooking rice is easy with my easy recipe.
FIRST POST 1-15-2010
Classic Caldo Verde Soup
Today we’re going on a journey to Portugal were the classic green soup, “Caldo Verde” is probably the most loved and well known soup in the country.
Caldo Verde, originated in the northern Minho region of Portugal and is made with basic ingredients of potato and onion puree, and collard greens. There are many variations to this basic recipe in every Portuguese kitchen where ingredients are added such as red or white beans, ham hocks and meat bones to flavor the broth.
Sometimes Caldo Verde is mistaken for another classic known as “Kale Soup” which is very popular in the New England. The Kale version uses cubed potatoes, chopped chourico, tomatoes, and chopped Kale and looks nothing like Caldo Verde.
This is a very healthy soup because collard greens are considered to be one of the healthiest foods in world since they’re loaded with vitamin.
I learned to make this soup at a Portuguese Restaurant named “The Matador” which my brothers owned for almost 15 years. This soup was made fresh every day and sold out by the dinner rush.
We used hand crank processor imported from Portugal to Chiffonade (translates to “made of rags” in French) to cut the collard greens into thin strips.


10 potatoes (peeled & cut into 1 inch slices)
2 large onions
2 cloves garlic
1 large bay leaf
1/4 cup olive oil (or more to taste)
1 tbsp salt
1/2 tsp pepper
1 whole medium Chourico (Portuguese) sausage (rinsed and dried)
6 cups of washed collard greens (sliced very thin)
10 cups water or more
Instructions:
In large soup stock pot, place water, broth, potatoes, onions, garlic, olive oil, and bay leaf. Cook on high for 20 – 30 minutes, or until potatoes are cooked.
Remove from heat, remove bay leaf and puree the soup with hand blender until it turns into a creamy like base. If you find the soup is too thick, add a little boiling water.
Place the pot on medium heat and add the Chourico sausage. Cook for about 10 minutes.
You may cook Chourico in separate pan in boiling water if you don’t want a smokiness taste in the soup.
Remove Chourico and slice into 1/4 inch slices and set aside for garnish.

Add the collard greens and cook on medium heat for about 5 – 10 minutes depending on your preference.

When ready to serve the soup add 3 slices of Chourico into each bowl for garnish. Add a drizzle of olive oil, and crushed pepper to taste.
Add more Chourico if you prefer of course! Enjoy!

These mussels are so easy and delicious!
You can also make this same recipe using little neck clams. Enjoy!
INGREDIENTS:
3-4 lbs mussels (cleaned)
8 oz Chouriço (chopped)
1 large onion (minced)
3 cloves garlic (minced)
1/4 cup olive oil
1/4 cup white wine
1 cup chopped tomatoes
1/2 cube boullion cube
1 tsp salt
1/4 tsp pepper
minced parsely
lemon wedges
PREPARATION:
Saute onion & garlic in oil.
Cook until translucent.
Add Chouriço.
Cook for a few minutes
Add tomatoes, salt
pepper, boullion.
Cook 5 min.
Add mussels & wine.
Cover, cook until
mussels open.
Add parsely &
lemon as garnish.

Make this TUNA & WHITE BEAN SALAD for a protein packed lunch or dinner.
INGREDIENTS
1 can tuna
1 can white beans
1 cup cubed cooked potatoes (optional)
1/4 minced red onion
1 tomatoes
3 tbsp parsley
salt & pepper to taste
1/4 cup olive oil
1/8 cup vinegar
Let’s go meatless and healthy this week. I make 2 quiches and eat them all week. It’s a perfect breakfast. takeaway lunch, snack or dinner.


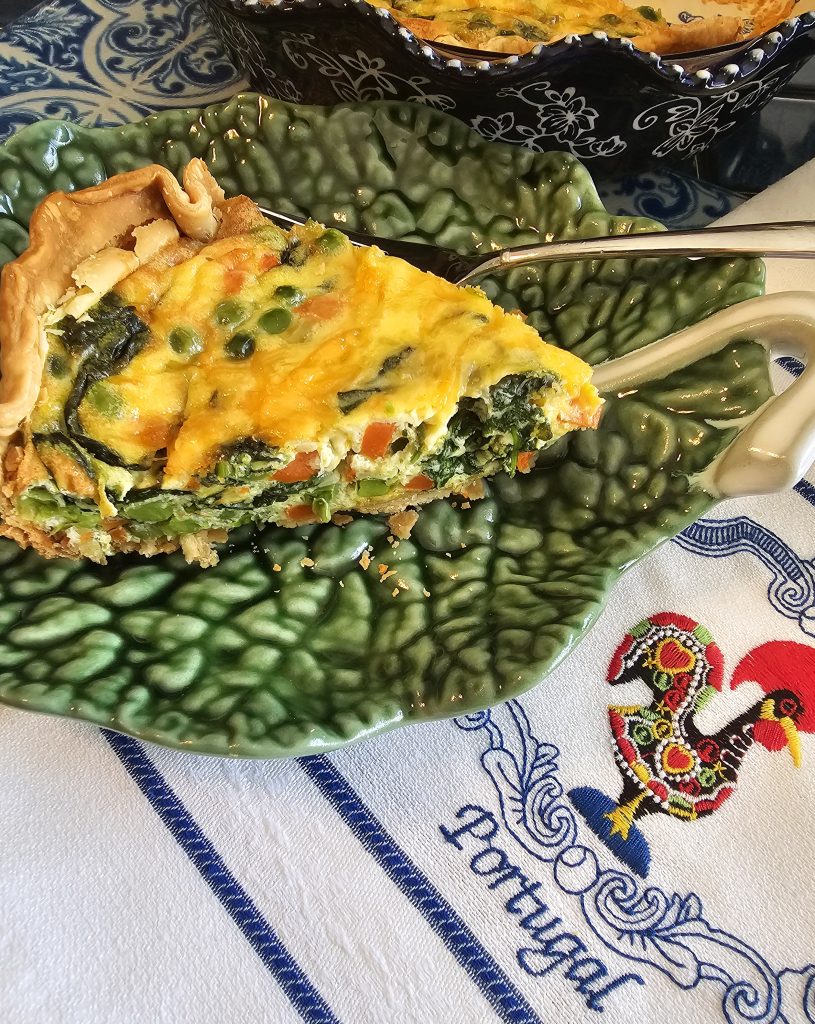
PREPARATION:
Cook peas, carrots and onions in butter for a few minutes. Add spinach and cook until spinach is slightly wilted. Let cool and mix in 1/2 cheese.
Pour evenly into 2 uncooked pie crusts. Top with remaining cheese.
Cook at 350 F. 40 to 50 min or until cooked. Pierce with fork to check for doneness. The fork should come out clean.

Making Portuguese Bife a Casa is so easy!
ingredients:
4 sirlion Steaks
4 eggs
3/4 tbsp Taste Portugal Seasoning
3 cloves minced garlic
1/4 cup olive oil
2 tbsp butter
Preparation:
2. Let marinate for 10 min.
3. Cook in hot oil, garlic and butter 2 – 3 minutes.
4. Fry eggs in olive oil.
Place eggs on Steaks and drizzle with the drippings. Add more butter if desired. Serve.
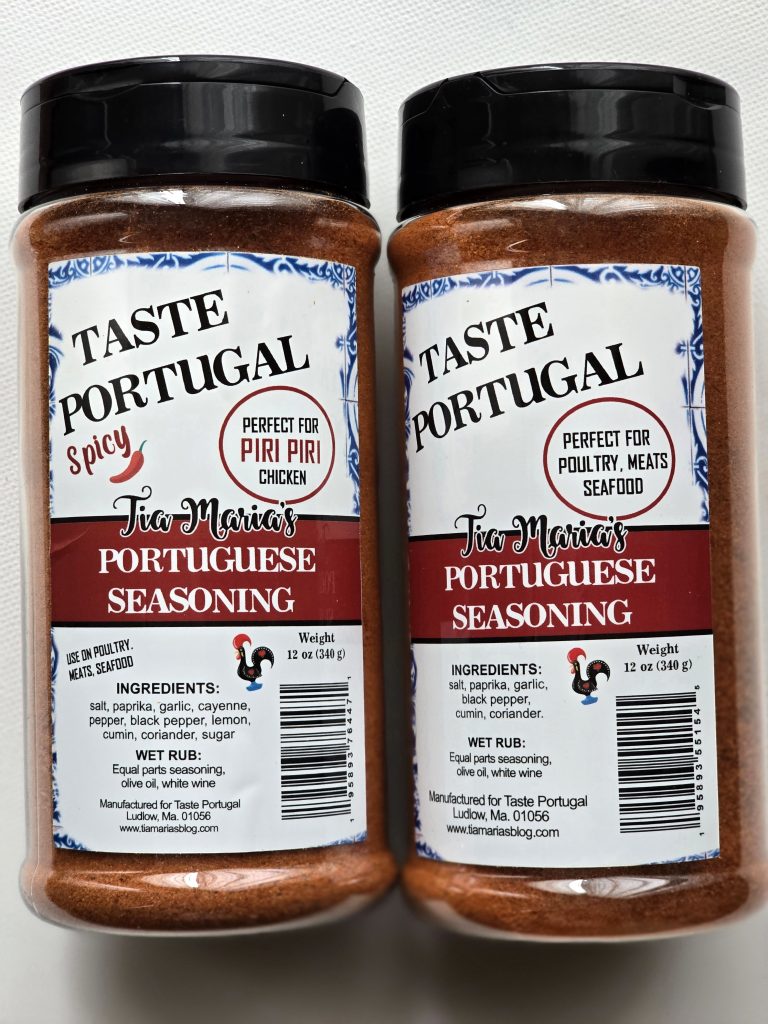
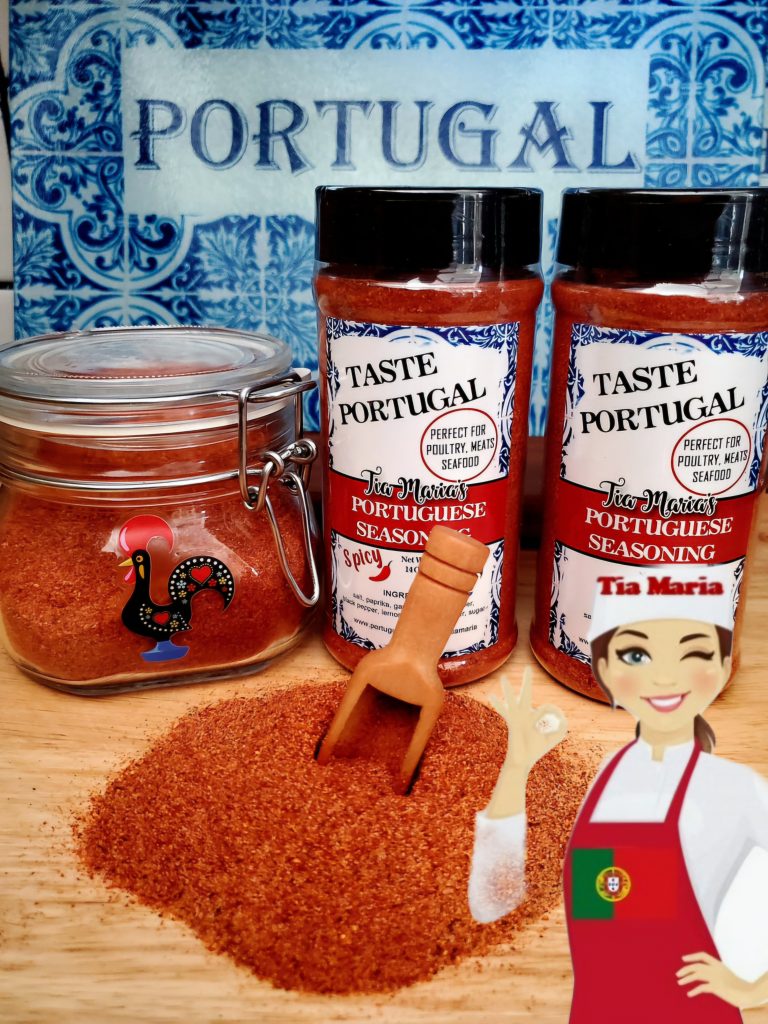
You’ll love this delicious low carb salad. It’s a lunch, side dish, or snack.
Mix in bowl and serve.
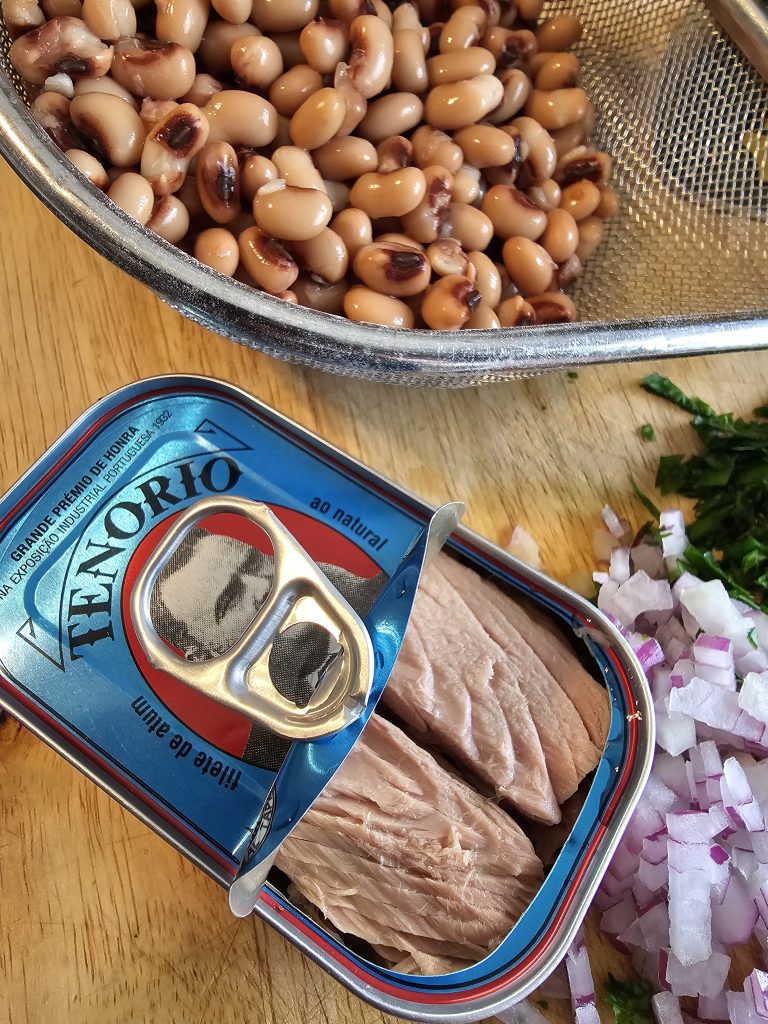
Ingredients:
1 can cooked black eye peas
1 can tuna in water
1/4 cup minced red onion
1/4 cup olive oil
salt and pepper to taste
2 tbsp minced parsley
1/2 cup cherry tomatoes or any chopped tomatoes

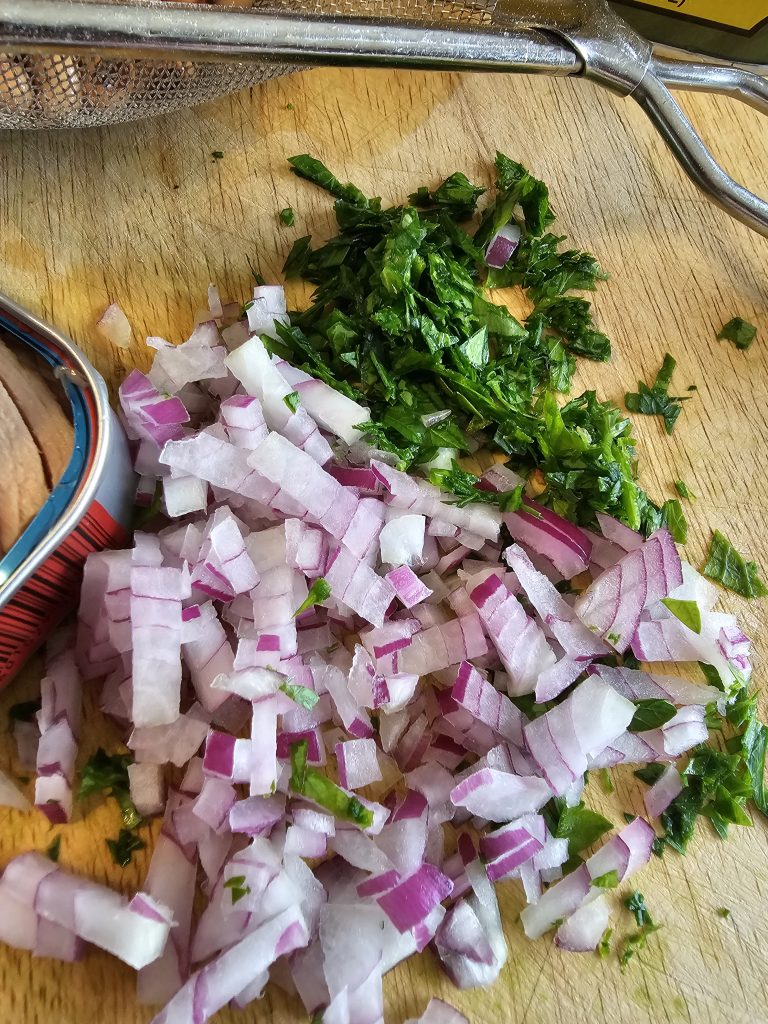
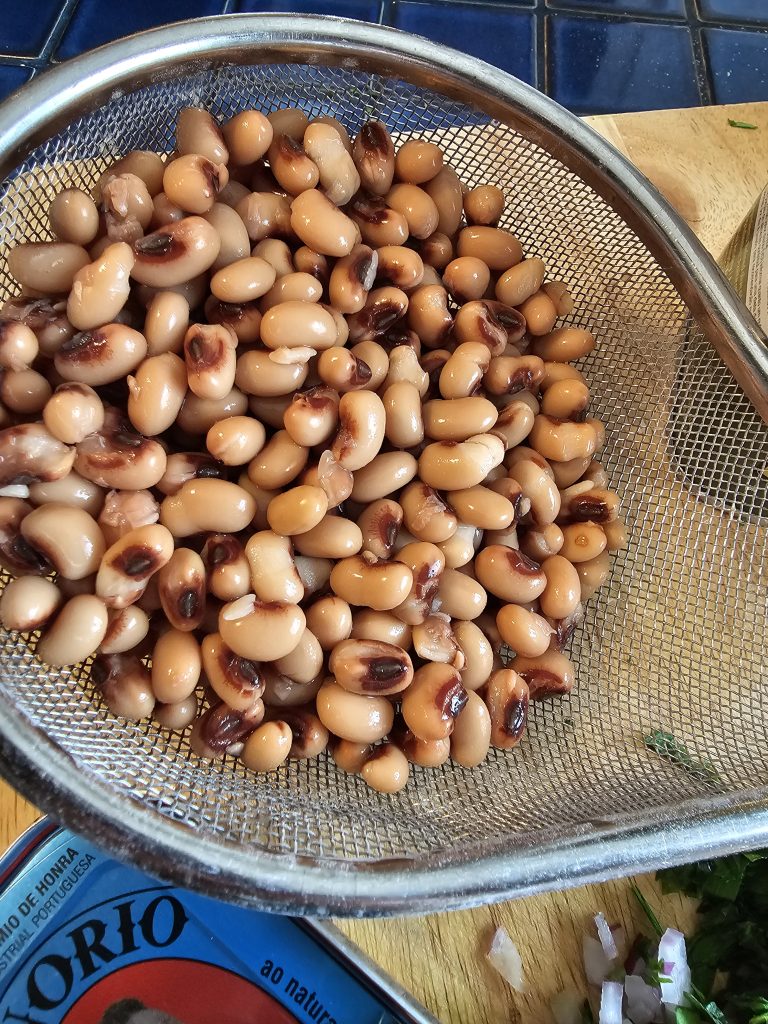
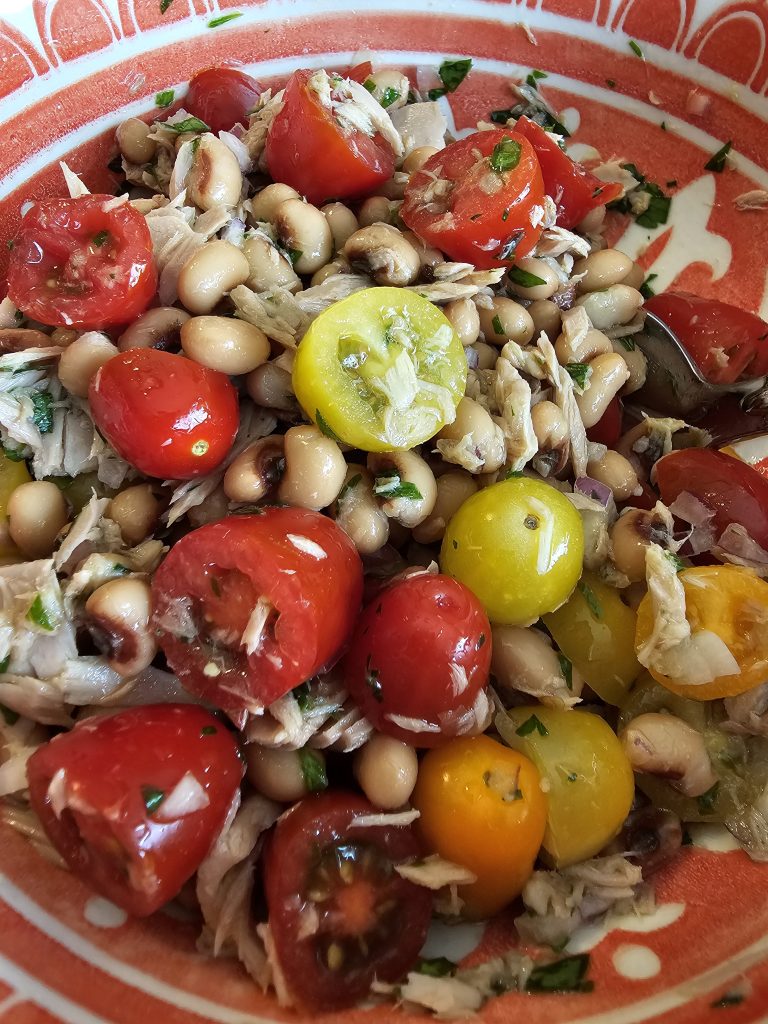

Easy Chicken Parmesan recipe. This is so easy that you’ll make it every weekend
RECIPE:
2 lbs chicken breast sliced thin
1 cup flavored bread crumbs
1/4 flour
2 beaten eggs
1/2 cup crated Parmesan cheese
1 tbsp Taste Portugal Seasoning
1/2 tsp Taste Portugal Seasoning
2 cups mozzarella cheese
1/4 to 1/2 cup oil for frying
1 jar marinara sauce
INSTRUCTIONS:
Season chicken with 1 tbsp of seasoning in a bowl. Add the eggs and blend well. Meanwhile mix bread crumbs, 1/2 of Parmesan cheese. flour and 1/2 tsp seasoning in a plastic bag or bowl.
Dredge chicken in bread crumbs. Fry in hot oil until golden and put on paper towels to absorb grease.
Prepare oven proof pan with a layer of sauce. Add chicken, cheese and a small layer of sauce. Top with remaining cheeses.
Bake at 350 f. For about 30 minutes.


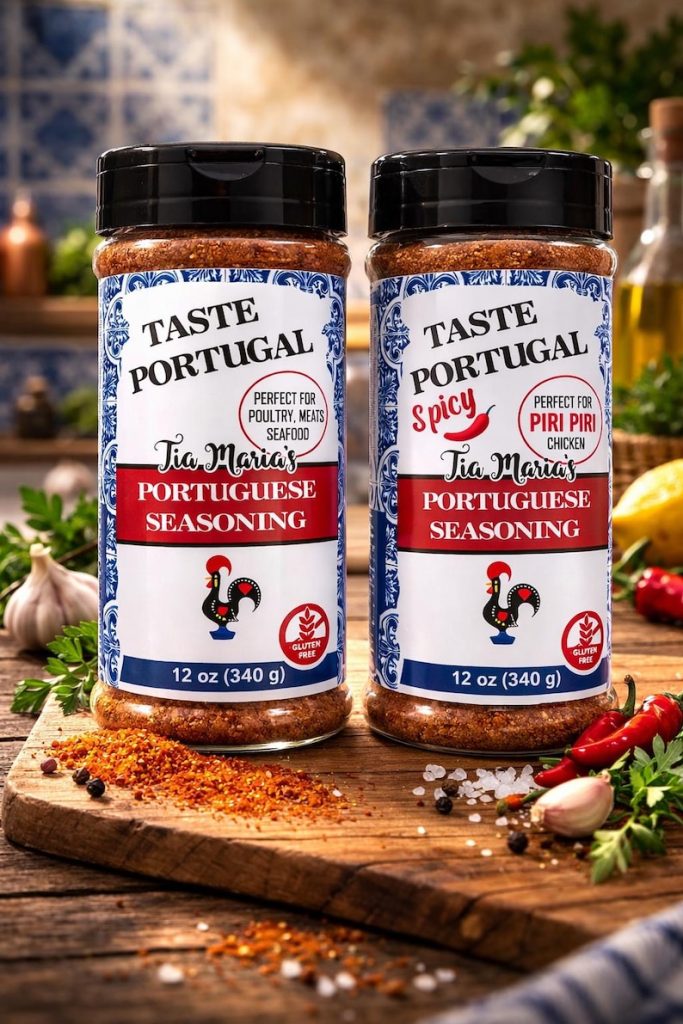
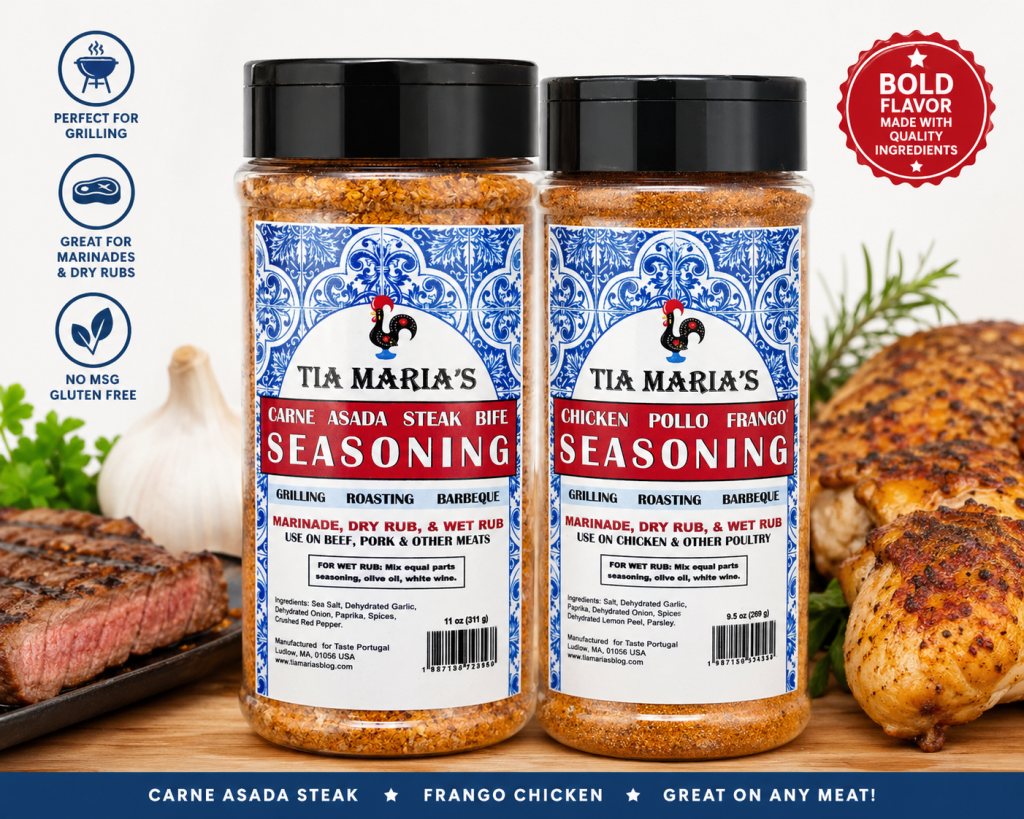
 Now available in Canada – Amazon Canada
Buy Taste Portugal cookbook in Canada
Now available in Canada – Amazon Canada
Buy Taste Portugal cookbook in Canada  LISBON BLUE ETSY SHOP
Portuguese Inspired Gifts – Men, Women, Cooks, Mom, Dad, Grandparents
0
LISBON BLUE ETSY SHOP
Portuguese Inspired Gifts – Men, Women, Cooks, Mom, Dad, Grandparents
0 My appearance on RTP Portuguese TV Notícias do Meu País
Notícias do Meu País – Episódio 9 – RTP Play – RTP – Maria Dias – Tia Maria’s Blog
My appearance on RTP Portuguese TV Notícias do Meu País
Notícias do Meu País – Episódio 9 – RTP Play – RTP – Maria Dias – Tia Maria’s Blog


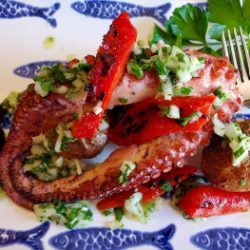

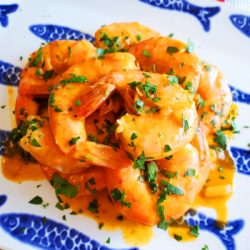


 For nearly a century Gaspar’s Sausage Co., Inc. Has been recognized as the largest manufacturer of Portuguese smoked sausage in the United States. Order today! www.gasparssausage.com or call us at 1-800-542-2038 GONSALVES FOODS
The taste of Portugal here in America Your source for authentic Portuguese products We’re proud to offer a wide selection of authentic Portuguese foods from our Gonsalves and Bom Petisco brands as well as the leading Portuguese brands like Saloio olive
0
For nearly a century Gaspar’s Sausage Co., Inc. Has been recognized as the largest manufacturer of Portuguese smoked sausage in the United States. Order today! www.gasparssausage.com or call us at 1-800-542-2038 GONSALVES FOODS
The taste of Portugal here in America Your source for authentic Portuguese products We’re proud to offer a wide selection of authentic Portuguese foods from our Gonsalves and Bom Petisco brands as well as the leading Portuguese brands like Saloio olive
0


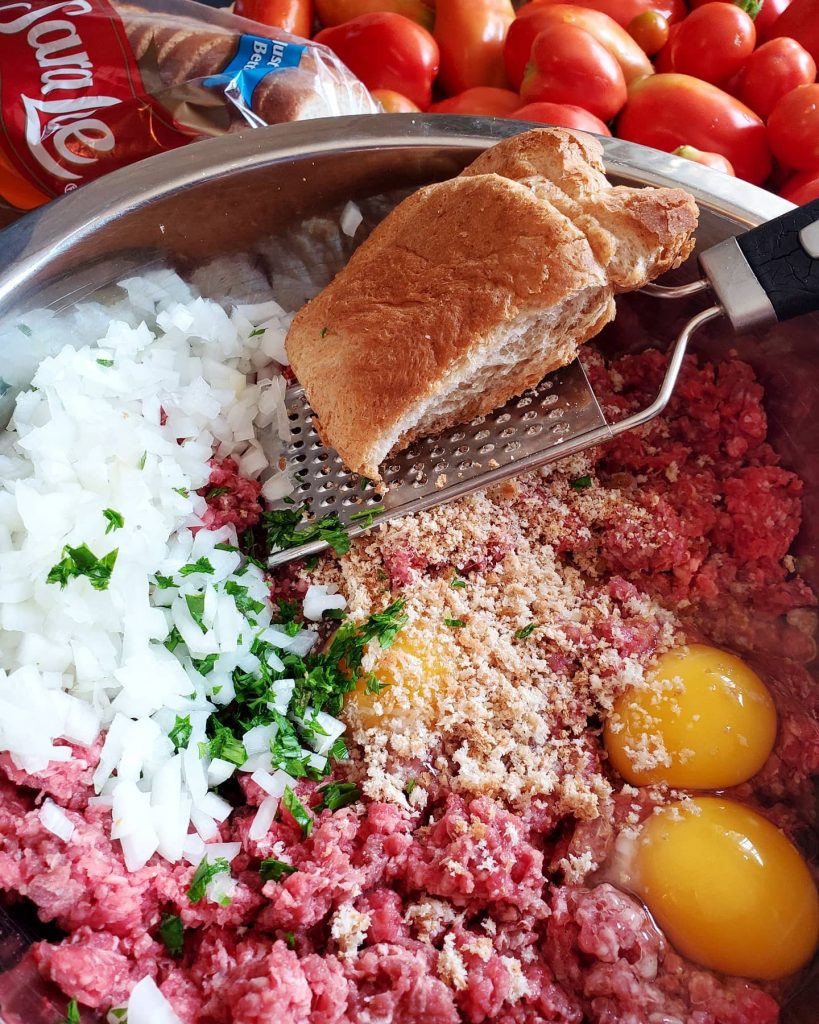

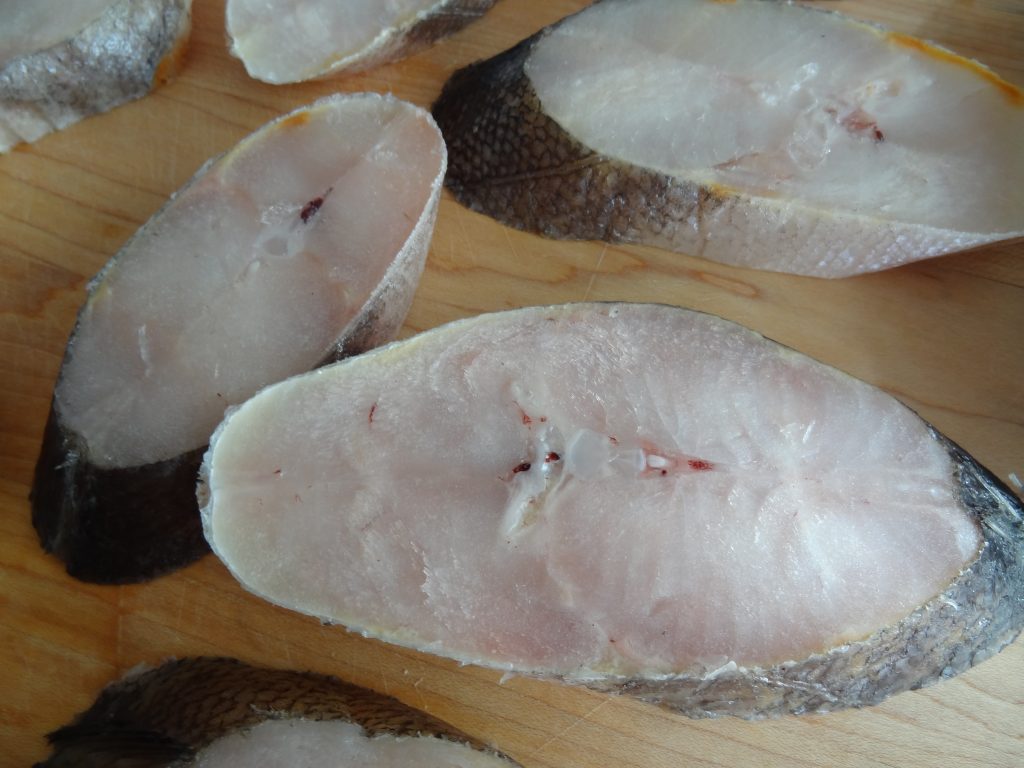
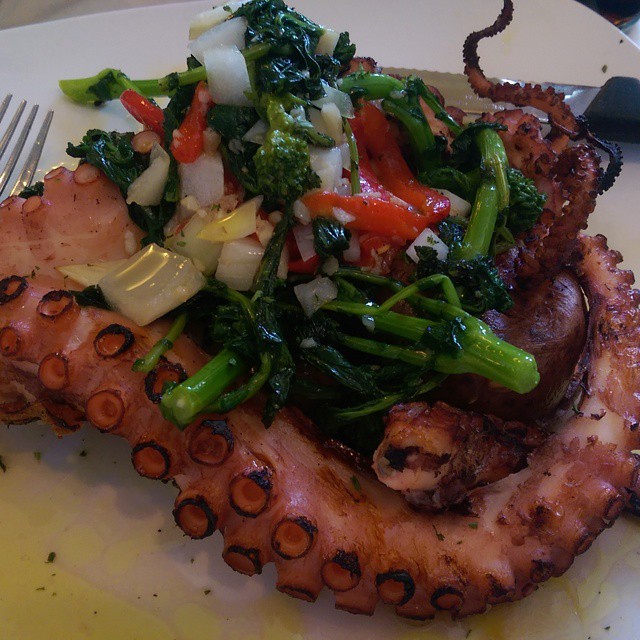

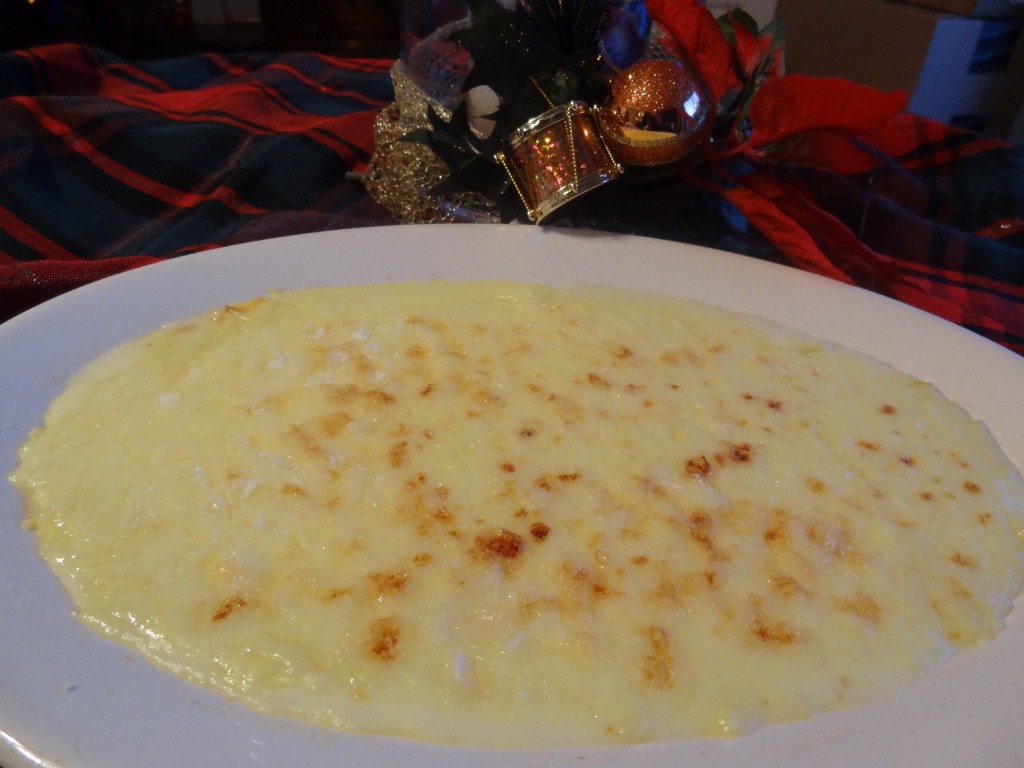

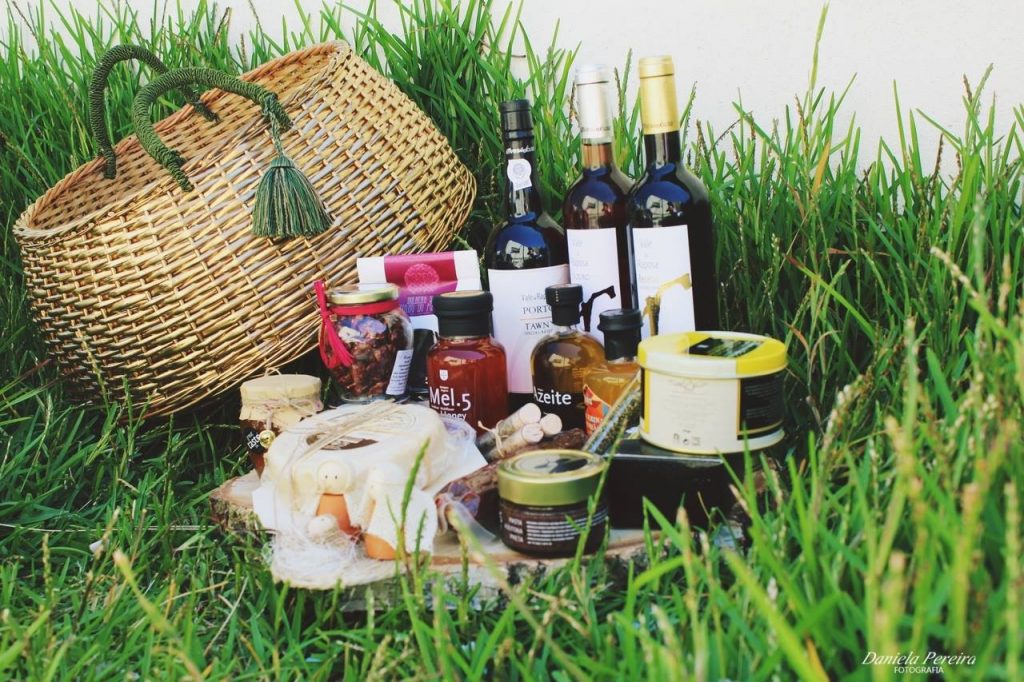

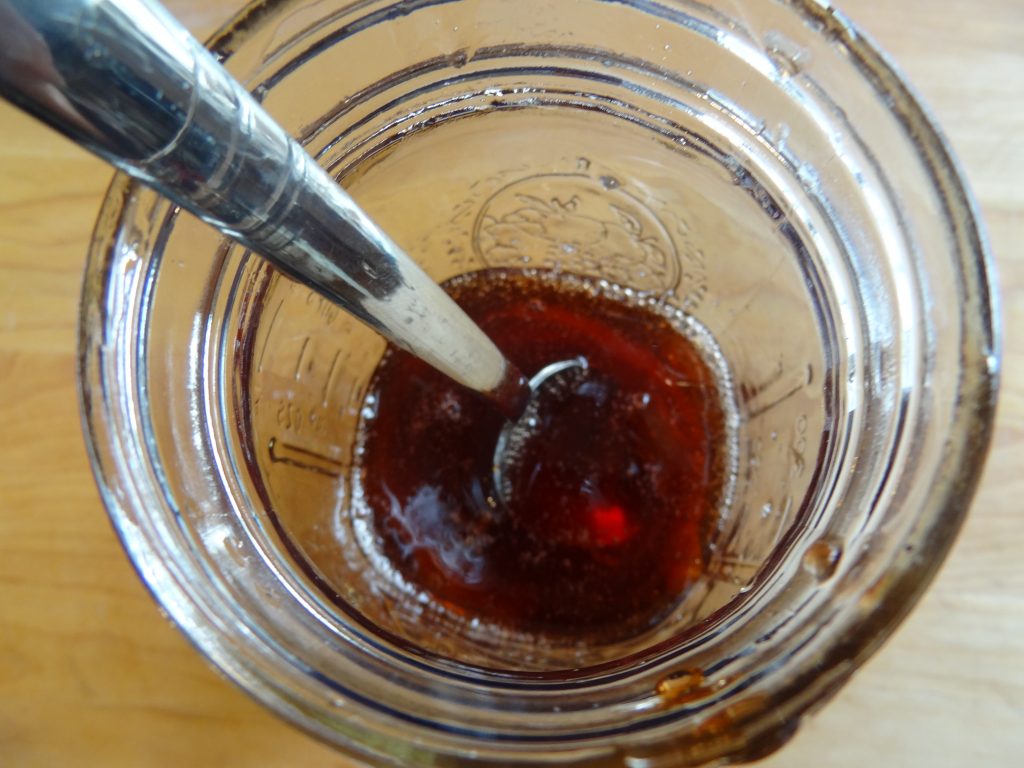
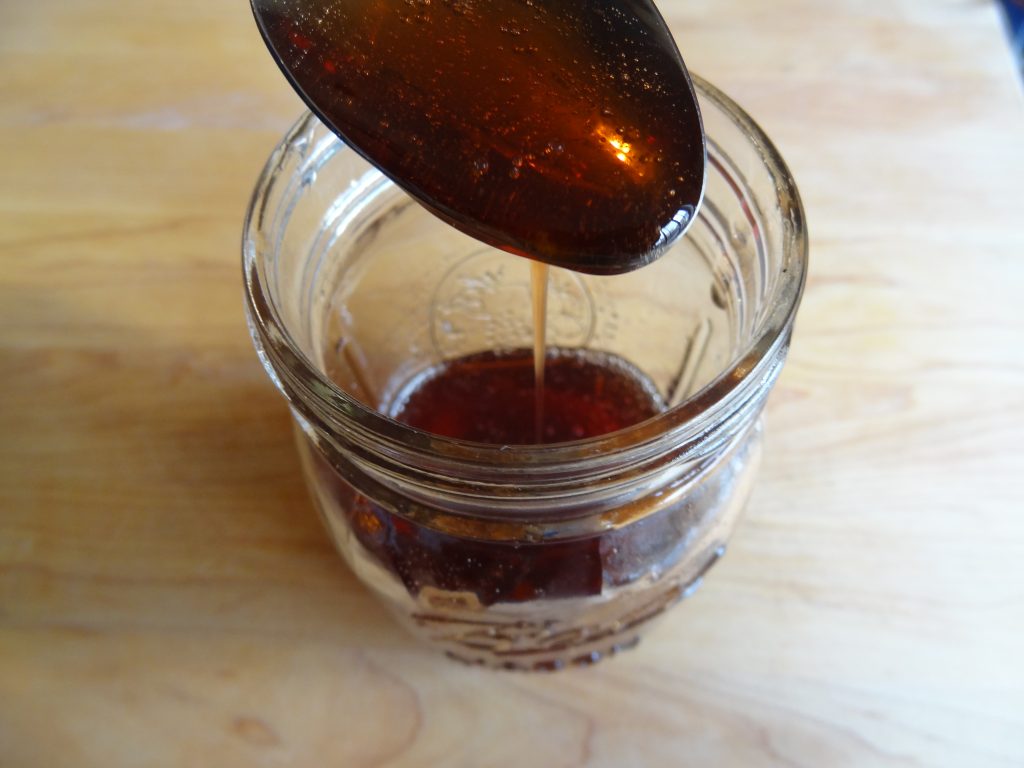
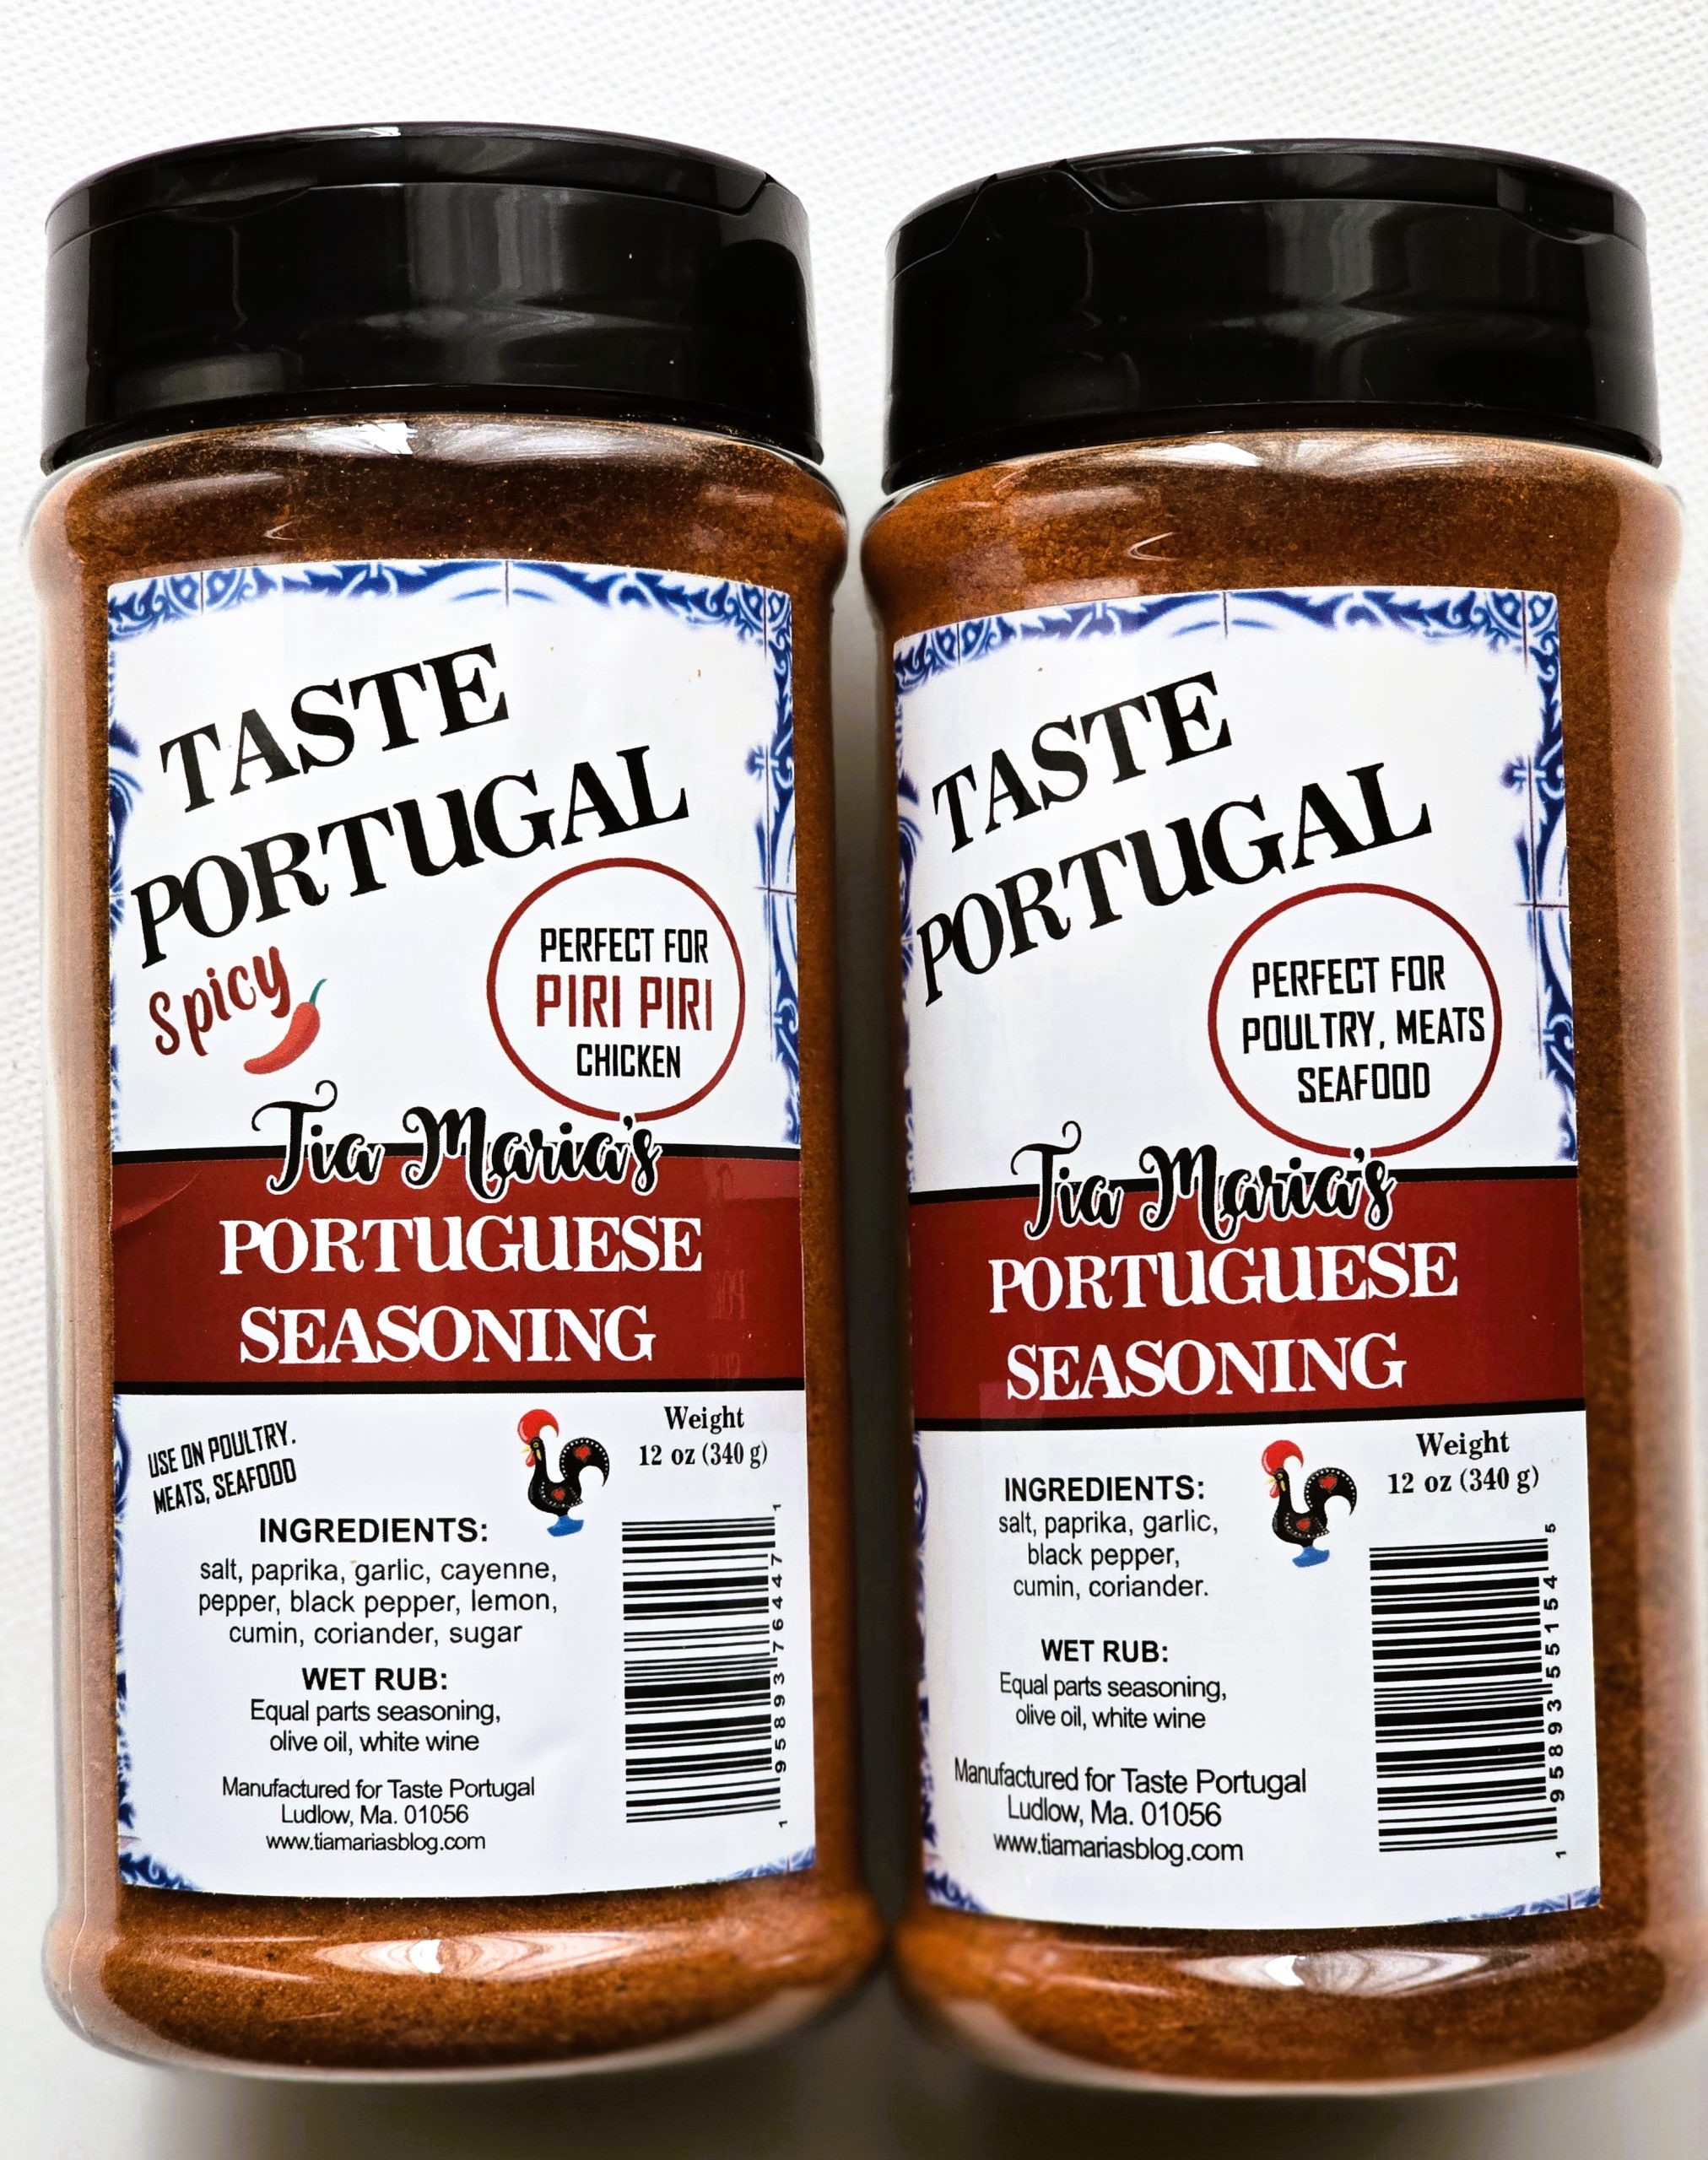
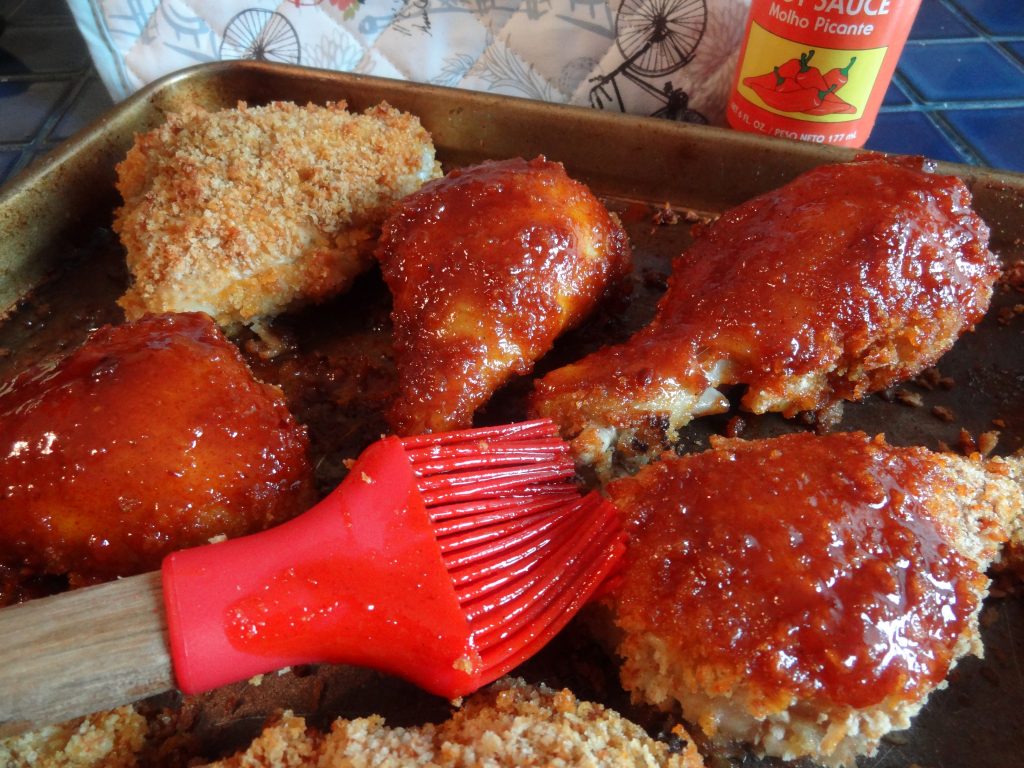
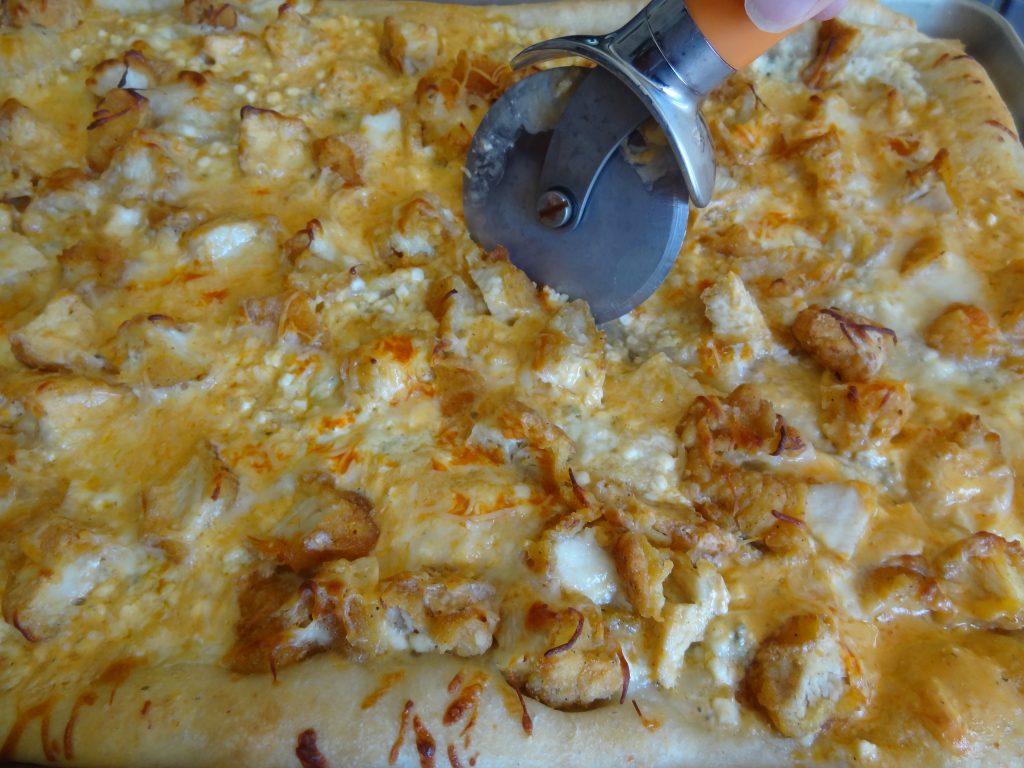
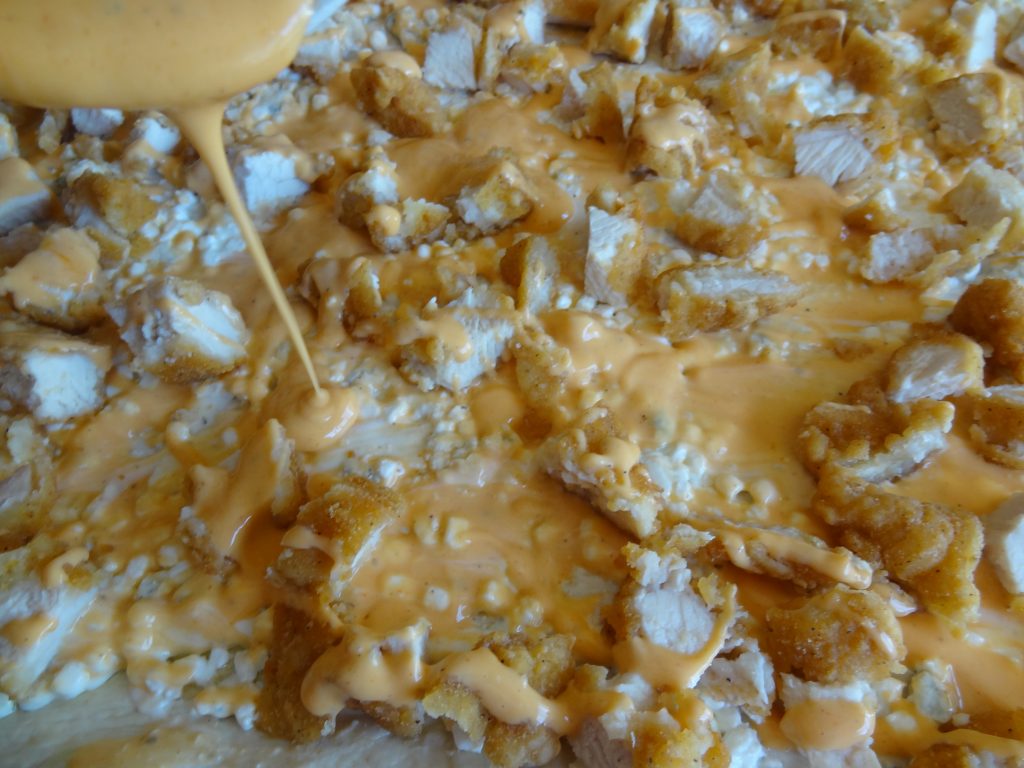
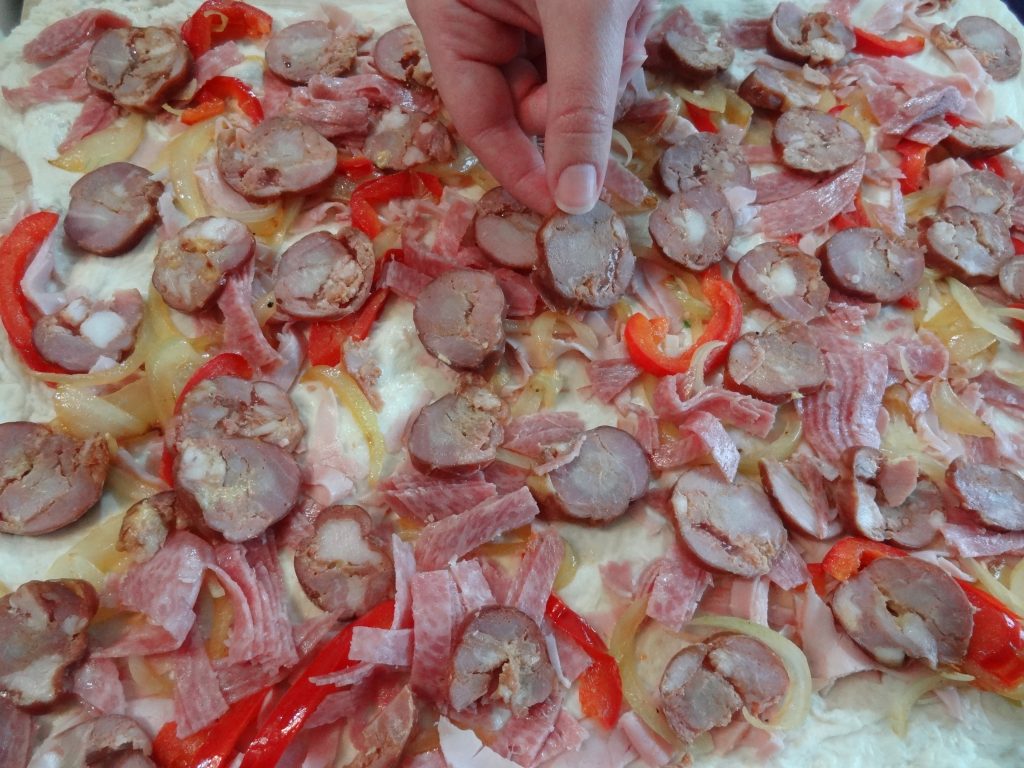
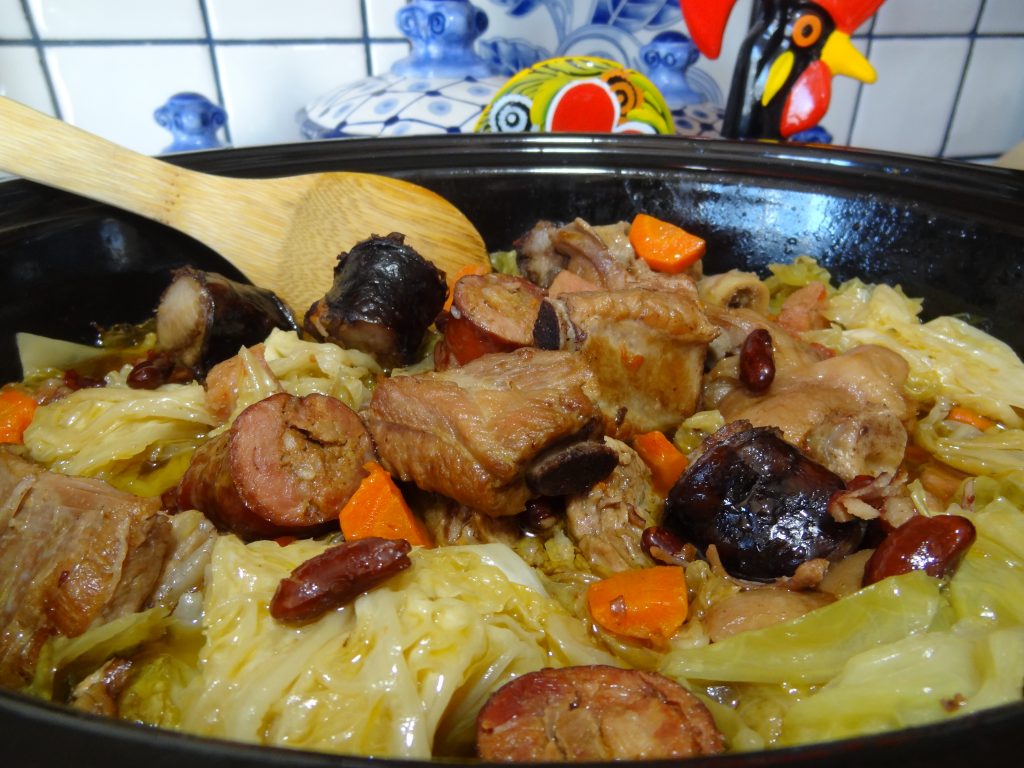
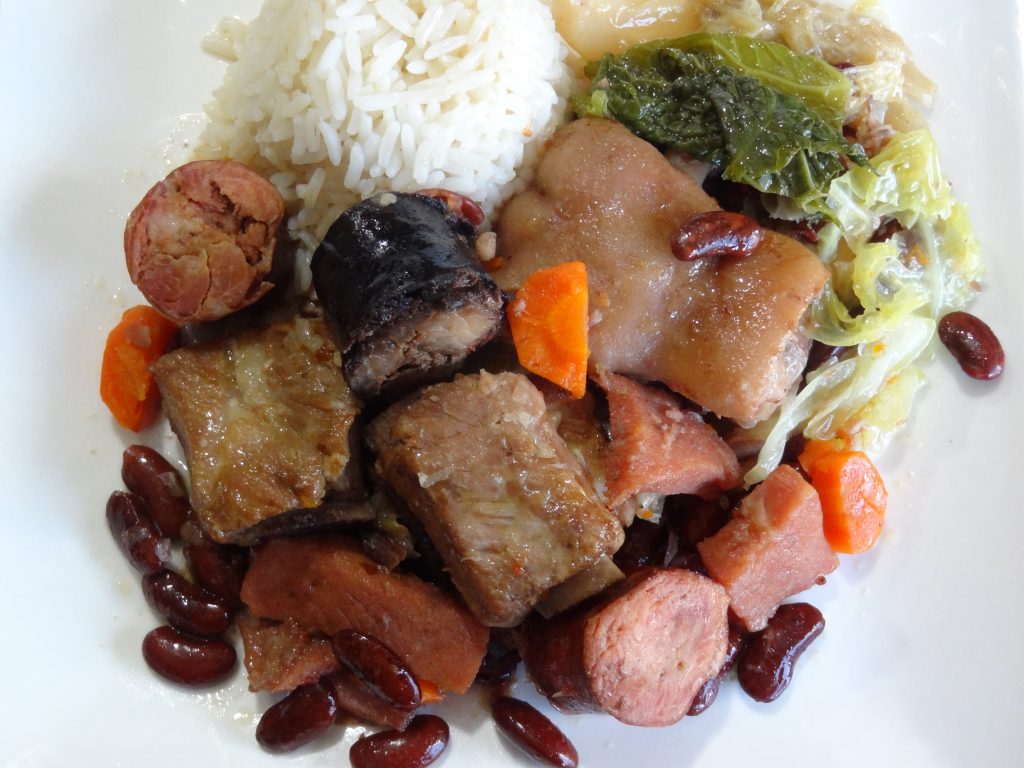


 No Kid Hungry | Share our Strength Help End Child Hunger in America
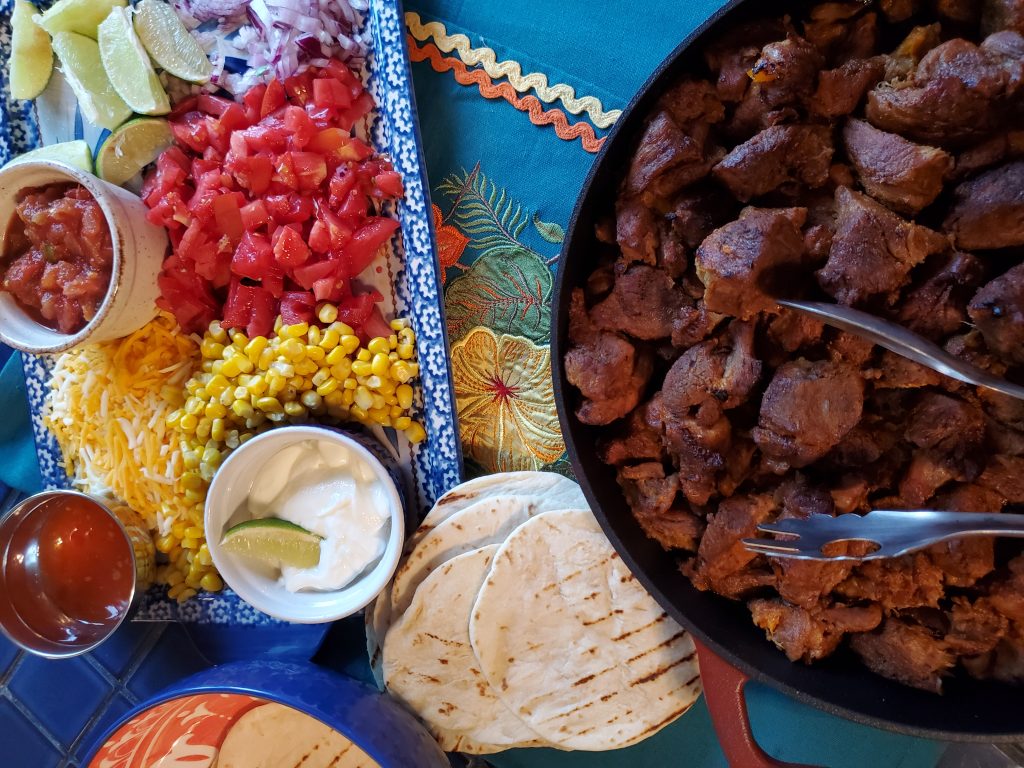