Author: Tia Maria

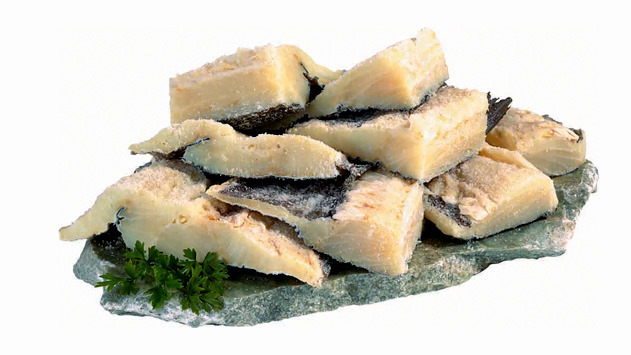
Bachalhau Com Grao Assado- Salt Cod with Chick Pea Bake

DSC06668

One bite brings me home to Portugal!

DSC06666Bacalhau com Grao is as classic home comfort food, one of the most popular dishes, and served in most Portuguese homes and restaurants. This recipe is versatile, so you can add more or less of the ingredients to your taste. You can serve this dish as a hot bake or as a cold salad. You can also substitute the chick peas with chopped cooked potatoes, or use many bean varieties such as black eyed peas, white beans etc. I sauteed the onions for a sweet flavor addition but many recipes use raw chopped onions. Once you try this recipe you’ll find that you’ll make it often because it’s so easy to make. Enjoy!

Ingredients:

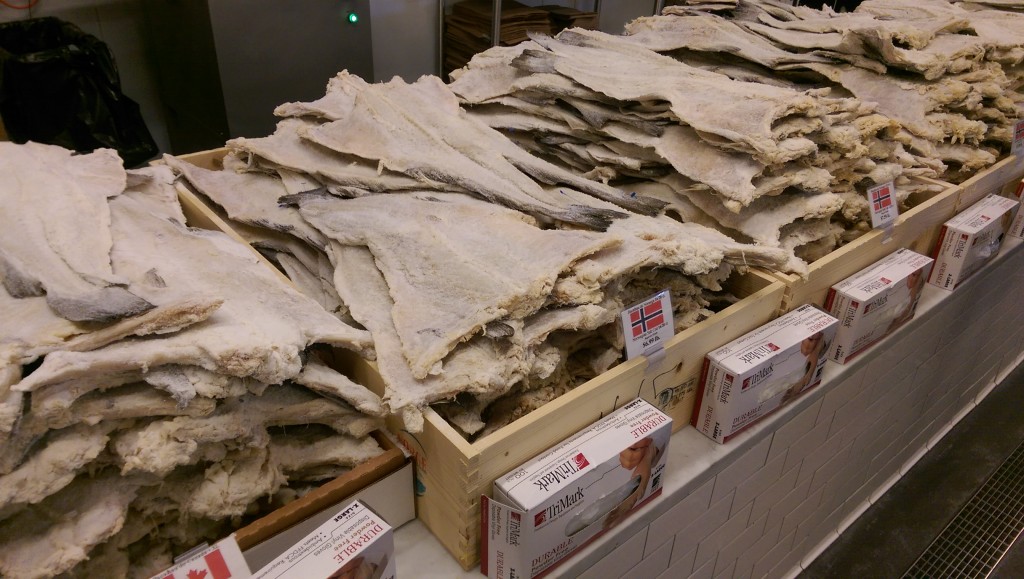
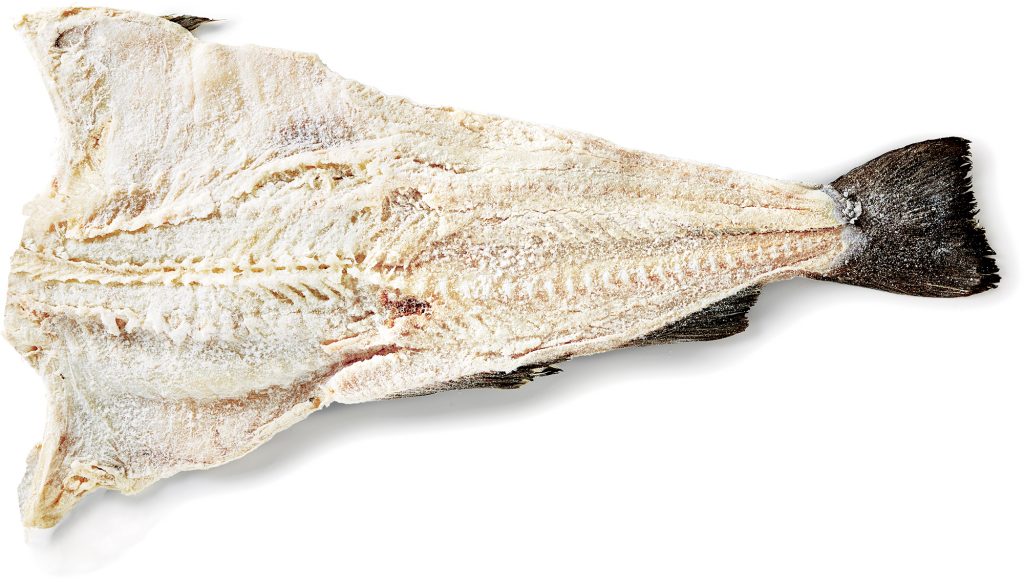
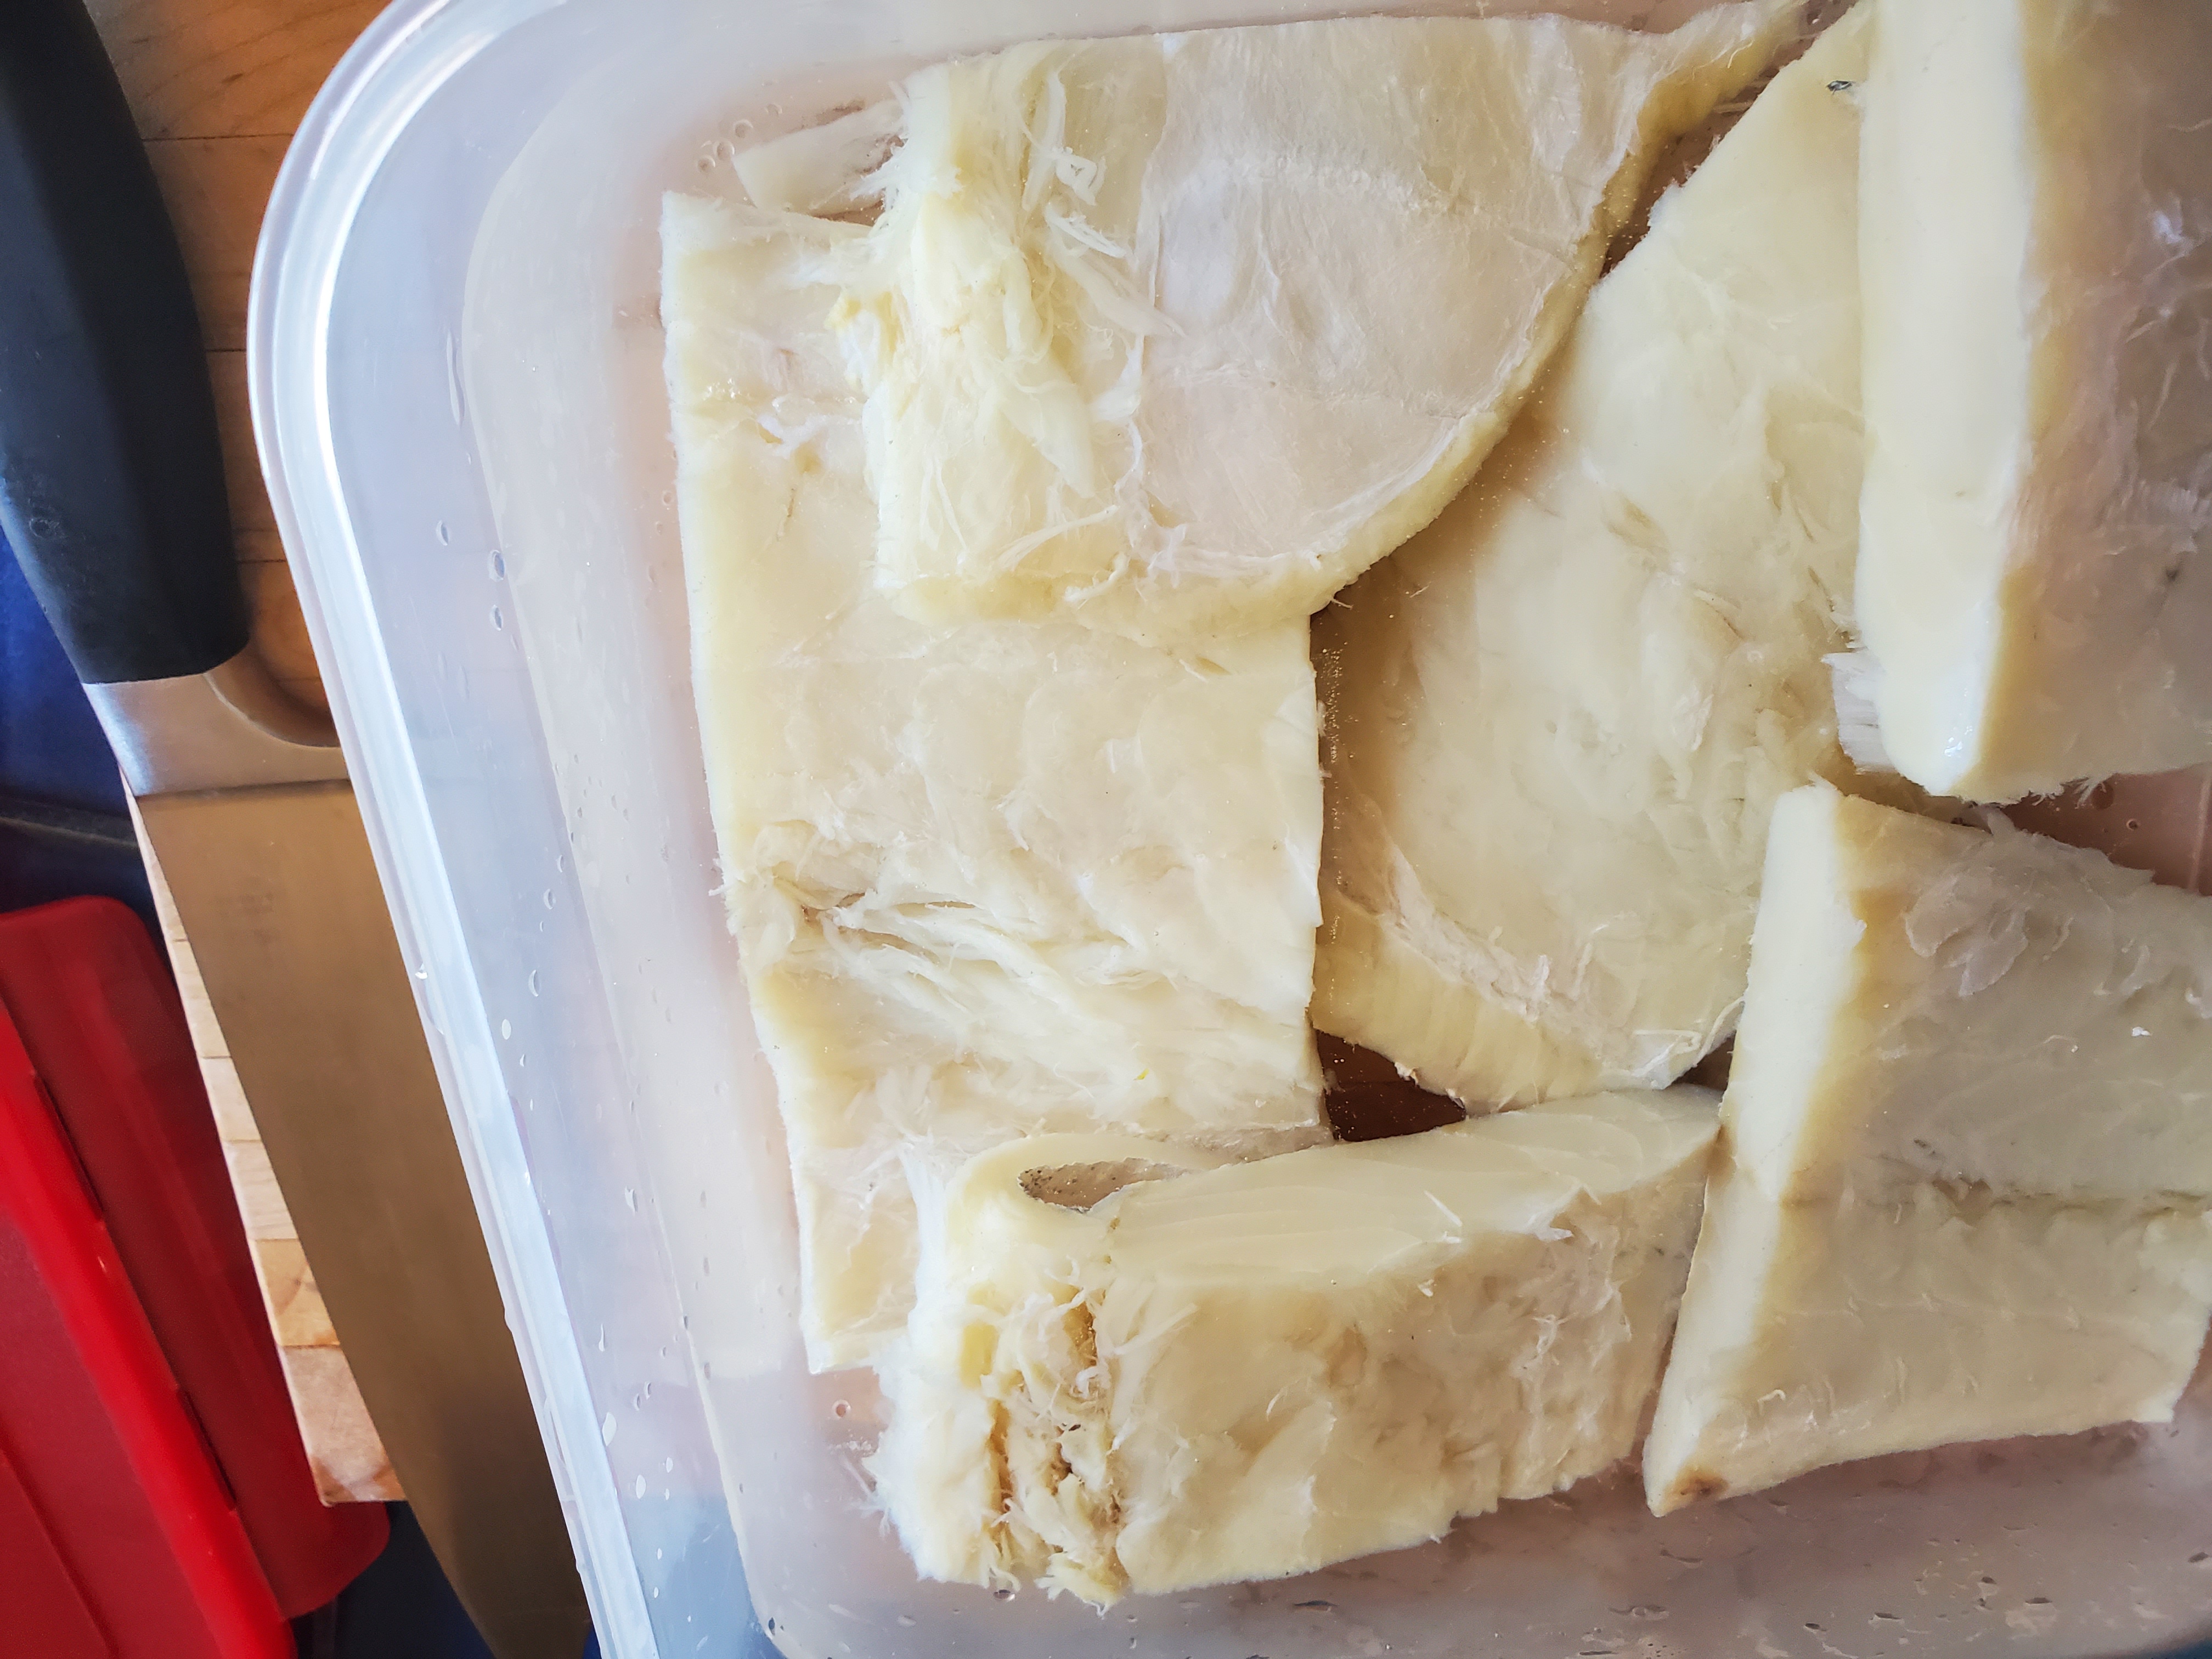
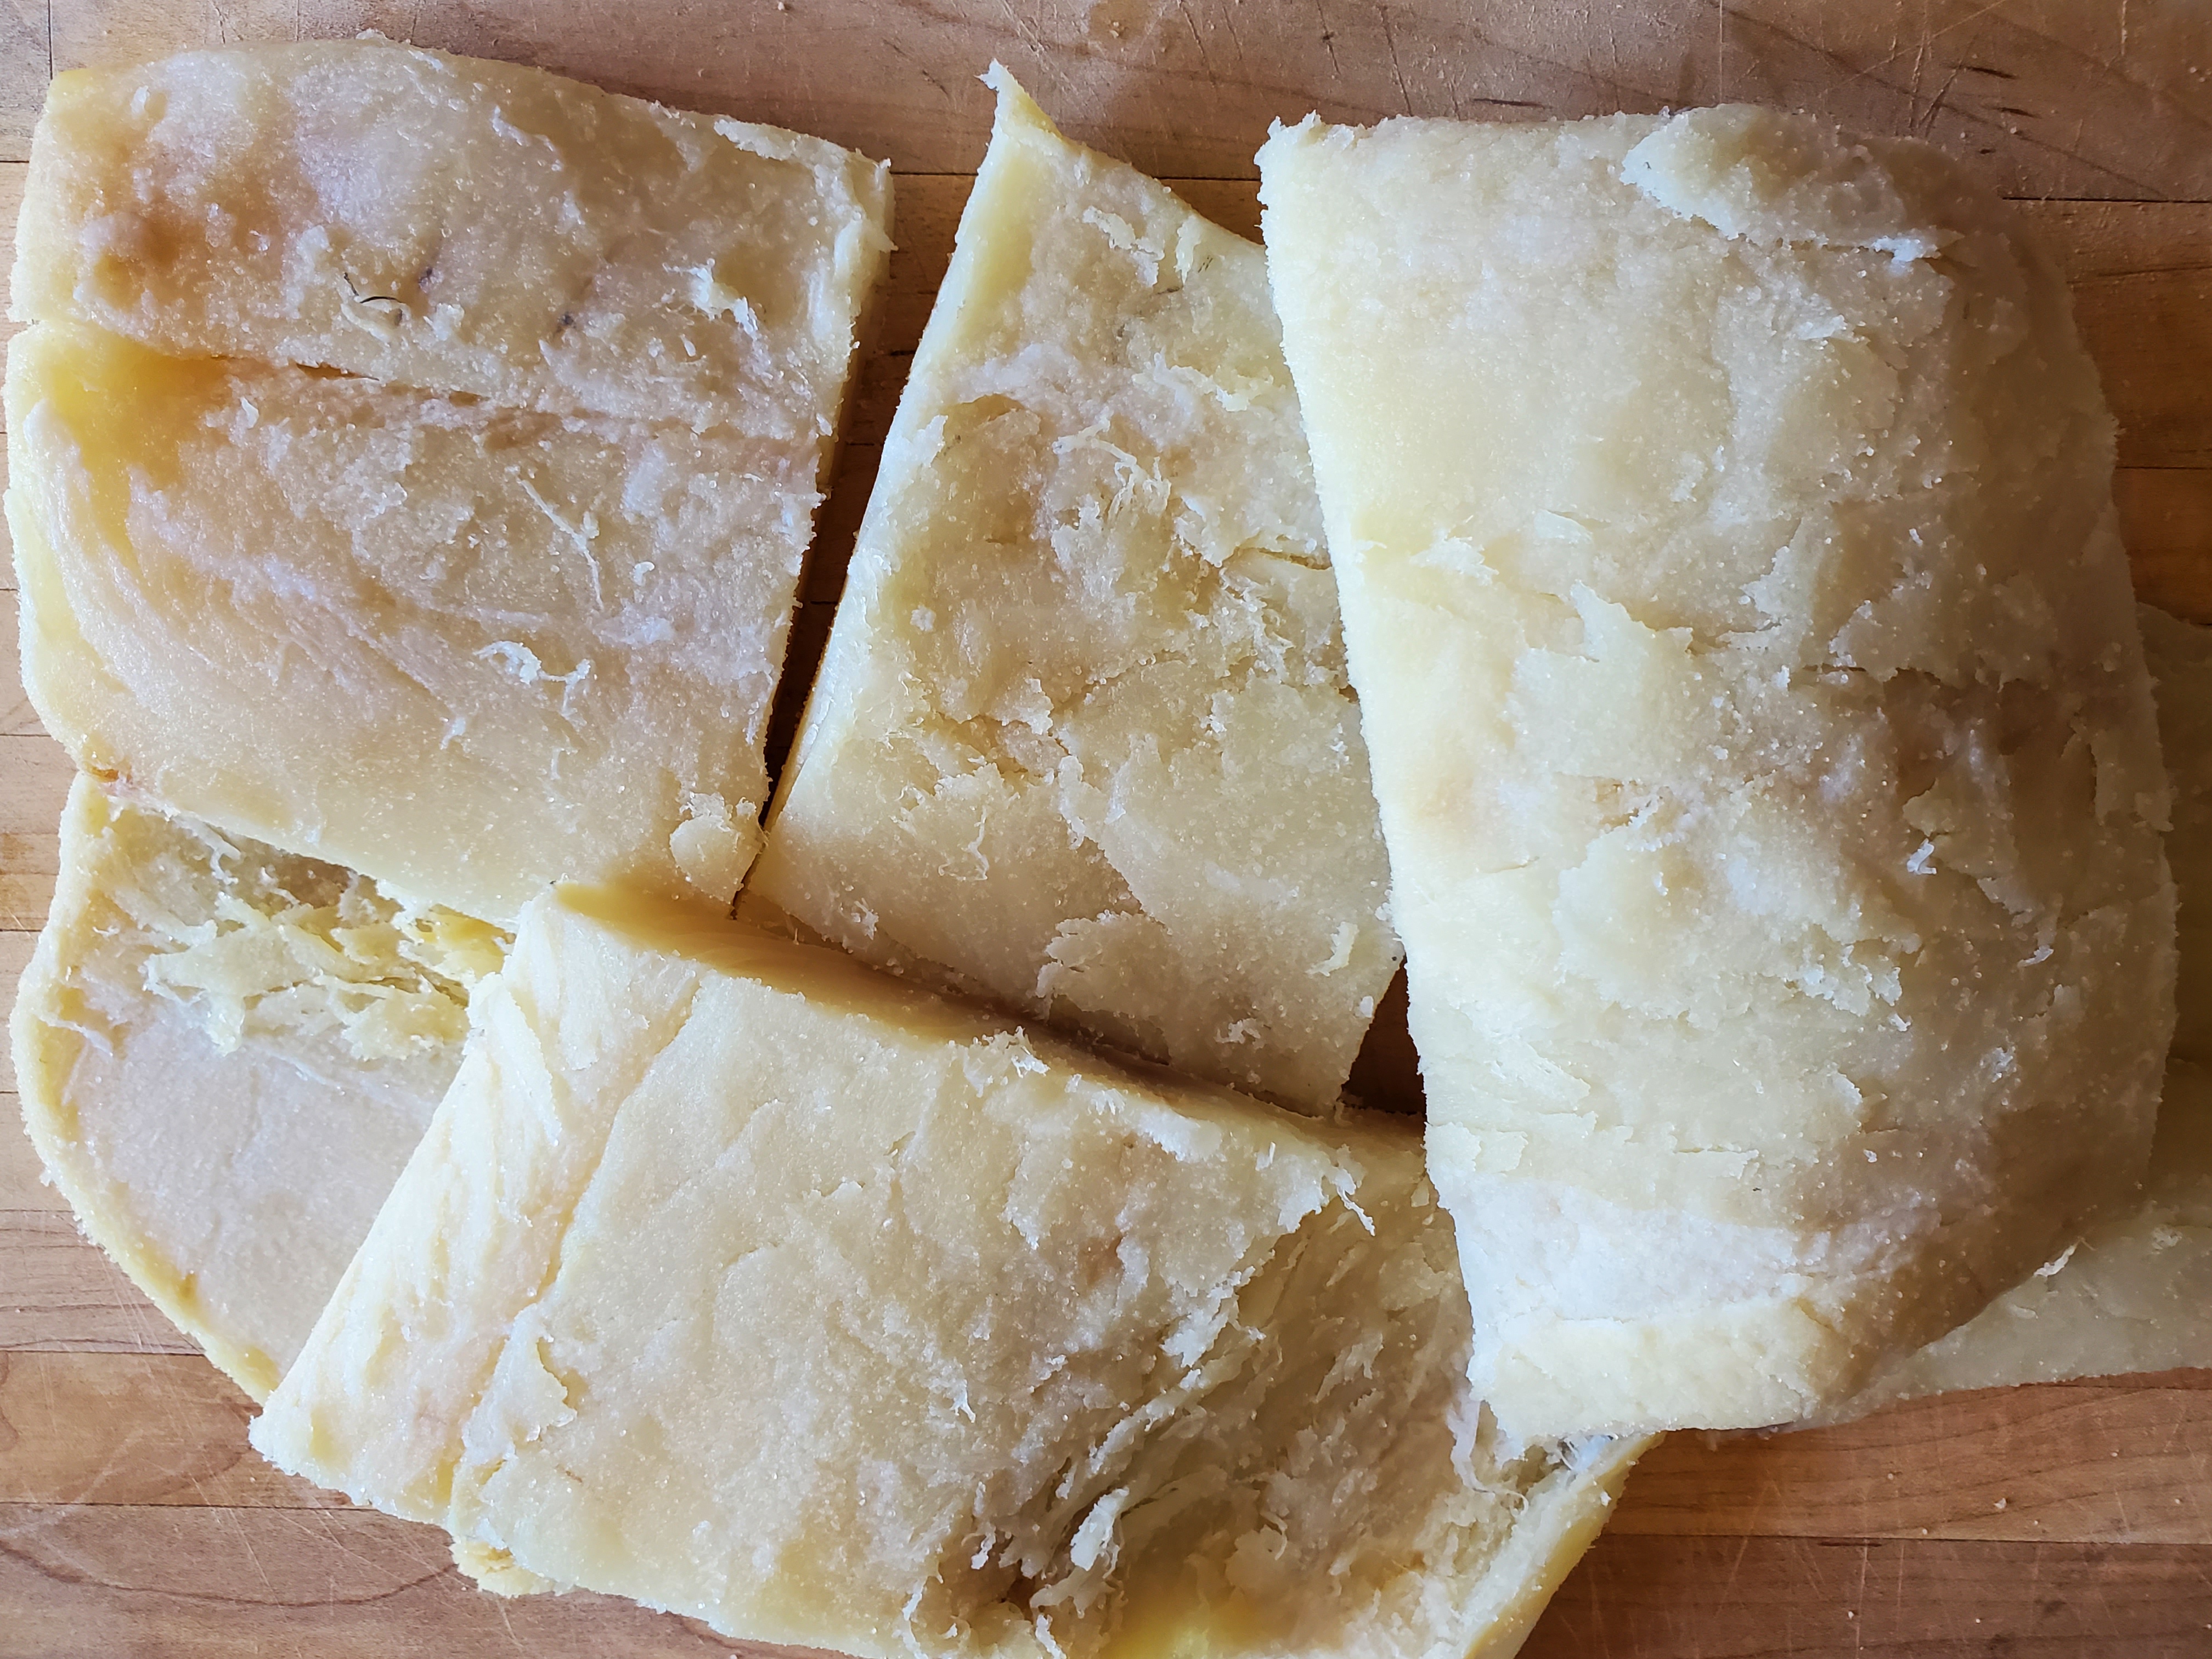
2 pounds of cooked and flaked salt cod

1 large onion (sliced)

3 cloves garlic (minced)

2 large 28 -32 oz. cans of cooked chick peas

6 hard boiled eggs (crumbled)

1 bay leaf

1/2 cup of Portuguese olive oil

3 teaspoons fresh chopped parsley for garnish

olives for garnish

salt and pepper to taste

dash of white wine vinegar

Preparation:

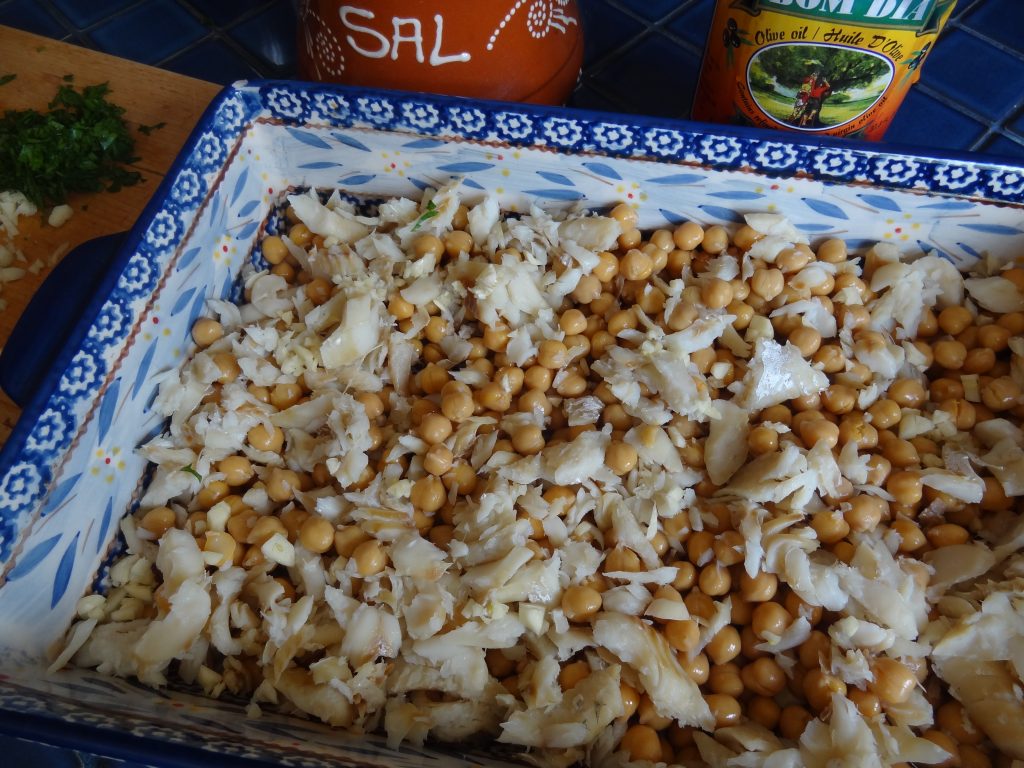
Drain and rinse the chick peas and set aside.

Saute the onions in 2-3 tablespoons of olive oil until caramel colored. Remove bay leaf and add a pinch of salt and pepper.

In a deep dish pan, layer 1/2 of the chick peas, followed by 1/2 of the cod. Top with 1/2 of the sauteed onions and 1/2 of the garlic. Repeat with remaining chick peas, cod, onions and garlic.

DSC06663
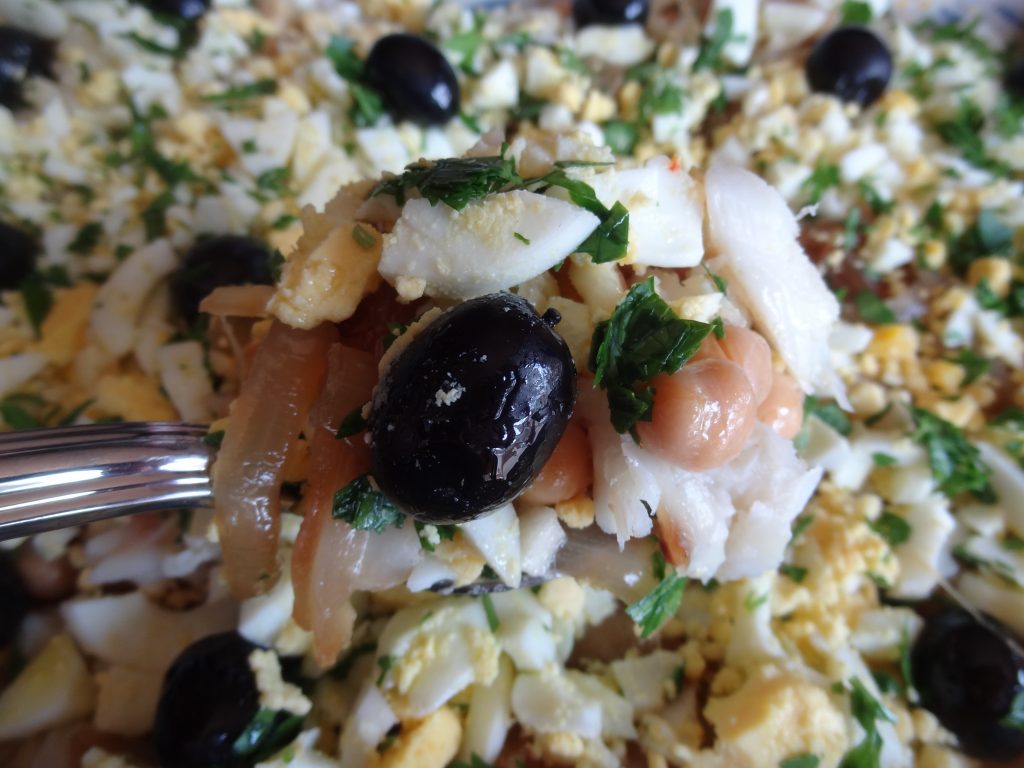
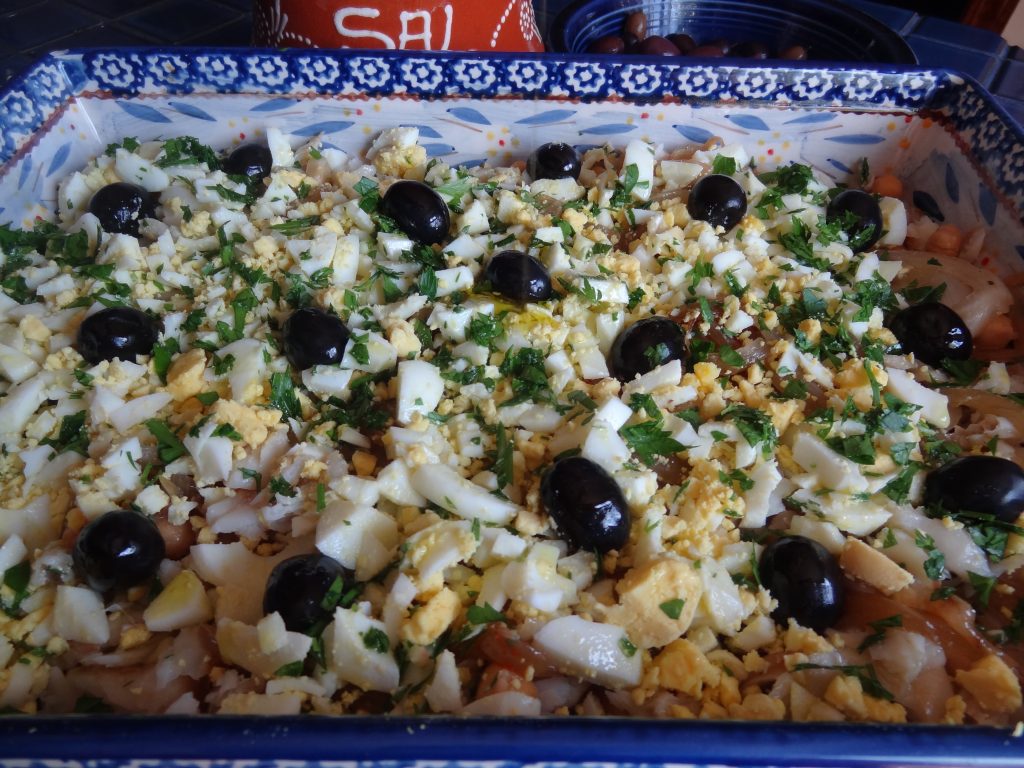
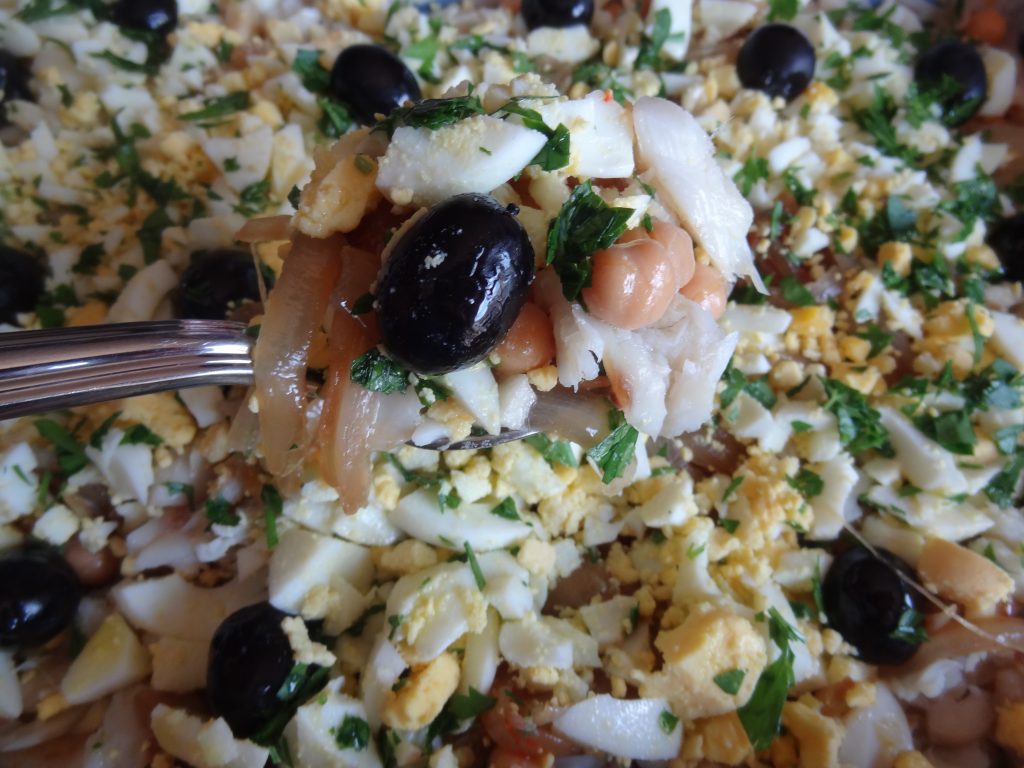
Top evenly with eggs and poor the remaining olive oil on top. Add a pinch of salt and pepper and a drizzle of the vinegar. Top with the eggs and place in a 350 F. oven for about 15 minutes or until hot. Garnish with the fresh parsley and olives and serve with more olive oil on the side if needed.

If you want to serve it cold just top with the eggs, parsley and olives and enjoy!

DSC06664
DSC06665


How to Hydrate Salt Cod – Bacalhau

Portugalia Bacalhau

I’ve had many requests for the process of hydrating salt cod (bacalhau). It’s relatively easy to do so I’ve posted some information here for those of you that are novices at cooking with the cod.

This photo above, was taken at Portugalia Marketplace in Fall River. They have an amazing refrigerated room solely for selling the salt cod. It is said that the best salt cod is from Portugal because they use the best cod fished in the oceans of Newfoundland, and then salt cured using Portuguese techniques.

You can find the cod at most Portuguese markets. Some Italian markets or even some Hispanic markets will sometimes carry salt cod as well, but they generally only use the boneless cod. If you’re lucky enough to live where you can find Portuguese salt cod, I suggest you buy the whole fish, since it’s cheaper by the pound.

bacalao

bacalhau-crescido

The tail portions and the belly portions are great to make dishes such as Pasteis de Bacalhau (Codfish Croquettes), Pataniscas (Codfish Cakes) or any recipe that uses shredded cod. Most will save the thicker portions to serve in recipes that call for bigger pieces such as; Bacalhau Assado, (Baked) or Cozido (Boiled).

You’ll find many other recipes here on this blog by using the search bar under: Bacalhau, or Salt Cod

This video is very informative for those of you that want to know all about the process.

Process for hydrating salt cod: **Have the market cut it into 8 oz serving portions.  Many markets also sell the cod in portioned or boneless packages.

Day 1: Cut salted cod into 8 to 10-ounce portions or have the market cut it for you. Rinse in very cold water to remove the excess salt. Place into a large pan or bowl which is big enough to completely submerge cod. Place in refrigerator, or in a large tub filled with ice to keep the water cold.

Day 2: Drain water, rinse and add very cold water to submerge cod. Place back in refrigerator. Later in the day drain, rinse and add cold water again. Place back in the refrigerator.

Day 3: Drain and rinse cod in very cold water. Cut a small piece from the thickest portion of cod and taste for saltiness. It should have some fishy and salty taste. If the saltiness is to your taste you can proceed to next step. Remove from water, pat dry on paper towels. Store in refrigerator up to 3 days in covered container.


Note: Some people will soak the cod in milk on the last day to remove some of the fishy taste, but this is optional. I like my cod to taste like cod, so I just use water for this process. As you do this more often you’ll find you’re an expert at it and you’ll know the exact timing for the process.

Storing: If you find the cod is to your taste on the third day, go ahead and rinse, pat the cod dry with a towel. Wrap individual pieces with parchment paper, foil, or plastic and freeze in freezer bags and label the date. When you need to cook it,  simply remove as many portions as you need and place in the refrigerator overnight to thaw. You can also place in a bowl of cold water for a few hours to thaw.

Note: Boneless cod like this photo below will take less time to soak.

Pears in Vinho do Porto

DSC06636Pears in Vinho do Porto dessert is elegant, yet so easy to make to impress your family or guests at your next party.  Be sure to serve a glass of authentic “Vinho do Porto” with it of course!

Vinho do Porto (Port wine) is a Portuguese fortified wine exclusively made in the Douro Valley in northern Portugal. Many other countries make port wine but in the EU only wines made in Portugal can be labeled Port or Porto. In the USA wine using the “port” term, are recognized as generic. but the wines name “Porto”, and “Vinho do Porto” are deemed to be exclusively Portuguese.

port wineIngredients:

3-4 ripe pears

1 cup Vinho do Porto (Port wine)

2 cups water

1 cup sugar

2 strips orange peel

2 strips lemon peel

1 stick cinnamon

vanilla ice cream for serving

mint leaves for garnish

Preparation:

Place the sugar, port, 2 cups water, lemon and orange peel, and cinnamon in a pan. Cook on medium high for about 5 minutes. Set aside.

Carefully peel the pears and slice of a 1/4 inch piece on the bottom to make them stand. Place the pears upright in the syrup and bring syrup to boil. Lower heat to medium, cover, and cook for about 50 minutes or until a knife cuts easily through the pears. Remove pears and let cool.

DSC06624

DSC06627Place pears upright on plate topped with the syrup or make the thick Port glaze below.  Add ice cream and garnish with mint leaves.

  DSC06635

DSC06637Port Wine Syrup Glaze:

Simmer remaining syrup from cooking pears on low heat for another 20 – 30 minutes or until the syrup thickens. Store in jar in the refrigerator up to 30 days. Serve over fruit, ice cream, french toast, pancakes, etc.

DSC06643DSC06638


Maria Cookies and Cream Strawberry Banana Trifle

Maria banana cream trifle
Dig in!

Maria Cookies add crunchy layers to this easy trifle recipe. Fresh bananas, strawberries, and home made whipped cream create a melt in your mouth fruit bomb! Bring it to your next cookout or family gathering.

 Strawberry season is here!

freshstrawberriesIngredients:

3 large bananas (sliced thin)

1 or 2 quarts of strawberries (sliced thin)

1 package yellow cake mix (follow directions) (or use a pre made store bought cake)

1 package Maria cookies (Bolacha Maria)

2 packages instant vanilla pudding (follow directions)

2 cups (1 pint) heavy cream

3 tablespoons powdered sugar

2 teaspoons vanilla extract

bananabolacha maria

DSC06649Preparation:

Prepare cake per package directions. When cake is done, let cool and cut into 2 inches cubes. Set aside.

Prepare pudding per package directions and set aside. Prepare the whipped cream.

Whipped Cream instructions: Place mixing bowl in freezer for a few minutes to chill bowl. Place the cream in mixing bowl and beat until soft peaks form. Add the sugar and vanilla and beat on high until stiff peaks form. Place in refrigerator until ready to begin assembling the trifle.

DSC06645Assemble:

Place 1/3 of the cake at the bottom of a large glass bowl. Spread cake with 1/3 of pudding, then layer 1/3 bananas, 1/3  strawberries. Add layer of Maria cookies. Top with 1/4 whipped cream.

Continue layering leaving a top layer of the remaining bananas, strawberries and whipped cream. Top the trifle with crushed Maria cookies. Chill in the refrigerator until ready to serve. Dig in and enjoy!

DSC06648

Portuguese Shrimp Bake

DSC06662

This shrimp boil was a hit at my family’s cookout! This is a perfect dish for the summer months when it’s too hot to cook because it’s prepared, cooked for only 15-20 minutes, and then served in the same sheet pan. For variety, add a few fresh clams or mussels in the shell! Just adjust the cooking time.

If you prefer, you can even prepare everything the night before, cover with foil and store in the refrigerator to cook the next day. When you’re done eating, just through out the pan for an easy clean up!

Serves 6-10

Ingredients:

2 pounds raw, shelled shrimp

2 – 3  pounds red potatoes (cubed)

1 pound Portuguese chourico or linguica sausage (cut into 1 or 2 inch slices)

4 fresh corn on the cob (cut into 4 pieces)

1 lemon (cut into slices)

SEASONING: 

1 tbsp olive oil

1/2 stick melted butter

2 tbsp Taste Portugal Seasoning 

1 or 2 teaspoons piri piri hot sauce or Cayenne pepper (optional depending on your taste)

3 tablespoons chopped parsley for garnish

CLICK IMAGE TO ORDER: 

https://amzn.to/404B2V2

Preparation:

Boil potatoes with 2 teaspoons of salt for about 10-12 minutes until slightly under cooked. (do not over cook) Drain and place on a large sheet pan to cool. Cook the corn for about 5-10 minutes, drain, and add to the sheet pan to cool.

Melt butter, oil in a small ramekin for about 30 seconds. Add sseasonings and mix well

When the potatoes and corn are cooled, spread evenly on the pan. Arrange the chourico evenly between the potatoes and corn followed by the shrimp and lemon slices. 


DSC06658

Add the seasonings and mix thoroughly with your hands to coat ingredients evenly.

DSC06660*At this point, you can cover the pan with foil and put it into the refrigerator until ready to cook the next day.*

Cook in heated 425 F degree oven for 15 minutes or until shrimp turns pink and cooked through.

*You can also cook in the same pan, covered with foil on your grill. You many have to alter the cooking time.*

Top with the parsley and serve. Enjoy!

DSC06661

 Serve with Portuguese Vinho Verde or any good white wine.

Seafood Chowder with 1920 Portuguese Brandy

seafood chowder
Are you drooling yet? This is my favorite soup which I make every summer after our families Father’s Day clam bake! This is a great way to use up the leftover seafood and corn.  Here’s the recipe for the Clam Bake.

I add a little 1920 Portuguese brandy to the broth for an added kick. Serve with an extra shot of brandy to drizzle into the chowder. The flavor is intense, rich and creamy. You’ll never through out that day old lobster again!

DSC05817

Ingredients:

Lobster shells from 3 lobsters

Meat from 1 lobster (or 1-2 cups) chopped into small pieces

1 pound shelled shrimp (raw or cooked)

1 pound little neck clams (with or without shell)

1 pound mussels (with or without shell)

2 cups of corn kernels

2 tbsp of Brandy (I used 1920 Portuguese Brandy)

2 cups fish or chicken stock

1 small onion (finely minced)

1 celery stalk (finely minced)

4 tbsp butter

1 tsp paprika

1 tsp pepper

2 tsp salt

1/2 cup of  flour

2 cups of light cream

1/2 gallon of whole or light milk

Lemon wedges for garnish

Parsley for garnish


DSC05816Preparation:

In a medium pan, place the lobster shells in the stock and milk and cook on medium heat for about 10 minutes. This will infuse the stock with the lobster. Strain the broth, remove shells and discard shells.

lobstercornchowder

In a large stock pot, saute the onion, and celery in the butter until translucent. Add the flour, and stir until the flour has melted into the butter. Add the seafood, corn, milk broth and remaining ingredients except the cream, brandy, and lobster pieces and stir on low heat. Cook on low for a few minutes.

Cover and continue cooking for 15 minutes on low  heat or until thickened. Add the cream, lobster pieces and brandy. Simmer on low heat for another 10 minutes stirring gently. Taste and add more salt and pepper if desired. Note: If you want a thicker chowder milk a little flour with milk in a small bowl and add to the chowder. Cook for a few minutes until thicker.

Serve garnished with lemon wedges and parsley.

DSC05819Serve with an additional  shot of 1920 brandy. Drizzle it into the chowder for a kick!

portugal-world-cup-celebrate


Portuguese Owned, Morais Vineyards of Bealeton, Virginia, Hosts Portuguese Food and Wine Pairing

The Morais family has been making wine for over a hundred years.  In Portugal, the heritage of wine making has been passed down from generation to generation.  Joining this age old family tradition with Virginia’s rich history of winemaking, the Morais family has built a legacy which has become an area landmark. The Winery opened its doors to the public in 2011. Since then they have expanded vineyards, wine production and venue space to accommodate the increase of visitors every year. The winery features many varieties of award winning wines which you can sample in the beautiful tasting room, they offer tours and host many weddings and special celebrations throughout the year!

Watch this video of the beautiful and spectacular property!

This summer, they will be hosting a Portuguese food and wine pairing on; Sun, June 25, 2017 – 1:00 PM – 3:00 PM

moraiswinery2 I’m so honored that they are featuring my Taste Portugal 101 easy Portuguese recipes cookbook at the event!

Morais vineyards - Taste PortugalWhat goes great with Portuguese wine? Portuguese FOOD!


“We are excited to host a Portuguese food and wine pairing at the winery. Portuguese dishes will be provided by the delicious tastes of Columbus Grill and will be paired with Morais Portuguse wine. 5 different tastings from exquisite Bacalhao (cod fish) to a sweet delicous Portuguese pastry. You will learn a little more of the Morais background culture and get a little taste of Portugal! Meet the master of our wines, Vitor, the wine maker and also get to learn more about Portuguese dishes from Columbus Grill.”

Food, wine and culture? Doesn’t get any better than that!

Purchase Tickets Here. PRIZES!! Purchase tickets to our Portuguese food & wine pairing and be entered to win Maria Dias & Lisa Dias “Taste Portugal | 101 Easy Portuguese Recipes” cook book! Lots of delicious authentic Portuguese recipes to learn and master at home! All the dishes in the tasting are in the book. So if you love it here, you can make it at home too! “https://moraisvineyards.com/

Visit their homepage or follow and like them on Facebook!

Morais Vineyards & Winery

11409 Marsh Road

Bealeton, VA 22712

(540) 326-6336


DIY Hanging Fairy Garden

enchanted forest baby shower fairy gardenNow that planing season is here, this is a fun project for you or to make with your kids. It make the imagination go wild and brings out your creativity. I used a hanging planter, but you can use any pot you have on hand.

I found most of the supplies at Christmas Tree Shops, Michael’s Craft store and Hobby lobby and use some succulent plants from my garden. Enjoy it and Happy Summer! 🙂

Fairy Garden:

1 hanging planter or any of your choice

potting soil

small rocks

blue rocks or gems for water

multi color rocks

1 small package of moss

Fairy house

Fairies

bridge

live succulents

extra pot liner

plastic bags

pop sickle sticks

cardboard

Assembly:

Fill the pot half up with some filler such as plastic bags or extra pot liner. Cut a piece of cardboard to fit the inside of pot. Poke holes in the cardboard for water to seep through and place into pot. Spread dirt evenly on the cardboard. Place stones around the edges followed by the pieces of moss. Add succulents as desired.

DSC06439Begin assembling the garden by adding the fairy house first. Then make the brook by placing pop sickle sticks as base of the water so the stones don’t sink into the dirt.   DSC06444 DSC06445 Make a path from the house by making a walkway with more sticks followed by the small rocks. Add more succulents and arrange fairies.

DSC06447 DSC06448  DSC06450 DSC06451   It’s tea time in the garden.

DSC06454 DSC06455 DSC06453

Sloppy Ronaldo Sliders

Sloppy MariasDelicious sliders with a kick of ground chourico Portuguese sausage. I used to call them Sloppy Maria’s but I changed the name to Sloppy Ronaldo Sliders in honor of Cristiano because last year I made them for the World Cup and Portugal won! Maybe my sliders gave Ronaldo good luck!

If you prefer you can leave out the chourico if your family prefers the original sloppy Joe taste. I always make this big batch and I store half of the recipe for the next day, or freeze in small containers for 1-2 person servings. It’s perfect for a busy night when you don’t have time to make dinner or to give as an after school snack.

I took these pictures on live TV after the win! 


portugal world cup live

portugal world cup

Ingredients:

2 pounds ground beef or turkey

1 pound chourico or linguica sausage (skin removed and ground in processor) (this is optional to your taste)

2 medium onions (finely minced)

4 cloves garlic (finely minced)

2 cups of crushed tomatoes

2 teaspoons salt

1/4 teaspoon pepper

2 cups ketchup (depending how sweet you want the Joe’s

1 tablespoon tomato paste to thicken if necessary

1 tablespoon piri piri hot sauce more (optional to your taste)

hamburger buns

portugal national football team

Preparation:

Brown the ground beef in a large heave saucepan or skillet. Drain the fat and add the onions and garlic to pan. Cook the onions and garlic for a few minutes until translucent along with the beef.

Add the chourico and cook for a few minutes. Add the rest of the ingredients and let simmer for about 10 minutes stirring often. Taste and add more ketchup or brown sugar if you want more sweetness. Add the hot sauce if desired.

Let cook for another 10 minutes on low until the sauce and meats are thick and rich. Add the tomato paste to thicken sauce if needed.

Serve on warm buns.

After game celebration!

portugal world cup celebrate