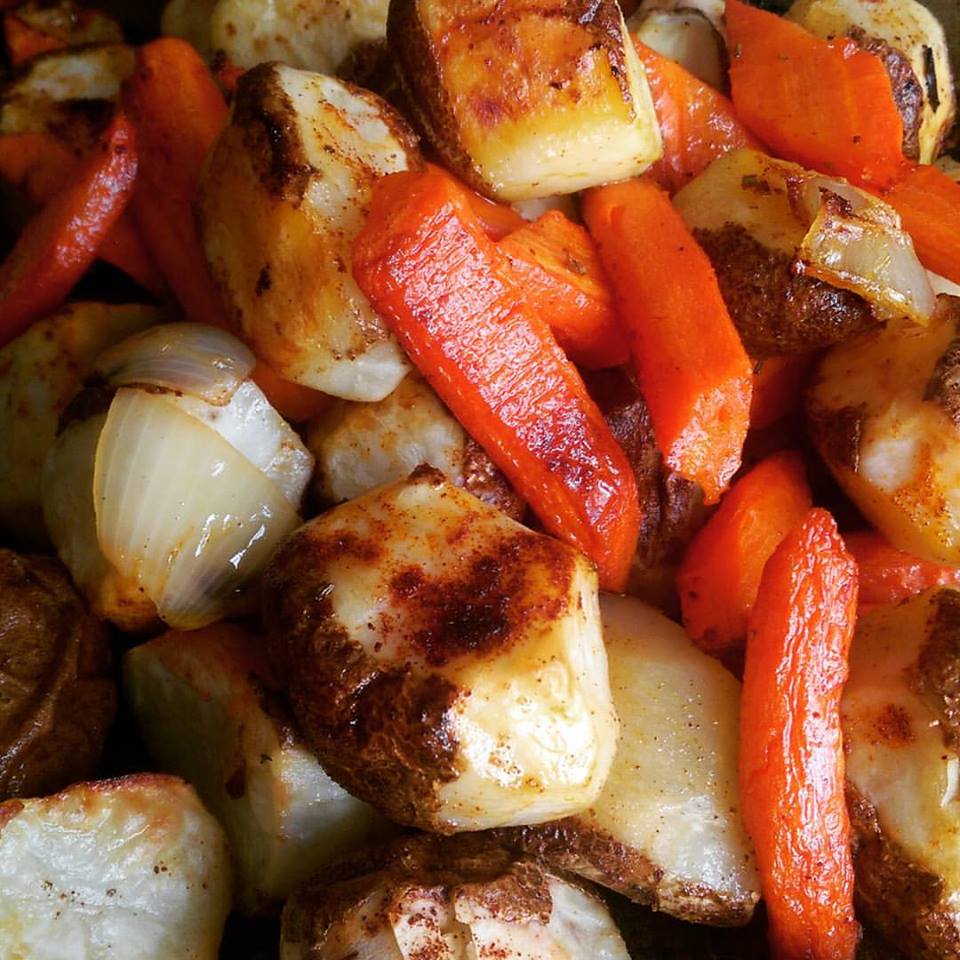
Portuguese Roast potatoes are a hit at every party! They’re a perfect side dish for your roast beef, roast chicken, pork and delicious with your Holiday Baked Ham.
Ingredients:
2 pounds any potatoes ( washed, peeled or slightly peeled)
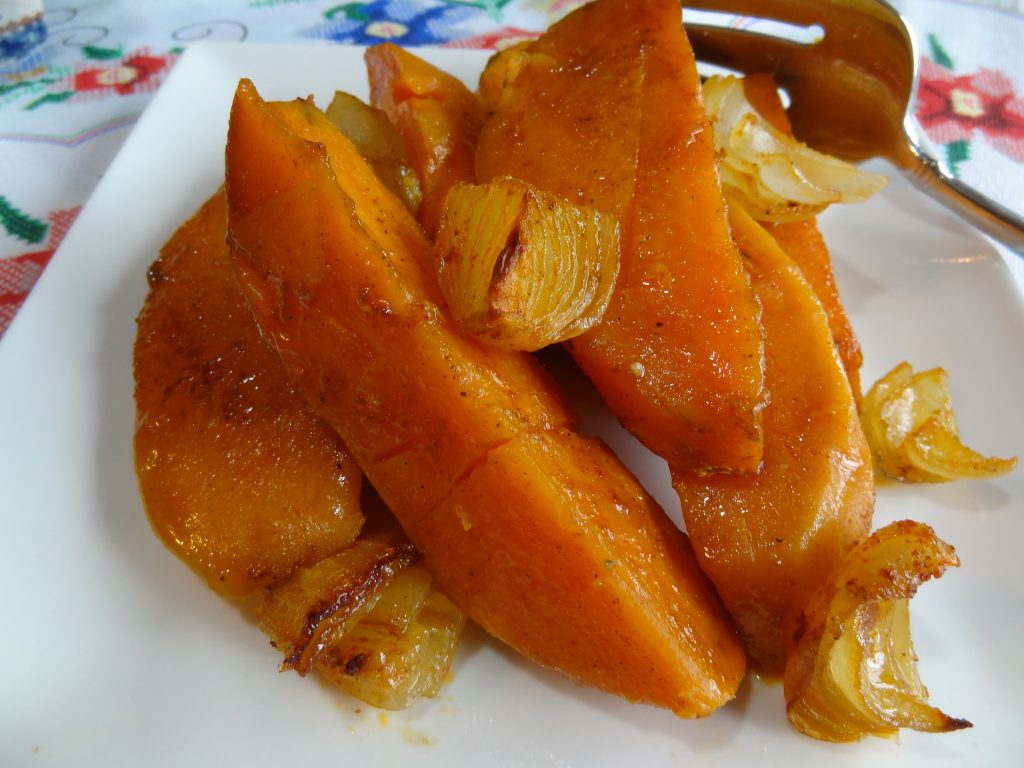
If making sweet potatoes (peel and cut into quarters)
2 large carrots (peeled and quartered) optional
1 small onion (chopped)
1 teaspoon salt
1 teaspoon garlic powder
1/2 teaspoon pepper
1 teaspoon Paprika
1/4 stick of melted margarine or butter
1/4 cup of olive oil
Instructions:
Place all ingredients into a large mixing bowl. Toss well to coat.
Place seasoned potatoes into a medium olive oil greased baking pan.
Cook at 400 degrees for about 1 hour or until fork tender. Toss potatoes every 15 minutes to achieve a crispy texture. Do not use a fork to turn over potatoes, use a spatula. Enjoy!
You can also cook the potatoes in small cubes, but cook for only 30-40 minutes.
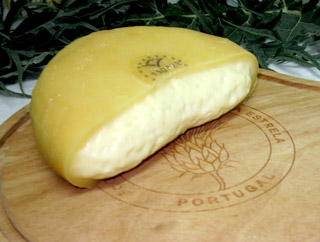
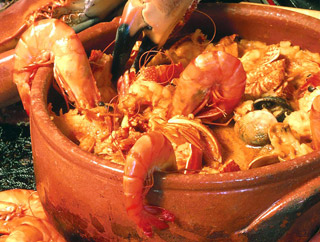
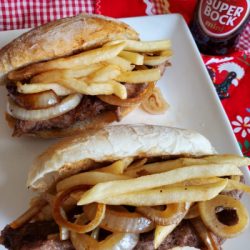
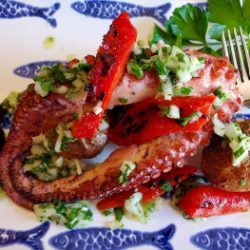
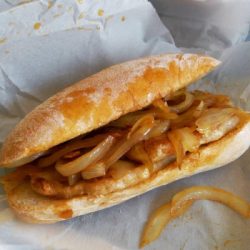
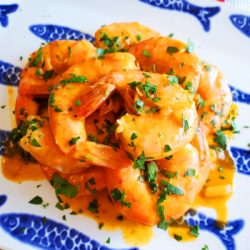
Click on the links below each photo to find the location in Portugal from where the dish is famous! If you can’t read Portuguese just paste the pages URL’s onto Google Translate.
My favorite is “Seafood Rice” and “Queijo Serra da Estrela” What’s your favorite?
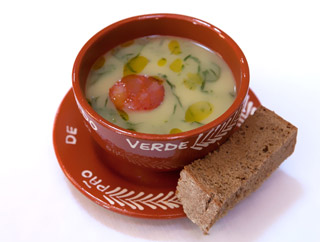
Appetizer Category: Caldo Verde – (Collard Green With Potato Puree)
I make lots of Corn Muffins since they’re easy to make, but you’ll love these because they’re light and fluffy and they’re even better than Bakery!
This is a great recipe to make as a side dish, on cold winter days when you make Chilli or Soup. Enjoy!
Ingredients:
2 cups flour
2 cups corn muffin mix
(If you don’t have the mix, use corn meal but increase the baking powder to 2 teaspoons)
2 eggs
3/4 stick margarine (soft)
2 cups milk
1 cup sugar
1 tsp salt
1 tsp baking powder
1 small 6-8 oz container vanilla yogurt or 1/2 cup sour cream
Preparation:
In a large mixing bowl beat the eggs, sugar and margarine until creamy. Add the remaining ingredients and beat until the batter has no lumps.
Coat 2 large muffin pans (6 muffins each) or 2 small (12 muffins each) with cooking spray or with margarine.
Fill to 3/4 full. Cook at 350 f. for about 20 minutes or until a toothpick comes out clean.
Serve while hot, or split them in half, butter the sides and grill until golden brown. You can freeze them in freezer bags and enjoy them all month long! Enjoy!
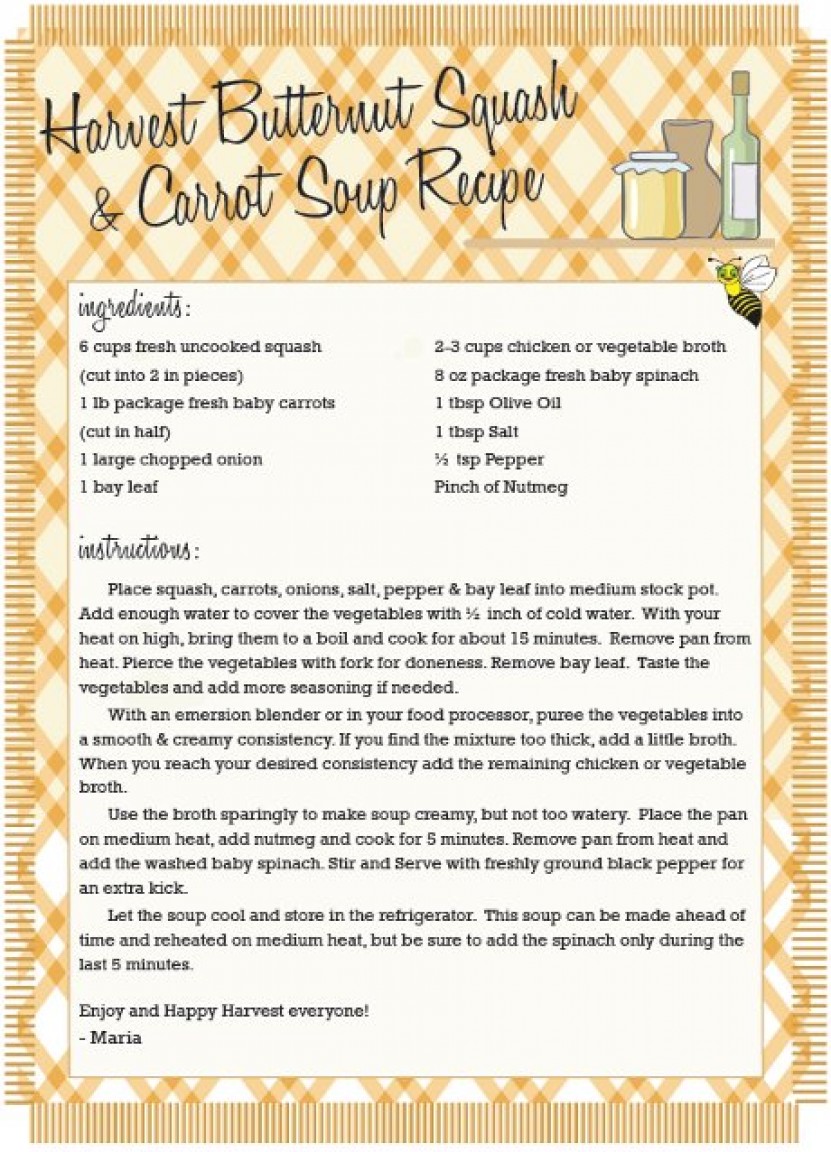
Harvest Butternut Squash & Carrot Soup – Western Mass Women Magazine
by Maria Dias, Contributing Writer
I love the beauty of the fall harvest season in Western Mass. Soon, I’ll be following my family’s tradition by making our annual trip to the local farms in the Hadley area where I buy my Potatoes and root vegetables that I use all winter long.
Did you know that you can store potatoes and butternut squash to last through the winter? Just place them into a brown paper bag or cardboard box and store in a cool basement, or in your garage. (Be sure the temp doesn’t reach freezing.) My favorite winter vegetable is butternut squash because it’s so versatile and it stores so well.
I always have some on hand for Thanksgiving to make this easy and delicious butternut squash soup.
I’m sharing the recipe with you today because I know you’ll love it and it will become your fall tradition like mine.
There are many reasons to add butternut squash to your daily diet.
Butternut Squash Low in calories: One cup of raw butternut squash only has 63 calories. Dietary Fiber: There are 3 gr. of dietary fiber in every serving. Vitamin A: One serving has 298 %of your daily recommended value. Vitamin C: One cup serving has 50 % of your daily recommended value. Omega-3 fatty acids: Fights high cholesterol and high blood pressure Minerals: One serving has 14 % of your daily recommended value of manganese, 12 % of magnesium and 14 % of potassium.
Cook book author Ana Patuleia Ortins begins her cook book’s website; Portuguese Homestyle Cooking with a welcoming phrase; “Welcome to the flavors of Portuguese Homestyle Cooking. Traditional Portuguese recipes combine a blend of flavors and techniques of many other cultures dating back centuries. My book, Portuguese Homestyle Cooking, gives an overview of centuries old cultural influences on Portugal’s cuisine.”
When I asked the Author how she was influenced and why she decided to write a Portuguese cook book she responded;
“Like most Portuguese girls, growing up in America, I grew up with a vast influence of Portuguese culture from my family and other Portuguese friends. I had to learn to sew, crochet, cook and clean, etc, etc, etc. Eventually I became a medical secretary, and while raising a family decided to follow my passion and went to culinary school.
The biggest influence for the cook book was my father’s passion for our traditional recipes. I realized when my father passed away that I needed to record these favorites for my children or the real versions, as we knew them would be lost. After the urging of one of my brothers, what was to be a book for my children, became the idea to make a community book which then went on to be what it is today.”
Her original book was first published in 2008, but a new edition with a beautiful new cover was just released in 2011. The book has received great Reviews including the following in the Boston Globe.
Portuguese Homestyle Cooking by Ana Patuleia Ortins
“Startlingly delicious…superb…Ortin’s meticulously assembled collection should be widely welcomed…liberally interspersed with words of wisdom from her ‘Pai’ and classic tidbits of folklore…extremely thorough, addressing not only mainland cooking but Portuguese-American variations and the distinctive styles of the Azores islands…Though often built from just a few ingredients, Ortin’s recipes usually yield spectacular results…. Longer more complicated recipes are just as rewarding.”
–The Boston Globe
Ana has many favorite Portuguese dishes. “I love Pork with Clams, made in the real Alentejo style with massa de pimentão (red pepper paste). I also love Bacalhau com Natas, – but I could go on forever.” She says.
Although Ana hasn’t been to Portugal in a few years, she longs to take a trip back to visit to her homeland along her family and her husband who is also Portuguese and from Graciosa, in the Azores.
You may contact the Author on her website with any questions about her recipes. Free Cook Book Giveaway! … Sign up for Ana’s newsletter this month and just mention ‘Tia Maria’s Blog”. She will give away one cook book to my fans! * (Contest ended Sept 2011)
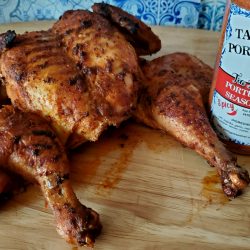
Thank you, Ana for the great cook book and for the following classic Portuguese barbecue chicken that we all love. This recipe is perfect for “tailgating” and to make “party wings”.
Frango Piri Piri – From Portuguese Homestyle Cooking (2008)
Variations of this dish abound, from the simple basting of hot sauce while grilling to the addition of other seasoning including whiskey and a mayonnaide type coating. Mine is a simple one that I have made for years. I hope you like it. You can use small fryer chickens but I find cornish hens are really tasty for this dish. the sweet paprika is a counterpoint to the hot chili. With a lighter hand with the spices, use the seasonings to flavor shrimp and the grill for Camarao Pir Piri.
Serves 2-4
1 tablespoon coarse kosher or sea salt
4 cloves garlic, halved
1 tablespoon sweet paprika
2 tablespoons finely chopped cilantro or parsley
1/4 teaspoon ground black or white pepper
1/4 cup red wine vinegar
1/2 to 3/4 cup olive oil as needed
1/4 cup hot chili sauce (malequeta moida) or 1/2 cup bottled hot sauce
1. Toss the salt into a mortar and using the pestle crush the garlic into the salt forming a paste. Grind in the paprika, follow by the cilantro or parsley and the ground pepper. Mix in the wine vinegar. Drizzle in enough olive oil to make a mushy spreadable paste. Stir in the hot sauce of your choice.
2. Cut the cornish hens from the stem to stern, down the belly to open them up. Turn them over and cut along the back bone so that you cut each chicken in half. You also can just leave them butterflied. Place them in a non-reactive pan. Coat them with the garlic seasoning sauce and turn to evenly season them. Cover the dish and chill over night turning occasionally and at least once before retiring for the night.
3. Bring them to room temperature about 1/2 hour before cooking. Drain and reserve the marinade, you will need it for basting.
4. Place skin side up on the hot grill, basting and grilling for about 15 minutes. Turn the birds over, skin side down, and continue to grill for another 15 minutes. Stop basting about 2 minutes before the birds are done so that any raw marinade applied will have time to cook. If using a thermometer, the internal Temperature of the thick part of the thigh should be 165 degrees F. In any event, when cooking chicken, the juices should be clear. Serve with a bottle of hot sauce on the side for extra dousing. Serve with Sauteed Broccoli Rabe or turnip greens and fried potatoes.
When one of my friends Miguel, who loves to cook Portuguese food, sent me his recipe for Pao Caseiro.
This is his photo of his bread and the wooden spoon he uses to mix the dough using only one mixing bowl. “I never get my hands dirty” he said.
“I grew up watching my mother and her friends cooking, especially deserts. Fortunately she always involved me and my brother in the cooking … and the favorite task was “rapar os tachos, especially the dessert ones! Before moving to the United States in December 2001, I asked my mother to write down my favorite recipe from her. Once in the states I really started missing the desserts and the cooking.Taking advantage of my mother in laws visits to the US, I asked her to teach me how to make bread, plus trouxas de ovos, and over time I started to adapt it and learned from my mistakes.
The secret “orange” ingredient in this Pao Caseiro recipe, was discovered watching a you tube video about pao caseiro da Vidigueira, Alentejo. And a curious fact … my mother was born in evora, so I do love pao Alentejano and grow up with acordas, sopa de cacao e soupa de ovo com pao.”
I made the bread last week and it was delicious of course. I ate far to much of it. So now, I’m happy to share with you.
The next day, I told him that I loved the recipe and that I couldn’t stop eating it! Miguel said he loves it too, especially toasted with butter for breakfast.
Miguel was born in Leiria Portugal and lives in NY with his family. He works AICEP Portugal Global – Portuguese National Tourist Office. A few years ago Meridith Vieira of “The Today Show” had segment on the show which documented her visit to her family’s ancestral home in the Azores. Miquel was her quide. Meredith-vieira-azores .
The video is very interesting and we can all relate to it. This is Meredith’s last week on “The Today Show” and we wish her the best. Merediths last “Today Show”. Miguel is also in this video sitting with Meredith at the Vieira Cafe.
Enjoy the recipe…and let me know how it turns out:).. Tia Maria
P.S. Thanks to Miguel for a great bread recipe!
Here’s a photo of Miquel enjoying Pasteis de Nata in Belem, Portugal.
Pao Caseiro
Ingredients:
7 cups white flour
2 tsp spoons sea salt
2 tsp (pkg) granulated active dry yeast
1 tsp regular sugar
½ cup orange juice
½ cup milk
2 1/2 cups of hot water
Instructions:
Dissolve the sea salt in the water.
Put the flour in a large bowl and add the yeast, sugar, milk, orange juice and the salted water.
Mix all the ingredients with a wooden spoon until you form soft dough. You can use your mixer with a dough hook, or use your bread machine on dough cycle. If dough is still extremely soft add more flour.
Cover the bowl with a warm cloth and let it rise for at least one hour or until it doubles in size.
Flour your hands; place the dough on a floured surface. Knead the dough for a few minutes and separate into 2 parts
Pre heat oven to 400 degrees.
Form the dough into round loaves and place on a lightly floured sheet pan. Let dough rest for 15 minutes.
Cook for about 30 to 40 minutes or until a dark golden crust forms.
Take bread out of the oven and tap with your knuckles. If you hear a hollow sound, the bread is cooked.
Remove bread when fully cooked and serve warm with butter.
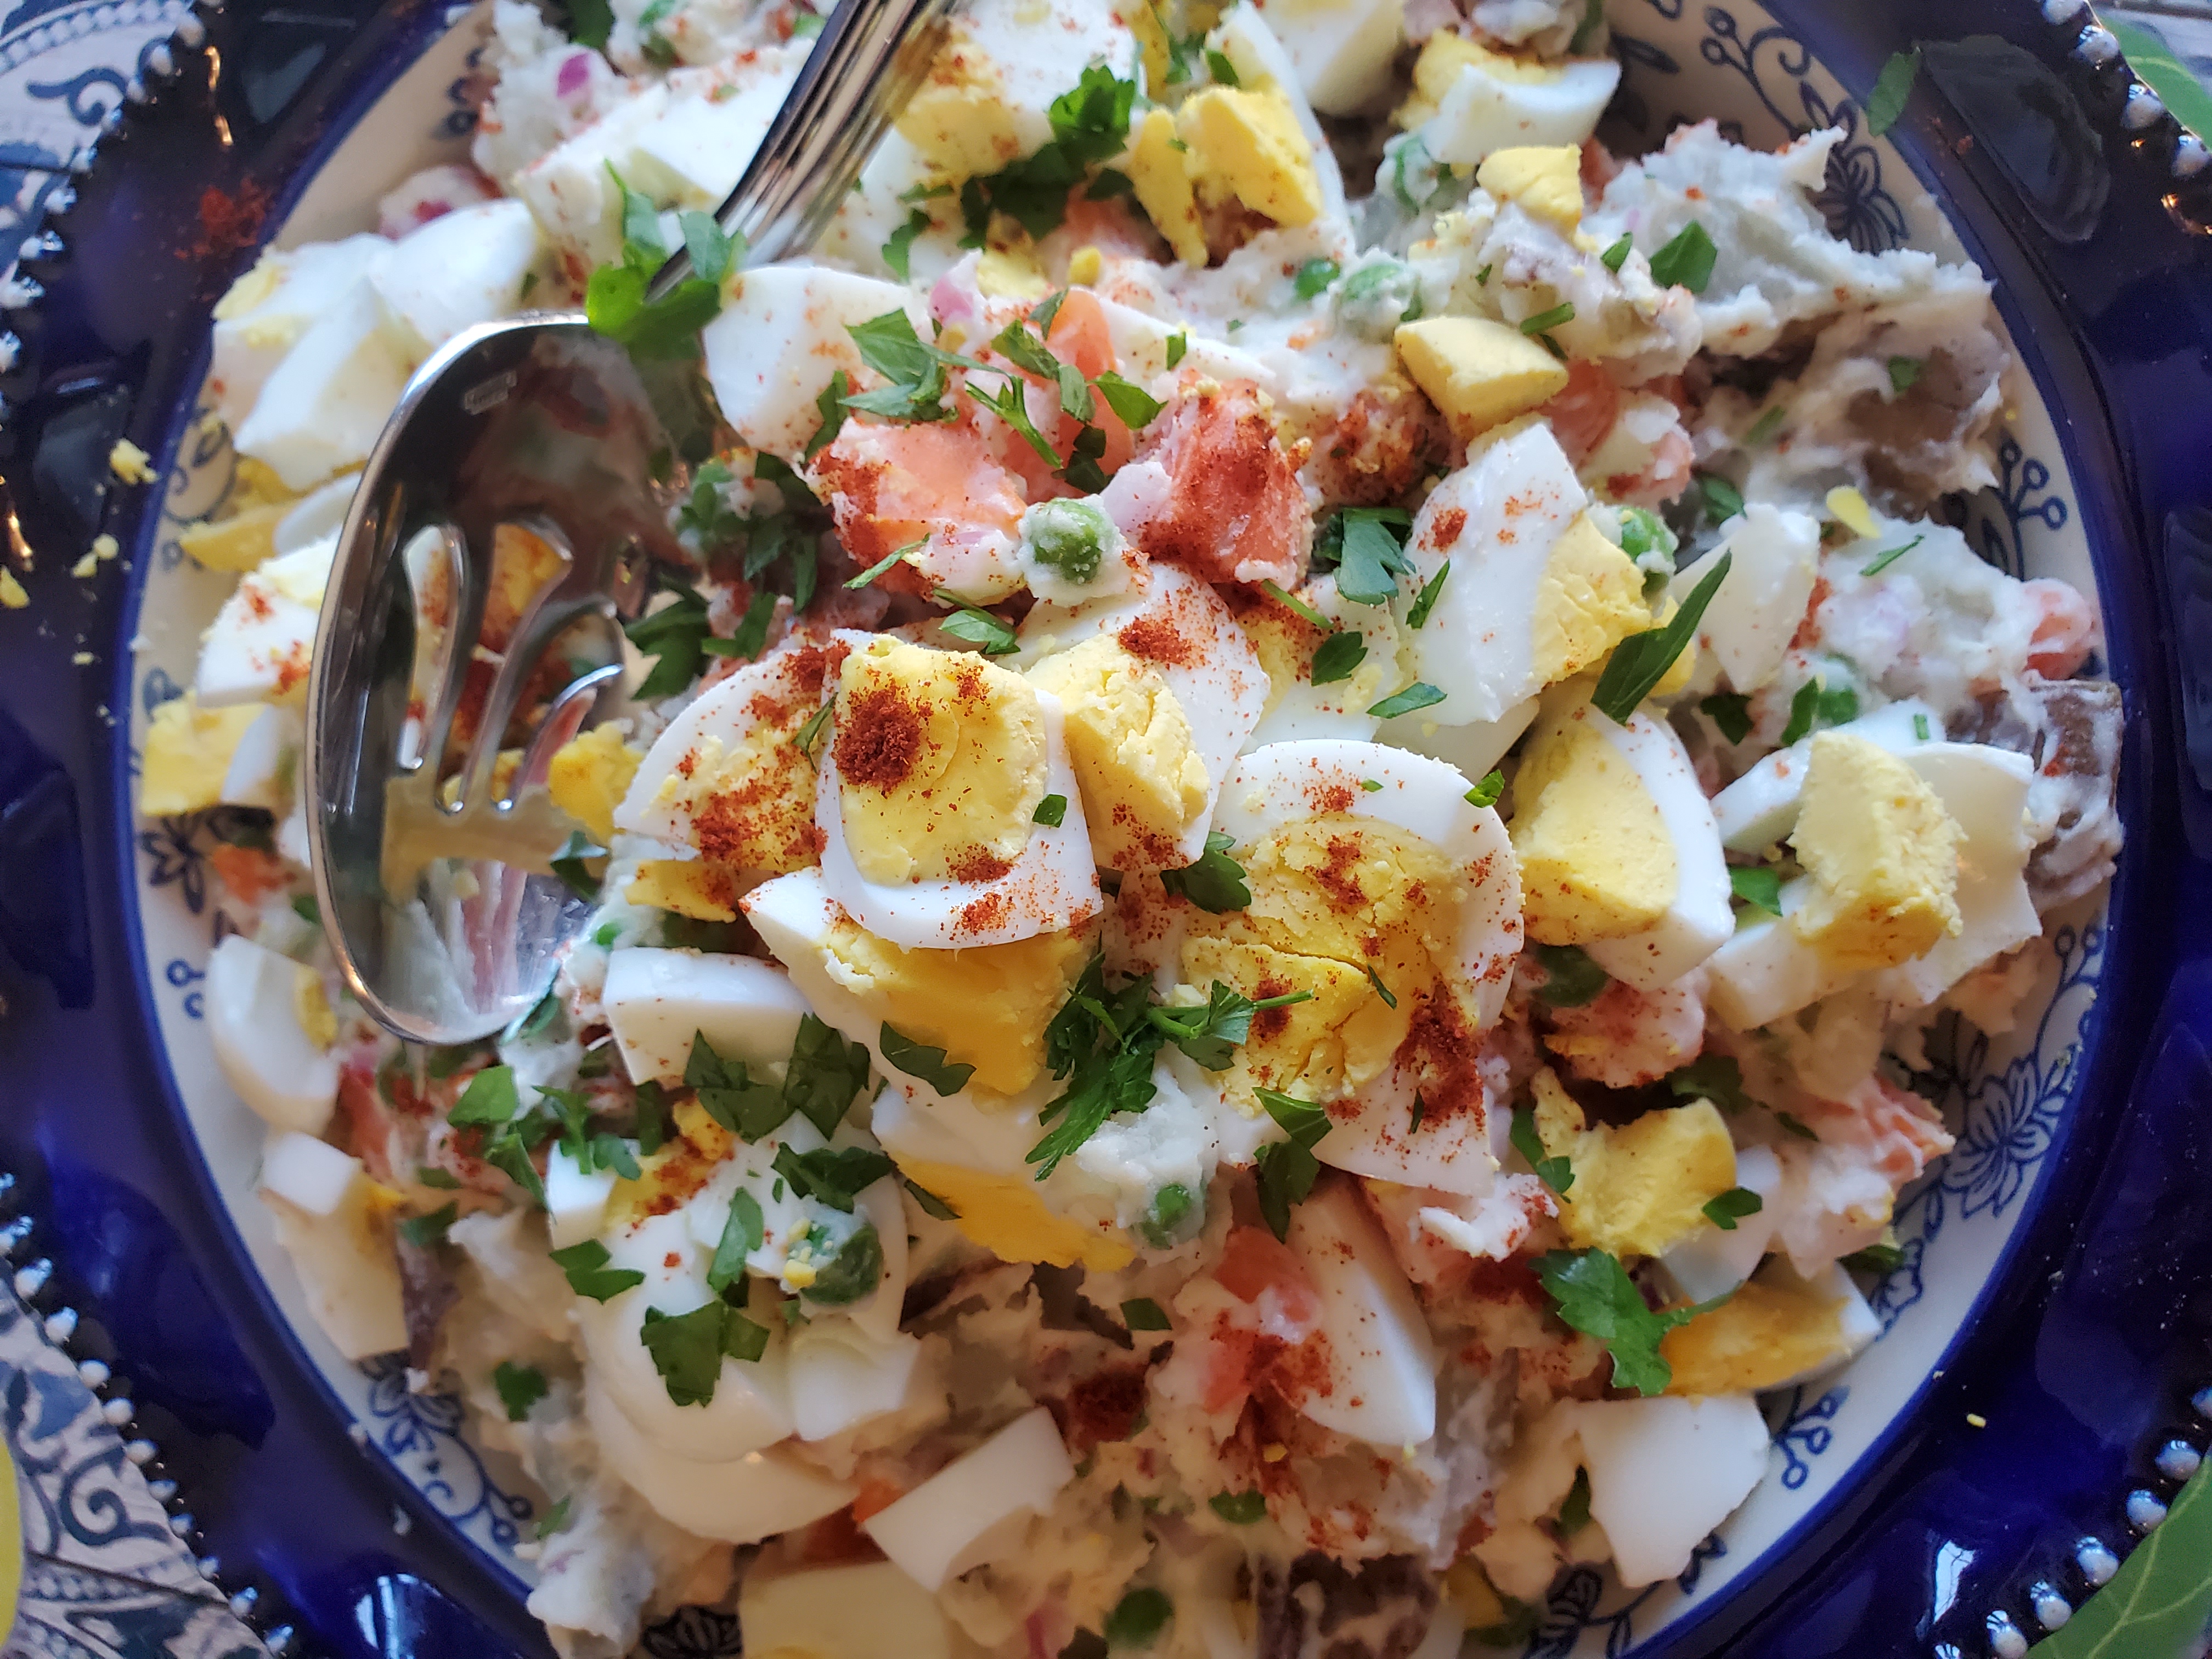
Some recipes seem to remain family favorites through time like this potato salad that I make all summer long and even in the winter and it never gets old. This is a must have recipe for your next cookout if you’re tired of the same old potato salads.
There’s an old Portuguese saying; “Godchildren take after their Godparents”. Through the years, I have come to believe that this may be true.
I had my first bite of potato salad when I was about 8 years old. The salad was made by my Aunt and Godmother named “Alzira”. She was a great cook who had been the personal chef to a Portuguese General in Lisbon, Portugal for many years before she moved to America.
I didn’t like the salad because it had peas, carrots & green beans, and something called “mayonnaise” which I had never heard of before in my life! She called it “Russian Salad”, another word I’d never heard before.
Through my young age, my mother often sent me to Aunt Alzira’s house to help her prepare the special dishes for family celebrations and holidays. Although I tried, my help was never good enough, so most of the time I’d just sit and watch her cook.
I always had a slight suspicion that she knew very well that I was too young to help her in the kitchen, but she wanted me there beside her so I would learn how to cook. I was confused by her temperamental chef’s outbursts when I didn’t stir the batter enough, or fry the “Rissois de Camarao” properly.
What was the big deal anyway? I didn’t understand why she was so meticulous and her strive for perfection in all the recipes.
Today, I may not be as temperamental and as meticulous as my Godmother when it comes to cooking but I understand that cooking takes time and patience and I find myself striving for that same perfection in my own recipes.
I have a few of my her treasured kitchen utensils. Her turkey roasting pan is used every Thanksgiving and guess what, the turkey comes out perfect every time.
So here’s to my Godmother who inspired me to become a pretty good cook!
Portuguese Style Potato Salad
Instructions:
2 1/2 lbs potatoes (any you prefer)
1/2 small onion finely chopped
1 cup frozen petite peas
1 cup chopped carrots about 1/4 inch cubes
1 cup frozen cut green beans (optional)
1 tbsp minced parsley
1 tbsp salt
1/2 tsp pepper
1/2 tsp garlic powder
2 tbsp Italian salad dressing
1/2 – 1 cup mayonnaise
1/2 tsp paprika
6 hard boiled eggs (optional)
Instructions:
Wash, peel and cut the potatoes into 1 inch cubes. (You may also leave skins on but scrub them well before cooking)
Place the potatoes into salted water and let them come to a boil. After about 5 minutes add the carrots, and green beans.
Let them come to another boil and cook for about 5 more minutes. Taste one piece of potato to be sure its almost done.
Add peas and onions during the last 2 minutes of cooking. Drain and let the mixture cool.
When cool, add the remaining ingredients except eggs. Toss the ingredients or fold with plastic spatula. (Stir gently not to break the potatoes apart)
(Chop eggs into fourths and add to mixture if desired)
Place into serving dish and garnish with parsley and a sprinkle of paprika.
The salad can be served at room temperature or chilled the next day. Take my advise and double up the recipe because you’ll wish you’d made more the next day!
Did you know that there’s an old Portuguese saying?
“There are 365 recipes for Bacalhau – one for each day of the year.”
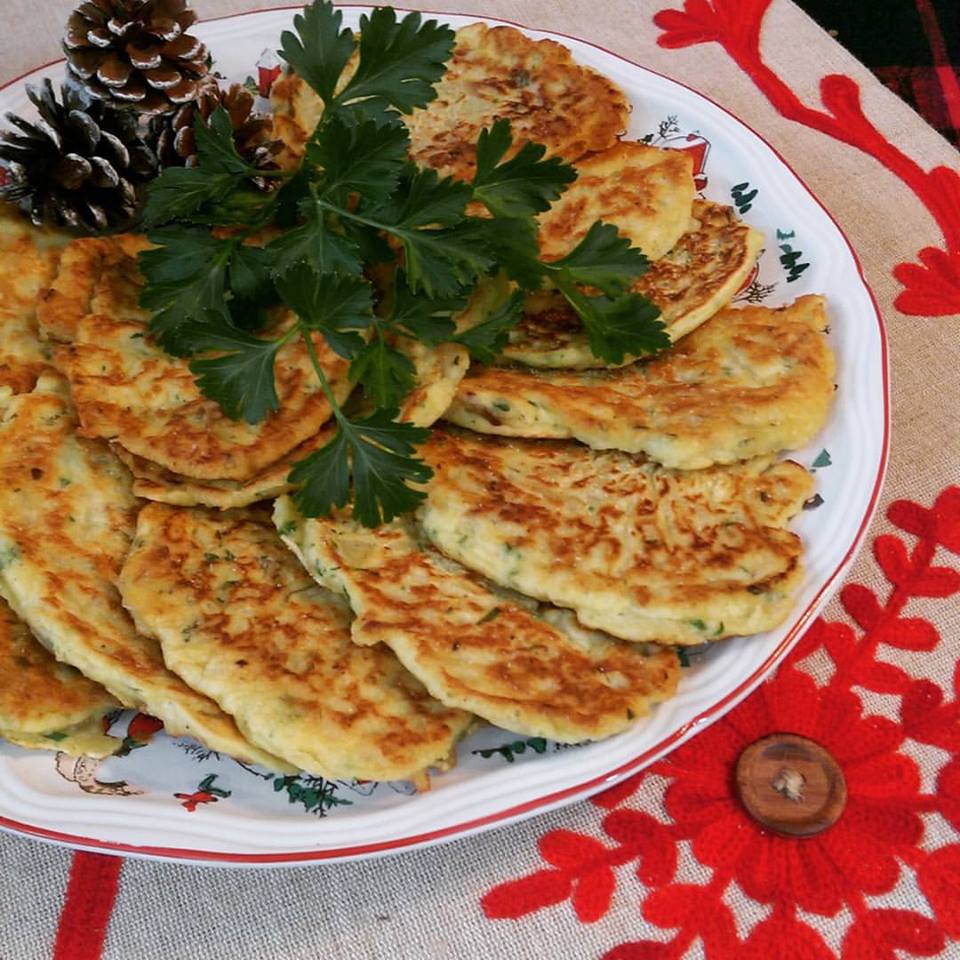
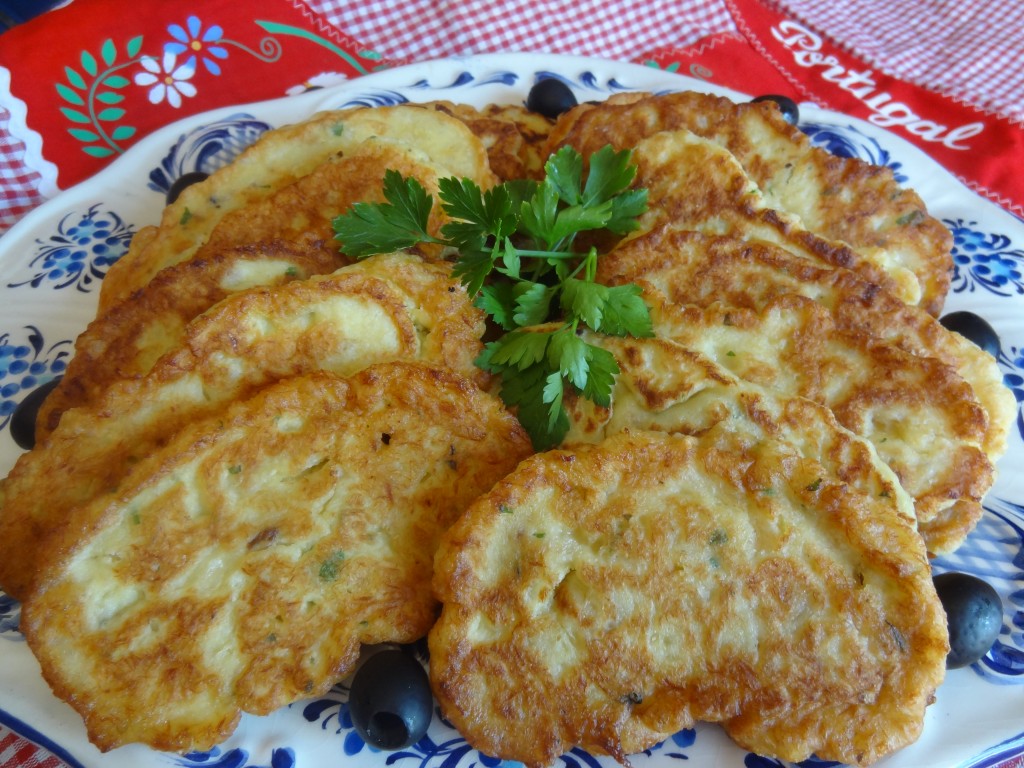
Try this easy and delicious recipe for Pataniscas (Salt Cod Fish Fritters). They are similar to clam fritters made in New England but these are pan fried into a flat shape.
This recipe brings me back sweet memories of my dear mother who taught me how to make them when I was a little girl. We would make these on Sunday mornings for family trips to the beach or during family trips with a long driving distance. We’d stop half way into the trip at the roadside rest stops to enjoy these along with good Portuguese cheese, presunto, bread, and Portuguese wine.
If you love Bacalhau you’ll love these. They’re so simple yet so good, the intense flavor of the Bacalhau, combined with the sweetness of the onions and parsley in the batter gives this classic a taste, which you’ll crave again and again.
Serve them as an appetizer, or as a main dish withmy rice recipe. Oh by the way, make extra because they taste even better the next day! Enjoy!
Here’s our youtube videos. Stop by and subscribe for the latest videos! Our latest video in Portuguese for those of you that requested it.
enjoy the recipe and happy Portuguese cooking!
Ingredients:
1 lb boneless Salt Cod (Bacalhau)
4 eggs
1 1/2 cups flour
1/2 small minced onion (or Scallions)
2 teaspoons fresh minced parsley (or 1 tsp dry)
1/4 tsp black pepper
1/2 tsp garlic powder
1 tablespoon olive oil
salt to taste
1 cup of cold water from poaching the bacalhau
1/2 teaspoon baking soda optional
1/4 cup Olive oil for frying
1/4 cup Vegetable oilfor frying
Instructions:
Hydrate the Cod in water for 1-2 days in cold water in refrigerator changing the water 2 times a day.
Cook the Salt Cod in boiling water for about 5-8 minutes. Let it cool, and then shred it into flakes. Reserve 1 cup of water and let it cool.
In a bowl, mix onion, parsley, bacalhau, flour, salt, pepper, garlic powder, and the olive oil, and mix well. Beat the eggs with the cold water and add to the bacalhau mix. Stir well to incorporate.
Add more salt and pepper is desired. Note: I like a pancake like texture and appearance so I make a thinner batter. If you like a thicker style flat cake use less water.
In a heavy skillet, add half of both oils to reach 1/4 inch in pan and heat to medium.
Note: (You may use all veg oil, or corn oil if you wish).
Test the oil temp by placing a tiny amount of batter in oil. If batter sizzles it’s ready to fry in. (If you see the oil begin to smoke, lower the heat.)
Spoon silver dollar size pancake batter into pan. Pat them down to cook flat into oval shapes to about 1/4 inch. Cook until golden brown on each side.
Place them onto paper towels or use brown paper lunch bags to absorb any grease. Serve hot or cold….Top with squeezed lemon if desired. Make a double batch because they’re better the next day.
It’s zucchini harvest season. I’ve made zucchini breads, fried zucchini and all kinds of casseroles but his following recipe is my family’s favorite zucchini recipe and I know it will be yours too.
It’s great for those of you on low carb diets because it uses no pasta!
You can substitute the zucchini for eggplant in the fall & winter and make it all year long.
Ingredients:
6 extra large zucchini
1 Jar of your favorite pasta sauce or a can of chopped tomatoes with Italian seasonings
1 cup low fat cottage cheese, or low fat ricotta cheese
1/2 cup flour
1 cup Italian bread crumbs
Chopped fresh basil – 1/4 cup
1 tsp salt
1 tsp pepper
1 tsp garlic powder
8 oz of mozzarella (or any kind you prefer)
8 oz Parmesan or Pecorino cheese for shredding
Instructions:
Preheat oven to 400.
Slice the zucchini into round 1/2 inch slices, place them in a large bowl and coat them with salt, pepper, and the garlic powder.
Let them sit for about 5 min., then strain any water from the bowl. Mix bread crumbs with flour and lightly coat each zucchini slice.
You can just toss the flour mixture into the bowl and toss them, or use a plastic bag.
Layer the zucchini slices on a well greases cookie sheet and cook them for about 10 – 15 min or until cooked.
Gently check one slice by lifting one with a spatula. I like a golden coating on the bottom, but you can cook them to your taste.
If you prefer a crispier zucchini you can also fry them in hot oil. I prefer to bake them to save calories.
Coat the bottom of a lasagna pan with a small amount of pasta sauce, then start layering like a lasagna: zucchini, basil, cheeses, sauce, until you end up with cheese and sauce on top.
Shred the Parmesan cheese on top, cover with foil and bake for about 25 minutes.
Let it rest for about 10 minutes before serving. It’s just like lasagna, and even better the next day.
You can serve it with a salad, or a side of pasta if you prefer.
Enjoy!
Tia Maria
Find a Recipe
FIND RECIPES HERE
"Join me! Lets' s share recipes, learn how to cook traditional Portuguese dishes, or chat about our cuisine, culture and traditions. I want to share these recipes to preserve our Portuguese passion for great food and pass them along to the next generation. So come along, Let's cook Portuguese!"
Support Tia Maria's Blog page to promote our Portuguese heritage. SCAN QR CODE:
ORDER SET OF 1 REGULAR AND 1 SPICY JAR - FREE SHIPPING IN USA
BUY NOW ON PAYAPAL OR SCAN QR CODE BELOW
TASTE PORTUGAL COOKS AVAILABLE ON AMAZON ALL AROUND THE WORLD: FREE Prime shipping in USA
COOK BOOKS ARE ALSO AVAILABLE ON AMAZON.CA (CANADA)
ORDER SET OF 2 TASTE PORTUGAL SEASONINGS ON PAYPAL OR SCAN QR CODE: FREE SHIPPING USA
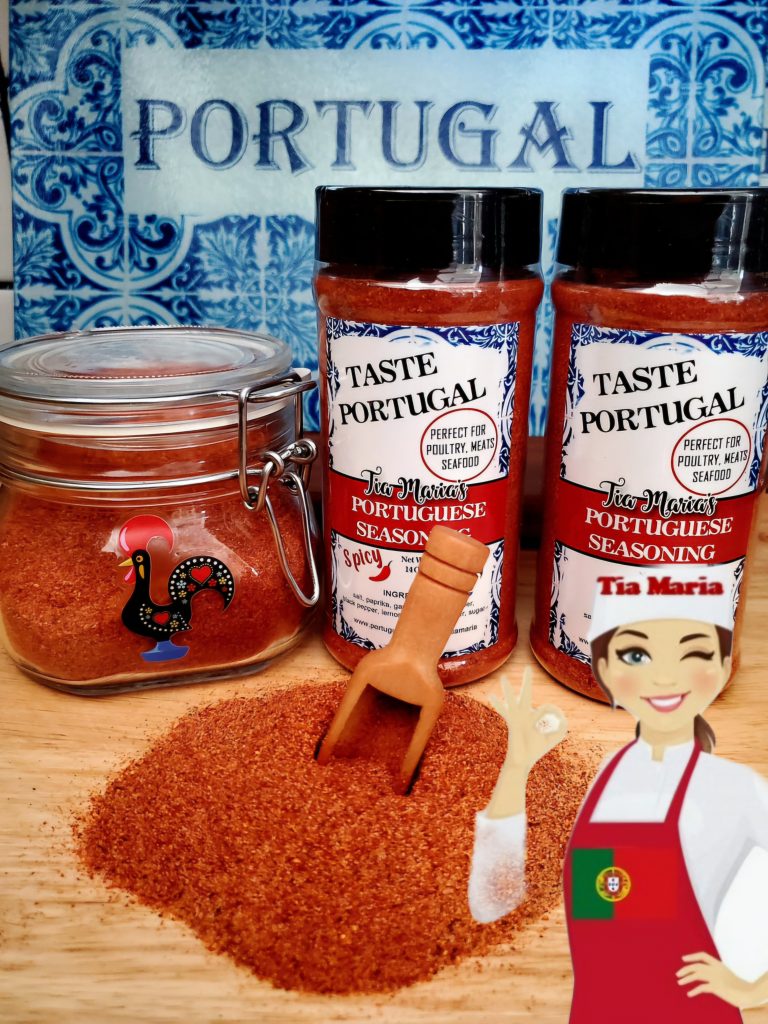
COOKING PORTUGUESE IS EASY WITH TIA MARIA’S TASTE PORTUGAL PORTUGUESE SEASONINGS
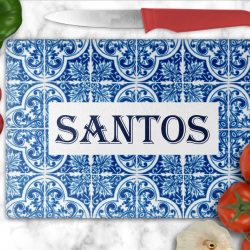
LISBON BLUE ETSY SHOP – FREE SHIPPING IN USA
Shop at Gaspars online for great Portuguese Products
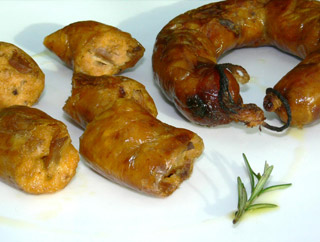
Portuguese Linguica and Chourico
Gift Packs
Gaspars Sausage Company
For nearly a century Gaspar’s Sausage Co., Inc. Has been recognized as the largest manufacturer of Portuguese smoked sausage in the United States. Order today! www.gasparssausage.com or call us at 1-800-542-2038
MY TASTE PORTUGAL SEASONINGS DISTRIBUTOR - GONSALVES FOODS.COM
GONSALVES FOODS
GONSALVES FOODS
The taste of Portugal here in America Your source for authentic Portuguese products We’re proud to offer a wide selection of authentic Portuguese foods from our Gonsalves and Bom Petisco brands as well as the leading Portuguese brands like Saloio olive
0


")


 Now available in Canada – Amazon Canada
 LISBON BLUE ETSY SHOP
 My appearance on RTP Portuguese TV Notícias do Meu País
 No Kid Hungry | Share our Strength Help End Child Hunger in America


 GONSALVES FOODS
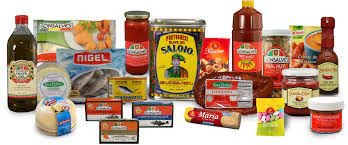