Papo Seco – Portugal’s Favorite Bread
The Portuguese passion for it’s cuisine is surely matched by the love of it’s bread!

- Home style bread & Portuguese rolls
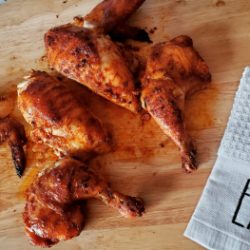
Various regions of the country have their own artisan favorites such as Pão de Centeio “Rye Bread” and “Broa de Milho” from Tras-Os-Montes, and Pão Alentejano from Alentejo, but the Papo Seco which literally means “dry throat” is the most popular bread eaten all over the country both in homes and a staple at every restaurant. The roll is crusty on the outside and light and airy in the center which make it perfect for sandwiches and for absorbing sauces.
The method of preparing it and shape of the roll is uniquely Portuguese and extremely popular but I found there are many recipes. While researching some bread recipes I discovered that there are many different recipes to make Papo Secos. Some use basic dry yeast, while other use (fresh starter).
Making and storing fresh starter in your home seems quite easy and the benefits of using are quite fascinating. I had always wondered how the starter was formed without yeast, and I’m so happy that I found the recipe.
I was even more thrilled to discover that “King Arthur Flour” website actually sells the “Starter Dough” and you can buy it online. You can have a piece of the starter that began 300 years ago!They also sell the yeast that they use in their kitchens. The best part is that the yeast is 75% cheaper and better than the one in the supermarkets!
Please bare with me until the end of this post for recipe for Papo Secos. I found this information very interesting to share with you since it will enhance your future bread making!


“Where else can you find FRESH sourdough starter – not dried? And what a history this has; it’s descended from a starter that’s been lovingly nurtured here in New England since the 1700s. When you feed it, it quickly becomes your own, adapting itself to your own region and climate. Generations of bakers before you have made wonderful bread with a bit of this same bubbling brew. Join the ranks of satisfied sourdough bakers. www.kingarthurflour.com/shop
SAF instant is the yeast used most often in the King Arthur test kitchens. It’s easy to use (no proofing or pre-dissolving), fast-acting and long-lasting, continuing to work for hours longer than “rapid” yeast. It’s absolutely reliable. AND it costs 75% LESS than supermarket active dry yeast. ‘Nuff said. . www.kingarthurflour.com

Here is a recipe to make a “Starter Dough”from scratch!
APPLE STARTER:
3/4 CUP OF SPRING WATER, 2 CUPS FLOUR, 1/2 CUP GRATED APPLE. Mix and cover, and let sit to ferment.
DAY 1-3: Stir once a day. You should be able to smell the starter.
DAY 4: Put starter into a bowl and add 2 cups flour and 3/4 cup spring water. Cover and let sit for another 24 hours.
DAY 5: The starter is now ready to use, and can be refrigerated. Once a week discard half the starter and add 1 cup fresh flour and 3/4 cup spring water, mix again
EASY YEAST STARTER or SPONGE:
1 PACKAGE DRY YEAST (2-1/4 TSP). 1 CUP WARM WATER, 1 CUP HIGH GLUTEN FLOUR.
Mix, set aside at room temperature for a minimum of 6 hours. or, mix at night, put in the frig, and then take it out about two hours before making the rolls.
5 Healthy Reasons to make your own Sourdough Starter
1- Increases beneficial lactic acid
The longer rise time needed for sourdough increases the lactic acid and creates an ideal pH for the enzyme phytase. This enzyme breaks down phytates (read more about the dangers of phytic acid here) more effectively than in yeast breads.
Sourdough rye has the least amount of phytates (somehow the Swiss culture mentioned above must have known this) making it a healthier bread.
2- Predigestion of starches
The bacteria and yeast in the sourdough culture work to predigest the starches in the grains, thus making it more easily digestible to the consumer.
3- Breakdown of gluten
Here again, the longer soaking and rising times in the preparation of sourdough breaks the protein gluten into amino acids, making it more digestible.
4- Preservative
The acetic acid which is produced along with lactic acid, helps preserve the bread by inhibiting the growth of mold.
5- Better blood glucose regulation
There has been some research suggesting that sourdough bread — sourdough white bread — showed positive physiological responses. The subjects’ blood glucose levels were lower after eating sourdough white bread compared to whole wheat, whole wheat with barley and plain white bread. Interestingly, the subjects tested after eating whole wheat bread fared the worse — with spiking blood glucose levels.(http://realfoodforager.com/5-reasons-to-make-sourdough-your-only-bread/January 17, 2012)
♥♥♥♥♥♥♥♥♥♥♥♥♥♥♥♥♥♥♥♥♥♥♥♥♥♥♥♥♥♥♥♥♥♥♥♥♥♥♥♥♥♥♥♥♥♥♥♥♥♥♥♥♥♥♥♥♥
Since we know the benefits of making your own starter dough, here’s the Papo Seco recipe! Enjoy!
Papo Seco recipe – By: Azorean Green Bean
“Azorean Green Bean is all about preserving the food and culture of the Azores.
There’s a lot of overlap between the Azores and continental Portugal, and we’ll be taking a look at that, too. But for now it’s all about the Azores”
1 tablespoon of salt
2 teaspoons of sugar
1 envelope package of rapid rise yeast
2 cups of lukewarm water
1 egg white beaten or milk for brushingDirections:
Using a large bowl mix together the flour, salt and sugar then leave aside.
In a separate large mixing bowl, add the two cups of lukewarm water and gently mix in the yeast using a whisk. Add the dry ingredients into the water a little at a time and keep mixing until it forms a soft ball of dough. At this time you will need to use your hands to mix in the remaining flour and combine together. Take the dough out into a floured surface and knead for a couple of minutes. Place the dough into a greased bowl and cover with a dish towel or blanket. Place the bowl in a warm place and let the dough rise for an hour.
Remove the dough and place onto a floured surface, punch the dough down, and knead for about 10 minutes, until the dough feels smooth.
Separate the dough into ten equal balls. Shape them and place them on a greased or parchment paper lined baking trays, and let them rise for 30 minutes. You can shape the rolls by making an indent in the middle with the side of your hand, or you can roll the dough into an oval shape and score with a knife across the top lengthwise before it goes in the oven. What ever way you chose you really can’t go wrong.
Preheat the oven at 375 degrees and brush the rolls with either egg white or milk. Bake for 30 minutes or until the rolls are slightly golden brown and sound hollow when tapped on the bottom.
Ingredients
4 cups bread flour
1 cup fermente (starter)
3/4 -1 teaspoon sea salt
1- 2 cups tepid water
Technique
Mix the ingredients and knead until smooth. About 10 minutes of hand-kneading.
Cover and let rise overnight. 10-12 hours is normal. I always make the dough at night and by morning it is ready to finish and bake.
STEP 1 – Divide into balls – divide the dough into several balls – a little smaller than the size of a tennis bal
l
 |
| Dough divided into balls |
STEP 2 – Roll on a lightly floured board until you have a smooth ball of dough
 |
| Roll into small balls |
STEP 3 – Crease the ball of cough with the side of your hand – press firmly almost to the board.
 |
| Use the side edge of hand to crease |
This is what is looks like with the crease:
 |
| Roll creased ready to pinch ends |
STEP 4 – Twist the ends – now you must grab about an inch in from each end and twist the dough to for the ends – this technique hold the shape of the roll.
NOTE – some people use a little rice flour in the crease to keep it from sealing up.
 |
| Papo-Seco pinched ends ready to rise |
STEP 5 – Lay the roll CREASE side DOWN onto a floured tea towel or clean cloth – push the towel up slightly to the roll as you form the next roll – this keeps the rolls from spreading out.
 |
| Crease side down on this step! |
STEP 6 – cover and let rise – 1 hour – when ready. carefully lift the rolls onto your baking sheet, this time with the CREASE side UP
 |
| Ready to bake |
STEP 7 – Pre-heat the oven to 425F and set a pan of water on the bottom rack. Bake the rolls for 25 minutes or until done – they should be golden brown when they are done!
 |
| Can you smell them? |


 Now available in Canada – Amazon Canada
 LISBON BLUE ETSY SHOP
 My appearance on RTP Portuguese TV Notícias do Meu País
 No Kid Hungry | Share our Strength Help End Child Hunger in America


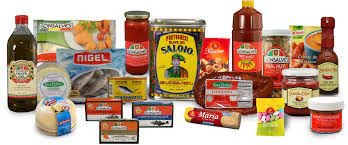
 GONSALVES FOODS