Correia Chestnut Farm Brings Fall Tradtion to Your Table

Chestnut – Castanha season is here!
Warm your family’s and friends heart with fresh chestnuts this fall. See the recipe for cooking chestnuts at the bottom of this article.
Harvey Correia is a third-generation farmer of Portuguese decent from the Sacramento River Delta. His grandfather first immigrated from Madeira Island, in the Azores in 1907 and returned twice to his homeland. On his second visit back to Madeira he married Harvey s grandmother. Harvey ponders at how in 1920, his grandfather and then pregnant grandmother sailed the long journey across the Atlantic, and traveled that long train ride across the country to reach California. Harvey’s father, is the second of 10 children and recently celebrated his 90th birthday.
His grandfather worked at the docks in the San Francisco Bay Area and then began farming near Isleton, California where he eventually purchased farmland and settled. Harvey began growing chestnuts at the  since 1998 after transitioning the farm from growing Bartlett pears. Growing pears required the use of many pesticides which left Harvey with concerns about the risks of using large amounts of pesticides on his farm. However, chestnuts in the Central Valley of California are relatively pest free.
Warm and just out of the oven! They came out delicious!

Correia Chestnut Farm has experimented with growing many different varieties of chestnuts and began offering a limited quantity of Italian marroni-type chestnuts in 2005 which received rave reviews from customers.
The rest of the farm’s orchard was grafted to these varieties in 2007 and they are now the only varieties grown in significant quantity. While some varieties of chestnuts will produce larger chestnuts, most customers have agreed that none match the taste and quality of the Italian marroni. Visit them on their website for more information and visit them on their Facebook page for updates.
Medium Size – 1.125 to 1.25 inches in diameter, averaging 30 nuts per pound. $5.50 per pound
Large Size – 1.25 or more inches in diameter, averaging 20 nuts per pound. $7.00 per pound
Minimum Order – 5 pounds
Don’t forget to order the chestnut knife and roasting pans as well !

Look at these beautiful chestnut trees on the Correia farm!

Chestnust should normally be able to be stored for at least a month in your refrigerator at home following the instructions supplied with your order.
“Chestnuts are unlike other “nuts” in that they have a high moisture content and are low in fat. Therefore, it is important to store chestnuts in refrigeration until a few days before you intend to enjoy them.
We have found that a majority of grocery stores do not properly refrigerate chestnuts or do not refrigerate them at all! As a result, chestnuts purchased from a store are often spoiled or dried out. The industry is attempting to educate retailers but this has been a slow process. To ensure the chestnuts you purchase are of the highest quality, we suggest that you make your chestnut purchase directly from us, the grower, so that we can rush them directly to you from our refrigerated storage.” www.chestnuts.us

Corriea Chestnut Farm video
How to roast chestnuts recipe:
1. Using sharp knife, make an incision about 1/8-inch deep through the top of chestnut.


 Now available in Canada – Amazon Canada
 LISBON BLUE ETSY SHOP
 My appearance on RTP Portuguese TV Notícias do Meu País
 No Kid Hungry | Share our Strength Help End Child Hunger in America


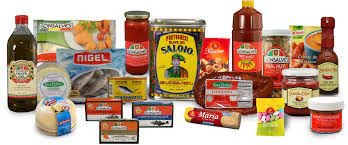
 GONSALVES FOODS