Tagged: side dish

Crustless Spinach and Broccoli Quiche

Spinach and brocolli quiche

Crust-less Spinach and Broccoli quiche is an amazing savory dish. This is my go to dish for meatless hearty lunch, but I also prepare it as a side dish.

Did you know that 2 cups of Spinach has only 20 calories and 2 cups of Broccoli has 60?


Ingredients:

1 pound package frozen broccoli spears or (1 bunch fresh)

4 cups fresh Baby Spinach (approximate)

1/2 small onion (finely minced)

6 eggs

1 cup whole milk

1 cup shredded cheese

1 tablespoon melted butter or margarine

1/2 teaspoon salt

crushed black pepper

Preparation:

Pre heat oven to 350 degrees F.

Steam or cook broccoli in a small amount of water until tender. Drain, chop into small pieces and place in a bowl. Cook spinach in a skillet with butter and cook until slightly wilted. Drain any moister and add to the broccoli. Let mixture cool.

Beat eggs with milk, salt and pepper. Add to the broccoli mix and mix well.

Grease a deep dish souffle pan or baking dish with margarine or cooking spray. Add broccoli mix evenly submerging the mix into eggs. Top with the cheese.

Bake at 350 for 25-30 minutes until a tooth pick comes out clean.

Let sit for 5-10 minutes before serving. Enjoy!


Portuguese Heirloom Tomato & Chick Pea Salad


Tomato season is almost here! If you’re lucky enough to live in a Portuguese community you probably have already tasted Portuguese Heirloom tomatoes. I grew up eating these tomatoes which my parents called “Bull Heart Tomatoes” planted every year in their backyard garden.

Nothing compares to them which of course means, that I have to carry on the tradition with my own family. Here are some photos of my tomato crop.

We’re lucky enough to have a Portuguese neighbor that grows them from seed and sells the plants ready to transplant for a ridiculous price of 3/$1.00!

But don’t worry if you don’t live in a Portuguese community. The tomatoes are very popular now, and there are many online sites that sell the seeds. Visit the links at the bottom of this post for more information.

Here are some popular varieties. Please note that these links are for informational purposes. I can not give warranty to the product or the availability on these websites.

DaCosta’s Portuguese Tomato

A regular leaf plant with high yield of huge ribbed pink beefsteaks that are mostly round, 1 lb+, similar to variety called Joe’s (Portuguese), but with slightly larger and more ribbed fruits. This tomato is not always the delicious tomato you have described though. It tends to mature earlier than the others and is unpredictable in taste. (http://gianttomatoseeds.com/tomato_seeds.html)

Joe’s Portuguese

A regular leaf, large pink fruits 12-16 oz, round ribbed beefsteak shape, good flavor, meaty with few seeds. 80 days, indet., regular leaf, 8-18 oz pink beefsteak fruit, excellent flavor, high yield. http://www.doublehelixfarms.com/joes-portuguese

Michael’s Portuguese Monster


Growing up to 4.5 pounds, you’ll have to put this next one on a full size platter:regular leaf, very large fruits to 3 lbs, original seed said to have come from 4.5 lb fruit, from M. Johnson, Loule Market, northern Portugal 2006.


Neves Azorean Red

Tony Neves and his family immigrated from the Portuguese island of the Azores and settled in the Boston area. The family brought with them their prized family heirloom tomato seeds. (http://www.tomatogrowers.com/NEVES-AZOREAN-RED/productinfo/4484/)


Gran’s Portuguese Neighbour

The most widely grown heart shaped tomatoes in Portugal. They grow medium to large pink blunt heart shaped fruits, excellent flavor. It typically weighs under one pound. From wikipedia: regular leaf, high yield of medium size pink hearts with blunt end, some fruits are slightly ribbed, excellent balanced tomato flavor, do not let it get overripe as the fruit quality quickly deteriorates; very few seeds, especially in early fruits, 6-12 oz.


Portuguese Heirloom Tomato and Chick Pea Salad

Ingredients:

1 can Chick Peas

2 large Portuguese tomatoes (or any meaty variety)

1/2 small red onion thinly sliced

2 tbsp chopped olives

Salt

Pepper

1 – 2 tbsp Olive oil

1 – 2 tbsp Wine Vinegar

2 tbsp chopped parsley

Crumbled Blue Cheese, Gorgonzola, farmers cheese

Suggestion: You may also add; chopped hard boiled eggs or canned tuna for a different Portuguese flavor!

Instructions:

Mix all ingredients in a medium bowl. Store in refrigerator until ready to serve. Enjoy!


Credits:

http://t.tatianastomatobase.com:88/wiki/Category:Portuguese_Tomatoes

http://gianttomatoseeds.wordpress.com/2012/12/06/portuguese_monster/

http://www.heritageharvestseed.com/tomatoespq.html

http://davesgarden.com/guides/pf/showimage/157975/

http://www.doublehelixfarms.com/joes-portuguese


Garlic, Olive Oil & Rosemary (Alecrim) Foccacia Bread

Making this flat bread took me back to my family’s hometown. Travassos, is a small village in Tras os Montes, Portugal near the city of Montalegre.

The bread for whole village was made in a communal oven shared by all. One local man, was in charge of preparing the wood fired oven twice a week. On those days, each family including our own, would bring their dough to bake their bread early in the morning.

The bread, called a “Bica” was simply made with flour, water, yeast and salt, sifted and mixed with the old traditional, wooden Peneira (flour sifter), and Maceira (dough mixer).

The next time you pass by a Panera Bread restaurant, you’ll know how it got it’s name. Panera is a flour sifter…Peneira in Portuguese!

This recipe uses garlic and rosemary, but you can adapt it by adding your favorite toppings such as pesto, sun dried tomatoes, olives, etc.

Ingredients:

5 1/2 cups flour

1 3/4 cups warm water

1/4 cup olive oil

1 package of yeast

1 tbsp salt

1 tbsp sugar

Toppings:

2 cloves garlic

1/4 cup olive oil

Rosemary

Sea Salt

Instructions:

Step 1

Place yeast warm water, salt & sugar in a small bowl. Stir well and let sit for about 10 minutes until bubbles form.

Step 2

Place flour n a large mixing bowl. Add olive oil, and the yeast mixture in the center of the flour and mix with dough hooks.

Mix until a round ball forms. * You may need to add a few sprinkles of flour if the dough is too sticky.

Remove from bowl and knead for 5-10 minutes until a smooth ball forms. Place in floured bowl, cover with plastic and a towel and set in a warm place for 1 hour or until the dough has doubled.

Mix the olive and garlic in a small bowl and set aside until the dough has risen.

When your dough is ready, brush a large baking sheet with some of the olive oil from the small bowl with garlic. (use olive oil only)

Spread the dough on the sheets. Use your fingers to spread the dough and make indentations to form crevasses.

Set the dough aside in a warm place for about 1 hour until it has doubled.

Preheat oven to 425 degrees.

When the dough has risen the second time, brush with the remaining olive oil and garlic, add rosemary and sea salt.* Add more or less to your desired taste. * At this point you can add sun dried tomatoes, pesto, olives, etc.

Cook for 20-25 minutes or until light golden brown.

Serve hot or cool and store for the next day!

Great for your Sardine cook outs this summer !

Chick Peas & Rice – Arroz com Grao

Chick Peas & Rice

Chick Pea Plant

Chick Pea & Rice Recipe:

Ingredients:

2 cups rice

4 cups water

1 small chopped onion

2 tbsp olive oil

1 tbsp any tomato sauce

1 tsp salt

1 small can Chick Peas

1 tsp finely chopped parsley (optional)


Instructions:

Saute onion in olive oil until translucent. Add the rice and stir to coat with the olive oil. Let the rice stir fry for about 2 minutes on medium heat.

Bring the water to a boil in a small saucepan and add to the rice. Add the tomato and salt. Turn burner on high and let it come to a boil.


Reduce the heat to medium, stir, and cover. Let the rice cook on medium for 15-20 minutes stirring a few times.

Add the drained chick peas, stir, cover pan and let sit until ready to serve. Enjoy!


Bifana Flat Bread Pizza

Bifana Flat Bread

Ingredients:

1 lb Pizza Dough

2 cups cooked pork loin (Bifanas) cut into thin strips

1 large sliced onion

1 small sliced green or red pepper

1 cup thinly sliced cooked potatoes

1 tsp paprika

1/2 tsp salt

1/2 tsp pepper

3 tbsp Olive Oil

2 crushed garlic cloves

1 cup shredded cheese (any you prefer)

*Piri Piri or Tabasco sauce if desired


In a large saute pan on high, grill onions and peppers in olive oil until translucent.

Lower heat to low. In a large bowl mix together the salt, pepper, paprika, garlic, pork and potatoes. Shake the bowl to mix ingredients.

Add the pork and potatoes to the pan with onions, stir well to incorporate flavors and set aside.

Sprinkle corn meal on a sheet pan or pizza stone. Roll out Pizza dough to desired shape and place on pan.

Brush the dough with the olive oil in pan from the onion sauce.

Spread the onion and pork topping evenly over the pizza. Add a few drops of *Piri Piri Sauce if you like it hot!

Top with shredded cheese as desired.

Cook at 400 for about 15-20 minutes or until the cheese is melted and a golden crust forms.

Enjoy!


Portuguese Style Chick Pea and Egg Salad

Chick Pea and Egg Salad


This dish can served as a side dish or main dish. It’s very popular as a side dish with Bacalhau Cozido (Boiled Salt Cod recipes) or Bacalhau Assado (Baked Cod Fish)

Ingredients:

2 cans Chick Peas (I use Progresso)

6  hard boiled eggs (sliced)

1/2  tsp salt

1/2 tsp pepper

1/2 small chopped onion

2 tbsp chopped fresh parsley

1/4 cup Olive Oil

1/4 cup White Vinegar

Instructions:

Rinse the chick peas, drain and put into a medium bowl. Toss in all ingredients.

Let  the mix sit for at least 15 minutes to absorb the marinate.

Taste and add more seasonings if desired.

Serve or store in refrigerator until the next day.

Batatas a Murro – Portuguese Garlicky “Punched Potatoes”

Order this beautiful Customizable Galo de Barcelos Ebroidered apron on Lisbon Blue Shop


If you love garlic, you’ll love this recipe for “Punched Potatoes”. Cook them in the oven along with your roasts and save yourself time in that kitchen!

You can use any kind of potato but I like to use russets or Idaho potatoes since they’re tend to bake fluffier. If you don’t like garlic just leave it out and use only the warm olive oil salt and pepper.

It doesn’t get any easier that! Enjoy!

Here’s A Potato Story from my younger days.

Before coming to America, my parents grew potatoes on their small farm in Northern Portugal near the border with Spain which provided enough income to support our family all year. My mother loved selling those potatoes and she loved being a business woman. Each harvest season my father traveled around the surrounding communities selling the potatoes to the local residents right off his truck.

The first year after immigrating to America, they learned about the fall harvest tradition observed by many Portuguese Americans living in New England who visit local potato farms to buy the newly harvested potatoes called “Green Mountains” in 50 pound sacks. The potatoes are then stored in the root cellars or in garages for consumption during the long winter months.

I hated potatoes when I was a little girl and honestly, I’m still not a big fan. Perhaps this is why I remember this event vividly.

One Saturday in late September my parents visited one of those local potato farms and brought home a huge truckload of fifty, 50 pound sacks of potatoes for our family to eat during the winter. If you do the math, that equals two and one half tons of potatoes!

I cringed at the thought of eating those damn potatoes all winter as I stood there watching my father and two brothers exhaustively unload the truck and carry the sacks into the basement!

Five months later, February arrived and the basement was filled with sacks of wrinkled potatoes that had sprouted and no longer edible! My poor brothers cursed as they lifted the 40 sacks of potatoes back up the cellar steps and load them back into that same truck to had brought them to bring to the dump! 

I often think that my mother missed being a potato farmer and a business woman, and she had secretly planned on selling those potatoes around town just like she had back in Portugal.

Her potato buying was scrutinized and limited from that year on, but this story has become a laughable family tale told every year during potato season in New England.

Learn more fascinating Potato history in Portugal at: (http://www.virgiliogomes.com/chronicles/135-glory-of-the-potato


Ingredients:

2 pounds small russet or Idaho potatoes

1 teaspoon sea or regular salt

1 teaspoon pepper

2 or 3 large cloves garlic (finely chopped)

1/2 cup of olive oil

Preparation:

Wash and scrub the potatoes. Remove any blemishes and pat dry. Pierce with a fork in a couple of spots. Coat with sea salt and a drizzle of olive oil.  Gently rub the oil into the potatoes and place in small oven proof dish or pan. I use an oven to table dish for easy serving. Cook at 400 degrees  for 45 minutes to 1 hour depending on your oven.

Note: (You can also boil the potatoes in salted water, with the skin on for about 30-45 minutes. Pierce with a fork for doneness.)

Meanwhile, make garlic oil:

In a small saucepan heat the oil and add the garlic. Cook on low for a few minutes untill the garlic turn slightly golden. Do not overcook or the garlic will become bitter!

To test potatoes for doneness, pierce them with a fork or gently squeeze a potato holding your oven mitt. The potato should be soft.

When the potatoes are ready, punch them down with your fist wrapped in a clean dish towel. or with a meat mallet until they “POP” open.

*Note: The potatoes are hot – be careful!


 When ready to serve, pour the garlic olive oil over the potatoes and sprinkle on fresh cracked black pepper as desired.

Place in the oven on low until ready to serve or re-heat the next day! Enjoy!


Presunto & Arugula Flat Bread

I love the American “melting pot” of different cuisines from all over the world!

This recipe incorporates a little bit of Portugal and Tuscany with my variation on “Flat Bread”.

If you prefer you can leave out the Presunto for a vegetarian style flat bread. Enjoy!

Ingredients:

2 lbs Pizza Dough

3 tbsp olive oil

1 clove garlic

1 cup shredded mozzarella cheese

1 large chopped tomato

1/2 cup sliced Portuguese olives

1/2 cup thinly sliced red onion

1 tbsp Corn Meal

1/2 cup Blue Cheese or (any you prefer)

4 thin slices of Presunto chopped into 2 inches pieces

 2 cups of fresh Arugula or (fresh baby spinach)

Fresh black pepper


Instructions:

Roll out pizza dough into desired length on a large cookie sheet or 2 small flat pans that have been heavily sprinkled with cornmeal. (If you love a crispy thin crust roll out the dough very thin.)

Place garlic with the olive oil in microwave and heat for 45 seconds. Brush the garlic infused olive oil over the pizza dough.

Spread the shredded cheese, tomatoes, olives, onion and Presunto on top.

Bake at 400 for 10-15 minutes until cheese is melted and a crispy crust has formed. * Your oven may require more cooking time. Lift bottom of pizza and look for a lightly golden crust. The Flat bread will be crispy when done.

Let flat bread cool for a few minutes. Spread the Arugula over the pizza then add the Blue cheese. Drizzle the arugula with olive oil if desired and top with fresh cracked pepper!

Slice into squares with a pizza cutter or a large serrated knife.

This is delicious with a cool refreshing classic Portuguese style wine cooler!

Recipe: Poor ice into a tall glass – Add equal parts – Vinho Tinto (Red wine) and Ginger Ale (or Orange Soda).

Garnish with Orange Slice!

Cheers!


Portuguese Style – Thanksgiving Stuffing


portuguese-stuffing-1

I get many requests from people looking for lost recipes, but especially around the Holidays.

There are many reasons why people don’t have their family recipes.

Some family members didn’t want to share them, the recipes were not written down, or they just hadn’t taken the time to learn the recipe until it was too late.

This Thanksgiving, I encourage you to sit down with the cooks in your family, write down their recipes and share the family traditions and history!

In this post, I’m sharing a little of my own family history along with my family’s favorite Thanksgiving recipe which I only cook once a year!

My family came to America in 1963, when John F. Kennedy was President of the United States. We came here, thanks to my Aunt Isabel, my mother’s sister, who immigrated to America when she was only 16 years old.

She sailed here by ship and passed through the historical landmark of Ellis Island in New York. She eventually became a US Citizen and later filed the paperwork for my mother and her family to immigrate!

My parents were typical Portuguese immigrants, who idolized President Kennedy because he was a proponent of Immigration, which eventually led to the Immigration Act of 1965.

This act, allowed my two older brothers who were living in Brazil at that time to join our family in the USA a few short years after we arrived here.

A soft velvety tapestry of JFK hung on the walls of most Portuguese family living rooms those days. I still have the one my parents had, neatly stored away in my cedar chest as a reminder of our family’s journey of coming to America.

President Kennedy was assassinated only 6 months later and like so many of others, I remember exactly where I was the moment I heard about it. I cried but I don’t think I knew why it affected me so much. Perhaps it was because my mother was crying.

Like so many before them my parents grew to love America and they were happy and grateful to move here. They followed the dream of a better life for their family, opportunity, and freedom from living in a country ruled by Salazar who was the dictator at that time.

I remember my first day in America, but that story is for another day and another recipe.

Like most Portuguese immigrants in America, my family has embraced the tradition of celebrating Thanksgiving since we were very grateful for the blessings of the food, our health, friends, and family.

I was very young when I watched my mother prepare our family’s first Thanksgiving diner, but I remember it vividly.

A friend of hers came by the night before Thanksgiving to teach her how to brine the turkey, and to make the stuffing.

I didn’t understand why they had to drown the poor bald turkey in a big plastic tub filled with salt, water and lemons since it was already dead anyway!

I watched in horror as they prepared the stuffing by peeling the sagging skin hanging off the turkey neck and then chopping up the cooked heart and the liver! Yuk!. I said to myself, I would never make that stuffing for my family, but of course I did.

Despite hating what I saw, I couldn’t leave that kitchen because I wanted to see, what this Thanksgiving cooking fuss was about anyway?

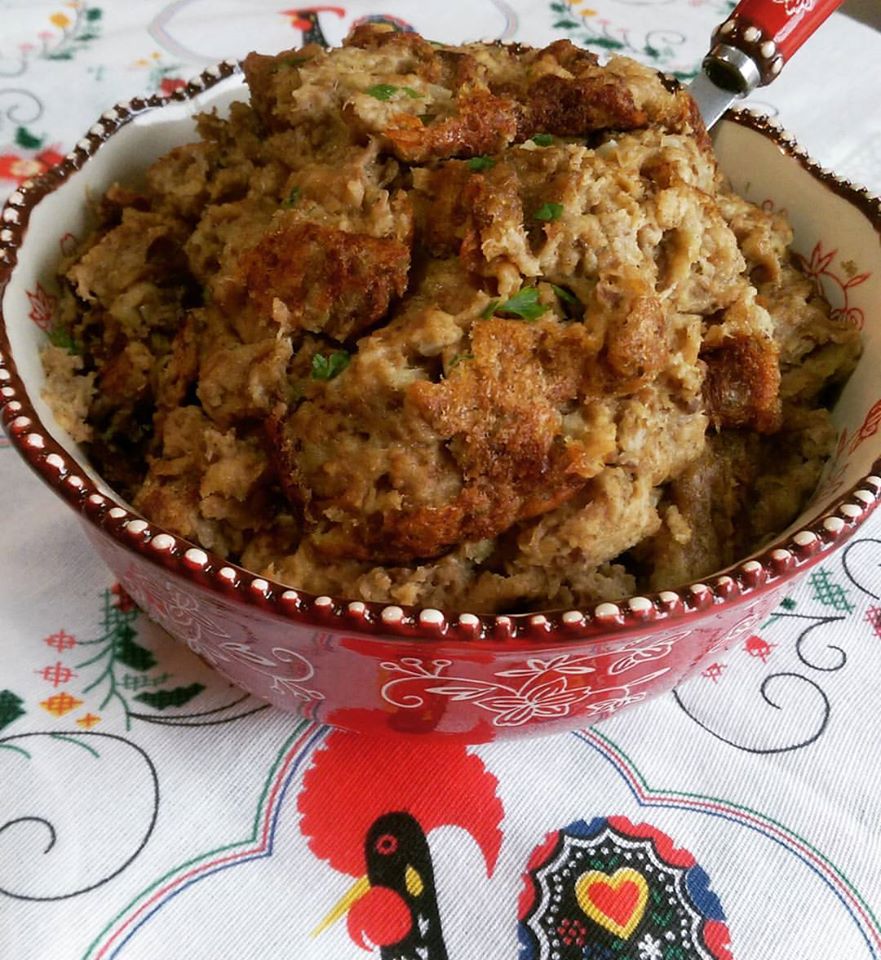
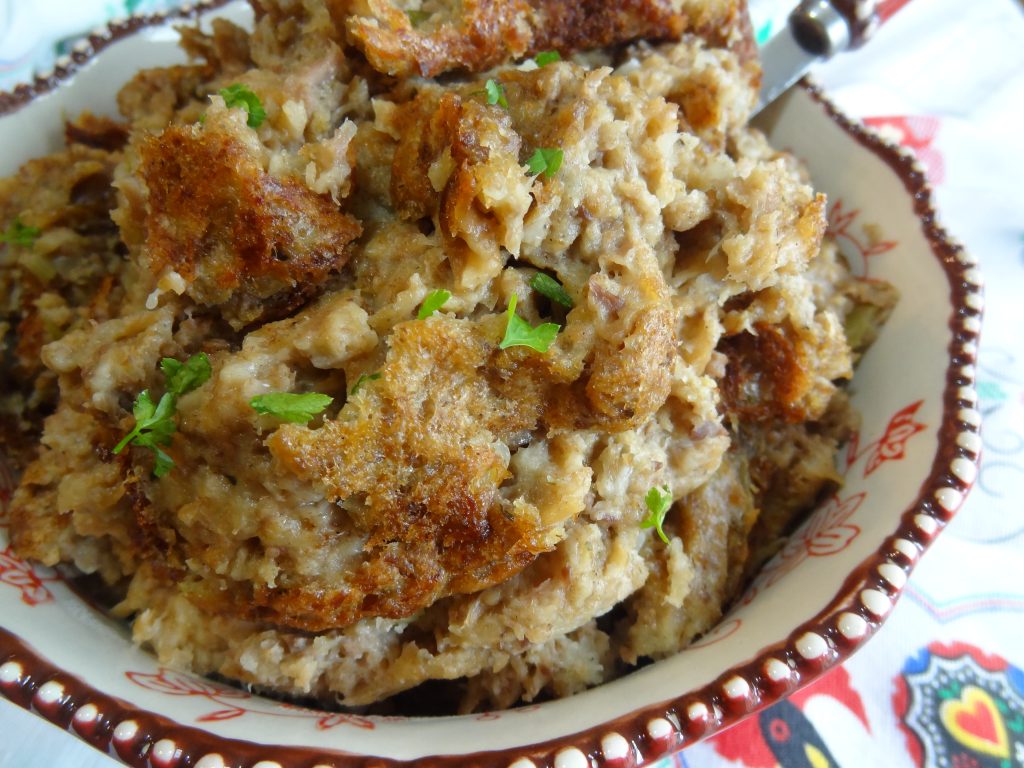
Many years later, I began preparing my mother’s stuffing recipe for my own family and it’s become the favorite side dish on our Thanksgiving table every year!

I hope you enjoy it as much as we do!

*Note that every family has a special Thanksgiving stuffing recipe. Some use meats in their stuffing, while some add chourica to the bread mix. I also use Pepperidge farm stuffing mix for an authentic Thanksgiving flavor. I suggest you try this recipe a couple of times to perfect to your taste by substituting your favorite meats, or bread stuffing mix. You can order chourica online at Gaspars Linguica.

Happy Thanksgiving Everyone!

Tia Maria

dsc06131

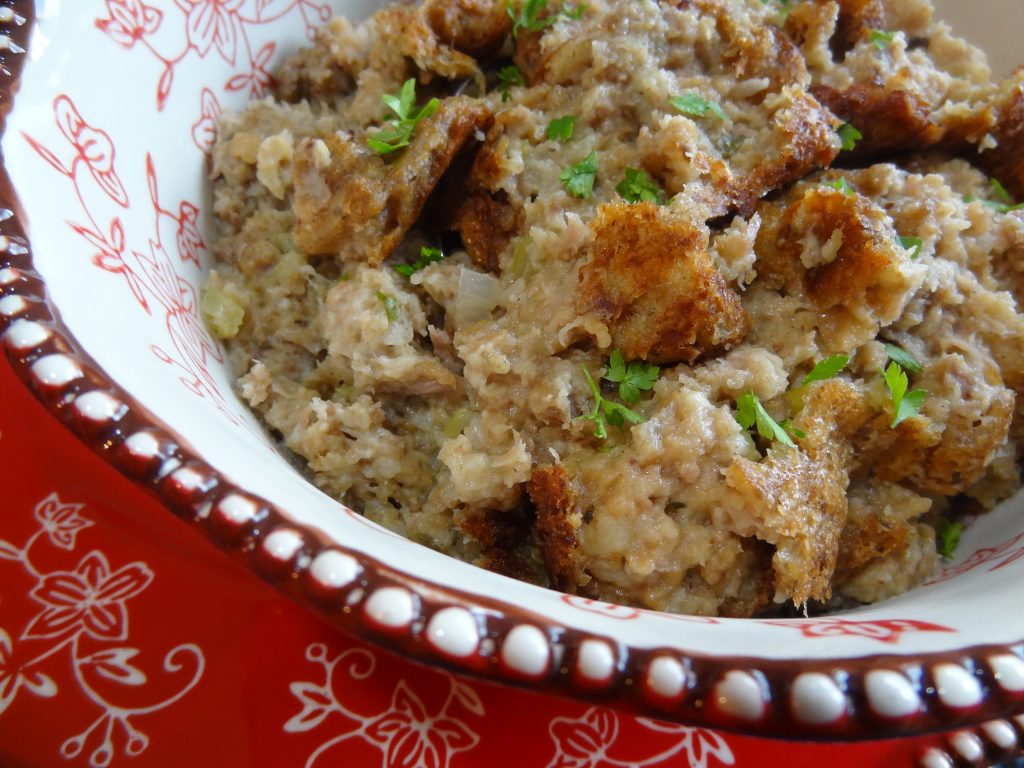
Portuguese Style – Thanksgiving Stuffing with Giblets – Serves 12 +

Ingredients:

Giblets & Stock

Turkey Giblets (which come inside turkey – neck, liver, heart, gizzard)

1 medium onion (chopped)

1 celery stock (chopped)

4 cups of water

4 cups of chicken broth

2 cloves of garlic

1 tsp of salt

1 tsp of pepper

Ground Meat & Bread Stuffing

1 lb ground beef, ground turkey, or sausage meat (this is optional)

1/2  cup diced Chourica or Linguica sausage (this is optional)

1/2 tsp garlic powder

1/2 tsp Paprika (omit if you use chourica)

1/2 tsp salt

1/2 tsp pepper

1 small diced onion

3 tbsp of olive oil

3 or 4 day old Portuguese rolls cut into cubes

4 cups of Pepperidge Farms stuffing mix with herbs (optional but use more bread instead and add 1/2 teaspoon of sage)

2 eggs

2 tsp very finely chopped parsley


Preparation:

How to cook giblets and stock:

Step 1:

Place the water, onion, garlic, celery, stock, and seasonings in a large stock pan and bring to a boil.

Rinse the giblets and neck and place them (except the liver) into the pan.
Cover, and cook on medium heat for at least 1 hour.

*Add liver during the last 10 minutes of cooking.

*The giblets should very well cooked, let cook longer if needed.

Remove the giblets from pan but save the stock. When giblets and neck are cooled, trim the meat by removing any ten-dints, veins or skin.

Place the trimmed meat in a food processor and pulse until they are the consistency of ground meat or leave chunky if you prefer.

Meatstuffing

Step 2

*Prepare meat for stuffing

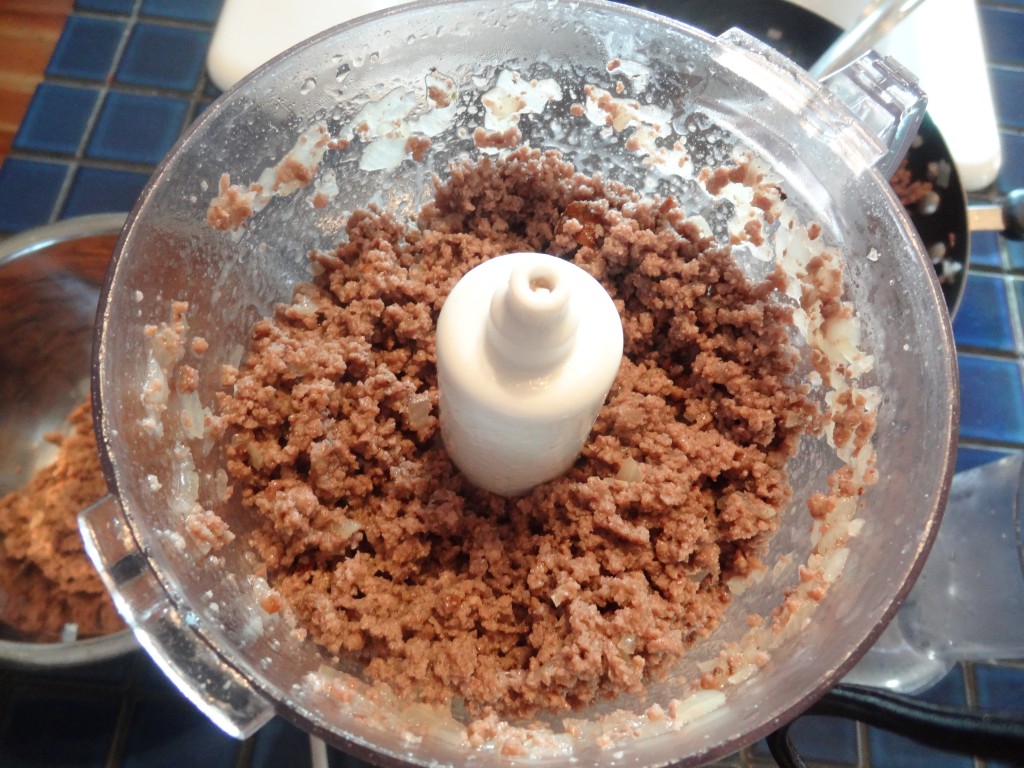
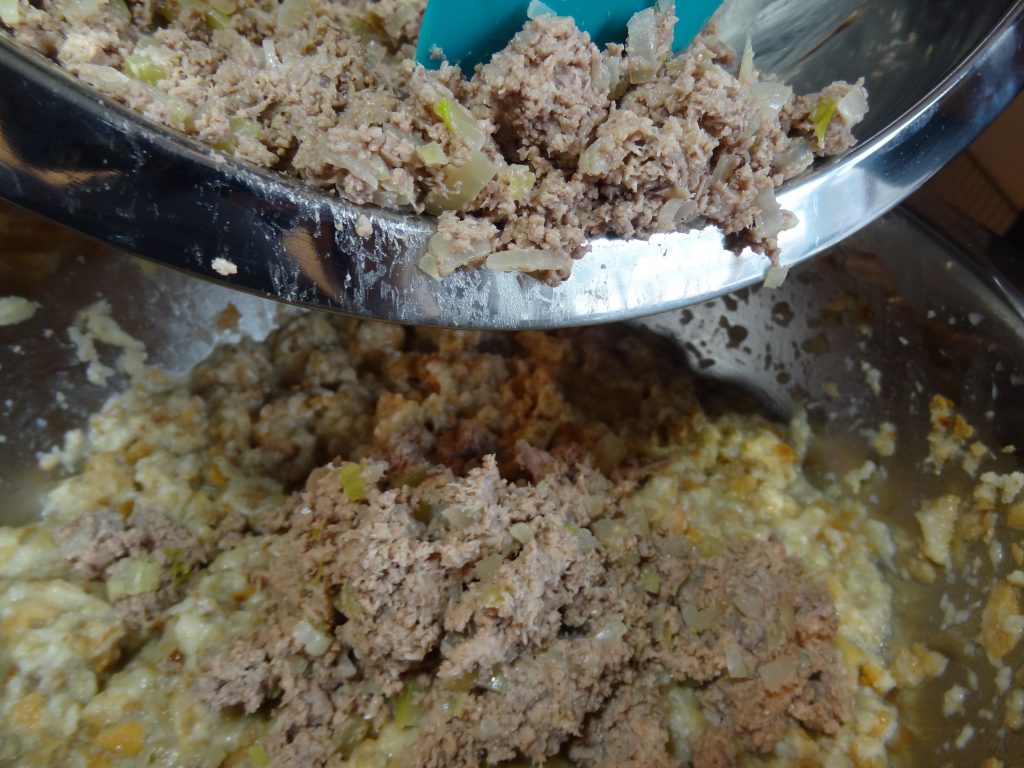
Saute ground meat in olive oil with onions and seasonings until cooked. Add the diced Chourica the meat and mix.

Place in a food processor and pulse about 5 times until you get a smooth like consistency – (or chunky if you prefer

Step3:

Strain your giblet turkey broth into a large bowl. Add the Portuguese rolls.

dsc06114

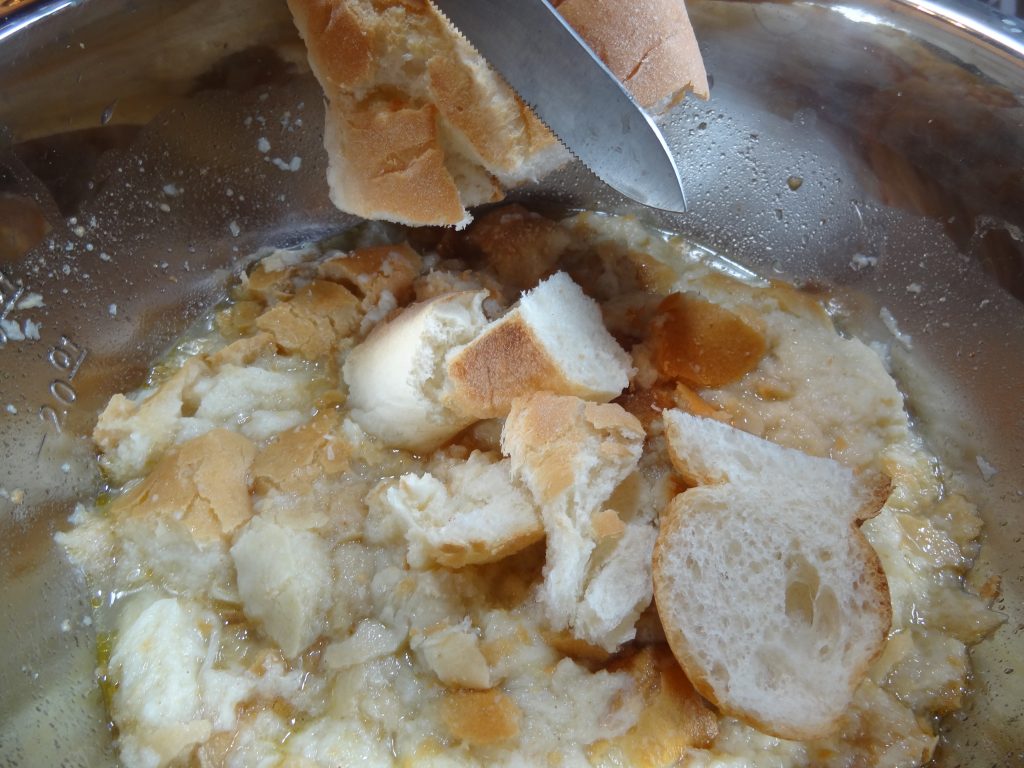
Let the rolls absorb the broth until they are soft. Add the cooked onion, garlic and celery from the broth. Mash well with your hand or a potato masher.

Add stuffing mix, ground meat mixture, and giblets. Mix until well incorporated.

dsc06118

dsc06122

At this point it’s up to you, if like a wet stuffing leave it alone, if you like a dry stuffing, add more stuffing mix or bread. If you find the stuffing dry add more broth.

Taste the stuffing and add salt or seasonings to your taste.

Add 2 eggs, and parsley. Mix well.

Spray or grease with margarine, a souffle, or baking pan which is at least 4 inches deep and big enough to hold all of the stuffing

Pour in the stuffing and cover with foil. Cook for at least 45 minutes at 350. If you want a crispy top remove foil during the last 15 minutes.

dsc06124

* Important – If you make this the day before. Let it cool – cover and store in refrigerator. (Heat up in the oven for 20-30 minutes at 350 F oven, or one portion at at time in the microwave.)

dsc06136

Spaghetti Pizza Pie!

Yes, it’s Spaghetti Pizza! You won’t believe how deliciously easy this recipe is.

You will never waste leftover spaghetti again, and best of all your family will love this.

I learned this recipe many many years ago from an Italian friend.

At first I was skeptical about making this because I had never heard of anything like before but I’ve been making it for many years.

This recipe  is very versatile because you can use whole wheat pasta for a healthier crust, add your favorite toppings like pepperoni, chourica, cooked meats and variety of cheeses.

Great for your “Meatless Mondays” Enjoy!


Ingredients

4 cups leftover cold spaghetti (preferably capellini)

2 eggs

2 tsp dry oregano

1 tsp black pepper

1 cup any shredded cheese

1 – 2 cups any favorite spaghetti sauce

chopped fresh basil

Parmesan cheese (crated)

1/2 cup of thinly sliced chourica or pepperoni.


Instructions:

In a large bowl, beat the eggs with the pepper and oregano. Add the pasta and mix well until coated. Heat the olive oil in a medium non stick skillet on high.

Add the pasta. Lower heat to medium and cook pasta until a crispy golden brown coating forms on the bottom. (check bottom regularly to make sure it does not burn).

Turn over pasta and cook until bottom also forms a crispy coating. Top with sauce, cheese and desired vegetables or chourica toppings and cover.

Lower heat to low, and cook until cheese melts. Add basil and shredded Parmesan before serving. Enjoy!