Category: Side Dish

Roasted Brussels Sprouts & Sweet Potatoes

This is perfect side dish that cooks along with your main dish such a roasted chicken, pork or beef. It takes only minutes to prepare and the vegetables come out crispy and full of flavor!

Ingredients:

1 package frozen brussels sprouts

1 small onion chopped

2 sweet potatoes

2 large potatoes

2 tablespoons olive oil

1/2 tsp salt

1/2 tsp pepper

1/2 tsp garlic powder

1/2 tsp paprika

olive oil cooking spray


Instructions:

Chop the potatoes into 1 inch cubes and place in a bowl. Season the potatoes with the salt, pepper, garlic and paprika.


Add the olive oil and toss to coat them evenly.


Place the chopped onion and brussels sprouts in a baking pan that has been coated with olive oil cooking spray.


Add the potatoes to the brussels sprouts and spread evenly in the pan. Spray the vegetables with a light coating of the olive oil spray.


Cook at 350 degrees for 45 min or until the potatoes are cooked and crispy. Shake the pan a few times while they cook to crisp on all sides.


You can also make this recipe ahead of time and heat in oven or microwave when ready to serve.

Serve and Enjoy!


Arroz de Bacalhau – Salt Cod Fish & Rice Casserole


Most of you know the Portuguese saying; “there are 365 recipes for bacalhau, one for each day of the year”!

This recipe is super easy and takes only 30 minutes to prepare! If you’re lucky enough to have a Portuguese market nearby, you can buy the Codfish already hydrated.

It’s perfect for a main dish, or to serve as a side dish with Portuguese Fish Fillets! Enjoy!


Serves 4-6  Prep 10 min Cook 20 min

Ingredients:

1/2 lb of Salt Cod (boneless & hydrated)

4 cups of cooked long grain rice (recipe here)

2 tbsp of Olive Oil

1 small onion diced

1/2 cup red & green pepper diced

2 small crushed ripe tomatoes (about 1 cup)

2 cloves of chopped garlic

2 tsp of chopped parsley

Salt & Pepper to taste

Black Olives for garnish


Instructions:

Cook the cod fish in boiling water for 10 minutes. Pat dry, shred into chunks and set aside.

In a medium heavy skillet on medium heat, saute the onions, garlic and peppers in the olive oil for about 2 minutes until translucent.

Add the tomatoes and cod fish, and cook for 5 minutes until the tomatoes have concentrated.

Add the cooked rice and stir to incorporate. Cook on low heat for a few minutes until the rice is hot. Add salt & pepper to taste.

Add the parsley and olives as garnish when ready to serve.


Photo image credit: http://mdemulher.abril.com.br/culinaria/receitas/arroz-bacalhau-pimentao

Oven Fried Pork Chops and Stir Fry Cabbage

If you’ve wondered why pork and other meats are so tender at an Asian restaurant, here’s the reason why.

The secret is that they use a technique called velveting to tenderize the meat.

Velveting;  is soaking meat in an egg white and corn starch wash before cooking.

I don’t use the exact technique, in this recipe, but I soak the pork in egg wash for a few minutes to tenderize it.

The pork always comes out tender and juicy. I’ve made this recipe many times and I have never fried a pork chop again!

The stir fry cabbage retains all it’s nutrients and it’s easy to make while your pork is in the oven.

Enjoy!


Ingredients:

6 Pork chops (3/4″ center cut)

1 egg

1 + 1/2 cups of flavored bread crumbs

1/4 cup of all purpose flour

1 tsp salt

1 tsp garlic powder

1 tsp paprika

1/4 tsp pepper

Cabbage Ingredients:

1/2 of a small head of cabbage (Shredded into 1 inch strips)

1 small onion (sliced)

1 tbsp of olive oil

1/2 tsp of salt

Pepper to taste


Instructions:

Season the pork chops with the salt, garlic, pepper and paprika and let them marinate for at least 1 hour in the refrigerator or overnight.

When ready to cook, heat the oven at 350.

In a small bowl, beat the egg with a tbsp of water to make a light egg wash.

Place the bread crumbs and flour in a plastic bag or large bowl and mix well.

Dip each pork chop into the egg wash and let them sit for about 10 minutes.

Place them 2 at a time in the plastic bag with the breadcrumbs and shake well to generously coat.

Grease a medium flat baking sheet with a heavy coat of cooking spray or margarine and place the pork chops on pan.

Cook on the lower oven rack for 15-20 minutes until golden brown on the bottom.

Flip the pork chops over, and cook for another 15-20 minutes.

The pork should be golden brown but not over cooked or it will become dry.


Cabbage instructions:

While the pork chops are cooking the oven, place the olive oil and in a large skillet.

Add the onion and the cabbage, and cook on high heat for about 2 minutes stirring once in a while.

Lower the heat to medium and cook for about 5-10 minutes longer, depending on your preference for a well done or crunchy cabbage.


Butternut Squash and Carrot Puree


Butternut Squash and Carrot Puree

My family has a tradition of visiting local farms in New England during harvest season where we buy our locally grown apples to make fresh apple pies, and to buy our winter vegetables and potatoes.

Butternut Squash Puree is one of the side dishes that I always have on my Thanksgiving table but I also make this recipe all winter long since my family loves it.

Some people bake the squash in the oven with brown sugar or maple syrup, but I’m not of fan of the sweet taste, so I came up with my recipe.

Did you know that you can store potatoes and butternut squash to last through the winter?

Just place them into a brown paper bag or cardboard box and store in a cool basement, or in your garage. (Be sure the temp doesn’t reach freezing.)

I also make Butternut Squash and Spinach Soup which is healthy and full of nutrients all year long.

Here’s some great information about butternut squash below. Enjoy!

Low in calories: One cup of raw butternut squash only has 63 calories.
Dietary Fiber: There are 3 gr. of dietary fiber in every serving.
Vitamin A: One serving has 298 %of your daily recommended value.
Vitamin C: One cup serving has 50 % of your daily recommended value.
Omega-3 fatty acids: Fights high cholesterol and high blood pressure
Minerals: One serving has 14 % of your daily recommended value of manganese, 12 % of magnesium and 14 % of potassium

Butternut Squash Puree

2 cups chopped Butternut Squash

2 cups chopped carrots

1/2 small onion chopped

1 small scallion

1/2 tsp salt

1 tbsp butter or margarine

1/4 cup of milk

2 cups of water


Instructions:

Place all ingredients except the butter and milk into a medium saucepan. Bring to a boil and cook on medium for about 10-15 minutes or until the vegetables are fully cooked.

Remove the scallion and most of the water left in the pan leaving only about 1/4 cup. Add the butter and milk to the pan and puree the vegetables with a hand blender until very smooth and silky.

Taste and add more salt to your taste if needed. Keep in pan on low heat until ready to serve with your dinner or let it cool and store in the refrigerator.

The puree will last for 3 days or freeze in individual ice cube trays or containers.

* Note, this puree is great to serve your baby but leave out the onion and salt!

Butternut squash image credit:  http://www.slashfood.com/2008/02/17/how-to-peel-a-butternut-squash-without-also-peeling-your-fingers/

Carmelina’s Chicken and Rice Casserole

 A Rebel Rooster

During my teenage years, when my siblings and I were still living at home on a small dead end street in a small town in New England, my father brought home a little yellow chick for Easter given to him by his friend who raised chickens.

My father thought it was a great idea because we had raised chickens back in Portugal and soon, we’d be eating fresh eggs every morning. He made the little chick, a coop under our back porch and eventually the chick became our family’s pet.

My parents couldn’t tell whether the chick was a rooster or a hen that would lay eggs. Apparently sexing chicks is difficult and it is said that only professionals know how to determine it.

The chick grew bigger week by week, and we soon realized that the little chick had turned into a white Leghorn Rooster!But he was no ordinary rooster; he was very temperamental and quite a rebel who often escaped his coop, terrorizing our family and the neighborhood.

My rooster was a traffic cop.

He designated himself that position by stopping any car that drove into the street by parking himself right in front of it! Honking would ensue, followed by a loud screams of; “get the damn rooster off the road”!

Our rooster also had an aversion to anything with wheels; my father’s wheel barrel, my brother’s bicycle and especially one particular pink bicycle owned by one of my sister’s teenage friends who lived up the street!

The poor girl tried to speed by our house to elude his assaults, but the rooster was too fast for her. He terrorized her daily to the point that she eventually stopped riding by our house. She opted to use the opposite side of the street instead but unfortunately, the poor girl’s strategy didn’t work and he always found her.

My rooster was a leg man.

The females in my family lived in fear of having our legs pecked and scratched every time we walked outside our front door. Many pairs of pantyhose were torn up every weekday morning when my sister left for work that summer.

It reached the point where she’d have to ask one of us to be her lookout so she could make a run for her car. “Where’s the Galo” “Where’s the Galo” shouted my sister as she headed out the door.

If you’ve ever been pecked by a wild tempered rooster’s beak and clawed in your bare legs you know what I mean. If you haven’t, I can tell you it really hurts, because I was also attacked all summer long myself.

As that summer went on, the rooster grew bigger and his early morning “cock-a-doodle-doo” made it impossible for my family, or any one in the neighborhood to sleep past sunrise. Soon, the neighbors began knocking on our front door to complain and something had to be done about it.

My mother was a very resourceful woman and a great cook! I’ll let you figure out the rest of the story.

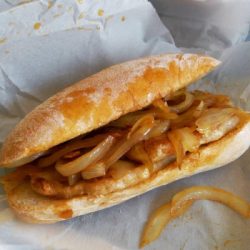
Meanwhile here’s her recipe for chicken and rice.


Ingredients:

1 small fryer chicken 3-4 lbs (cut into about 10 pieces)

2 cups of long grain rice

1 small onion chopped

1 small garlic clove chopped

1 bay leaf

2 large carrots chopped

1 small very ripe tomato

1/4 cup of olive oil

1 tsp paprika

1 tbsp salt

1 pinch of black pepper

1/2 cup of white wine

2 cups of chicken broth

4 cups of boiling water


Instructions:

Wash, and pat dry the chicken. Marinate with the salt, pepper, paprika, wine, and let sit for at least 2 hours or overnight in the refrigerator.

When ready to cook, saute the onion and garlic in the olive oil in a heavy stove top casserole pan or deep skillet until translucent.

Add the chicken, carrots, tomato, and bay leaf.

Cook on medium heat until the chicken gets browned stirring once in a while. Add the wine, chicken broth and any remaining marinade.

Let the chicken cook on medium-low for a few minutes and then cover and cook for at least 30 minutes stirring once in a while.

After the 30 minutes add the 4 cups of boiling water, let it come to a boil and add the rice.

Stir, wait for the rice to come to a boil, stir, cover, and cook on medium heat for about 15 minutes.

Remove from heat. Leave covered and let the rice sit for about 10 minutes. (The rice will continue to cook)

Uncover, stir and test rice. Add seasonings to your desired taste. *(I like a firm rice, but you may let it cook longer if you choose)


Bruschetta a Portuguesa

I’m reinventing the Papo Seco!

You’ll never waste any leftover Papo Secos again, once you make this easy recipe for Bruschetta; an antipasto from Italy whose origin dates back to the 15th century.

Bruschetta; is grilled bread rubbed with garlic and topped with olive oil. Many variations include toppings of tomatoes, grilled vegetables, beans and cured meats and cheese.

My Italian friend hates the English translation so he always makes us pronounce it correctly in Italian; (bru-sket-ta).

You can be creative with this recipe by adding your favorite variations of olives, cheeses and cured meats!

Don’t be afraid to make a double batch because there seems to never be enough of these little mouthwatering treats!

Ingredients:

3 – 4 Papo Secos – Portuguese Rolls or Baguette (day old or more)

2 medium ripe tomatoes (chopped very finely)

Or use 1/2 cup of my sun dried tomato recipe

1 slice of Presunto (finely diced)

1/4 cup finely chopped red onions

1/4 cup chopped black olives

1/4 cup roasted red pepper (finely chopped)

2 cloves garlic (finely diced)

4  tablespoons of Portuguese Olive oil

1 teaspoon of finely chopped parsley

crushed black pepper

Instructions:

Slice the bread into very thin 1/4 to 1/2 inch slices and place each one flat down onto a large baking sheet.

Place one chopped garlic clove and 2 tablespoons of olive oil in a very small microwave safe bowl and cook for about 30 seconds to infuse the oil with garlic flavor.

Brush the bread with the garlic infused oil, but leave half for the topping.

Place the tray with the slices of bread under the broiler to toast for about 2 minutes or until a light golden brown turning over to brown the other side.

*Caution: The bread will toast quickly. Always leave the oven door open when you toast bread in your oven broiler!

Drain the tomatoes to remove any moisture and place them in a plastic or ceramic bowl. Add the remaining ingredients including the remaining garlic clove and olive oil and mix.

Place 1 tablespoon of the topping onto each slice of toasted bread.


Portuguese Style Antipasti – Aperitivo

When I serve Antipasti before diner, I make an easy and colorful presentation of cheeses and cured meats for my guests.

What’s great about this easy appetizer is that is requires no cooking, and it’s easy cleanup since you just through away the parchment paper when you finish this wonderful sampler.

My family loves both varieties of Portuguese and Italian meats so I use both and call it a “PortItalian” platter.

You can improvise and use your family favorites.

How to set up your Antipasti tray:

1. Use a big wooden cutting board (this gives it a rustic look) and place a large piece of parchment paper over the board.

2. Next, place the meats in small piles around the edge. Pile the cheeses in the middle of the meats. Arrange the sliced bread on the tray.

3. Add color with olives, cherry tomatoes, roasted peppers, pickled vegetables, or any of your favorites.

I also serve fruit along this platter to balance the saltiness with the sweet fruits.

Ingredient Ideas: 

PresuntoProsciutto cured pork (Sliced very thin)

Salpicao – A spicy cured meat, made from Pork, wine garlic and salt  (Sliced very thin)

Chourico  – A spicy, pork cured sausage (Sliced very thin)

Queijo Fresco – A soft fresh cheese made from fresh milk – (Recipe for Queijo Fresco)

Queijo da ilhaSão Jorge cheese – A hard, sharp, spicy taste is a famous cheese that comes from the island of St. Jorge in the Azores.

Queijo Casteloes –  Casteloes Cheese –  A semi-hard cheese and has a lovely mild and buttery flavor

Mortadela Optional

Pepperoni – Optional 

Salami – Optional 

Azetitonas – Portuguese olives

Cherry Tomatoes

Dried figs

Shelled Nuts

Fresh ground pepper – For fresh cheese

Salt – For fresh cheese

Crushed red pepper paste – For the fresh cheese

Pao Caseiro Recipe – Or any Homestyle crusty bread sliced into thin slices.

Find more Pao –  bread recipes in search bar at the right top of this page.


There is an art to slicing Presunto very thinly. Watch this video it will make your mouth water!


There are many varieties of Portuguese cheeses which you can use. If you want to learn all about these cheeses, here’s a great resource at;  Catavino – The Ultimate Guide to Portuguese Cheeses!

You can also visit one of my favorite Pintrest Page – Portuguese Cheeses.


Here are some English translations of Portuguese cheese descriptions for your search.

DOP- Like DOC in wine, designated to cheeses produced in their traditional area Velho- Old, designation given to cheeses that have been aged at least 90 days or more
Curado, Semi-Curado- Cured, Semi-Cured Amanteigado- “Smooth Like Butter”, good for spreading on bread!
Mole/ de Pasta Mole, Semi-Mole- Soft, Semi-Soft Duro/ de Pasta Dura, Semi-Duro- Hard, Semi-Hard
Seco- Dry Leite – Milk
Leite de Vaca- Cow’s Milk Leite de Ovelha( “o-vayl-ya)- Sheep’s Milk
Leite de Cabra/Cabreiro- Goat’s Milk Cru- Raw
Gordura- Fat (in foods) Picante– Spicy
Casca- Casing, wrapping, shell Ligeiro/a- Light (in consistency and/or flavor)
Sabor Suave- Smooth Flavor Sabor Forte- Strong Flavor
Queijo em Barra- Block Cheese Queijo em Fatias- Sliced Cheese

( http://catavino.net/part-1-the-ultimate-user%E2%80%99s-guide-to-portuguese-cheese/)


Seafood Stuffed Mushrooms

stuffed-mushroomsThis stuffed mushroom recipe is perfect for a special occasion appetizer. It’s deliciously decadent, and full of flavor.

The mushrooms come out moist, and the crunchy topping adds texture creating a perfect bite! Enjoy!

dsc06129

Ingredients

2 packages of white mushrooms

1 can finely chopped clams

1/2 cup of finely chopped raw shrimp

2 tbsp of finely chopped onion

2 tbsp of butter or margarine

1/4  tsp of Paprika

1 tsp very finely chopped parsley

1/2 cup of bread crumbs

1 cup of garlic flavored salad croutons

1 cup of ritz crackers

1/4 cup melted butter or margarine


Shrimp Sauce (optional)

1 can of shrimp soup

1/4 cup of milk


Instructions:

Prep mushrooms by removing the stems. Save stems to use in a different recipe in the refrigerator.

Rinse and pat dry. Place the mushrooms in a lightly greased medium baking pan. Saute the onion in the butter for about 1 minute in a small skillet.

Add the shrimp and cook for 1 minute and set aside off heat. Drain the clams but save the juice for later.  Add the clams and paprika to the cooked shrimp.

Place the crackers and croutons in a food safe plastic bag and crush with your kitchen mallet until very crumbly.

Place 1/2 of the cracker mix, and bread crumbs in a medium bowl. Add the seafood mix, and parsley, and mix well.

Slowly add a little of the clam juice until your stuffing is moist but not mushy. *If you find it to dry, add a few tbsp s of water.

Fill the mushroom caps with the stuffing. Top each mushroom with 1 tsp of the remaining cracker mix. *Don’t be afraid to use all of the topping mix.

Coat each mushroom cap with a little melted butter.

Cook at 350 for about 15-20 minutes or until the stuffing is golden brown and slightly crispy.

Mix the shrimp soup with the milk and heat in a small skillet.*The soup should be smooth but not runny.

Place the mushrooms onto your serving platter and spoon the shrimp sauce around them.

*You can make these mushrooms ahead of time, store in the refrigerator, and heat them in the oven with the shrimp sauce.


Flaming Grilled Chourica – Chouriço Bombeiro

Chouriço Bombeiro

This appetizer creates a memorable cooking experience for your guests. The flaming chouriço creates a crispy browned skin and savory flavor. Chourico sausage is cured so don’t worry if think you haven’t cooked it long enough. Chourico sausage is cured so don’t worry if think you haven’t cooked it long enough. Serve with fresh crusty bread.

Recipe Ingredients:

1    Whole Linquica or Chourica Sausage

2 – 4 oz Whole grain – Alcohol (Preferably Portuguese)

1 Cooking Vessel – Assa Chourica Cookware

Long fireplace matches

Instructions:

Wash and dry the Chourica with paper towels. Place 2 oz of Alcohol in the bottom of the dish.

Make a few cuts into the top of the Chourica and place on cooking dish.

Light a match and slowly light the alcohol.

Let the flames cook the Chourica until crispy. *Caution* Do not touch flames

Turn the Chourica over to cook the other side if desired.

If the flames die out before the Chourica is cooked, start the process over!

Remove the Chourica onto a serving plate and serve in slices.

Serve with Portuguese bread such as Papo Seco, Caseiro, or Milho!

Enjoy!

Flaming chourico image credit: golisbon.com

Rose’s Stuffed Cabbage – Golumpki

It’s become a tradition of mine to make Polish Golumpki every September during the harvest season in New England.

Visiting the local farm stands you’ll find large cabbage heads selling at ridiculous low prices ranging from .99 cents to $1.49 each.

This recipe is adapted from my sister Rose’s recipe who got her recipe from her Polish Mother in Law!

Rose is the designated Golumpki maker for every family party and there is never enough!

Every time I make these I think of a nick name;  PortaPole (Being of Portuguese and Polish decent)!

I hope I have a pot big enough to cook this cabbage head that I bought at my local farmers market!

Enjoy!

Stuffed Cabbage

Makes: 18- 20 rolls

Ingredients:

1 large head of cabbage

2 lbs of ground turkey or lean ground beef

1 large onion finely chopped

2 tbsp of olive oil

4 cups of cooked rice (room temp or cold)

1 stick of margarine

3 eggs

1 tsp of salt

1 tsp of pepper

1 chicken bouillon  cube

1 tsp garlic powder

1 Jar of marinara sauce or (* 1 can of Tomato soup)

1 cup of water

1 small onion sliced

Directions:

Heat oven to 350°. Core the end of the cabbage but keep it a whole head, and boil for about 10 minutes (or until leaves are soft) in a large pot of water.

Remove from the water, drain and let the cabbage cool on a large tray.

Saute the diced onion in a small skillet in the olive oil and 1/2 if the stick of margarine on medium-low heat.

Add the chicken bouillon cube do dissolve it and set the onion mixture aside to cool.

In a large bowl, combine the rice, eggs, ground meat, onion and spices and mix well to incorporate all the ingredients as you would a meatloaf.

Pull the leaves of the cabbage apart. *Slowly and try not to tear them. With a small carving knife, remove the thick rib part from the leaves.

Coat the bottom of a large deep dish baking pan or lasagna dish with 1/2 cup of the marinara sauce.

Fill each cabbage leaf with about 1/2 cup of equal portions, roll each leaf like a wrap and slowly place them in the baking pan.

Slice the remaining cabbage into shreds.

Saute the small sliced onion and the shredded cabbage in a skillet with a couple of tbsp of the margarine until the onion is translucent.

Pour the cooked onion and cabbage over the rolls filling in the sides and open spaces.

Add the 1 cup of water to the remaining marinara sauce and pour it over the cabbage rolls and into the sides.

Shake the pan to incorporate the sauce evenly.

Dot the top of the cabbage rolls with the remaining margarine.

Cover with foil and cook for 1 – 1/2 to 2 hours or longer until the cabbage is tender. *Test by piercing with a fork.

Remove from oven and let the rolls sit for at least 15 minutes before serving.

You can freeze the rolls covered in any type of tomato sauce in a plastic food safe container.

Defrost them overnight in refrigerator and heat in the oven or microwave.

Serve with Rye bread or Pao caseiro. Enjoy!