Category: Holiday Recipes

Portuguese Style Roast Turkey Thanksgiving Menu


A Portuguese Thanksgiving menu – Enjoy!

Portuguese-sweet-bread

butternut-squash-carrot-puree

roast-potatoes

Portuguese-style stuffing

classic-Portuguese-rice

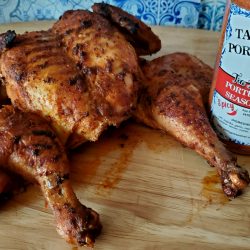
There are many variations to preparing at Thanksgiving Turkey. Some people brine the turkey for 48 hours while others simply rub the turkey with soft butter before baking.

I take this easy route. I marinate the turkey the day before Thanksgiving with basic Portuguese spices which enhance the turkey flavor but dot not overpower it.

Then I brush it with Olive oil, which will give the turkey a beautiful golden color when it’s cooked.

Happy Thanksgiving to all!

Ingredients:

2 -3 tablespoons of salt

1 lemon

1 large onion

1 large celery stalk

3 large sprigs of parsley

1 large carrot

1/4 cup of olive oil

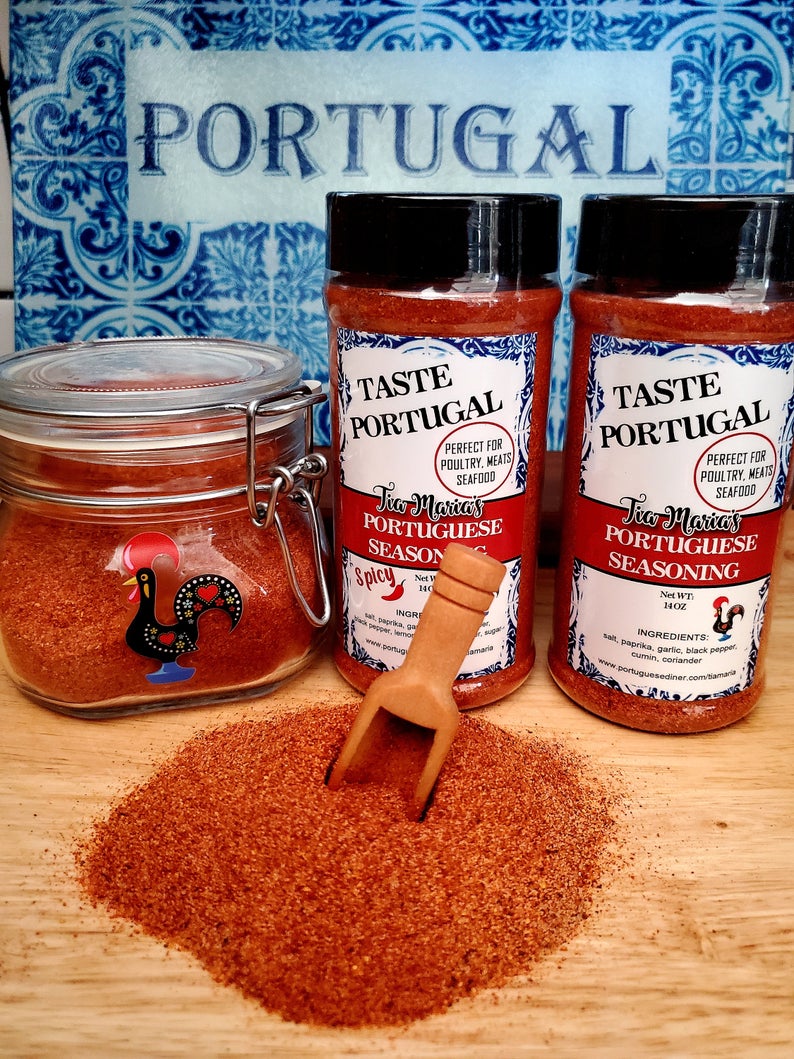
1 tablespoon garlic powder

1 to 2 tablespoons paprika

2 tablespoon butter

1/2 cup vinho verde or any white wine


Steps to prepping your turkey

Step 1

Remove packaging. Remove the neck and giblets from both cavities of the turkey.

Step 2

Wash the turkey, the neck and giblets in very cold water.

Step 3

Rub the inside and outside of the turkey evenly with the salt.

Step 4

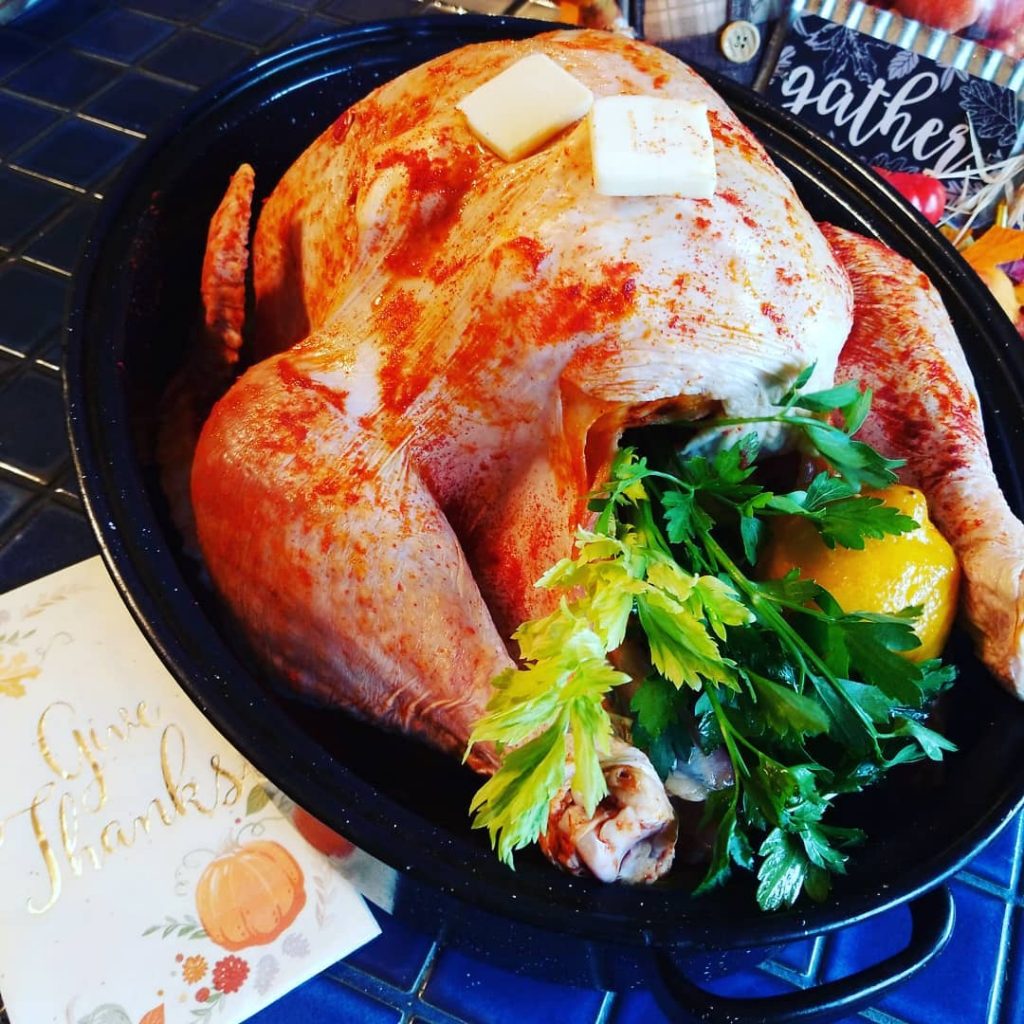
Slice the lemon in half and rub the inside and outside of the turkey with the lemon half squeezing the juice as you rub.

Place the used lemon halves inside the cavity.

Step 5

Place the butter underneath the chicken skin over the breast

Step 6

Sprinkle the paprika, pepper and garlic powder evenly over the chicken leaving a small amount to marinate the cavity.

Step 7

Place the neck and gizzards inside the turkey. Add the wine and remaining spices into the cavity to marinate.

Step 8

Place the celery, onion and carrot inside the cavity.

Step 9

Drizzle and rub the Olive oil over the Turkey.

Step 10

Place in the refrigerator overnight or up to 48 hours before cooking.

Step 11

Take the turkey out of the refrigerator at least 30 minutes before cooking.


*Remove the neck and gizzards from the cavity and save in the refrigerator until you are ready to make stock for my Portuguese Stuffing.

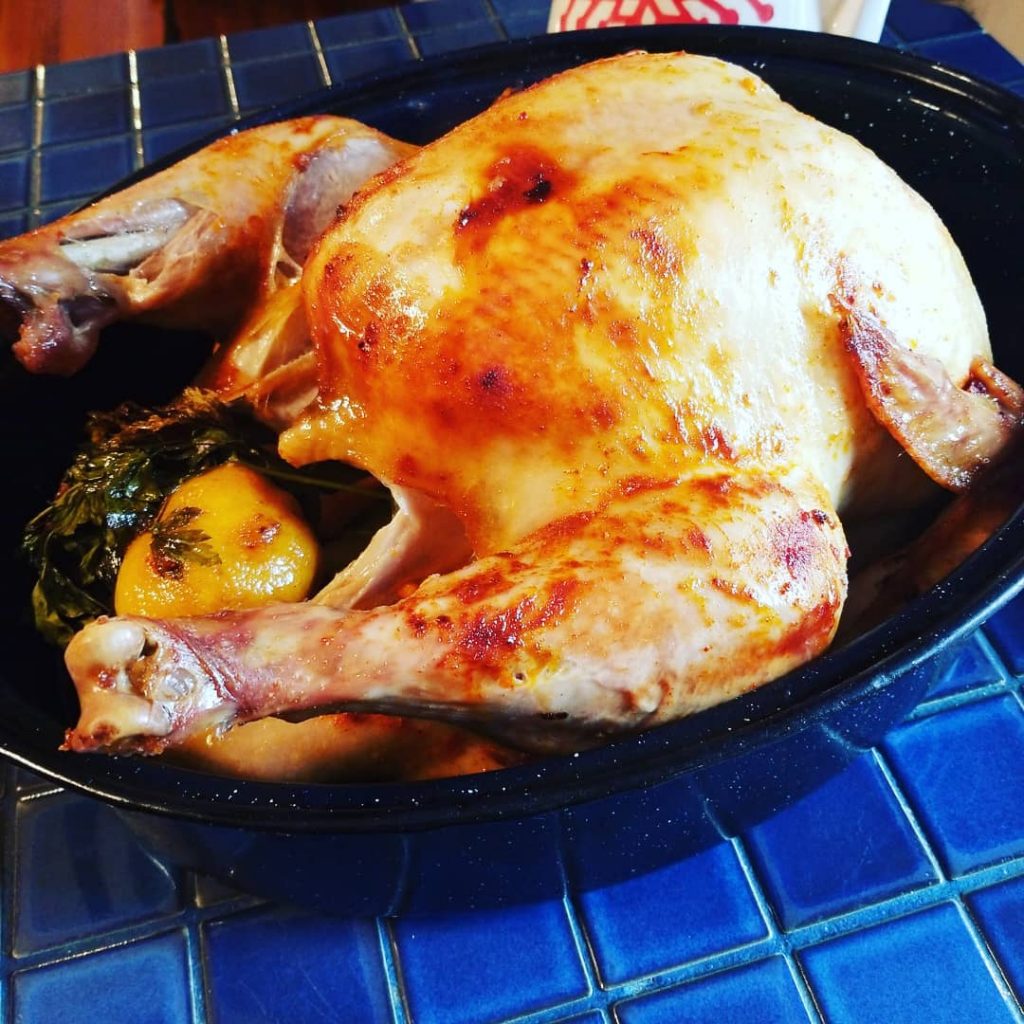
Cook the turkey with the remaining vegetables inside the cavity to add flavor.

My roaster is over 50 years old and it makes a perfect turkey every time!

Cook in Roasting pan, or cover with heavy aluminum foil. An average turkey of about 15 pounds will take about 3 hours to cook at 350.

My tips:

*Even if your timer pops up, it may not mean its fully cooked, test the turkey with a thermometer which reach 165 degrees.

*Marinate the turkey with the pan juices every hour.

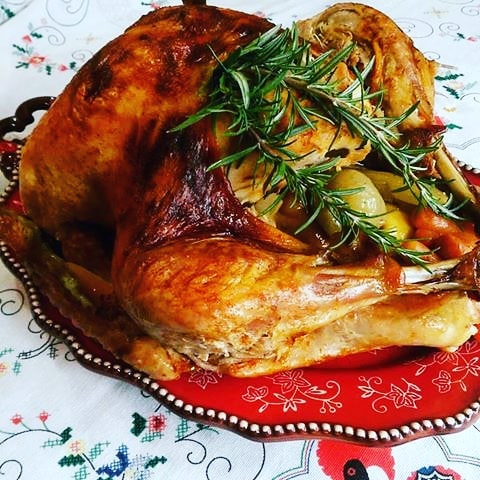
*If you like your turkey skin dark colored remove the foil during the last 30 minutes.

*My simple test to see if the turkey is cooked, is this; Try to pull the thigh away from the body, if the thigh bone doesn’t break off easy, then continue to cook the turkey longer.

*Let the turkey sit at least 20 minutes before carving.

*Warm the turkey with a little bit of hot chicken or turkey broth.

** Do not discard the cooking juices. Simply strain it, let it sit for a few minutes, remove any excess grease from the top and cook it in a few tablespoons of flour for at least 5 minutes on low heat.

** Save the remaining gravy to make Turkey Pot Pie!

Pumpkin Cake Bars With Cream Cheese Frosting

Get your pumpkin on!


Pumpkin Cake With Cream Cheese Frosting is a delightful dessert for those of you that want something different instead of pumpkin pie this Thanksgiving.

This cake is moist and full of flavor! Perfect addition to your Thanksgiving pot luck dinner, or as an add on to your dessert table!

It uses no oil and only 2 tablespoons of margarine for those of you on a low fat diet.

pumpkins

Ingredients:

2 cups of flour

1 + 1/2 cups of sugar

1 (15 oz can) of pumpkin

3 large eggs

5 oz of fat free vanilla yogurt

2 tbsp of butter or margarine (melted)

1 tsp salt

2 tsp baking powder

1 tsp baking soda

1 +1/2 tsp of cinnamon

1/2 tsp nutmeg

1 cup chopped walnuts (optional)

Frosting:

3 oz cream cheese (soft)

1 + 1/2 cups of confectioners sugar

1 tbsp butter (soft)

1 tbsp milk

Instructions:

In a large bowl, beat the eggs and sugar until light and lemony colored.

Add the yogurt, butter and pumpkin and beat for a few minutes.

In a separate bowl combine the flour, cinnamon, nutmeg, baking powder, baking soda and salt. Add to the pumpkin mixture and mix for about 3 minutes until smooth and creamy. Combine the nuts if desired.

Pour into an into a greased (15 x 10 x 1) baking pan or a deeper cake pan if you want a cake like dessert.

Bake at 350° for 25-30 minutes until a toothpick comes out clean. Cool completely before frosting.

Frosting instructions:

Mix all ingredients in a small bowl until creamy. Set aside until the cake is completely cooled and frost.

Pumpkins photo credit: http://www.koco.com

Crunchy Snickerdoodle Cookies


Last week I wanted to make a dessert but discovered that I was out of flour. I searched the pantry and found 1 box of yellow cake mix so this is what I came up with.

The cookies came out crunchy on the outside and chewing on the inside!

They were such a hit with my family that they insisted I have to put them on my Holiday baking list!

I posted a print out recipe for you…you’ll love it!


Crunchy Snickerdoodles Cookies
 
Easy recipe!
Ingredients
  • 1 package of yellow cake mix
  • 1 large egg
  • 1 cup flaked coconut
  • 1 cup fruit and nut granola
  • ½ tsp cinnamon
  • 1 tsp brown sugar
  • ½ cup veg oil
  • Coating mix
  • 2 tbsp granulated sugar 2 tbsp cinnamon
Instructions
  1. Place all ingredients except coating mix of sugar and cinnamon, into a large bowl and mix well. Scoop out about 1 tablespoon of the dough and form into balls.
  2. Make sugar coating by combining sugar and cinnamon in a small bowl. Dip each ball into the mixture and place on cookie sheet.
  3. *The dough will be dry when you make the balls just pack it firmly.
  4. Flatten the cookies into a cookie shape about 2-3 inches wide.
  5. Cook for about 8-10 minutes until the cookies are slightly browned on the bottom.
  6. Let cool and enjoy!

Bacalhau à Zé do Pipo – Codfish & Pototao Casserole


Salted Cod or Bacalhau as it is known in Portugal is a major ingredient in the Portuguese diet since the discovery of Newfoundland in 1497.

Fisherman began fishing its cod-rich Grand Banks and Bacalhau was nicknamed Fiel amigo (faithful friend).

The fish became popular in Portugal and other Catholic countries, when it was substituted on days of fasting from eating meat on Fridays, Lent, and other festivals.

Today, the legend is that the Portuguese have 365 or more recipes for bacalhau, one for each day of the year.

The recipe originates from the city of Porto, Portugal, and is named after its creator, Zé do Pipo, who owned a famous restaurant in that city during the 1960s. He won a national cooking contest with this dish. Since then, many restaurants have adopted it in their menus which has it made it extremely popular!


Bacalhau à Zé do Pipo

Ingredients:

1 lb Bacalhau (de salted – cut into 4 portion loins)

8 large potatoes

1/2 cup of olive oil

1 large sliced onion

1 diced garlic clove

1 bay leaf

2 tbsp butter

1 cup milk

1 egg yolk

1/2 cup mayonnaise

1 small roasted red pepper

black olives

1 tsp salt

pepper

parsley

1/4 cup flour for frying codfish


Instructions:

Peel and cook potatoes in boiling salted water for about 25 minutes. Remove from heat, drain potatoes, add the milk, butter, egg yolk and pepper and mash. Set the potatoes aside.

Coat the codfish in flour and fry in the olive oil on medium – low heat until golden brown. Place on paper towels to soak off excess oil.

Saute the onions, garlic and bay leaf in the same olive oil that you cooked the fish in, until lightly browned. Remove the bay leaf.

Place the codfish portions in a large oven safe casserole dish or in individual serving size dishes.

Coat the codfish with the onions and surround with the mashed potatoes.

Coat the codfish with a few tablespoons of the mayonnaise, the top each with a slice of red pepper.

Bake at 350 for about 20 minutes or until the mayonnaise is golden brown.

Garnish with olives and parsley.

Watch this video for the preparation instructions.

photo credits:http://chefdelucca.com/site/?p=487


Lobster Corn Chowder


Don’t through away those lobster shells before making this delicious chowder with them!

I used my favorite wine; Vinho Verde to enhance the flavor of this soup instead of regular white wine. If this recipe seems difficult, believe me it’s easy.

This chowder is perfect for your Holiday celebrations! Your friends and family will go crazy and love you for it!

Save some Vinho Verde to serve along with it!

Enjoy!

Ingredients:

Lobster shells from 3 lobsters

Meat from 1 lobster or 1-2 cups

1 cup of Vinho Verde wine (or any dry white wine)

2 tbsp of Brandy (I used 1920 Portuguese Brandy)

2 cups fish or chicken stock

1 small onion cut in half

1 small onion finely diced

1 celery stalk

1/2 celery stalk finely diced

3 ears of corn

3 tbsp butter

1 tsp paprika

1 tsp pepper

1 tsp salt

1/4 cup of  flour

2 cups of light cream

1/2 gallon of whole or light milk


Instructions:

Remove any tomalley (green part) from inside the lobster.

Cut the kernels off the corn and reserve for later. Save the cob for the stock.

In a medium stock pot, place the lobster shells,corn cob, stock, Vinho Verde, Brandy, 1 celery, 1 small onion, and salt.

Cover, let the stock come to a boil, and continue cooking for 20 minutes on low  heat.


Remove the cooked onion and celery from the pan and discard. Add the milk and cook for another 10 minutes on low heat. Strain the broth through a fine stainer into a separate bowl to remove any lobster shells. Save the milk broth and discard the shells and corn cob.

In a separate heavy soup pan, saute the diced onion and celery in the butter until translucent.

Add the flour to the butter and cook for about 1 minute on low heat.

Add the reserved broth, cream, paprika, corn, and pepper to the soup.


Cook the chowder on low heat for about 20 minutes stirring occasionally.

Add the diced lobster and cook for about 5 minutes longer.

Add more seasoning to taste if desired.

*If you want the soup thicker, mix 1 tbsp of flour with a little milk, add to the soup and let the soup cook for about 5 minutes.


Dia de Sao Martinho – Castanhas – Roasted Chestnuts

“É dia de São Martinho;comem-se castanhas, prova-se o vinho”

“It’s Saint Martin’s day; we eat chestnuts and drink the wine”

chestnuts


Dia de Sao Martinho – Saint Martin’s Day is celebrated each year on November 11.

Martinho, was a Roman soldier who encountered a bad storm on a winter day wearing only his cape to to keep him warm.

While riding through the storm, he was approached by a beggar who was shivering with the cold. Upon seeing the beggar, Martinho cut his cloak in half to share it with the beggar. When Martinho did this good deed, the clouds broke up, the storm ended and beams of sun shined in the sky.

That night, Martin had a dream of Jesus, who was wearing the half-cloak he had given away to the beggar. A voice spoke, saying;  “’I tell you with certainty, since you did it for one of the least important of these brothers of mine, you did it for me.”

Martin became a changed man and became a patron of the poor.

From this day on, he began looking at and treating people differently and was later canonized as a saint.

St Martin’s day is celebrated in many countries of Europe, as signifying the end of Fall and beginning of winter.

In Portugal, the first wine of the season is tasted and the harvested chestnuts are eaten around a bonfire.

The weather in Portugal during this time of year is generally mild and summer like, thus called; Verão de São Martinho (St. Martin’s Summer).

As the storm dissipated by the good deed of Sao Martinho, we thank God for the good summer like weather on the saints feast!


Chestnuts

The scent of roasting chestnuts during the Holiday’s is an instant heart warming feeling!

The season for chestnuts is October through late December. Look for unwrinkled shells and a glossy brown shell.

Avoid dingy shells with small pin holes. They feel very firm to the touch. Smell them for a scent of mold which means that they are not good!


How to roast Chestnuts recipe:

1. Using sharp knife, make an incision about 1/8-inch deep through the top of chestnut.

2. After slitting place the chestnuts on roasting pan and roast them at 350 degrees for about 35 minutes.

Here is a video of a different recipe with a great demonstration of the process!


Photo credit:

http://ladies-with-bottle.blogspot.com/2011/11/chestnut-liqueurfor-christmas.html

Puff Pastry Apple Tart

This recipe is deliciously easy! It’s my daughters recipe that she adapted from the Pioneer Woman.

What a scrumptious surprise to find this beauty waiting for me on the kitchen counter last night!

Perfect to serve to your family, yet it can be an elegant after dinner dessert for your guests!

Enjoy!

Ingredients:


1 box of frozen Puff Pastry (Pepperidge farm has 2 sheets)

4 Apples (cored, halved and sliced into very thin slices)

1/2 cup brown sugar

1/2 cup regular sugar

1/2 tsp cinnamon

1/4 tsp salt

Powdered Sugar for dusting


Instructions:

Defrost the pastry dough for about 20 minutes. Spray 2 sheet pans, with non stick spray or lightly grease. Heat oven to 415 degrees.

Place apples slices in a medium bowl and add the sugars, salt and cinnamon. Toss well and let them sit to absorb the flavor.

Cut the pastry dough into thirds which will give you 6 tarts.

Place the apple slices in a row overlapping each other onto the pastry dough.

*Note: She used unpeeled apples, but you may peel them if you prefer.

*Do not use the excess liquid from the apples since it may run over the pastry and cause burning.

Bake for 18-20 minutes until the pasty is golden brown.

Remove from pan and set on a platter to cool.

Dust with the powdered sugar and serve.


Roast Pork Loin with Caramelized Onions and Carrots

This picture tells the story! You’re going to love the savory and sweetness from the Caramelized Onions and carrots. Enjoy!

Ingredients:

(1) 4 to 5 lb Boneless Pork Loin

1 1/2 tbsp Taste Portugal Seasoning 

2 large sliced onions

2 large carrots (cut into pieces)

1/4 cup olive oil

2 tablespoons butter

Instructions:

Season the pork and let it marinate for at least 1 hour or overnight in the refrigerator.

When ready to cook, top with the olive oil and 1/2 onions. Place remaining onions and  carrots around pork. Mix vegetables once in a while as they cook.

Roast the pork for about 1 hour and 15 minutes at 350 degrees. Remove from the oven and marinate with the onions and cooking liquid that has formed. Cook for another 15 minutes. Test for doneness using a thermometer.

When the temperature reaches 155 degrees F, remove the roast from the oven. Allow it to sit for about 20 minutes before carving.

Serve with Portuguese Rice!

Butternut Squash and Carrot Puree


Butternut Squash and Carrot Puree

My family has a tradition of visiting local farms in New England during harvest season where we buy our locally grown apples to make fresh apple pies, and to buy our winter vegetables and potatoes.

Butternut Squash Puree is one of the side dishes that I always have on my Thanksgiving table but I also make this recipe all winter long since my family loves it.

Some people bake the squash in the oven with brown sugar or maple syrup, but I’m not of fan of the sweet taste, so I came up with my recipe.

Did you know that you can store potatoes and butternut squash to last through the winter?

Just place them into a brown paper bag or cardboard box and store in a cool basement, or in your garage. (Be sure the temp doesn’t reach freezing.)

I also make Butternut Squash and Spinach Soup which is healthy and full of nutrients all year long.

Here’s some great information about butternut squash below. Enjoy!

Low in calories: One cup of raw butternut squash only has 63 calories.
Dietary Fiber: There are 3 gr. of dietary fiber in every serving.
Vitamin A: One serving has 298 %of your daily recommended value.
Vitamin C: One cup serving has 50 % of your daily recommended value.
Omega-3 fatty acids: Fights high cholesterol and high blood pressure
Minerals: One serving has 14 % of your daily recommended value of manganese, 12 % of magnesium and 14 % of potassium

Butternut Squash Puree

2 cups chopped Butternut Squash

2 cups chopped carrots

1/2 small onion chopped

1 small scallion

1/2 tsp salt

1 tbsp butter or margarine

1/4 cup of milk

2 cups of water


Instructions:

Place all ingredients except the butter and milk into a medium saucepan. Bring to a boil and cook on medium for about 10-15 minutes or until the vegetables are fully cooked.

Remove the scallion and most of the water left in the pan leaving only about 1/4 cup. Add the butter and milk to the pan and puree the vegetables with a hand blender until very smooth and silky.

Taste and add more salt to your taste if needed. Keep in pan on low heat until ready to serve with your dinner or let it cool and store in the refrigerator.

The puree will last for 3 days or freeze in individual ice cube trays or containers.

* Note, this puree is great to serve your baby but leave out the onion and salt!

Butternut squash image credit:  http://www.slashfood.com/2008/02/17/how-to-peel-a-butternut-squash-without-also-peeling-your-fingers/

Triple Chocolate Raspberry Cake

Triple Chocolate Raspberry Cake

This recipe is for the chocolate lovers in your family!

Last week after I posted the recipe for Birthday Pistachio cake it had over 10,000 views and received a great response so I decided to post this cake recipe.

I created this recipe after I saw an amazing Chocolate Raspberry Cake in a Gourmet Pastry Shop and I knew that I had to try to replicate it.

Happy Birthday Chocolate lovers. I hope you enjoy it!


Ingredients:


1 package of Chocolate cake mix

1 small package fresh or frozen raspberries

6 oz raspberry Jelly

1 package semi sweet chocolate chips

1/2 cup heavy cream

Fresh raspberries for garnish

1 can of Chocolate frosting

1 cup finely Chopped walnuts, pecans or almonds


Instructions:

Prepare the round cake as per package directions and let cool down completely.

Meanwhile, cook the raspberries with the Jelly in a small saucepan letting the raspberries reduce to a thick puree and let cool.

Slice the cooled cakes into 2 layers layers.

Spread the raspberry sauce between layers. Frost the cake with the Chocolate frosting.

Sprinkle the nuts on the sides of cake and pat them into the frosting with the palm of your hand.

Prepare the chocolate sauce by placing the chocolate chips and cream in a double boiler and mix until creamy.

Let the melted chocolate cool down a minute and pour the chocolate sauce over the cake. Garnish with fresh raspberries.

Place in the refrigerator for about 1 hour or more to let the cake get firm. Enjoy!